Full sizetruckradionavguide
•
0 likes•206 views

How to use your Navigation, Audio System and IPOD/MP3 Player in your Full Size Chevy Truck.

Recommended
More Related Content
Viewers also liked
Viewers also liked (8)
More from Ron Westphal Chevy
More from Ron Westphal Chevy (20)
Recently uploaded
Recently uploaded (20)
Full sizetruckradionavguide
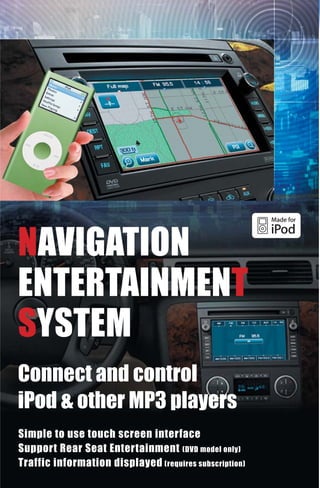
- 1. NAVIGATION ENTERTAINMENT SYSTEM Connect and control iPod & other MP3 players Simple to use touch screen interface Support Rear Seat Entertainment (DVD model only) Traffic information displayed (requires subscription)
- 2. Control Panel Overview + ) + NAV AUDIO ) ) DEST MENU RPT SEEK FAV SEEK A:Hard keys * B:Soft keys Button Name Function Button Name Function Power/ Turn on/off the radio by pressing Volume knob Adjust the audio volume by rotating Full map/ Display the Navigation screen Audio-Navi Touch to switch between the full NAV Switch the full map screen and map screen and the split screen (Navigation) button/Clock the split screen alternatively DEST Display the Destination Entry Screen (Destination) North Up/ Indicates a map view with North Up Heading Up Touch to change to Heading Up mode RPT (Repeat) Repeat the last voice prompt button Change the mixed presets page Zoom In FAV (Favorite) Display the split screen if the full screen button Touch to magnify or map screen is displayed Zoom Out reduce the map scale Audio/Video screen button CD/DVD eject Eject the Audio/Video CD/DVD Touch to register (addresses) in Mark button the address book Tune/ Tune the radio frequency by rotating Sound knob Display the sound menu screen by pressing POI button Touch to select POI icons AUDIO Display the audio screen Change the audio source to AM/FM/CD/DVD/AUX Display the menu screen C:Others MENU Change the screen to the Sound/ Button Name Function Radio/Nav/Display/Clock screen Connect the SEEK (or Next) Seek up the radio frequency/XM CH auxiliary to play Connect and play the auxiliary SEEK Seek down the radio frequency/XM CH Audio/Video Insert the Audio/Video CD/DVD (or Previous) CD/DVD slot iPod playback (Supported models/devices are in Owner's Manual) New features Onstar Destination Download XM Real time Traffic Energy Flow animation (Hybrid vehicle only)
- 3. Destination Entry by Address 1 6 Press DEST . Touch List . The Destination Entry screen will be displayed. 2 7 Touch Change Search Area . Select a city name from the displayed list. This operation is not necessary if the desired area has already been selected. 3 8 Select an area from among US1 to US10 , CAN , Enter a street name. AK and then touch Back . This operation is not necessary if the desired area has already been selected. 4 9 Touch Address Entry . Touch List . 5 10 Enter a city name. Select a street name from the displayed list.
- 4. Destination Entry by Point of Interest 11 1 Enter a house number. Press DEST . The Destination Entry screen will be displayed. 12 2 Touch Map . Touch Point of Interest . 13 3 Touch Go . Enter a POI name. 4 14 Touch List . Touch Start guidance . Route guidance will start.
- 5. Show POI icons 5 1 Select a POI name from the displayed list. Touch POI . 6 2 Touch Map . Select the POI category that you want to display. The POI icons will be displayed on the map. 7 3 Touch Go . Place the cursor over a POI icon, and touch Info . Information about the POI will be displayed. 8 Touch Start guidance . 4 Route guidance will start. Touch Add to Address Book . The selected location can be registered in the address book. Add to Address Book & Set Preset Destination 1 Touch Mark . Touch & hold one of the buttons at the bottom of the The Address Book screen will be displayed and screen to store your preset destinations. the selected location will be registered.
- 6. Cancel Route Guidance Add the Waypoint 1 1 Press DEST while route guidance is in progress. Press DEST while route guidance is in progress. 2 2 Touch Cancel Guidance . Touch Add Waypoint . 3 3 Touch Yes . Select a method for Destination Entry, and set Guidance will be canceled, and the current location will be displayed. additional destinations. For details on methods for Destination Entry, please refer to "Destination Entry by Address" and "Destination Entry by Point of Interest". 4 Touch Start guidance . Re-routing will take place.
- 7. Additional Quick Tips About the screen that appears after turning on the power 1 Read CAUTION and then touch OK . The current location will be displayed. Configure Menu You can adjust the functions of this system in any way you like. (sound settings, radio settings, navigation settings, screen display settings) 1 Press MENU . Select the function you want to set. (Sound / Radio /Nav / Display) Sound Menu screen Radio Menu screen Speakers Radio Station, Channel, DSP (Digital Signal CD, MP3 Information Processing) ON/OFF Preset Page Registration/Changes Automatic Volume Control Nav Menu screen Display Menu Voice Prompt setting Screen Display Route Preference setting Language Selection Edit Address Book Map Database Information Low Fuel Warning Off-Road Mode Audio System You can select radio (AM/FM), DISC (CD/DVD), or AUX. 1 2 Press AUDIO . Touch the source switch. The Audio screen will be displayed. The selected source screen will be displayed. 3 Touch & hold one of the buttons at the bottom of the screen to store your favorite station. You can mix AM, FM and XM (if equipped) and store up to 30 presets for them through 6 pages. After storing, you can select the stored station by touching the preset button.
- 8. Voice Recognition Commands Helpful Hints for Stating Commands 1 Please state your command clearly after the beep. 2 Please roll up the windows (of the vehicle), as background noise, such as airflow noise from the wind, may cause voice commands to be misunderstood. Function Voice Recognition Commands Radio Radio Radio AM, radio FM, radio XM Radio select (frequency) AM, radio select (frequency) FM Example: Radio select ninety-five point five FM CD/DVD CD, DVD, Disc CD, DVD, Disc, select track (one, two, three, etc.) Auxiliary Aux, Auxiliary Display Display day mode Display night mode Display auto mode OnStar R OnStar Help Navigation Help System help Radio help CD help, DVD help, Disc help Voice help Safety Instructions Before you begin to operate the navigation system, read this manual thoroughly to become familiar with it and to understand how the system works. DVD Map Disc noise, when entering the vehicle and turning the vehicle off, is normal system operation. Keeping your mind on the drive is important for safe driving. See "Defensive Driving" in the Index of your vehicle's owner manual for more information. Get familiar with your vehicle's navigation system so you can use it with less effort and take full advantage of its features. Your navigation system includes not only navigation, but also audio functions. While your vehicle is parked: Familiarize yourself with all of its controls: hard keys on the faceplate and touch-sensitive screen buttons. Familiarize yourself with its operation. Set up your audio by presetting your favorite stations, setting the tone, and adjusting the speakers. Then, when driving conditions permit, you can tune to your favorite stations using the presets and steering wheel controls (if equipped). Set up the navigation features that can only be done before you begin driving, such as entering an address or a preset destination. Entering a destination or alphanumeric text requires many steps, so you can only perform these operations when the vehicle is in PARK (P). You will notice that touch-sensitive screen buttons leading to the alphanumeric keyboard are dimmed out while driving. Other functions may also be locked out while driving and they too will appear grayed out on the screen - but all functions are available when parked. Some functions can be performed while driving, as long as you can do so without diverting too much of your attention from your driving. This system provides you with a far greater access to audio stations and song listings.Giving extended attention to entertainment tasks while driving can cause a crash and you or others can be injured or killed. Always keep CAUTION your eyes on the road and your mind on the drive - avoid engaging in extended searching while driving. Looking at the moving map on the navigation screen frequently or for too long while driving can cause a crash and you or others can be injured or killed. Keep your eyes and mind on the road and avoid looking too long or CAUTION too often at the moving map on the navigation screen. Use the voice guidance directions whenever possible. The navigation system uses an onboard computer, DVD map database and sensors that use Global Positioning System (GPS) satellites to pinpoint your exact vehicle location, which allows you to: Plan an excursion with provided turn-by-turn route and map guidance and voice prompts. Select a destination using various methods and choices. You should always be alert and obey traffic and roadway laws and instructions, regardless of the guidance from the navigation system. The navigation system uses street map information that does not include all traffic restrictions or the latest road changes, it may suggest using a road that is now closed for construction or a turn that is prohibited by signs at the intersection. The system uses limited information, you must always evaluate whether following the system's directions is safe and legal for the current conditions. "Made for iPod" means that an electronic accessory has been designed to connect specifically to iPod and has been certified by the developer to meet Apple performance standards. Apple is not responsible for the operation of this device or its compliance with safety and regulatory standards. iPod is a trademark of Apple Inc., registered in the U.S. and other countries.