Lightweight Multiplayer HTML5 Games with PubNub
•Als PPTX, PDF herunterladen•
0 gefällt mir•678 views

Can a web browser be used as a platform for serious gaming? Here at PubNub, we intended to find out, and decided to experiment with an HTML5 game engine.

Empfohlen
Weitere ähnliche Inhalte
Was ist angesagt?
Was ist angesagt? (16)
Andere mochten auch
Ähnlich wie Lightweight Multiplayer HTML5 Games with PubNub
Ähnlich wie Lightweight Multiplayer HTML5 Games with PubNub (20)
Kürzlich hochgeladen
Kürzlich hochgeladen (20)
Lightweight Multiplayer HTML5 Games with PubNub
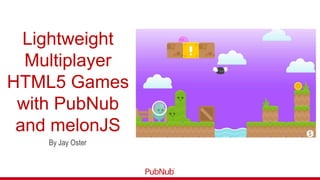
- 1. Lightweight Multiplayer HTML5 Games with PubNub and melonJS By Jay Oster
- 2. Can a web browser be used as a platform for serious gaming? Here at PubNub, we intended to find out, and decided to experiment with an HTML5 game engine. melonJS is the tool of choice because it’s lightweight, runs well on mobile, and is very easy to use. One question that always comes up on the melonJS forum is the best way to use Node.js/socket.io to build multiplayer games. In this article, we will be using PubNub, but many of the techniques can be applied to socket.io as well. For this experiment, we start with the platformer demo that ships with the melonJS 0.9.7 source code, and transform it into a multiplayer game with just a few extra lines of code. And all without any servers! This is only possible with the power provided by PubNub. Want to see the end result? Check it out here. We’ll walk you through how to add multiplayer support to your own game below:
- 3. Download melonJS First step, clone the git repository and checkout the 0.9.7 tag: Next, you’ll want to follow the build instructions to build the library. And you can test the vanilla platformer demo by launching an HTTP server with Python: Now visit the URL in your favorite web browser: It’s a very simple game demo, with a handful of enemies and two maps. However, we want multiplayer support as well. What we started with is a simple module to handle the multiplayer communications: $ git clone https://github.com/melonjs/melonjs.git $ cd melonJS $ git checkout 0.9.7 $ python –m SimpleHTTPServer http://localhost:8000/examples/platformer/
- 4. mp.js var Multiplayer = Object.extend({ init : function (new_player) { this.pubnub = PUBNUB.init({ publish_key : "demo", subscribe_key : "demo" }); this.new_player = new_player; // Record my UUID, so I don't process my own messages this.UUID = this.pubnub.uuid(); // Listen for incoming messages this.pubnub.subscribe({ channel : "PubNub-melonJS-demo", message : this.handleMessage.bind(this) }); }, handleMessage : function (msg) { // Did I send this message? if (msg.UUID === this.UUID) return; // Get a reference to the object for the player that sent // this message var obj = me.game.getEntityByName(msg.UUID); if (obj.length) { obj = obj[0]; } else { var x = obj.pos && obj.pos.x || 50; var y = obj.pos && obj.pos.y || 50; obj = this.new_player(x, y); obj.name = msg.UUID; } // Route message switch (msg.action) { case "update": // Position update obj.pos.setV(msg.pos); obj.vel.setV(msg.vel); break; // TODO: Define more actions here } }, sendMessage : function (msg) { msg.UUID = this.UUID; this.pubnub.publish({ channel : "PubNub-melonJS-demo", message : msg }); } });
- 5. mp.js This class has a constructor and two methods; the constructor takes one callback, and the sendMessage() method is the one we’ll be using to send game state updates. This module also does some useful things like creating new player objects, and handling player position updates. We placed this file (mp.js) into the platformer directory, and included it within index.html (along with pubnub-3.4.5-min.js)
- 6. Creating a new Multiplayer object To initialize the Multiplayer object, we added a few lines after the level has been loaded, around line 104: // Instantiate the Multiplayer object game.mp = new Multiplayer(function (x, y) { // Create a new player object var obj = me.entityPool.newInstanceOf("mainplayer", x, y, { spritewidth : 72, spriteheight : 98, isMP : true }); me.game.add(obj, 4); me.game.sort(); return obj; }); This creates the object, placing a reference into the game namespace as game.mp , and passes a callback function that will create new player objects when we receive messages from other players we haven’t seen before. That isMP : true line is important! It will be used later to determine whether the player object is Keyboard-controlled, or controlled by messages from the network.
- 7. Creating a new Multiplayer object Side note: to make testing easier, you can disable the “automatic pause” feature when navigating away from the browser window. We added the following line just before the call to me.video.init() in main.js: me.sys.pauseOnBlur = false;
- 8. Turning the PlayerEntity object into a Multi-PlayerEntity Object Now we’re ready to hack the PlayerEntity object to work in a multiplayer environment, sending position updates, and ignoring the keyboard input for the isMP entities. Starting in entities.js at line 25, we added two new properties: this.isMP = settings.isMP; this.step = 0; Then we changed the following lines to be conditional on the value of the isMP property. The viewport follow and key bindings should be skipped if the entity is a multiplayer object: if (!this.isMP) { // set the display around our position /* ... snip */ // enable keyboard /* ... snip */ }
- 9. Turning the PlayerEntity object into a Multi-PlayerEntity Object The original code has been snipped from the example above, but it should be pretty obvious what needs to be changed here. In the PlayerEntity.update() method, there are a few things that also need to be made conditional on the value of isMP. This first checks the key status: if (!this.isMP) { if (me.input.isKeyPressed('left')) { /* ... snip */ } if (me.input.isKeyPressed('jump')) { /* ... snip */ } }
- 10. Turning the PlayerEntity object into a Multi-PlayerEntity Object There’s also a call to me.game.viewport.fadeIn() that reloads the level when the player falls into a hole. We could make that conditional too, if we don’t want to reload the level when other players fall in. And finally, there’s a comment at the end of the method about checking if the player has moved. This is the perfect hook for sending out player position updates to other players! We added the following code just before the call to this.parent() : if (this.vel.x !== 0) this.flipX(this.vel.x < 0); if (!this.isMP) { // Check if it's time to send a message if (this.step == 0) { game.mp.sendMessage({ action : "update", pos : { x : this.pos.x, y : this.pos.y }, vel : { x : this.vel.x, y : this.vel.y } }); } if (this.step++ > 3) this.step = 0; } The first two lines will fix the “direction” of the player object when it is updated by a message from the network. The rest contains a basic counter to prevent sending messages too fast, and the final message publish that other players will receive.
- 11. Play It Online! The final demo can be played online now! And you can also have a peek at the full patch here. A much better approach would be separating control logic entirely from the entity. But in this case, the demo serves its purpose. Maybe next time, we can work on synchronizing more of the game state, like enemy positions and individual score counters!