EPiServer report generation
•Als DOCX, PDF herunterladen•
1 gefällt mir•264 views

A report that describes how to use PowerShell to generate a Microsoft word report on an eEPiServer website.

Empfohlen
Weitere ähnliche Inhalte
Was ist angesagt?
Was ist angesagt? (20)
Andere mochten auch
Ähnlich wie EPiServer report generation
Ähnlich wie EPiServer report generation (20)
Mehr von Paul Graham
Kürzlich hochgeladen
Kürzlich hochgeladen (20)
EPiServer report generation
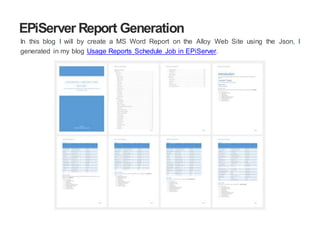
- 1. EPiServer Report Generation In this blog I will be creating a Word Report on the Alloy Web Site using the Json, I generated in my blog Usage Reports Schedule Job in EPiServer.
- 2. Word Generation Before I can create a report I need to choose an approach. Custom API’s (DocX) or generating Word compatible HTML are options. However, I’ve chosen to use the scripting language PowerShell with COM (Component Object Model), to allows anyone to customize the reports generation. I will have a dependency on MS Word. But give me full access to word's functionality and I will be ensured full compatibility. For development, I will be using the Windows PowerShell ISE.
- 3. Extract Json I firstly I need to set a variable $root to the location where the script is running, in this folder, this will be used thought out my script. In this folder, I’ve placed the UsageReport.zip which will be used with the Extract-ZipFile command to copy the contents into the temporary folder. $root = (Get-Item -Path "." -Verbose).FullName; Extract-ZIPFile –File "$rootUsageReport.zip" -Destination "$root$tmpFolder"; Now we can use the Get-Content command to read the JSON file and pass it to ConvertFrom-Json, which will generate a valid object or collection. $contentTypes = Get-Content -Raw -Path "$roottmpcontentproperties- zreport.json" | ConvertFrom-Json; Due to the dynamic nature of PowerShell, we don’t need to worry about creating POC classes, as would be the case with a purely statically typed language.
- 4. Create New Document We’re now ready to create our word document. First we instantiate the word COM object. Here I also set word to be visible to allows us to check on the progress. However, if you were developing this for a server, you naturally would set this to false. $word = New-Object -ComObject word.application; $word.visible = $true; Now, we can create the document, below I’ve also included a template, so I can predetermine the style and give it a basic structure. $doc = $word.documents.add("$rootDefaultTemplate.dotx"); Next I’ll update a couple of document properties, which will are used on the cover page. $doc.BuiltInDocumentProperties["Title"].Value = "EPiServer Report"; $doc.BuiltInDocumentProperties["Subject"].Value = "An Automatically generated epierver Report on the content types";
- 5. Creating the structure By using heading correctly, you create structure inside a word document. This structure can be used to generate TOC (table of contents). In fact, the template that I used in the previous section contained a TOC. $selection.TypeParagraph(); $selection.style = "Heading 1"; $selection.TypeText("Introduction"); $selection.TypeParagraph(); $selection.style = "Normal"; $selection.TypeText("This document is divided into multiple sections"); $selection.TypeParagraph(); $selection.style = "Heading 2"; $selection.TypeText("Content Types"); The above code creates two heading and with normal text between. The rule for heading are similar to HTML. You start with 1 and progress down, with more sub heading’s allows below its parent.
- 6. Creating a table Now we have a structure we need to create a table. However, we do need to know the total number of rows and columns, plus an additional row for the heading. $totalRows = $;content.Properties $table = $doc.Tables.Add($selection.Range, $totalRows + 1, 7); Now we can add individual cell for the heading row. $table.Cell(1,1).Range.Text = "Name"; $table.Cell(1,2).Range.Text = "EPiServer Type"; … It’s also possible to style the cell, for instance some of the cell will only be filed with a Boolean (T/F) value. This means if the header cell’s text is vertical I’ll save space. $table.Cell(1,7).Range.Font.Size = 8; $table.Cell(1,7).Range.Orientation = 3; $table.Cell(1,7).Range.Text = "Required";
- 7. Now we just need to loop from the collection of objects returned from the Json, remember to start at 2, we use row 1 for the heading. $p = 2; foreach ($property in $content.Properties | Sort-Object TabName) { $table.Cell($p,1).Range.Text = $property.EditCaption; $table.Cell($p,2).Range.Text = $property.TypeName; … $table.Cell($p,7).Range.Text = ?: $property.Required "T" "F"; $p++; } Finally, I need to styling the table. $table.Style = "Grid Table 4 - Accent 1"; Here I’ve chosen to use an inbuilt style, however it’s possible to create a custom table style and save it as part of the template.
- 8. Saving the report Now we’ve finished generating out report, we can save it, which is possible to do with one line. However, this also require us to know enumerate value for the second parameter of the saveas method. For Word Documents its 0 and PDF’s it’s 17. However, to prevent the use of magic numbers I’ve import the Word Interop assembly and retrieved the value directly. $wdTypes = Add-Type -AssemblyName 'Microsoft.Office.Interop.Word' - Passthru; $wdDoc = [Enum]::Parse([Microsoft.Office.Interop.Word.WdSaveFormat], "wdFormatDocument"); $doc.saveas([ref] "$rootContent-Type-Report", [ref]$wdDoc); Finally, we finish up by closing the generate document and quitting word. $doc.Close(); $word.quit();
- 9. Conclusion The biggest problem with this developing this script is knowing when to stop. For instance, I could just as easily update the report and add Background tasks or Plugin. Alternatively, I could change how the properties table works by the group the row by the Tab Column and adding more columns. My final script along with a couple of examples can be found by following the link below. http://bit.ly/1nkWQGF PowerShell is built on the NET Framework and give you access to COM and WMI (Windows Management Instrumentation). This gives you the ability to not only generate Word and other Office document types but also perform a wide variety of tasks. This means PowerShell is a must for any windows developer or administrators. Additional Resources http://bit.ly/20kTkuy - MS-Word with HTML & CSS http://bit.ly/23kJ8ES - DocX C# MS Word API http://bit.ly/1KwzKCx - XML-FO