Instruction Manual | Sig Sauer Bravo Sights | Optics Trade
•
0 likes•201 views

This document is the owner's manual for the BRAVO3 and BRAVO5 battle sights manufactured by SIG Sauer. It provides information on the key features and specifications of the sights, how to operate them, change batteries, adjust settings, mount them, and maintain them. It also details SIG Sauer's limited warranty and infinite guarantee policies that cover repairs or replacements if the sights become damaged or defective.

Recommended
More Related Content
What's hot
What's hot (20)
Similar to Instruction Manual | Sig Sauer Bravo Sights | Optics Trade
Similar to Instruction Manual | Sig Sauer Bravo Sights | Optics Trade (20)
More from Optics-Trade
More from Optics-Trade (20)
Recently uploaded
Recently uploaded (20)
Instruction Manual | Sig Sauer Bravo Sights | Optics Trade
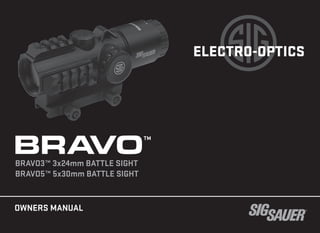
- 1. BRAVO3™ 3x24mm BATTLE SIGHT BRAVO5™ 5x30mm BATTLE SIGHT BRA VO™ OWNERS MANUAL ELECTRO-OPTICS ELECTRO-OPTICS
- 2. 2 TABLE OF CONTENTS This manual is available in the following languages: French, Spanish, German, Italian, Portuguese, Russian, Afrikaans, Swedish, and Norwegian. Please visit sigsauer.com for Owners Manual downloads. Introduction. . . . . . . . . . . . . . . . . . . . . . . . . . . . . . . . . . . . . . . . . . . . . . . . . . . 3 Contents. . . . . . . . . . . . . . . . . . . . . . . . . . . . . . . . . . . . . . . . . . . . . . . . . . . . . 4 Key Features. . . . . . . . . . . . . . . . . . . . . . . . . . . . . . . . . . . . . . . . . . . . . . . . . . 5 Product Identification. . . . . . . . . . . . . . . . . . . . . . . . . . . . . . . . . . . . . . . . . . . 6 Operation . . . . . . . . . . . . . . . . . . . . . . . . . . . . . . . . . . . . . . . . . . . . . . . . . . . . 8 Mounting The Sight. . . . . . . . . . . . . . . . . . . . . . . . . . . . . . . . . . . . . . . . . . . . 10 Sight Adjustments. . . . . . . . . . . . . . . . . . . . . . . . . . . . . . . . . . . . . . . . . . . . . 11 Maintenance. . . . . . . . . . . . . . . . . . . . . . . . . . . . . . . . . . . . . . . . . . . . . . . . . 13 Troubleshooting . . . . . . . . . . . . . . . . . . . . . . . . . . . . . . . . . . . . . . . . . . . . . . 13 SIG SAUER® Electro-Optics Infinite Guarantee™ . . . . . . . . . . . . . . . . . . . . . 14 SIG SAUER Electronic & Tritium Component Limited 5-Year Warranty .. . . 15 Specifications. . . . . . . . . . . . . . . . . . . . . . . . . . . . . . . . . . . . . . . . . . . . . . . . 16
- 3. 3 sigsauer.com INTRODUCTION The BRAVO™ Battle Sights are state of the art in optical design as well as ultra rugged. The BRAVO5 combines 5X magnification with a 6* Field of View, while the BRAVO3 sports 3X magnification with a 10* Field Of View. High performance coatings, and bright illumination settings provide an unparalleled shooting experience. The BRAVO series of sights is covered by SIG SAUER Electro-Optics Infinite Guarantee and SIG SAUER Electronic & Tritium Component Limited 5-Year Warranty.
- 4. 4 CONTENTS: • BRAVO3™ or BRAVO5™ Battle Sight • CR2032 Battery • Lens Cloth
- 5. 5 sigsauer.com KEY FEATURES: • MegaView™ system utilizes an advanced prism and ocular design yielding >40% greater field of view than the competitive prismatic battle sights • MOTAC™ (Motion Activated Illumination) powers up when it senses motion and powers down when it does not. Provides for optimum operational safety and enhanced battery life • Lightweight yet durable aluminum housing with integrated Picatinny top rail for additional accessories such as MRDs and lasers • Adjustable eyepiece with +/- 2 diopter correction • Dependable IPX-7 waterproof (to 1M for 30 Minutes) and fog-proof performance • The BRAVO optics are engineered with the centerline of the optical axis at 1.535” above the top of an M1913 Picatinny rail interface for night vision compatibility • SIG SAUER® Electro-Optics Infinite Guarantee™ and SIG SAUER Electronic & Tritium Component Limited 5-Year Warranty.
- 6. 6 PRODUCT IDENTIFICATION: A – Battery Cap / Illumination Control B – Ocular Lens C – Elevation Adjustment D – Objective Lens E – Diopter Adjustment Ring F – 1913 Picatinny Mount G – Windage Adjustment H – 1/2” Hex Nut D A
- 7. 7 sigsauer.com E F G H B C
- 8. 8 Before working on your BRAVO sight always ensure that the firearm is unloaded with the safety on. OPERATION Installing the battery The battery is mounted on the left side of the optic. To change the battery, remove the cap by rotating in a counter-clockwise (CCW) direction. Remove the cap and battery, replacing with a fresh CR2032 battery, positive (+) side facing out. Replace cap and tighten to finger tight only. W WARNING
- 9. 9 sigsauer.com Adjusting Illumination • The illumination knob has a setting with a grey square filled black. This is the OFF setting for the illumination. • Rotate the knob Counter Clockwise (forward) one click, to quickly go to MAX illumination. This is shown with a large red square. • As the red squares become smaller going through the rotation, the illumination will decrease. • The sight also features MOTAC™. It will automatically turn off after 2 minutes of non use. As soon as the sight senses motion it will automatically power back on to the current setting. • The sight has 11 settings, 8 Daylight settings and 3 Night Vision settings.
- 10. 10 MOUNTING THE SIGHT • The hex nut mount that comes with your BRAVO sight is nominally set to 1.535 inches to the optical axis, which is ideal for use with NV and thermal clip-on sights. • The hex nuts should be torqued using a torque wrench to 50in-lb. This should be done with a calibrated torque wrench and 1/2” socket. • The BRAVO sights were designed for use on most types of firearms that utilize the MIL-STD 1913 Picatinny Rail. • Mount the firearm to your shoulder and then set the sight at the proper eye relief. Eye relief is set properly when the sight image fills the entire field of view of the ocular lens. Make sure to press FORWARD (toward the muzzle) on the sight while tightening the nuts, as this will help the sight properly maintain zero.
- 11. 11 sigsauer.com • Windage and elevation adjustments are located on the rear top and rear right side of the sight. Windage and Elevation sight adjustments can be made once the caps are removed. • Elevation adjustments - the elevation adjustment is on the top of your sight. To raise your point of impact turn the adjustment counter- clockwise. Each click is equal to 0.5 MOA. To lower the point of impact turn the adjustment clockwise. • Windage adjustments - the windage adjustment is on the right side of your sight. To shift your point of impact to the right turn the adjustment counter-clockwise. Each click is equal to 0.5 MOA. To shift the point of impact to the left turn the adjustment clockwise. • Windage and Elevation sight adjustments can be made once the caps are removed. SIGHT ADJUSTMENTS
- 12. 12 DIOPTER ADJUSTMENT • Aim the sight at a light object to maximize the clarity of the reticle. Turn the diopter until the reticle comes into focus.
- 13. 13 sigsauer.com MAINTENANCE • Cleaning – Keep your lenses clear by using a soft cloth or lens pen. The best way to maintain image quality is by keeping your lenses clear of dirt and dust that cause scratches. • Always use your sight cover to ensure that the sight optics remain scratch free. TROUBLESHOOTING POI changes between groups • Check that the 1/2” hex mount is affixed tightly to the rail. • Check/Clean your firearm. • Check for variations in ammunition.
- 14. 14 I N F I N I T E G U A R A N T E E S I G S A U E R SIG SAUER Electro-Optics Infinite Guarantee™ SIG SAUER has manufactured the most rugged, dependable high-performance firearms for over two centuries. Our heritage of design, engineering and precision-manufactured quality predates the existence of any other optics company worldwide. We understand the importance of quality in the line of fire, at the shooting range or on your next hunt. SIG SAUER Electro-Optics had to earn the right to wear that badge and the Infinite Guarantee has your back, forever. Period. We will repair or replace your SIG SAUER product in the event it becomes damaged or defective, at no charge to you. If we cannot repair your product, we will replace it with a product in perfect working order of equal or better physical condition. It doesn’t matter how it happened, whose fault it was, or where you purchased it. SIG SAUER Infinite Guarantee™ • Unlimited Lifetime Guarantee • Fully Transferable • No Warranty Card Required • No Receipt Required • No Time Limit Applies • No Charge
- 15. 15 sigsauer.com L I M I T ED 5 Y E A R WA R R A N T Y E L E C TRON I C & TRI T I U M If you ever have a problem, no matter the cause, we promise to take care of you when it counts. Please note that our Infinite Guarantee does not provide coverage for intentional damage, misuse, cosmetic damage that does not affect the performance of the optic, loss, theft or unauthorized repair or modification. Excludes electronic components. SIG SAUER Electronic & Tritium Component Limited 5-Year Warranty For components not included under the SIG SAUER® Infinite Guarantee™, this warranty covers any defects in materials and workmanship in the electronic and Tritium components of illuminated riflescopes/sights, pistol sights, electronic sights, flashlights, lasers, binoculars, spotting scopes, and rangefinders. This warranty lasts for five years from the date of manufacture. If, during that five-year period, these products are found to have electronic or Tritium component defects in materials or workmanship, SIG SAUER will repair your product, at no charge to you. If we cannot repair your product, we will replace it with a product in perfect working order of equal or better physical condition.
- 16. 16 BRAVO3/5 SPECIFICATIONS Magnification 3x 5x Clear Aperture 24mm 30mm Illumination Settings 8 Daylight Settings / 3 NV 8 Daylight Settings / 3 NV Sight Height to Optical Axis 1.535 in 1.535 in Elevation Adjustment Range +/- 60 MOA +/- 40 MOA Windage Adjustment Range +/- 60 MOA +/- 40 MOA Weight 22.4 oz / 635 g 23.46 oz / 665 g Battery CR2032 CR2032 Waterproofing IPX-7 IPX-7
- 17. 17 sigsauer.com A – 6.3 in / 160mm B – 2.53 in / 64mm C – 2.8 in / 71mm A C B
- 18. 18 NOTES:
- 19. 19 sigsauer.com
- 20. FOR PRODUCT SERVICE ON THIS MODEL, PLEASE CALL 603-610-3000 27100 SW Parkway Avenue, Wilsonville, OR 97070 USA sigsauer.com P/N 7401088-01 R00