SlideShare a Scribd company logo
1 of 56
Download to read offline
MNVD-TM-ITI
OPERATOR MANUAL
FOR THE
Monocular Night Vision Device (MNVD)
Rev. 1 11 October 2011
i
SAFETY SUMMARY
GENERAL
This manual contains operating instructions and
maintenance procedures which may cause injury or death to
personnel, or damage to equipment if not properly followed.
Prior to performing any task, the WARNINGs, CAUTIONs
and NOTEs included in that task shall be reviewed and
understood.
DEFINITIONS
WARNING
Highlights an essential operating or maintenance
procedure, practice, condition or statement, which,
if not strictly observed, could result in injury to, or
death of, personnel or long term health hazards.
CAUTION
Highlights an essential operating or maintenance
procedure, practice, condition or statement, which,
if not strictly observed, could result in damage to,
or destruction of, equipment or loss of mission
effectiveness.
NOTE
Highlights an essential operating or maintenance
procedure, condition or statement.
ii
SAFETY PRECAUTIONS
The following general safety precautions supplement the
specific WARNINGs, CAUTIONs and NOTEs that appear
elsewhere in this manual.
WARNING
The Infrared (IR) LED Illuminator is detectable by
an enemy using night vision devices. Detection is
easier in smoky, foggy, or rainy conditions. To
reduce the risk of detection by an enemy using
night vision devices, avoid prolonged activation of
the IR LED Illuminator.
WARNING
Emission of stray light from the eyepiece (even
with eyecup installed) may be detectable by the
enemy.
WARNING
Do not touch, ingest, or inhale particles or
fragments of a broken objective lens. Lens
contains material that may cause irritation to eyes,
skin, upper and lower respiratory tracts, or
gastrointestinal tract. If contacted, flush eyes or
skin with large amounts of water. If ingested, DO
NOT induce vomiting. Rinse mouth with water
and give victim 2-4 cupfuls of milk or water.
Fragments of lens may be sharp enough to cut
personnel if touched.
iii
WARNING
Remove the MNVD from the weapon before
inspecting, cleaning, or performing other
maintenance functions.
WARNING
• Do not short circuit, puncture, incinerate, or
disassemble battery.
• Do not attempt to recharge battery.
• Prior to use, inspect battery for cracks, dents,
leakage, or bulging. Never install a defective
battery in the MNVD.
WARNING
Lithium batteries can explode or cause burns if
disassembled, shorted, recharged, exposed to
water, fire, or high temperatures (above 100°C or
212°F). Do not place loose batteries in a pocket
or other container containing metal objects. Do
not store batteries with hazardous or combustible
materials. Store in a cool, dry, ventilated area.
WARNING
Use of off-brand batteries poses a risk of fire or
explosion. Ensure that only a 1.5V AA battery
produced by a well-known battery manufacturer is
installed in the MNVD. These batteries are
specifically designed for use in high performance,
high-drain devices, and contain built-in fault and
heat protection features.
iv
CAUTION
Do not ship or store the MNVD with the battery
installed.
CAUTION
Pointing the MNVD at the sun without the lens
cover installed may damage internal imaging
components.
CAUTION
The coating on the demist shield may be damaged
if cleaned while wet. Clean the demist shield only
when dry and using dry lens tissue.
CAUTION
Use of acetone or gun cleaning agents containing
perchloroethylene or methylene chloride may
permanently damage the MNVD.
v
TABLE OF CONTENTS
SAFETY SUMMARY.......................................................................i
TABLE OF CONTENTS.................................................................v
LIST OF FIGURES .......................................................................vii
LIST OF TABLES.........................................................................vii
CHAPTER 1......................................................................................1-1
INTRODUCTION .........................................................................1-1
SECTION I..............................................................................1-1
GENERAL INFORMATION...............................................1-1
1.1 SCOPE..................................................................1-1
1.2 MODEL NUMBER AND EQUIPMENT NAME......1-2
1.3 MANUFACTURER................................................1-2
1.4 PURPOSE OF EQUIPMENT................................1-2
1.5 ABBREVIATIONS AND ACRONYMS ..................1-2
SECTION II.............................................................................1-3
EQUIPMENT DESCRIPTION ...........................................1-3
1.6 SYSTEM DESCRIPTION......................................1-3
1.7 TECHNICAL SPECIFICATIONS ..........................1-4
1.8 MAJOR COMPONENTS.......................................1-5
1.9 FEATURES AND CONTROLS .............................1-8
CHAPTER 2......................................................................................2-1
OPERATING INSTRUCTIONS ...................................................2-1
SECTION I..............................................................................2-1
PREPARATION FOR USE ...............................................2-1
2.1 PREPARATION FOR USE ...................................2-1
2.2 BATTERY HANDLING..........................................2-2
2.3 HEADMOUNT ASSEMBLY ..................................2-3
2.4 WEAPON MOUNTING INSTRUCTIONS ...........2-11
2.5 LENS ACCESSORIES........................................2-14
SECTION II...........................................................................2-16
OPERATING INSTRUCTIONS.......................................2-16
2.6 MODES OF OPERATION...................................2-16
2.7 IR LED ILLUMINATOR .......................................2-17
2.8 GAIN (CONTRAST) ............................................2-18
2.9 FOCUS................................................................2-18
2.10 DIOPTER ADJUSTMENT.................................2-19
2.11 STARTUP PROCEDURES...............................2-19
vi
TABLE OF CONTENTS – Continued
CHAPTER 3......................................................................................3-1
MAINTENANCE ..........................................................................3-1
SECTION I..............................................................................3-1
OPERATOR MAINTENANCE...........................................3-1
3.1 TROUBLESHOOTING PROCEDURES ...............3-1
3.2 INSPECTION / CLEANING...................................3-3
3.3 CORRECTIVE MAINTENANCE PROCEDURES 3-5
SECTION II.............................................................................3-7
SERVICE / PACKING AND UNPACKING........................3-7
3.4 SERVICE / REPAIR..............................................3-7
3.5 WARRANTY INFORMATION ...............................3-8
3.6 NON-WARRANTY INFORMATION......................3-8
APPENDIX A ...................................................................................A-1
REPAIR PARTS LIST ................................................................A-1
APPENDIX B ...................................................................................B-1
ACCESSORIES..........................................................................B-1
vii
LIST OF FIGURES
Figure 1-1 Headmounted MNVD .....................................................1-1
Figure 1-2 Major Components.........................................................1-5
Figure 1-3 Features and Controls....................................................1-8
Figure 2-1 Battery Installation..........................................................2-2
Figure 2-2 Low Battery Indicator......................................................2-3
Figure 2-3 Headmount Assembly ....................................................2-4
Figure 2-4 Headmount Adapter Installation.....................................2-6
Figure 2-5 Mounting to Headmount Assembly................................2-7
Figure 2-6 Fore / Aft Release Button...............................................2-8
Figure 2-7 Adjustment Knob............................................................2-9
Figure 2-8 Weapon Mount Assembly ............................................2-11
Figure 2-9 Weapon Mount Assembly Installation..........................2-12
Figure 2-10 Mounting the MNVD...................................................2-13
Figure 2-11 MNVD Eyecups ..........................................................2-15
Figure 2-12 IR LED Illuminator Indicator .......................................2-18
Figure 3-1 Neck Cord Replacement ................................................3-6
Figure A-1 End Item Components .................................................. A-1
Figure A-2 MNVD Assembly........................................................... A-3
LIST OF TABLES
Table 1-1 Technical Specifications..................................................1-4
Table 1-2 List of Major Components ...............................................1-6
Table 1-3 List of Features and Controls ..........................................1-9
Table 2-1 Field of View and Positioning Adjustments ...................2-10
Table 2-2 Mode Switch Operation .................................................2-17
Table 3-1 Troubleshooting Procedures ...........................................3-1
Table A-1 List of End Item Components......................................... A-2
Table A-2 List of Repair Parts......................................................... A-3
Table B-1 List of Accessories ......................................................... B-1
1-1
CHAPTER 1
INTRODUCTION
SECTION I
GENERAL INFORMATION
Figure 1-1 Headmounted MNVD
1.1 SCOPE
This manual is intended for use by operators of the
Monocular Night Vision Device (MNVD). It provides a
system description, operational procedures, and
maintenance responsibilities. Complete familiarization with
this manual prior to using the equipment will ensure safe
operation and maximum effectiveness of the MNVD.
1-2
1.2 MODEL NUMBER AND EQUIPMENT NAME
245620, Monocular Night Vision Device (MNVD)
1.3 MANUFACTURER
L-3 Communications Corporation
Warrior Systems Division
Insight Operations
9 Akira Way
Londonderry, NH 03053 USA
1.4 PURPOSE OF EQUIPMENT
The MNVD allows for observation under adverse conditions
including light rain, smoke, light snow, and low light to total
darkness.
1.5 ABBREVIATIONS AND ACRONYMS
Abbreviations and acronyms used in this manual are listed
as follows:
cm Centimeter
g Gram
I2
Image Intensifier
IR Infrared
ITAR International Traffic in Arms Regulations
LED Light Emitting Diode
mm Millimeter
MNVD Monocular Night Vision Device
NSN National Stock Number
RMA Return Material Authorization
TBD To Be Determined
V Volt
1-3
SECTION II
EQUIPMENT DESCRIPTION
1.6 SYSTEM DESCRIPTION
The MNVD is a portable, battery operated night vision device
with an integrated IR light source. It can be used as a
handheld device or may be mounted to a weapon, helmet, or
headmount assembly.
When used in the normal operating mode (ON), the MNVD
amplifies available ambient light to allow for observation
under adverse conditions including light rain, smoke, light
snow, and low light conditions. When used in the IR mode,
the MNVD generates its own light with an integrated IR LED
Illuminator to allow for observation, map reading, etc. even in
complete darkness.
The MNVD is a ruggedized system designed for operation in
battlefield environments.
1-4
1.7 TECHNICAL SPECIFICATIONS
Table 1-1 provides technical specifications for the MNVD.
Table 1-1 Technical Specifications
WEIGHT AND DIMENSIONS
Weight < 14.1 ounces (400 g)
Length
(with standard eyecup)
6.5 inches (16.5 cm)
Width 2.8 inches (7.1 cm)
Height 2.4 inches (6.1 cm)
POWER AND PERFORMANCE
Battery One 1.5V AA lithium battery
Battery Life
1
> 15 hours
Magnification 1x
Field of View 40° (± 2°)
Objective Focus 9.8 inches (25cm) to infinity
Diopter Adjustment +2 to -6
Immersion 1 meter for 30 minutes
Operating Temperature -60°F (-51°C) to 120°F (49°C)
Storage Temperature -60°F (-51°C) to 185°F (85°C)
1
Performance will vary depending on actual environmental and
atmospheric conditions.
1-5
1.8 MAJOR COMPONENTS
The MNVD system includes the components shown in Figure
1-2. Table 1-2 provides a brief functional description of each
item. The “Key” column in Table 1-2 corresponds to the
label numbers in Figure 1-2.
Figure 1-2 Major Components
1
2 3
4
5
67
8
9
10
11
12
13
15
14
1-6
1.8 MAJOR COMPONENTS – Continued
Table 1-2 List of Major Components
Key
Major
Component
Function
1 Brow Pads Used on the headmount assembly to
provide maximum comfort and best fit.
2 Headmount
Assembly
Worn on the head to permit hands-free
operation of the MNVD.
3 Soft Carrying
Case
Protects the MNVD and accessories
while in a field environment.
4 Operator Manual Provides detailed operating and
maintenance procedures specific to the
MNVD.
5 Quick Reference
Guide
Provides at-a-glance operating
instructions for the MNVD.
6 Lens Tissue Used to clean the optical surfaces of the
MNVD.
7 Retainer Cord May be tied to the MNVD and clipped to
the operator to secure the MNVD when
not in use.
8 Sacrificial
Window
Protects the objective lens from
becoming scratched or otherwise
damaged.
9 Demist Shield Protects the eyepiece from becoming
scratched or otherwise damaged and
prevents fogging of the eyepiece.
1-7
1.8 MAJOR COMPONENTS – Continued
Table 1-2 List of Major Components – Continued
Key
Major
Component
Function
10 Headmount
Adapter
Allows the MNVD to be installed on the
headmount assembly or a suitably
configured helmet.
11 Weapon Mount
Assembly
Allows the MNVD to be mounted to
weapons equipped with a MIL-STD-
1913 rail.
12 Eyecup,
Shuttered
Reduces emission of stray light from the
eyepiece when the MNVD is used in a
weapon-mounted configuration.
13 MNVD Assembly A portable, battery operated night vision
device with integrated IR light source.
14 AA Lithium
Battery (2)
Provides power to the MNVD.
15 Shoulder Strap Allows the soft carrying case to be slung
across the shoulder for ease of carrying.
1-8
1.9 FEATURES AND CONTROLS
Figure 1-3 shows features and controls for the MNVD. Table
1-3 provides a brief functional description of each item. The
“Key” column in Table 1-3 corresponds to the label numbers
in Figure 1-3.
Figure 1-3 Features and Controls
1
2
5 6
7
8
1112
3
10 9
4
1-9
1.9 FEATURES AND CONTROLS – Continued
Table 1-3 List of Features and Controls
Key
Major
Component
Function
1 Objective Lens Collects available light within the viewed
scene and focuses it onto the input
surface of an image intensifier (I2
) tube.
2 Focus Ring Used to focus the MNVD from 9.8
inches (25cm) to infinity.
3 High Light Sensor Detects ambient light conditions so that
the I
2
tube will be automatically shut off
if conditions are so bright as to risk
damaging internal components.
4 Mounting
Interface
Provides female threading to accept the
headmount adapter and weapon mount
assembly.
5 Diopter Adjuster Used to focus the eyepiece lens to
compensate for the visual acuity of the
operator.
6 Eyecup Assists in positioning the MNVD relative
to the operator’s eye in handheld and
headmounted configurations. Reduces
emission of stray light from the
eyepiece.
7 Mode Switch A 3-position switch used to turn the
MNVD on in a selected operating mode.
8 Lens Cover Protects the objective lens and internal
imaging components and prevents glare
or reflection off the objective lens when
the MNVD is not in use.
1-10
1.9 FEATURES AND CONTROLS – Continued
Table 1-3 List of Features and Controls – Continued
Key
Major
Component
Function
9 Neck Cord Holds the objective lens cover captive to
the MNVD. Allows for the MNVD to be
worn around the neck during periods of
nonuse.
10 IR LED
Illuminator
Used to provide a supplementary light
source in conditions of extreme
darkness.
11 Gain Control
Knob
Used to adjust the gain (contrast) of the
viewed image.
12 Battery Cap /
Compartment
Provides secure housing for the single
AA battery that powers the MNVD.
2-1
CHAPTER 2
OPERATING INSTRUCTIONS
SECTION I
PREPARATION FOR USE
2.1 PREPARATION FOR USE
Unpacking the Equipment
Open the soft carrying case and verify that all major
components listed in Table 1-2 are present. Check the
MNVD to ensure the following additional items are included:
a. Eyecup
b. Lens Cover
c. Battery Cap
d. Neck Cord
If any of the major components or items listed above are
missing, seek guidance from the equipment issuing
authority.
Inspection of the Equipment
Before use, inspect all pieces of equipment for any damage
such as cracks, loose parts, faulty cables, or other visible
defects. If any damage or defects are noted, seek guidance
from the equipment issuing authority.
2-2
2.2 BATTERY HANDLING
Battery Inspection
Before installation, inspect the battery for any cracks, dents,
leakage, or bulging. Never install a defective battery in the
MNVD.
Battery Installation
Access the battery compartment by turning the battery cap
counterclockwise. Install one AA lithium battery with the
positive terminal facing in as shown in Figure 2-1. Proper
battery orientation is clearly marked on the MNVD housing.
Replace the battery cap and turn clockwise to tighten.
Figure 2-1 Battery Installation
2-3
2.2 BATTERY HANDLING – Continued
CAUTION
Do not ship or store the MNVD with battery
installed.
Low Battery Indicator
A red light visible through the eyepiece, just outside the
intensified field of view, indicates a low battery condition. It
will illuminate when approximately 30 minutes of operation
remain.
Figure 2-2 Low Battery Indicator
2.3 HEADMOUNT ASSEMBLY
The MNVD system comes with a headmount assembly that
may be worn on the head to permit hands-free operation of
the MNVD.
FIELD OF VIEW
LOW BATTERY
INDICATOR
2-4
2.3 HEADMOUNT ASSEMBLY – Continued
Donning the Headmount Assembly
The following procedures for donning the headmount
assembly should be performed before attaching the
headmount adapter and MNVD.
1. Review Figure 2–3 to gain familiarity with the labeled
items that will be referred to in this section.
Figure 2-3 Headmount Assembly
FRONT CHIN
STRAP (2)
REAR CHIN
STRAP (2)
VERTICAL
ADJUSTMENT
STRAP
NECK PAD
SNAPS (4)
2-5
2.3 HEADMOUNT ASSEMBLY – Continued
2. Loosen the four chin straps until the ends of each strap
are approximately two inches from the sliding bar
buckles.
3. Ensure the front and rear snaps are engaged.
4. Position the neck pad on the back of the neck and pull the
headmount assembly over the head.
5. Remove slack from the two rear chin straps but do not
tighten.
6. Adjust front and rear chin straps and vertical adjustment
strap until the headmount assembly is in a comfortable
but firm position.
NOTE
Minor strap adjustments may be necessary after
installing the headmount adapter and MNVD.
Headmount Adapter
The headmount adapter allows the MNVD to be installed on
the headmount assembly or a suitably configured helmet.
1. With the MNVD in one hand, use the free hand to orient
the headmount adapter above the mounting interface as
shown in Figure 2-4. Keying features in the headmount
adapter and mounting interface allow only one
orientation.
2. Rotate the thumbscrew clockwise to secure the
headmount adapter to the MNVD, taking care not the
cross threads.
2-6
2.3 HEADMOUNT ASSEMBLY – Continued
Figure 2-4 Headmount Adapter Installation
3. The headmount adapter is now installed on the MNVD.
Mounting
Align the headmount adapter with the receptacle on the
headmount assembly as shown in Figure 2-5 and push the
parts together until the mating features engage. To
disengage, press the release lever shown below.
THUMBSCREW
MOUNTING
INTERFACE
2-7
2.3 HEADMOUNT ASSEMBLY – Continued
Figure 2-5 Mounting to Headmount Assembly
Positioning Adjustments
With the MNVD system installed, positioning adjustments
must be made for maximum performance and comfort.
Figures 2-6 and 2-7 show controls used for positioning
adjustments.
NOTE
Positioning adjustments are made with the MNVD
attached to the headmount, the eyecup installed,
and the headmount properly donned. The MNVD
cannot be properly adjusted until the headmount
itself is correctly fitted.
RELEASE
LEVER
2-8
2.3 HEADMOUNT ASSEMBLY – Continued
NOTE
Optimal system performance and comfort of the
operator rely on carefully following the procedures
below. The best visual performance is possible
only when the optical axis of the device is aligned
with the visual axis of the eye.
• Fore / Aft Adjustment. The MNVD can be moved
forward or backward relative to the head. Press the
fore / aft release button and slide the MNVD forward
or backward to achieve optimal eye relief.
Figure 2-6 Fore / Aft Release Button
2-9
2.3 HEADMOUNT ASSEMBLY – Continued
• Height Adjustment. The headmount’s vertical
adjustment strap (see Figure 2-3) provides for height
adjustment of the MNVD. Tighten or loosen the
vertical adjustment strap until the MNVD is level with
the operator’s eyes.
• Pupillary Adjustment. The MNVD can be moved in
an arc to provide best alignment with the operator’s
eye. Unscrew the adjustment knob to its full and
open position (see Figure 2-7). Gently push the
MNVD away from the operator’s head and rotate
clockwise or counterclockwise until proper
positioning is achieved. Screw in the adjustment
knob to lock the MNVD in place.
Figure 2-7 Adjustment Knob
2-10
2.3 HEADMOUNT ASSEMBLY – Continued
The first row in Table 2-1 shows the optimal field of view for
the MNVD when positioning adjustments are correctly
performed. The remaining rows show unsatisfactory fields of
view when positioning adjustments are performed
incorrectly, along with corrective action that can be taken to
resolve the problem.
Table 2-1 Field of View and Positioning Adjustments
Field of View Remarks / Corrective Action
Optimal alignment.
Eye relief too long. Correct fore and aft
adjustment.
Eye relief too short. Correct fore and aft
adjustment.
Eyepiece set too left. Correct pupillary
adjustment.
Eyepiece set too right. Correct pupillary
adjustment.
2-11
2.3 HEADMOUNT ASSEMBLY – Continued
Table 2-1 Field of View and Positioning Adjustments –
Continued
Field of View Remarks / Corrective Action
Positioned too high. Correct height
adjustment.
Positioned too low. Correct height
adjustment.
MNVD field of view
Eyepiece field of view
Obstructed MNVD field of view
2.4 WEAPON MOUNTING INSTRUCTIONS
The weapon mount assembly allows the MNVD to be
mounted to weapons equipped with a MIL-STD-1913 rail.
Figure 2-8 Weapon Mount Assembly
THUMBSCREW
MOUNTING SCREW
JAWS
2-12
2.4 WEAPON MOUNTING INSTRUCTIONS – Continued
Installing the Weapon Mount Assembly
1. With the MNVD in one hand, use the free hand to orient
the weapon mount assembly above the mounting
interface as shown in Figure 2-9. Keying features in the
weapon mount assembly and mounting interface allow
only one orientation.
2. Rotate the thumbscrew clockwise to secure the weapon
mount assembly to the MNVD, taking care not the cross
threads.
Figure 2-9 Weapon Mount Assembly Installation
3. The weapon mount assembly is now installed on the
MNVD.
MOUNTING
INTERFACE
THUMBSCREW
2-13
2.4 WEAPON MOUNTING INSTRUCTIONS – Continued
Mounting the MNVD
WARNING
Be sure the weapon is CLEAR and SAFE before
proceeding.
1. Loosen the mounting screw on the weapon mount
assembly until the jaws have sufficient space to fit over
the weapon rail.
2. Position the MNVD facing forward, ensuring the recoil lug
is seated in the desired recoil groove of the rail. While
pushing down and forward on the MNVD, turn the
mounting screw clockwise until snug.
Figure 2-10 Mounting the MNVD
2-14
2.5 LENS ACCESSORIES
Objective Lens Cover
The objective lens cover affords additional protection to the
objective lens and protects the MNVD’s internal imaging
components. It should be pressed into place (installed) over
the objective lens whenever the MNVD is not being used. It
should also be installed when the MNVD is being used in
brightly lit environments. A small hole in the center of the
lens cover allows enough light to enter the MNVD when
operating in these conditions. In darker environments, better
performance will be observed with the lens cover uninstalled.
The objective lens cover is held captive to the MNVD by the
neck cord.
Sacrificial Window
A sacrificial window is provided to protect the objective lens
from becoming scratched or otherwise damaged. The
sacrificial window should be pressed into place (installed)
over the objective lens whenever the lens cover is not
installed.
Demist Shield
CAUTION
The coating on the demist shield may be damaged
if cleaned while wet. Clean the demist shield only
when dry and using dry lens tissue.
2-15
2.4 LENS ACCESSORIES – Continued
The demist shield is provided to protect the eyepiece from
becoming scratched or otherwise damaged, and to prevent
fogging of the eyepiece. It should be installed whenever the
MNVD is in use. With the eyecup removed, place the demist
shield over the eyepiece with the narrow side in. Taking
care not to smudge the eyepiece or demist shield, press the
demist shield into place.
Eyecups
The MNVD is equipped with both a standard and shuttered
eyecup to accommodate a variety of tactical situations and
mounting configurations.
Figure 2-11 MNVD Eyecups
To install, press the desired eyecup over the end of the
eyepiece. If installing the standard eyecup, rotate to obtain
proper eye / cheek weld.
STANDARD EYECUP SHUTTERED EYECUP
2-16
SECTION II
OPERATING INSTRUCTIONS
2.6 MODES OF OPERATION
The MNVD is powered on by turning the Mode Switch to the
desired position.
CAUTION
Pointing the MNVD at the sun without the lens
cover installed may damage internal imaging
components.
NOTE
The MNVD is equipped with a high light sensor
(see Figure 1-3) that detects ambient light
conditions and automatically shuts down the I2
tube if conditions are so bright as to risk damaging
internal components. To reset (power on) the
MNVD after a high light shutdown, turn the Mode
Switch to the RESET / OFF position and then back
to the desired setting.
2-17
2.6 MODES OF OPERATION – Continued
Table 2-2 Mode Switch Operation
Mode Switch
Position
Effect
RESET
OFF
Turns MNVD off. Resets the MNVD after a high
light shutdown.
ON
Activates the MNVD using (and amplifying)
available, ambient light.
IR
PULL
Activates the MNVD using the IR LED Illuminator
to provide an integrated light source in conditions
of extreme darkness.
2.7 IR LED ILLUMINATOR
WARNING
The IR LED Illuminator is detectable by an enemy
using night vision devices. Detection is easier in
smoky, foggy, or rainy conditions. To reduce the
risk of detection by an enemy using night vision
devices, avoid prolonged activation of the IR LED
Illuminator.
The IR LED Illuminator is used to provide a supplementary
light source in conditions of extreme darkness. In addition to
the IR mode described in Table 2-2, the IR LED Illuminator
may also be activated in a momentary setting. To
momentarily activate the IR LED Illuminator, turn the Mode
Switch to the ON position. Continue turning past the ON
position and hold. The IR LED Illuminator will remain
activated until the Mode Switch is released.
A red light in the eyepiece, just outside the intensified field of
view, indicates that the IR LED Illuminator is activated.
2-18
2.7 IR LED ILLUMINATOR – Continued
Figure 2-12 IR LED Illuminator Indicator
2.8 GAIN (CONTRAST)
The MNVD is equipped with a gain control knob used to
adjust the gain (contrast) of the viewed image. When
looking through the eyepiece, turning the gain control knob
clockwise will provide more contrast. Turning the gain
control knob counterclockwise will provide less contrast.
2.9 FOCUS
The objective lens must be focused for the viewing distance
being observed. While looking at an object at least 9.8
inches (25cm) from the MNVD, rotate the objective focus
ring for best image clarity. A change in viewing distance
requires that the objective lens be refocused. If already
focused for a distance of at least 250 feet (76m), no change
in focus is required between this distance and infinity.
FIELD OF VIEW
IR LED ILLUMINATOR
INDICATOR
2-19
2.10 DIOPTER ADJUSTMENT
The eyepiece may be focused to accommodate differences
in the visual acuity of individual operators, from +2 to -6
diopters. While looking at an object at least 9.8 inches
(25cm) from the MNVD, rotate the diopter adjuster to
achieve the sharpest possible image.
2.11 STARTUP PROCEDURES
To achieve optimal performance and image clarity, the
following procedures should be accomplished in the order
presented, each time the MNVD is placed into use.
1. Perform mounting procedures and positioning
adjustments as applicable:
a. For head or helmet-mounted configurations, don the
headmount and MNVD and make all positioning
adjustments per section 2.3.
b. For weapon-mounted configurations, install the
weapon mount assembly and mount to the host
weapon per section 2.4.
2. Turn the Mode Switch to the desired position per section
2.6.
3. Adjust the gain (contrast) to a comfortable viewing level
per section 2.8.
4. Rotate the objective focus ring for best image clarity.
5. Make diopter adjustments per section 2.10.
3-1
CHAPTER 3
MAINTENANCE
SECTION I
OPERATOR MAINTENANCE
3.1 TROUBLESHOOTING PROCEDURES
The procedures below will help correct some of the basic
problems that may arise with the MNVD. If the equipment
malfunction is not listed, or the actions listed do not correct
the fault, refer to section 3.4 for additional guidance.
Table 3-1 Troubleshooting Procedures
Malfunction Probable Cause Corrective Action
1. No image is
present when
turning on the
MNVD.
a. Batteries are improperly
installed.
a. Verify batteries are properly
installed per section 2.2, Battery
Installation.
b. Battery power is low. b. Replace batteries per section
2.2, Battery Installation.
c. Battery contacts require
cleaning.
c. Clean battery contacts per
section 3.2, Battery Compartment
and Battery Cap.
2. Image abruptly
turns off when in
ON or IR modes.
a. High light shutdown has
been initiated.
a. Reset (power on) the MNVD
per section 2.6. Install the
objective lens cover per section
2.5, Objective Lens Cover, if
necessary.
3. Poor or
degraded image.
a. Lens cover installed
(dark ambient conditions).
a. Remove lens cover per section
2.4, Objective Lens Cover.
b. Lens cover not installed
(bright ambient conditions).
b. Install lens cover per section
2.5, Objective Lens Cover.
3-2
3.1 TROUBLESHOOTING – Continued
Table 3-1 Troubleshooting Procedures – Continued
Malfunction Probable Cause Corrective Action
3. Poor or
degraded image –
Continued.
c. Insufficient ambient
light.
c. Turn the Mode Switch to the IR
position to provide IR light source
per section 2.6, or momentarily
activate the IR LED Illuminator per
section 2.7.
d. Gain (contrast) not
adjusted to an appropriate
setting.
d. Adjust gain (contrast) to a
comfortable level per section 2.8.
e. Not focused for viewing
distance being observed
(minimum 9.8 inches).
e. Focus objective lens per
section 2.9.
f. Diopter setting not
adjusted correctly.
f. Adjust diopter setting per
section 2.10.
g. Sacrificial window
and/or demist shield
obscured by dirt, dust, or
grime.
g. Clean sacrificial window and/or
demist shield per section 3.2,
Optical Surfaces.
h. Sacrificial window
and/or demist shield
cracked or scratched.
h. Replace sacrificial window
and/or demist shield per section
2.5.
i. Objective lens and/or
eyepiece obscured by dirt,
dust or grime.
i. Remove sacrificial window
and/or demist shield. Clean
objective lens and/or eyepiece per
section 3.2, Optical Surfaces.
4. IR LED
Illuminator does
not appear to
operate or
provides
insufficient light.
a. IR LED Illuminator exit
port is dirty.
a. Clean IR LED Illuminator exit
port per section 3.2, Optical
Surfaces.
b. Viewed scene is outside
effective range of IR LED
Illuminator.
b. Limit use of IR LED Illuminator
to viewed scenes within a few
meters of the MNVD.
3-3
3.2 INSPECTION / CLEANING
The operator should inspect the MNVD before each use and
after it has been in extreme conditions, such as prolonged
exposure to intense temperatures. The following procedures
will extend the life of the MNVD and help ensure safe
operation.
WARNING
Remove the MNVD from the weapon before
inspecting, cleaning, or performing other
maintenance functions.
WARNING
Prior to performing any inspection or maintenance
procedure, verify that batteries are not installed.
MNVD Housing
To clean the MNVD housing, rinse with water or mild soap
and water and then wipe dry with a soft cloth. Clean around
adjusters, levers, and interfaces with a cotton swab.
Battery Compartment
Inspect the battery compartment for dirt, dust, or corrosion.
Dirt or debris that cannot be shaken loose from the battery
compartment may be removed using a clean cloth or cotton
swab. Periodically lubricate the o-ring with fluorinated
grease. The o-ring should be replaced if it becomes cut,
nicked, or dried out per section 3.3, Replacing Battery
Compartment O-Ring. If necessary, clean battery contacts
with a cotton swab and isopropyl alcohol.
3-4
3.2 INSPECTION / CLEANING - Continued
Battery Cap
Inspect the battery cap for dirt, sand, and grime. Thoroughly
clean the battery cap and o-ring by flushing with water and
wiping with a cotton swab. Periodically lubricate the o-ring
with fluorinated grease. If necessary, clean the battery
contact with a cotton swab and isopropyl alcohol.
Optical Surfaces
CAUTION
The coating on the demist shield may be damaged
if cleaned while wet. Clean the demist shield only
when dry and using dry lens tissue.
Inspect optical surfaces for dirt, dust, and grime. Except for
the demist shield, clean with water or mild soap and water.
Fine cleaning of the optical surfaces should be performed
using the provided lens tissue and lens cleaning solution, or
the flexible tip of the lens pen. Avoid using excessive force
as this may scratch the lenses. The sacrificial window and
demist shield should be replaced if scratches degrade
performance or cracks are present.
Neck Cord
Inspect the neck cord for any signs of cuts, nicks, or fraying.
Replace as necessary per section 3.3, Lens Cover / Neck
Cord Replacement.
3-5
3.3 CORRECTIVE MAINTENANCE PROCEDURES
The MNVD has no internal parts or assemblies replaceable
by the user or organizational level personnel. Refer to
section 3.4 regarding maintenance and/or repair actions
beyond those described in this manual.
Replacing Battery Compartment O-Ring
No tools are required to perform this procedure.
1. Access the battery compartment by turning the battery
cap counterclockwise.
2. Use the fingers of one hand to squeeze the battery
compartment o-ring while simultaneously pushing it out of
its retaining groove. Grasp the o-ring with fingers of the
other hand and pull it off the battery compartment.
3. Ensure the o-ring retaining groove is clean and free of
debris.
4. Stretch the replacement o-ring over the battery
compartment and into its retaining groove.
Neck Cord Replacement
No tools are required to perform this procedure.
1. Feed one end of the neck cord through the channel on
the MNVD housing as shown in Figure 3-1.
2. Feed the other end of the neck cord through the tab in the
lens cover.
3. Secure both ends with a knot.
4. Place the lens cover over the objective lens.
3-6
3.3 CORRECTIVE MAINTENANCE PROCEDURES –
Continued
Figure 3-1 Neck Cord Replacement
3-7
SECTION II
SERVICE / PACKING AND UNPACKING
3.4 SERVICE / REPAIR
For service, repair, or replacement, first e-mail
returns.insight@l-3com.com or call toll-free 1-877-744-4803.
To assist with determining if the item is repairable, the
following information will be requested:
a. Serial number of the defective item;
b. Thorough description of the malfunction, defect, or
damage; and
c. If known, an explanation as to how the malfunction,
defect or damage occurred.
If the item is determined to be beyond economical repair,
follow applicable replacement procedures through your
Property Officer. If it is determined that the item is under
warranty, or should be returned for repair, a Return Material
Authorization (RMA) number will be provided.
When returning the MNVD for service / repair, the following
procedures should be followed to prevent any additional
damage:
1. Be sure that the MNVD is free of all contaminants such as
dirt or any other foreign material.
2. Remove battery.
3. Place the MNVD in the soft carrying case.
3-8
3.4 RETURN INSTRUCTIONS – Continued
Place the item and a copy of the test report or detailed
description of the failure in a suitable packing container.
Mark the package with “Field Return” and the RMA number.
Ship via fastest, traceable, pre-paid means to:
L-3 Communications Corporation
Warrior Systems Division
Insight Operations
9 Akira Way
Londonderry, NH 03053
3.5 WARRANTY INFORMATION
The MNVD is under warranty from defects in material and
workmanship for a minimum of one (1) year from the date of
manufacture. This warranty does not protect against
damage due to misuse, mishandling or battery leakage.
Additional warranty coverage may have been provided
through the contract or via subsequent contract extension.
Specific warranty terms can be obtained from your
procurement agent, Contracting Officer or L-3 Warrior
Systems, Insight.
3.6 NON-WARRANTY INFORMATION
Non-warranty repairs are subject to an evaluation fee. The
item will be tested and evaluated for failure, then customer
permission and payment terms are obtained prior to any
repairs being performed.
A-1
APPENDIX A
REPAIR PARTS LIST
SCOPE
This Appendix lists end item components and repair parts for
the MNVD.
Figure A-1 End Item Components
1
3 4
5
6
78
9
10
11
12
13
14
16
15
2
A-2
SCOPE – Continued
Table A-1 List of End Item Components
ITEM
NO.
NATIONAL
STOCK NUMBER
PART
NUMBER
DESCRIPTION QTY
1 8415-01-560-1800 7B435 Browpad, Medium 1
2 8415-01-560-1799 7B436 Browpad, Thick 1
3 TBD 7B268 Headmount Assembly 1
4 TBD 7B262 Soft Carrying Case 1
5 N/A MNVD-TM-ITI Operator Manual 1
6 N/A MNVD-QRG-ITI Quick Reference Guide 1
7 6760-01-556-4306 7B626 Lens Tissue 1
8 TBD MND-187 Retaining Cord 1
9 TBD 7B264 Sacrificial Window 1
10 5855-01-444-1230 MND-200 Demist Shield 1
11 TBD MND-160 Adapter, Headmount / Helmet Mount 1
12 TBD MND-140 Mount Assembly, Weapon 1
13 6650-01-444-1229 A3256345 Eyecup, Shuttered 1
14 N/A 245000
MNVD Assembly
(see Figure A-2 for parts breakdown)
1
15 6135-01-559-9637 M30-044 Battery, 1.5V, AA Lithium 2
16 8465-01-559-8427 7B267 Shoulder Strap Assembly 1
- 8415-01-598-3125 7B280
Browpad, Thin
(pre-installed on Headmount Assembly)
1
A-3
SCOPE – Continued
Figure A-2 MNVD Assembly
Table A-2 List of Repair Parts
ITEM
NO.
NATIONAL
STOCK NUMBER
PART
NUMBER
DESCRIPTION QTY
1 5855-01-556-2660 7B422 Eyecup, Standard 1
2 4520-01-455-6662 7B306 Neck Cord 1
3 TBD 7B318 Lens Cover 1
4 TBD A3256356 O-Ring, Battery Compartment 1
1
2
34
B-1
APPENDIX B
ACCESSORIES
SCOPE
This Appendix lists accessories available for support of the
MNVD.
Table B-1 List of Accessories
NATIONAL STOCK
NUMBER
PART NUMBER DESCRIPTION
QTY
RECM
TBD ICS-024-US Compass 1
The MNVD
Is designed and produced by:
L-3 Communications Corporation
Warrior Systems Division
Insight Operations
9 Akira Way
Londonderry, NH 03053
USA
Phone 603.626.4800 / Fax 603.626.4888
www.l3warriorsystems.com
This manual contains technical data whose export is governed
by the U.S. International Traffic in Arms Regulations (ITAR).
This information must not be transferred to a foreign person
without the proper authorization of the U.S. Government. Please
contact L-3 Warrior Systems for more information.
© 2011 L-3 Communications Corporation
Warrior Systems Division
Instruction Manual EOTECH MNVD | Optics Trade

More Related Content

What's hot

NX Air also Any other MV Training Index
NX Air also Any other MV Training IndexNX Air also Any other MV Training Index
NX Air also Any other MV Training IndexNiels Inderbiethen
 
Instruction Manual EOTECH MIPIM | Optics Trade
Instruction Manual EOTECH MIPIM | Optics TradeInstruction Manual EOTECH MIPIM | Optics Trade
Instruction Manual EOTECH MIPIM | Optics TradeOptics-Trade
 
MSI GT73VR TITAN PRO (GEFORCE® GTX 1080) User Manual PDF Download / User Guide
  MSI GT73VR TITAN PRO (GEFORCE® GTX 1080) User Manual PDF Download / User Guide  MSI GT73VR TITAN PRO (GEFORCE® GTX 1080) User Manual PDF Download / User Guide
MSI GT73VR TITAN PRO (GEFORCE® GTX 1080) User Manual PDF Download / User Guidemanualsheet
 
MSI GT73VR TITAN 4K (GEFORCE® GTX 1070) manual PDF download / User Guide
  MSI GT73VR TITAN 4K (GEFORCE® GTX 1070) manual PDF download  / User Guide  MSI GT73VR TITAN 4K (GEFORCE® GTX 1070) manual PDF download  / User Guide
MSI GT73VR TITAN 4K (GEFORCE® GTX 1070) manual PDF download / User Guidemanualsheet
 
iTime - Time and Attendance Manual
iTime - Time and Attendance ManualiTime - Time and Attendance Manual
iTime - Time and Attendance Manualamanodirect
 
Instruction Manual EOTECH MRDS Mini Red Dot Sight | Optics Trade
Instruction Manual EOTECH MRDS Mini Red Dot Sight | Optics TradeInstruction Manual EOTECH MRDS Mini Red Dot Sight | Optics Trade
Instruction Manual EOTECH MRDS Mini Red Dot Sight | Optics TradeOptics-Trade
 
New holland w80 btc compact wheel loader service repair manual
New holland w80 btc compact wheel loader service repair manualNew holland w80 btc compact wheel loader service repair manual
New holland w80 btc compact wheel loader service repair manualkjskemmd
 
Goodrive10 english-manual
Goodrive10 english-manualGoodrive10 english-manual
Goodrive10 english-manualToàn Huỳnh
 
B 64014 en-04
B 64014 en-04B 64014 en-04
B 64014 en-04mt7038
 
New holland mh plus wheel excavator service repair manual
New holland mh plus wheel excavator service repair manualNew holland mh plus wheel excavator service repair manual
New holland mh plus wheel excavator service repair manualkjskemmd
 
New holland mh city wheel excavator service repair manual
New holland mh city wheel excavator service repair manualNew holland mh city wheel excavator service repair manual
New holland mh city wheel excavator service repair manualfjskefkemms
 
B 64483 en-01
B 64483 en-01B 64483 en-01
B 64483 en-01mt7038
 
Dc600 crane drive-firmware-manual
Dc600 crane drive-firmware-manualDc600 crane drive-firmware-manual
Dc600 crane drive-firmware-manualnesa69
 
Mountain Stream Group: Portfolio Sample - Technical Manual Development
Mountain Stream Group: Portfolio Sample - Technical Manual DevelopmentMountain Stream Group: Portfolio Sample - Technical Manual Development
Mountain Stream Group: Portfolio Sample - Technical Manual DevelopmentMountain Stream Group, Inc.
 
Hot Cathode Ionization Vacuum Gauge with Dual Convection IGM402 Module
Hot Cathode Ionization Vacuum Gauge with Dual Convection IGM402 ModuleHot Cathode Ionization Vacuum Gauge with Dual Convection IGM402 Module
Hot Cathode Ionization Vacuum Gauge with Dual Convection IGM402 ModuleInstruTech, Inc.
 
Daewoo doosan solar 170 lc v excavator operator and maintenance manual
Daewoo doosan solar 170 lc v excavator operator and maintenance manualDaewoo doosan solar 170 lc v excavator operator and maintenance manual
Daewoo doosan solar 170 lc v excavator operator and maintenance manualfksjksmmde
 

What's hot (19)

NX Air also Any other MV Training Index
NX Air also Any other MV Training IndexNX Air also Any other MV Training Index
NX Air also Any other MV Training Index
 
Instruction Manual EOTECH MIPIM | Optics Trade
Instruction Manual EOTECH MIPIM | Optics TradeInstruction Manual EOTECH MIPIM | Optics Trade
Instruction Manual EOTECH MIPIM | Optics Trade
 
MSI GT73VR TITAN PRO (GEFORCE® GTX 1080) User Manual PDF Download / User Guide
  MSI GT73VR TITAN PRO (GEFORCE® GTX 1080) User Manual PDF Download / User Guide  MSI GT73VR TITAN PRO (GEFORCE® GTX 1080) User Manual PDF Download / User Guide
MSI GT73VR TITAN PRO (GEFORCE® GTX 1080) User Manual PDF Download / User Guide
 
MSI GT73VR TITAN 4K (GEFORCE® GTX 1070) manual PDF download / User Guide
  MSI GT73VR TITAN 4K (GEFORCE® GTX 1070) manual PDF download  / User Guide  MSI GT73VR TITAN 4K (GEFORCE® GTX 1070) manual PDF download  / User Guide
MSI GT73VR TITAN 4K (GEFORCE® GTX 1070) manual PDF download / User Guide
 
505 de vol1 copy
505 de vol1   copy505 de vol1   copy
505 de vol1 copy
 
iTime - Time and Attendance Manual
iTime - Time and Attendance ManualiTime - Time and Attendance Manual
iTime - Time and Attendance Manual
 
KT600 eng manual paperless recorder
KT600 eng manual paperless recorderKT600 eng manual paperless recorder
KT600 eng manual paperless recorder
 
Protecor vp 1
Protecor vp 1Protecor vp 1
Protecor vp 1
 
Instruction Manual EOTECH MRDS Mini Red Dot Sight | Optics Trade
Instruction Manual EOTECH MRDS Mini Red Dot Sight | Optics TradeInstruction Manual EOTECH MRDS Mini Red Dot Sight | Optics Trade
Instruction Manual EOTECH MRDS Mini Red Dot Sight | Optics Trade
 
New holland w80 btc compact wheel loader service repair manual
New holland w80 btc compact wheel loader service repair manualNew holland w80 btc compact wheel loader service repair manual
New holland w80 btc compact wheel loader service repair manual
 
Goodrive10 english-manual
Goodrive10 english-manualGoodrive10 english-manual
Goodrive10 english-manual
 
B 64014 en-04
B 64014 en-04B 64014 en-04
B 64014 en-04
 
New holland mh plus wheel excavator service repair manual
New holland mh plus wheel excavator service repair manualNew holland mh plus wheel excavator service repair manual
New holland mh plus wheel excavator service repair manual
 
New holland mh city wheel excavator service repair manual
New holland mh city wheel excavator service repair manualNew holland mh city wheel excavator service repair manual
New holland mh city wheel excavator service repair manual
 
B 64483 en-01
B 64483 en-01B 64483 en-01
B 64483 en-01
 
Dc600 crane drive-firmware-manual
Dc600 crane drive-firmware-manualDc600 crane drive-firmware-manual
Dc600 crane drive-firmware-manual
 
Mountain Stream Group: Portfolio Sample - Technical Manual Development
Mountain Stream Group: Portfolio Sample - Technical Manual DevelopmentMountain Stream Group: Portfolio Sample - Technical Manual Development
Mountain Stream Group: Portfolio Sample - Technical Manual Development
 
Hot Cathode Ionization Vacuum Gauge with Dual Convection IGM402 Module
Hot Cathode Ionization Vacuum Gauge with Dual Convection IGM402 ModuleHot Cathode Ionization Vacuum Gauge with Dual Convection IGM402 Module
Hot Cathode Ionization Vacuum Gauge with Dual Convection IGM402 Module
 
Daewoo doosan solar 170 lc v excavator operator and maintenance manual
Daewoo doosan solar 170 lc v excavator operator and maintenance manualDaewoo doosan solar 170 lc v excavator operator and maintenance manual
Daewoo doosan solar 170 lc v excavator operator and maintenance manual
 

Viewers also liked

March20_Risk_and_Returns_Quantitative_Investment_Forum
March20_Risk_and_Returns_Quantitative_Investment_ForumMarch20_Risk_and_Returns_Quantitative_Investment_Forum
March20_Risk_and_Returns_Quantitative_Investment_ForumJohnny Wu
 
Memoria de actividades 2013 copia
Memoria de actividades 2013   copiaMemoria de actividades 2013   copia
Memoria de actividades 2013 copiaKika Lopez Prados
 
Capitulo nª4 03 07-2015 nuevo
Capitulo nª4   03 07-2015 nuevoCapitulo nª4   03 07-2015 nuevo
Capitulo nª4 03 07-2015 nuevoDiego Caceres
 
"Nacha es Eva"
"Nacha es Eva""Nacha es Eva"
"Nacha es Eva"Alyla
 
Transcat Webinar: Fluke Connect - How Wireless Is Changing the Game
Transcat Webinar: Fluke Connect - How Wireless Is Changing the GameTranscat Webinar: Fluke Connect - How Wireless Is Changing the Game
Transcat Webinar: Fluke Connect - How Wireless Is Changing the GameTranscat
 
Circular Princ Curso 09 10
Circular Princ Curso 09 10Circular Princ Curso 09 10
Circular Princ Curso 09 10fercanarias
 
Memoria RSE Interpyme 2012
Memoria RSE Interpyme 2012Memoria RSE Interpyme 2012
Memoria RSE Interpyme 2012Interpyme
 
Seminário Alerj - Cidades Inteligentes e SIT - Apresentacao - Jose Gustavo de...
Seminário Alerj - Cidades Inteligentes e SIT - Apresentacao - Jose Gustavo de...Seminário Alerj - Cidades Inteligentes e SIT - Apresentacao - Jose Gustavo de...
Seminário Alerj - Cidades Inteligentes e SIT - Apresentacao - Jose Gustavo de...Amar Jardim Oceânico
 
Aprendizaje cooperativo-22453-27667
Aprendizaje cooperativo-22453-27667Aprendizaje cooperativo-22453-27667
Aprendizaje cooperativo-22453-27667Cesar Cruz Tinco
 
2010 Phy V1
2010 Phy V12010 Phy V1
2010 Phy V1luxvis
 
Leyes 39 y 40 de 2015, del procedimiento administrativo. novedades. obsae
Leyes 39 y 40 de 2015, del procedimiento administrativo. novedades. obsaeLeyes 39 y 40 de 2015, del procedimiento administrativo. novedades. obsae
Leyes 39 y 40 de 2015, del procedimiento administrativo. novedades. obsaeeCityclic
 
Marcador deportivo baloncesto
Marcador deportivo baloncestoMarcador deportivo baloncesto
Marcador deportivo baloncestoSDA4
 
Informe sobre política europea de cuotas de mujeres en los consejos de admini...
Informe sobre política europea de cuotas de mujeres en los consejos de admini...Informe sobre política europea de cuotas de mujeres en los consejos de admini...
Informe sobre política europea de cuotas de mujeres en los consejos de admini...CristinaMunozRejaRuiz
 
Fake it 'til you make it
Fake it 'til you make itFake it 'til you make it
Fake it 'til you make itJonathan Snook
 

Viewers also liked (20)

March20_Risk_and_Returns_Quantitative_Investment_Forum
March20_Risk_and_Returns_Quantitative_Investment_ForumMarch20_Risk_and_Returns_Quantitative_Investment_Forum
March20_Risk_and_Returns_Quantitative_Investment_Forum
 
Boletín informativo circuito europeo2016
Boletín informativo circuito europeo2016Boletín informativo circuito europeo2016
Boletín informativo circuito europeo2016
 
Memoria de actividades 2013 copia
Memoria de actividades 2013   copiaMemoria de actividades 2013   copia
Memoria de actividades 2013 copia
 
Capitulo nª4 03 07-2015 nuevo
Capitulo nª4   03 07-2015 nuevoCapitulo nª4   03 07-2015 nuevo
Capitulo nª4 03 07-2015 nuevo
 
"Nacha es Eva"
"Nacha es Eva""Nacha es Eva"
"Nacha es Eva"
 
Transcat Webinar: Fluke Connect - How Wireless Is Changing the Game
Transcat Webinar: Fluke Connect - How Wireless Is Changing the GameTranscat Webinar: Fluke Connect - How Wireless Is Changing the Game
Transcat Webinar: Fluke Connect - How Wireless Is Changing the Game
 
Circular Princ Curso 09 10
Circular Princ Curso 09 10Circular Princ Curso 09 10
Circular Princ Curso 09 10
 
Introducción a las redes sociales en la Pyme
Introducción a las redes sociales en la PymeIntroducción a las redes sociales en la Pyme
Introducción a las redes sociales en la Pyme
 
Memoria RSE Interpyme 2012
Memoria RSE Interpyme 2012Memoria RSE Interpyme 2012
Memoria RSE Interpyme 2012
 
Como elaborar un cable red
Como elaborar un cable redComo elaborar un cable red
Como elaborar un cable red
 
Seminário Alerj - Cidades Inteligentes e SIT - Apresentacao - Jose Gustavo de...
Seminário Alerj - Cidades Inteligentes e SIT - Apresentacao - Jose Gustavo de...Seminário Alerj - Cidades Inteligentes e SIT - Apresentacao - Jose Gustavo de...
Seminário Alerj - Cidades Inteligentes e SIT - Apresentacao - Jose Gustavo de...
 
Santhosh M S Resume
Santhosh M S ResumeSanthosh M S Resume
Santhosh M S Resume
 
Aprendizaje cooperativo-22453-27667
Aprendizaje cooperativo-22453-27667Aprendizaje cooperativo-22453-27667
Aprendizaje cooperativo-22453-27667
 
Comercial mision japan
Comercial mision japanComercial mision japan
Comercial mision japan
 
2010 Phy V1
2010 Phy V12010 Phy V1
2010 Phy V1
 
Leyes 39 y 40 de 2015, del procedimiento administrativo. novedades. obsae
Leyes 39 y 40 de 2015, del procedimiento administrativo. novedades. obsaeLeyes 39 y 40 de 2015, del procedimiento administrativo. novedades. obsae
Leyes 39 y 40 de 2015, del procedimiento administrativo. novedades. obsae
 
Marcador deportivo baloncesto
Marcador deportivo baloncestoMarcador deportivo baloncesto
Marcador deportivo baloncesto
 
Guía Básica en español de Google+
Guía Básica en español de Google+Guía Básica en español de Google+
Guía Básica en español de Google+
 
Informe sobre política europea de cuotas de mujeres en los consejos de admini...
Informe sobre política europea de cuotas de mujeres en los consejos de admini...Informe sobre política europea de cuotas de mujeres en los consejos de admini...
Informe sobre política europea de cuotas de mujeres en los consejos de admini...
 
Fake it 'til you make it
Fake it 'til you make itFake it 'til you make it
Fake it 'til you make it
 

Similar to Instruction Manual EOTECH MNVD | Optics Trade

Instruction Manual EOTECH CNVD-T | Optics Trade
Instruction Manual EOTECH CNVD-T | Optics TradeInstruction Manual EOTECH CNVD-T | Optics Trade
Instruction Manual EOTECH CNVD-T | Optics TradeOptics-Trade
 
Instruction Manual EOTECH CNVD-T3 | Optics Trade
Instruction Manual EOTECH CNVD-T3 | Optics TradeInstruction Manual EOTECH CNVD-T3 | Optics Trade
Instruction Manual EOTECH CNVD-T3 | Optics TradeOptics-Trade
 
Daewoo doosan solar s220 lc v excavator operator and maintenance manual
Daewoo doosan solar s220 lc v excavator operator and maintenance manualDaewoo doosan solar s220 lc v excavator operator and maintenance manual
Daewoo doosan solar s220 lc v excavator operator and maintenance manualsoeldksejdksem
 
Daewoo Doosan Solar S220LC-V Excavator Operator and Maintenance manual
Daewoo Doosan Solar S220LC-V Excavator Operator and Maintenance manualDaewoo Doosan Solar S220LC-V Excavator Operator and Maintenance manual
Daewoo Doosan Solar S220LC-V Excavator Operator and Maintenance manualudfjjdfjkksekm
 
Daewoo doosan solar s220 lc v excavator operator and maintenance manual
Daewoo doosan solar s220 lc v excavator operator and maintenance manualDaewoo doosan solar s220 lc v excavator operator and maintenance manual
Daewoo doosan solar s220 lc v excavator operator and maintenance manualfhsejkdkmem
 
Daewoo doosan solar s220 lc v excavator operator and maintenance manual
Daewoo doosan solar s220 lc v excavator operator and maintenance manualDaewoo doosan solar s220 lc v excavator operator and maintenance manual
Daewoo doosan solar s220 lc v excavator operator and maintenance manualidkkdmmdd
 
Daewoo Doosan Solar S220LC-V Excavator Operator and Maintenance manual
Daewoo Doosan Solar S220LC-V Excavator Operator and Maintenance manualDaewoo Doosan Solar S220LC-V Excavator Operator and Maintenance manual
Daewoo Doosan Solar S220LC-V Excavator Operator and Maintenance manualfudjjjskeskmmd
 
Daewoo doosan solar s220 lc v excavator operator and maintenance manual
Daewoo doosan solar s220 lc v excavator operator and maintenance manualDaewoo doosan solar s220 lc v excavator operator and maintenance manual
Daewoo doosan solar s220 lc v excavator operator and maintenance manualfhsjekkdkem
 
operators manual Furuno FCV 627.pdf
operators manual Furuno FCV 627.pdfoperators manual Furuno FCV 627.pdf
operators manual Furuno FCV 627.pdffajarriyadi12
 
John Deere 997 Mid Mount Z-Trak Commercial Mower TM2259 Shop Manual.pdf
John Deere 997 Mid Mount Z-Trak Commercial Mower TM2259 Shop Manual.pdfJohn Deere 997 Mid Mount Z-Trak Commercial Mower TM2259 Shop Manual.pdf
John Deere 997 Mid Mount Z-Trak Commercial Mower TM2259 Shop Manual.pdfExcavator
 
John Deere 997 Mid Mount Z-Trak Commercial Mower TM2259 Shop Manual.pdf
John Deere 997 Mid Mount Z-Trak Commercial Mower TM2259 Shop Manual.pdfJohn Deere 997 Mid Mount Z-Trak Commercial Mower TM2259 Shop Manual.pdf
John Deere 997 Mid Mount Z-Trak Commercial Mower TM2259 Shop Manual.pdfReparacionPcLaptopsDesktop
 
Instruction Manual EOTECH TPIAL | Optics Trade
Instruction Manual EOTECH TPIAL | Optics TradeInstruction Manual EOTECH TPIAL | Optics Trade
Instruction Manual EOTECH TPIAL | Optics TradeOptics-Trade
 
New holland l220 skid steer loader service repair manual
New holland l220 skid steer loader service repair manualNew holland l220 skid steer loader service repair manual
New holland l220 skid steer loader service repair manualfhsjejkdm
 
New holland l220 skid steer loader service repair manual
New holland l220 skid steer loader service repair manualNew holland l220 skid steer loader service repair manual
New holland l220 skid steer loader service repair manualfjjsjeskkekem
 
New holland l220 skid steer loader service repair manual
New holland l220 skid steer loader service repair manualNew holland l220 skid steer loader service repair manual
New holland l220 skid steer loader service repair manualfhjsekfksemert
 
New holland l220 skid steer loader service repair manual
New holland l220 skid steer loader service repair manualNew holland l220 skid steer loader service repair manual
New holland l220 skid steer loader service repair manualjjfjsekksemm
 
Infini solar 10kw-manual
Infini solar 10kw-manualInfini solar 10kw-manual
Infini solar 10kw-manualNaveed Ahmed
 

Similar to Instruction Manual EOTECH MNVD | Optics Trade (19)

Instruction Manual EOTECH CNVD-T | Optics Trade
Instruction Manual EOTECH CNVD-T | Optics TradeInstruction Manual EOTECH CNVD-T | Optics Trade
Instruction Manual EOTECH CNVD-T | Optics Trade
 
Instruction Manual EOTECH CNVD-T3 | Optics Trade
Instruction Manual EOTECH CNVD-T3 | Optics TradeInstruction Manual EOTECH CNVD-T3 | Optics Trade
Instruction Manual EOTECH CNVD-T3 | Optics Trade
 
Daewoo doosan solar s220 lc v excavator operator and maintenance manual
Daewoo doosan solar s220 lc v excavator operator and maintenance manualDaewoo doosan solar s220 lc v excavator operator and maintenance manual
Daewoo doosan solar s220 lc v excavator operator and maintenance manual
 
Daewoo Doosan Solar S220LC-V Excavator Operator and Maintenance manual
Daewoo Doosan Solar S220LC-V Excavator Operator and Maintenance manualDaewoo Doosan Solar S220LC-V Excavator Operator and Maintenance manual
Daewoo Doosan Solar S220LC-V Excavator Operator and Maintenance manual
 
Daewoo doosan solar s220 lc v excavator operator and maintenance manual
Daewoo doosan solar s220 lc v excavator operator and maintenance manualDaewoo doosan solar s220 lc v excavator operator and maintenance manual
Daewoo doosan solar s220 lc v excavator operator and maintenance manual
 
Daewoo doosan solar s220 lc v excavator operator and maintenance manual
Daewoo doosan solar s220 lc v excavator operator and maintenance manualDaewoo doosan solar s220 lc v excavator operator and maintenance manual
Daewoo doosan solar s220 lc v excavator operator and maintenance manual
 
Daewoo Doosan Solar S220LC-V Excavator Operator and Maintenance manual
Daewoo Doosan Solar S220LC-V Excavator Operator and Maintenance manualDaewoo Doosan Solar S220LC-V Excavator Operator and Maintenance manual
Daewoo Doosan Solar S220LC-V Excavator Operator and Maintenance manual
 
Daewoo doosan solar s220 lc v excavator operator and maintenance manual
Daewoo doosan solar s220 lc v excavator operator and maintenance manualDaewoo doosan solar s220 lc v excavator operator and maintenance manual
Daewoo doosan solar s220 lc v excavator operator and maintenance manual
 
operators manual Furuno FCV 627.pdf
operators manual Furuno FCV 627.pdfoperators manual Furuno FCV 627.pdf
operators manual Furuno FCV 627.pdf
 
John Deere 997 Mid Mount Z-Trak Commercial Mower TM2259 Shop Manual.pdf
John Deere 997 Mid Mount Z-Trak Commercial Mower TM2259 Shop Manual.pdfJohn Deere 997 Mid Mount Z-Trak Commercial Mower TM2259 Shop Manual.pdf
John Deere 997 Mid Mount Z-Trak Commercial Mower TM2259 Shop Manual.pdf
 
John Deere 997 Mid Mount Z-Trak Commercial Mower TM2259 Shop Manual.pdf
John Deere 997 Mid Mount Z-Trak Commercial Mower TM2259 Shop Manual.pdfJohn Deere 997 Mid Mount Z-Trak Commercial Mower TM2259 Shop Manual.pdf
John Deere 997 Mid Mount Z-Trak Commercial Mower TM2259 Shop Manual.pdf
 
Instruction Manual EOTECH TPIAL | Optics Trade
Instruction Manual EOTECH TPIAL | Optics TradeInstruction Manual EOTECH TPIAL | Optics Trade
Instruction Manual EOTECH TPIAL | Optics Trade
 
Ist280 mc424 r001
Ist280 mc424 r001Ist280 mc424 r001
Ist280 mc424 r001
 
Thomas and Betts Cable Crimping Tools
Thomas and Betts Cable Crimping ToolsThomas and Betts Cable Crimping Tools
Thomas and Betts Cable Crimping Tools
 
New holland l220 skid steer loader service repair manual
New holland l220 skid steer loader service repair manualNew holland l220 skid steer loader service repair manual
New holland l220 skid steer loader service repair manual
 
New holland l220 skid steer loader service repair manual
New holland l220 skid steer loader service repair manualNew holland l220 skid steer loader service repair manual
New holland l220 skid steer loader service repair manual
 
New holland l220 skid steer loader service repair manual
New holland l220 skid steer loader service repair manualNew holland l220 skid steer loader service repair manual
New holland l220 skid steer loader service repair manual
 
New holland l220 skid steer loader service repair manual
New holland l220 skid steer loader service repair manualNew holland l220 skid steer loader service repair manual
New holland l220 skid steer loader service repair manual
 
Infini solar 10kw-manual
Infini solar 10kw-manualInfini solar 10kw-manual
Infini solar 10kw-manual
 

More from Optics-Trade

Technical Data | Sig Sauer Easy6 BDX 1-6x24 | Optics Trade
Technical Data | Sig Sauer Easy6 BDX 1-6x24 | Optics TradeTechnical Data | Sig Sauer Easy6 BDX 1-6x24 | Optics Trade
Technical Data | Sig Sauer Easy6 BDX 1-6x24 | Optics TradeOptics-Trade
 
Technical Data | ThermTec Wild 650L | Optics Trade
Technical Data | ThermTec Wild 650L | Optics TradeTechnical Data | ThermTec Wild 650L | Optics Trade
Technical Data | ThermTec Wild 650L | Optics TradeOptics-Trade
 
Technical Data | ThermTec Wild 635L | Optics Trade
Technical Data | ThermTec Wild 635L | Optics TradeTechnical Data | ThermTec Wild 635L | Optics Trade
Technical Data | ThermTec Wild 635L | Optics TradeOptics-Trade
 
Technical Data | ThermTec Wild 650 | Optics Trade
Technical Data | ThermTec Wild 650 | Optics TradeTechnical Data | ThermTec Wild 650 | Optics Trade
Technical Data | ThermTec Wild 650 | Optics TradeOptics-Trade
 
Technical Data | ThermTec Wild 635 | Optics Trade
Technical Data | ThermTec Wild 635 | Optics TradeTechnical Data | ThermTec Wild 635 | Optics Trade
Technical Data | ThermTec Wild 635 | Optics TradeOptics-Trade
 
Technical Data | ThermTec Wild 335 | Optics Trade
Technical Data | ThermTec Wild 335 | Optics TradeTechnical Data | ThermTec Wild 335 | Optics Trade
Technical Data | ThermTec Wild 335 | Optics TradeOptics-Trade
 
Technical Data | ThermTec Wild 325 | Optics Trade
Technical Data | ThermTec Wild 325 | Optics TradeTechnical Data | ThermTec Wild 325 | Optics Trade
Technical Data | ThermTec Wild 325 | Optics TradeOptics-Trade
 
Instruction Manual | ThermTec Wild Thermal Monoculars | Optics Trade
Instruction Manual | ThermTec Wild Thermal Monoculars | Optics TradeInstruction Manual | ThermTec Wild Thermal Monoculars | Optics Trade
Instruction Manual | ThermTec Wild Thermal Monoculars | Optics TradeOptics-Trade
 
Technical Data | ThermTec Hunt 335 | Optics Trade
Technical Data | ThermTec Hunt 335 | Optics TradeTechnical Data | ThermTec Hunt 335 | Optics Trade
Technical Data | ThermTec Hunt 335 | Optics TradeOptics-Trade
 
Instruction Manual | ThermTec Hunt Thermal Clip-On Series | Optics Trade
Instruction Manual | ThermTec Hunt Thermal Clip-On Series | Optics TradeInstruction Manual | ThermTec Hunt Thermal Clip-On Series | Optics Trade
Instruction Manual | ThermTec Hunt Thermal Clip-On Series | Optics TradeOptics-Trade
 
Instruction Manual | Steiner eRanger LRF 10x42 | Optics Trade
Instruction Manual | Steiner eRanger LRF 10x42 | Optics TradeInstruction Manual | Steiner eRanger LRF 10x42 | Optics Trade
Instruction Manual | Steiner eRanger LRF 10x42 | Optics TradeOptics-Trade
 
Flyer | Guide DN Series Handheld Digital Binoculars | Optics Trade
Flyer | Guide DN Series Handheld Digital Binoculars | Optics TradeFlyer | Guide DN Series Handheld Digital Binoculars | Optics Trade
Flyer | Guide DN Series Handheld Digital Binoculars | Optics TradeOptics-Trade
 
Quick Start Guide | Guide TB Series | Optics Trade
Quick Start Guide | Guide TB Series | Optics TradeQuick Start Guide | Guide TB Series | Optics Trade
Quick Start Guide | Guide TB Series | Optics TradeOptics-Trade
 
Instruction Manual | Pard FD1 Digital NV Front Attachment | Optics Trade
Instruction Manual | Pard FD1 Digital NV Front Attachment | Optics TradeInstruction Manual | Pard FD1 Digital NV Front Attachment | Optics Trade
Instruction Manual | Pard FD1 Digital NV Front Attachment | Optics TradeOptics-Trade
 
Instruction Manual | EOTech Vudu X 2-12x40 | Optics Trade
Instruction Manual | EOTech Vudu X 2-12x40 | Optics TradeInstruction Manual | EOTech Vudu X 2-12x40 | Optics Trade
Instruction Manual | EOTech Vudu X 2-12x40 | Optics TradeOptics-Trade
 
Instruction Manual | EOTech Vudu X 1-6x24 | Optics Trade
Instruction Manual | EOTech Vudu X 1-6x24 | Optics TradeInstruction Manual | EOTech Vudu X 1-6x24 | Optics Trade
Instruction Manual | EOTech Vudu X 1-6x24 | Optics TradeOptics-Trade
 
Instruction Manual | Nightforce CFS 6-36x50 F1 | Optics Trade
Instruction Manual | Nightforce CFS 6-36x50 F1 | Optics TradeInstruction Manual | Nightforce CFS 6-36x50 F1 | Optics Trade
Instruction Manual | Nightforce CFS 6-36x50 F1 | Optics TradeOptics-Trade
 
Instruction Manual | Athlon Cronus Tactical G2 ED 7-42x60 | Optics Trade
Instruction Manual | Athlon Cronus Tactical G2 ED 7-42x60 | Optics TradeInstruction Manual | Athlon Cronus Tactical G2 ED 7-42x60 | Optics Trade
Instruction Manual | Athlon Cronus Tactical G2 ED 7-42x60 | Optics TradeOptics-Trade
 
Insrtuction Manual | Swarovski CL Companion Habicht | Optics Trade
Insrtuction Manual | Swarovski CL Companion Habicht | Optics TradeInsrtuction Manual | Swarovski CL Companion Habicht | Optics Trade
Insrtuction Manual | Swarovski CL Companion Habicht | Optics TradeOptics-Trade
 
Technical Data | Swarovski CL Companion Habicht | Optics Trade
Technical Data | Swarovski CL Companion Habicht | Optics TradeTechnical Data | Swarovski CL Companion Habicht | Optics Trade
Technical Data | Swarovski CL Companion Habicht | Optics TradeOptics-Trade
 

More from Optics-Trade (20)

Technical Data | Sig Sauer Easy6 BDX 1-6x24 | Optics Trade
Technical Data | Sig Sauer Easy6 BDX 1-6x24 | Optics TradeTechnical Data | Sig Sauer Easy6 BDX 1-6x24 | Optics Trade
Technical Data | Sig Sauer Easy6 BDX 1-6x24 | Optics Trade
 
Technical Data | ThermTec Wild 650L | Optics Trade
Technical Data | ThermTec Wild 650L | Optics TradeTechnical Data | ThermTec Wild 650L | Optics Trade
Technical Data | ThermTec Wild 650L | Optics Trade
 
Technical Data | ThermTec Wild 635L | Optics Trade
Technical Data | ThermTec Wild 635L | Optics TradeTechnical Data | ThermTec Wild 635L | Optics Trade
Technical Data | ThermTec Wild 635L | Optics Trade
 
Technical Data | ThermTec Wild 650 | Optics Trade
Technical Data | ThermTec Wild 650 | Optics TradeTechnical Data | ThermTec Wild 650 | Optics Trade
Technical Data | ThermTec Wild 650 | Optics Trade
 
Technical Data | ThermTec Wild 635 | Optics Trade
Technical Data | ThermTec Wild 635 | Optics TradeTechnical Data | ThermTec Wild 635 | Optics Trade
Technical Data | ThermTec Wild 635 | Optics Trade
 
Technical Data | ThermTec Wild 335 | Optics Trade
Technical Data | ThermTec Wild 335 | Optics TradeTechnical Data | ThermTec Wild 335 | Optics Trade
Technical Data | ThermTec Wild 335 | Optics Trade
 
Technical Data | ThermTec Wild 325 | Optics Trade
Technical Data | ThermTec Wild 325 | Optics TradeTechnical Data | ThermTec Wild 325 | Optics Trade
Technical Data | ThermTec Wild 325 | Optics Trade
 
Instruction Manual | ThermTec Wild Thermal Monoculars | Optics Trade
Instruction Manual | ThermTec Wild Thermal Monoculars | Optics TradeInstruction Manual | ThermTec Wild Thermal Monoculars | Optics Trade
Instruction Manual | ThermTec Wild Thermal Monoculars | Optics Trade
 
Technical Data | ThermTec Hunt 335 | Optics Trade
Technical Data | ThermTec Hunt 335 | Optics TradeTechnical Data | ThermTec Hunt 335 | Optics Trade
Technical Data | ThermTec Hunt 335 | Optics Trade
 
Instruction Manual | ThermTec Hunt Thermal Clip-On Series | Optics Trade
Instruction Manual | ThermTec Hunt Thermal Clip-On Series | Optics TradeInstruction Manual | ThermTec Hunt Thermal Clip-On Series | Optics Trade
Instruction Manual | ThermTec Hunt Thermal Clip-On Series | Optics Trade
 
Instruction Manual | Steiner eRanger LRF 10x42 | Optics Trade
Instruction Manual | Steiner eRanger LRF 10x42 | Optics TradeInstruction Manual | Steiner eRanger LRF 10x42 | Optics Trade
Instruction Manual | Steiner eRanger LRF 10x42 | Optics Trade
 
Flyer | Guide DN Series Handheld Digital Binoculars | Optics Trade
Flyer | Guide DN Series Handheld Digital Binoculars | Optics TradeFlyer | Guide DN Series Handheld Digital Binoculars | Optics Trade
Flyer | Guide DN Series Handheld Digital Binoculars | Optics Trade
 
Quick Start Guide | Guide TB Series | Optics Trade
Quick Start Guide | Guide TB Series | Optics TradeQuick Start Guide | Guide TB Series | Optics Trade
Quick Start Guide | Guide TB Series | Optics Trade
 
Instruction Manual | Pard FD1 Digital NV Front Attachment | Optics Trade
Instruction Manual | Pard FD1 Digital NV Front Attachment | Optics TradeInstruction Manual | Pard FD1 Digital NV Front Attachment | Optics Trade
Instruction Manual | Pard FD1 Digital NV Front Attachment | Optics Trade
 
Instruction Manual | EOTech Vudu X 2-12x40 | Optics Trade
Instruction Manual | EOTech Vudu X 2-12x40 | Optics TradeInstruction Manual | EOTech Vudu X 2-12x40 | Optics Trade
Instruction Manual | EOTech Vudu X 2-12x40 | Optics Trade
 
Instruction Manual | EOTech Vudu X 1-6x24 | Optics Trade
Instruction Manual | EOTech Vudu X 1-6x24 | Optics TradeInstruction Manual | EOTech Vudu X 1-6x24 | Optics Trade
Instruction Manual | EOTech Vudu X 1-6x24 | Optics Trade
 
Instruction Manual | Nightforce CFS 6-36x50 F1 | Optics Trade
Instruction Manual | Nightforce CFS 6-36x50 F1 | Optics TradeInstruction Manual | Nightforce CFS 6-36x50 F1 | Optics Trade
Instruction Manual | Nightforce CFS 6-36x50 F1 | Optics Trade
 
Instruction Manual | Athlon Cronus Tactical G2 ED 7-42x60 | Optics Trade
Instruction Manual | Athlon Cronus Tactical G2 ED 7-42x60 | Optics TradeInstruction Manual | Athlon Cronus Tactical G2 ED 7-42x60 | Optics Trade
Instruction Manual | Athlon Cronus Tactical G2 ED 7-42x60 | Optics Trade
 
Insrtuction Manual | Swarovski CL Companion Habicht | Optics Trade
Insrtuction Manual | Swarovski CL Companion Habicht | Optics TradeInsrtuction Manual | Swarovski CL Companion Habicht | Optics Trade
Insrtuction Manual | Swarovski CL Companion Habicht | Optics Trade
 
Technical Data | Swarovski CL Companion Habicht | Optics Trade
Technical Data | Swarovski CL Companion Habicht | Optics TradeTechnical Data | Swarovski CL Companion Habicht | Optics Trade
Technical Data | Swarovski CL Companion Habicht | Optics Trade
 

Recently uploaded

Exploring the Future Potential of AI-Enabled Smartphone Processors
Exploring the Future Potential of AI-Enabled Smartphone ProcessorsExploring the Future Potential of AI-Enabled Smartphone Processors
Exploring the Future Potential of AI-Enabled Smartphone Processorsdebabhi2
 
Axa Assurance Maroc - Insurer Innovation Award 2024
Axa Assurance Maroc - Insurer Innovation Award 2024Axa Assurance Maroc - Insurer Innovation Award 2024
Axa Assurance Maroc - Insurer Innovation Award 2024The Digital Insurer
 
Advantages of Hiring UIUX Design Service Providers for Your Business
Advantages of Hiring UIUX Design Service Providers for Your BusinessAdvantages of Hiring UIUX Design Service Providers for Your Business
Advantages of Hiring UIUX Design Service Providers for Your BusinessPixlogix Infotech
 
CNv6 Instructor Chapter 6 Quality of Service
CNv6 Instructor Chapter 6 Quality of ServiceCNv6 Instructor Chapter 6 Quality of Service
CNv6 Instructor Chapter 6 Quality of Servicegiselly40
 
Presentation on how to chat with PDF using ChatGPT code interpreter
Presentation on how to chat with PDF using ChatGPT code interpreterPresentation on how to chat with PDF using ChatGPT code interpreter
Presentation on how to chat with PDF using ChatGPT code interpreternaman860154
 
Bajaj Allianz Life Insurance Company - Insurer Innovation Award 2024
Bajaj Allianz Life Insurance Company - Insurer Innovation Award 2024Bajaj Allianz Life Insurance Company - Insurer Innovation Award 2024
Bajaj Allianz Life Insurance Company - Insurer Innovation Award 2024The Digital Insurer
 
Data Cloud, More than a CDP by Matt Robison
Data Cloud, More than a CDP by Matt RobisonData Cloud, More than a CDP by Matt Robison
Data Cloud, More than a CDP by Matt RobisonAnna Loughnan Colquhoun
 
A Year of the Servo Reboot: Where Are We Now?
A Year of the Servo Reboot: Where Are We Now?A Year of the Servo Reboot: Where Are We Now?
A Year of the Servo Reboot: Where Are We Now?Igalia
 
08448380779 Call Girls In Diplomatic Enclave Women Seeking Men
08448380779 Call Girls In Diplomatic Enclave Women Seeking Men08448380779 Call Girls In Diplomatic Enclave Women Seeking Men
08448380779 Call Girls In Diplomatic Enclave Women Seeking MenDelhi Call girls
 
A Call to Action for Generative AI in 2024
A Call to Action for Generative AI in 2024A Call to Action for Generative AI in 2024
A Call to Action for Generative AI in 2024Results
 
Driving Behavioral Change for Information Management through Data-Driven Gree...
Driving Behavioral Change for Information Management through Data-Driven Gree...Driving Behavioral Change for Information Management through Data-Driven Gree...
Driving Behavioral Change for Information Management through Data-Driven Gree...Enterprise Knowledge
 
Factors to Consider When Choosing Accounts Payable Services Providers.pptx
Factors to Consider When Choosing Accounts Payable Services Providers.pptxFactors to Consider When Choosing Accounts Payable Services Providers.pptx
Factors to Consider When Choosing Accounts Payable Services Providers.pptxKatpro Technologies
 
Boost Fertility New Invention Ups Success Rates.pdf
Boost Fertility New Invention Ups Success Rates.pdfBoost Fertility New Invention Ups Success Rates.pdf
Boost Fertility New Invention Ups Success Rates.pdfsudhanshuwaghmare1
 
08448380779 Call Girls In Civil Lines Women Seeking Men
08448380779 Call Girls In Civil Lines Women Seeking Men08448380779 Call Girls In Civil Lines Women Seeking Men
08448380779 Call Girls In Civil Lines Women Seeking MenDelhi Call girls
 
08448380779 Call Girls In Greater Kailash - I Women Seeking Men
08448380779 Call Girls In Greater Kailash - I Women Seeking Men08448380779 Call Girls In Greater Kailash - I Women Seeking Men
08448380779 Call Girls In Greater Kailash - I Women Seeking MenDelhi Call girls
 
Handwritten Text Recognition for manuscripts and early printed texts
Handwritten Text Recognition for manuscripts and early printed textsHandwritten Text Recognition for manuscripts and early printed texts
Handwritten Text Recognition for manuscripts and early printed textsMaria Levchenko
 
GenCyber Cyber Security Day Presentation
GenCyber Cyber Security Day PresentationGenCyber Cyber Security Day Presentation
GenCyber Cyber Security Day PresentationMichael W. Hawkins
 
Raspberry Pi 5: Challenges and Solutions in Bringing up an OpenGL/Vulkan Driv...
Raspberry Pi 5: Challenges and Solutions in Bringing up an OpenGL/Vulkan Driv...Raspberry Pi 5: Challenges and Solutions in Bringing up an OpenGL/Vulkan Driv...
Raspberry Pi 5: Challenges and Solutions in Bringing up an OpenGL/Vulkan Driv...Igalia
 
How to Troubleshoot Apps for the Modern Connected Worker
How to Troubleshoot Apps for the Modern Connected WorkerHow to Troubleshoot Apps for the Modern Connected Worker
How to Troubleshoot Apps for the Modern Connected WorkerThousandEyes
 
Understanding Discord NSFW Servers A Guide for Responsible Users.pdf
Understanding Discord NSFW Servers A Guide for Responsible Users.pdfUnderstanding Discord NSFW Servers A Guide for Responsible Users.pdf
Understanding Discord NSFW Servers A Guide for Responsible Users.pdfUK Journal
 

Recently uploaded (20)

Exploring the Future Potential of AI-Enabled Smartphone Processors
Exploring the Future Potential of AI-Enabled Smartphone ProcessorsExploring the Future Potential of AI-Enabled Smartphone Processors
Exploring the Future Potential of AI-Enabled Smartphone Processors
 
Axa Assurance Maroc - Insurer Innovation Award 2024
Axa Assurance Maroc - Insurer Innovation Award 2024Axa Assurance Maroc - Insurer Innovation Award 2024
Axa Assurance Maroc - Insurer Innovation Award 2024
 
Advantages of Hiring UIUX Design Service Providers for Your Business
Advantages of Hiring UIUX Design Service Providers for Your BusinessAdvantages of Hiring UIUX Design Service Providers for Your Business
Advantages of Hiring UIUX Design Service Providers for Your Business
 
CNv6 Instructor Chapter 6 Quality of Service
CNv6 Instructor Chapter 6 Quality of ServiceCNv6 Instructor Chapter 6 Quality of Service
CNv6 Instructor Chapter 6 Quality of Service
 
Presentation on how to chat with PDF using ChatGPT code interpreter
Presentation on how to chat with PDF using ChatGPT code interpreterPresentation on how to chat with PDF using ChatGPT code interpreter
Presentation on how to chat with PDF using ChatGPT code interpreter
 
Bajaj Allianz Life Insurance Company - Insurer Innovation Award 2024
Bajaj Allianz Life Insurance Company - Insurer Innovation Award 2024Bajaj Allianz Life Insurance Company - Insurer Innovation Award 2024
Bajaj Allianz Life Insurance Company - Insurer Innovation Award 2024
 
Data Cloud, More than a CDP by Matt Robison
Data Cloud, More than a CDP by Matt RobisonData Cloud, More than a CDP by Matt Robison
Data Cloud, More than a CDP by Matt Robison
 
A Year of the Servo Reboot: Where Are We Now?
A Year of the Servo Reboot: Where Are We Now?A Year of the Servo Reboot: Where Are We Now?
A Year of the Servo Reboot: Where Are We Now?
 
08448380779 Call Girls In Diplomatic Enclave Women Seeking Men
08448380779 Call Girls In Diplomatic Enclave Women Seeking Men08448380779 Call Girls In Diplomatic Enclave Women Seeking Men
08448380779 Call Girls In Diplomatic Enclave Women Seeking Men
 
A Call to Action for Generative AI in 2024
A Call to Action for Generative AI in 2024A Call to Action for Generative AI in 2024
A Call to Action for Generative AI in 2024
 
Driving Behavioral Change for Information Management through Data-Driven Gree...
Driving Behavioral Change for Information Management through Data-Driven Gree...Driving Behavioral Change for Information Management through Data-Driven Gree...
Driving Behavioral Change for Information Management through Data-Driven Gree...
 
Factors to Consider When Choosing Accounts Payable Services Providers.pptx
Factors to Consider When Choosing Accounts Payable Services Providers.pptxFactors to Consider When Choosing Accounts Payable Services Providers.pptx
Factors to Consider When Choosing Accounts Payable Services Providers.pptx
 
Boost Fertility New Invention Ups Success Rates.pdf
Boost Fertility New Invention Ups Success Rates.pdfBoost Fertility New Invention Ups Success Rates.pdf
Boost Fertility New Invention Ups Success Rates.pdf
 
08448380779 Call Girls In Civil Lines Women Seeking Men
08448380779 Call Girls In Civil Lines Women Seeking Men08448380779 Call Girls In Civil Lines Women Seeking Men
08448380779 Call Girls In Civil Lines Women Seeking Men
 
08448380779 Call Girls In Greater Kailash - I Women Seeking Men
08448380779 Call Girls In Greater Kailash - I Women Seeking Men08448380779 Call Girls In Greater Kailash - I Women Seeking Men
08448380779 Call Girls In Greater Kailash - I Women Seeking Men
 
Handwritten Text Recognition for manuscripts and early printed texts
Handwritten Text Recognition for manuscripts and early printed textsHandwritten Text Recognition for manuscripts and early printed texts
Handwritten Text Recognition for manuscripts and early printed texts
 
GenCyber Cyber Security Day Presentation
GenCyber Cyber Security Day PresentationGenCyber Cyber Security Day Presentation
GenCyber Cyber Security Day Presentation
 
Raspberry Pi 5: Challenges and Solutions in Bringing up an OpenGL/Vulkan Driv...
Raspberry Pi 5: Challenges and Solutions in Bringing up an OpenGL/Vulkan Driv...Raspberry Pi 5: Challenges and Solutions in Bringing up an OpenGL/Vulkan Driv...
Raspberry Pi 5: Challenges and Solutions in Bringing up an OpenGL/Vulkan Driv...
 
How to Troubleshoot Apps for the Modern Connected Worker
How to Troubleshoot Apps for the Modern Connected WorkerHow to Troubleshoot Apps for the Modern Connected Worker
How to Troubleshoot Apps for the Modern Connected Worker
 
Understanding Discord NSFW Servers A Guide for Responsible Users.pdf
Understanding Discord NSFW Servers A Guide for Responsible Users.pdfUnderstanding Discord NSFW Servers A Guide for Responsible Users.pdf
Understanding Discord NSFW Servers A Guide for Responsible Users.pdf
 

Instruction Manual EOTECH MNVD | Optics Trade

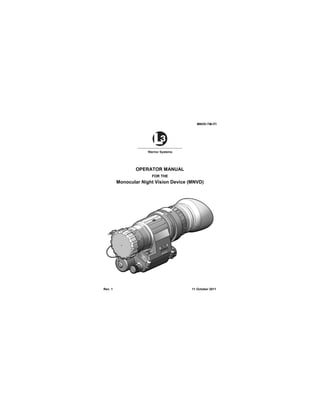
  • 1. MNVD-TM-ITI OPERATOR MANUAL FOR THE Monocular Night Vision Device (MNVD) Rev. 1 11 October 2011
  • 2.
  • 3. i SAFETY SUMMARY GENERAL This manual contains operating instructions and maintenance procedures which may cause injury or death to personnel, or damage to equipment if not properly followed. Prior to performing any task, the WARNINGs, CAUTIONs and NOTEs included in that task shall be reviewed and understood. DEFINITIONS WARNING Highlights an essential operating or maintenance procedure, practice, condition or statement, which, if not strictly observed, could result in injury to, or death of, personnel or long term health hazards. CAUTION Highlights an essential operating or maintenance procedure, practice, condition or statement, which, if not strictly observed, could result in damage to, or destruction of, equipment or loss of mission effectiveness. NOTE Highlights an essential operating or maintenance procedure, condition or statement.
  • 4. ii SAFETY PRECAUTIONS The following general safety precautions supplement the specific WARNINGs, CAUTIONs and NOTEs that appear elsewhere in this manual. WARNING The Infrared (IR) LED Illuminator is detectable by an enemy using night vision devices. Detection is easier in smoky, foggy, or rainy conditions. To reduce the risk of detection by an enemy using night vision devices, avoid prolonged activation of the IR LED Illuminator. WARNING Emission of stray light from the eyepiece (even with eyecup installed) may be detectable by the enemy. WARNING Do not touch, ingest, or inhale particles or fragments of a broken objective lens. Lens contains material that may cause irritation to eyes, skin, upper and lower respiratory tracts, or gastrointestinal tract. If contacted, flush eyes or skin with large amounts of water. If ingested, DO NOT induce vomiting. Rinse mouth with water and give victim 2-4 cupfuls of milk or water. Fragments of lens may be sharp enough to cut personnel if touched.
  • 5. iii WARNING Remove the MNVD from the weapon before inspecting, cleaning, or performing other maintenance functions. WARNING • Do not short circuit, puncture, incinerate, or disassemble battery. • Do not attempt to recharge battery. • Prior to use, inspect battery for cracks, dents, leakage, or bulging. Never install a defective battery in the MNVD. WARNING Lithium batteries can explode or cause burns if disassembled, shorted, recharged, exposed to water, fire, or high temperatures (above 100°C or 212°F). Do not place loose batteries in a pocket or other container containing metal objects. Do not store batteries with hazardous or combustible materials. Store in a cool, dry, ventilated area. WARNING Use of off-brand batteries poses a risk of fire or explosion. Ensure that only a 1.5V AA battery produced by a well-known battery manufacturer is installed in the MNVD. These batteries are specifically designed for use in high performance, high-drain devices, and contain built-in fault and heat protection features.
  • 6. iv CAUTION Do not ship or store the MNVD with the battery installed. CAUTION Pointing the MNVD at the sun without the lens cover installed may damage internal imaging components. CAUTION The coating on the demist shield may be damaged if cleaned while wet. Clean the demist shield only when dry and using dry lens tissue. CAUTION Use of acetone or gun cleaning agents containing perchloroethylene or methylene chloride may permanently damage the MNVD.
  • 7. v TABLE OF CONTENTS SAFETY SUMMARY.......................................................................i TABLE OF CONTENTS.................................................................v LIST OF FIGURES .......................................................................vii LIST OF TABLES.........................................................................vii CHAPTER 1......................................................................................1-1 INTRODUCTION .........................................................................1-1 SECTION I..............................................................................1-1 GENERAL INFORMATION...............................................1-1 1.1 SCOPE..................................................................1-1 1.2 MODEL NUMBER AND EQUIPMENT NAME......1-2 1.3 MANUFACTURER................................................1-2 1.4 PURPOSE OF EQUIPMENT................................1-2 1.5 ABBREVIATIONS AND ACRONYMS ..................1-2 SECTION II.............................................................................1-3 EQUIPMENT DESCRIPTION ...........................................1-3 1.6 SYSTEM DESCRIPTION......................................1-3 1.7 TECHNICAL SPECIFICATIONS ..........................1-4 1.8 MAJOR COMPONENTS.......................................1-5 1.9 FEATURES AND CONTROLS .............................1-8 CHAPTER 2......................................................................................2-1 OPERATING INSTRUCTIONS ...................................................2-1 SECTION I..............................................................................2-1 PREPARATION FOR USE ...............................................2-1 2.1 PREPARATION FOR USE ...................................2-1 2.2 BATTERY HANDLING..........................................2-2 2.3 HEADMOUNT ASSEMBLY ..................................2-3 2.4 WEAPON MOUNTING INSTRUCTIONS ...........2-11 2.5 LENS ACCESSORIES........................................2-14 SECTION II...........................................................................2-16 OPERATING INSTRUCTIONS.......................................2-16 2.6 MODES OF OPERATION...................................2-16 2.7 IR LED ILLUMINATOR .......................................2-17 2.8 GAIN (CONTRAST) ............................................2-18 2.9 FOCUS................................................................2-18 2.10 DIOPTER ADJUSTMENT.................................2-19 2.11 STARTUP PROCEDURES...............................2-19
  • 8. vi TABLE OF CONTENTS – Continued CHAPTER 3......................................................................................3-1 MAINTENANCE ..........................................................................3-1 SECTION I..............................................................................3-1 OPERATOR MAINTENANCE...........................................3-1 3.1 TROUBLESHOOTING PROCEDURES ...............3-1 3.2 INSPECTION / CLEANING...................................3-3 3.3 CORRECTIVE MAINTENANCE PROCEDURES 3-5 SECTION II.............................................................................3-7 SERVICE / PACKING AND UNPACKING........................3-7 3.4 SERVICE / REPAIR..............................................3-7 3.5 WARRANTY INFORMATION ...............................3-8 3.6 NON-WARRANTY INFORMATION......................3-8 APPENDIX A ...................................................................................A-1 REPAIR PARTS LIST ................................................................A-1 APPENDIX B ...................................................................................B-1 ACCESSORIES..........................................................................B-1
  • 9. vii LIST OF FIGURES Figure 1-1 Headmounted MNVD .....................................................1-1 Figure 1-2 Major Components.........................................................1-5 Figure 1-3 Features and Controls....................................................1-8 Figure 2-1 Battery Installation..........................................................2-2 Figure 2-2 Low Battery Indicator......................................................2-3 Figure 2-3 Headmount Assembly ....................................................2-4 Figure 2-4 Headmount Adapter Installation.....................................2-6 Figure 2-5 Mounting to Headmount Assembly................................2-7 Figure 2-6 Fore / Aft Release Button...............................................2-8 Figure 2-7 Adjustment Knob............................................................2-9 Figure 2-8 Weapon Mount Assembly ............................................2-11 Figure 2-9 Weapon Mount Assembly Installation..........................2-12 Figure 2-10 Mounting the MNVD...................................................2-13 Figure 2-11 MNVD Eyecups ..........................................................2-15 Figure 2-12 IR LED Illuminator Indicator .......................................2-18 Figure 3-1 Neck Cord Replacement ................................................3-6 Figure A-1 End Item Components .................................................. A-1 Figure A-2 MNVD Assembly........................................................... A-3 LIST OF TABLES Table 1-1 Technical Specifications..................................................1-4 Table 1-2 List of Major Components ...............................................1-6 Table 1-3 List of Features and Controls ..........................................1-9 Table 2-1 Field of View and Positioning Adjustments ...................2-10 Table 2-2 Mode Switch Operation .................................................2-17 Table 3-1 Troubleshooting Procedures ...........................................3-1 Table A-1 List of End Item Components......................................... A-2 Table A-2 List of Repair Parts......................................................... A-3 Table B-1 List of Accessories ......................................................... B-1
  • 10.
  • 11. 1-1 CHAPTER 1 INTRODUCTION SECTION I GENERAL INFORMATION Figure 1-1 Headmounted MNVD 1.1 SCOPE This manual is intended for use by operators of the Monocular Night Vision Device (MNVD). It provides a system description, operational procedures, and maintenance responsibilities. Complete familiarization with this manual prior to using the equipment will ensure safe operation and maximum effectiveness of the MNVD.
  • 12. 1-2 1.2 MODEL NUMBER AND EQUIPMENT NAME 245620, Monocular Night Vision Device (MNVD) 1.3 MANUFACTURER L-3 Communications Corporation Warrior Systems Division Insight Operations 9 Akira Way Londonderry, NH 03053 USA 1.4 PURPOSE OF EQUIPMENT The MNVD allows for observation under adverse conditions including light rain, smoke, light snow, and low light to total darkness. 1.5 ABBREVIATIONS AND ACRONYMS Abbreviations and acronyms used in this manual are listed as follows: cm Centimeter g Gram I2 Image Intensifier IR Infrared ITAR International Traffic in Arms Regulations LED Light Emitting Diode mm Millimeter MNVD Monocular Night Vision Device NSN National Stock Number RMA Return Material Authorization TBD To Be Determined V Volt
  • 13. 1-3 SECTION II EQUIPMENT DESCRIPTION 1.6 SYSTEM DESCRIPTION The MNVD is a portable, battery operated night vision device with an integrated IR light source. It can be used as a handheld device or may be mounted to a weapon, helmet, or headmount assembly. When used in the normal operating mode (ON), the MNVD amplifies available ambient light to allow for observation under adverse conditions including light rain, smoke, light snow, and low light conditions. When used in the IR mode, the MNVD generates its own light with an integrated IR LED Illuminator to allow for observation, map reading, etc. even in complete darkness. The MNVD is a ruggedized system designed for operation in battlefield environments.
  • 14. 1-4 1.7 TECHNICAL SPECIFICATIONS Table 1-1 provides technical specifications for the MNVD. Table 1-1 Technical Specifications WEIGHT AND DIMENSIONS Weight < 14.1 ounces (400 g) Length (with standard eyecup) 6.5 inches (16.5 cm) Width 2.8 inches (7.1 cm) Height 2.4 inches (6.1 cm) POWER AND PERFORMANCE Battery One 1.5V AA lithium battery Battery Life 1 > 15 hours Magnification 1x Field of View 40° (± 2°) Objective Focus 9.8 inches (25cm) to infinity Diopter Adjustment +2 to -6 Immersion 1 meter for 30 minutes Operating Temperature -60°F (-51°C) to 120°F (49°C) Storage Temperature -60°F (-51°C) to 185°F (85°C) 1 Performance will vary depending on actual environmental and atmospheric conditions.
  • 15. 1-5 1.8 MAJOR COMPONENTS The MNVD system includes the components shown in Figure 1-2. Table 1-2 provides a brief functional description of each item. The “Key” column in Table 1-2 corresponds to the label numbers in Figure 1-2. Figure 1-2 Major Components 1 2 3 4 5 67 8 9 10 11 12 13 15 14
  • 16. 1-6 1.8 MAJOR COMPONENTS – Continued Table 1-2 List of Major Components Key Major Component Function 1 Brow Pads Used on the headmount assembly to provide maximum comfort and best fit. 2 Headmount Assembly Worn on the head to permit hands-free operation of the MNVD. 3 Soft Carrying Case Protects the MNVD and accessories while in a field environment. 4 Operator Manual Provides detailed operating and maintenance procedures specific to the MNVD. 5 Quick Reference Guide Provides at-a-glance operating instructions for the MNVD. 6 Lens Tissue Used to clean the optical surfaces of the MNVD. 7 Retainer Cord May be tied to the MNVD and clipped to the operator to secure the MNVD when not in use. 8 Sacrificial Window Protects the objective lens from becoming scratched or otherwise damaged. 9 Demist Shield Protects the eyepiece from becoming scratched or otherwise damaged and prevents fogging of the eyepiece.
  • 17. 1-7 1.8 MAJOR COMPONENTS – Continued Table 1-2 List of Major Components – Continued Key Major Component Function 10 Headmount Adapter Allows the MNVD to be installed on the headmount assembly or a suitably configured helmet. 11 Weapon Mount Assembly Allows the MNVD to be mounted to weapons equipped with a MIL-STD- 1913 rail. 12 Eyecup, Shuttered Reduces emission of stray light from the eyepiece when the MNVD is used in a weapon-mounted configuration. 13 MNVD Assembly A portable, battery operated night vision device with integrated IR light source. 14 AA Lithium Battery (2) Provides power to the MNVD. 15 Shoulder Strap Allows the soft carrying case to be slung across the shoulder for ease of carrying.
  • 18. 1-8 1.9 FEATURES AND CONTROLS Figure 1-3 shows features and controls for the MNVD. Table 1-3 provides a brief functional description of each item. The “Key” column in Table 1-3 corresponds to the label numbers in Figure 1-3. Figure 1-3 Features and Controls 1 2 5 6 7 8 1112 3 10 9 4
  • 19. 1-9 1.9 FEATURES AND CONTROLS – Continued Table 1-3 List of Features and Controls Key Major Component Function 1 Objective Lens Collects available light within the viewed scene and focuses it onto the input surface of an image intensifier (I2 ) tube. 2 Focus Ring Used to focus the MNVD from 9.8 inches (25cm) to infinity. 3 High Light Sensor Detects ambient light conditions so that the I 2 tube will be automatically shut off if conditions are so bright as to risk damaging internal components. 4 Mounting Interface Provides female threading to accept the headmount adapter and weapon mount assembly. 5 Diopter Adjuster Used to focus the eyepiece lens to compensate for the visual acuity of the operator. 6 Eyecup Assists in positioning the MNVD relative to the operator’s eye in handheld and headmounted configurations. Reduces emission of stray light from the eyepiece. 7 Mode Switch A 3-position switch used to turn the MNVD on in a selected operating mode. 8 Lens Cover Protects the objective lens and internal imaging components and prevents glare or reflection off the objective lens when the MNVD is not in use.
  • 20. 1-10 1.9 FEATURES AND CONTROLS – Continued Table 1-3 List of Features and Controls – Continued Key Major Component Function 9 Neck Cord Holds the objective lens cover captive to the MNVD. Allows for the MNVD to be worn around the neck during periods of nonuse. 10 IR LED Illuminator Used to provide a supplementary light source in conditions of extreme darkness. 11 Gain Control Knob Used to adjust the gain (contrast) of the viewed image. 12 Battery Cap / Compartment Provides secure housing for the single AA battery that powers the MNVD.
  • 21. 2-1 CHAPTER 2 OPERATING INSTRUCTIONS SECTION I PREPARATION FOR USE 2.1 PREPARATION FOR USE Unpacking the Equipment Open the soft carrying case and verify that all major components listed in Table 1-2 are present. Check the MNVD to ensure the following additional items are included: a. Eyecup b. Lens Cover c. Battery Cap d. Neck Cord If any of the major components or items listed above are missing, seek guidance from the equipment issuing authority. Inspection of the Equipment Before use, inspect all pieces of equipment for any damage such as cracks, loose parts, faulty cables, or other visible defects. If any damage or defects are noted, seek guidance from the equipment issuing authority.
  • 22. 2-2 2.2 BATTERY HANDLING Battery Inspection Before installation, inspect the battery for any cracks, dents, leakage, or bulging. Never install a defective battery in the MNVD. Battery Installation Access the battery compartment by turning the battery cap counterclockwise. Install one AA lithium battery with the positive terminal facing in as shown in Figure 2-1. Proper battery orientation is clearly marked on the MNVD housing. Replace the battery cap and turn clockwise to tighten. Figure 2-1 Battery Installation
  • 23. 2-3 2.2 BATTERY HANDLING – Continued CAUTION Do not ship or store the MNVD with battery installed. Low Battery Indicator A red light visible through the eyepiece, just outside the intensified field of view, indicates a low battery condition. It will illuminate when approximately 30 minutes of operation remain. Figure 2-2 Low Battery Indicator 2.3 HEADMOUNT ASSEMBLY The MNVD system comes with a headmount assembly that may be worn on the head to permit hands-free operation of the MNVD. FIELD OF VIEW LOW BATTERY INDICATOR
  • 24. 2-4 2.3 HEADMOUNT ASSEMBLY – Continued Donning the Headmount Assembly The following procedures for donning the headmount assembly should be performed before attaching the headmount adapter and MNVD. 1. Review Figure 2–3 to gain familiarity with the labeled items that will be referred to in this section. Figure 2-3 Headmount Assembly FRONT CHIN STRAP (2) REAR CHIN STRAP (2) VERTICAL ADJUSTMENT STRAP NECK PAD SNAPS (4)
  • 25. 2-5 2.3 HEADMOUNT ASSEMBLY – Continued 2. Loosen the four chin straps until the ends of each strap are approximately two inches from the sliding bar buckles. 3. Ensure the front and rear snaps are engaged. 4. Position the neck pad on the back of the neck and pull the headmount assembly over the head. 5. Remove slack from the two rear chin straps but do not tighten. 6. Adjust front and rear chin straps and vertical adjustment strap until the headmount assembly is in a comfortable but firm position. NOTE Minor strap adjustments may be necessary after installing the headmount adapter and MNVD. Headmount Adapter The headmount adapter allows the MNVD to be installed on the headmount assembly or a suitably configured helmet. 1. With the MNVD in one hand, use the free hand to orient the headmount adapter above the mounting interface as shown in Figure 2-4. Keying features in the headmount adapter and mounting interface allow only one orientation. 2. Rotate the thumbscrew clockwise to secure the headmount adapter to the MNVD, taking care not the cross threads.
  • 26. 2-6 2.3 HEADMOUNT ASSEMBLY – Continued Figure 2-4 Headmount Adapter Installation 3. The headmount adapter is now installed on the MNVD. Mounting Align the headmount adapter with the receptacle on the headmount assembly as shown in Figure 2-5 and push the parts together until the mating features engage. To disengage, press the release lever shown below. THUMBSCREW MOUNTING INTERFACE
  • 27. 2-7 2.3 HEADMOUNT ASSEMBLY – Continued Figure 2-5 Mounting to Headmount Assembly Positioning Adjustments With the MNVD system installed, positioning adjustments must be made for maximum performance and comfort. Figures 2-6 and 2-7 show controls used for positioning adjustments. NOTE Positioning adjustments are made with the MNVD attached to the headmount, the eyecup installed, and the headmount properly donned. The MNVD cannot be properly adjusted until the headmount itself is correctly fitted. RELEASE LEVER
  • 28. 2-8 2.3 HEADMOUNT ASSEMBLY – Continued NOTE Optimal system performance and comfort of the operator rely on carefully following the procedures below. The best visual performance is possible only when the optical axis of the device is aligned with the visual axis of the eye. • Fore / Aft Adjustment. The MNVD can be moved forward or backward relative to the head. Press the fore / aft release button and slide the MNVD forward or backward to achieve optimal eye relief. Figure 2-6 Fore / Aft Release Button
  • 29. 2-9 2.3 HEADMOUNT ASSEMBLY – Continued • Height Adjustment. The headmount’s vertical adjustment strap (see Figure 2-3) provides for height adjustment of the MNVD. Tighten or loosen the vertical adjustment strap until the MNVD is level with the operator’s eyes. • Pupillary Adjustment. The MNVD can be moved in an arc to provide best alignment with the operator’s eye. Unscrew the adjustment knob to its full and open position (see Figure 2-7). Gently push the MNVD away from the operator’s head and rotate clockwise or counterclockwise until proper positioning is achieved. Screw in the adjustment knob to lock the MNVD in place. Figure 2-7 Adjustment Knob
  • 30. 2-10 2.3 HEADMOUNT ASSEMBLY – Continued The first row in Table 2-1 shows the optimal field of view for the MNVD when positioning adjustments are correctly performed. The remaining rows show unsatisfactory fields of view when positioning adjustments are performed incorrectly, along with corrective action that can be taken to resolve the problem. Table 2-1 Field of View and Positioning Adjustments Field of View Remarks / Corrective Action Optimal alignment. Eye relief too long. Correct fore and aft adjustment. Eye relief too short. Correct fore and aft adjustment. Eyepiece set too left. Correct pupillary adjustment. Eyepiece set too right. Correct pupillary adjustment.
  • 31. 2-11 2.3 HEADMOUNT ASSEMBLY – Continued Table 2-1 Field of View and Positioning Adjustments – Continued Field of View Remarks / Corrective Action Positioned too high. Correct height adjustment. Positioned too low. Correct height adjustment. MNVD field of view Eyepiece field of view Obstructed MNVD field of view 2.4 WEAPON MOUNTING INSTRUCTIONS The weapon mount assembly allows the MNVD to be mounted to weapons equipped with a MIL-STD-1913 rail. Figure 2-8 Weapon Mount Assembly THUMBSCREW MOUNTING SCREW JAWS
  • 32. 2-12 2.4 WEAPON MOUNTING INSTRUCTIONS – Continued Installing the Weapon Mount Assembly 1. With the MNVD in one hand, use the free hand to orient the weapon mount assembly above the mounting interface as shown in Figure 2-9. Keying features in the weapon mount assembly and mounting interface allow only one orientation. 2. Rotate the thumbscrew clockwise to secure the weapon mount assembly to the MNVD, taking care not the cross threads. Figure 2-9 Weapon Mount Assembly Installation 3. The weapon mount assembly is now installed on the MNVD. MOUNTING INTERFACE THUMBSCREW
  • 33. 2-13 2.4 WEAPON MOUNTING INSTRUCTIONS – Continued Mounting the MNVD WARNING Be sure the weapon is CLEAR and SAFE before proceeding. 1. Loosen the mounting screw on the weapon mount assembly until the jaws have sufficient space to fit over the weapon rail. 2. Position the MNVD facing forward, ensuring the recoil lug is seated in the desired recoil groove of the rail. While pushing down and forward on the MNVD, turn the mounting screw clockwise until snug. Figure 2-10 Mounting the MNVD
  • 34. 2-14 2.5 LENS ACCESSORIES Objective Lens Cover The objective lens cover affords additional protection to the objective lens and protects the MNVD’s internal imaging components. It should be pressed into place (installed) over the objective lens whenever the MNVD is not being used. It should also be installed when the MNVD is being used in brightly lit environments. A small hole in the center of the lens cover allows enough light to enter the MNVD when operating in these conditions. In darker environments, better performance will be observed with the lens cover uninstalled. The objective lens cover is held captive to the MNVD by the neck cord. Sacrificial Window A sacrificial window is provided to protect the objective lens from becoming scratched or otherwise damaged. The sacrificial window should be pressed into place (installed) over the objective lens whenever the lens cover is not installed. Demist Shield CAUTION The coating on the demist shield may be damaged if cleaned while wet. Clean the demist shield only when dry and using dry lens tissue.
  • 35. 2-15 2.4 LENS ACCESSORIES – Continued The demist shield is provided to protect the eyepiece from becoming scratched or otherwise damaged, and to prevent fogging of the eyepiece. It should be installed whenever the MNVD is in use. With the eyecup removed, place the demist shield over the eyepiece with the narrow side in. Taking care not to smudge the eyepiece or demist shield, press the demist shield into place. Eyecups The MNVD is equipped with both a standard and shuttered eyecup to accommodate a variety of tactical situations and mounting configurations. Figure 2-11 MNVD Eyecups To install, press the desired eyecup over the end of the eyepiece. If installing the standard eyecup, rotate to obtain proper eye / cheek weld. STANDARD EYECUP SHUTTERED EYECUP
  • 36. 2-16 SECTION II OPERATING INSTRUCTIONS 2.6 MODES OF OPERATION The MNVD is powered on by turning the Mode Switch to the desired position. CAUTION Pointing the MNVD at the sun without the lens cover installed may damage internal imaging components. NOTE The MNVD is equipped with a high light sensor (see Figure 1-3) that detects ambient light conditions and automatically shuts down the I2 tube if conditions are so bright as to risk damaging internal components. To reset (power on) the MNVD after a high light shutdown, turn the Mode Switch to the RESET / OFF position and then back to the desired setting.
  • 37. 2-17 2.6 MODES OF OPERATION – Continued Table 2-2 Mode Switch Operation Mode Switch Position Effect RESET OFF Turns MNVD off. Resets the MNVD after a high light shutdown. ON Activates the MNVD using (and amplifying) available, ambient light. IR PULL Activates the MNVD using the IR LED Illuminator to provide an integrated light source in conditions of extreme darkness. 2.7 IR LED ILLUMINATOR WARNING The IR LED Illuminator is detectable by an enemy using night vision devices. Detection is easier in smoky, foggy, or rainy conditions. To reduce the risk of detection by an enemy using night vision devices, avoid prolonged activation of the IR LED Illuminator. The IR LED Illuminator is used to provide a supplementary light source in conditions of extreme darkness. In addition to the IR mode described in Table 2-2, the IR LED Illuminator may also be activated in a momentary setting. To momentarily activate the IR LED Illuminator, turn the Mode Switch to the ON position. Continue turning past the ON position and hold. The IR LED Illuminator will remain activated until the Mode Switch is released. A red light in the eyepiece, just outside the intensified field of view, indicates that the IR LED Illuminator is activated.
  • 38. 2-18 2.7 IR LED ILLUMINATOR – Continued Figure 2-12 IR LED Illuminator Indicator 2.8 GAIN (CONTRAST) The MNVD is equipped with a gain control knob used to adjust the gain (contrast) of the viewed image. When looking through the eyepiece, turning the gain control knob clockwise will provide more contrast. Turning the gain control knob counterclockwise will provide less contrast. 2.9 FOCUS The objective lens must be focused for the viewing distance being observed. While looking at an object at least 9.8 inches (25cm) from the MNVD, rotate the objective focus ring for best image clarity. A change in viewing distance requires that the objective lens be refocused. If already focused for a distance of at least 250 feet (76m), no change in focus is required between this distance and infinity. FIELD OF VIEW IR LED ILLUMINATOR INDICATOR
  • 39. 2-19 2.10 DIOPTER ADJUSTMENT The eyepiece may be focused to accommodate differences in the visual acuity of individual operators, from +2 to -6 diopters. While looking at an object at least 9.8 inches (25cm) from the MNVD, rotate the diopter adjuster to achieve the sharpest possible image. 2.11 STARTUP PROCEDURES To achieve optimal performance and image clarity, the following procedures should be accomplished in the order presented, each time the MNVD is placed into use. 1. Perform mounting procedures and positioning adjustments as applicable: a. For head or helmet-mounted configurations, don the headmount and MNVD and make all positioning adjustments per section 2.3. b. For weapon-mounted configurations, install the weapon mount assembly and mount to the host weapon per section 2.4. 2. Turn the Mode Switch to the desired position per section 2.6. 3. Adjust the gain (contrast) to a comfortable viewing level per section 2.8. 4. Rotate the objective focus ring for best image clarity. 5. Make diopter adjustments per section 2.10.
  • 40.
  • 41. 3-1 CHAPTER 3 MAINTENANCE SECTION I OPERATOR MAINTENANCE 3.1 TROUBLESHOOTING PROCEDURES The procedures below will help correct some of the basic problems that may arise with the MNVD. If the equipment malfunction is not listed, or the actions listed do not correct the fault, refer to section 3.4 for additional guidance. Table 3-1 Troubleshooting Procedures Malfunction Probable Cause Corrective Action 1. No image is present when turning on the MNVD. a. Batteries are improperly installed. a. Verify batteries are properly installed per section 2.2, Battery Installation. b. Battery power is low. b. Replace batteries per section 2.2, Battery Installation. c. Battery contacts require cleaning. c. Clean battery contacts per section 3.2, Battery Compartment and Battery Cap. 2. Image abruptly turns off when in ON or IR modes. a. High light shutdown has been initiated. a. Reset (power on) the MNVD per section 2.6. Install the objective lens cover per section 2.5, Objective Lens Cover, if necessary. 3. Poor or degraded image. a. Lens cover installed (dark ambient conditions). a. Remove lens cover per section 2.4, Objective Lens Cover. b. Lens cover not installed (bright ambient conditions). b. Install lens cover per section 2.5, Objective Lens Cover.
  • 42. 3-2 3.1 TROUBLESHOOTING – Continued Table 3-1 Troubleshooting Procedures – Continued Malfunction Probable Cause Corrective Action 3. Poor or degraded image – Continued. c. Insufficient ambient light. c. Turn the Mode Switch to the IR position to provide IR light source per section 2.6, or momentarily activate the IR LED Illuminator per section 2.7. d. Gain (contrast) not adjusted to an appropriate setting. d. Adjust gain (contrast) to a comfortable level per section 2.8. e. Not focused for viewing distance being observed (minimum 9.8 inches). e. Focus objective lens per section 2.9. f. Diopter setting not adjusted correctly. f. Adjust diopter setting per section 2.10. g. Sacrificial window and/or demist shield obscured by dirt, dust, or grime. g. Clean sacrificial window and/or demist shield per section 3.2, Optical Surfaces. h. Sacrificial window and/or demist shield cracked or scratched. h. Replace sacrificial window and/or demist shield per section 2.5. i. Objective lens and/or eyepiece obscured by dirt, dust or grime. i. Remove sacrificial window and/or demist shield. Clean objective lens and/or eyepiece per section 3.2, Optical Surfaces. 4. IR LED Illuminator does not appear to operate or provides insufficient light. a. IR LED Illuminator exit port is dirty. a. Clean IR LED Illuminator exit port per section 3.2, Optical Surfaces. b. Viewed scene is outside effective range of IR LED Illuminator. b. Limit use of IR LED Illuminator to viewed scenes within a few meters of the MNVD.
  • 43. 3-3 3.2 INSPECTION / CLEANING The operator should inspect the MNVD before each use and after it has been in extreme conditions, such as prolonged exposure to intense temperatures. The following procedures will extend the life of the MNVD and help ensure safe operation. WARNING Remove the MNVD from the weapon before inspecting, cleaning, or performing other maintenance functions. WARNING Prior to performing any inspection or maintenance procedure, verify that batteries are not installed. MNVD Housing To clean the MNVD housing, rinse with water or mild soap and water and then wipe dry with a soft cloth. Clean around adjusters, levers, and interfaces with a cotton swab. Battery Compartment Inspect the battery compartment for dirt, dust, or corrosion. Dirt or debris that cannot be shaken loose from the battery compartment may be removed using a clean cloth or cotton swab. Periodically lubricate the o-ring with fluorinated grease. The o-ring should be replaced if it becomes cut, nicked, or dried out per section 3.3, Replacing Battery Compartment O-Ring. If necessary, clean battery contacts with a cotton swab and isopropyl alcohol.
  • 44. 3-4 3.2 INSPECTION / CLEANING - Continued Battery Cap Inspect the battery cap for dirt, sand, and grime. Thoroughly clean the battery cap and o-ring by flushing with water and wiping with a cotton swab. Periodically lubricate the o-ring with fluorinated grease. If necessary, clean the battery contact with a cotton swab and isopropyl alcohol. Optical Surfaces CAUTION The coating on the demist shield may be damaged if cleaned while wet. Clean the demist shield only when dry and using dry lens tissue. Inspect optical surfaces for dirt, dust, and grime. Except for the demist shield, clean with water or mild soap and water. Fine cleaning of the optical surfaces should be performed using the provided lens tissue and lens cleaning solution, or the flexible tip of the lens pen. Avoid using excessive force as this may scratch the lenses. The sacrificial window and demist shield should be replaced if scratches degrade performance or cracks are present. Neck Cord Inspect the neck cord for any signs of cuts, nicks, or fraying. Replace as necessary per section 3.3, Lens Cover / Neck Cord Replacement.
  • 45. 3-5 3.3 CORRECTIVE MAINTENANCE PROCEDURES The MNVD has no internal parts or assemblies replaceable by the user or organizational level personnel. Refer to section 3.4 regarding maintenance and/or repair actions beyond those described in this manual. Replacing Battery Compartment O-Ring No tools are required to perform this procedure. 1. Access the battery compartment by turning the battery cap counterclockwise. 2. Use the fingers of one hand to squeeze the battery compartment o-ring while simultaneously pushing it out of its retaining groove. Grasp the o-ring with fingers of the other hand and pull it off the battery compartment. 3. Ensure the o-ring retaining groove is clean and free of debris. 4. Stretch the replacement o-ring over the battery compartment and into its retaining groove. Neck Cord Replacement No tools are required to perform this procedure. 1. Feed one end of the neck cord through the channel on the MNVD housing as shown in Figure 3-1. 2. Feed the other end of the neck cord through the tab in the lens cover. 3. Secure both ends with a knot. 4. Place the lens cover over the objective lens.
  • 46. 3-6 3.3 CORRECTIVE MAINTENANCE PROCEDURES – Continued Figure 3-1 Neck Cord Replacement
  • 47. 3-7 SECTION II SERVICE / PACKING AND UNPACKING 3.4 SERVICE / REPAIR For service, repair, or replacement, first e-mail returns.insight@l-3com.com or call toll-free 1-877-744-4803. To assist with determining if the item is repairable, the following information will be requested: a. Serial number of the defective item; b. Thorough description of the malfunction, defect, or damage; and c. If known, an explanation as to how the malfunction, defect or damage occurred. If the item is determined to be beyond economical repair, follow applicable replacement procedures through your Property Officer. If it is determined that the item is under warranty, or should be returned for repair, a Return Material Authorization (RMA) number will be provided. When returning the MNVD for service / repair, the following procedures should be followed to prevent any additional damage: 1. Be sure that the MNVD is free of all contaminants such as dirt or any other foreign material. 2. Remove battery. 3. Place the MNVD in the soft carrying case.
  • 48. 3-8 3.4 RETURN INSTRUCTIONS – Continued Place the item and a copy of the test report or detailed description of the failure in a suitable packing container. Mark the package with “Field Return” and the RMA number. Ship via fastest, traceable, pre-paid means to: L-3 Communications Corporation Warrior Systems Division Insight Operations 9 Akira Way Londonderry, NH 03053 3.5 WARRANTY INFORMATION The MNVD is under warranty from defects in material and workmanship for a minimum of one (1) year from the date of manufacture. This warranty does not protect against damage due to misuse, mishandling or battery leakage. Additional warranty coverage may have been provided through the contract or via subsequent contract extension. Specific warranty terms can be obtained from your procurement agent, Contracting Officer or L-3 Warrior Systems, Insight. 3.6 NON-WARRANTY INFORMATION Non-warranty repairs are subject to an evaluation fee. The item will be tested and evaluated for failure, then customer permission and payment terms are obtained prior to any repairs being performed.
  • 49. A-1 APPENDIX A REPAIR PARTS LIST SCOPE This Appendix lists end item components and repair parts for the MNVD. Figure A-1 End Item Components 1 3 4 5 6 78 9 10 11 12 13 14 16 15 2
  • 50. A-2 SCOPE – Continued Table A-1 List of End Item Components ITEM NO. NATIONAL STOCK NUMBER PART NUMBER DESCRIPTION QTY 1 8415-01-560-1800 7B435 Browpad, Medium 1 2 8415-01-560-1799 7B436 Browpad, Thick 1 3 TBD 7B268 Headmount Assembly 1 4 TBD 7B262 Soft Carrying Case 1 5 N/A MNVD-TM-ITI Operator Manual 1 6 N/A MNVD-QRG-ITI Quick Reference Guide 1 7 6760-01-556-4306 7B626 Lens Tissue 1 8 TBD MND-187 Retaining Cord 1 9 TBD 7B264 Sacrificial Window 1 10 5855-01-444-1230 MND-200 Demist Shield 1 11 TBD MND-160 Adapter, Headmount / Helmet Mount 1 12 TBD MND-140 Mount Assembly, Weapon 1 13 6650-01-444-1229 A3256345 Eyecup, Shuttered 1 14 N/A 245000 MNVD Assembly (see Figure A-2 for parts breakdown) 1 15 6135-01-559-9637 M30-044 Battery, 1.5V, AA Lithium 2 16 8465-01-559-8427 7B267 Shoulder Strap Assembly 1 - 8415-01-598-3125 7B280 Browpad, Thin (pre-installed on Headmount Assembly) 1
  • 51. A-3 SCOPE – Continued Figure A-2 MNVD Assembly Table A-2 List of Repair Parts ITEM NO. NATIONAL STOCK NUMBER PART NUMBER DESCRIPTION QTY 1 5855-01-556-2660 7B422 Eyecup, Standard 1 2 4520-01-455-6662 7B306 Neck Cord 1 3 TBD 7B318 Lens Cover 1 4 TBD A3256356 O-Ring, Battery Compartment 1 1 2 34
  • 52.
  • 53. B-1 APPENDIX B ACCESSORIES SCOPE This Appendix lists accessories available for support of the MNVD. Table B-1 List of Accessories NATIONAL STOCK NUMBER PART NUMBER DESCRIPTION QTY RECM TBD ICS-024-US Compass 1
  • 54.
  • 55. The MNVD Is designed and produced by: L-3 Communications Corporation Warrior Systems Division Insight Operations 9 Akira Way Londonderry, NH 03053 USA Phone 603.626.4800 / Fax 603.626.4888 www.l3warriorsystems.com This manual contains technical data whose export is governed by the U.S. International Traffic in Arms Regulations (ITAR). This information must not be transferred to a foreign person without the proper authorization of the U.S. Government. Please contact L-3 Warrior Systems for more information. © 2011 L-3 Communications Corporation Warrior Systems Division