SlideShare ist ein Scribd-Unternehmen logo
1 von 8
Downloaden Sie, um offline zu lesen
Quick Start Guide 
Polycom VVX 500 12-Line Desktop Phone with HD Voice 
Polycom VVX 600 16-Line Desktop Phone with HD Voice 
VVX500 pictured
Quick Start Guide 
1. Getting to know your VVX500/600 
VVX600 pictured
Quick Start Guide 
2. Understanding the icons 
Lines Calls 
Registered line Placing a call 
Shared line Incoming call (home view) 
Unregistered line Incoming call (lines view) 
Phone warning Active call using Polycom HD 
L ogin credentials locked Active conference 
Call forwarding always enabled Held call 
DND enabled Shared line with a held call 
USB flash drive attached 
Status indicators in line view 
Flashing red indicates held call 
Green indicates active call 
Recording in progress or paused 
Menu Presence 
Press to view more or fewer 
icons (home view) Presence status: Available 
Tap to see more information Presence status: Busy 
Tap to edit Presence status: Away 
Tap to access recent calls Presence status: DND 
Tap to access message centre Presence status: Offline 
Backspace Presence status: Unknown 
Placed calls 
(recent calls view) 
Received calls 
(recent calls view) 
Missed calls 
(recent calls view)
Quick Start Guide 
3. Using the touchscreen 
 The keys shown on the touchscreen are referred to as soft keys. Different soft 
key options will appear depending on what features you are accessing. 
 Press to select and highlight screen items. To scroll, touch the screen and swipe 
your finger up, down, left or right. To go back to the previous screen, press 
back. 
 Pressing the home button at any time will take you to the home view menu. 
To select an option, simply press the relevant icon on the touchscreen. This 
screen will also display your phone extension number along with the date and 
time. 
Page indicator 
Extension number 
 If you press and hold the page indicator highlighted above, home view expands 
to display additional icons 
4. Basic phone features 
Place a call 
Use any of the following approaches to place a call 
 Dial the number and lift the handset 
 Dial the number then press the speaker button 
 Dial the number then press the dial soft key 
 If you are using a headset, dial the number then press the headset button 
 If you have selected a number from a directory, press the dial soft key 
Answer a call 
Use any of the following approaches to answer a call 
 Lift the handset 
 If you are using a headset, press the headset button 
 To use the speakerphone, press the speaker button 
 Press the answer soft key 
Call waiting 
 If you are on a call and a new incoming call arrives, a call waiting tone beeps and 
the incoming call window displays 
 To answer the call, press answer. This will place your active call on hold 
 To send the incoming call to voicemail, press reject 
 If you don’t answer the call within 10 seconds, the incoming call window 
disappears. Press to see active call(s) again. 
View your current details 
You can access calls view if your phone has multiple calls in progress, or you have 
one held call. Scroll to see all your calls.
Quick Start Guide 
Call colour indicates status 
 Dark Green – Active Call 
 Dark Blue – Incoming and held calls 
Press a call to highlight it. Soft keys will apply to the highlighted call 
End a call 
 Hang up the handset 
 If you are using a headset, press the headset button or the end call soft key 
 If you are using the speakerphone press the speaker button or the end call soft key 
Place a call on hold 
To place a call on hold, press the hold soft key. The hold icon will display on the line key label. Press hold again or the resume soft key to retrieve the call. 
Mute a call 
Press the mute button . To disengage mute, press the mute button again. 
Redial a number 
To view the most recently dialled numbers press the call history button then press the dial soft key to initiate the call. 
Note: you can scroll up and down through the list of recently dialled numbers 
View missed calls 
If your phone displays shows new missed call press the soft key to see the list of missed calls marked with the missed calls icon next to the number. 
Transferring a call 
You can transfer calls using either method: 
 Blind transfer 
Transfer a call to another party without waiting for the other party to answer 
 Consultative transfer 
Transfer a call to another party after speaking to the other person first 
To perform a blind transfer: 
1. During a call, press the transfer soft key. This puts the call on hold 
2. Press the blind soft key located on top of the screen. 
3. Dial the number to which you want to transfer the call. 
To perform a consultative transfer: 
1. During a call, press the transfer soft key. This puts the call on hold 
2. Dial the number to which you want to transfer the call. 
3. When the other party answers, press transfer to handover the call 
4. If the transfer fails or you need to get the caller back, press the resume soft key to return to the original call.
Quick Start Guide 
5. Using the contact directory 
Dial from the directory menu 
 Press the home button to open the main menu 
 Press directories 
 Press on the contact you want to dial 
 Press the contact number you want to dial 
Adding a favourite contact 
 Press home button to open the main menu 
 Press directories 
 Press the + soft key and enter the details of your contact 
 Swipe your finger up the screen to scroll to favourite index 
 Add the number you want your contact to appear under, on your home view 
Adding a contact from call history 
 In your call history navigate to the relevant contact and press 
 Press save and enter the details as per steps in adding a favourite contact 
Update contact information 
 Navigate to your contact directory and press the contact you want to update 
 Press to update the contact’s information, then press save 
6. Voicemail 
Setting up voicemail: 
 Access the voice portal by pressing on the top right corner of your home screen 
 Enter the default password: 0000# 
 Change the password to your personal four digit password and then confirm 
 Record your name 
Customise your greetings: 
 Access the voice portal by pressing on the top right corner of your home screen 
 Enter your 4 digit password 
 Press 1 to access your voicemail box 
 Then press 2 to change your busy greeting 
 Or press 3 to change your no answer greeting 
 Follow the prompts to listen, re-record, delete or save recorded greetings 
Remote access to your voicemail: 
 Dial your direct telephone number 
 Interrupt the greeting by pressing the * key 
 Enter your 4 digit password 
 Press 1 to access your voicemail box 
 Then press 1 to listen to your messages 
 To save the message, press # 
 To delete the message, press 7 
 To repeat the message, press 2
Quick Start Guide 
7. Call forwarding options 
Forward calls to another number: 
 Press the forward soft key on the bottom of your home screen. 
 Press 1 (always) 
 Enter the number you want to forward all calls to 
 Press the enable soft key. 
Note: to disable, press the forward soft key again and disable the always option. 
Forward unanswered calls to another number 
 Press the forward soft key on the bottom of your home screen 
 Press 2 (no answer) 
 Enter the number you want to forward unanswered calls to 
 Press the enable soft key. 
Note: to disable, press the forward soft key again and disable the no answer option. 
Forward calls, when busy, to another number 
 Press the forward soft key on the bottom of your home screen 
 Press 3 (busy) 
 Enter the number you want to forward busy calls to 
 Press the enable soft key. 
Note: to disable, press the forward soft key again and disable the busy option. 
Note: If you have previously entered a destination phone number for a call forward type, you do not need to re-enter it each time the call forward option is enabled. 
8. Conference Calls 
Place a conference call: 
 During a call, press the confrnc soft key to open a new line and put the first party on hold. 
 Dial the number of the party who you want to conference in. 
 When the call connects, press confrnc to join the two calls in a conference. 
Note: the system defined conference call is limited between you and two other parties, making a 3-way conference call. 
9. Ringer type or volume 
Adjust the Ringer volume 
Press the + or – volume buttons while the handset is in its cradle 
Adjust the handset, speaker or headset volume 
During an active call, press the +or – volume buttons
Quick Start Guide 
 This guide is intended for users of Polycom VVX400 and Vvx500 series handsets. 
 Not all features listed in this guide may be available at time of installation and may be licence dependant 
 If you have any questions, we are here to help. 
Please call 1300 00 6398 or email team@nexttelecom.com.au 
Next Telecom Pty Ltd 
Level 12, 100 Miller Street 
North Sydney NSW 2060 
p: 1300 00 6398 
f: 1300 66 4447 
e: team@nexttelecom.com.au 
abn: 77 074 728 724

Weitere ähnliche Inhalte

Was ist angesagt?

Interviewer User Guide
Interviewer User GuideInterviewer User Guide
Interviewer User GuideDaryl Jones
 
Microsoft lync 2010_cx600_device_training_rtm shared by voip.com.vn
Microsoft lync 2010_cx600_device_training_rtm shared by voip.com.vnMicrosoft lync 2010_cx600_device_training_rtm shared by voip.com.vn
Microsoft lync 2010_cx600_device_training_rtm shared by voip.com.vnTran Thanh
 
Manual of panasonic fax machine-55030114
Manual of panasonic fax machine-55030114Manual of panasonic fax machine-55030114
Manual of panasonic fax machine-55030114iphungs
 
manjooo phone analytic software
manjooo phone analytic softwaremanjooo phone analytic software
manjooo phone analytic softwareManoj Rajayah
 
Logging into the blended dialer instructions (1)
Logging into the blended dialer instructions (1)Logging into the blended dialer instructions (1)
Logging into the blended dialer instructions (1)LaRussa Lakes
 
Bt decor 310 user Guide from Telephones Online www.telephonesonline.co.uk
Bt decor 310  user Guide from Telephones Online  www.telephonesonline.co.ukBt decor 310  user Guide from Telephones Online  www.telephonesonline.co.uk
Bt decor 310 user Guide from Telephones Online www.telephonesonline.co.ukTelephones Online
 
David mitby2015portfolio8x11
David mitby2015portfolio8x11David mitby2015portfolio8x11
David mitby2015portfolio8x11David Mitby
 
The Ultimate Guide to Skype Tips & Tricks
The Ultimate Guide to Skype Tips & TricksThe Ultimate Guide to Skype Tips & Tricks
The Ultimate Guide to Skype Tips & TricksDoug McLennan
 

Was ist angesagt? (11)

Interviewer User Guide
Interviewer User GuideInterviewer User Guide
Interviewer User Guide
 
Microsoft lync 2010_cx600_device_training_rtm shared by voip.com.vn
Microsoft lync 2010_cx600_device_training_rtm shared by voip.com.vnMicrosoft lync 2010_cx600_device_training_rtm shared by voip.com.vn
Microsoft lync 2010_cx600_device_training_rtm shared by voip.com.vn
 
Manual of panasonic fax machine-55030114
Manual of panasonic fax machine-55030114Manual of panasonic fax machine-55030114
Manual of panasonic fax machine-55030114
 
manjooo phone analytic software
manjooo phone analytic softwaremanjooo phone analytic software
manjooo phone analytic software
 
Logging into the blended dialer instructions (1)
Logging into the blended dialer instructions (1)Logging into the blended dialer instructions (1)
Logging into the blended dialer instructions (1)
 
Cz call conference manual
Cz call conference manualCz call conference manual
Cz call conference manual
 
Bt decor 310 user Guide from Telephones Online www.telephonesonline.co.uk
Bt decor 310  user Guide from Telephones Online  www.telephonesonline.co.ukBt decor 310  user Guide from Telephones Online  www.telephonesonline.co.uk
Bt decor 310 user Guide from Telephones Online www.telephonesonline.co.uk
 
David mitby2015portfolio8x11
David mitby2015portfolio8x11David mitby2015portfolio8x11
David mitby2015portfolio8x11
 
The Ultimate Guide to Skype Tips & Tricks
The Ultimate Guide to Skype Tips & TricksThe Ultimate Guide to Skype Tips & Tricks
The Ultimate Guide to Skype Tips & Tricks
 
Making a phone call
Making a phone callMaking a phone call
Making a phone call
 
Getting started with Google Voice
Getting started with Google VoiceGetting started with Google Voice
Getting started with Google Voice
 

Ähnlich wie Polycom vvx-500

Sagemcom D21V Digital Cordless Phone User Guide
Sagemcom D21V Digital Cordless Phone User GuideSagemcom D21V Digital Cordless Phone User Guide
Sagemcom D21V Digital Cordless Phone User GuideTelephones Online
 
Yealink cp860 quick_start_guide_v80_10
Yealink cp860 quick_start_guide_v80_10Yealink cp860 quick_start_guide_v80_10
Yealink cp860 quick_start_guide_v80_10Miluska Guerra Guerra
 
Avaya J179 J139 User Manual SS Lootah.pptx
Avaya J179 J139 User Manual SS Lootah.pptxAvaya J179 J139 User Manual SS Lootah.pptx
Avaya J179 J139 User Manual SS Lootah.pptxDomenico (Nico) Paduano
 
Sagemcom D750A Digital Cordless Phone User Guide
Sagemcom D750A Digital Cordless Phone User GuideSagemcom D750A Digital Cordless Phone User Guide
Sagemcom D750A Digital Cordless Phone User GuideTelephones Online
 
Yealink SIP T28P Quick Start Reference
Yealink SIP T28P Quick Start ReferenceYealink SIP T28P Quick Start Reference
Yealink SIP T28P Quick Start ReferenceLATECO
 
Cisco spa508 quick reference card
Cisco spa508   quick reference cardCisco spa508   quick reference card
Cisco spa508 quick reference cardkaka010
 
BT Decor 2600 Corded Phone Advanced Call Blocker
BT Decor 2600 Corded Phone Advanced Call BlockerBT Decor 2600 Corded Phone Advanced Call Blocker
BT Decor 2600 Corded Phone Advanced Call BlockerTelephones Online
 
BT Decor 2600 Telephone User Guide
BT Decor 2600 Telephone User GuideBT Decor 2600 Telephone User Guide
BT Decor 2600 Telephone User GuideTelephones Online
 
Alcatel easy (phone)
Alcatel easy (phone)Alcatel easy (phone)
Alcatel easy (phone)Mohd Shaizan
 
Grandstream GRP261X Carrier-Grade IP Phone
Grandstream GRP261X Carrier-Grade IP PhoneGrandstream GRP261X Carrier-Grade IP Phone
Grandstream GRP261X Carrier-Grade IP PhoneTRIKONPtyLtd
 
Grandstream networks, inc.
Grandstream networks, inc.Grandstream networks, inc.
Grandstream networks, inc.TRIKONPtyLtd
 
Lync 2013 - Audio - Quick Reference - 2 Page Reference - EPC Group
Lync 2013 - Audio - Quick Reference - 2 Page Reference - EPC GroupLync 2013 - Audio - Quick Reference - 2 Page Reference - EPC Group
Lync 2013 - Audio - Quick Reference - 2 Page Reference - EPC GroupEPC Group
 
Bt big button phone user manual from Telephones Online www.telephonesonline....
Bt big button phone user manual from Telephones Online  www.telephonesonline....Bt big button phone user manual from Telephones Online  www.telephonesonline....
Bt big button phone user manual from Telephones Online www.telephonesonline....Telephones Online
 
Bt décor 310 user Guide from Telephones Online www.telephonesonline.co.uk
Bt décor 310  user Guide from Telephones Online  www.telephonesonline.co.ukBt décor 310  user Guide from Telephones Online  www.telephonesonline.co.uk
Bt décor 310 user Guide from Telephones Online www.telephonesonline.co.ukTelephones Online
 
Nortel Norstar ICS telephone feature guide
Nortel Norstar ICS telephone feature guideNortel Norstar ICS telephone feature guide
Nortel Norstar ICS telephone feature guideClearlines Telephone Co.
 
Lync 2013 audio_quick_reference card
Lync 2013 audio_quick_reference cardLync 2013 audio_quick_reference card
Lync 2013 audio_quick_reference cardPeter Diaz
 

Ähnlich wie Polycom vvx-500 (20)

Polycom vvx 400
Polycom vvx 400Polycom vvx 400
Polycom vvx 400
 
Polycom vvx-300
Polycom vvx-300Polycom vvx-300
Polycom vvx-300
 
Sagemcom D21V Digital Cordless Phone User Guide
Sagemcom D21V Digital Cordless Phone User GuideSagemcom D21V Digital Cordless Phone User Guide
Sagemcom D21V Digital Cordless Phone User Guide
 
Yealink cp860 quick_start_guide_v80_10
Yealink cp860 quick_start_guide_v80_10Yealink cp860 quick_start_guide_v80_10
Yealink cp860 quick_start_guide_v80_10
 
Avaya J179 J139 User Manual SS Lootah.pptx
Avaya J179 J139 User Manual SS Lootah.pptxAvaya J179 J139 User Manual SS Lootah.pptx
Avaya J179 J139 User Manual SS Lootah.pptx
 
Sagemcom D750A Digital Cordless Phone User Guide
Sagemcom D750A Digital Cordless Phone User GuideSagemcom D750A Digital Cordless Phone User Guide
Sagemcom D750A Digital Cordless Phone User Guide
 
Yealink SIP T28P Quick Start Reference
Yealink SIP T28P Quick Start ReferenceYealink SIP T28P Quick Start Reference
Yealink SIP T28P Quick Start Reference
 
Cisco spa508 quick reference card
Cisco spa508   quick reference cardCisco spa508   quick reference card
Cisco spa508 quick reference card
 
BT Decor 2200
BT Decor 2200BT Decor 2200
BT Decor 2200
 
BT Decor 2600 Corded Phone Advanced Call Blocker
BT Decor 2600 Corded Phone Advanced Call BlockerBT Decor 2600 Corded Phone Advanced Call Blocker
BT Decor 2600 Corded Phone Advanced Call Blocker
 
BT Decor 2600 Telephone User Guide
BT Decor 2600 Telephone User GuideBT Decor 2600 Telephone User Guide
BT Decor 2600 Telephone User Guide
 
Alcatel easy (phone)
Alcatel easy (phone)Alcatel easy (phone)
Alcatel easy (phone)
 
Grandstream GRP261X Carrier-Grade IP Phone
Grandstream GRP261X Carrier-Grade IP PhoneGrandstream GRP261X Carrier-Grade IP Phone
Grandstream GRP261X Carrier-Grade IP Phone
 
Grandstream networks, inc.
Grandstream networks, inc.Grandstream networks, inc.
Grandstream networks, inc.
 
Lync 2013 - Audio - Quick Reference - 2 Page Reference - EPC Group
Lync 2013 - Audio - Quick Reference - 2 Page Reference - EPC GroupLync 2013 - Audio - Quick Reference - 2 Page Reference - EPC Group
Lync 2013 - Audio - Quick Reference - 2 Page Reference - EPC Group
 
Bt big button phone user manual from Telephones Online www.telephonesonline....
Bt big button phone user manual from Telephones Online  www.telephonesonline....Bt big button phone user manual from Telephones Online  www.telephonesonline....
Bt big button phone user manual from Telephones Online www.telephonesonline....
 
BT Decor 2500
BT Decor 2500BT Decor 2500
BT Decor 2500
 
Bt décor 310 user Guide from Telephones Online www.telephonesonline.co.uk
Bt décor 310  user Guide from Telephones Online  www.telephonesonline.co.ukBt décor 310  user Guide from Telephones Online  www.telephonesonline.co.uk
Bt décor 310 user Guide from Telephones Online www.telephonesonline.co.uk
 
Nortel Norstar ICS telephone feature guide
Nortel Norstar ICS telephone feature guideNortel Norstar ICS telephone feature guide
Nortel Norstar ICS telephone feature guide
 
Lync 2013 audio_quick_reference card
Lync 2013 audio_quick_reference cardLync 2013 audio_quick_reference card
Lync 2013 audio_quick_reference card
 

Polycom vvx-500

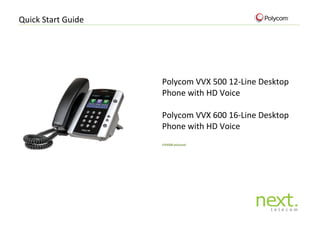
  • 1. Quick Start Guide Polycom VVX 500 12-Line Desktop Phone with HD Voice Polycom VVX 600 16-Line Desktop Phone with HD Voice VVX500 pictured
  • 2. Quick Start Guide 1. Getting to know your VVX500/600 VVX600 pictured
  • 3. Quick Start Guide 2. Understanding the icons Lines Calls Registered line Placing a call Shared line Incoming call (home view) Unregistered line Incoming call (lines view) Phone warning Active call using Polycom HD L ogin credentials locked Active conference Call forwarding always enabled Held call DND enabled Shared line with a held call USB flash drive attached Status indicators in line view Flashing red indicates held call Green indicates active call Recording in progress or paused Menu Presence Press to view more or fewer icons (home view) Presence status: Available Tap to see more information Presence status: Busy Tap to edit Presence status: Away Tap to access recent calls Presence status: DND Tap to access message centre Presence status: Offline Backspace Presence status: Unknown Placed calls (recent calls view) Received calls (recent calls view) Missed calls (recent calls view)
  • 4. Quick Start Guide 3. Using the touchscreen  The keys shown on the touchscreen are referred to as soft keys. Different soft key options will appear depending on what features you are accessing.  Press to select and highlight screen items. To scroll, touch the screen and swipe your finger up, down, left or right. To go back to the previous screen, press back.  Pressing the home button at any time will take you to the home view menu. To select an option, simply press the relevant icon on the touchscreen. This screen will also display your phone extension number along with the date and time. Page indicator Extension number  If you press and hold the page indicator highlighted above, home view expands to display additional icons 4. Basic phone features Place a call Use any of the following approaches to place a call  Dial the number and lift the handset  Dial the number then press the speaker button  Dial the number then press the dial soft key  If you are using a headset, dial the number then press the headset button  If you have selected a number from a directory, press the dial soft key Answer a call Use any of the following approaches to answer a call  Lift the handset  If you are using a headset, press the headset button  To use the speakerphone, press the speaker button  Press the answer soft key Call waiting  If you are on a call and a new incoming call arrives, a call waiting tone beeps and the incoming call window displays  To answer the call, press answer. This will place your active call on hold  To send the incoming call to voicemail, press reject  If you don’t answer the call within 10 seconds, the incoming call window disappears. Press to see active call(s) again. View your current details You can access calls view if your phone has multiple calls in progress, or you have one held call. Scroll to see all your calls.
  • 5. Quick Start Guide Call colour indicates status  Dark Green – Active Call  Dark Blue – Incoming and held calls Press a call to highlight it. Soft keys will apply to the highlighted call End a call  Hang up the handset  If you are using a headset, press the headset button or the end call soft key  If you are using the speakerphone press the speaker button or the end call soft key Place a call on hold To place a call on hold, press the hold soft key. The hold icon will display on the line key label. Press hold again or the resume soft key to retrieve the call. Mute a call Press the mute button . To disengage mute, press the mute button again. Redial a number To view the most recently dialled numbers press the call history button then press the dial soft key to initiate the call. Note: you can scroll up and down through the list of recently dialled numbers View missed calls If your phone displays shows new missed call press the soft key to see the list of missed calls marked with the missed calls icon next to the number. Transferring a call You can transfer calls using either method:  Blind transfer Transfer a call to another party without waiting for the other party to answer  Consultative transfer Transfer a call to another party after speaking to the other person first To perform a blind transfer: 1. During a call, press the transfer soft key. This puts the call on hold 2. Press the blind soft key located on top of the screen. 3. Dial the number to which you want to transfer the call. To perform a consultative transfer: 1. During a call, press the transfer soft key. This puts the call on hold 2. Dial the number to which you want to transfer the call. 3. When the other party answers, press transfer to handover the call 4. If the transfer fails or you need to get the caller back, press the resume soft key to return to the original call.
  • 6. Quick Start Guide 5. Using the contact directory Dial from the directory menu  Press the home button to open the main menu  Press directories  Press on the contact you want to dial  Press the contact number you want to dial Adding a favourite contact  Press home button to open the main menu  Press directories  Press the + soft key and enter the details of your contact  Swipe your finger up the screen to scroll to favourite index  Add the number you want your contact to appear under, on your home view Adding a contact from call history  In your call history navigate to the relevant contact and press  Press save and enter the details as per steps in adding a favourite contact Update contact information  Navigate to your contact directory and press the contact you want to update  Press to update the contact’s information, then press save 6. Voicemail Setting up voicemail:  Access the voice portal by pressing on the top right corner of your home screen  Enter the default password: 0000#  Change the password to your personal four digit password and then confirm  Record your name Customise your greetings:  Access the voice portal by pressing on the top right corner of your home screen  Enter your 4 digit password  Press 1 to access your voicemail box  Then press 2 to change your busy greeting  Or press 3 to change your no answer greeting  Follow the prompts to listen, re-record, delete or save recorded greetings Remote access to your voicemail:  Dial your direct telephone number  Interrupt the greeting by pressing the * key  Enter your 4 digit password  Press 1 to access your voicemail box  Then press 1 to listen to your messages  To save the message, press #  To delete the message, press 7  To repeat the message, press 2
  • 7. Quick Start Guide 7. Call forwarding options Forward calls to another number:  Press the forward soft key on the bottom of your home screen.  Press 1 (always)  Enter the number you want to forward all calls to  Press the enable soft key. Note: to disable, press the forward soft key again and disable the always option. Forward unanswered calls to another number  Press the forward soft key on the bottom of your home screen  Press 2 (no answer)  Enter the number you want to forward unanswered calls to  Press the enable soft key. Note: to disable, press the forward soft key again and disable the no answer option. Forward calls, when busy, to another number  Press the forward soft key on the bottom of your home screen  Press 3 (busy)  Enter the number you want to forward busy calls to  Press the enable soft key. Note: to disable, press the forward soft key again and disable the busy option. Note: If you have previously entered a destination phone number for a call forward type, you do not need to re-enter it each time the call forward option is enabled. 8. Conference Calls Place a conference call:  During a call, press the confrnc soft key to open a new line and put the first party on hold.  Dial the number of the party who you want to conference in.  When the call connects, press confrnc to join the two calls in a conference. Note: the system defined conference call is limited between you and two other parties, making a 3-way conference call. 9. Ringer type or volume Adjust the Ringer volume Press the + or – volume buttons while the handset is in its cradle Adjust the handset, speaker or headset volume During an active call, press the +or – volume buttons
  • 8. Quick Start Guide  This guide is intended for users of Polycom VVX400 and Vvx500 series handsets.  Not all features listed in this guide may be available at time of installation and may be licence dependant  If you have any questions, we are here to help. Please call 1300 00 6398 or email team@nexttelecom.com.au Next Telecom Pty Ltd Level 12, 100 Miller Street North Sydney NSW 2060 p: 1300 00 6398 f: 1300 66 4447 e: team@nexttelecom.com.au abn: 77 074 728 724