
Empfohlen
Weitere ähnliche Inhalte
Andere mochten auch
Andere mochten auch (15)
Ähnlich wie Rain Barrel Brochure
Ähnlich wie Rain Barrel Brochure (14)
Kürzlich hochgeladen
Kürzlich hochgeladen (9)
Rain Barrel Brochure
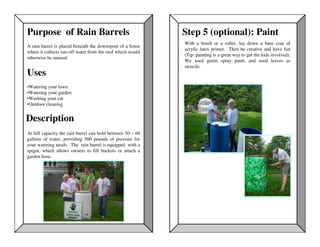
- 1. Purpose of Rain Barrels Step 5 (optional): Paint With a brush or a roller, lay down a base coat of A rain barrel is placed beneath the downspout of a home acrylic latex primer. Then be creative and have fun where it collects run-off water from the roof which would (Tip: painting is a great way to get the kids involved). otherwise be unused. We used green spray paint, and used leaves as stencils. Uses •Watering your lawn •Watering your garden •Washing your car •Outdoor cleaning Description At full capacity the rain barrel can hold between 50 – 60 gallons of water, providing 500 pounds of pressure for your watering needs. The rain barrel is equipped with a spigot, which allows owners to fill buckets or attach a garden hose.
- 2. DO-IT-YOURSELF For more information please contact NAACAP or the RAIN BARRELS Conservation Corps Northeast Avalon ACAP, Inc. The Gathering Place, 172 Military Road P.O. Box 1027, Station "C" St. John's, Newfoundland and Labrador A1C 5M3 Tel: 709-726-9673 Fax: 709-726-2764 Web: www.naacap.ca Conservation Corps Newfoundland and Labrador Suite 103, 10 Austin Street A guide prepared by the North East Avalon Atlantic St. John’s, Newfoundland Coastal Action Program and the Conservation Corps A1B 4C2 Newfoundland and Labrador www.conservationcorps.nf.ca tel: (709) 729-7262 fax: (709) 729-7270 Email: metrogreenteams@conservationcorps.nf.ca
- 3. Step 2: Cut Hole for Intake Step 3: Assemble Intake Drill pilot holes and cut a 3” hole in the lid with a Cut out a circular piece of mosquito netting that hacksaw blade (or a serrated knife) – aim for a low measures 5 inches in diameter. Attach mosquito point, but remember, the barrel will need to fit under netting to a PVC reducer with a hose clamp (Tip: your eavestrough’s downspout. cable-ties also work well). Insert the PVC reducer into the 3 inch hole in the lid of the barrel.
- 4. Step 4: Connect Tap Step 1: Gather Tools and Drill a hole in the side of the barrel, towards the bottom. Materials Remember, you will want to leave enough room for a bucket or a watering can (or the barrel can be raised on The specific tools and materials you will need will blocks). Insert the tap. On the back of the tap, apply a depend somewhat on the type of barrel you have. You bead of silicone, add the o-ring, then the washer, and then will likely need: the nut. Tighten the nut with an adjustable wrench. Your rain barrel is all done! Tools Materials Drill (and bits) Barrel Adjustable Wrench Insect Netting Serrated Blade 4`` Hose Clamp Tap Rubber O-Ring Washer 3``-4`` PVC Coupling Silicone