Cpg giving gardenprojectguide_rev112012
•
1 gefällt mir•400 views


Empfohlen
Weitere ähnliche Inhalte
Was ist angesagt?
Was ist angesagt? (18)
Andere mochten auch
Andere mochten auch (13)
Ähnlich wie Cpg giving gardenprojectguide_rev112012
Ähnlich wie Cpg giving gardenprojectguide_rev112012 (20)
Mehr von University of Minnesota Landscape Arboretum
Mehr von University of Minnesota Landscape Arboretum (9)
Cpg giving gardenprojectguide_rev112012
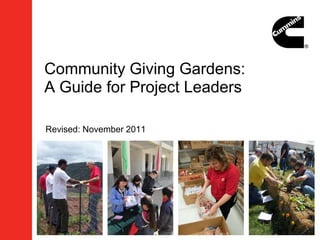
- 1. Community Giving Gardens: A Guide for Project Leaders Revised: November 2011
- 2. INTRODUCTION Leveraging employee talent. Strengthening partnerships. Improving communities. Welcome! This guide is the culmination of a Six Sigma project to create a comprehensive, global “toolkit” on how to lead a successful Community This project is Giving Garden CIT project based on the straw-bale gardening method. engaging volunteers The information in this guide was collected by the 6S team from the people who are directly involved in Giving Gardens: From the volunteers across the company. who plant the seeds to the community partner agencies that receive the --Nihal Shetty, Fridley CIT Leader plentiful harvest; from the CIT and Corporate Responsibility leaders who envision the big picture to the project leaders who implement that vision each step of the way. This guide also includes information from expert gardeners and external resources, which are listed in the bibliography at the end of the guide. As a winner of the 2010 Environmental Challenge, the Community Giving Garden is a leading example of a best-practice CIT project. The first Community Giving Garden was planted in 2010 at the Fridley (MN, USA) plant of Cummins Power Generation. In 2011, the project expanded to Cummins sites in southern Indiana: Columbus Mid-Range Engine Plant and Seymour Engine Plant. The community garden also extended into CPG Fridley’s community partner CommonBond Communities, which has set up gardens at several affordable-housing sites in Minnesota and Wisconsin. But the history of the Giving Garden doesn’t stop there. This guide has been provided as a tool to project leaders interested in planting their own seeds, wherever that may be. We hope you find this a useful The Fridley Community Giving Garden resource to make that happen. team accepts the 2010 Environmental Challenge award. 2
- 3. TABLE OF CONTENTS Table of Contents Intro to Straw-Bale Gardening………….. Page 4 Project Planning…………………………. Page 5 Installation………………………………... Page 10 Conditioning………………………........... Page 13 Planting……………………………........... Page 14 Garden Maintenance………………......... Page 16 Harvest & Delivery………………………. Page 17 Teardown…………………………………. Page 22 Appendix………………………………….. Page 24 Bibliography………………………………. Page 28 3
- 4. PROJECT PLANNING Intro to Straw-Bale Gardening How does one design the perfect garden? Let’s face it – gardening has its frustrations. Weeds, weather conditions, pool soil, moisture, pests, disease and the back-breaking work can all take its toll on even the greenest of thumbs. When the Fridley project team was considering what method of gardening to employ, they chose a lesser-known method using straw bales, which is a form of container gardening. Types of gardening methods What a straw-bale garden needs In-ground Sun Raised bed Water Container Relatively flat space Examples of Containers How a straw-bale garden works Pot or planter box A straw bale is a container held Old boot or antique urn together by string. Straw bale The bale is “conditioned” to allow the inner straw to decay. Benefits of a straw-bale garden When the straw inside the bale No tilling starts to decay, it forms a compost That’s what this is: A suitable for plant growth. form of container Less weeding gardening, but a much Fewer bugs and animals Where to find straw bales more sustainable one. Less prone to disease Local farmer --Melissa King, Fridley garden leader More capable of handling frost Garden centers Less bending Holiday displays (churches, schools) Creates its own compost Craig’s List (www.craigslist.com) or other Local Classifieds Holds moisture well Can be located almost anywhere 4
- 5. PROJECT PLANNING Identifying Community Need Need to ask… o What are the hunger issues in my local community? o Is there a need in the community for fresh produce? o What are the organizations we currently partner with through the Community Involvement Team? A grand opening ceremony was held in July o Who would benefit from fresh produce? 2011 at Glenbrook Apartments in Milwaukee, Wis., to celebrate the community garden – one of several on-site gardens at CommonBond Communities residential programs. Once the need is established, solicit information from community partners. o Set up initial meeting with program director or other agency representative to learn about the organization’s current operations, meal program(s), and need for fresh produce. (See Appendix A and B.) Select community partners First-year gardens should identify no more than three (3) community partner organizations to partner with. If multiple opportunities exist, a Cause & Effect Matrix may help to prioritize recipients. (See Appendix C.) 5
- 6. PROJECT PLANNING Identifying a garden location With community organization(s) identified to receive the produce, you can now move forward with getting a garden set up. This is where engagement with Health, Safety & Environmental (HSE) and Facilities leaders is most important. While it is true that a straw-bale garden can be placed virtually anywhere (since the soil underneath the bales is irrelevant), it does need to meet all other site requirements. Site identification 1. Is it near a water source? 2. Will it be in full sunlight for 6-8 hours a day? 3. What are the policies and laws surrounding safety and environment? 4. Is it easily accessible to employees? How visible is it to Turning lemons into lemonade. When Seymour employees and the general Engine Plant (Seymour, Ind.) project leaders discovered that public? they could not place their garden on the rooftop or on the asphalt due to environmental restrictions, they resorted to an elevated ivy bed against the building. In fact, it turned out to be We selected the site based on open an ideal location, SEP garden co-chair Renee Wilson said, due areas around the plant with easy to the high visibility as employees walk past the windows. water access and high visibility. It is There was a secondary benefit, too: “The bales are waist high very important to have the garden in and require even less effort as there is no bending required,” an easy access point so people can Wilson said. run out for short visits. --Amanda Williams, CMEP CIT Leader 6
- 7. PROJECT PLANNING Creating a Shopping List & Budget One benefit of the garden project is much of the material can be reused year after year, so the start-up expenses will go away after the first year. It is also important to check with your Facilities team and other colleagues to find out if any items (tools, hoses, etc.) can be donated. The source of the straw bales may also be willing to offer bales for free or at a discount, or deliver at no charge. Potting Materials Checklist soil Straw bales* Scoops T-Posts (6 feet) Garden clippers Post driver Wire cutters and/or Plant 14-gauge steel wire pliers Heavy garden hose markets Watering can Soaker hose(s) – UV Supply storage bin Wire cutters resistant, rubber Tomato cages Watering timer Plant markers Watering manifold Seeds* T-Post and post Tomato cage (splitter) driver Plants or seedlings* Garden staples or Garden gloves landscape pins First-aid kit Fertilizer (15M High Nitrogen 32-0-5)* Scale Garden staples 10-10-10 Fertilizer* Volunteer log & pen Potting soil* Trowel * denotes a consumable Trowels Soaker hose 7
- 8. PROJECT PLANNING Recruiting volunteers There are at least two types of volunteers needed for a project like this: short-term and long-term volunteers. Short- term volunteers are generally involved in one-day events, such as installation and teardown. Long-term volunteers are generally involved in the ongoing harvesting and delivery. Knowing this, you can target your recruitment efforts to engage the right type of volunteer. Type of volunteer Participation Recruitment ideas activities Short-Term •Installation • Engage manufacturing •Bale conditioning leaders to enlist their teams •Planting • Create an event on •Teardown MyCommunity Long-Term •Planting • Site-wide posters, e-mails •Maintenance • If second-year project, enlist •Harvest first-year volunteers to help •Delivery recruit others •Communications 8
- 9. PROJECT PLANNING Layout configurations Stars Yellow represent T- Squares Posts for represent Trellis Straw Bales Support 9
- 10. INSTALLATION Installing the bales 1. Coordinate delivery of bales. 2. Line the bales according to the selected layout. Position the bales so that the cut side is up, folded side down. The strings are horizontal (parallel to the ground), not vertical. North to south facing is best but not required. Place bales far enough apart to mow between rows and to avoid crop shading. 10
- 11. INSTALLATION Installing supporting hardware Materials needed: T-Posts 14-gauge electric fence wire Post driver and/or large mallets Wire cutters and/or pliers Installation: 1. Post or stake at the end of each row with up to five bales between posts. 2. Use 14-gauge electric fence wire to create a trellis between stakes. 11
- 12. INSTALLATION Installing the water system Materials needed: Soaker hoses Regular heavy-duty hose Faucet timer Stakes or garden staples (Wire coat hangers work well, clipped and re-shaped into an upside- down “U”) Watering manifold: Each soaker hose is connected into the regular hose for easier, more consistent watering. Installation: U-shaped wire for staking the hose in the bale 1. Place the soaker hose in a straight line or “snaked” across the row of bales directly on top of the bales. Stake the soaker hose in place. 2. Attach the timer to the faucet. 3. Attach the regular hose from the faucet to the soaker hose. Soaker hoses are “snaked” across the row of bales. 12
- 13. CONDITIONING Conditioning the bales for planting Why do we need to condition the bales? Straw bales must decompose in order to create the nitrogen-rich media for plants to grow. To do so, there is a simple 10-day formula of nitrogen-enriched fertilizer, moisture and time to force the decay process. Conditioning Schedule Fertilizer 101 Day 1: Sprinkle evenly ½ cup per bale Ammonium Nitrate The three numbers on a bag of (34-0-0) fertilizer. Then water aggressively until water fertilizer represent the proportions of three important plant nutrients: runs out bottom Nitrogen, Phosphorus and Potassium, Day 2: Water in that order. Day 3: Sprinkle ½ cup (34-0-0) evenly per bale + water. N-P-K Day 4: Water Nitrogen is the primary nutrient for plant growth. Day 5: Sprinkle ½ cup (34-0-0) evenly per bale + water. Phosphorus encourages rooting, Day 6: Water blooming and fruit production. Days 7-9: Sprinkle ¼ cup (34-0-0) evenly per bale + water. Potassium helps plants resist disease and be hardy in winter. Day 10: Sprinkle 1 cup (10-10-10) evenly per bale + water. Day 11 or 12: PLANTING! 13
- 14. PLANTING What & When to Plant The first goal was, ‘Let’s grow something.’ Then it kept growing. What to Plant --Melissa King, Fridley garden Vegetables, root corps, vine crops, leaf crops, herbs and flowers. Annuals, not leader perennials. What Not to Plant Anything that is tall, like corn, is not recommended because it becomes too top-heavy and unstable. When to Plant Cool-season crops can be planted on Day 11 or 12 after the bales are conditioned. They are hardy and can endure colder temperatures and short periods of frost. Cool- season crops include beets, broccoli, carrots, lettuce, radishes and onions. Warm-season crops can be planted after the last frost because these plants cannot handle the cold or frost. Warm-season crops include tomatoes, beans, cucumbers, zucchini, peppers, tomatoes, melons and squash. **Best Practice Ideas** • To ensure your planting aligns with the Community Partner needs, the best thing to do is consult the agency. One exercise is to have the agency rank a list of fruits, vegetables and herbs (that are available and within budget for purchase, of course). Or, have the agency survey their clients to really get their clients engaged. 14
- 15. PLANTING If people want to understand how the Companion Planting different plants work together, then you plant a variety of plants in each row. --John Pendray, Fridley garden core The theory behind companion planting is that certain team member plants can benefit others when placed next to each other. They may help by deterring pests or depositing nutrients into the soil that another plant requires to grow. This method of gardening is beneficial to the environment because it reduces the need for pesticides and fertilizers. For more on companion plants, research on the web or visit your local agricultural agency or research institution. Onions and beets **Best Practice Ideas** are planted together in one • Create a Produce Reference Guide to bale. Onions help help educate your garden volunteers. beets and other Collect information that identifies each plants by producing a strong produce in the garden, such as what odor that repels helps/hinders their growth, time it takes insects. to harvest, and photos of what a ready- to-harvest crop looks like. Keep this in a three-ring binder in the storage bin/shed. Flowers are planted in the • Clip diagrams of the bale layouts (see sides of each bale Appendix D for an example) to the trellis to attract good above each bale using plastic sleeves insects such as and clothespins. This will ensure seeds bees and are placed where they should be and butterflies, and to repel pests. will help identify plants when it comes to harvest time. 15
- 16. GARDEN MAINTENANCE While the garden grows… The seeds have been planted… now what?! Volunteers should visit the garden at least once per week to do any weeding and check on the progress of seeds and plants. Weeding. Some weeds may sprout; pull or cut as necessary. Observation. Look for possible problems or issues such as dry plants, diseases, insects, pests. Let Project Leader know of any issues. Education. Improve your vegetable knowledge by reading about the produce you've planted. Collection. Start saving those containers you buy strawberries, blueberries and tomatoes in. Bring them to the garden shed for collecting harvested produce. Also, save plastic shopping bags for harvesting and delivery of produce. **Best Practice Ideas** • Create a Produce Reference Guide to help to help educate your garden volunteers. Collect information that identifies each produce in the garden, such as what helps/hinders their growth, time it takes to harvest, and photos of what a ready-to-harvest crop looks like. Keep this in a three-ring binder in the storage bin/shed. • Plan a “garden party” that will be held during peak harvest season. Include company leadership, community partners, the general public and the media, and send invitations now! • Develop a communication campaign. Invite others to “come watch us grow.” Host a Lunch & Learn to recruit volunteers. 16
- 17. HARVEST & DELIVERY Preparing for the harvest Educate volunteers. Offer as much training as possible, especially for first-time gardeners, on plant identification, garden maintenance and the harvest. Solicit more experienced gardeners to help out first-time gardeners. Education is empowerment! Create a detailed schedule. Having a weekly schedule helps. We have that Work with community partner(s) to develop a schedule, such as deliveries once or expectation that something twice a week. For instance, designate Mondays and Thursdays as harvesting is coming. days and Tuesdays and Fridays as delivery days. Rotate each team through the --Liz Meyers, Alexandra delivery schedule. House volunteer coordinator Set up drop-off location and designate a “central depot” volunteer. Having a dedicated volunteer with the right resources – a nearby refrigerator and plenty of space to weigh and store incoming produce – is a critical part of the harvest and delivery process. Be sure to leave out a Harvest Record in case this volunteer is out of the office when a delivery arrives. I can hear something from one gardener and pass it along to another gardener and it makes us more connected. --Nanette Cubus, Fridley garden volunteer and “central depot” for harvest 17
- 18. HARVEST & DELIVERY Harvesting The harvest season can inspire many special occasions – from the very first harvest to the 100-pound milestone, to the 1000-pound milestone and beyond. With a growing season that lasts for months – how many depends on the climate – it is important to keep volunteers motivated through those “blue-thumb” days. **Best Practice Ideas!** • Constant communication. Send e-mail blasts to volunteers on a regular basis. You never know what you’re going to find. When CMEP These messages could include a Garden Leader Heather Wilson was picking radishes “Featured Produce of the Week,” a one day, she did not expect to see this five-foot-long reminder to harvest or a milestone radish at the other end. The root alone was 26 inches. announcement. • Encourage team challenges and decorations to add some flair. • Host a “garden party” or a Lunch & Learn session. With the garden in full bloom, it’s the perfect opportunity to invite employees, leadership, community partners, the media and general public to see the garden grow. Serve dishes directly from your garden! Better yet, provide garden recipes for attendees. • Provide garden tours to recruit new volunteers mid-season. Flamingos were the theme of the CMEP garden in 2011. 18
- 19. HARVEST & DELIVERY Harvesting: In Their Own Words It leverages our employee talents and skill sets. There’s a huge variety of people (at --Sue Piva, Corporate Responsibility Manager Cummins), so it really pulls the different functions together better. So you actually see people that you would never see at I’ve taught people on my team what a work; you’ve been working at the same carrot looks like or when peas should be building for years but you never see each harvested. other. So you actually get out there and find you have a common interest. --Dennis Otremba, Fridley garden --John Pendray, Fridley garden core team volunteer It gives the employees member something outside of their normal duties to attend to and watch grow. --Paul Homer, CMEP CIT “It gives people a destination. sponsor There are some people who I encourage the people who are would never leave their desk if working in the garden to try the they didn’t have a destination.” produce you are growing. You’re more inclined to try something new if you are --Melissa King, Fridley garden growing it yourself; you have an leader investment in growing it. They (the residents) go out and pick it --Melissa King, Fridley garden leader directly from the garden. It gives them a feeling that I picked it directly out of the garden. --Wally Kammeier, resident of The garden is therapeutic in a way. CommonBond Communities’ Norwood -- Kendall Bannister, SEP garden volunteer Square and garden leader 19
- 20. HARVEST & DELIVERY Delivery Ideally, delivery should happen the day after each harvest. It **Best Practice Ideas!** is important to keep in regular contact with community partners to understand if the delivery schedule and the • When bagging produce for produce they are receiving are meeting their needs, and the delivery, include the product needs of their clients. name and cooking instructions. • If the produce goes directly to Remember to invite the community partners clients, attach a tag explaining out to the garden, too! where the food came from (i.e., ‘This food was grown by Cummins employees at [Seymour Engine Plant] and is donated to you through the [Anchor House Pantry Program]. Please enjoy these healthy food choices for you and your family.’ • If the garden yields excess produce, consider freezing or canning for off-season consumption. Barbara Cummings, the food pantry coordinator at Love Chapel, visits the CMEP Giving Garden. 20
- 21. HARVEST & DELIVERY Delivery: In Their Own Words We always enjoyed getting the lettuces, anything that can be put into a salad. We have a green “I have my twins, Braeden and salad for every lunch or dinner. Tristen, who are seven years old, --Liz Meyers, Alexandra House helping me out with deliveries to volunteer coordinator Anchor House every Friday. They get so excited to see how much more we are getting every week. Tristen said to me, "Mommy, these people are so happy when we bring the food. I saw how that I delivered once last year to an lady started smiling when we elderly care facility. They were walked in the gate.” able to come down and take some vegetables to cook in their -- Kendall Bannister, SEP garden apartment’s kitchen. They were volunteer surprised to see something that didn’t come from Rainbow or Cub Foods. --Dennis Otremba, Fridley garden volunteer It’s not the company giving money to a need, but empowering the employee to make a difference and participate on even It would also be good to get the simplest level. feedback from those receiving the produce, to keep the volunteers --Renee Wilson, SEP project leader motivated. --Colby Christensen, SEP garden volunteer 21
- 22. TEARDOWN Teardown Similar to installation, work with the Facilities team on the logistics of garden teardown and removal of all material from the site. If you are reusing any equipment, document where ALL items are being stored so that you can find it next year. Composting Interested in composting the straw for use in next year’s garden? Here’s how! Research. Understand local laws regulating what organic waste can be composted , where and how. Structure. Enclosing a compost pile in a structure prevents material from blowing around and also speeds up the composting process by creating a insulation layer to warm the center of the pile. Enclosed structures are also usually required by law. Structures can be purchased at stores such as garden centers, or built manually. They should be: (1) cylindrical or cubical in shape (2) about 5 feet x 5 feet x 5 feet and (3) built from woven wire fencing and metal posts, or rot-resistant wood, wire and metal posts. Preparation. Build your compost pile in layers, beginning with 8-10 inches of organic material. Water it to the point of being moist, but not soggy. Then add a nitrogen source, such as ammonium nitrate, ammonium sulfate or an inexpensive high-nitrogen lawn fertilizer without herbicide. Sprinkle the pile with 1/3 to 1/2 cup of fertilizer per 25 square feet of surface area (a 5-foot by 5-foot bin.) You may choose to add a one-inch layer of soil or completed compost over the nitrogen to increase the number of decomposing microbes in the pile. Repeat these layers until the pile reaches a height of five feet, watering each time you add new layers. Maintenance. An active compost pile will heat to130-160° Fahrenheit. As the center cools, turn the pile to help speed decomposition (about once or twice a month). Continue to water your compost pile periodically to keep it moist but not soggy. A well-managed compost pile will be ready in two to four months in the warm season, and a pile not well tended will take a year or more. When completed, the compost pile will be about half its original height. 22
- 23. TEARDOWN Analysis VOLUNTEERS PRODUCE MATERIALS/FACILITIES • Number of volunteers • What produce grew well? • Was the location • Number of EEEC hours What did not? effective? • Volunteer recruitment – • Total yield, and yield by • Can materials and what was effective? date supplies be reused? • Volunteer feedback • If companion planting • Can materials and was done, was it effective? supplies be stored on-site? • Was employee time used effectively? What • What pests, weather improvements can be conditions, etc. were problematic? COMMUNICATION made? • How much weeding • What communication needed to be done? methods were used for COMMUNITY PARTNERS volunteer recruitment? • Community partner • How were volunteers BUDGET feedback educated and prepared? • Was the project within • Were the expectations of • What communication budget? the community partner methods were used to met? • What materials/supplies engage people (internal were purchased but not and external) to the • Was the delivery process needed? garden? effective? • How can budget be better • What improvements can • What are controlled? be made? recommendations for next year’s planting? • Is there funding and interest to expand the garden? 23
- 24. APPENDIX A Agency Interview Guide Example Community Organization: Date: Interviewer(s): Interviewee(s): Who we are and why we're here: Cummins Power Generation is a Fridley Business dedicated to improving the communities in which we live and work. Our company and employees regularly contribute to CommonBond and we are exploring ways in which we can continue to improve that partnership. The purpose of this interview is to determine if the people that use the services of CommonBond have a need for additional produce in their diets in order to meet the guidelines created by the USDA Food Pyramid. This visit is strictly to collect information it will not be shared with anyone outside of Cummins Power Generation and CommonBond. We want to talk directly to CommonBond: To get a clear picture of what some of the nutritional needs of our community are How much need is there And how those needs are currently being met Questions 1. How many clients do you serve at this location? What are their age ranges? Children: _____ 2-3 years _____ 4-8 years _____ 9-13 years _____ 14-18 years Adults: _____ 19-30 years _____ 31-50 years _____ 51+ years 2. Please describe the role of your organization as it relates to the diet of your clients. 3. How would you describe the diet of your clients? Why is it that way? 4. What types of produce do they consume? Is it primarily fresh, frozen or canned? What would they like that they don’t currently have? 5. What would be the most effective method to distribute produce to your agency? 6. Please describe your produce storage capacity. 7. Please describe how your clients might like to get involved in providing their own produce. Does your facility have the capacity to have an on-site garden? 8. Please list any other benefits you foresee from receiving fresh produce at no cost. 9. Please describe anything we may have missed or any disadvantages you perceive from receiving donations of fresh produce. 10. This is the end of the interview. Before we go, is there anything you would like to tell us? 11. Would you mind if we contacted you again in the future if we have any more questions? 24
- 25. APPENDIX B Food Pyramid Guidelines Fruit Vegetables 25
- 26. APPENDIX C Cause & Effect Matrix for Determining Community Partner Recipients (example) 26
- 27. APPENDIX D Companion Planting - Diagrams Lettuce or Peppers Swiss & Onions Chard Radishes Tomato & Carrots 27
- 28. BIBLIOGRAPHY Bibliography Brown, Deborah L. and Rosen, Carl J. Backyard Composting. University of Minnesota Extension Service, 2011. http://www.extension.umn.edu/distribution/horticultur e/DG3899.html Karsten, Joel. “Straw Bale Gardening.” Roseville, Minn. http://strawbalegardens.com 28