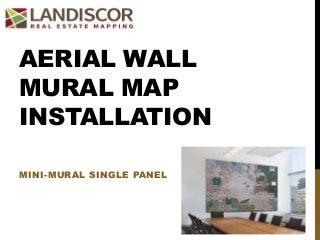
Aerial Wall Mural Installation
•Download as PPTX, PDF•
0 likes•1,577 views
How to install an aerial wall mural. The mini single panel version is outlined in this deck. https://landiscor.com.
Report
Share
Report
Share

Recommended
Recommended
More Related Content
Recently uploaded
Recently uploaded (20)
MEQ Mainstreet Equity Corp Q2 2024 Investor Presentation
MEQ Mainstreet Equity Corp Q2 2024 Investor Presentation
Housing Price Regulation Thesis Defense by Slidesgo.pptx
Housing Price Regulation Thesis Defense by Slidesgo.pptx
Call girls in Shakti Nagar Delhi~8447779280°/=@/ Short 1500 Night 6000}ESCORT...
Call girls in Shakti Nagar Delhi~8447779280°/=@/ Short 1500 Night 6000}ESCORT...
~Call Girls In Roop Nagar {8447779280}(Low Price) Escort Service In Delhi
~Call Girls In Roop Nagar {8447779280}(Low Price) Escort Service In Delhi
Low Rate Call girls in Sant Nagar{Delhi }8447779280} Service Escorts In South...
Low Rate Call girls in Sant Nagar{Delhi }8447779280} Service Escorts In South...
BPTP THE AMAARIO Luxury Project Invest Like Royalty in Sector 37D Gurgaon Dwa...
BPTP THE AMAARIO Luxury Project Invest Like Royalty in Sector 37D Gurgaon Dwa...
Escort—>Call GiRls In Mori Gate Delhi —>8447779280—Service Escorts In South D...
Escort—>Call GiRls In Mori Gate Delhi —>8447779280—Service Escorts In South D...
Low Rate ✨➥9711108085▻✨Call Girls In East Of Kailash (E.K) (Delhi)
Low Rate ✨➥9711108085▻✨Call Girls In East Of Kailash (E.K) (Delhi)
Cheap Rate ✨➥9711108085▻✨Call Girls In Connaught Place (Delhi)
Cheap Rate ✨➥9711108085▻✨Call Girls In Connaught Place (Delhi)
Low Rate ✨➥9582086666▻✨Call Girls In Gurgaon Sector 21 (Gurgaon)
Low Rate ✨➥9582086666▻✨Call Girls In Gurgaon Sector 21 (Gurgaon)
Featured
Featured (20)
How Race, Age and Gender Shape Attitudes Towards Mental Health
How Race, Age and Gender Shape Attitudes Towards Mental Health
AI Trends in Creative Operations 2024 by Artwork Flow.pdf
AI Trends in Creative Operations 2024 by Artwork Flow.pdf
Content Methodology: A Best Practices Report (Webinar)
Content Methodology: A Best Practices Report (Webinar)
How to Prepare For a Successful Job Search for 2024
How to Prepare For a Successful Job Search for 2024
Social Media Marketing Trends 2024 // The Global Indie Insights
Social Media Marketing Trends 2024 // The Global Indie Insights
Trends In Paid Search: Navigating The Digital Landscape In 2024
Trends In Paid Search: Navigating The Digital Landscape In 2024
5 Public speaking tips from TED - Visualized summary
5 Public speaking tips from TED - Visualized summary
Google's Just Not That Into You: Understanding Core Updates & Search Intent
Google's Just Not That Into You: Understanding Core Updates & Search Intent
The six step guide to practical project management
The six step guide to practical project management
Beginners Guide to TikTok for Search - Rachel Pearson - We are Tilt __ Bright...
Beginners Guide to TikTok for Search - Rachel Pearson - We are Tilt __ Bright...
Unlocking the Power of ChatGPT and AI in Testing - A Real-World Look, present...
Unlocking the Power of ChatGPT and AI in Testing - A Real-World Look, present...
Aerial Wall Mural Installation
- 1. AERIAL WALL MURAL MAP INSTALLATION MINI-MURAL SINGLE PANEL
- 2. TOOLS & SUPPLIES YOU WILL NEED Hammer 1 5/8” panel board nails (4) Level Pencil
- 3. DETERMINE THE MURAL LOCATION (1) 1) Determine the desired center point for your mural location. 2) From the center mark, mark 12” on each side using your pencil and level. 3) Draw your top mark line for the mural. (1) (2) (2)
- 4. PLACE THE MURAL (1) 1) Using the top mark line, place your mural on the wall. 2) Since most ceilings are not level, make any placement adjustments so the mural will look level within the room.
- 5. HANG THE MURAL 1) Place a nail in each top corner of the mural and drive in the nails. (See tip about nail placement) 2) Place nails in the two bottom corners of the mural. Your mural should be fully secure at this point. You may add more nails if necessary. The small nail head will be almost impossible to see within the mural. TIP: Place the nail in a portion of the mural with a similar color as the nail.