1. OWNER’S Product code: D71 M80930
UPC code: 7-6945575811-8
MANUAL
Vendor Item: C-I-138-2NGZ
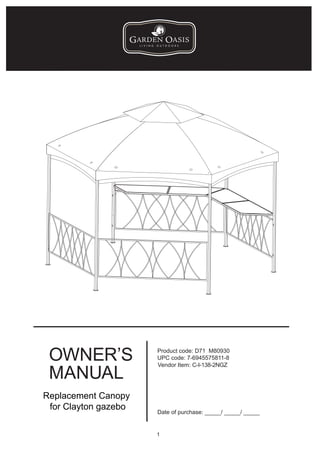
Replacement Canopy
for Clayton gazebo
Date of purchase: _____/ _____/ _____
1
2. Gazebo Replacement Canopy
PARTS
Read through all the instructions before beginning assembly. Unpack and identify all the parts.
Place them on a flat, non-abrasive surface. Assembly by two people is recommended.
A (1) B (6)
Orignal Canopy Frame New Canopy Fabric
(not included in this package)
ACCESSORIES
Use the follwing parts from your orignal gazebo Use the follwing parts from the hardware
Ca (6) Cd (1)
Bolt Assembly
Instructions Sheet
Cb (12) Ce (1)
Metal Washer Allen Wrench
Cc (6) Cf (1)
Nut Open Hex Wrench
2
3. Gazebo Replacement Canopy
Special Warning
Assemble your gazebo on a soft, non-abrasive surface to avoid damage. The gazebo is heavy. Use care when handing.
Assembly by four adults is recommended. The gazebo is not intended to be a permanent structure. Take it down during
high winds or it may be damaged.
KEEP ALL FLAME AND HEAT SOURCES AWAY FROM CANOPY FABRIC
The canopy is made with flame-resistant fabric which meets CPAI-84 specifications. It is not fireproof. The canopy fabric
will burn if left in continuous contact with flame source. The application of any foreign substance to the canopy fabric
may render the flame-resistant properties ineffective.
Ca
ASSEMBLY INSTRUCTIONS Fig. 1 Cb
A
Cb
Cc
Process of removing gazebo canopy
1 Pull the bars of gazebo frame (A) from the canopy
pockets. Remove the bars of the canopy frame out
of the brackets of the legs. See Fig. 1.
A
Fig. 2
2 Pull out the short top bars of the canopy frame (A)
from the wind vent canopy. Then remove the
canopy from the canopy frame (A). See Fig. 2.
A
Process of replacing new gazebo canopy
3 Attach the canopy fabric (B) to the assembled canopy
frame (A). Insert each top short bar into each top pocket
A
of the canopy frame. Pull down the canopy and spread
the canopy top to the location. See Fig. 3.
Fig. 3 B
3
4. Gazebo Replacement Canopy
4 Place the completed canopy onto the top of the assembled
leg posts. Make sure each crossbar is between two edges
of the canopy. Line up the holes, for each hole insert a
Ca
bolt (Ca) through a metal washer (Cb), short bar, a bracket, Fig. 4 Cb
A
another metal washer (Cb) and secure with a nut (Cc). Cb
Don’t tighten completely. Repeat procedure for the remaining Cc
five short bars. Tighten all bolts and nuts. Pull down the edge
of the canopy and insert each bar of the canopy frame (A) into
the pocket of the canopy. See Fig. 4. Affix inner edges with
Velcro tabs.
Your gazebo with new canopy is now ready for use.
CARE INSTRUCTIONS
Wash with a mild solution of soap and water; rinse thoroughly. Dry completely. Do not use bleach or solvents.
Cover furniture with outdoor furniture covers when not in use.
Please refer to part numbers when reordering
For questions or comments about product:
Call toll-free: 800-457-4652
Made in CHINA
Distributed by Sears, Roebuck and Co., Hoffman Estates, IL 60179
See our extensive assortment of outdoor living products
on-line at www.sears.com and www.kmart.com
4