2. TABLE OF CONTENTS OF CONTENTS
Th
Before using the Monitor Au
1. Introduction ................................................. 3 Fi
2. Safety Information ....................................... 4
D
3. Device Description ..................................... 5
4. Device Function .......................................... 6 S
5. How to Install the Battery ............................ 7
S
6. Specifications ............................................. 8
7. Applying The Cuff ...................................... 9 R
ht
8. Before Taking a Measurement ................. 11 Blo
9. Measure the Blood Pressure .................... 12
10. Setting the Date and Time ........................ 14
11. How to view average value ....................... 15
12. How to Maintain and store the unit........... 16
13. Limited Warranties .................................... 17
14. Troubleshooting tips ................................. 18
15. State of Health .......................................... 19
2
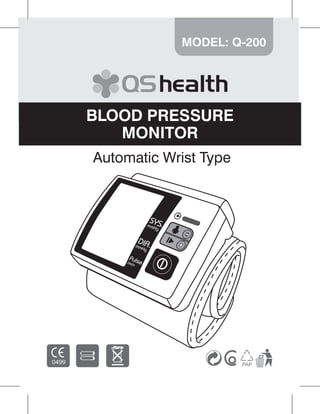
3. S 1. INTRODUCTION
Thank you for purchasing the QS HEALTH Q-200
Automatic Wrist Blood Pressure Monitor.
3 Fill in for future reference.
4
DATE PURCHASED:
5
6 SERIAL NUMBER:
7
Staple your purchase receipt here.
8
9 Register your product on-line at
http://www.qs-health.com/product-register
1 Blood Pressure Monitor CE ROHS FDA certificate
2
4
5
6
7
8
9
3
4. 2. SAFETY INFORMATION
To assure the correct use of the product, basic safety measures
should always be followed including the warnings and cautions listed
in this instruction manual.
OPERATING THE DEVICE: Self-diagnosis and treatment using
measured results may be dangerous.Follow the Instructions of your
physician or licensed healthcare provider.
DO NOT adjust medication based on measurement results from this
blood pressure monitor take medication asprescribed by your physi-
cian. Only a physician is qualified to diagnose and treat High Blood
Pressure.The monitor is not intended to be a diagnostic device.
Read all of the information in the instruction manual and any
other literature in the box before operating the unit.
This device is intended for use in measuring blood pressure and pul-
se rate in the adult population.Do not use this device on infants or
persons who cannot express their intentions.
Operate the device only as intended. Do not use the device for any
other purpose. Do not use a cellular phone near the device. It may
result in an operational failure.
Use only 1.5 V “AAA” alkaline batteries with this device. Do not use
other types of Batteries This may damagethe unit.
4
6. P
4. DEVICE FUNCTION The
rate
LED light signs the state of health. me
4-person memory zones, each 99-reading with measuring date/time
Quick and clinically accurate measure blood pressure and pulse rate B
Automatic determines ideal cuff inflation. Dis
Completely automatic, operates with the push of a button
Clear easy to read digital display Afte
Average value for last three records pre
High and Low pulse rate indicator If y
Warning heart blinker, shows that the monitor is taking measurement mm
Ultra compact design. -sta
Selectable Kpa and mmHg ste
Automatic shut off in 1 minute, power saving
Low battery indicator
Operated by 2 x1.5v “AAA” batteries.
A. When the user measures the blood pressure and intend to delete any
record. Please take the following step.*press button twice to enter
into memory display, then press button around 3 seconds that will A.
show “Clr” on LCD, then press button.
B. If the user intend to clean all records, please take the following step. B.
*Press button twice to enter into memory display, then press
button around 3 seconds that will show “CLr ” on LCD, then press
button, it will show “ ALL ”, then press button. C.
6
7. Pulse Function
There are two warning signs (PH and PL) to display with the “Pulse
rate” if the user’s pulse rate is high or low. The warning sign “PH”
means “Pulse” High The warning sign “PL” means “Pulse” Low
me
ate Battery Indicator:
Display 3 level battery capacitive indicator during measurement.
After setting, display will show “Kpa” “ON” or “OF”, you can select
pressure unit with mmHg or Kpa. ON means Kpa, OF means mmHg.
If you selected the Kpa for pressure unit, but you want to return
ent mmHg, you should move the batteries around 3 minutes, then re-
-start the device, it will be revert mmHg or you repeat the above
step again
5. HOW TO INSTALL BATTERY
any
nter
will A. Remove the battery cover in accordance
with thedirection of arrow.
ep. B. Insert 2 x “AAA” batteries in
ess accordance with the indication of
ess polarities on the batteries.
C. Slide the battery cover to close.
7
8. 6. SPECIFICATIONS
Type: Wrist Blood Pressure Monitor CA
4 Person Memory: 1 ~ 99 with data and time stamp Rea
Measurement Method: Oscillometric Method Technology lite
Measurement Range: Pressure: 30 ~ 280 mmHg
Do
Pulse Rate: 40 ~ 195 beats / min
the
Accuracy Pressure: within ±3 mmHg
Pulse rate: within ±5% of reading AP
Inflation: Automatic inflation via pump
Selectable between mmHg and Kpa 1
Auto Power off: 1 minute after last key operation
Operating Temperature: 10 ~ 40 °C (50 ~ 104 °F)
Operating Humidity: 30 ~ 85% R.H.
Storage Temperature: -20 ~ 60 °C (-4 ~ 140 °F)
Storage Humidity: 10 ~ 95% R.H.
Power supply: 2 x1.5v “AAA” Alkaline batteries
Wrist Circumference: 13.5 ~ 19.5 cm (5.31 ~ 7.68 inch)
Item Dimension: approx. 69 (L) x 63.5 (W) x 37.5 (H) mm
(2.72’ x 2.5’1.48’ inch) (excluding cuff)
Item Weight: approx. 110 g - 3.88 ozsetting the advanced
positioning sensor (APS)
NOTE: These specifications are subject to change without notice
8
9. 7. APPLYING THE CUFF
CAUTION
Read all of the information in the instruction manual and any other
literature in the box before operating the unit.
Do not use this device on infants or persons who cannot express
their intentions.
APPLYING THE WRIST CUFF
1 Roll up sleeve. Make sure
your sleeve is not rolled
up too tightly on your arm.
This may constrict the flow
of blood in your arm.
2 Wrap the cuff directly 3 Position the cuff leaving
against your skin do a clearance of appro-
not apply over clothing. ximately ½ to 1 inch
Place the cuff over your between the cuff and the
left wristwith your left bottom ofyour palm
thumb facing upward.
9
10. 4 Hold the bottom part of the cuff
and wrap it around the wrist so
it fits comfortably and securely To
aroundyour wrist.
1.
NOTE: Make sure the wrist thin
cuff does not cover the min
protruding part of the wrist
bone on the outside ofthe wrist. 2.
stre
5 Fold the remaining part APPLYING THE CUFF 3.
ON THE RIGHT WRIST
of the wrist cuff back out 4.
of the way. When taking a measurement
5.
using the right wrist position
the cuff as shown in the 6.
illustration.Refer to “Setting
for Right or Left Wrist for 7.
Measurement”. the
me
8.
phy
cat
ralr
at t
10
11. 8. Before taking a meassurement
To ensure a reliable reading follow these recommendations
1. Avoid eating, drinking alcohol, and smoking, exercising, and ba-
thing for 30 minutes before taking ameasurement. Rest for at least 15
minutes before taking the measurement.
2. Stress raises blood pressure. Avoid taking measurements during
stressful times.
3. The cuff can be applied to your left or right wrist.
4. Measurements should be taken in a quiet place.
5. Position the unit at heart level throughout the measurement.
6. Remain still and do not talk during the measurement.
7. Wait 2-3 minutes between measurements. The wait time allows
the arteries to return to the conditionprior to taking the blood pressure
measurement.
8. Keep a record of your blood pressure and pulse readings for your
physician. A single measurementdoes not provide an accurate indi-
cation of your true blood pressure. You need to take and record seve-
ralreadings over a period of time. Try to measure your blood pressure
at the same time each day forconsistency.
11
12. B.
9. MEASURE THE BLOOD PRESURE Ho
Sit
Home Guideline for Upper Limit of Normal BP C.
Systolic Blood Pressure 135 mmHg, Diastolic Blood Pressure 85
mmHg
1.Be ready to measurement
A. Turn the unit facing toward body, Place the unit on wrist with both
display panel and palm up.
B. Leave about 1 cm distance between palm and the unit.
C. Fasten the cuff securely around bare skin, seat upright and be
ready to start.
2.To start the measurement 3.
A. Sit comfortably in a chair A.
with your feet flat on the floor. val
B.
pre
C.
D.
ma
12
13. B. Hold your arm across your chest at heart level.
Hold your elbow firmly to avoid body movement.
Sit still and do not talk or move during the measurement.
C. Press button to turn on the monitor.
oth
3. Finish the measurement
A. After detecting systolic/diastolic values and pulse rate, them
values will be displayed on the LCDdisplay.
B. After themeasuring session, if you want to measure again,just
press button.
C. Press buttonto turn off the unit.
D. If you forget topress the button, the power will turn offauto-
matically after 1minutes.
13
14. 10. HOW TO SET TIME AND DATE
Generally, LCD panel displays Month/Date/Hour/Minute.Once you Thi
intend to set the time. Please operate as below: The
1. Press button at least 5 seconds, then the YEAR“2008” will 1.
appear and blinking.
2.
2. Then press to forward YEAR setting, also youcan press
to backward YEAR setting.
3. After finishing it, you can press button again. Nowyou can
adjust Month/Date/Hour and Minute as youdesired.
• After setting, display will show “Kpa” “ON” or “OF”, youcan
select pressure unit with mmHg or Kpa. ONmeans Kpa, OF means
mmHg.
14
15. 11. HOW TO VIEW AVERAGE VALUE
u This unit could offer average value for user reference automatically.
The average is decided by user’s latest 3 measurements.
l 1. Press , you can view the value for latest 3 measurements.
2. You can press to read the other person’s average values.
15
16. 12. How to maintain and store the unit
1. Use a dry, soft cloth to clean the unit, if desired, or use a cloth You
lightly dampened with tapwater. ran
ring
2. Do not use alcohol, benzene thinner or other harsh chemicals to
ce
clean the device or cuff.
3. Before measuring, please wash your hand. The
4. Do not wash or wet the cuff. obt
519
5. Keep away from direct sunlight, high humidity or dust for storage. clo
6. Do not subject the monitor to strong shocks, such as dropping the pho
unit on the floor.
QS
7. Do not submerge the device or any of the components in water. TH
8. Store the device and the components in a clean, safe location. TCO
9. Changes or modification not approved by the manufacturer will void
FO
the user
Vis
10. Warranty. Do not disassemble or attempt to repair the unit or htt
components. Ca
Note: When the unit will not be used for a long time, be sure to remo-
ve the batteries. Otherwise, thebatteries may leak damage to the unit.
16
17. t 13. LIMITED WARRANTIES
oth Your QS HEALTH Q-200 Automatic blood pressure monitor , iswar-
ranted to be free from defects in materials and workmanshipappea-
ring within 2 years from the date of purchase, when used inaccordan-
s to
ce with the instructions provided with the monitor.
The abovewarranties extend only to the original retail purchaser.To
obtain warranty service contact Customer Service by calling 1-786
519 1206 for the address of return shipping and handling fee. En-
e. close the Proof of Purchase. Include a letter, with your name,address,
the phone number, and description of the specific problem.
QS HEALTH SHALL NOT BE LIABLE FOR LOSS OF USE OR ANYO-
THER SPECIAL, INCIDENTAL, CONSEQUENTAIL OR INDIREC-
TCOSTS, EXPENSES OR DAMAGES.
oid
FOR CUSTOMER SERVICE
Visit our web site at:
or http://www.qs-health.com/technical-support
Call 1-786-519-1206
mo-
nit.
17
18. 14. TROUBLESHOOTING TIPS
Phenomenon Problems Solutions Sta
Nothing is 1.Batteries exhausted. Replace the batteries tob
displayed when 2.The polarities of with new ones (W
you press the batteries in the wrong
Power position the
“ Err P ” shown Fail to inflate 1.Please check the connection on O
on LCD display main unit and cuff. If loosened,
then connect them tightly. G
2.Please check if air tube isbroken,
then change it
“ Err 1 ”shown 1.The cuff is loosened. 1.Fasten the cuff, stant it again.
on LCD display 2.Deflate too fast 2.Please send it to service station
“ Err 2 ”shown 1.Movements occur on 1.Keep still after you press
on LCD display the wrist. Power button - 2.Please remove
2.Interference signal interfering sources from Magnetic
around the BPM. material or cell phone
“ Err 3 ”shown Incorrect measured 1.Take off your watch or cuff
on LCD display result might be placed incorrectly. Please
re-wrap cuff in correct position.
2.You might use it incorrectly, such
as measure blood pressure on child
• If correct measurement is impossible even after checking the above mentioned
points, consult at the store where you have purchased the unit or the nearest dealer
without touching the internal mechanism.
• In some very rare cases, there may be error due to the physical condition of the
person. In such cases, please consult your doctor.
• If LCD display doesn’t show anything, you may release Battery and install it again.
18
19. 15. STATE OF HEALTH
Standards for assessment of high blood pressure, without regard
tobage, have been established by the World health Organization
(WHO), as shown in the chart below. It will help users to find out
their health situation.
Optimal; Normal; High-normal; Grade 1 hypertension;
Grade 2 hypertension; Grade 3 hypertension
ned
aler
the
in.
19