1. After we had taken all the raw footage I plugged the camera in and dragged the footage to my own
work area, I did not have much structure for this but I knew what every file looked like as I could
preview them in Premire Elements.
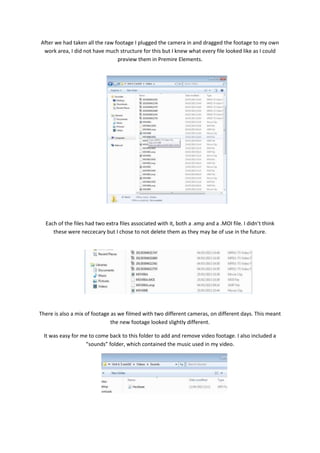
Each of the files had two extra files associated with it, both a .xmp and a .MOI file. I didn’t think
these were neccecary but I chose to not delete them as they may be of use in the future.
There is also a mix of footage as we filmed with two different cameras, on different days. This meant
the new footage looked slightly different.
It was easy for me to come back to this folder to add and remove video footage. I also included a
“sounds” folder, which contained the music used in my video.
2. It is easier to conglomerate all the footage as it makes it clear what parts you’re going to need at any
specific time, despite the fact Premire Elements does a good job of displaying which footage you
have associated with the program.
Firstly I had to set up the video; it needs to be the correct format and also has to be saved in the
correct place.
After opening Adobe Premier Elements I chose the “New Project” option from the starting screen.
I then chose the correct file name and video destination.
The first step was to put in the media I had
filmed previously. I did this by clicking “Get
Media” under the project tab. From here I
chose the from file and folder location, I could
then choose each individual clip that I wanted
to include in my project.
3. From here:
I am now able to drag each specific clip into the timeline below to create a movie.
The first clip of the movie was one that was going away from the whiteboard; instead I wanted to
reverse the clip so it went from the classroom to the whiteboard so I could show something on the
board. To do this I right clicked the clip and chose: Time Stretch…
From the next menu I clicked the Reverse Clip option; this reverses everything in the clip.
4. The next step was to extend just the end of this clip as I wanted it to hang on the whiteboard for a
little longer so I could put something on it.
At the correct time I wanted to split the clip in order to extend that specific part.
From this part I extended the clip by holding the end of the extended clip and dragging it forwards.
I wanted to move all of the clips forward to place another clip in front of them, to do this I clicked
one of the clips and then presses shift and clicked all the clips I wanted to move. This highlighted
them all and meant I could move them without interfering with the timeline and changing the video.
5. To make it easier to navigate around my video I put different elements on different lines in order to
differentiate them from one another.
As can be seen above the clips are spread out onto different lines.
The audio of my video sounded strange due to the fact lots of the clips had been sped up a fair bit,
this meant that there were lots of squeaking and popping noises coming from the shortened clips. In
order to rectify this I opened up the audio layer by clicking the spin arrow next to the audio track.
This opened up the track and let me see what the audio levels were at, in this case the audio was set
high and by holding and dragging the video clip I was able to lower the volume so you couldn’t hear
the noises.
I needed a simple intro to the video, I wanted something quite clean and plain so I decided to use a
single still image perhaps faded in. In this case I decided to create a simple graphic on Photoshop
using the original college logo as a template.
To do it I put in a picture of the original logo and converted it to black and white using the high
contrast red filter.
This filter meant that the presets of the black and white changed how the colours looked together,
and I was very happy with this black and white.
6. Next I needed to select the individual elements of the image in order to delete them and have the
simple outline of the text and the & in the middle of both Cheadle and Marple.
This was done by using the magic wand tool and deleting all the solid colours, I then needed to tidy
up the remaining lettering.
Here is the final image, it now looks much tidier and more professional and I was ready to use it in
my video.
I took the same steps as to importing the videos into Elements, and then dragged it onto the
timeline at the start of the video and extended the clip in order to fit with the rest.
7. I also wanted to make sure the video faded in at a certain length; to do this I opened the video track
after right clicking the clip and selecting fade then fade in video.
At the small diamond you can select how far into the video you want the clip to fade in, in this case it
was a fairly slow fade in so I extended the diamond quite far
Colour Correction and sharpening
Each of the video clips in my project were shot raw from a video camera, this means that the video
which I extract from the camera will be fairly plain. To make each clip sharper and more vibrant I
needed to increase the sharpness and the saturation from the presets in the video editing program.
From the ‘Edit’ section on the right I selected which effects I would like to apply to the specific clip
and then the effect was applied instantly. In this case I wanted to sharpen and AutoTone&Vibrance,
this made the clip more vibrant and sharp.
8. This is a comparison between both the before and after screenshots:
From the screenshots it is clear to see how much the video has improved. The fuzzy tint that is
usually present has disappeared, and the colours have been massively improved.
As the video is not all a single clip I had to apply this effect to each one specifically. In order to do
this I CTRL+Clicked each of the clips which selected them all at the same time, after this I then
pressed the same two affects which applied them to the whole video.
After completing the video, I now needed to render all of the clips in order to create my final movie.
This is a very simple process made easier by Adobe Premire Elements.
The first step is to press “share” at the top of the editing menu:
Before After
9. Then the next step was to click the “computer” button, located here:
After clicking this, it then brings up a secondary menu which allows you to fill in the custom settings.
On this menu I wanted to choose MPEG, then the 720p setting from the presets menu. The program
does the rest so I just needed to choose the desired file location and export the video.
After clicking the save button, I now had to wait till the video has rendered and exported.
This is the finished video folder.