SlideShare a Scribd company logo
1 of 8
Download to read offline
TEACHER MATERIALS
Page 1
MEASURING DISTANCES USING PARALLAX
BIG HISTORY PROJECT / LESSON 1.4 ACTIVITY
Note: This activity is an adaptation of material © 1992 by the Regents of the
University of California, published in the Project ASTRO Resource Notebook by
the Astronomical Society of the Pacific.
Preparation
Ensure each group of students has a complete copy of this worksheet. Optional:
Print out copies of the angle measurer sheet (page 3 of this PDF) onto card
stock.
Gather these additional materials, one per group of students:
•	 Scissors
•	 Rulers or blank sheets of 8-1/2 x 11 sheets of paper
•	 Pushpins or tacks
•	 Small piece of soft material (eraser or piece of Styrofoam or cork) for
pushpin/tack to stick into
•	 Tape measure
•	 Roll of tape
•	 A total of 5 to 6 items (a stuffed animal, plastic cup, picture frame, book,
and hat, for example) that you will place around the classroom (optional)
Purpose
In this activity, students will practice using parallax to measure an unknown
distance in the classroom.
Process
Note to teachers: You may conduct this activity in the classroom or in a larger
space like a gym or football field, if available. If you are doing this activity outside,
pick one or two large objects that won’t move in the wind and are large enough
to be seen from a distance to set up as target objects. For reference points,
students can use tree trunks, a goal post, or some other stationary object.
Tell students to get into small groups. Let them know that they are going
to practice using parallax to measure distances with tools similar to those
Aristarchus and other early astronomers would have used. Let them know they
are going to measure the distance to an object in the classroom using simple
geometry. Place the 5-6 items you have collected around the room, or if there
is time, have each group of students select a personal item that belongs to
someone in the group and place it somewhere in the room.
Distribute an angle measurer sheet, pair of scissors, pushpin or tack, and
small piece of soft material to each group. Instruct groups to carefully cut the
two pieces of the angle measuring device along the dashed lines. Have them
carefully fold along the dotted lines, and use the pushpin or tack to attach
the pointer piece to the angle measurer, with the sharp side of the pushpin/
tack sticking downwards into the soft bit of material. Check each group’s
construction, which should look something like this:
TEACHER MATERIALS
Page 2
MEASURING DISTANCES USING PARALLAX
BIG HISTORY PROJECT / LESSON 1.4 ACTIVITY
Explain to students that they will choose a target object in the classroom and measure
their distance from that object. Then, tell them that in order to measure an angle, they
need to use a reference point in the classroom. Each group will use the vertical line
formed by the corner of the room farthest from the group.
If necessary, have the groups reposition themselves around the edges of the classroom
so that each group has an unobstructed sightline of a target object that is in the general
direction of the corner of the classroom that will act as their reference point. Have each
group agree on their object and reference point, and ask each group to point to these.
Distribute the distance measuring sheets to each group, as well as the rulers or sheets
of paper, and tape. The rulers/sheets of paper will act as a baseline and should be
placed roughly perpendicular to the direction of the target object and reference point.
Tell the groups to arrange their baseline on a desktop and have them tape it down so it
won’t move.
•	 If students are using a ruler as the baseline, have them tape it down so that the
centimeter side is facing upward and outward toward the target object. Explain
that the exact length of the baseline will be used later in their calculations.
•	 If students are using a piece of paper as their baseline, have them use the long
edge of the paper as their baseline. Explain that the exact length of their baseline
will be used later in their calculations.
Explain to students that they are going to measure the angle between their target object
and their reference point twice—one measurement at each end of their baseline. Guide
them through the following steps to find the two target angles:
1.	 Place the eye arrow of the angle measurer all the way at one end of the
baseline so that the edge of the angle measurer is flat against the length of the
baseline. If students are using a ruler, have them place it where the centimeter
measurements begin, rather than at the edge of the ruler. The exact length of the
baseline will be used later in their calculations.
2.	 Line up the eye arrow, the reference arrow, and the reference point (the corner
of the room they chose earlier). All three of these must line up in one line. Once
the reference corner is lined up with the eye arrow and the reference arrow,
press the bottom scale piece of the angle measurer to the desk with one hand so
that it doesn’t move.
3.	 Pivot the target arrow on the top pointer piece so that it’s in line with both the eye
arrow and the target object. Again, all three of these must line up. The bottom
scale piece should not have moved during this step; only the pointer piece will
move.
4.	 Now, read the angle-to-target object indicated on the scale. Write this angle down
on the Distance Measuring Worksheet in the space for target angle 1.
5.	 Move the angle measurer tool all the way to the other end of the baseline ruler or
piece of paper. If students are using a ruler, have them place the eye arrow at the
end of the measurement marks, rather than at the edge of the ruler.
6.	 Repeat Steps 2 and 3 to measure target angle 2 and have them write this second
angle on the worksheet.
With these two angles calculated, students can now complete the distance measuring
chart. Have them subtract target angle 2 from target angle 1 to determine their parallax
angle. Their parallax angle corresponds to a distance in baselines as listed on the
distance measuring chart. Have students find this distance as listed on the worksheet,
and write this number in the number of baselines space. The last number they need is
the length of their baseline. If students are using a standard ruler, the baseline is 30 cm.
If they’re using the length of a sheet of paper, the baseline is 28 cm.
Students can now calculate the distance to their target object by multiplying the distance
in baselines by the length of the baseline. Have them write this distance in the distance
to target object space. If you have tape measures available, groups can check how
accurate they were by directly measuring the distance from the middle of their baseline
to their target object.
Directions: After they’ve completed their calculations, have students answer the
following two questions.
•	 How accurate were your calculations?
•	 If you had the chance to do this activity again and you wanted to increase your
accuracy, would you choose to increase or decrease the size of your baseline?
Why?
TEACHER MATERIALS
Page 3
MEASURING DISTANCES USING PARALLAX
BIG HISTORY PROJECT / LESSON 1.4 ACTIVITY
TEACHER MATERIALS
Page 4
MEASURING DISTANCES USING PARALLAX
BIG HISTORY PROJECT / LESSON 1.4 ACTIVITY
Distance Measuring
1.
Target Angle 1
Target Angle 2 -
Parallax Angle =
3.
Number of
Baselines
Length of
Baseline
x
Distance to
Object
=
2.
Parallax Angle Distance in
1 ° 57.3
2 ° 28.6
3 ° 19.1
4 ° 14.3
5 ° 11.4
6 ° 9.5
7 ° 8.1
8 ° 7.1
9 ° 6.3
10 ° 5.7
11 ° 5.1
12 ° 4.7
13 ° 4.3
14 ° 4.0
15 ° 3.7
16 ° 3.5
17 ° 3.3
18 ° 3.1
19 ° 2.9
20 ° 2.7
Name: Group Name:
STUDENT MATERIALS
Page 1
MEASURING DISTANCES USING PARALLAX
BIG HISTORY PROJECT / LESSON 1.4 ACTIVITY
Note: This activity is an adaptation of material © 1992 by the Regents of the University of California, published in the Project ASTRO Resource Notebook by the
Astronomical Society of the Pacific.
Purpose
In this activity, you will practice using parallax to measure an unknown distance in your classroom.
Process
Working in small groups, you’re going to practice using parallax to measure distances using tools similar to those Aristarchus and other early astronomers would
have used. You will measure the distance to an object in the classroom using simple geometry. Your teacher has either placed objects around the room, or your
group will select an item from that will act as your target object.
Each group will get an angle measurer sheet, pair of scissors, pushpin or tack, and a small piece of soft material. Carefully cut the two pieces of the angle
measuring device along the dashed lines. Fold along the dotted lines, and use the pushpin to attach the pointer piece to the angle measurer with the pushpin or tack,
keeping the sharp side sticking downward into the soft bit of material.
Your angle measurer should look something like this:
Name: Group Name:
STUDENT MATERIALS
Page 2
MEASURING DISTANCES USING PARALLAX
BIG HISTORY PROJECT / LESSON 1.4 ACTIVITY
With your group, choose one target object in the classroom. In order to measure an
angle, you will need to use a reference point in the classroom. Find the corner of the
room farthest from your group, and notice the vertical line made by the corner—this will
be your reference point.
If necessary, reposition your group along the edge of the classroom so that you have an
unobstructed line of sight to a target object that is in the same general direction as the
corner of the classroom that will be your reference point. With your group, decide on
the object and reference point. Be prepared to point out to your class what your target
object and reference point are.
Each group should have a worksheet for this activity. This worksheet has a distance
measuring chart, which you should locate. In addition, you’ll now get a ruler or sheet of
paper, and tape. The ruler or sheet of paper will act as a baseline and should be placed
roughly perpendicular to the direction of the target object and reference point. Arrange
your baseline flat on a desktop and tape it down so that it won’t move.
•	 If you’re using a ruler as the baseline, tape it down so that the centimeter side
is facing upward and outward toward the target object. The exact length of the
baseline will be used later in your calculations.
•	 If you’re using a piece of paper as the baseline, use the long edge of the paper
as your baseline. The exact length of the baseline will be used later in your
calculations.
Now, measure the angle between your target object and your reference point twice—
one measurement at each end of your baseline. Follow these steps to find the two target
angles:
1.	 Place the eye arrow of the angle measurer all the way at one end of the baseline
so that the edge of the angle measurer is flat against the length of the baseline. If
you’re using a ruler, place it where the centimeter measurements begin, rather
than at the edge of the ruler.
2.	 Line up the eye arrow, the reference arrow, and the reference point (the corner
of the room you chose earlier). All three of these must line up in one line. Once
the reference corner is lined up with the eye arrow and the reference arrow,
press the bottom scale piece of the angle measurer to the desk with one hand so
that it doesn’t move.
3.	 Pivot the target arrow on the top pointer piece so that it’s in line with both the eye
arrow and the target object. Again, all three of these must line up. The bottom
scale piece should not have moved during this step; only the pointer piece will
move.
4.	 Read the angle-to-target object indicated on the scale. Write this angle down on
the worksheet’s distance measuring chart in the space for target angle 1.
5.	 Move the angle measurer tool all the way to the other end of the baseline ruler
or piece of paper. If you’re using a ruler, place the eye arrow at the end of the
measurement marks, rather than at the edge of the ruler.
6.	 Repeat Steps 2 and 3 to measure target angle 2, and then write this second angle
down on the worksheet.
With these two angles calculated, you can now complete the distance measuring chart.
Subtract target angle 2 from target angle 1 to determine your group’s parallax angle.
The parallax angle corresponds to a distance in baselines, as listed on your distance
measuring chart. Find this distance as listed on the worksheet, and write this number
in the number of baselines space. The last number your need is the length of baseline.
If you used a standard ruler, the baseline is 30 cm. If you used the length of a sheet of
paper, the baseline is 28 cm.
Now you can calculate the distance to your target object by multiplying the distance
in baselines by the length of the baselines. Write this distance in the distance to target
object space. If you have a tape measure, your group can check how accurate your
measurements and calculations are by directly measuring the distance from the middle
of your baseline to your target object.
Directions: After your group has completed their calculations, answer the following two
questions:
•	 How accurate were your calculations?
•	 If you had the chance to do this activity again and you wanted to increase your
accuracy, would you choose to increase or decrease the size of your baseline?
Why?
Name: Group Name:
STUDENT MATERIALS
Page 3
MEASURING DISTANCES USING PARALLAX
BIG HISTORY PROJECT / LESSON 1.4 ACTIVITY
Name: Group Name:
STUDENT MATERIALS
Page 4
MEASURING DISTANCES USING PARALLAX
BIG HISTORY PROJECT / LESSON 1.4 ACTIVITY
Distance Measuring
1.
Target Angle 1
Target Angle 2 -
Parallax Angle =
3.
Number of
Baselines
Length of
Baseline
x
Distance to
Object
=
2.
Parallax Angle Distance in
1 ° 57.3
2 ° 28.6
3 ° 19.1
4 ° 14.3
5 ° 11.4
6 ° 9.5
7 ° 8.1
8 ° 7.1
9 ° 6.3
10 ° 5.7
11 ° 5.1
12 ° 4.7
13 ° 4.3
14 ° 4.0
15 ° 3.7
16 ° 3.5
17 ° 3.3
18 ° 3.1
19 ° 2.9
20 ° 2.7

More Related Content

Viewers also liked

Subjective Quality Assessment in Stereoscopic Video Based on Analyzing Parall...
Subjective Quality Assessment in Stereoscopic Video Based on Analyzing Parall...Subjective Quality Assessment in Stereoscopic Video Based on Analyzing Parall...
Subjective Quality Assessment in Stereoscopic Video Based on Analyzing Parall...Universidad Politécnica de Madrid
 
Razorbase vs. Parallax
Razorbase vs. ParallaxRazorbase vs. Parallax
Razorbase vs. ParallaxSherman Monroe
 
Poynter Parallax Scroll Research for SXSW
Poynter Parallax Scroll Research for SXSWPoynter Parallax Scroll Research for SXSW
Poynter Parallax Scroll Research for SXSWSara Quinn
 
Topic stereoscopy, Parallax, Relief displacement
Topic  stereoscopy, Parallax, Relief displacementTopic  stereoscopy, Parallax, Relief displacement
Topic stereoscopy, Parallax, Relief displacementsrinivas2036
 
Parallax Theme in PowerPoint
Parallax Theme in PowerPointParallax Theme in PowerPoint
Parallax Theme in PowerPointIndezine.com
 
Immersive Storytelling: Scrollytelling One-Page Parallax - a short guide how ...
Immersive Storytelling: Scrollytelling One-Page Parallax - a short guide how ...Immersive Storytelling: Scrollytelling One-Page Parallax - a short guide how ...
Immersive Storytelling: Scrollytelling One-Page Parallax - a short guide how ...Ulf Grüner: training for journalists
 

Viewers also liked (7)

Subjective Quality Assessment in Stereoscopic Video Based on Analyzing Parall...
Subjective Quality Assessment in Stereoscopic Video Based on Analyzing Parall...Subjective Quality Assessment in Stereoscopic Video Based on Analyzing Parall...
Subjective Quality Assessment in Stereoscopic Video Based on Analyzing Parall...
 
Razorbase vs. Parallax
Razorbase vs. ParallaxRazorbase vs. Parallax
Razorbase vs. Parallax
 
Poynter Parallax Scroll Research for SXSW
Poynter Parallax Scroll Research for SXSWPoynter Parallax Scroll Research for SXSW
Poynter Parallax Scroll Research for SXSW
 
Stereoscopic Parallax
Stereoscopic ParallaxStereoscopic Parallax
Stereoscopic Parallax
 
Topic stereoscopy, Parallax, Relief displacement
Topic  stereoscopy, Parallax, Relief displacementTopic  stereoscopy, Parallax, Relief displacement
Topic stereoscopy, Parallax, Relief displacement
 
Parallax Theme in PowerPoint
Parallax Theme in PowerPointParallax Theme in PowerPoint
Parallax Theme in PowerPoint
 
Immersive Storytelling: Scrollytelling One-Page Parallax - a short guide how ...
Immersive Storytelling: Scrollytelling One-Page Parallax - a short guide how ...Immersive Storytelling: Scrollytelling One-Page Parallax - a short guide how ...
Immersive Storytelling: Scrollytelling One-Page Parallax - a short guide how ...
 

Similar to Lesson 1.4 Activity: Measuring Distances Using Parallax

Pumpkin π: A Multi-Grade Math Activity
Pumpkin π: A Multi-Grade Math ActivityPumpkin π: A Multi-Grade Math Activity
Pumpkin π: A Multi-Grade Math ActivityMedia4math
 
Capstone Project Chamberlin
Capstone Project   ChamberlinCapstone Project   Chamberlin
Capstone Project ChamberlinJulie Chamberlin
 
Elcc puede #4
Elcc puede #4Elcc puede #4
Elcc puede #4rmd1843
 
Hands on Measurement for K-2 Learners
Hands on Measurement for K-2 LearnersHands on Measurement for K-2 Learners
Hands on Measurement for K-2 Learnersmflaming
 
Module-2-TLE-Dressmaking-10-Self-Learning-Material_edited (1).pdf
Module-2-TLE-Dressmaking-10-Self-Learning-Material_edited (1).pdfModule-2-TLE-Dressmaking-10-Self-Learning-Material_edited (1).pdf
Module-2-TLE-Dressmaking-10-Self-Learning-Material_edited (1).pdfBeatrizOrbitaPacanza
 
Blood spatter mini-unit
Blood spatter mini-unitBlood spatter mini-unit
Blood spatter mini-unitBlancoScience
 
Balaam & Trigonometry
Balaam & Trigonometry Balaam & Trigonometry
Balaam & Trigonometry M H
 
3.3 Star Class - Blue, White, Yellow, and Red
3.3 Star Class - Blue, White, Yellow, and Red3.3 Star Class - Blue, White, Yellow, and Red
3.3 Star Class - Blue, White, Yellow, and RedBig History Project
 
Instructional Materials in Mathematics
Instructional Materials in MathematicsInstructional Materials in Mathematics
Instructional Materials in MathematicsMary Caryl Yaun
 
Maths Class 10th Projects
Maths Class 10th ProjectsMaths Class 10th Projects
Maths Class 10th ProjectsKeril Patel
 
*Math Lesson Plan #1
*Math Lesson Plan #1*Math Lesson Plan #1
*Math Lesson Plan #1Amanda Hilton
 
Online "Experience" of Chapter 19: Measurement
Online "Experience" of Chapter 19: MeasurementOnline "Experience" of Chapter 19: Measurement
Online "Experience" of Chapter 19: Measurementshaynaynay
 
Task 1 PPM - Group 6 - Skill Development
Task 1 PPM - Group 6 - Skill DevelopmentTask 1 PPM - Group 6 - Skill Development
Task 1 PPM - Group 6 - Skill Developmentouronlinemeetings
 
Educ 2130 lesson plan for jigsaw activity
Educ 2130 lesson plan for jigsaw activityEduc 2130 lesson plan for jigsaw activity
Educ 2130 lesson plan for jigsaw activitymsceduc
 
ABSTRACT The objective of this experiment is to calculate the ar.docx
ABSTRACT The objective of this experiment is to calculate the ar.docxABSTRACT The objective of this experiment is to calculate the ar.docx
ABSTRACT The objective of this experiment is to calculate the ar.docxransayo
 
Ed 451 lesson plan 1 - spreedsheet
Ed 451 lesson plan 1 - spreedsheetEd 451 lesson plan 1 - spreedsheet
Ed 451 lesson plan 1 - spreedsheetbuki671
 
Visual Presentation of Units Presentation.pptx
Visual Presentation of Units Presentation.pptxVisual Presentation of Units Presentation.pptx
Visual Presentation of Units Presentation.pptxTamaraGrant9
 

Similar to Lesson 1.4 Activity: Measuring Distances Using Parallax (20)

Pumpkin π: A Multi-Grade Math Activity
Pumpkin π: A Multi-Grade Math ActivityPumpkin π: A Multi-Grade Math Activity
Pumpkin π: A Multi-Grade Math Activity
 
Capstone Project Chamberlin
Capstone Project   ChamberlinCapstone Project   Chamberlin
Capstone Project Chamberlin
 
Elcc puede #4
Elcc puede #4Elcc puede #4
Elcc puede #4
 
Hands on Measurement for K-2 Learners
Hands on Measurement for K-2 LearnersHands on Measurement for K-2 Learners
Hands on Measurement for K-2 Learners
 
Marshmallow algebra
Marshmallow algebraMarshmallow algebra
Marshmallow algebra
 
Module-2-TLE-Dressmaking-10-Self-Learning-Material_edited (1).pdf
Module-2-TLE-Dressmaking-10-Self-Learning-Material_edited (1).pdfModule-2-TLE-Dressmaking-10-Self-Learning-Material_edited (1).pdf
Module-2-TLE-Dressmaking-10-Self-Learning-Material_edited (1).pdf
 
Blood spatter mini-unit
Blood spatter mini-unitBlood spatter mini-unit
Blood spatter mini-unit
 
Balaam & Trigonometry
Balaam & Trigonometry Balaam & Trigonometry
Balaam & Trigonometry
 
Crystallesson
CrystallessonCrystallesson
Crystallesson
 
3.3 Star Class - Blue, White, Yellow, and Red
3.3 Star Class - Blue, White, Yellow, and Red3.3 Star Class - Blue, White, Yellow, and Red
3.3 Star Class - Blue, White, Yellow, and Red
 
Instructional Materials in Mathematics
Instructional Materials in MathematicsInstructional Materials in Mathematics
Instructional Materials in Mathematics
 
Maths Class 10th Projects
Maths Class 10th ProjectsMaths Class 10th Projects
Maths Class 10th Projects
 
*Math Lesson Plan #1
*Math Lesson Plan #1*Math Lesson Plan #1
*Math Lesson Plan #1
 
Online "Experience" of Chapter 19: Measurement
Online "Experience" of Chapter 19: MeasurementOnline "Experience" of Chapter 19: Measurement
Online "Experience" of Chapter 19: Measurement
 
Task 1 PPM - Group 6 - Skill Development
Task 1 PPM - Group 6 - Skill DevelopmentTask 1 PPM - Group 6 - Skill Development
Task 1 PPM - Group 6 - Skill Development
 
Educ 2130 lesson plan for jigsaw activity
Educ 2130 lesson plan for jigsaw activityEduc 2130 lesson plan for jigsaw activity
Educ 2130 lesson plan for jigsaw activity
 
ABSTRACT The objective of this experiment is to calculate the ar.docx
ABSTRACT The objective of this experiment is to calculate the ar.docxABSTRACT The objective of this experiment is to calculate the ar.docx
ABSTRACT The objective of this experiment is to calculate the ar.docx
 
Lesson5
Lesson5Lesson5
Lesson5
 
Ed 451 lesson plan 1 - spreedsheet
Ed 451 lesson plan 1 - spreedsheetEd 451 lesson plan 1 - spreedsheet
Ed 451 lesson plan 1 - spreedsheet
 
Visual Presentation of Units Presentation.pptx
Visual Presentation of Units Presentation.pptxVisual Presentation of Units Presentation.pptx
Visual Presentation of Units Presentation.pptx
 

More from Big History Project

Unit 9 Extension: Impacts of Interconnection
Unit 9 Extension: Impacts of InterconnectionUnit 9 Extension: Impacts of Interconnection
Unit 9 Extension: Impacts of InterconnectionBig History Project
 
Lesson 10.3 Activity: First Contact
Lesson 10.3 Activity: First ContactLesson 10.3 Activity: First Contact
Lesson 10.3 Activity: First ContactBig History Project
 
Unit 10: Are We Alone? Now Is the Time to Find Out
Unit 10: Are We Alone? Now Is the Time to Find OutUnit 10: Are We Alone? Now Is the Time to Find Out
Unit 10: Are We Alone? Now Is the Time to Find OutBig History Project
 
Unit 9: Comparing the Costs of Renewable and Conventional Energy Sources
Unit 9: Comparing the Costs of Renewable and Conventional Energy SourcesUnit 9: Comparing the Costs of Renewable and Conventional Energy Sources
Unit 9: Comparing the Costs of Renewable and Conventional Energy SourcesBig History Project
 
Lesson 9.8 Activity: Surviving on Mars (Part 1)
Lesson 9.8 Activity: Surviving on Mars (Part 1)Lesson 9.8 Activity: Surviving on Mars (Part 1)
Lesson 9.8 Activity: Surviving on Mars (Part 1)Big History Project
 
Lesson 9.6 Activity: Mapping the World
Lesson 9.6 Activity: Mapping the WorldLesson 9.6 Activity: Mapping the World
Lesson 9.6 Activity: Mapping the WorldBig History Project
 
Unit 9: Collective Learning (Part 4)
Unit 9: Collective Learning (Part 4)Unit 9: Collective Learning (Part 4)
Unit 9: Collective Learning (Part 4)Big History Project
 
Lesson 9.2 Activity: The Impact of Population Growth Essay
Lesson 9.2 Activity: The Impact of Population Growth EssayLesson 9.2 Activity: The Impact of Population Growth Essay
Lesson 9.2 Activity: The Impact of Population Growth EssayBig History Project
 
Unit 8: Guns, Germs, and Steel: The Fates of Human Societies
Unit 8: Guns, Germs, and Steel: The Fates of Human SocietiesUnit 8: Guns, Germs, and Steel: The Fates of Human Societies
Unit 8: Guns, Germs, and Steel: The Fates of Human SocietiesBig History Project
 
Lesson 8.3 Activity: Revising Investigation Writing - Sentence Starters Part 2
Lesson 8.3 Activity: Revising Investigation Writing - Sentence Starters Part 2Lesson 8.3 Activity: Revising Investigation Writing - Sentence Starters Part 2
Lesson 8.3 Activity: Revising Investigation Writing - Sentence Starters Part 2Big History Project
 
Unit 8: When Humans Became Inhumane: The Atlantic Slave Trade
Unit 8: When Humans Became Inhumane: The Atlantic Slave TradeUnit 8: When Humans Became Inhumane: The Atlantic Slave Trade
Unit 8: When Humans Became Inhumane: The Atlantic Slave TradeBig History Project
 
Unit 8: Investigating the Consequences of the Columbian Exchange
Unit 8: Investigating the Consequences of the Columbian ExchangeUnit 8: Investigating the Consequences of the Columbian Exchange
Unit 8: Investigating the Consequences of the Columbian ExchangeBig History Project
 
Lesson 8.1 Activity: An Age of Adventure
Lesson 8.1 Activity: An Age of AdventureLesson 8.1 Activity: An Age of Adventure
Lesson 8.1 Activity: An Age of AdventureBig History Project
 
Lesson 7.2 Activity: Essay - Were They Pushed or Did They Jump?
Lesson 7.2 Activity: Essay - Were They Pushed or Did They Jump?Lesson 7.2 Activity: Essay - Were They Pushed or Did They Jump?
Lesson 7.2 Activity: Essay - Were They Pushed or Did They Jump?Big History Project
 
Lesson 7.2 Activity: Social Status, Power, and Human Burials
Lesson 7.2 Activity: Social Status, Power, and Human BurialsLesson 7.2 Activity: Social Status, Power, and Human Burials
Lesson 7.2 Activity: Social Status, Power, and Human BurialsBig History Project
 
Unit 7: Greco-Roman: Early Experiments in Participatory Government
Unit 7: Greco-Roman: Early Experiments in Participatory GovernmentUnit 7: Greco-Roman: Early Experiments in Participatory Government
Unit 7: Greco-Roman: Early Experiments in Participatory GovernmentBig History Project
 
Unit 7: Agrarian Civilizations: Introduction
Unit 7: Agrarian Civilizations: IntroductionUnit 7: Agrarian Civilizations: Introduction
Unit 7: Agrarian Civilizations: IntroductionBig History Project
 

More from Big History Project (20)

Unit 9 Extension: Impacts of Interconnection
Unit 9 Extension: Impacts of InterconnectionUnit 9 Extension: Impacts of Interconnection
Unit 9 Extension: Impacts of Interconnection
 
Lesson 10.3 Activity: First Contact
Lesson 10.3 Activity: First ContactLesson 10.3 Activity: First Contact
Lesson 10.3 Activity: First Contact
 
Unit 10: Are We Alone? Now Is the Time to Find Out
Unit 10: Are We Alone? Now Is the Time to Find OutUnit 10: Are We Alone? Now Is the Time to Find Out
Unit 10: Are We Alone? Now Is the Time to Find Out
 
Unit 9: Comparing the Costs of Renewable and Conventional Energy Sources
Unit 9: Comparing the Costs of Renewable and Conventional Energy SourcesUnit 9: Comparing the Costs of Renewable and Conventional Energy Sources
Unit 9: Comparing the Costs of Renewable and Conventional Energy Sources
 
Lesson 9.8 Activity: Surviving on Mars (Part 1)
Lesson 9.8 Activity: Surviving on Mars (Part 1)Lesson 9.8 Activity: Surviving on Mars (Part 1)
Lesson 9.8 Activity: Surviving on Mars (Part 1)
 
Lesson 9.6 Activity: Mapping the World
Lesson 9.6 Activity: Mapping the WorldLesson 9.6 Activity: Mapping the World
Lesson 9.6 Activity: Mapping the World
 
Unit 9: Smith, Marx, and Keynes
Unit 9: Smith, Marx, and KeynesUnit 9: Smith, Marx, and Keynes
Unit 9: Smith, Marx, and Keynes
 
Unit 9: Collective Learning (Part 4)
Unit 9: Collective Learning (Part 4)Unit 9: Collective Learning (Part 4)
Unit 9: Collective Learning (Part 4)
 
Lesson 9.2 Activity: The Impact of Population Growth Essay
Lesson 9.2 Activity: The Impact of Population Growth EssayLesson 9.2 Activity: The Impact of Population Growth Essay
Lesson 9.2 Activity: The Impact of Population Growth Essay
 
Unit 8: Guns, Germs, and Steel: The Fates of Human Societies
Unit 8: Guns, Germs, and Steel: The Fates of Human SocietiesUnit 8: Guns, Germs, and Steel: The Fates of Human Societies
Unit 8: Guns, Germs, and Steel: The Fates of Human Societies
 
Unit 8: Investigation 8
Unit 8: Investigation 8Unit 8: Investigation 8
Unit 8: Investigation 8
 
Lesson 8.3 Activity: Revising Investigation Writing - Sentence Starters Part 2
Lesson 8.3 Activity: Revising Investigation Writing - Sentence Starters Part 2Lesson 8.3 Activity: Revising Investigation Writing - Sentence Starters Part 2
Lesson 8.3 Activity: Revising Investigation Writing - Sentence Starters Part 2
 
Unit 8: When Humans Became Inhumane: The Atlantic Slave Trade
Unit 8: When Humans Became Inhumane: The Atlantic Slave TradeUnit 8: When Humans Became Inhumane: The Atlantic Slave Trade
Unit 8: When Humans Became Inhumane: The Atlantic Slave Trade
 
Unit 8: Investigating the Consequences of the Columbian Exchange
Unit 8: Investigating the Consequences of the Columbian ExchangeUnit 8: Investigating the Consequences of the Columbian Exchange
Unit 8: Investigating the Consequences of the Columbian Exchange
 
Unit 8: Ibn Battuta
Unit 8: Ibn BattutaUnit 8: Ibn Battuta
Unit 8: Ibn Battuta
 
Lesson 8.1 Activity: An Age of Adventure
Lesson 8.1 Activity: An Age of AdventureLesson 8.1 Activity: An Age of Adventure
Lesson 8.1 Activity: An Age of Adventure
 
Lesson 7.2 Activity: Essay - Were They Pushed or Did They Jump?
Lesson 7.2 Activity: Essay - Were They Pushed or Did They Jump?Lesson 7.2 Activity: Essay - Were They Pushed or Did They Jump?
Lesson 7.2 Activity: Essay - Were They Pushed or Did They Jump?
 
Lesson 7.2 Activity: Social Status, Power, and Human Burials
Lesson 7.2 Activity: Social Status, Power, and Human BurialsLesson 7.2 Activity: Social Status, Power, and Human Burials
Lesson 7.2 Activity: Social Status, Power, and Human Burials
 
Unit 7: Greco-Roman: Early Experiments in Participatory Government
Unit 7: Greco-Roman: Early Experiments in Participatory GovernmentUnit 7: Greco-Roman: Early Experiments in Participatory Government
Unit 7: Greco-Roman: Early Experiments in Participatory Government
 
Unit 7: Agrarian Civilizations: Introduction
Unit 7: Agrarian Civilizations: IntroductionUnit 7: Agrarian Civilizations: Introduction
Unit 7: Agrarian Civilizations: Introduction
 

Recently uploaded

Student Profile Sample - We help schools to connect the data they have, with ...
Student Profile Sample - We help schools to connect the data they have, with ...Student Profile Sample - We help schools to connect the data they have, with ...
Student Profile Sample - We help schools to connect the data they have, with ...Seán Kennedy
 
4.16.24 Poverty and Precarity--Desmond.pptx
4.16.24 Poverty and Precarity--Desmond.pptx4.16.24 Poverty and Precarity--Desmond.pptx
4.16.24 Poverty and Precarity--Desmond.pptxmary850239
 
HỌC TỐT TIẾNG ANH 11 THEO CHƯƠNG TRÌNH GLOBAL SUCCESS ĐÁP ÁN CHI TIẾT - CẢ NĂ...
HỌC TỐT TIẾNG ANH 11 THEO CHƯƠNG TRÌNH GLOBAL SUCCESS ĐÁP ÁN CHI TIẾT - CẢ NĂ...HỌC TỐT TIẾNG ANH 11 THEO CHƯƠNG TRÌNH GLOBAL SUCCESS ĐÁP ÁN CHI TIẾT - CẢ NĂ...
HỌC TỐT TIẾNG ANH 11 THEO CHƯƠNG TRÌNH GLOBAL SUCCESS ĐÁP ÁN CHI TIẾT - CẢ NĂ...Nguyen Thanh Tu Collection
 
Field Attribute Index Feature in Odoo 17
Field Attribute Index Feature in Odoo 17Field Attribute Index Feature in Odoo 17
Field Attribute Index Feature in Odoo 17Celine George
 
Music 9 - 4th quarter - Vocal Music of the Romantic Period.pptx
Music 9 - 4th quarter - Vocal Music of the Romantic Period.pptxMusic 9 - 4th quarter - Vocal Music of the Romantic Period.pptx
Music 9 - 4th quarter - Vocal Music of the Romantic Period.pptxleah joy valeriano
 
4.16.24 21st Century Movements for Black Lives.pptx
4.16.24 21st Century Movements for Black Lives.pptx4.16.24 21st Century Movements for Black Lives.pptx
4.16.24 21st Century Movements for Black Lives.pptxmary850239
 
Q4-PPT-Music9_Lesson-1-Romantic-Opera.pptx
Q4-PPT-Music9_Lesson-1-Romantic-Opera.pptxQ4-PPT-Music9_Lesson-1-Romantic-Opera.pptx
Q4-PPT-Music9_Lesson-1-Romantic-Opera.pptxlancelewisportillo
 
AUDIENCE THEORY -CULTIVATION THEORY - GERBNER.pptx
AUDIENCE THEORY -CULTIVATION THEORY -  GERBNER.pptxAUDIENCE THEORY -CULTIVATION THEORY -  GERBNER.pptx
AUDIENCE THEORY -CULTIVATION THEORY - GERBNER.pptxiammrhaywood
 
Grade 9 Quarter 4 Dll Grade 9 Quarter 4 DLL.pdf
Grade 9 Quarter 4 Dll Grade 9 Quarter 4 DLL.pdfGrade 9 Quarter 4 Dll Grade 9 Quarter 4 DLL.pdf
Grade 9 Quarter 4 Dll Grade 9 Quarter 4 DLL.pdfJemuel Francisco
 
Active Learning Strategies (in short ALS).pdf
Active Learning Strategies (in short ALS).pdfActive Learning Strategies (in short ALS).pdf
Active Learning Strategies (in short ALS).pdfPatidar M
 
Concurrency Control in Database Management system
Concurrency Control in Database Management systemConcurrency Control in Database Management system
Concurrency Control in Database Management systemChristalin Nelson
 
Full Stack Web Development Course for Beginners
Full Stack Web Development Course  for BeginnersFull Stack Web Development Course  for Beginners
Full Stack Web Development Course for BeginnersSabitha Banu
 
Incoming and Outgoing Shipments in 3 STEPS Using Odoo 17
Incoming and Outgoing Shipments in 3 STEPS Using Odoo 17Incoming and Outgoing Shipments in 3 STEPS Using Odoo 17
Incoming and Outgoing Shipments in 3 STEPS Using Odoo 17Celine George
 
Virtual-Orientation-on-the-Administration-of-NATG12-NATG6-and-ELLNA.pdf
Virtual-Orientation-on-the-Administration-of-NATG12-NATG6-and-ELLNA.pdfVirtual-Orientation-on-the-Administration-of-NATG12-NATG6-and-ELLNA.pdf
Virtual-Orientation-on-the-Administration-of-NATG12-NATG6-and-ELLNA.pdfErwinPantujan2
 
Transaction Management in Database Management System
Transaction Management in Database Management SystemTransaction Management in Database Management System
Transaction Management in Database Management SystemChristalin Nelson
 
Difference Between Search & Browse Methods in Odoo 17
Difference Between Search & Browse Methods in Odoo 17Difference Between Search & Browse Methods in Odoo 17
Difference Between Search & Browse Methods in Odoo 17Celine George
 
THEORIES OF ORGANIZATION-PUBLIC ADMINISTRATION
THEORIES OF ORGANIZATION-PUBLIC ADMINISTRATIONTHEORIES OF ORGANIZATION-PUBLIC ADMINISTRATION
THEORIES OF ORGANIZATION-PUBLIC ADMINISTRATIONHumphrey A Beña
 
Food processing presentation for bsc agriculture hons
Food processing presentation for bsc agriculture honsFood processing presentation for bsc agriculture hons
Food processing presentation for bsc agriculture honsManeerUddin
 

Recently uploaded (20)

Student Profile Sample - We help schools to connect the data they have, with ...
Student Profile Sample - We help schools to connect the data they have, with ...Student Profile Sample - We help schools to connect the data they have, with ...
Student Profile Sample - We help schools to connect the data they have, with ...
 
4.16.24 Poverty and Precarity--Desmond.pptx
4.16.24 Poverty and Precarity--Desmond.pptx4.16.24 Poverty and Precarity--Desmond.pptx
4.16.24 Poverty and Precarity--Desmond.pptx
 
HỌC TỐT TIẾNG ANH 11 THEO CHƯƠNG TRÌNH GLOBAL SUCCESS ĐÁP ÁN CHI TIẾT - CẢ NĂ...
HỌC TỐT TIẾNG ANH 11 THEO CHƯƠNG TRÌNH GLOBAL SUCCESS ĐÁP ÁN CHI TIẾT - CẢ NĂ...HỌC TỐT TIẾNG ANH 11 THEO CHƯƠNG TRÌNH GLOBAL SUCCESS ĐÁP ÁN CHI TIẾT - CẢ NĂ...
HỌC TỐT TIẾNG ANH 11 THEO CHƯƠNG TRÌNH GLOBAL SUCCESS ĐÁP ÁN CHI TIẾT - CẢ NĂ...
 
LEFT_ON_C'N_ PRELIMS_EL_DORADO_2024.pptx
LEFT_ON_C'N_ PRELIMS_EL_DORADO_2024.pptxLEFT_ON_C'N_ PRELIMS_EL_DORADO_2024.pptx
LEFT_ON_C'N_ PRELIMS_EL_DORADO_2024.pptx
 
Field Attribute Index Feature in Odoo 17
Field Attribute Index Feature in Odoo 17Field Attribute Index Feature in Odoo 17
Field Attribute Index Feature in Odoo 17
 
Music 9 - 4th quarter - Vocal Music of the Romantic Period.pptx
Music 9 - 4th quarter - Vocal Music of the Romantic Period.pptxMusic 9 - 4th quarter - Vocal Music of the Romantic Period.pptx
Music 9 - 4th quarter - Vocal Music of the Romantic Period.pptx
 
4.16.24 21st Century Movements for Black Lives.pptx
4.16.24 21st Century Movements for Black Lives.pptx4.16.24 21st Century Movements for Black Lives.pptx
4.16.24 21st Century Movements for Black Lives.pptx
 
Q4-PPT-Music9_Lesson-1-Romantic-Opera.pptx
Q4-PPT-Music9_Lesson-1-Romantic-Opera.pptxQ4-PPT-Music9_Lesson-1-Romantic-Opera.pptx
Q4-PPT-Music9_Lesson-1-Romantic-Opera.pptx
 
AUDIENCE THEORY -CULTIVATION THEORY - GERBNER.pptx
AUDIENCE THEORY -CULTIVATION THEORY -  GERBNER.pptxAUDIENCE THEORY -CULTIVATION THEORY -  GERBNER.pptx
AUDIENCE THEORY -CULTIVATION THEORY - GERBNER.pptx
 
Grade 9 Quarter 4 Dll Grade 9 Quarter 4 DLL.pdf
Grade 9 Quarter 4 Dll Grade 9 Quarter 4 DLL.pdfGrade 9 Quarter 4 Dll Grade 9 Quarter 4 DLL.pdf
Grade 9 Quarter 4 Dll Grade 9 Quarter 4 DLL.pdf
 
FINALS_OF_LEFT_ON_C'N_EL_DORADO_2024.pptx
FINALS_OF_LEFT_ON_C'N_EL_DORADO_2024.pptxFINALS_OF_LEFT_ON_C'N_EL_DORADO_2024.pptx
FINALS_OF_LEFT_ON_C'N_EL_DORADO_2024.pptx
 
Active Learning Strategies (in short ALS).pdf
Active Learning Strategies (in short ALS).pdfActive Learning Strategies (in short ALS).pdf
Active Learning Strategies (in short ALS).pdf
 
Concurrency Control in Database Management system
Concurrency Control in Database Management systemConcurrency Control in Database Management system
Concurrency Control in Database Management system
 
Full Stack Web Development Course for Beginners
Full Stack Web Development Course  for BeginnersFull Stack Web Development Course  for Beginners
Full Stack Web Development Course for Beginners
 
Incoming and Outgoing Shipments in 3 STEPS Using Odoo 17
Incoming and Outgoing Shipments in 3 STEPS Using Odoo 17Incoming and Outgoing Shipments in 3 STEPS Using Odoo 17
Incoming and Outgoing Shipments in 3 STEPS Using Odoo 17
 
Virtual-Orientation-on-the-Administration-of-NATG12-NATG6-and-ELLNA.pdf
Virtual-Orientation-on-the-Administration-of-NATG12-NATG6-and-ELLNA.pdfVirtual-Orientation-on-the-Administration-of-NATG12-NATG6-and-ELLNA.pdf
Virtual-Orientation-on-the-Administration-of-NATG12-NATG6-and-ELLNA.pdf
 
Transaction Management in Database Management System
Transaction Management in Database Management SystemTransaction Management in Database Management System
Transaction Management in Database Management System
 
Difference Between Search & Browse Methods in Odoo 17
Difference Between Search & Browse Methods in Odoo 17Difference Between Search & Browse Methods in Odoo 17
Difference Between Search & Browse Methods in Odoo 17
 
THEORIES OF ORGANIZATION-PUBLIC ADMINISTRATION
THEORIES OF ORGANIZATION-PUBLIC ADMINISTRATIONTHEORIES OF ORGANIZATION-PUBLIC ADMINISTRATION
THEORIES OF ORGANIZATION-PUBLIC ADMINISTRATION
 
Food processing presentation for bsc agriculture hons
Food processing presentation for bsc agriculture honsFood processing presentation for bsc agriculture hons
Food processing presentation for bsc agriculture hons
 

Lesson 1.4 Activity: Measuring Distances Using Parallax

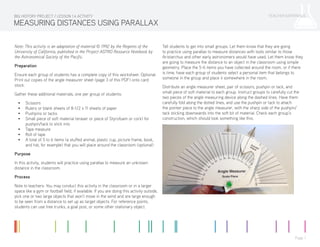
  • 1. TEACHER MATERIALS Page 1 MEASURING DISTANCES USING PARALLAX BIG HISTORY PROJECT / LESSON 1.4 ACTIVITY Note: This activity is an adaptation of material © 1992 by the Regents of the University of California, published in the Project ASTRO Resource Notebook by the Astronomical Society of the Pacific. Preparation Ensure each group of students has a complete copy of this worksheet. Optional: Print out copies of the angle measurer sheet (page 3 of this PDF) onto card stock. Gather these additional materials, one per group of students: • Scissors • Rulers or blank sheets of 8-1/2 x 11 sheets of paper • Pushpins or tacks • Small piece of soft material (eraser or piece of Styrofoam or cork) for pushpin/tack to stick into • Tape measure • Roll of tape • A total of 5 to 6 items (a stuffed animal, plastic cup, picture frame, book, and hat, for example) that you will place around the classroom (optional) Purpose In this activity, students will practice using parallax to measure an unknown distance in the classroom. Process Note to teachers: You may conduct this activity in the classroom or in a larger space like a gym or football field, if available. If you are doing this activity outside, pick one or two large objects that won’t move in the wind and are large enough to be seen from a distance to set up as target objects. For reference points, students can use tree trunks, a goal post, or some other stationary object. Tell students to get into small groups. Let them know that they are going to practice using parallax to measure distances with tools similar to those Aristarchus and other early astronomers would have used. Let them know they are going to measure the distance to an object in the classroom using simple geometry. Place the 5-6 items you have collected around the room, or if there is time, have each group of students select a personal item that belongs to someone in the group and place it somewhere in the room. Distribute an angle measurer sheet, pair of scissors, pushpin or tack, and small piece of soft material to each group. Instruct groups to carefully cut the two pieces of the angle measuring device along the dashed lines. Have them carefully fold along the dotted lines, and use the pushpin or tack to attach the pointer piece to the angle measurer, with the sharp side of the pushpin/ tack sticking downwards into the soft bit of material. Check each group’s construction, which should look something like this:
  • 2. TEACHER MATERIALS Page 2 MEASURING DISTANCES USING PARALLAX BIG HISTORY PROJECT / LESSON 1.4 ACTIVITY Explain to students that they will choose a target object in the classroom and measure their distance from that object. Then, tell them that in order to measure an angle, they need to use a reference point in the classroom. Each group will use the vertical line formed by the corner of the room farthest from the group. If necessary, have the groups reposition themselves around the edges of the classroom so that each group has an unobstructed sightline of a target object that is in the general direction of the corner of the classroom that will act as their reference point. Have each group agree on their object and reference point, and ask each group to point to these. Distribute the distance measuring sheets to each group, as well as the rulers or sheets of paper, and tape. The rulers/sheets of paper will act as a baseline and should be placed roughly perpendicular to the direction of the target object and reference point. Tell the groups to arrange their baseline on a desktop and have them tape it down so it won’t move. • If students are using a ruler as the baseline, have them tape it down so that the centimeter side is facing upward and outward toward the target object. Explain that the exact length of the baseline will be used later in their calculations. • If students are using a piece of paper as their baseline, have them use the long edge of the paper as their baseline. Explain that the exact length of their baseline will be used later in their calculations. Explain to students that they are going to measure the angle between their target object and their reference point twice—one measurement at each end of their baseline. Guide them through the following steps to find the two target angles: 1. Place the eye arrow of the angle measurer all the way at one end of the baseline so that the edge of the angle measurer is flat against the length of the baseline. If students are using a ruler, have them place it where the centimeter measurements begin, rather than at the edge of the ruler. The exact length of the baseline will be used later in their calculations. 2. Line up the eye arrow, the reference arrow, and the reference point (the corner of the room they chose earlier). All three of these must line up in one line. Once the reference corner is lined up with the eye arrow and the reference arrow, press the bottom scale piece of the angle measurer to the desk with one hand so that it doesn’t move. 3. Pivot the target arrow on the top pointer piece so that it’s in line with both the eye arrow and the target object. Again, all three of these must line up. The bottom scale piece should not have moved during this step; only the pointer piece will move. 4. Now, read the angle-to-target object indicated on the scale. Write this angle down on the Distance Measuring Worksheet in the space for target angle 1. 5. Move the angle measurer tool all the way to the other end of the baseline ruler or piece of paper. If students are using a ruler, have them place the eye arrow at the end of the measurement marks, rather than at the edge of the ruler. 6. Repeat Steps 2 and 3 to measure target angle 2 and have them write this second angle on the worksheet. With these two angles calculated, students can now complete the distance measuring chart. Have them subtract target angle 2 from target angle 1 to determine their parallax angle. Their parallax angle corresponds to a distance in baselines as listed on the distance measuring chart. Have students find this distance as listed on the worksheet, and write this number in the number of baselines space. The last number they need is the length of their baseline. If students are using a standard ruler, the baseline is 30 cm. If they’re using the length of a sheet of paper, the baseline is 28 cm. Students can now calculate the distance to their target object by multiplying the distance in baselines by the length of the baseline. Have them write this distance in the distance to target object space. If you have tape measures available, groups can check how accurate they were by directly measuring the distance from the middle of their baseline to their target object. Directions: After they’ve completed their calculations, have students answer the following two questions. • How accurate were your calculations? • If you had the chance to do this activity again and you wanted to increase your accuracy, would you choose to increase or decrease the size of your baseline? Why?
  • 3. TEACHER MATERIALS Page 3 MEASURING DISTANCES USING PARALLAX BIG HISTORY PROJECT / LESSON 1.4 ACTIVITY
  • 4. TEACHER MATERIALS Page 4 MEASURING DISTANCES USING PARALLAX BIG HISTORY PROJECT / LESSON 1.4 ACTIVITY Distance Measuring 1. Target Angle 1 Target Angle 2 - Parallax Angle = 3. Number of Baselines Length of Baseline x Distance to Object = 2. Parallax Angle Distance in 1 ° 57.3 2 ° 28.6 3 ° 19.1 4 ° 14.3 5 ° 11.4 6 ° 9.5 7 ° 8.1 8 ° 7.1 9 ° 6.3 10 ° 5.7 11 ° 5.1 12 ° 4.7 13 ° 4.3 14 ° 4.0 15 ° 3.7 16 ° 3.5 17 ° 3.3 18 ° 3.1 19 ° 2.9 20 ° 2.7
  • 5. Name: Group Name: STUDENT MATERIALS Page 1 MEASURING DISTANCES USING PARALLAX BIG HISTORY PROJECT / LESSON 1.4 ACTIVITY Note: This activity is an adaptation of material © 1992 by the Regents of the University of California, published in the Project ASTRO Resource Notebook by the Astronomical Society of the Pacific. Purpose In this activity, you will practice using parallax to measure an unknown distance in your classroom. Process Working in small groups, you’re going to practice using parallax to measure distances using tools similar to those Aristarchus and other early astronomers would have used. You will measure the distance to an object in the classroom using simple geometry. Your teacher has either placed objects around the room, or your group will select an item from that will act as your target object. Each group will get an angle measurer sheet, pair of scissors, pushpin or tack, and a small piece of soft material. Carefully cut the two pieces of the angle measuring device along the dashed lines. Fold along the dotted lines, and use the pushpin to attach the pointer piece to the angle measurer with the pushpin or tack, keeping the sharp side sticking downward into the soft bit of material. Your angle measurer should look something like this:
  • 6. Name: Group Name: STUDENT MATERIALS Page 2 MEASURING DISTANCES USING PARALLAX BIG HISTORY PROJECT / LESSON 1.4 ACTIVITY With your group, choose one target object in the classroom. In order to measure an angle, you will need to use a reference point in the classroom. Find the corner of the room farthest from your group, and notice the vertical line made by the corner—this will be your reference point. If necessary, reposition your group along the edge of the classroom so that you have an unobstructed line of sight to a target object that is in the same general direction as the corner of the classroom that will be your reference point. With your group, decide on the object and reference point. Be prepared to point out to your class what your target object and reference point are. Each group should have a worksheet for this activity. This worksheet has a distance measuring chart, which you should locate. In addition, you’ll now get a ruler or sheet of paper, and tape. The ruler or sheet of paper will act as a baseline and should be placed roughly perpendicular to the direction of the target object and reference point. Arrange your baseline flat on a desktop and tape it down so that it won’t move. • If you’re using a ruler as the baseline, tape it down so that the centimeter side is facing upward and outward toward the target object. The exact length of the baseline will be used later in your calculations. • If you’re using a piece of paper as the baseline, use the long edge of the paper as your baseline. The exact length of the baseline will be used later in your calculations. Now, measure the angle between your target object and your reference point twice— one measurement at each end of your baseline. Follow these steps to find the two target angles: 1. Place the eye arrow of the angle measurer all the way at one end of the baseline so that the edge of the angle measurer is flat against the length of the baseline. If you’re using a ruler, place it where the centimeter measurements begin, rather than at the edge of the ruler. 2. Line up the eye arrow, the reference arrow, and the reference point (the corner of the room you chose earlier). All three of these must line up in one line. Once the reference corner is lined up with the eye arrow and the reference arrow, press the bottom scale piece of the angle measurer to the desk with one hand so that it doesn’t move. 3. Pivot the target arrow on the top pointer piece so that it’s in line with both the eye arrow and the target object. Again, all three of these must line up. The bottom scale piece should not have moved during this step; only the pointer piece will move. 4. Read the angle-to-target object indicated on the scale. Write this angle down on the worksheet’s distance measuring chart in the space for target angle 1. 5. Move the angle measurer tool all the way to the other end of the baseline ruler or piece of paper. If you’re using a ruler, place the eye arrow at the end of the measurement marks, rather than at the edge of the ruler. 6. Repeat Steps 2 and 3 to measure target angle 2, and then write this second angle down on the worksheet. With these two angles calculated, you can now complete the distance measuring chart. Subtract target angle 2 from target angle 1 to determine your group’s parallax angle. The parallax angle corresponds to a distance in baselines, as listed on your distance measuring chart. Find this distance as listed on the worksheet, and write this number in the number of baselines space. The last number your need is the length of baseline. If you used a standard ruler, the baseline is 30 cm. If you used the length of a sheet of paper, the baseline is 28 cm. Now you can calculate the distance to your target object by multiplying the distance in baselines by the length of the baselines. Write this distance in the distance to target object space. If you have a tape measure, your group can check how accurate your measurements and calculations are by directly measuring the distance from the middle of your baseline to your target object. Directions: After your group has completed their calculations, answer the following two questions: • How accurate were your calculations? • If you had the chance to do this activity again and you wanted to increase your accuracy, would you choose to increase or decrease the size of your baseline? Why?
  • 7. Name: Group Name: STUDENT MATERIALS Page 3 MEASURING DISTANCES USING PARALLAX BIG HISTORY PROJECT / LESSON 1.4 ACTIVITY
  • 8. Name: Group Name: STUDENT MATERIALS Page 4 MEASURING DISTANCES USING PARALLAX BIG HISTORY PROJECT / LESSON 1.4 ACTIVITY Distance Measuring 1. Target Angle 1 Target Angle 2 - Parallax Angle = 3. Number of Baselines Length of Baseline x Distance to Object = 2. Parallax Angle Distance in 1 ° 57.3 2 ° 28.6 3 ° 19.1 4 ° 14.3 5 ° 11.4 6 ° 9.5 7 ° 8.1 8 ° 7.1 9 ° 6.3 10 ° 5.7 11 ° 5.1 12 ° 4.7 13 ° 4.3 14 ° 4.0 15 ° 3.7 16 ° 3.5 17 ° 3.3 18 ° 3.1 19 ° 2.9 20 ° 2.7