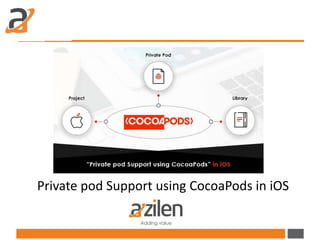
Private pod support using cocoa pods in ios
•Als PPTX, PDF herunterladen•
0 gefällt mir•148 views

In this presentation, we have explained step by step Guide for adding private pod support in iOS using CocoaPods. Private pods make managing your project much simpler. It saves lot of effort and time when dealing with dependencies in your project. Also we can use this pod privately for internal access.

Empfohlen
Weitere ähnliche Inhalte
Was ist angesagt?
Was ist angesagt? (16)
Ähnlich wie Private pod support using cocoa pods in ios
Ähnlich wie Private pod support using cocoa pods in ios (20)
Mehr von Azilen Technologies Pvt. Ltd.
Mehr von Azilen Technologies Pvt. Ltd. (20)
Kürzlich hochgeladen
Kürzlich hochgeladen (20)
Private pod support using cocoa pods in ios
- 1. Private pod Support using CocoaPods in iOS
- 2. Introduction You might have read our recent blog on SDUI framework that introduced the concept of UI presentation made easier by eliminating the need of frequent updates for an application by the end user. It is built and deployed with just “one code base logic” and is applicable for each of the UI releases, while eliminating the need of frequent updates for the Apps. The framework can be of use in other iOS projects; hence it requires lot of effort in manually installing and building it. Therefore to overcome this challenge the team explored various options and found a more centralized solution ‘CocoaPods’ a dependency manager tool that provides a standard format for managing the external libraries. It has over 27 thousand libraries and is used in over 1.6 million apps and can help scale any project elegantly. It focuses on source-based distribution of third party code and automatic integration into Xcode projects.
- 3. The dependencies for projects are specified in a single text file called a Podfile. CocoaPods will resolve the dependencies between libraries fetch the resulting source code then link it together in the XCode workspace to build your project. Getting Started
- 5. Follow the below steps to add private pod in your iOS project: By default CocoaPods uses public specification repository (https://github.com/CocoaPods/Specs).If you want to make your pod private then you have to create a private repository with the same structure and upload your pod specification file to private repository. Installation • CocoaPods is built with Ruby and it will be installable with default Ruby available on Mac OS. Using the default Ruby install will require you to use “sudo” when installing gems. • Follow the below command to install Cocopods in your system: 1 $ sudo gem install cocoapods
- 6. • Create a pod specification file (.podspec file) • Specification file contains detailed information about the repository. When you execute pod install or pod update command, CocoaPods will look into specification file and clone the repository. Follow the below steps: 1. Create specification for your pod using the following command Example : pod spec create AppUtils Create and Use CocoaPods in your iOS project 1 $pod spec create <your_pod_name>
- 7. • Create a pod specification file (.podspec file) • Specification file contains detailed information about the repository. When you execute pod install or pod update command, CocoaPods will look into specification file and clone the repository. Follow the below steps: 1. Create specification for your pod using the following command Example : pod spec create AppUtils Create and Use CocoaPods in your iOS project 1 $pod spec create <your_pod_name>
- 8. 2. Edit the AppUtils.podspec • Name – name of pod • Version – current version for specification. your repo must contain a tag for version number. i.e. 1.0,1.2 etc. • Summary – short summary of project • Description – details description of project • Homepage – homepage of project • License – license for project i.e – MIT,BSD • Author – author of repo • Platform – OS and version used in repo. i.e. iOS 9.0 • Source – source url of repo • source_files – files to be included in pod. • exclude_files – files to be not included in pod. • Dependency – any third party dependency for pod project
- 9. 3. Now verify pod spec file by using the following command Solve any error or warning that occur while validating .podspec file 1 $ pod spec lint AppUtils.podspec
- 10. 4. Now upload specification file to specification repository. CocoaPod is using a public specification repository for public pod. If you want to create a private pod than you have to create your own private specification repo that will store .podspec file.
- 12. Each version has its own specification file. Specification repository can have more than one specification.
- 13. 5. Specifying private pod in Podfile. If you are using private pod than you have to tell CocoaPod, where the specification repository is located by specifying source at top of the Podfile If you don’t want to create a private specification repository then create a same specification structure in your project and specify the repository URL as source in Podfile. 1 Source “<path of your private specification git repo> " 2 pod 'AppUtils', '~> 1.0'
- 15. Benefits CocoaPods is widely used for third party dependency integration. Below are few benefits of using CocoaPod over manually managing Dependencies in your project. • Managing dependencies in your code is simplified by downloading all of them when you run pod install/update command. • Manually added dependency may not be easy for another coder to locate it. Pods ensure that one can easily go through the pod scheme or a Podfile to understand all the dependencies used in the project. • Task of replacing a library with a new version is simplified with CocoaPods automatically by using only one command instead of manually deleting old files and adding new ones,
- 16. Conclusion Private pods make managing your project much simpler. It saves lot of effort and time when dealing with dependencies in your project. Also we can use this pod privately for internal access.
- 18. Thanks You www.azilen.com Let us know if you have any Question! info@azilen.com | +1-972-325-2243