
Empfohlen
Weitere ähnliche Inhalte
Was ist angesagt?
Was ist angesagt? (20)
Andere mochten auch
Andere mochten auch (20)
Ähnlich wie Embedded system programming using Arduino microcontroller
Ähnlich wie Embedded system programming using Arduino microcontroller (20)
Kürzlich hochgeladen
Kürzlich hochgeladen (20)
Embedded system programming using Arduino microcontroller
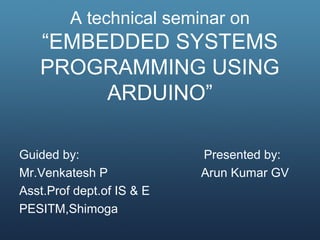
- 1. A technical seminar on “EMBEDDED SYSTEMS PROGRAMMING USING ARDUINO” Guided by: Presented by: Mr.Venkatesh P Arun Kumar GV Asst.Prof dept.of IS & E PESITM,Shimoga
- 2. Contents Introduction Architecture Arduino example Serial communication Arduino software interface Programming the arduino Programming examples Applications
- 3. Introduction • An embedded system is a computer system with a dedicated function within a larger mechanical or electrical system, often with real-time computing constraints. • Arduino is an open-source electronic prototyping platform based on a simple i/o board and a development environment for writing software for the board. • It is an open source hardware, any one can get the details of its design and modify it or make his own one himself.
- 4. Architecture
- 5. • X1 – External power supply or a battery.The power requirement for ARDUINO is 9 to 12V DC,250mA or more,2.1mm plug
- 6. • USB – We can connect arduino to our PC for programmming the arduino through USB.
- 7. • IC1 – Microcontroller ICSP – In circuit serial programming AREF – Analog reference pin GND – Digital ground 2-13 Digital pins 0-1(TX/RX) – Serial In/Out S1 – Reset button 0-5 Analog Input pins Power and Ground pins
- 9. Serial communication • The communication between the computer and the arduino is ‘serial’ , because data is broken down into bits, each sent one after the other down a single wire.
- 10. •The Arduino board can communicate at various “baud rates”. A baud is a measure of how many times the hardware can send 0’s and 1’s in a second •The baud rate must be set properly for the board to convert incoming and outgoing information to useful data. •If your receiver is expecting to communicate at a baud rate of 2400, but your transmitter is transmitting at a different rate, the data you get will not make sense. •To set the baud rate, use the following code: void setup() { Serial.begin(9600); } •Other standard baud rates available on most Arduino modules include: 300, 1200, 2400, 4800, 9600, 14400, 19200, 28800, 38400, 57600, or 115200
- 11. Arduino software interface • The software used by the arduino is Arduino IDE. • The open-source Arduino Software (IDE-Integrated development Environment) makes it easy to write code and upload it to the board. • IDE runs on Windows, Mac OS X, and Linux. The environment is written in Java. • It is designed to introduce programming to artists and other newcomers unfamiliar with software development. It includes a code editor with features such as syntax highlighting, brace matching, and is also capable of compiling and uploading programs to the board with a single click. • The code for the arduino is written in C/C++. The Arduino IDE comes with a C/C++ library , which makes many common input/output operations much easier.
- 12. •The main headings are “File” “Edit” “Sketch” “Tools” “Help” and several shortcut icons beneath “Verify”, “Upload”, “New”, “Open”, “Save”, and at the far right, the “Serial Monitor”.
- 15. Programming the arduino • Arduino programs only need to define two functions to make a runnable program: void setup() {} – a function run once at the start of a program that can initialize settings. This section is widely used to initialize variables, pin modes, set the serial baud rate and related. void loop() {} – a function called repeatedly until the board powers off. This section is the part of the code that loops back onto itself and is the main part of the code. • Programmers are free to add subroutines using the same syntax: void subroutinename() {} • We will use same data types, operators, statements as we use in C programming language.
- 16. •Almost every line of code needs to end with a semicolon ‘;’. •To write single line comments in the code, type two back slashes followed by the text. •To write multi-line comments, start the comment with /* and end with */. •The Arduino language is case sensitive. • The following code represents the minimum in order for a program to compile:
- 17. Programming examples To output a value on arduino window
- 18. Blink LED programm •In this program the Led should blink (turn on) for 1 second and after 1 second the LED should turn off for 1 second,and hence this cycle repeats.
- 19. • pinMode(13, OUTPUT); • digitalWrite(13, HIGH); • digitalWrite(13, LOW); • delay(1000);
- 20. set up() function is executed only once at the start
- 22. Applications Light control Motor control Home Automation Robotics Networking Scientific equipment Arduinome ArduinoPhone Water quality testing platform
- 23. Conclusion • Over the years, Arduino has went out to become a huge success . By using the arduino we can put together both software and hardware. Arduino will be the most useful interface between the software and the hardware in future. In summary, this arduino concept is a good software hardware co-design practice.
- 24. References http://www.arduino.cc-Arduino Official webpage http://en.wikipedia.org/wiki/Arduino-wikipedia http://www.arduino.cc/playground/Projects/ArduinoUsers http://www.arduinothedocumentary.org http://www.arduinothedocumentary.org http://arduino.cc/en/Tutorial/WebServer http://slideshare.com/Arduino section programming slides "Programming Arduino Getting Started with Sketches" McGraw-Hill. Embedded Microcontroller Systems: real time interfacing Jonathan Valvano, 2006 Beginning arduino by Michael McRobert
- 25. Thank you