Arduino Day 1 Presentation
•Als PPTX, PDF herunterladen•
5 gefällt mir•3,498 views

I have prepared this presentation when I was studying at Western Region Campus. I along with some of my friends conducted training for junior students on Arduino. Its day-1 presentation.

Empfohlen
Weitere ähnliche Inhalte
Was ist angesagt?
Was ist angesagt? (20)
Andere mochten auch
Andere mochten auch (20)
Ähnlich wie Arduino Day 1 Presentation
Ähnlich wie Arduino Day 1 Presentation (20)
Mehr von Yogendra Tamang
Mehr von Yogendra Tamang (19)
Kürzlich hochgeladen
Kürzlich hochgeladen (20)
Arduino Day 1 Presentation
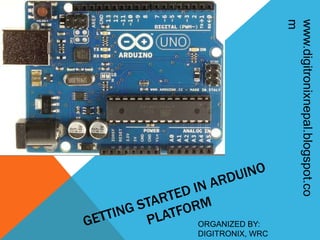
- 2. INTRODUCTION TO ARDUINO - Open Source Hardware and Software Platform -Self Contained Computer in an IC INTEL 286 Arduino Diecimila
- 3. INTRODUCTION TO ARDUINO - Based on AVR microcontrollers that are widely popular for their RISC architecture, hight flash memory, inbuilt different features - Arduino Uses C programming(E A S Y)……
- 4. WHY ARDUINO? - Inbuilt ADC, Serial Interface, PWM, IO pins -Programming so easy……(Can be used available libraries) -Open Source platform
- 5. HARDWARE I/O PORTS ========== 14 PWM ========== 6 Analog ========== 6 8 bit =======256 10 bit ======= 1023 ADC
- 8. SOFTWARE REQUIREMENTS Arduino IDE Serial Port Driver
- 9. ARDUINO PROGRAMMING BASICS Void setup() { //your initialization code } GLOBAL Variables 1. 2. Void loop() { //your repeating code } 3.
- 10. int ledInput=13; //pin 13 is ledIput EXAMPLE:
- 11. Example void setup() { Serial,begin(9600); //serial port baudrate=9600bps pinMode(ledInput, output); // configure pin 13 as output port }
- 12. void loop() { digitalWrite(ledinput, high); //led=on delay(500); digitalWrite(ledinput, low); //led=off delay(500); }
- 13. Functions used in setup()1. pinMode(13, OUTPUT); makes pin 13 as output pin 2. pinMode(8, INPUT); makes pin 8 as input pin 3. Serial.begin(9600) ; starts serial communication with Baudrate 9600 Functions used in loop() 1. digitalWrite(13, HIGH): makes pin 13 high ie pin13=ON; 2. delay(500) : delays system by 500 ms. 3. analogRead() : Reads analog value 4. analogWrite() : writes anlog value(PWM) 5. Serial.print() : Prints at serial monitor 6. Serial.println() : prints at serial monitor with line break
- 14. EXERCISE: Write the code and implement: 1. One led blinking at each 1s. 2. A led with ON time=600ms and OFF time=900ms 3. You are given 6 leds. Now light these leds in different patterns
- 15. int ledPin = 13; // choose the pin for the LED int inPin = 2; // choose the input pin (for a pushbutton) int val = 0; // variable for reading the pin status void setup() { pinMode(ledPin, OUTPUT); // declare LED as output pinMode(inPin, INPUT); // declare pushbutton as input } void loop() { val = digitalRead(inPin); // read input value if (val == HIGH) { // check if the input is HIGH (button released) digitalWrite(ledPin, LOW); // turn LED OFF } else { digitalWrite(ledPin, HIGH); // turn LED ON } }
- 16. --What is debounce ? --Bistable Switch
- 17. REVIEW: ARDUINO INTRODUCTION ARDUINO PROGRAMMING LED BLINKING BUTTON INTERFACING