
Empfohlen
Weitere ähnliche Inhalte
Andere mochten auch
Ähnlich wie W 1 Deliverable Sample
Ähnlich wie W 1 Deliverable Sample (20)
W 1 Deliverable Sample
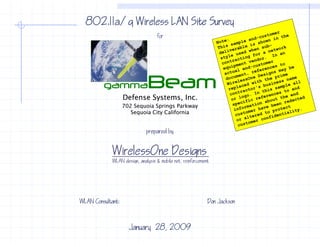
- 1. 802.11a/g Wireless LAN Site Survey for for gamma Beam Defense Systems, Inc. 702 Sequoia Springs Parkway Sequoia City California prepared by WirelessOne Designs WLAN design, analysis & mobile net reinforcement WLAN Consultant: Don Jackson January 28, 2009
- 2. Using This Report This report was designed to be viewed with Adobe Reader. The following “Table of Contents” pages are intended as a navigation tool to quickly identify and display the desired location detail. The embedded hyperlinks support this navigation function Start detail function. from the Table of Contents, then click on any hyperlinked item to view the linked page, and click “Return to table of contents” to come back and select another destination. Or, view the pages serially by scrolling up or down. The “WLAN Design” and “Location Detail“ pages are intended to be printed out for the cable drop and AP installers, but they also include hyperlinks to return to the corresponding floor plan for that location. If the customer wishes to use this format for As-Built WLAN documentation, WirelessOne Designs can be engaged to replace the Location Detail photos with As-Built photos, the Propagation Testing Plots replaced with post-install as measured validation plots, and the Spectrum Analysis/Protocol Analysis reports replaced with reports based on current conditions. WirelessOne Designs can also arrange to return, on request to identify or locate specific interferers or “rogues” that may appear later.
- 3. Table of Contents Click on an item below to view that page TITLE PAGE 1 USING THIS REPORT 2 TABLE OF CONTENTS 3 GOALS 4 ASSUMPTIONS 5 STRATEGY & RESULTS SUMMARY 6 OVERHEAD SITE ORIENTATION 7 EQUIPMENT RECOMMENDATIONS LIST 8 AP, CONTROLLER AND MANAGEMENT RECOMMENDATIONS 9 ENCLOSURE RECOMMENDATION 10 ANTENNA RECOMMENDATIONS 2.4 gHz external omni directional dipole 11 5 gHz external omni directional dipole 12 2.4 gHz 6 dBi directional patch 13 2.4 2 4 gHz 8 5 dBi directional patch 8.5 14 SPECTRUM ANALYSIS Overview 15 RF General Analysis 16 RF Detail, Spectrum Traces 17 RF Detail, Interferers List 18 RF Detail, Non-802.11 Interferer Analysis 19-23 RF Detail, 802.11 Interferer Analysis 24-25 PROTOCOL ANALYSIS Overview 26 Detail 27 PROPAGATION TESTING Overview: 28 Selected Key Results, Loc A Results 29 Selected Key Results, Loc B 30 Selected Key Results, Loc G 31 WLAN DESIGN: AP LOCATIONS 32 LOCATION DETAIL Equipment Listing 33 A: Production Alley 34 B: Production All B P d i Alley 35 C: Electrical Assembly 36 D: Engineering Hallway 37 E: Machine Shop Hallway 38 F: MRS Hallway 39 G: Stock Room 40 H: Stock Room 41 I: Loading Dock 42 J: Below Deck Stock Room 43 K: Above Deck Stock Room 44
- 4. Goals Site Survey Goals: This document is intended to provide the customer with a design for an upgraded “Lightweight” AP Wireless Local Area Network (WLAN) proposed at the customer s existing Lightweight customer’s ground floor site located at 702 Sequoia Springs Parkway, in Sequoia City California. This WLAN will provide 802.11a/b/g wireless VoWLAN ready coverage using the customer preferred Cisco 1240a/g Wireless Access Point (WAP) in “lightweight” mode along with controllers, for all customer specified indoor work areas of the ground floor, and stock room deck. It is i d k I i primarily i il intended to support 802 11b/ d d d 802.11b/g data-only wireless b l i l barcode scanners, and d d mobile wireless label printers at this time. Additionally, the customer requires this WLAN to be designed to accommodate a probable future deployment of VoWLAN push-to-talk telephones, and 5 gHz frequency band client devices. Draft a preliminary design based on customer provided floor p p y g p plan, using advanced g computer modeling and simulation techniques for complete, reliable, data and VoWLAN ready RF saturation at -67 dBm or better throughout the in-scope area. Refine the preliminary design parameters using observations and field measurements of RF signal penetration and coverage area at key representative locations. Identify any required WAP antenna, controller wireless mgmt software and WAP, antenna controller, enclosure/accessory types, locations, numbers, mounting requirements and recommendations, for upgraded WLAN infrastructure equipment along with new Ethernet cable drop locations for the proposed project. Use RF spectrum analysis and wireless protocol analysis to identify and report current or foreseeable effects of any existing significant i t f bl ff t f i ti i ifi t internal or external RF i t f l t l interference or noise i found during the site survey that could impair performance in the new WLAN. Return to table of contents
- 5. Assumptions Assumptions: In order to accommodate an extremely short project timeline, the customer may have already begun implementing some of the recommendations noted here, while this document is being drafted. The Th customer requires a WLAN design t support th use of 802.11b/g data clients at this t i d i to t the f 802 11b/ d t li t t thi time, and VoWLAN phones and 5 gHz clients later. Target minimum signal strength design threshold conforms to the Cisco VoWLAN guideline of -67 dBm or better in all areas of scope. The customer will use “LightWeight” AP technology with a pre-existing local WLC (controller) to configure and manage the upgraded WLAN. All hard walls will continue to conform to the provided campus plan diagrams used in this survey, for the expected life of this network. No additional authorized or unauthorized 802.11, 802.11b, 802.11a, 802,11g, or 802.11n APs, clients, peer networks or other transmitters or emitters (like Bluetooth applications, cordless phones/headsets, microwave ovens or other non 802.11 devices using the 2 4 gHz phones/headsets non-802 11 2.4 and/or 5.2 gHz frequency bands) will be installed or used in or near the in-scope area for the expected life of this network. No layer 3 client roaming is required at this time. The effects of non-WLAN RF emitters, obstructions, reflectors and refractors like furnishings, partitions, equipment machinery partitions equipment, machinery, stored stock and other undefined items that may be moved or added after the site survey can not be accounted for, and may negatively effect WLAN performance. RF noise & interference in the 2.4 & 5.2 gHz band from nearby and internal sources not a part of the proposed WLAN will remain constant or decrease in severity. There is no requirement for concentrations of greater than 25 wireless data clients, or more than 8 VoWLAN phones on any single AP. All APs specified in this document will connect to the customer network via Cisco Catalyst switch based power over-Ethernet (PoE), or mid-span power injectors, so no local AC power for APs is required. Return to table of contents
- 6. Strategy & Results Summary Strategy: Use floor plan diagram to model projected RF propagation using computer simulation. Base a preliminary WLAN design on this data, then adjust that design per on-site observations, RF propagation testing and measurement. Design for 802.11a/b/g clients, including VoWLAN phones. Use the Cisco 1242a/g LWAP throughout, with a pre-existing local WLC along with Cisco WCS management system to maintain optimum performance with minimum administration labor. Use external 2.4 and 5.2 gHz low gain omni directional, and some medium gain directional antennas throughout the site. Wall and overhead bracket mount the APs, with optional locking steel enclosures in areas where physical security may be a benefit. p y y y Results: WirelessOne Designs testing, modeling, simulation and analysis found the size, shape, design, construction, and obstructions on the customer campus should allow for good coverage within the minimum design threshold target of -67 dBm or better signal strength at 36 MB connect rate and 67 strength, 10% network load or less, when this recommended design is implemented exactly as described in this document. The ambient RF interference & noise level is moderate to high in all areas of the floor. This interference is from an unusually wide variety of sources. Please see the spectrum analysis section for details. Modern wireless broadband communications standards like 802.11a/b/g/n 802 11 /b/ / are quite resilient and resistant to interference. High utilization in the 2 gHz b d l d f h l h 2.4 band was present from some applications during the spectrum analysis sweep. Common-channel interference from pre-existing internal WLAN sources is present, but much or perhaps all of this will disappear when the old WLAN is decommissioned and replaced by a properly channelized network. But if not, this interference can increase error rates and retransmissions, so corresponding , , p g throughput could decrease, as utilization in the new WLAN becomes heavy. WirelessOne Designs recommends careful periodic review of error/retransmission statistics as well as other alerts at the WLAN management level (WCS) to identify any problem trends early. Return to table of contents
- 7. Overhead Site Orientation Mechanical Build gammaBeam ufacturing Parts St Parts St Manu torage torage Return to table of contents
- 8. Equipment Recommendation List Does not include Ethernet drop cabling and other wired infrastructure such as PoE Catalyst switches/blades, which are cabling, switches/blades outside the scope of this document because they have already been procured by the customer and are in service. Source Cat # Quan Description 4400 Series WLAN Controller for up to 25 Lightweight APs Cisco AIR‐WLC4402‐25‐K9 1 Systems WLAN management software WCS Base v3.0 up to 50 Lightweight AP Cisco AIR‐WCS‐WB‐1.0‐K9 1 Win2K/2003Server Systems 802.11ag LWAP with external antennas FCC Cnfg Cisco AIR‐LAP1242AG‐A‐K9 11 Systems 2.4 gHz 2.2 dBi articulating dipole antenna with RP‐TNC connector Cisco AIR‐ANT4941 13 Systems 5 gHz 3.5 dBi articulating dipole antenna with RP‐TNC connector Cisco AIR‐ANT5135D‐R 22 Systems 2.4 gHz 8.5 dBi directional patch antenna with RP‐TNC pigtail Cisco AIR‐ANT2485P‐R 2 Systems 2.4 gHz 6 dBi directional Patch antenna with RP‐TNC pigtail Cisco AIR‐ANT2460P‐R 7 Systems Locking steel wall mount AP enclosure for physical security & aesthetics WirelessOne 1022‐00 9 Designs Return to table of contents
- 9. AP, Controller & Management Recommendations WirelessOne Designs recommends the following AP, controllers and WCS management software. Cisco Aironet 1240AG Series IEEE 802.11a/b/g access p / /g points deliver the versatility, high y, g capacity, security, and enterprise-class features demanded by WLAN customers. Designed specifically for challenging RF environments like factories, warehouses, and large retail establishments it has the versatility associated with connected antennas, a rugged metal enclosure, and a broad operating temperature range. The Cisco 4400 Series Wireless LAN Controllers are designed for medium-to-large enterprise facilities. The Cisco 4402 with two Gigabit Ethernet ports comes in configurations that support up to 12, 25, and 50 lightweight access points. The Cisco 4402 Series provides one expansion slot that can be used to add enhanced functionality, such as VPN termination and other capabilities, in the future capabilities future. Cisco Wireless Control System (WCS) is the industry leading platform for wireless LAN planning, configuration, and management. Cisco WCS provides a powerful foundation that allows IT managers to design, control, and monitor enterprise wireless networks from a centralized location, location simplifying operations and reducing the total cost of ownership ownership. The Cisco WCS is an optional network component that works in conjunction with Cisco Aironet Lightweight Access Points, Cisco wireless LAN controllers and the Cisco Wireless Location Appliance. With Cisco WCS, network administrators have a single solution for RF prediction, policy provisioning, network optimization, troubleshooting, user tracking, security monitoring, and wireless LAN systems management Robust graphical interfaces make wireless LAN management. deployment and operations simple and cost-effective. Detailed trending and analysis reports make Cisco WCS vital to ongoing network operations. Cisco WCS includes tools for wireless LAN planning and design, RF management, location tracking, Intrusion Prevention System (IPS), and wireless LAN systems configuration, monitoring, and management. g Return to table of contents
- 10. Enclosure Recommendation WirelessOne Designs recommends this aesthetic locking security enclosure where APs must be low mounted within easy reach from the floor floor. The model 1022-00 wireless LAN access point enclosure is a locking, wall-mounted enclosure, designed to accommodate access points from most manufacturers. This aesthetic, off-white powder coated (can be painted to match walls) steel enclosure has seven knockouts for antennas and cables. The Model 1022-00 is large enough to accommodate the Cisco 1250 series, and other 802.11n, wireless access points with six antennas. Specifications: · Designed for mounting on indoor hard walls, where secure mounting is required · Internal mounting plate accommodates access points from most manufacturers · Antennas may be mounted externally using optional bulkhead connectors (P/N 35-BULKHD-KIT) or 34-ZDUAL antennas · Beveled corners permit easy installation in the corner of the room · Construction: 16 gauge door, 18 gauge back-box, textured off-white powder coated steel · Fully hinged locking door, keyed alike · Size: 11" x 12.5" x 4.25”, 3.75" useful depth with universal mounting plate in place · Weight: < 7lbs Model 1022-00 includes: · Mounting plate for many manufacturers access points, mounting screws and hardware · (3) Knockouts on both top and bottom permit mounting of up to (6) external antennas · Knockout for ¾" diameter cable clamp connector (included) · Mounting instructions Return to table of contents
- 11. Antenna Recommendation 2.4 gHz 2.2 dBi omni directional dipole WirelessOne Designs recommends this low gain antenna for good close-in saturation directly under the antenna and medium range, to be paired with a longer range directional antenna, or for ceiling mounting with another dipole antenna for spatial diversity. AIR-ANT4941 AIR ANT4941 Return to table of contents
- 12. Antenna Recommendation 5 gHz 3.5 dBi omni directional dipole WirelessOne Designs recommends this medium gain 5 gHz antenna to match the range of the 2.4 gHz 2.2 dBi dipole and still provide good saturation directly under the antenna. To be paired with another dipole antenna for spatial diversity. AIR-ANT5135D-R AIR ANT5135D R Return to table of contents
- 13. Antenna Recommendation 2.4 gHz 6 dBi directional patch WirelessOne Designs recommends this medium gain directional antenna for longer range, to be paired with a shorter range omni directional antenna for close-in saturation and spatial diversity. AIR-ANT2460P-R AIR ANT2460P R Return to table of contents
- 14. Antenna Recommendation 2.4 gHz 8.5 dBi directional patch WirelessOne Designs recommends this medium gain directional antenna for longer range and penetration of the multi-path inducing production environment, to be paired with a shorter range omni directional antenna for close-in saturation and spatial diversity. AIR-ANT2485P-R AIR ANT2485P R Return to table of contents
- 15. Spectrum Analysis: Overview Test Parameters: WirelessOne Designs performed spectrum analysis sampling of the in-scope areas of this project for the purpose of identifying and quantifying potential interference in the 2.4 & 5 gHz WLAN frequency bands. The strategy was to t use b i protocol analysis t h l identify 802.11a/b/g networks, and RF spectrum analysis t id tif and basic t l l i to help id tif 802 11 /b/ t k d t l i to identify d evaluate non-802.11 interferers sharing the same unlicensed frequencies. The equipment and software used included a Windows tablet computer running, Cisco Spectrum ExpertTM using its native client adapter card, with external multi-frequency antenna, and NetStumblerTM using the internal Intel 802.11a/g/n adapter. The Cisco Spectrum Expert TM was used here primarily for it’s ability to capture, replay and report 802.11a/b/g, here, it s capture 802 11a/b/g and other interference in the 2.4 & 5 gHz frequency bands, and to identify many interfering sources by type. The primary causes for concern with the existing customer network include: 1) Most WLANs in the 2.4 gHz band not maintaining proper separation between APs using same RF channels. Most APs detected were crowded into Ch 1, with a couple on Ch 11. This results in unnecessary interference with each other other. 2) Some WLANs in the 2.4 gHz band are using overlapping RF channels. This results in interference with non- overlapping channels on both sides of the “off-key” channels. 3) Several non-WiFi transmitters in the 2.4 gHz band have potential to degrade performance on the new WLAN. This is because non-WiFi equipment doesn’t use the kind of “polite” protocols that WiFi networks use, like listening for traffic before transmitting. And they also may keep their transmitters on a greater percentage of transmitting the time than most WiFi networks, making it even harder for neighboring WLANs to get on the air. The 5 gHz bands were wide open and interference free, however. Protocol analysis recorded the presence of 30 sources of WiFi transmissions, all in the 2.4 gHz band. This is a fairly high level of competition for the 2.4 gHz frequencies, but when they are not all properly channelized so they can be good neighbors, the result is less performance than you paid for. Internal non-802.11 WLAN interference from sources like microwave ovens, production related equipment, Bluetooth hardware, and cordless phones/headsets may or may not be addressable by the customer, depending on sociological as well as technical issues. WirelessOne Designs recommends leveraging the 5 gHz bands as much as possible. Return to table of contents
- 16. Spectrum Analysis: Cisco Spectrum Expert RF General Analysis TM Please see further analysis of these interferers on pages 19 & 20 Pl f h l i f h i f Example of sporadic microwave oven interference. Interference from DECT-like cordless phones/headsets is in upper UNII band so is not a threat to WLANs in lower frequency bands. Note the high signal strength of these non- WiFi and peer to Example of peer interferers sporadic Bluetooth interference WirelessOne Designs suggests use of 900 mHz, or WLAN phones rather than 2.4 gHz or 5 gHz cordless phones/headsets, to eliminate this as a source of internal interference with the WLAN. Return to table of contents
- 17. Spectrum Analysis: Cisco Spectrum Expert RF Detail, Spectrum Traces TM There is substantial competition for the 2.4 gHz band, including non- While the Max 802.11 recorded duty interference from cycle in the 2.4 fixed frequency gHz band reached devices, about 99% at peak, microwave ovens, (non-WiFi) the cordless phones highest avg level and bluetooth was under 10% hardware and which is heavy for improperly a shared medium. channelized The proposed WLANs. WLAN will experience some slowdowns with this level of utilization . But overall performance over time should be acceptable This spectrogram At the time of this shows how much sweep the 5 gHz traffic is currently low b d was wide l band d concentrated in Ch open, with virtually 1 due to improper no signals or channel separation competition. of APs. Recommendation: leverage 5 gHz frequencies for bandwidth b d id h sensitive ii applications Return to table of contents
- 18. Spectrum Analysis: Cisco Spectrum Expert RF Detail, Interferers List TM See analysis following See analysis following See analysis following See analysis following See analysis following See analysis following See analysis following Return to table of contents
- 19. Spectrum Analysis: RF Detail, Non−802.11 Interferers Analysis Non− The Cisco Spectrum Expert TM analysis b l Th Ci S t E t l i below refers t th specific interferer(s) listed on page 18 f to the ifi i t f ( ) li t d Return to table of contents
- 20. Spectrum Analysis: RF Detail, Non−802.11 Interferers Analysis Contd Non− The Cisco Spectrum Expert TM analysis b l Th Ci S t E t l i below refers t th specific interferer(s) listed on page 18 f to the ifi i t f ( ) li t d Return to table of contents
- 21. Spectrum Analysis: RF Detail, Non−802.11 Interferers Analysis Contd Non− The Cisco Spectrum Expert TM analysis b l Th Ci S t E t l i below refers t th specific interferer(s) listed on page 18 f to the ifi i t f ( ) li t d Return to table of contents
- 22. Spectrum Analysis: RF Detail, Non−802.11 Interferers Analysis Contd Non− The Cisco Spectrum Expert TM analysis b l Th Ci S t E t l i below refers t th specific interferer(s) listed on page 18 f to the ifi i t f ( ) li t d Return to table of contents
- 23. Spectrum Analysis: RF Detail, Non−802.11 Interferers Analysis Contd Non− The Cisco Spectrum Expert TM analysis b l Th Ci S t E t l i below refers t th specific interferer(s) listed on page 18 f to the ifi i t f ( ) li t d Return to table of contents
- 24. Spectrum Analysis: RF Detail, 802.11 Interferers Analysis The Cisco Spectrum Expert TM analysis b l Th Ci S t E t l i below refers t th specific interferer(s) listed on page 18 f to the ifi i t f ( ) li t d Return to table of contents
- 25. Spectrum Analysis: RF Detail, 802.11 Interferers Analysis Contd The Cisco Spectrum Expert TM analysis b l Th Ci S t E t l i below refers t th specific interferer(s) listed on page 18 f to the ifi i t f ( ) li t d Return to table of contents
- 26. Protocol Analysis: Overview Protocol analysis is included here because it can often be helpful in identifying the use or owners of the 802.11a/b/g transmitters on the air in the customer WLAN environment. However, only 802.11a/b/g transmitters are reported on. None of the other devices or noise sources in the 2.4 and 5 gHz frequency bands are reported. The tool used to collect the following data is NetStumblerTM version 0.4.0, a commonly available simple WLAN analysis software application. g , y p y pp The data is shown sorted in order by rf channel. All transmitters heard while walking throughout the given floor are listed, and some may be located outside customer property. A very weak signal on all floors may help identify outside transmitters. Please see the table below for the author of NetStumbler TM, Marius Milner’s explanation of the meaning of the columns: Column C l Description D i ti MAC The text contains the BSSID for wireless devices. The icon shows the signal strength as reported in the last scan. A lock appears in the icon if encryption is enabled on the network. SSID The reported SSID. This may be blank for access points that report their existence but not their SSID. For wired network items, the SSID is assumed to be the SSID that was associated when the item was discovered. Chan All the channels that the device has been seen on. The most recent one is listed first. Speed The maximum reported bandwidth for the device (this is not the actual bandwidth). Some devices are capable of 108Mbps but only report 54Mbps. Vendor The vendor assigned to the MAC, which may not be the actual equipment manufacturer. Type "AP" for a BSS, "Peer" for an IBSS. Encryption The word "WEP" will appear on an encrypted network, regardless of whether it is really using WEP. Signal+ The highest seen Signal value. Flags The 802.11 capability flags, in hexadecimal. Return to table of contents
- 27. Protocol Analysis: Detail These networks are displayed in ascending order by radio frequency channel These two peer components of a possible wireless video screen net may cause high levels of interference due to very high network utilization. Stationary video app data is better on a wire. The non-secure “public WiFi” & “iphoneModem” WLANs are potential rogue network security breaches if connected to the customer wired network, and should be located and investigated. It is not possible to reuse the same non-overlapping channel this often in a space this size without causing serious common channel interference resulting in degraded throughput. Only channels 1, 6 and 11 in the 802.11g 2.4 gHz band are non-overlapping. Use of any other channels interferes with the closest non-overlapping channels. It is not possible to reuse the same non-overlapping channel this often in a space this size without causing serious common channel interference resulting in degraded throughput. Return to table of contents
- 28. Propagation Testing: Overview WirelessOne Designs used the Ekahau Site Survey TM release 4.5 from among the most advanced generation of site survey tools to model the campus construction on the proposed floor plans, then simulate RF propagation with various AP configurations and antennas. The stage shown in this antennas section is the on-site propagation measurement, in which actual results are compared against simulations, allowing the simulations to be refined. This step provides for an accurate WLAN performance design based on both computer simulation and field measurement for the property. The following page shows selected actual raw as-measured RF signal strength samples from key locations which were used to refine the final design in this site survey. l i hi h d fi h fi l d i i hi i Note: The site survey AP used for the following testing was configured for 50/30 mW transmitter power for 2.4 gHz CCK/OFDM transmitters. Antennas used were one 2.15 dBi ‘rubber duck’ dipole, and one 8.5 dBi directional patch for 2.4 g p gHz, and two 3.5 dBi ‘rubber duck’ dipoles for 5 g p gHz. WirelessOne Designs found signal blocking and multi-path interference due to tall machinery in the Production section, and signal attenuation due to shelving loaded with stock to be acceptable, thus allowing effective propagation of WLAN microwave signaling. This allows the entire area of scope including three connecting hallways to be effectively covered with eleven APs. APs Return to table of contents
- 29. Propagation Testing: Selected Key Results, Loc A Test Loc A This plot shows that a wall mounted AP using one 8.5 dBi directional antenna and one 2.2 dBi dipole antenna at 22 8’ height in Build Area can cover more than the left half of the Manufacturing section. All colored tints mapped above represent acceptable signal strength. Return to table of contents
- 30. Propagation Testing: Selected Key Results, Loc B Test Loc B This plot shows that a wall mounted AP using one 8.5 dBi directional antenna and one 2.2 dBi dipole antenna at 22 8’ height in Build Area can cover more than the right half of the Manufacturing section. All colored tints mapped above represent acceptable signal strength. Return to table of contents
- 31. Propagation Testing: Selected Key Results, Loc G Test Loc G This plot shows that a wall mounted AP using one 6 dBi directional antenna and one 2.2 dBi dipole antenna at 8’ height in the Supply Area can cover more than the right half of Parts Storage and the workrooms behind. behind All colored tints mapped above represent acceptable signal strength. Return to table of contents
- 32. WLAN Design: AP Locations Click on a location label below to view that detail page A B C E D F H G J I K Return to table of contents
- 33. Location Detail: Listing location AP type Enclosure Antenna type mounting A 1242a/g 1022‐00 2.4 gHz dipole + patch, 5 gHz dual dipole Wall mount per photo detail B 1242a/g 1022‐00 2.4 gHz dipole + patch, 5 gHz dual dipole Wall mount per photo detail C 1242a/g 1022‐00 2.4 gHz dipole + patch, 5 gHz dual dipole Wall mount per photo detail D 1242a/g 1022‐00 2.4 gHz dipole + patch, 5 gHz dual dipole Wall mount per photo detail E 1242a/g n/a 2.4 gHz dual dipole, 5 gHz dual dipole Overhead mount per photo F 1242a/g 1022‐00 2.4 gHz dipole + patch, 5 gHz dual dipole Wall mount per photo detail G 1242a/g 1022‐00 2.4 gHz dipole + patch, 5 gHz dual dipole Wall mount per photo detail H 1242a/g 1022‐00 2.4 gHz dipole + patch, 5 gHz dual dipole Wall mount per photo detail I 1242a/g n/a 2.4 gHz dual dipole, 5 gHz dual dipole 2 4 gHz dual dipole 5 gHz dual dipole Overhead mount per photo mount per photo J 1242a/g 1022‐00 2.4 gHz dipole + patch, 5 gHz dual dipole Wall mount per photo detail K 1242a/g 1022‐00 2.4 gHz dipole + patch, 5 gHz dual dipole Wall mount per photo detail General installation guidelines: Prime APs according to IOS commands in Cisco Quick Start Guide, or via DHCP/DNS. These low power microwave signals cannot penetrate metal, so avoid metal objects or surfaces as much as is practical. Install Cat 6 cable from PoE switch or mid-span PoE injector in IDF to Ethernet drop location, terminated with RJ45 biscuit block at each location. Connect AP to biscuit block with short patch cable. Please dress patch cables and any other wiring to prevent them from hanging between an antenna and any potential client devices. h f h b d l l d Return to Floor Plan
- 34. Location Detail: A−Build Area A− Wall Mount this AP in optional enclosure, with 2.4 gHz antenna ports at top, and articulating dipole antennas in vertical position or no more than 45 degrees from vertical. Mount the directional antenna facing away from the wall with cable exit downward. Note: if your access point is connected to in-line power, do not connect the power module to the access point. Using two power sources on the access point might cause the access point to shut down to protect internal components and might cause the switch to shut down the port to which the access point is connected. If your access point shuts down, you must remove all power and reconnect i t h t d t ll d t only a single power source. Enclosure 1022-00 AP mounting bracket Cisco 1242 a/g Return to Floor Plan
- 35. Location Detail: B−Build Area B− Wall Mount this AP in optional enclosure, with 2.4 gHz antenna ports at top, and articulating dipole antennas in vertical position or no more than 45 degrees from vertical. Mount the directional antenna facing away from the wall with cable exit downward. Note: if your access point is connected to in-line power, do not connect the power module to the access point. Using two power sources on the access point might cause the access point to shut down to protect internal components and might cause the switch to shut down the port to which the access point is connected. If your access point shuts down, you must remove all power and reconnect i t h t d t ll d t only a single power source. Enclosure 1022-00 AP mounting bracket Cisco 1242 a/g Return to Floor Plan
- 36. Location Detail: C−Mechanical Build C− Wall Mount this AP in optional enclosure, with 2.4 gHz antenna ports at top, and articulating dipole antennas in vertical position or no more than 45 degrees from vertical. Mount the directional antenna facing away from the wall with cable exit downward. Note: if your access point is connected to in-line power, do not connect the power module to the access point. Using two power sources on the access point might cause the access point to shut down to protect internal components and might cause the switch to shut down the port to which the access point is connected. If your access point shuts down, you must remove all power and reconnect i t h t d t ll d t only a single power source. Enclosure 1022-00 AP mounting bracket Cisco 1242 a/g Return to Floor Plan
- 37. Location Detail: D−Planning Hallway D− Wall Mount this AP in optional enclosure, with 2.4 gHz antenna ports at top, and articulating dipole antennas in vertical position or no more than 45 degrees from vertical. Mount the directional antenna facing away from the wall with cable exit downward. Note: if your access point is connected to in-line power, do not connect the power module to the access point. Using two power sources on the access point might cause the access point to shut down to protect internal components and might cause the switch to shut down the port to which the access point is connected. If your access point shuts down, you must remove all power and reconnect i t h t d t ll d t only a single power source. Enclosure 1022-00 AP mounting bracket Cisco 1242 a/g Return to Floor Plan
- 38. Location Detail: E−Construction Hallway E− Mount this AP horizontally in optional enclosure, with articulating dipole antennas in vertical position or no more than 45 degrees from vertical. Note: if your access point is connected to in-line power, do not connect the power module to the access point. Using two power sources on the access point might cause the access point to shut down to protect internal components and might cause the switch to shut down the port to which the access point is connected. If your access point shuts down, you must remove all power and reconnect i t h t d t ll d t only a single power source. Cisco 1242 a/g AP mounting bracket Cisco 1242 a/g Return to Floor Plan
- 39. Location Detail: F−Development Hallway F− Wall Mount this AP in optional enclosure, with 2.4 gHz antenna ports at top, and articulating dipole antennas in vertical position or no more than 45 degrees from vertical. Note: if your access point is connected to in-line power, do not connect the power module to the access point. Using two power sources on the access point might cause the access point to shut down to protect internal components and might cause the switch to shut down the port to which the access point is connected. If your access point shuts down, you must remove all power and reconnect i t h t d t ll d t only a single power source. Enclosure 1022-00 AP mounting bracket Cisco 1242 a/g Return to Floor Plan
- 40. Location Detail: G−Parts Storage G− Wall Mount this AP in optional enclosure, with 2.4 gHz antenna ports at top, and articulating dipole antennas in vertical position or no more than 45 degrees from vertical. Mount the directional antenna facing toward the shelves in the foreground, with cable exit downward. Note: if your access point is connected to in-line power, do not connect the power module to the access point. Using two power sources on the access point might cause the access point to shut down to protect internal components and might cause the switch to shut down the port to which the access point is connected. If your access point shuts down, you must remove all power and reconnect i t h t d t ll d t only a single power source. Enclosure 1022-00 AP mounting bracket Cisco 1242 a/g Return to Floor Plan
- 41. Location Detail: H−Parts Storage H− Wall Mount this AP in optional enclosure, with 2.4 gHz antenna ports at top, and articulating dipole antennas in vertical position or no more than 45 degrees from vertical. Mount the directional antenna facing toward the shelves in the foreground with cable exit downward. Note: if your access point is connected to in-line power, do not connect the power module to the access point. Using two power sources on the access point might cause the access point to shut down to protect internal components and might cause the switch to shut down the port to which the access point is connected. If your access point shuts down, you must remove all power and reconnect i t h t d t ll d t only a single power source. Enclosure 1022-00 AP mounting bracket Cisco 1242 a/g Return to Floor Plan
- 42. Location Detail: I−Receiving Area I− Mount this AP horizontally in optional enclosure, with articulating dipole antennas in vertical position or no more than 45 degrees from vertical. Note: if your access point is connected to in-line power, do not connect the power module to the access point. Using two power sources on the access point might cause the access point to shut down to protect internal components and might cause the switch to shut down the port to which the access point is connected. If your access point shuts down, you must remove all power and reconnect i t h t d t ll d t only a single power source. Cisco 1242 a/g AP mounting bracket Return to Floor Plan
- 43. Location Detail: J−Below Deck Parts Storage J− Wall Mount this AP in optional enclosure, with 2.4 gHz antenna ports at top, and articulating dipole antennas in vertical position or no more than 45 degrees from vertical. Mount the directional antenna facing away from the wall wall, with cable exit downward. Note: if your access point is connected to in-line power, do not connect the power module to the access point. Using two power sources on the access point might cause the access point to shut down to protect internal components and might cause the switch to shut down the port to which the access point is connected. If your access point shuts down, you must remove all power and reconnect i t h t d t ll d t only a single power source. Enclosure 1022-00 AP mounting bracket Cisco 1242 a/g Return to Floor Plan
- 44. Location Detail: K−Above Deck Parts Storage K− Beam Mount this AP in optional enclosure, with 2.4 gHz antenna ports at top, and articulating dipole antennas in vertical position or no more than 45 degrees from vertical. Mount the directional antenna facing toward the shelves in the foreground with cable exit downward. Note: if your access point is connected to in-line power, do not connect the power module to the access point. Using two power sources on the access point might cause the access point to shut down to protect internal components and might cause the switch to shut down the port to which the access point is connected. If your access point shuts down, you must remove all power and reconnect i t h t d t ll d t only a single power source. Enclosure 1022-00 AP mounting bracket Cisco 1242 a/g Return to Floor Plan