
Empfohlen
Empfohlen
Weitere ähnliche Inhalte
Was ist angesagt?
Was ist angesagt? (20)
Ähnlich wie Overmold Design Guide
Ähnlich wie Overmold Design Guide (20)
Overmold Design Guide
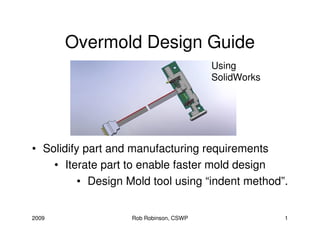
- 1. Overmold Design Guide Using SolidWorks • Solidify part and manufacturing requirements • Iterate part to enable faster mold design • Design Mold tool using “indent method”. 2009 Rob Robinson, CSWP 1
- 2. Requirements checklist • Understand Cavist and Henkel products. • Cover all exposed metal. • Flow around and through PCB. • Balance coverage with short cycle time. • Minimize flow over snapped PCB edges. • Good appearance builds customer confidence. 2009 Rob Robinson, CSWP 2
- 3. Interesting design requirement: reduce “thermal traffic” at neck. Snapped edges vary in Guide precision width, invite Pin flash PCB surface is good for shut off Long set back reduces material leak along snapped edges. 2009 Rob Robinson, CSWP 3
- 4. Cavist Mold-Man 8000 • Metric dimensioned • Small molds 4x4” • Large molds 8x6” • ~4” total shut height. • Injects polyamide at 425F • Low pressure • Adjustable shot size • Cooling by conduction into frame. (Option to have water flow thru frame.) 2009 Rob Robinson, CSWP 4
- 5. Cover metal – promote flow SolidWorks hint: Import IGS file from Small holes allow material to Altium then simplify. Create single flow through and bind. feature PCB. Selectively suppress Altium features for assembly speed. COMPONENT Collaborate with SIDE Electrical Engineer 2009 Rob Robinson, CSWP 5
- 6. Good Appearance plus great functionality keeps customer confidence for Davis Instruments. 2009 Rob Robinson, CSWP 6
- 7. Part impact on mold checklist • Mold layout. • Pull direction. • Design “Standards” • Which side down? • Cable shutoff. • Sensor protection? • L.E.D.s or other components? 2009 Rob Robinson, CSWP 7
- 8. Mold layout sketch with evolving part overlaid. Fill Eject on overmold material! Eject pins on pcb at 3 or more locations. Cable location Symmetrical pattern for balance because ejector plate is spring return. Is this tool center same as Ejector cavity Mold-Man eject piston? 2009 Rob Robinson, CSWP 8
- 9. Design dimensional “defaults” • Consider the coated PCB to be exactly 0.062” thick. • Design for a nominal 0.063” thickness of Chem 860 over the flat surfaces. • Less thickness for corners and edges OK. • Temp-Hum sensor is 0.095” from surface; RTV rubber should be 0.085” from surface and have a pocket depth of 0.080” for resilience and reliable shut off. • Ribbon cable grooves 0.030-.031” deep seems to work well for shutting off without damage to cable. • Medical grade rubber tubing from McMaster-Carr is working well enough to protect L.E.D. from mold material. 2009 Rob Robinson, CSWP 9
- 10. Assembly saved as part with all components and tested with ”Draft Analysis”. This particular assembly to be molded “component side up” 2009 Rob Robinson, CSWP 10
- 11. Which mold design sequence shall I choose? • Brute force (tool cuts calculated and placed directly in block.) • SolidWorks “tutorial method” as typically taught in a SW instructional course? (See following “pink” examples.) • Or the “indent method” better suited for parts with a planar parting surface such as these Davis parts. (Go “green”.) 2009 Rob Robinson, CSWP 11
- 12. Requirements driven New Overmolded 2D Tool Layout. Electrical and Assembly LFV&E Mechanical Engineering Save Assy as Part, Combine Bodies Clearances, Shutoffs, etc SolidWorks Mold Subroutines SolidWorks Tutorial Draft Analysis Parting Line Method (mold worthiness) Simpler SolidWorks functions Cut (split), name Indent Method and save bodies Shutoff surfaces Clearances, Shutoffs, etc Parting Surface, Tooling Split Insert into Mold Parts Unpredicatability Tool may be may require compromised Returning Indent (cut) split to design part from Mold Works best for Rename, save mold bodies planar parting surface Detail Mold fill, vent & eject features Insert mold bodies into new parts Shop Drawings Great Tool Required for curved parting surfaces 2009 Rob Robinson, CSWP 12
- 13. Successfully generated (whew!) parting surface would extend to cover only one half of the mold! ….Which led to several frustrations. Considerable training in SolidWorks surfaces would be advised. 2009 Rob Robinson, CSWP 13
- 14. Two “half molds” combined to make a whole mold is “awkward”. Long feature tree due to incomplete “part design”. Powerful features employed from designing by “better method”. 2009 Rob Robinson, CSWP 14
- 15. Requirements driven New Overmolded 2D Tool Layout. Assembly Electrical and Mechanical LFV&E Take home message: Engineering More time spent in part Save Assy as Part, Combine Bodies design means less time in tool design. Clearances, Shutoffs, etc SolidWorks Mold Subroutines SolidWorks Tutorial Draft Analysis Parting Line Method (mold worthiness) Simpler SolidWorks functions Cut (split), name Indent Method and save bodies Shutoff surfaces Clearances, Shutoffs, etc Parting Surface, Tooling Split Insert into Mold Parts Unpredicatability Tool may be may require compromised Returning Indent (cut) split to design part from Mold Works best for Rename, save mold bodies planar parting surface Detail Mold fill, vent & eject features Insert mold bodies into new parts Shop Drawings Great Tool Required for curved parting surfaces 2009 Rob Robinson, CSWP 15
- 16. Take home message #2, insert a well designed split part into the tool block with “move dialog” on. 1st insertion of part has already been “indented” as a “cut”. 2nd insertion of identical part 2009 Rob Robinson, CSWP 16
- 17. These are the hidden “cutting bodies”. Here is the first indent “cut”. 2009 Rob Robinson, CSWP 17
- 18. Multi-body parts can be inserted so all cavities are cut at once. 2009 Rob Robinson, CSWP 18
- 19. Summary • Spend a lot of time designing and reviewing the part. • Don’t hesitate to iterate! Ask why! • Use layouts, planes and draft analysis. • Use the flow chart and follow the green. 2009 Rob Robinson, CSWP 19