install CentOS 6.3 minimal on Hyper-V
•
0 gefällt mir•1,198 views

install CentOS 6.3 minimal on Hyper-V

Empfohlen
Weitere ähnliche Inhalte
Was ist angesagt?
Was ist angesagt? (20)
Andere mochten auch
Ähnlich wie install CentOS 6.3 minimal on Hyper-V
Ähnlich wie install CentOS 6.3 minimal on Hyper-V (20)
Mehr von Tũi Wichets
Mehr von Tũi Wichets (20)
install CentOS 6.3 minimal on Hyper-V
- 1. INSTALL CENTOS MINIMAL ON HYPER-V I’ll quickly take you through the steps required to get the CentOS 6.3 minimal Linux distribution up and running on a Hyper-V host, along with networking and the Linux integration components all enabled. The minimal release of CentOS only appeared with release 6.2 –You get literally the core OS, and nothing else (not even network access, but we’ll fix that!) – You just install what you require afterwards. I think this is a great idea, as it will keep your attack surface area to a minimum, you’re not wasting resources on the Hyper-V node with components you’re not going to use, and it’s much quicker to download (~=330MB) than the full DVD ISOs (~=5.4GB)! First, download the CentOS 6.3 minimal ISO. While we’re at it, grab a copy of the Linux integration components. While they are downloading, head over to your Hyper-V host, and create a new virtual machine.
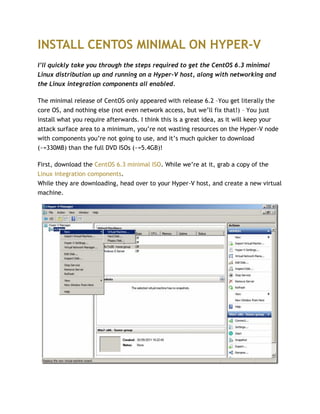
- 2. Hyper-V Manager Name it as you please, then make sure you connect it to a network with external connectivity. On disk size, if you want to keep it tight, you could get away with 2GB. When we get to the installation option screen of the new VM wizard, we will want to tell it to boot from our CentOS minimal ISO. Hopefully your download has finished now, so copy it along with the Linux integration components ISO, onto your Hyper-V host. Select the CentOS minimal ISO as the boot image file, then continue with the wizard. When the wizard has completed, start the new VM, from the actions on the right, then click connect. CentOS minimal installer At the startup screen, select the first option to start the CentOS installer. I would skip the media check that the installer offers as it can cause the ISO to eject.
- 3. In the installer you will need to select the regional settings appropriate to you. The VHD for the VM will be empty/not formatted, so needs initializing: CentOS drive initialization Keep going through the wizard, entering your timezone and root password. For disk partitioning, just go with the defaults (unless you have special requirements) and write the changes to the disk.
- 5. Our CentOS system should now begin the installation, don’t make a coffee – it won’t take very long! CentOS installation Once the installation has finished, the VM will reboot. It might end at the installer screen, as our ISO is still mounted. Don’t go through the installation again! Turn off the VM via the action menu, then from the media menu, eject the CentOS minimal ISO, and replace it by moutning the Microsoft Linux Integration Components that we downloaded earlier, and start up the VM again. All being well, we should end up at the login prompt, login with username root, and whatever password you chose earlier. We will now install the Linux Integration Components. These enhance your VM by adding features such as time sync with the Hyper-V host, heartbeat reporting to Hyper-V host, multi processor support, shutdown support form Hyper-V manager, and also NIC, IDE and SCSI drivers. Issuing the following commands as root should install the Linux Integration Components:
- 6. mount –r /dev/sr0 /media cd /media/RHEL63 ./install.sh Once installed we’ll need to restart again, type reboot at the command prompt. While the VM is rebooting, we can eject the ISO via the media menu. Hopefully the Hyper-V management console should now be reporting on the heartbeat status for your VM. If we log in again as root, with the password we used earlier, we can now proceedd to configure the network on the VM, as the system isnt’t going to be much use without it! Run ‘vi /etc/sysconfig/network-scripts/ifcfg-eth0’ at the command prompt, then in vi, press i to go into insert mode, then enter the following: DEVICE=eth0 BOOTPROTO=static ONBOOT=yes IPADDR=192.168.1.16 NETMASK=255.255.255.0 GATEWAY=192.168.1.123 Obviously you have to replace the settings with the correct details for your network! To save the file, press Esc, Shift + : , wp, <Enter> We now need to do the same as above for /etc/resolv.conf – add the IP’s of your DNS servers to this file: nameserver 8.8.8.8 nameserver 8.8.4.4 The final file we need to edit is /etc/sysconfig/network in order to enable networking, and set the system hostname. Add the following ot this file: NETWORKING=yes HOSTNAME=myServer.mydomain.net
- 7. Now start the network by entering the command ‘service network restart’. You should see eth0 start up, and should be able to ping other hosts on your network, and beyond! At this stage I like to update all the packages on the system with the following command ‘yum –y update’ Once the update has completed, we’ve got a minimal CentOS system configured, with network connectivity and the Linux integration components fully working – now it’s time for you to install whatever you need onto it, and put it to some use!