Vestibule connector
•Als PPTX, PDF herunterladen•
0 gefällt mir•918 views

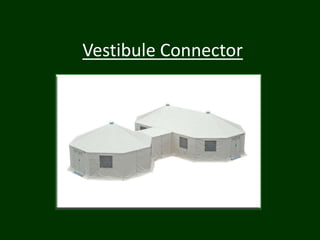
The document provides installation instructions for connecting a vestibule connector between two shelters. It involves aligning the shelters and connection points, installing the vestibule floor between the shelters and attaching them, installing the vestibule framework including eave bars and doors, and attaching the vestibule roof panel to create an enclosed vestibule between the two shelters.

Empfohlen
Weitere ähnliche Inhalte
Was ist angesagt?
Ähnlich wie Vestibule connector
Ähnlich wie Vestibule connector (16)
Vestibule connector
- 2. a. Connection Points 1. Two types of connection points are located on each shelter – Door Split Connections are the connection where the wall fabric connects to the door – Wall Split Connection is the connection where the wall fabric connects to the opposite wall fabric (Blue Hook & Loop)
- 3. b. Inventory • Assure that you have all the components located within the Vestibule Bag • Separate the different types of material (Fabric and Metal)
- 4. c. Alignment 1. Open the connection point on the completed shelter to expose the connection point legs • From the interior, unfasten the buckles and straps located at the floor connection • Peel back Insulation and Vinyl Roof panels • Remove door if necessary
- 5. c. Alignment Continued… 1. Roughly align the shelters with a standard eave or base bar 2. Place two bars on the ground at a perpendicular angle to the connection point 3. Visually square the two bars so that they are also parallel to each other 4. Move partially completed shelter to align with the alignment bars on the connection point
- 6. d. Flooring Installation 1. Lay out the shelter floor and position to line up with the vestibule floor 2. Match the alignment arrows on both floo 3. Fold the shelter floor under and attach to the vestibule floor matching up the Hook and Loop Fastener 4. Continue the connection along the entire section
- 7. d. Installation Continued… 5. Fold over the Caution flap to cover connection point and stretch the floor so there are no wrinkles 6. Place shelter legs on 2’’ weld along the floor 7. Create vestibule berm by attaching the velcro flaps on either end of the vestibule floor to the perspective shelter floor
- 8. e. Vestibule Framework 1. Replace eave bars on the two shelters with arched eave bars from vestibule kit 2. Connect the eave bars that were removed to the outside of the vestibule connection 3. Connect the center arched bar
- 9. e. Vestibule Framework Continued… 4. Connect the telescoping base bars 5. Attach Shelter Doors to each side of the Vestibule 6. Stretch the existing shelter walls to attach along the side of the door
- 10. f. Vestibule Roof Panel 1. Drape the roof over center arched bar and align with center screw on arched Eave Bar 1. Match up and attach the Hook and Loop Fastener to the arched eave bar • Ensure the center weld line matches with the center arched eave bar 1. Continue to outsides of section • Do not attach exterior of vestibule roof
- 11. f. Vestibule Roof Panel Continued… 1. Connect the Shelter Insulation and Vinyl Roof Panels • Center the two seams, and set back the Insulation Roof Panel ½ to ¾ inches 1. Pull black strap on vestibule roof to the inside of the shelter and stretch the shelter roof panel over top of vestibule roof and attach Velcro • Tip: Press on inside of shelter and go outside of the shelter to ensure the connection is sealed
- 12. f. Vestibule Roof Panel Continued… 1. From the outside, continue to attach the shelter roof panel to outside edge, taking special care to ensure the corner of the vestibule is completely sealed • We recommend the karate-chop method 1. Repeat on other shelter