
Empfohlen
Weitere ähnliche Inhalte
Was ist angesagt?
Was ist angesagt? (20)
Ähnlich wie Making my coverpage
Ähnlich wie Making my coverpage (20)
Mehr von tk04851811
Mehr von tk04851811 (13)
Making my coverpage
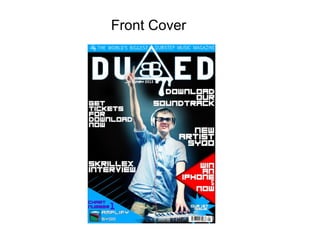
- 1. Front Cover
- 2. First i added the black background to the magazine using the colour tool and then clicking (ctrl + backspace).
- 3. Then I added my Masthead which contains I then added both the shapes and lines a logo which I designed using the pentool in so I could put a special prize on top photoshop. I also put a small blue outer and the Number 1 chart single. glow around the edge to make it stand out.
- 4. I then added all the cover-lines using the font tool and my main image which a left part of the edge there to give it a good effect. Then I changed the colour balance of the image to make the image looker more attractive. And the price, barcode and issue number are at the bottom.
- 5. I have now added a top bar which is like a slogan. I used the shape tool and put a glow around it to give the magazine depth. I put a shape here using the shape tool.
- 6. Contents
- 7. I have put in the black background and then added some shapes using the shape tool for where I will add my title in quark. And then added some line effects using the pen tool.
- 8. I have then put in two images and cut around them using the polygonal lasso tool to keep the lines straight and giving it an effect to match my target audience Then around the right hand side i put in a panel where I will put social media icons.
- 9. Now I have added the social media icons on the right hand side and a large logo at the bottom. On the logo at the bottom a have lowered the opacity because text will be going over the top of it.
- 10. In quark I added all the text on the page using the text tool and got fonts from the internet to match my house style. And I put the page number in the bottom right using the same tool.
- 12. Firstly I created a white background in Photoshop and added a banner across the top which went with my design, I did this using the shape tool and dragging it across. Then I inserted my logo on each end by using “File” + “Place”.
- 13. The I have put my image and cutting it using the polygonal tool the same way I did my contents page. Then on the image I changed the colour balance to give it a blue effect. Also on the image I used and inner glow making it look like the images were engraved into the page. Then I put in two shapes one ontop of the other where I will place tour dates into in Quark.
- 14. In quark I have now added all the text using the text tool including some text which I have pen tooled around a shaped to make the text fit how I wanted it.