1. Digital Scrapbooking
Open the Internet browser and type www.scrapblog.com on the adress bar.
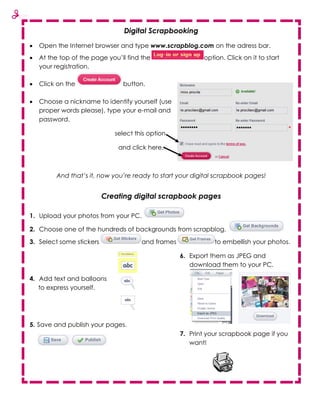
At the top of the page you’ll find the option. Click on it to start
your registration.
Click on the button.
Choose a nickname to identify yourself (use
proper words please), type your e-mail and
password.
select this option
and click here.
And that’s it, now you’re ready to start your digital scrapbook pages!
Creating digital scrapbook pages
1. Upload your photos from your PC.
2. Choose one of the hundreds of backgrounds from scrapblog.
3. Select some stickers and frames to embellish your photos.
6. Export them as JPEG and
download them to your PC.
4. Add text and balloons
to express yourself.
5. Save and publish your pages.
7. Print your scrapbook page if you
want!
2. Frequently Asked Questions
How can I add an item to my scrapbook page?
DRAG AND DROP. Click on the element you chose and
without releasing the mouse button, drag it over the
work area and when the small green circle with the plus
sign appears, drop it.
How can I resize and rotate an element?
Move the small circle to rotate
an element.
Use the small squares on the corners
of the element to resize it.
Do I necessarily have to pay for the backgrounds or stickers?
No you don’t. An advice is to choose the “Least Credits” option to select from
hundreds of free elements for using in your page.
How can I change the font properties?
When you select any item from your page, its
properties and edit options appear on the right side
bar, use them to personalize them.
Teacher: LTE Priscila Velázquez