Smoke 1 The Interface
•Als PPTX, PDF herunterladen•
0 gefällt mir•825 views

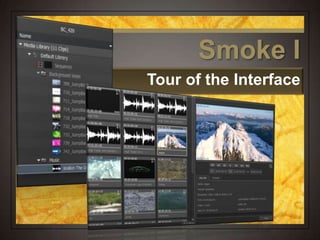
An introduction to Autodesk Smoke as taught by Professor Sam Edall using clips from FCP7 Quest media files. This first lecture shows the Media Hub and Timeline interface.

Empfohlen
Weitere ähnliche Inhalte
Was ist angesagt?
Was ist angesagt? (19)
Andere mochten auch
Andere mochten auch (20)
Ähnlich wie Smoke 1 The Interface
Ähnlich wie Smoke 1 The Interface (20)
Mehr von Samuel Edsall
Mehr von Samuel Edsall (20)
Kürzlich hochgeladen
Kürzlich hochgeladen (20)
Smoke 1 The Interface
- 1. Smoke I Tour of the Interface
- 2. Getting Smoke Installed Setting up Smoke with a stand-alone license Click here to open YouTube video
- 3. Tour of the Interface Video Tour of the interface Click here to open YouTube video
- 4. Firing Up Smoke Student version When Smoke starts a welcome screen that says this is a student version of Smoke Lucky you, you don’t have to buy it! Just click Continue
- 5. Title Screen On the bottom Set who the user is You! Set your storage volume Set what project you are working one or create a new one
- 6. Title Screen To the left Access to the Smoke Learning Channel on YouTube That’s where these videos come from Smoke forum for questions and answers Smoke on Facebook
- 7. Getting Started Set who’s project you will work on Under User choose New
- 8. Getting Started In the name box enter your name Under Keyboard shortcuts choose FCP7 Leave the other settings the same and choose Create
- 9. Getting Started In the welcome screen under Project -- Click New
- 10. Getting Started In the Create New Project screen by Name Let’s name this project ‘BC 420 Practice’ Click on the Config Template pop-up Choose ‘1920 x 1080’ This sets the recording format for your project
- 11. Getting Started Click the Create button in the bottom right Then click Start on the Welcome screen That’s how we make or load projects when Smoke starts
- 12. Getting Started
- 13. Different Tabs for Different Jobs On the bottom MediaHub Where your media is kept Conform Troubleshoot imported timelines and to relink segments Timeline Where you do your editing Tools Special effects Select Timeline
- 14. Panels The workspace is where you accomplish all of your project tasks. Three main panels: The Media panel The Viewing panel The Editing panel
- 15. Media Panel Where you manage the media in your current project. Any media listed in the Media panel is saved inside the project.
- 16. Media Panel Libraries All media and folders reside in a Library. You can create as many Libraries as you want, enabling you to better organize your project media. Folders Create folders to organize your media. You can create as many folders as you want. Folders can be expanded and collapsed in the Media panel.
- 17. Media Panel Source Clips: A source clip has only one video segment. It contains no edits and all its audio segments have the same tape name, source timecode and duration as the video. Sequences: A sequence is the same as in FCP7 or a project in FCPX. It contains multiple clips. Effect Clips: An effect clip is a metadata-only clip. You can use this type of clip to copy timeline effects from one clip to another.
- 18. Media Panel Load in some content Right click or control click on the Default Library and choose New > Folder Name the new folder Video
- 19. Media Panel Two more times Make two more folders by right clicking on the default library and name the 2 news folders Music and Sound Effects Good idea to put your stuff into separate folders so you can find it easier later
- 20. Viewer Panel Load them up Click on the Bookmarks button and select User Home Double-click on the Documents folder to open it Double-click on the BC 420 folder to open that folder Double-click on the Smoke Content folder to open it
- 21. Viewer Panel Save that directory While the Smoke Content folder is open, click on the Bookmark button again. This time select Add Bookmark
- 22. Viewer Panel Load them up Double-click on the Quest Clips folder to open them in the Media Hub
- 23. Viewer Panel Checking out your stuff Different views Thumbnails only Thumbnails with a preview screen List view only List view with a preview screen
- 24. Viewer Panel Move your cursor left and right inside the lower third of a clip to scrub through the thumbnail Double-click the clip to open the viewer and load the clip
- 25. Viewer Panel Check them out Change the view to Thumbnail with Preview Select the Began clip and use the playback controls to check it out
- 26. Viewer Panel Scrubbing your footage Go to beginning Go to In point Back 1 frame Play/pause Forward 1 frame Go to Out point Go to end
- 27. Viewer Panel Get around Select a clip and use the controls to scrub though a clip Pause playback, then put your cursor in the video clip and drag left and right to scrub though your clip
- 28. Media Panel & Viewer Panel Load up your media panel Select the video folder in the media panel Select any clip in the media hub, then press Command A to select all of the clips
- 29. Media Panel & Viewer Panel Load up your media panel By the Media Hub button in the lower left click the Import button Open your Video folder You should see all the clips now inside
- 30. Getting Around Backing up Use the directory tree on top of the media hub Click on the folder you wish to look at Press the Up button to back up to its parent directory
- 31. Media Panel & Viewer Panel Load up the music Click on the Smoke Content folder to step back to the parent directory Then double-click on the Music folder to open its contents
- 32. Media Panel & Viewer Panel Load up the music Make sure the Music folder in the Media Panel is selected Select all three music clips Press the Import button
- 33. Media Panel & Viewer Panel Load up the SFX Use this same procedure to load the sound effects clips into the Sound Effects folder in the Media Panel
- 34. Timeline Click on the Timeline tab on the bottom to switch to the timeline view. Click on the Viewer Mode box and select Player
- 35. Timeline Double-click on the ‘immersed’ clip in the Video folder to load it into the viewer.
- 36. The Viewing Panel About the Viewing Panel The Viewing panel gives you different visual representations of the clips in the Media panel. From the View mode box, you can select from the following views: Thumbnail Player Source – Sequence Triptych Player
- 37. The Viewing Panel Thumbnail View Displays the clips within the selected Media panel folder as thumbnails. Player View Displays and plays back the selected clip in a player.
- 38. Viewing Pane Click on the View button and change the view to Thumbnail (if necessary). Click on the Thumbnail Task menu and choose Arrange > Fit All This will show
- 39. Viewing Pane Now you can see all the clips inside the Video folder.
- 40. Viewing Pane Click on the View button and change the view from Thumbnail to Player.
- 41. Viewing Pane Click on the View button and change the view from Thumbnail to Player. Select the immersed clip
- 42. Getting Around While immersed is still selected, change the view to Triptych Player See the same clip in three players Default view Media start Middle of clip Media end
- 43. Homework Assignment: Using the Grab application take a snapshot of the media panel Make sure you have the Music, Sound Effects, and Video folders open to show the contents Save the image and post to Western Online in the Smoke I dropbox folder.
- 44. Smoke I Tour of the Interface