Affinity Diagrams
•
2 likes•2,208 views

Affinity Diagrams provides and overview of the Lean Six Sigma Tool. Lean Six Sigma Article by Master Black Belt, Steven Bonacorsi, Vice President at the AIT Group.

Recommended
Recommended
More Related Content
More from Steven Bonacorsi
More from Steven Bonacorsi (20)
Recently uploaded
Recently uploaded (20)
Affinity Diagrams
- 1. Affinity Diagrams The affinity diagram is a management and planning tool. Use of this tool is based on the understanding that time invested in planning will produce remarkable dividends as the generated ideas and plans are acted upon and implemented. Unlike the basic tools for improvement that deal primarily with collecting and analyzing hard data, this tool focuses on issues and ideas, soft data. An affinity diagram is the result of a creative process focused on finding the major themes affecting a problem by generating a number of ideas, issues or opinions. The process identifies these ideas, groups naturally related items and identifies the one concept that ties each grouping together. The team working on a problem reaches consensus by the cumulative effect of individual sorting decisions rather than through discussion. What can it do for you? Affinity diagrams can help you organize random data to show the underlying organization of a problem or issue. They are especially useful if the situation seems chaotic because there is an excess of ideas, influences, objectives or requirements, or if breakthrough thinking rather than incremental improvement is required. An affinity diagram can help clarify the broad themes and issues acting on any situation. The affinity process lets you sift through large volumes of information efficiently and allows truly new patterns or approaches to emerge for consideration. Affinity diagrams are especially useful in the measure and analyze phases of Lean Six Sigma methodology.
- 2. How do you do it? 1. The first step is to assemble the right team. The team should consist of five or six people who have knowledge about the situation to be considered. They should be relatively familiar with each other and accustomed to working together and should “speak the same language,” but care should be taken not to bring together the same old people to work on the same old problem. Include people with valuable input who may not have been included in the past. If the team needs specific information beyond the scope of the members’ knowledge, the team should draw in resource people as temporary team members. 2. Phrase the issue to be considered. The affinity process seems to be most effective if the issue is loosely or vaguely stated. The more explanation or limitation in the issue statement, the more likely the thought process will be constrained. The statement should be neutral to avoid limiting or directing responding ideas. For example, “How are we going to fix our quality problems?” might produce a fuller and more valuable collection of responses if rephrased “What are the issues affecting product quality?” When you have decided the phrasing of the statement, write it on the top of a flipchart or board so that it is visible to the group. 3. Generate and record ideas. Traditional guidelines for brainstorming: • No criticism or discussion of ideas • Generate many ideas in a short time • Everyone participates • Record the ideas exactly as spoken and not as interpreted by the recorder. One technique is to have team members silently record their ideas on 3x5 cards or Post-it™ notes for some amount of time. Members can then take turns offering ideas one-at-a-time for the recorder to write on a flip-chart or board. As the ideas are recorded, other team members can use those ideas to help generate additional ideas and additional cards. To be most useful, idea statements should be: • Concise, about five to seven words • Unambiguous, at least one noun and one verb • Legible, printed neatly, one idea to a card Another technique is to generate ideas and have the recorder write them directly on a flip-chart or board (without having team members first write them on cards). After all the ideas have been recorded, the team would then transfer them to cards.
- 3. 4. Display the completed idea cards. Randomly lay out the cards so that all the team members can see them. 5. Arrange the cards in natural groupings. The purpose of this step is to collect ideas that go with each other. In silence, all team members should simultaneously begin moving idea cards, collecting and arranging in columns the cards that each person believes belong together. All the cards should remain visible during this process so that everyone can consider and reconsider the arrangement as it emerges.
- 4. If cards are redundant, overlap them but in such a way that both can be read. Team members should freely change cards between groupings or create new groupings as they feel appropriate. Team members are allowed to disagree with a placement by making a new placement or returning to a previous one. Back and forth moves may occur for some time until the team settles on an arrangement that is acceptable to everyone. Some cards may be loners that do not seem to fit in any grouping. They should be left that way rather than try to force-fit them into a grouping.
- 5. 6. Create headers. Look for a card in each grouping that describes the central idea that ties the whole group together. In many cases that central idea will not exist yet on a card. If it does not, the team should decide on the central idea and create a concise, usually three to five words, header card for that grouping. While silence is important for sorting, discussion should be used for selecting or creating headers. If one or more groupings are unusually large, look for sub-groupings within the larger groups. Sub- groupings should also have headers. Resist the temptation to create endless groupings and sub- groupings. Keep the number of headers between five and ten, if at all possible. 7. Draw the finished diagram. Your finished diagram could simply be Post-it™ notes stuck to flip-chart paper with lines containing and connecting the groupings or 3x5 cards pinned or taped to the wall. It is a good idea, however, to make an actual drawing of the finished diagram and to share it outside the team for comments and modification. The team should continue to change the diagram until it reflects the actual situation. Now what? If your time is limited or you don’t know whether applying a whole cycle of tools will be valuable, try making an affinity diagram and see what happens. In general, an affinity diagram will help add clarity and understanding whenever: 1. There appears to be chaos in the facts or ideas relating to the situation 2. Old solutions do not seem to be working and breakthrough thinking seems in order 3. Support for any proposed solution is critically essential to its success. Creating an affinity diagram may not be very valuable if: 1. The solution to the problem is simple 2. The situation demands quick, decisive action.
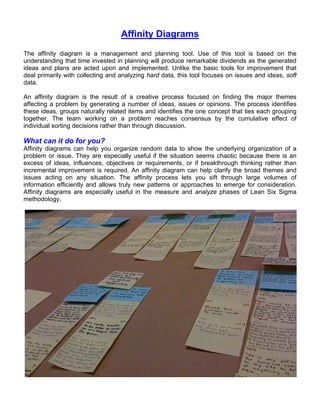
- 6. Making an affinity diagram will allow you to sift through large volumes of information and ideas with efficiency, however. It will also let truly new ways of looking at a problem or situation emerge for your consideration. This is an example of how one team used the affinitization process. Their objective was to define a current best practice. This diagram shows the main blocks and header cards they developed. Steven Bonacorsi is a Certified Lean Six Sigma Senior Master Black Belt instructor and coach. Steven Bonacorsi has trained hundreds of Master Black Belts, Black Belts, Green Belts, and Project Sponsors and Executive Leaders in Lean Six Sigma DMAIC and Design for Lean Six Sigma process improvement methodologies. He has led some of the largest deployments in the world and has saved hundreds of millions with his project teams results. The AIT Group, Inc. Steven Bonacorsi, Vice President, MBA, MS-CIS, PMP Lean Six Sigma Master Black Belt 3135 South Price Road, Suite 115 Chandler, AZ 85248-3549 Phone: +(1) 888.826.2484 sbonacorsi@comcast.net http://www.linkedin.com/in/stevenbonacorsi http://www.theaitgroup.com