SlideShare ist ein Scribd-Unternehmen logo
1 von 119
Downloaden Sie, um offline zu lesen
Post-Field


Collect
Data


           DNR Garmin


                    .txt

                           ArcView
Post-Field Overview
• DNR Garmin Program
• DNR Garmin Extension in ArcView

          Managing GPS Data
        Editing GPS & GIS Data
            Attributing Data
              Map Making
Review of ArcView Terminology
View =
  Window to display (and sometimes edit)
  geographic features (as themes)
Shapefile =
  ArcView data layer
Theme =
  Single data layer (e.g., Shapefile) added to View
Layout =
  Window to display View and graphics for map
  creation
DNR Garmin: Installation and Setup


Collect
Data


                 DNR Garmin


                          .txt

                                  ArcView
Objectives
• Overview of DNR Garmin
• Install DNR Garmin
  – Requirements
  – Installation Steps
DNR Garmin
• Overview
  – Developed by Minnesota Dept. of Natural Resources
  – Integrates ESRI’s ArcView 3.x software with all types
    of Garmin brand GPS receivers.
  – Comprised of a Visual Basic (VB) program and an
    ArcView extension
     • VB: DNRGarmin program (*.exe) communicates with GPS
       via a serial port allowing for transfer of waypoints and
       tracks
     • ArcView Extension: Allows for working in ArcView for
       shapefile / graphic creation (shapefiles in projection and
       datum of choice)
DNR Garmin
• Overview cont.
  – Can work independently of ArcView, data saved as
    text files (*.txt) or shapefiles in Lat/Long Decimal
    Degrees, WGS84 datum
  – Available from Internet or your Training CD
     • Training CD: /Software/DNRGarmin
     • Internet*


      TIP http://www.dnr.state.mn.us/mis/gis/tools/arcview/
      extensions/DNRGarmin/DNRGarmin.html
DNR Garmin Functionality Highlights
•   Download / Upload Waypoints & Tracks
•   Convert Waypoints to Points, Lines and Polygons
•   Convert Tracks to Points, Lines or Polygons
•   Calculates Area, Perimeter, Length
•   Allows for Attribute documentation
•   Real-Time Tracking*
•   Convert Line/Polygon Shapefiles back to Tracks*
•   Calculates Circular Error Probable (CEP)*

        * Advanced techniques taught later in class!
How it Works
• Outside of ArcView

• Inside of ArcView
Typical Use on a Fire

• Data             Download
  Transfer                    Upload
Installation Requirements
• Hardware:
  – Garmin GPS III Plus Receiver
  – PC (Windows 95 or higher) with available Serial Port
    (COM Port)
  – Garmin PC Download Cable

• Software
  – ArcView 3.X
  – DNR Garmin
Installation Requirements
• Ensure ArcView 3.X is functioning properly
   – Go To: Start Button | Programs | Esri | ArcView3 |
     ArcView
   – Confirm ArcView runs
   – Exit Program


• Proceed to DNR Garmin Installation
DNR Garmin Installation
• Installation
  – Navigate to /Software/DNRGarmin. Find on Training
    CD or local copy
  – Double-Click GarminSetup.exe


 – Execute the Program
                                        Press
 – Need to Change the
   Destination Directory
 – Press Browse
Installation
 • Download DNR Garmin cont.
   – Navigate to the c:/esri/av_gis30/arcview/ext32
     directory*
   – Press OK


• Continue Installation
  – Click Next
  – Accept Typical Installation
  – Click Next to Install
DNR Garmin Summary
• Overview of DNR Garmin capabilities
• Installed 10 files including ArcView extension
  and help file in
  c:/esri/av_gis30/arcview/ext32 directory
• Installed the DNR Garmin program on the PC
  desktop

• Congratulations!
DNR Garmin Program: Download Waypoints


 Collect
 Data


                DNR Garmin


                             Fire Data
Objectives
• Getting Connected
    – Opening DNR Garmin Outside of ArcView
•   Download Waypoints
•   Basic Waypoint Table Edits
•   Save GPS Data as TEXT File
•   Confirm File Naming Convention
Getting Connected - Step 1

  Connect
•
GPS unit
to PC
• Start Receiver
    - Push the ON button
    - Push the MENU button twice
    - Scroll down to SETUP
    - Push ENTER
    - Scroll left to the SIMULATOR tab
• Change
  Simulator Mode
  to On
• Check Interface
                                 Protocol
• Scroll up to Simulator Tab
• Scroll right to the INTERFACE tab
Getting Connected - Step 2
• Double-Click DNRGarmin shortcut on
  Desktop


                     VB Program


             Current GPS III+ Version
              Recommended for Class
Troubleshooting Tips
• Check the following if connection cannot be made

  – Cables are securely attached
  – Interface on receiver is set to Garmin
• VB Menu Option GPS
  – These options set up communication protocols with
    GPS
     • Select GPS | Assign Port and Select other COM port*
     • Select GPS | Open Port to establish connection

      * ActiveSync or other peripherals may be using same port
Download Waypoints to Text File
 • Select Waypoint | Download
 • Click <<<Advanced<<< button to see entire
   table
 • Data is Lat/Long in Decimal Degrees
 • Datum is WGS84*


* WGS84 is a result of setting
Interface to Garmin and is the
native language of GPS
Table Edit Techniques
• Important Fields:
  – TYPE: Type of point this represents
  – IDENT: 6 characters defining name (defaulted
    here to Garmin’s AutoNumber)
  – LAT/LONG: Latitude / Longitude in WGS84
    Datum
  – COMMENT: 16 characters stored with Waypoint
    only


    TIP “CRTD” in
    Comment field
    stands for Created
Table Edit Techniques
• Editing Table Information
  – Double-Clicking on Cell - Modifies Cell Value
                       You could m
                                     ove the
                       waypoint if y
                                     ou wanted to
  – Deleting Records                              !


  – Deleting Columns


  – To Select multiple columns or rows, hold down
    mouse and drag
Table Edit Techniques
• Edit Restoration Fire Scenario Data
  – Delete 2nd Archeological Site (remove row two)
     • Highlight Row 2
     • Click                  to delete selected row


  – Delete extraneous column data
     • Highlight “unused1” column
     • Left mouse drag left to “depth”


     • Click                  to delete selected columns
Save Waypoints to Text File
• Select File | Save As | GPS Text File...

• Save As: See Instructors Guidelines
Confirm Directory Structure
– Example shown here for the Restoration Fire at
 Tallahassee Florida Training
Review
DNR Garmin is two programs in one
1.) VB Program outside of ArcView
2.) ArcView 3.x extension

• VB Program can save .txt file or shapefile
  – coordinates in Latitude/Longitude Decimal Degrees,
    WGS84 datum ONLY
• ArcView extension can save as graphic or
  shapefile
  – has shapefile projection and datum change capabilities
Summary
• Connected successfully to the GPS
• Used DNR Garmin Program
  – Outside of ArcView
• Edited simple Waypoint Data
• Saved as Text File
• Confirmed location of file on PC
DNR Garmin Extension in ArcView: Set up


Collect
Data


               DNR Garmin


                              ArcView
Objectives
• Getting Connected
  –   Open ArcView a new project
  –   Set View Properties
  –   Load the DNR Extension
  –   Opening DNR Garmin Inside of ArcView
• Overview Menu Options
• Help Review
Getting Connected - Check

  Turn on
 •
 Garmin GPS

• For best results, the Garmin
  GPS should be connected to
  the computer via a serial
  cable and turned on before
  loading the DNR Garmin
  extension.
Getting Connected - Check

• Simulator Mode to On


 TIP Garmin GPS returns to Simulator Off during power up
Getting Connected - Step 1
• Start ArcView
  – Start Button| Programs | ESRI | ArcView3 | ArcView

• Open an ArcView
  – New View
  Or...
  – “with a new View”
    when dialog box
    inquires
Getting Connected - Step 1
• Set View | Properties
  – Map Units: meters
  – Distance Units: feet
• Load DNR Garmin
  Extension
  – Select File | Extensions...
  – Scroll to Select
    “DNR Garmin - ArcView”
  – Press OK
Getting Connected - Step 2
• Set Projection
  – Since some of you may already have loaded DNR
    Garmin, we need to ensure the Projection is set
  – Select DNR Garmin | Set Projection


  – This may not be the correct projection and datum,
    Press NO
  – Set parameters to the Class
    Instructions
Projections - What’s the big deal anyway!
• To GIS personnel - this is a big deal
• Intimately linked to the data collection from the
  field
• Ask how the GIS personnel prefers the data
• All raw GPS data is expressed in Lat/Long
  Decimal Degrees - WGS84 Datum
  – Setting Garmin to Garmin Protocol ensures data
    arriving in downloaded as DD WGS84
Projections - What’s the big deal anyway!
• When GPS data is downloaded to ArcView the
  data is projected “on the fly” using the projection
  you define using:
  – DNRGarmin | Set Projection Dialog box
  – Information is stored in a file and can be reset at any
    time
• This assumes the base data is
  projected and is being displayed
  in an unprojected View.
Getting Connected - Step 3
• Open DNR Garmin - Select DNR Garmin | Open
  Garmin GPS


• If GPS is turned on you will see this

• Congratulations!
Overview DNR Garmin Menu
• OPEN Garmin GPS: Starts the DNR Garmin Program
• Set Projection: Sets the Projection for Incoming Data
• Convert Points: Convert Point shapefile to line or
  polygon
• Calculate Shape Attributes: Calculates attributes of
  shapefile (GIS units) and adds them to the attribute table.
• Add Documentation
• Calculate CEP: Calculates Circular Error Probability
  for the Selected Point Theme
DNR Garmin Help
• Open DNR Help
• Select Help | DNR Help File
  Index
• Select “Downloading Data”
  from the Contents Tab

• Close Help
Summary
• Connected successfully to the GPS
• Used DNR Garmin Program (extension)
  – INSIDE of ArcView
• Reviewed basic capabilities in DNR Garmin
  Menu
• Launched DNR Garmin Help
DNR Garmin & ArcView:
          Waypoint and Track Download


Collect
Data


                   DNR Garmin


                                  ArcView
Objectives

• Add Themes to View
• Download Waypoints and Tracks with the DNR
  Garmin extension in ArcView
• Basic Waypoint and Track table edit with DNR
  Garmin
• Save Waypoints and Tracks as ArcView
  Shapefiles
Add Themes to View
• We can add an image theme (background) to the
  view
• Load MrSID Extension
  – Select File | Extensions...
  – Scroll to Select
    “MrSID Image Support”
  – Press OK
Add Themes to the View
• Add Image Themes from Incident Folder
– Add Theme Button      or...
– View | Add Theme

– Look in
  ACTIVE_INCIDENT/BASE
  DATA/IMAGES folder
– Change Data Source Type to
  Image Data Source
– Add themes (e.g.,
  wicadrg.sid, wicadoqq.sid)
Add Themes to the View
• Add Vector (feature) Themes from Incident
  Folder
– Add Theme Button    or...
– View | Add Theme
– Look in
  ACTIVE_INCIDENT/BASE
  DATA/SHAPEFILES
  folder for feature data
– Add theme
  (e.g., wicatrll.shp)
– Add others
Download Waypoints into ArcView
• Select Waypoint | Download
• Click <<<Advanced<<< button to see entire table
Table Edit Techniques
• Edit Waypoint Data
  – Delete 2nd Archeological Site (Remove Row two)
     • Highlight row

     • Click               to delete selected row
  – Delete extraneous column data
     • Highlight “unused1” column
     • Left mouse drag left to “depth”


     • Click               to delete selected columns
Save as ArcView Shapefile
• Select File | Save As | ArcView Shapefile
• Output Point
• Rename and Save
  Shapefile


• Shapefile will be added to View
• Turn on in View
Download Track into ArcView
• Select Tracks | Download
• <<<Advanced<<<


What’s with the blue?
This is an indication of a
“new” track. This
signifies a break in
sequence of track point
data collection based on
date and/or time.
Download Track into ArcView

• Delete Track Data
  – Delete extraneous columns
     • Highlight column


     • Left mouse drag for
       multiple selection

     • Click         to delete
       selected columns
Save as ArcView Shapefile
• Select File | Save As | ArcView Shapefile
• Output Polygon
• Rename and Save
  Shapefile


• Shapefile will be added to Themes
• Turn on in View
Save ArcView Project
• File | Save Project As…
  – Browse to Projects folder
  – Name with incident name and date
  – OK
Summary
• Added Themes to View
• Downloaded Waypoints and Tracks with the DNR
  Garmin extension in ArcView
• Edited the Waypoint and Track tables with DNR
  Garmin
• Saved Waypoints as ArcView Point Shapefile and
  Track as ArcView Polygon Shapefiles
ArcView: Basic Editing


Collect
Data


                DNR Garmin


                                   ArcView
Objectives
•   Edit the View legend for point and polygon themes
•   Calculate attributes for shapefile with DNR Garmin
•   Document shapefiles with DNR Garmin
•   Print or save a “map”
•   Install AlaskaPak Extension
•   Turn on AlaskaPak in ArcView
•   Calculate Polygon Acreage and Perimeter Miles
•   Create a Layout with the AlaskaPak Layout Wizard
Edit Legend: Point Theme
• Double click on Point theme
• Double click on symbol to Edit
• Change point size

• Click on Paint Brush


• Change color
• Apply
Edit Legend: Polygon Theme
• Double click on theme in legend
• Double click on symbol to Edit

• Use the Fill Palette to change the fill to
  transparent and thicken outline
• Click on Paint Brush button
• Use the Color Palette to change
  Outline color
• Apply
DNR Garmin: Attribute Shapefiles
• Make polygon shapefile the active (raised) theme


• DNR Garmin | Calculate Shape Attributes
• Use identify button to show attributes
                      DN R
                           G
                     attrib armin cal
                                          culate
                           utes w
                                                   s
                    the G        i
                          IS (U th the unit
                                TM -              s
                                        meter of
                                               s ).
                            Area
   Identify

                                  = squ
                                          ar e m
• Click inside polygon     Perim                   eters
                                  e te r =
                                           meter
                                                    s
                +
DNR Garmin: Shapefile Documentation
• Make Theme Active
• DNR Garmin | Add Documentation
  –   Creator
  –   Agency
  –   Year
  –   Day
  –   Month
  –   Hour
  –   GPS Model
  –   Overwrite Field Option
What if I Want a Quick Map?
• File | Print to print the View
  – Screen capture, nothing fancy
  – No legend, scale bar, etc.

• File | Export to save as
  a .jpg
   –   Products folder by date
   –   Change file type to .jpg
   –   Name file
   –   OK
             TIP: Click on Options to increase
             resolution and quality of .jpg
ArcView: AlaskaPak Extension


Collect
Data


                    DNR Garmin


                                   ArcView
AlaskaPak Extension
       AlaskaPak is a NPS - AKRO developed
         extension for use with ArcView 3.x.
• Provides a suite of general utilities for use in a
  variety of GIS projects.
• Utilities are particularly useful for natural resource
  and cultural resource needs.
• Free to download, and all code is available within
  the extension for public use or modification.
AlaskaPak Installation
• Installation
  – Navigate to SoftwareAlaskaPak. Find on Training CD
    or internet*
  – Copy aksopack.avx to
    C:ESRIAV_GIS30ARCVIEWEXT32
  – Copy aksopack.hlp to
    C:ESRIAV_GIS30ARCVIEWHELP


      *http://www.nps.gov/gis/applications/new_apps.html
AlaskaPak Extension: Quick Acres
• Turn on AlaskaPak
  – File | Extensions | AlaskaPak

• Polygon Theme Active


• Add Acres/Miles to Attributes

• Identify Button
  – How many acres and perimeter miles was the burn?
AlaskaPak Extension: Quick Map
• Choose View Extent
  – Zoom in
  – Zoom out
  – Pan


• AlaskaPak | Layout Wizard
AlaskaPak Extension: Quick Map
• Create a Customized Layout
  –   Main Title
  –   Subtitle
  –   Park Unit
  –   Team or Group
  –   Template
  –   Orientation
  –   Size
  –   Scalebar units
AlaskaPak Extension: Quick Map
• Create a Customized Layout
  –   Select Themes - use shift key for multiple selection
  –   Number of columns in legend
  –   View for the vicinity map
  –   New layout name
  –   Create Layout

• Change Scale?

  – allows for more logical ratio
  – repeat until desired outcome
AlaskaPak Extension: Quick Map
• File | Print
• File | Export…*

   *Save .jpgs in
   products folder
      by date!


                                   Creation
          Legend                    Date
                     Locator Map
Save ArcView Project
• File | Save Project
      OR…

• Hit that SAVE button!
Summary
•   Edit the View legend for point and polygon themes
•   Calculate attributes for shapefile with DNR Garmin
•   Document shapefiles with DNR Garmin
•   Print or save a “map”
•   Install AlaskaPak Extension
•   Turn on AlaskaPak in ArcView
•   Calculate Polygon Acreage and Perimeter Miles
•   Create a Layout with the AlaskaPak Layout Wizard
END OF POST-FIELD
     FOR RESTORATION FIRE
• Close ArcView Project
DNR Garmin & ArcView:
     Downloading Waypoints & Tracks,
    Managing Tracks and Editing Legend


Collect
Data


                DNR Garmin


                                ArcView
Objectives
• Download Waypoints and save as Point Shapefile
• Track Management for multiple track segments
  –   Download track
  –   Save as Point Shapefile
  –   Save as again as Line Shapefile
  –   Select points that make up “polygon”
  –   convert points to polygon
  –   Delete unwanted lines
• Edited legend symbology, labels and theme names
New ArcView Project
• Start ArcView
  – Start Button| Programs | ESRI | ArcView3 | ArcView

• Open an ArcView
  – New View
  Or...
  – “with a new View”
    when dialog box
    inquires
New ArcView Project
• Set View | Properties
  – Map Units: meters
  – Distance Units: feet
New ArcView Project
• Load Extensions
  – AlaskaPak
  – DNR Garmin
  – MrSID
New ArcView Project
• Set Projection
  – Since some of you may already have loaded DNR
    Garmin, we need to ensure the Projection is set
  – Select DNR Garmin | Set Projection
Download Waypoints into ArcView
• Select Waypoint | Download
• Click <<<Advanced<<< button to see entire table
Save as ArcView Shapefile
• Select File | Save As | ArcView Shapefile
• Output Point
• Rename and Save
  Shapefile


• Shapefile will be added to View
• Turn on in View
Track Management
• DNR Garmin Extension
  – Track | Download
  – File | Save As | ArcView Shapefile
  – Output Point
  – Save in Working Folder
Track Management
• DNR Garmin Extension
  – Track | Download
  – File | Save As | ArcView Shapefile
  – Output Line
  – New Shapefile
  – Working Folder OR...
  – INCIDENTDATA
  folder and name
  as line feature
  (e.g., cigtoss_05162003_hndln.shp)
Track Management
• Exit the DNR Garmin Extension
  – File | Exit
Edit Point Shapefile
• Turn on Track Point Shapefile (turn off others)
  – Make Point Theme
    Active (raised)


  – Use Select tool and select points that make
    up the “polygon”
Edit Point Shapefile
• In the DNR Garmin drop down menu choose:
  DNR Garmin | Convert Points


• Convert Points
  window pops
  open

                            Selected Selected Points in Yellow in
                            Yellow
Edit Point Shapefile
• Order Field | Time
• Conversion Type | To Polygon
• Output | As Shapefile

 Result: Polygon created from selected points


                                         TIP -
                                         AlaskaPak
                                         also has this
                                         menu option!
Edit Line Shapefile
• Turn on Track Line Shapefile (turn off others)
• Line Theme Active
• Theme | Start Editing


• Select unwanted lines
  (i.e. those that make up
  the polygon features)
Edit Line Shapefile
• Edit | Delete Features


• Theme | Stop Editing


• Yes, Save Edits
FYI - Copying Shapefiles
• File | Manage Data Source
• Select Shapefile, Copy
• Browse to new folder
• OK


• Repeat to copy additional files
• Close Shapefile Manager
Deleting a Theme in the View
• Delete Track Point Theme from View
  – Select theme (make active) to
    delete

  – Hold shift key to select more
    than one theme (for future
    reference)

  – Edit | Delete Themes

  – Yes or Yes to All
Add Themes to the View

• Add Theme Button       or View | Add Theme

• Change Data Source
  Type to Feature or
  Image Data Source

• Select more than one
  file by holding the
  shift key down
Edit Theme Legend
• Double click on Point theme

• Legend Type: Unique Value


• Values Field:
  – select a field with a unique attribute
  – e.g., ident
Edit Theme Legend
• Edit size, symbol, and color for each unique point
  – double-click on symbol to open symbol window
  – change symbols


  – double-click on cell in label field to change label
• Click Apply !
• Save Project!
Edit Theme Legend
• Edit legend for line and polygon shapefiles
• Double click on theme in legend
• Double click on symbol to Edit
• Use the fill palette, color palette
  and pen palette to change style,
  fill, line/outline weight, and
  give color to foreground,
  background, and outline
• Apply
Example of View with Edited Legend
Advanced Legend Operations
• The map legend will look like this…
  – symbols look good
  – names are cryptic!


• You would like your map legend to look like
  this!
Advanced Legend Operations
• Make the theme active
• Theme | Properties

• Change Theme Name


• OK
• Repeat for all other themes
Save ArcView Project
• File | Save Project
      OR…

• Hit that SAVE button!
Summary
• Track Management
  –   Downloaded track with polygon and line features
  –   Saved as Polygon Shapefile
  –   Saved as Line Shapefile
  –   Deleted unwanted polygons
  –   Deleted unwanted lines
  –   Copied final shapefiles to incident data folder
• Deleted/Added themes to View
• Edited legend symbology, labels and theme names
ArcView: FirePak Extension &
          Advanced Legend Edits, Continued


Collect
Data


                     DNR Garmin


                                     ArcView
Objectives
• Install and turn on FirePak Extension
• Attribute Fire Perimeter Polygon
• Perform Additional Advanced Legend Operations
  – Add new palette to the legend editor
  – Use forestry.avp to change symbology
  – Change theme name in legend
• Create a Layout with the AlaskaPak Layout
  Wizard or on your own
FirePak Extension
  NPS Firepak 1.0 provides a set of tools useful for
    a variety of fire management applications.
• Allows users to convert a set of points to a polygon
• Calculate acreage and perimeter miles
• Add a set of key attributes to daily fire perimeter
  shapefiles and coverages
• The attributes added to fire perimeter polygons
  using the Fire Perimeter Attributes function
  conform to the proposed interagency data standard
  for daily fire perimeters
FirePak Installation
• Installation
   – Navigate to SoftwareFirePak. Find on Training
     CD or internet*
   – Copy firepak.avx to
     C:ESRIAV_GIS30ARCVIEWEXT32
   – Optional: Open and read readme.txt for a quick
     overview of FirePak
  * http://www.nps.gov/gis/applications/new_apps.html
                                           TIP ArcGIS 8.x
                                           version also available
                                           on CD and on the web
FirePak Extension: Attribution
• Turn on FirePak
  – File | Extensions | NPS FirePak
• FirePak | Fire Perimeter Attributes
• or… Fire Button

• STOP                        Polygon must be selected
• Make sure theme is active
• Select polygon
• Try again
FirePak Extension: Attribution
•   Unit ID
                  TIP: Float cursor
•   Fire Name over field
•   Fire Number
•   Collection Date
•   Collection Time
•   Collection Method
•   Source
•   Differential Correction
•   Travel Method

          Example displayed in the ArcView project status bar
FirePak Extension: Attribution
•   Contact
•   Phone
•   Email
•   Projection
    – Zone if UTM
• Units
• Datum
• Comments

• Finish!
FirePak Extension: Attribution
• Recalculate Acres?
• Recalculate Perimeter Miles?

• Identify Polygon
  Attributes


                    elp n!
                es h atio
              t
           ibu cre
       attr data
  ood eta
G
    th m
 wi
Advanced Legend Operations
• ArcView provides some additional legend
  palettes that can be loaded to your project
  – Double-click on a theme to bring up the legend editor
    and palette

  – Click on palette button

  – Click on Load
Advanced Legend Operations
• Browse to c:esriav_gis30arcviewsymbols
• Select forestry.avp from list
Advanced Legend Operations
• Forestry.avp has
  symbology similar
  to suggested
  symbols in the
  fireline handbook


• Click on Pen and Marker Palettes to see additions
• Edit the legend for your themes
• Then, make a map with AlaskaPak!
AlaskaPak Extension: Quick Map
What if you don’t like this map?
                               Double-click
Double-click
                                to change
 to change
                              *you can find
                              other logos on
                              the CD in
                              BASEDATA/
                              LOGOS


Double-click                  Double-click
 to change                     to change
What if you don’t like this map?
   Create a Layout on your own!


              View | Layout
              OR
              New Layout from
              Project Window


  Review Pre-work ArcView Training or use Help
Save Layout & ArcView Project
• Export or Print Layout
  – File | Print
  – File | Export…
  – Save .jpg in products folder by date


• Save ArcView Project!!!!!!!!!
Summary
• Installed and turned on FirePak Extension
• Attributed Fire Perimeter Polygon

• Performed Advanced Legend Operations
   – Added new palette to the legend editor
   – Used forestry.avp to change symbology

• Created a Layout with the AlaskaPak Layout
  Wizard or on your own
END OF POST-FIELD
   FOR CIGARETTE TOSS FIRE
• Close ArcView Project
Post-Field Summary
• DNR Garmin Program
• DNR Garmin Extension in ArcView

          Managing GPS Data
        Editing GPS & GIS Data
            Attributing Data
              Map Making

Weitere ähnliche Inhalte

Andere mochten auch

ATTRIBUT TABLE pada ARCGIS 10.0
ATTRIBUT TABLE pada ARCGIS 10.0ATTRIBUT TABLE pada ARCGIS 10.0
ATTRIBUT TABLE pada ARCGIS 10.0oriza steva andra
 
Pelatihan arc gis 10
Pelatihan arc gis 10Pelatihan arc gis 10
Pelatihan arc gis 10Bangka_31
 
Tutorial penyusunan layer peta & pembuatan layout di arcgis
Tutorial penyusunan layer peta & pembuatan layout di arcgisTutorial penyusunan layer peta & pembuatan layout di arcgis
Tutorial penyusunan layer peta & pembuatan layout di arcgisEgi Septiana
 
Belajar arc gis 10.2 10.3
Belajar arc gis 10.2 10.3Belajar arc gis 10.2 10.3
Belajar arc gis 10.2 10.3Beni Raharjo
 
Modul GIS (QGIS) Diklat GPS dan GIS BPSDM Kementerian PUPR, April 2016
Modul GIS (QGIS) Diklat GPS dan GIS BPSDM Kementerian PUPR, April 2016Modul GIS (QGIS) Diklat GPS dan GIS BPSDM Kementerian PUPR, April 2016
Modul GIS (QGIS) Diklat GPS dan GIS BPSDM Kementerian PUPR, April 2016bramantiyo marjuki
 
Survei dan Pemetaan Menggunakan GPS
Survei dan Pemetaan Menggunakan GPSSurvei dan Pemetaan Menggunakan GPS
Survei dan Pemetaan Menggunakan GPSbramantiyo marjuki
 

Andere mochten auch (7)

ATTRIBUT TABLE pada ARCGIS 10.0
ATTRIBUT TABLE pada ARCGIS 10.0ATTRIBUT TABLE pada ARCGIS 10.0
ATTRIBUT TABLE pada ARCGIS 10.0
 
Pelatihan arc gis 10
Pelatihan arc gis 10Pelatihan arc gis 10
Pelatihan arc gis 10
 
Pemetaan digital
Pemetaan digital Pemetaan digital
Pemetaan digital
 
Tutorial penyusunan layer peta & pembuatan layout di arcgis
Tutorial penyusunan layer peta & pembuatan layout di arcgisTutorial penyusunan layer peta & pembuatan layout di arcgis
Tutorial penyusunan layer peta & pembuatan layout di arcgis
 
Belajar arc gis 10.2 10.3
Belajar arc gis 10.2 10.3Belajar arc gis 10.2 10.3
Belajar arc gis 10.2 10.3
 
Modul GIS (QGIS) Diklat GPS dan GIS BPSDM Kementerian PUPR, April 2016
Modul GIS (QGIS) Diklat GPS dan GIS BPSDM Kementerian PUPR, April 2016Modul GIS (QGIS) Diklat GPS dan GIS BPSDM Kementerian PUPR, April 2016
Modul GIS (QGIS) Diklat GPS dan GIS BPSDM Kementerian PUPR, April 2016
 
Survei dan Pemetaan Menggunakan GPS
Survei dan Pemetaan Menggunakan GPSSurvei dan Pemetaan Menggunakan GPS
Survei dan Pemetaan Menggunakan GPS
 

Ähnlich wie GPS

Global mapper tutorial Jimma University Ethiopia
Global mapper tutorial Jimma University EthiopiaGlobal mapper tutorial Jimma University Ethiopia
Global mapper tutorial Jimma University Ethiopiachala hailu
 
Adding waypoints to Arc Map
Adding waypoints to Arc MapAdding waypoints to Arc Map
Adding waypoints to Arc MapJessica Meyer
 
Quadcept v9.3.6 Released
Quadcept v9.3.6 ReleasedQuadcept v9.3.6 Released
Quadcept v9.3.6 ReleasedQuadcept
 
Whats New In Silverlight 3
Whats New In Silverlight 3Whats New In Silverlight 3
Whats New In Silverlight 3Bruce Johnson
 
CDMA1X Pilot Panorama introduction
CDMA1X Pilot Panorama introductionCDMA1X Pilot Panorama introduction
CDMA1X Pilot Panorama introductionTempus Telcosys
 
A Graph Database That Scales - ArangoDB 3.7 Release Webinar
A Graph Database That Scales - ArangoDB 3.7 Release WebinarA Graph Database That Scales - ArangoDB 3.7 Release Webinar
A Graph Database That Scales - ArangoDB 3.7 Release WebinarArangoDB Database
 
Pallab\'s Presentation at Gis for Transportation Symposium
Pallab\'s Presentation at Gis for Transportation SymposiumPallab\'s Presentation at Gis for Transportation Symposium
Pallab\'s Presentation at Gis for Transportation Symposiumpallabgc
 
2018 GIS Colorado: Your Geospatial Connection: ZDV 3D A Modern 3D Visualizati...
2018 GIS Colorado: Your Geospatial Connection: ZDV 3D A Modern 3D Visualizati...2018 GIS Colorado: Your Geospatial Connection: ZDV 3D A Modern 3D Visualizati...
2018 GIS Colorado: Your Geospatial Connection: ZDV 3D A Modern 3D Visualizati...GIS in the Rockies
 
OpenStreetMap gps
OpenStreetMap gpsOpenStreetMap gps
OpenStreetMap gpsRuying Mi
 
Gps Drive introduction
Gps Drive introductionGps Drive introduction
Gps Drive introductionjasonplus
 
Mapping Water features from SAR Imagery
Mapping Water features from SAR ImageryMapping Water features from SAR Imagery
Mapping Water features from SAR Imagerybramantiyo marjuki
 
Users Guide Installation Techni Sat Sky Star
Users Guide Installation Techni Sat Sky StarUsers Guide Installation Techni Sat Sky Star
Users Guide Installation Techni Sat Sky StarSais Abdelkrim
 
Garmin api integration
Garmin api integrationGarmin api integration
Garmin api integrationKetan Raval
 
Jd Photo Tools - Company Presentation
Jd Photo Tools - Company PresentationJd Photo Tools - Company Presentation
Jd Photo Tools - Company Presentationjdingley
 

Ähnlich wie GPS (20)

Global mapperhelp
Global mapperhelpGlobal mapperhelp
Global mapperhelp
 
manual global mapper
manual global mappermanual global mapper
manual global mapper
 
Global mapper tutorial Jimma University Ethiopia
Global mapper tutorial Jimma University EthiopiaGlobal mapper tutorial Jimma University Ethiopia
Global mapper tutorial Jimma University Ethiopia
 
Global mapperhelp
Global mapperhelpGlobal mapperhelp
Global mapperhelp
 
Adding waypoints to Arc Map
Adding waypoints to Arc MapAdding waypoints to Arc Map
Adding waypoints to Arc Map
 
Quadcept v9.3.6 Released
Quadcept v9.3.6 ReleasedQuadcept v9.3.6 Released
Quadcept v9.3.6 Released
 
Whats New In Silverlight 3
Whats New In Silverlight 3Whats New In Silverlight 3
Whats New In Silverlight 3
 
CDMA1X Pilot Panorama introduction
CDMA1X Pilot Panorama introductionCDMA1X Pilot Panorama introduction
CDMA1X Pilot Panorama introduction
 
A Graph Database That Scales - ArangoDB 3.7 Release Webinar
A Graph Database That Scales - ArangoDB 3.7 Release WebinarA Graph Database That Scales - ArangoDB 3.7 Release Webinar
A Graph Database That Scales - ArangoDB 3.7 Release Webinar
 
Pallab\'s Presentation at Gis for Transportation Symposium
Pallab\'s Presentation at Gis for Transportation SymposiumPallab\'s Presentation at Gis for Transportation Symposium
Pallab\'s Presentation at Gis for Transportation Symposium
 
2018 GIS Colorado: Your Geospatial Connection: ZDV 3D A Modern 3D Visualizati...
2018 GIS Colorado: Your Geospatial Connection: ZDV 3D A Modern 3D Visualizati...2018 GIS Colorado: Your Geospatial Connection: ZDV 3D A Modern 3D Visualizati...
2018 GIS Colorado: Your Geospatial Connection: ZDV 3D A Modern 3D Visualizati...
 
Where 2.0
Where 2.0Where 2.0
Where 2.0
 
Promark 120
Promark 120Promark 120
Promark 120
 
Pm120
Pm120Pm120
Pm120
 
OpenStreetMap gps
OpenStreetMap gpsOpenStreetMap gps
OpenStreetMap gps
 
Gps Drive introduction
Gps Drive introductionGps Drive introduction
Gps Drive introduction
 
Mapping Water features from SAR Imagery
Mapping Water features from SAR ImageryMapping Water features from SAR Imagery
Mapping Water features from SAR Imagery
 
Users Guide Installation Techni Sat Sky Star
Users Guide Installation Techni Sat Sky StarUsers Guide Installation Techni Sat Sky Star
Users Guide Installation Techni Sat Sky Star
 
Garmin api integration
Garmin api integrationGarmin api integration
Garmin api integration
 
Jd Photo Tools - Company Presentation
Jd Photo Tools - Company PresentationJd Photo Tools - Company Presentation
Jd Photo Tools - Company Presentation
 

Kürzlich hochgeladen

DSPy a system for AI to Write Prompts and Do Fine Tuning
DSPy a system for AI to Write Prompts and Do Fine TuningDSPy a system for AI to Write Prompts and Do Fine Tuning
DSPy a system for AI to Write Prompts and Do Fine TuningLars Bell
 
The Ultimate Guide to Choosing WordPress Pros and Cons
The Ultimate Guide to Choosing WordPress Pros and ConsThe Ultimate Guide to Choosing WordPress Pros and Cons
The Ultimate Guide to Choosing WordPress Pros and ConsPixlogix Infotech
 
Digital Identity is Under Attack: FIDO Paris Seminar.pptx
Digital Identity is Under Attack: FIDO Paris Seminar.pptxDigital Identity is Under Attack: FIDO Paris Seminar.pptx
Digital Identity is Under Attack: FIDO Paris Seminar.pptxLoriGlavin3
 
SAP Build Work Zone - Overview L2-L3.pptx
SAP Build Work Zone - Overview L2-L3.pptxSAP Build Work Zone - Overview L2-L3.pptx
SAP Build Work Zone - Overview L2-L3.pptxNavinnSomaal
 
Transcript: New from BookNet Canada for 2024: Loan Stars - Tech Forum 2024
Transcript: New from BookNet Canada for 2024: Loan Stars - Tech Forum 2024Transcript: New from BookNet Canada for 2024: Loan Stars - Tech Forum 2024
Transcript: New from BookNet Canada for 2024: Loan Stars - Tech Forum 2024BookNet Canada
 
Nell’iperspazio con Rocket: il Framework Web di Rust!
Nell’iperspazio con Rocket: il Framework Web di Rust!Nell’iperspazio con Rocket: il Framework Web di Rust!
Nell’iperspazio con Rocket: il Framework Web di Rust!Commit University
 
unit 4 immunoblotting technique complete.pptx
unit 4 immunoblotting technique complete.pptxunit 4 immunoblotting technique complete.pptx
unit 4 immunoblotting technique complete.pptxBkGupta21
 
TeamStation AI System Report LATAM IT Salaries 2024
TeamStation AI System Report LATAM IT Salaries 2024TeamStation AI System Report LATAM IT Salaries 2024
TeamStation AI System Report LATAM IT Salaries 2024Lonnie McRorey
 
"Subclassing and Composition – A Pythonic Tour of Trade-Offs", Hynek Schlawack
"Subclassing and Composition – A Pythonic Tour of Trade-Offs", Hynek Schlawack"Subclassing and Composition – A Pythonic Tour of Trade-Offs", Hynek Schlawack
"Subclassing and Composition – A Pythonic Tour of Trade-Offs", Hynek SchlawackFwdays
 
TrustArc Webinar - How to Build Consumer Trust Through Data Privacy
TrustArc Webinar - How to Build Consumer Trust Through Data PrivacyTrustArc Webinar - How to Build Consumer Trust Through Data Privacy
TrustArc Webinar - How to Build Consumer Trust Through Data PrivacyTrustArc
 
Generative AI for Technical Writer or Information Developers
Generative AI for Technical Writer or Information DevelopersGenerative AI for Technical Writer or Information Developers
Generative AI for Technical Writer or Information DevelopersRaghuram Pandurangan
 
Hyperautomation and AI/ML: A Strategy for Digital Transformation Success.pdf
Hyperautomation and AI/ML: A Strategy for Digital Transformation Success.pdfHyperautomation and AI/ML: A Strategy for Digital Transformation Success.pdf
Hyperautomation and AI/ML: A Strategy for Digital Transformation Success.pdfPrecisely
 
SALESFORCE EDUCATION CLOUD | FEXLE SERVICES
SALESFORCE EDUCATION CLOUD | FEXLE SERVICESSALESFORCE EDUCATION CLOUD | FEXLE SERVICES
SALESFORCE EDUCATION CLOUD | FEXLE SERVICESmohitsingh558521
 
"ML in Production",Oleksandr Bagan
"ML in Production",Oleksandr Bagan"ML in Production",Oleksandr Bagan
"ML in Production",Oleksandr BaganFwdays
 
Ensuring Technical Readiness For Copilot in Microsoft 365
Ensuring Technical Readiness For Copilot in Microsoft 365Ensuring Technical Readiness For Copilot in Microsoft 365
Ensuring Technical Readiness For Copilot in Microsoft 3652toLead Limited
 
A Deep Dive on Passkeys: FIDO Paris Seminar.pptx
A Deep Dive on Passkeys: FIDO Paris Seminar.pptxA Deep Dive on Passkeys: FIDO Paris Seminar.pptx
A Deep Dive on Passkeys: FIDO Paris Seminar.pptxLoriGlavin3
 
The Fit for Passkeys for Employee and Consumer Sign-ins: FIDO Paris Seminar.pptx
The Fit for Passkeys for Employee and Consumer Sign-ins: FIDO Paris Seminar.pptxThe Fit for Passkeys for Employee and Consumer Sign-ins: FIDO Paris Seminar.pptx
The Fit for Passkeys for Employee and Consumer Sign-ins: FIDO Paris Seminar.pptxLoriGlavin3
 
Gen AI in Business - Global Trends Report 2024.pdf
Gen AI in Business - Global Trends Report 2024.pdfGen AI in Business - Global Trends Report 2024.pdf
Gen AI in Business - Global Trends Report 2024.pdfAddepto
 
Streamlining Python Development: A Guide to a Modern Project Setup
Streamlining Python Development: A Guide to a Modern Project SetupStreamlining Python Development: A Guide to a Modern Project Setup
Streamlining Python Development: A Guide to a Modern Project SetupFlorian Wilhelm
 
How AI, OpenAI, and ChatGPT impact business and software.
How AI, OpenAI, and ChatGPT impact business and software.How AI, OpenAI, and ChatGPT impact business and software.
How AI, OpenAI, and ChatGPT impact business and software.Curtis Poe
 

Kürzlich hochgeladen (20)

DSPy a system for AI to Write Prompts and Do Fine Tuning
DSPy a system for AI to Write Prompts and Do Fine TuningDSPy a system for AI to Write Prompts and Do Fine Tuning
DSPy a system for AI to Write Prompts and Do Fine Tuning
 
The Ultimate Guide to Choosing WordPress Pros and Cons
The Ultimate Guide to Choosing WordPress Pros and ConsThe Ultimate Guide to Choosing WordPress Pros and Cons
The Ultimate Guide to Choosing WordPress Pros and Cons
 
Digital Identity is Under Attack: FIDO Paris Seminar.pptx
Digital Identity is Under Attack: FIDO Paris Seminar.pptxDigital Identity is Under Attack: FIDO Paris Seminar.pptx
Digital Identity is Under Attack: FIDO Paris Seminar.pptx
 
SAP Build Work Zone - Overview L2-L3.pptx
SAP Build Work Zone - Overview L2-L3.pptxSAP Build Work Zone - Overview L2-L3.pptx
SAP Build Work Zone - Overview L2-L3.pptx
 
Transcript: New from BookNet Canada for 2024: Loan Stars - Tech Forum 2024
Transcript: New from BookNet Canada for 2024: Loan Stars - Tech Forum 2024Transcript: New from BookNet Canada for 2024: Loan Stars - Tech Forum 2024
Transcript: New from BookNet Canada for 2024: Loan Stars - Tech Forum 2024
 
Nell’iperspazio con Rocket: il Framework Web di Rust!
Nell’iperspazio con Rocket: il Framework Web di Rust!Nell’iperspazio con Rocket: il Framework Web di Rust!
Nell’iperspazio con Rocket: il Framework Web di Rust!
 
unit 4 immunoblotting technique complete.pptx
unit 4 immunoblotting technique complete.pptxunit 4 immunoblotting technique complete.pptx
unit 4 immunoblotting technique complete.pptx
 
TeamStation AI System Report LATAM IT Salaries 2024
TeamStation AI System Report LATAM IT Salaries 2024TeamStation AI System Report LATAM IT Salaries 2024
TeamStation AI System Report LATAM IT Salaries 2024
 
"Subclassing and Composition – A Pythonic Tour of Trade-Offs", Hynek Schlawack
"Subclassing and Composition – A Pythonic Tour of Trade-Offs", Hynek Schlawack"Subclassing and Composition – A Pythonic Tour of Trade-Offs", Hynek Schlawack
"Subclassing and Composition – A Pythonic Tour of Trade-Offs", Hynek Schlawack
 
TrustArc Webinar - How to Build Consumer Trust Through Data Privacy
TrustArc Webinar - How to Build Consumer Trust Through Data PrivacyTrustArc Webinar - How to Build Consumer Trust Through Data Privacy
TrustArc Webinar - How to Build Consumer Trust Through Data Privacy
 
Generative AI for Technical Writer or Information Developers
Generative AI for Technical Writer or Information DevelopersGenerative AI for Technical Writer or Information Developers
Generative AI for Technical Writer or Information Developers
 
Hyperautomation and AI/ML: A Strategy for Digital Transformation Success.pdf
Hyperautomation and AI/ML: A Strategy for Digital Transformation Success.pdfHyperautomation and AI/ML: A Strategy for Digital Transformation Success.pdf
Hyperautomation and AI/ML: A Strategy for Digital Transformation Success.pdf
 
SALESFORCE EDUCATION CLOUD | FEXLE SERVICES
SALESFORCE EDUCATION CLOUD | FEXLE SERVICESSALESFORCE EDUCATION CLOUD | FEXLE SERVICES
SALESFORCE EDUCATION CLOUD | FEXLE SERVICES
 
"ML in Production",Oleksandr Bagan
"ML in Production",Oleksandr Bagan"ML in Production",Oleksandr Bagan
"ML in Production",Oleksandr Bagan
 
Ensuring Technical Readiness For Copilot in Microsoft 365
Ensuring Technical Readiness For Copilot in Microsoft 365Ensuring Technical Readiness For Copilot in Microsoft 365
Ensuring Technical Readiness For Copilot in Microsoft 365
 
A Deep Dive on Passkeys: FIDO Paris Seminar.pptx
A Deep Dive on Passkeys: FIDO Paris Seminar.pptxA Deep Dive on Passkeys: FIDO Paris Seminar.pptx
A Deep Dive on Passkeys: FIDO Paris Seminar.pptx
 
The Fit for Passkeys for Employee and Consumer Sign-ins: FIDO Paris Seminar.pptx
The Fit for Passkeys for Employee and Consumer Sign-ins: FIDO Paris Seminar.pptxThe Fit for Passkeys for Employee and Consumer Sign-ins: FIDO Paris Seminar.pptx
The Fit for Passkeys for Employee and Consumer Sign-ins: FIDO Paris Seminar.pptx
 
Gen AI in Business - Global Trends Report 2024.pdf
Gen AI in Business - Global Trends Report 2024.pdfGen AI in Business - Global Trends Report 2024.pdf
Gen AI in Business - Global Trends Report 2024.pdf
 
Streamlining Python Development: A Guide to a Modern Project Setup
Streamlining Python Development: A Guide to a Modern Project SetupStreamlining Python Development: A Guide to a Modern Project Setup
Streamlining Python Development: A Guide to a Modern Project Setup
 
How AI, OpenAI, and ChatGPT impact business and software.
How AI, OpenAI, and ChatGPT impact business and software.How AI, OpenAI, and ChatGPT impact business and software.
How AI, OpenAI, and ChatGPT impact business and software.
 

GPS

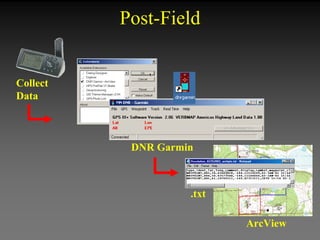
  • 1. Post-Field Collect Data DNR Garmin .txt ArcView
  • 2. Post-Field Overview • DNR Garmin Program • DNR Garmin Extension in ArcView Managing GPS Data Editing GPS & GIS Data Attributing Data Map Making
  • 3. Review of ArcView Terminology View = Window to display (and sometimes edit) geographic features (as themes) Shapefile = ArcView data layer Theme = Single data layer (e.g., Shapefile) added to View Layout = Window to display View and graphics for map creation
  • 4. DNR Garmin: Installation and Setup Collect Data DNR Garmin .txt ArcView
  • 5. Objectives • Overview of DNR Garmin • Install DNR Garmin – Requirements – Installation Steps
  • 6. DNR Garmin • Overview – Developed by Minnesota Dept. of Natural Resources – Integrates ESRI’s ArcView 3.x software with all types of Garmin brand GPS receivers. – Comprised of a Visual Basic (VB) program and an ArcView extension • VB: DNRGarmin program (*.exe) communicates with GPS via a serial port allowing for transfer of waypoints and tracks • ArcView Extension: Allows for working in ArcView for shapefile / graphic creation (shapefiles in projection and datum of choice)
  • 7. DNR Garmin • Overview cont. – Can work independently of ArcView, data saved as text files (*.txt) or shapefiles in Lat/Long Decimal Degrees, WGS84 datum – Available from Internet or your Training CD • Training CD: /Software/DNRGarmin • Internet* TIP http://www.dnr.state.mn.us/mis/gis/tools/arcview/ extensions/DNRGarmin/DNRGarmin.html
  • 8. DNR Garmin Functionality Highlights • Download / Upload Waypoints & Tracks • Convert Waypoints to Points, Lines and Polygons • Convert Tracks to Points, Lines or Polygons • Calculates Area, Perimeter, Length • Allows for Attribute documentation • Real-Time Tracking* • Convert Line/Polygon Shapefiles back to Tracks* • Calculates Circular Error Probable (CEP)* * Advanced techniques taught later in class!
  • 9. How it Works • Outside of ArcView • Inside of ArcView
  • 10. Typical Use on a Fire • Data Download Transfer Upload
  • 11. Installation Requirements • Hardware: – Garmin GPS III Plus Receiver – PC (Windows 95 or higher) with available Serial Port (COM Port) – Garmin PC Download Cable • Software – ArcView 3.X – DNR Garmin
  • 12. Installation Requirements • Ensure ArcView 3.X is functioning properly – Go To: Start Button | Programs | Esri | ArcView3 | ArcView – Confirm ArcView runs – Exit Program • Proceed to DNR Garmin Installation
  • 13. DNR Garmin Installation • Installation – Navigate to /Software/DNRGarmin. Find on Training CD or local copy – Double-Click GarminSetup.exe – Execute the Program Press – Need to Change the Destination Directory – Press Browse
  • 14. Installation • Download DNR Garmin cont. – Navigate to the c:/esri/av_gis30/arcview/ext32 directory* – Press OK • Continue Installation – Click Next – Accept Typical Installation – Click Next to Install
  • 15. DNR Garmin Summary • Overview of DNR Garmin capabilities • Installed 10 files including ArcView extension and help file in c:/esri/av_gis30/arcview/ext32 directory • Installed the DNR Garmin program on the PC desktop • Congratulations!
  • 16. DNR Garmin Program: Download Waypoints Collect Data DNR Garmin Fire Data
  • 17. Objectives • Getting Connected – Opening DNR Garmin Outside of ArcView • Download Waypoints • Basic Waypoint Table Edits • Save GPS Data as TEXT File • Confirm File Naming Convention
  • 18. Getting Connected - Step 1 Connect • GPS unit to PC • Start Receiver - Push the ON button - Push the MENU button twice - Scroll down to SETUP - Push ENTER - Scroll left to the SIMULATOR tab
  • 19. • Change Simulator Mode to On
  • 20. • Check Interface Protocol • Scroll up to Simulator Tab • Scroll right to the INTERFACE tab
  • 21. Getting Connected - Step 2 • Double-Click DNRGarmin shortcut on Desktop VB Program Current GPS III+ Version Recommended for Class
  • 22. Troubleshooting Tips • Check the following if connection cannot be made – Cables are securely attached – Interface on receiver is set to Garmin • VB Menu Option GPS – These options set up communication protocols with GPS • Select GPS | Assign Port and Select other COM port* • Select GPS | Open Port to establish connection * ActiveSync or other peripherals may be using same port
  • 23. Download Waypoints to Text File • Select Waypoint | Download • Click <<<Advanced<<< button to see entire table • Data is Lat/Long in Decimal Degrees • Datum is WGS84* * WGS84 is a result of setting Interface to Garmin and is the native language of GPS
  • 24. Table Edit Techniques • Important Fields: – TYPE: Type of point this represents – IDENT: 6 characters defining name (defaulted here to Garmin’s AutoNumber) – LAT/LONG: Latitude / Longitude in WGS84 Datum – COMMENT: 16 characters stored with Waypoint only TIP “CRTD” in Comment field stands for Created
  • 25. Table Edit Techniques • Editing Table Information – Double-Clicking on Cell - Modifies Cell Value You could m ove the waypoint if y ou wanted to – Deleting Records ! – Deleting Columns – To Select multiple columns or rows, hold down mouse and drag
  • 26. Table Edit Techniques • Edit Restoration Fire Scenario Data – Delete 2nd Archeological Site (remove row two) • Highlight Row 2 • Click to delete selected row – Delete extraneous column data • Highlight “unused1” column • Left mouse drag left to “depth” • Click to delete selected columns
  • 27. Save Waypoints to Text File • Select File | Save As | GPS Text File... • Save As: See Instructors Guidelines
  • 28. Confirm Directory Structure – Example shown here for the Restoration Fire at Tallahassee Florida Training
  • 29. Review DNR Garmin is two programs in one 1.) VB Program outside of ArcView 2.) ArcView 3.x extension • VB Program can save .txt file or shapefile – coordinates in Latitude/Longitude Decimal Degrees, WGS84 datum ONLY • ArcView extension can save as graphic or shapefile – has shapefile projection and datum change capabilities
  • 30. Summary • Connected successfully to the GPS • Used DNR Garmin Program – Outside of ArcView • Edited simple Waypoint Data • Saved as Text File • Confirmed location of file on PC
  • 31. DNR Garmin Extension in ArcView: Set up Collect Data DNR Garmin ArcView
  • 32. Objectives • Getting Connected – Open ArcView a new project – Set View Properties – Load the DNR Extension – Opening DNR Garmin Inside of ArcView • Overview Menu Options • Help Review
  • 33. Getting Connected - Check Turn on • Garmin GPS • For best results, the Garmin GPS should be connected to the computer via a serial cable and turned on before loading the DNR Garmin extension.
  • 34. Getting Connected - Check • Simulator Mode to On TIP Garmin GPS returns to Simulator Off during power up
  • 35. Getting Connected - Step 1 • Start ArcView – Start Button| Programs | ESRI | ArcView3 | ArcView • Open an ArcView – New View Or... – “with a new View” when dialog box inquires
  • 36. Getting Connected - Step 1 • Set View | Properties – Map Units: meters – Distance Units: feet • Load DNR Garmin Extension – Select File | Extensions... – Scroll to Select “DNR Garmin - ArcView” – Press OK
  • 37. Getting Connected - Step 2 • Set Projection – Since some of you may already have loaded DNR Garmin, we need to ensure the Projection is set – Select DNR Garmin | Set Projection – This may not be the correct projection and datum, Press NO – Set parameters to the Class Instructions
  • 38. Projections - What’s the big deal anyway! • To GIS personnel - this is a big deal • Intimately linked to the data collection from the field • Ask how the GIS personnel prefers the data • All raw GPS data is expressed in Lat/Long Decimal Degrees - WGS84 Datum – Setting Garmin to Garmin Protocol ensures data arriving in downloaded as DD WGS84
  • 39. Projections - What’s the big deal anyway! • When GPS data is downloaded to ArcView the data is projected “on the fly” using the projection you define using: – DNRGarmin | Set Projection Dialog box – Information is stored in a file and can be reset at any time • This assumes the base data is projected and is being displayed in an unprojected View.
  • 40. Getting Connected - Step 3 • Open DNR Garmin - Select DNR Garmin | Open Garmin GPS • If GPS is turned on you will see this • Congratulations!
  • 41. Overview DNR Garmin Menu • OPEN Garmin GPS: Starts the DNR Garmin Program • Set Projection: Sets the Projection for Incoming Data • Convert Points: Convert Point shapefile to line or polygon • Calculate Shape Attributes: Calculates attributes of shapefile (GIS units) and adds them to the attribute table. • Add Documentation • Calculate CEP: Calculates Circular Error Probability for the Selected Point Theme
  • 42. DNR Garmin Help • Open DNR Help • Select Help | DNR Help File Index • Select “Downloading Data” from the Contents Tab • Close Help
  • 43. Summary • Connected successfully to the GPS • Used DNR Garmin Program (extension) – INSIDE of ArcView • Reviewed basic capabilities in DNR Garmin Menu • Launched DNR Garmin Help
  • 44. DNR Garmin & ArcView: Waypoint and Track Download Collect Data DNR Garmin ArcView
  • 45. Objectives • Add Themes to View • Download Waypoints and Tracks with the DNR Garmin extension in ArcView • Basic Waypoint and Track table edit with DNR Garmin • Save Waypoints and Tracks as ArcView Shapefiles
  • 46. Add Themes to View • We can add an image theme (background) to the view • Load MrSID Extension – Select File | Extensions... – Scroll to Select “MrSID Image Support” – Press OK
  • 47. Add Themes to the View • Add Image Themes from Incident Folder – Add Theme Button or... – View | Add Theme – Look in ACTIVE_INCIDENT/BASE DATA/IMAGES folder – Change Data Source Type to Image Data Source – Add themes (e.g., wicadrg.sid, wicadoqq.sid)
  • 48. Add Themes to the View • Add Vector (feature) Themes from Incident Folder – Add Theme Button or... – View | Add Theme – Look in ACTIVE_INCIDENT/BASE DATA/SHAPEFILES folder for feature data – Add theme (e.g., wicatrll.shp) – Add others
  • 49. Download Waypoints into ArcView • Select Waypoint | Download • Click <<<Advanced<<< button to see entire table
  • 50. Table Edit Techniques • Edit Waypoint Data – Delete 2nd Archeological Site (Remove Row two) • Highlight row • Click to delete selected row – Delete extraneous column data • Highlight “unused1” column • Left mouse drag left to “depth” • Click to delete selected columns
  • 51. Save as ArcView Shapefile • Select File | Save As | ArcView Shapefile • Output Point • Rename and Save Shapefile • Shapefile will be added to View • Turn on in View
  • 52. Download Track into ArcView • Select Tracks | Download • <<<Advanced<<< What’s with the blue? This is an indication of a “new” track. This signifies a break in sequence of track point data collection based on date and/or time.
  • 53. Download Track into ArcView • Delete Track Data – Delete extraneous columns • Highlight column • Left mouse drag for multiple selection • Click to delete selected columns
  • 54. Save as ArcView Shapefile • Select File | Save As | ArcView Shapefile • Output Polygon • Rename and Save Shapefile • Shapefile will be added to Themes • Turn on in View
  • 55. Save ArcView Project • File | Save Project As… – Browse to Projects folder – Name with incident name and date – OK
  • 56. Summary • Added Themes to View • Downloaded Waypoints and Tracks with the DNR Garmin extension in ArcView • Edited the Waypoint and Track tables with DNR Garmin • Saved Waypoints as ArcView Point Shapefile and Track as ArcView Polygon Shapefiles
  • 58. Objectives • Edit the View legend for point and polygon themes • Calculate attributes for shapefile with DNR Garmin • Document shapefiles with DNR Garmin • Print or save a “map” • Install AlaskaPak Extension • Turn on AlaskaPak in ArcView • Calculate Polygon Acreage and Perimeter Miles • Create a Layout with the AlaskaPak Layout Wizard
  • 59. Edit Legend: Point Theme • Double click on Point theme • Double click on symbol to Edit • Change point size • Click on Paint Brush • Change color • Apply
  • 60. Edit Legend: Polygon Theme • Double click on theme in legend • Double click on symbol to Edit • Use the Fill Palette to change the fill to transparent and thicken outline • Click on Paint Brush button • Use the Color Palette to change Outline color • Apply
  • 61. DNR Garmin: Attribute Shapefiles • Make polygon shapefile the active (raised) theme • DNR Garmin | Calculate Shape Attributes • Use identify button to show attributes DN R G attrib armin cal culate utes w s the G i IS (U th the unit TM - s meter of s ). Area Identify = squ ar e m • Click inside polygon Perim eters e te r = meter s +
  • 62. DNR Garmin: Shapefile Documentation • Make Theme Active • DNR Garmin | Add Documentation – Creator – Agency – Year – Day – Month – Hour – GPS Model – Overwrite Field Option
  • 63. What if I Want a Quick Map? • File | Print to print the View – Screen capture, nothing fancy – No legend, scale bar, etc. • File | Export to save as a .jpg – Products folder by date – Change file type to .jpg – Name file – OK TIP: Click on Options to increase resolution and quality of .jpg
  • 65. AlaskaPak Extension AlaskaPak is a NPS - AKRO developed extension for use with ArcView 3.x. • Provides a suite of general utilities for use in a variety of GIS projects. • Utilities are particularly useful for natural resource and cultural resource needs. • Free to download, and all code is available within the extension for public use or modification.
  • 66. AlaskaPak Installation • Installation – Navigate to SoftwareAlaskaPak. Find on Training CD or internet* – Copy aksopack.avx to C:ESRIAV_GIS30ARCVIEWEXT32 – Copy aksopack.hlp to C:ESRIAV_GIS30ARCVIEWHELP *http://www.nps.gov/gis/applications/new_apps.html
  • 67. AlaskaPak Extension: Quick Acres • Turn on AlaskaPak – File | Extensions | AlaskaPak • Polygon Theme Active • Add Acres/Miles to Attributes • Identify Button – How many acres and perimeter miles was the burn?
  • 68. AlaskaPak Extension: Quick Map • Choose View Extent – Zoom in – Zoom out – Pan • AlaskaPak | Layout Wizard
  • 69. AlaskaPak Extension: Quick Map • Create a Customized Layout – Main Title – Subtitle – Park Unit – Team or Group – Template – Orientation – Size – Scalebar units
  • 70. AlaskaPak Extension: Quick Map • Create a Customized Layout – Select Themes - use shift key for multiple selection – Number of columns in legend – View for the vicinity map – New layout name – Create Layout • Change Scale? – allows for more logical ratio – repeat until desired outcome
  • 71. AlaskaPak Extension: Quick Map • File | Print • File | Export…* *Save .jpgs in products folder by date! Creation Legend Date Locator Map
  • 72. Save ArcView Project • File | Save Project OR… • Hit that SAVE button!
  • 73. Summary • Edit the View legend for point and polygon themes • Calculate attributes for shapefile with DNR Garmin • Document shapefiles with DNR Garmin • Print or save a “map” • Install AlaskaPak Extension • Turn on AlaskaPak in ArcView • Calculate Polygon Acreage and Perimeter Miles • Create a Layout with the AlaskaPak Layout Wizard
  • 74. END OF POST-FIELD FOR RESTORATION FIRE • Close ArcView Project
  • 75. DNR Garmin & ArcView: Downloading Waypoints & Tracks, Managing Tracks and Editing Legend Collect Data DNR Garmin ArcView
  • 76. Objectives • Download Waypoints and save as Point Shapefile • Track Management for multiple track segments – Download track – Save as Point Shapefile – Save as again as Line Shapefile – Select points that make up “polygon” – convert points to polygon – Delete unwanted lines • Edited legend symbology, labels and theme names
  • 77. New ArcView Project • Start ArcView – Start Button| Programs | ESRI | ArcView3 | ArcView • Open an ArcView – New View Or... – “with a new View” when dialog box inquires
  • 78. New ArcView Project • Set View | Properties – Map Units: meters – Distance Units: feet
  • 79. New ArcView Project • Load Extensions – AlaskaPak – DNR Garmin – MrSID
  • 80. New ArcView Project • Set Projection – Since some of you may already have loaded DNR Garmin, we need to ensure the Projection is set – Select DNR Garmin | Set Projection
  • 81. Download Waypoints into ArcView • Select Waypoint | Download • Click <<<Advanced<<< button to see entire table
  • 82. Save as ArcView Shapefile • Select File | Save As | ArcView Shapefile • Output Point • Rename and Save Shapefile • Shapefile will be added to View • Turn on in View
  • 83. Track Management • DNR Garmin Extension – Track | Download – File | Save As | ArcView Shapefile – Output Point – Save in Working Folder
  • 84. Track Management • DNR Garmin Extension – Track | Download – File | Save As | ArcView Shapefile – Output Line – New Shapefile – Working Folder OR... – INCIDENTDATA folder and name as line feature (e.g., cigtoss_05162003_hndln.shp)
  • 85. Track Management • Exit the DNR Garmin Extension – File | Exit
  • 86. Edit Point Shapefile • Turn on Track Point Shapefile (turn off others) – Make Point Theme Active (raised) – Use Select tool and select points that make up the “polygon”
  • 87. Edit Point Shapefile • In the DNR Garmin drop down menu choose: DNR Garmin | Convert Points • Convert Points window pops open Selected Selected Points in Yellow in Yellow
  • 88. Edit Point Shapefile • Order Field | Time • Conversion Type | To Polygon • Output | As Shapefile Result: Polygon created from selected points TIP - AlaskaPak also has this menu option!
  • 89. Edit Line Shapefile • Turn on Track Line Shapefile (turn off others) • Line Theme Active • Theme | Start Editing • Select unwanted lines (i.e. those that make up the polygon features)
  • 90. Edit Line Shapefile • Edit | Delete Features • Theme | Stop Editing • Yes, Save Edits
  • 91. FYI - Copying Shapefiles • File | Manage Data Source • Select Shapefile, Copy • Browse to new folder • OK • Repeat to copy additional files • Close Shapefile Manager
  • 92. Deleting a Theme in the View • Delete Track Point Theme from View – Select theme (make active) to delete – Hold shift key to select more than one theme (for future reference) – Edit | Delete Themes – Yes or Yes to All
  • 93. Add Themes to the View • Add Theme Button or View | Add Theme • Change Data Source Type to Feature or Image Data Source • Select more than one file by holding the shift key down
  • 94. Edit Theme Legend • Double click on Point theme • Legend Type: Unique Value • Values Field: – select a field with a unique attribute – e.g., ident
  • 95. Edit Theme Legend • Edit size, symbol, and color for each unique point – double-click on symbol to open symbol window – change symbols – double-click on cell in label field to change label • Click Apply ! • Save Project!
  • 96. Edit Theme Legend • Edit legend for line and polygon shapefiles • Double click on theme in legend • Double click on symbol to Edit • Use the fill palette, color palette and pen palette to change style, fill, line/outline weight, and give color to foreground, background, and outline • Apply
  • 97. Example of View with Edited Legend
  • 98. Advanced Legend Operations • The map legend will look like this… – symbols look good – names are cryptic! • You would like your map legend to look like this!
  • 99. Advanced Legend Operations • Make the theme active • Theme | Properties • Change Theme Name • OK • Repeat for all other themes
  • 100. Save ArcView Project • File | Save Project OR… • Hit that SAVE button!
  • 101. Summary • Track Management – Downloaded track with polygon and line features – Saved as Polygon Shapefile – Saved as Line Shapefile – Deleted unwanted polygons – Deleted unwanted lines – Copied final shapefiles to incident data folder • Deleted/Added themes to View • Edited legend symbology, labels and theme names
  • 102. ArcView: FirePak Extension & Advanced Legend Edits, Continued Collect Data DNR Garmin ArcView
  • 103. Objectives • Install and turn on FirePak Extension • Attribute Fire Perimeter Polygon • Perform Additional Advanced Legend Operations – Add new palette to the legend editor – Use forestry.avp to change symbology – Change theme name in legend • Create a Layout with the AlaskaPak Layout Wizard or on your own
  • 104. FirePak Extension NPS Firepak 1.0 provides a set of tools useful for a variety of fire management applications. • Allows users to convert a set of points to a polygon • Calculate acreage and perimeter miles • Add a set of key attributes to daily fire perimeter shapefiles and coverages • The attributes added to fire perimeter polygons using the Fire Perimeter Attributes function conform to the proposed interagency data standard for daily fire perimeters
  • 105. FirePak Installation • Installation – Navigate to SoftwareFirePak. Find on Training CD or internet* – Copy firepak.avx to C:ESRIAV_GIS30ARCVIEWEXT32 – Optional: Open and read readme.txt for a quick overview of FirePak * http://www.nps.gov/gis/applications/new_apps.html TIP ArcGIS 8.x version also available on CD and on the web
  • 106. FirePak Extension: Attribution • Turn on FirePak – File | Extensions | NPS FirePak • FirePak | Fire Perimeter Attributes • or… Fire Button • STOP Polygon must be selected • Make sure theme is active • Select polygon • Try again
  • 107. FirePak Extension: Attribution • Unit ID TIP: Float cursor • Fire Name over field • Fire Number • Collection Date • Collection Time • Collection Method • Source • Differential Correction • Travel Method Example displayed in the ArcView project status bar
  • 108. FirePak Extension: Attribution • Contact • Phone • Email • Projection – Zone if UTM • Units • Datum • Comments • Finish!
  • 109. FirePak Extension: Attribution • Recalculate Acres? • Recalculate Perimeter Miles? • Identify Polygon Attributes elp n! es h atio t ibu cre attr data ood eta G th m wi
  • 110. Advanced Legend Operations • ArcView provides some additional legend palettes that can be loaded to your project – Double-click on a theme to bring up the legend editor and palette – Click on palette button – Click on Load
  • 111. Advanced Legend Operations • Browse to c:esriav_gis30arcviewsymbols • Select forestry.avp from list
  • 112. Advanced Legend Operations • Forestry.avp has symbology similar to suggested symbols in the fireline handbook • Click on Pen and Marker Palettes to see additions • Edit the legend for your themes • Then, make a map with AlaskaPak!
  • 114. What if you don’t like this map? Double-click Double-click to change to change *you can find other logos on the CD in BASEDATA/ LOGOS Double-click Double-click to change to change
  • 115. What if you don’t like this map? Create a Layout on your own! View | Layout OR New Layout from Project Window Review Pre-work ArcView Training or use Help
  • 116. Save Layout & ArcView Project • Export or Print Layout – File | Print – File | Export… – Save .jpg in products folder by date • Save ArcView Project!!!!!!!!!
  • 117. Summary • Installed and turned on FirePak Extension • Attributed Fire Perimeter Polygon • Performed Advanced Legend Operations – Added new palette to the legend editor – Used forestry.avp to change symbology • Created a Layout with the AlaskaPak Layout Wizard or on your own
  • 118. END OF POST-FIELD FOR CIGARETTE TOSS FIRE • Close ArcView Project
  • 119. Post-Field Summary • DNR Garmin Program • DNR Garmin Extension in ArcView Managing GPS Data Editing GPS & GIS Data Attributing Data Map Making