space.based.astronomy
•
1 gefällt mir•3,696 views

This document provides an educator guide for teaching space-based astronomy. It includes activities to teach students about astronomy using space-based observations. The guide begins with background on NASA's space exploration history and how space-based observations have advanced our understanding of the universe. It then outlines five activity units covering topics like the electromagnetic spectrum and collecting radiation from space. The guide aims to explain why space-based observations are important for studying celestial objects across the entire electromagnetic spectrum.

Empfohlen
Weitere ähnliche Inhalte
Was ist angesagt?
Was ist angesagt? (19)
Ähnlich wie space.based.astronomy
Ähnlich wie space.based.astronomy (20)
Kürzlich hochgeladen
Kürzlich hochgeladen (20)
space.based.astronomy
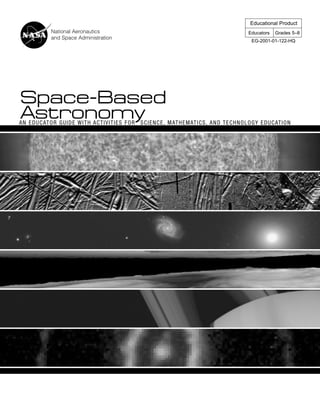
- 1. National Aeronautics and Space Administration Educational Product Educators Grades 5–8 EG-2001-01-122-HQ Space-Based AstronomyAN EDUCATOR GUIDE WITH ACTIVITIES FOR SCIENCE, MATHEMATICS, AND TECHNOLOGY EDUCATION * Space Based Atronomy.b/w 2/28/01 8:53 AM Page C1
- 2. Space-Based Astronomy—An Educator Guide with Activities for Science, Mathematics, and Technology Education is available in electronic format through NASA Spacelink—one of the Agency’s electronic resources specifically developed for use by the educa- tional community. The system may be accessed at the following address: http://spacelink.nasa.gov * Space Based Atronomy.b/w 2/28/01 8:54 AM Page C2
- 3. NATIONAL AERONAUTICS AND SPACE ADMINISTRATION | OFFICE OF HUMAN RESOURCES AND EDUCATION | EDUCATION DIVISION | OFFICE OF SPACE SCIENCE This publication is in the Public Domain and is not protected by copyright. Permission is not required for duplication. EG-2001-01-122-HQ Space-Based AstronomyAN EDUCATOR GUIDE WITH ACTIVITIES FOR SCIENCE, MATHEMATICS, AND TECHNOLOGY EDUCATION * Space Based Atronomy.b/w 2/28/01 8:54 AM Page i
- 4. ACKNOWLEDGMENTS Many thanks to the NASA Aerospace Education Services Program, NASA Teaching From Space Program, NASA Educator Resource Center Network, and NASA Office of Space Science for their contributions to the development of this guide. Writer: Gregory L. Vogt, Ed.D. Teaching From Space Program NASA Johnson Space Center Houston, TX National Aeronautics and Space Administrationii 1. EIT 304Å image captures a sweeping prominence—huge clouds of relatively cool dense plasma suspended in the Sun’s hot, thin corona. At times, they can erupt, escaping the Sun’s atmosphere. Emission in this spectral line shows the upper chro- mosphere at a temperature of about 60,000 degrees K. Source/Credits: Solar & Heliospheric Observatory (SOHO). SOHO is a project of international cooperation between ESA and NASA. 2. This mosaic shows some of the highest resolution images obtained by the Solid State Imaging (SSI) system on NASA’s Galileo spacecraft during its eleventh orbit around Jupiter. The sun illuminates the scene from the left, showing hundreds of ridges that cut across each other, indicating multiple episodes of ridge formation either by volcanic or tectonic activity within the ice. The Jet Propulsion Laboratory, Pasadena, CA, manages the mission for NASA’s Office of Space Science, Washington, DC. JPL is a division of California Institute of Technology. 3. A Minuet of Galaxies: This troupe of four galaxies, known as Hickson Compact Group 87 (HCG 87), is performing an intricate dance orchestrated by the mutual gravitational forces acting between them. The dance is a slow, graceful minuet, occurring over a time span of hundreds of millions of years. Image Credit: Hubble Heritage Team (AURA/ STScI/ NASA). 4. Frames from a three dimensional visualization of Jupiter’s equatorial region. These features are holes in the bright, reflective, equatorial cloud layer where warmer thermal emission from Jupiter’s deep atmosphere can pass through. The circulation pat- terns observed here along with the composition measurements from the Galileo Probe suggest that dry air may be converg- ing and sinking over these regions, maintaining their cloud-free appearance. The Jet Propulsion Laboratory, Pasadena, CA, manages the Galileo mission for NASA’s Office of Space Science, Washington, DC. JPL is an operating division of California Institute of Technology. 5. This image of the planet Saturn and natural satellites Tethys and Dione was taken on January 29, 1996, by Voyager 1. 6. This striking NASA Hubble Space Telescope picture shows three rings of glowing gas encircling the site of supernova 1987A, a star which exploded in February 1987. The supernova is 169,000 light years away, and lies in the dwarf galaxy called the Large Magellanic Cloud, which can be seen from the southern hemisphere. Credit: Dr. Christopher Burrows, ESA/STScI and NASA. To find out more about these images and projects, please visit http://spacescience.nasa.gov 1. 2. 3. 4. 5. 6. About the Cover Images * Space Based Atronomy.b/w 2/28/01 8:54 AM Page ii
- 5. Acknowledgments . . . . . . . . . . . . . . . . . . . . . . . . . . . . . . . . . . . . . . . . . . . . . . . . . . . . . . . . . . .ii Introduction . . . . . . . . . . . . . . . . . . . . . . . . . . . . . . . . . . . . . . . . . . . . . . . . . . . . . . . . . . . . . . .1 How to Use This Guide . . . . . . . . . . . . . . . . . . . . . . . . . . . . . . . . . . . . . . . . . . . . . . . . . . . . . . .3 The Space Age Begins . . . . . . . . . . . . . . . . . . . . . . . . . . . . . . . . . . . . . . . . . . . . . . . . . . . . . . . .5 Astrophysics . . . . . . . . . . . . . . . . . . . . . . . . . . . . . . . . . . . . . . . . . . . . . . . . . . . . . . . . . . . . . . . .7 A Brief History of United States Astronomy Spacecraft and Crewed Space Flights . . . . . . . . . . . . . . . . . . . . . . . . . . . . . . . . . . . .9 Activity Units Unit 1: The Atmospheric Filter . . . . . . . . . . . . . . . . . . . . . . . . . . . . . . . . . . . . . . . . . . . . . . .17 Unit 2: The Electromagnetic Spectrum . . . . . . . . . . . . . . . . . . . . . . . . . . . . . . . . . . . . . . . . .23 Unit 3: Collecting Electromagnetic Radiation . . . . . . . . . . . . . . . . . . . . . . . . . . . . . . . . . . . .53 Unit 4: Down to Earth . . . . . . . . . . . . . . . . . . . . . . . . . . . . . . . . . . . . . . . . . . . . . . . . . . . . .71 Unit 5: Space-Based Astronomy on the Internet . . . . . . . . . . . . . . . . . . . . . . . . . . . . . . . . . . .91 Glossary . . . . . . . . . . . . . . . . . . . . . . . . . . . . . . . . . . . . . . . . . . . . . . . . . . . . . . . . . . . . . . . . .94 Suggested Reading . . . . . . . . . . . . . . . . . . . . . . . . . . . . . . . . . . . . . . . . . . . . . . . . . . . . . . . . . .97 NASA Educational Resources . . . . . . . . . . . . . . . . . . . . . . . . . . . . . . . . . . . . . . . . . . . . . . . . . .99 Reply Card . . . . . . . . . . . . . . . . . . . . . . . . . . . . . . . . . . . . . . . . . . . . . . . . . . . . . . . . . . . . . .101 Space-Based Astronomy Activity Guide for Science, Mathematics, and Technology Education iii TABLE OF CONTENTS * Space Based Atronomy.b/w 2/28/01 8:54 AM Page iii
- 6. It would seem that when it comes to observing the universe, the larger the instrument, the bet- ter. This is true up to a point, but there are lim- its—limits not imposed by technology but by nature itself. Surrounding Earth is a life-sustaining atmos- phere that stands between our eyes and the radi- ation that falls upon Earth from outer space. This radiation is comprised of a very broad spec- trum of energies and wavelengths. Collectively, they are referred to as the electromagnetic spec- trum. They range from radio and microwave radiation on the low energy (long wavelength) end through infrared, visible, ultraviolet, and x- rays to gamma rays on the high energy (short wavelength) end. Gases and other components of our atmosphere distort, filter, and block most of this radiation permitting only a partial pic- ture, primarily visible radiation and some radio waves, to reach Earth’s surface. Although many things can be learned about our universe by studying it from the surface of Earth, the story is incomplete. To view celestial objects over the whole range of the electromagnetic spectrum, it is essential to climb above the atmosphere into outer space. From its earliest days, the National Aeronautics and Space Administration (NASA) has used the emerging technology of rockets to explore the universe. By lofting telescopes and other scientif- Space-Based Astronomy Activity Guide for Science, Mathematics, and Technology Education 1 INTRODUCTION If you go to the country, far from city lights, you can see about 3,000 stars on a clear night. If your eyes were bigger, you could see many more stars.With a pair of binoc- ulars, an optical device that effectively enlarges the pupil of your eye by about 30 times, the number of stars you can see increases to the tens of thousands. With a medium-sized telescope with a light-collecting mirror 30 centimeters in diameter, you can see hundreds of thousands of stars. With a large observatory telescope, millions of stars become visible. * Space Based Atronomy.b/w 2/28/01 8:54 AM Page 1
- 7. ic instruments above the veil of Earth’s atmos- phere, NASA has delivered a treasure house of information to astronomers, leading them to rethink their most fundamental ideas about what the universe is, how it came to be, how it func- tions, and what it is likely to become. National Aeronautics and Space Administration2 * Space Based Atronomy.b/w 2/28/01 8:54 AM Page 2
- 8. The guide begins with a survey of astronomy- related spacecraft NASA has sent into outer space. This is followed by a collection of activities organized into four units: The Atmospheric Filter, The Electromagnetic Spectrum, Collecting Electromagnetic Radiation, and Down to Earth. A curriculum matrix identifies the curriculum areas each activity addresses. Following the activities is information for obtaining a 35 mm slide set with descriptions showing current results from NASA spacecraft such as the Hubble Space Telescope (HST), Compton Gamma Ray Observatory (CGRO), and the Cosmic Background Explorer (COBE). The guide concludes with a glossary, a reference list, a NASA Resources list, and an evaluation card. Feedback from users of this guide is essential for the development of future editions and other classroom supplementary materials. Space-Based Astronomy Activity Guide for Science, Mathematics, and Technology Education 3 HOW TO USE THIS GUIDE This curriculum guide uses hands-on activities to help students and teachers understand the significance of space-based astronomy—astronomical observations made from outer space. It is not intended to serve as a curriculum. Instead, teachers should select activities from this guide that support and extend existing study.The guide contains few of the traditional activities found in many astronomy guides such as constellation stud- ies, lunar phases, and planetary orbits. It tells, rather, the story of why it is important to observe celestial objects from outer space and how to study the entire electromagnetic spectrum. Teachers are encouraged to adapt these activities for the particular needs of their students.When selected activities from this guide are used in conjunction with tra- ditional astronomy curricula, students benefit from a more complete experience. * Space Based Atronomy.b/w 2/28/01 8:54 AM Page 3
- 9. A much larger Sputnik 2 followed, carrying a small dog as a passenger. Although primarily investigating the response of living things to pro- longed periods of microgravity, Sputnik 2 did sense the presence of a belt of high-energy charged particles trapped by Earth’s magnetic field. Explorer 1, the United States’ first satellite, defined that field further. The cylindrical, 13.6 kilogram Explorer 1 rode to space on top of a Juno I rocket on January 31, 1958. It was launched by the United States Army in association with the National Academy of Sciences and the Jet Propulsion Laboratory of the California Institute of Technology. NASA was not created formally by an act of Congress until the following October. Explorer 1 carried scientific instruments designed by Dr. James Van Allen of the University of Iowa. Circling Earth in an orbit ranging from 360 to 2,531 kilometers, the satellite radioed back radiation measurements, revealing a deep zone of radiation surrounding Earth. Born of the technology of World War II and the tensions of the Cold War, the space age began in Space-Based Astronomy Activity Guide for Science, Mathematics, and Technology Education 5 THE SPACE AGE BEGINS Within months of each other, the United States and the Soviet Union launched their first artificial satellites into orbit around Earth. Both satellites were small and simple. Sputnik 1, a Soviet spacecraft, was the first to reach orbit. It was a 58-centimeter-diameter aluminum sphere that carried two radio transmitters, powered by chemical batteries. The satellite reached orbit on October 4, 1957. Although an extremely primitive satellite by today’s standards, Sputnik 1 never- theless enabled scientists to learn about Earth’s magnetic field, temperatures in space, and the limits of Earth’s atmosphere. * Space Based Atronomy.b/w 2/28/01 8:54 AM Page 5
- 10. the peaceful pursuit of scientific discovery. In the more than 35 years that have followed, thou- sands of spacecraft have been launched into Earth orbit, to the Moon, and to the planets. For the majority of those spacecraft, the goal has been to learn about Earth, our solar system, and the universe. National Aeronautics and Space Administration6 Artist’s concept of Explorer 1 in space * Space Based Atronomy.b/w 2/28/01 8:54 AM Page 6
- 11. Generally, objects beyond our solar system are handled in the field of astrophysics. These include stars, the interstellar medium, other objects in our Milky Way Galaxy, and galaxies beyond our own. NASA defines astrophysics as the investigation of astronomical bodies by remote sensing from Earth or its vicinity. Because the targets of the astrophysicist are generally beyond human reach even with our fastest rockets, astrophysi- cists concentrate solely on what the electro- magnetic spectrum can tell them about the universe. NASA’s astrophysics program has three goals: to understand the origin and fate of the universe; to describe the fundamental laws of physics; and to discover the nature and evolution of galaxies, stars, and the solar sys- tem. The investigations of astrophysicists are carried out by instruments aboard free-flying satellites, sounding rockets that penetrate into space for brief periods, high-flying aircraft and high-altitude balloons, and Space Shuttle mis- sions. Space-Based Astronomy Activity Guide for Science, Mathematics, and Technology Education 7 ASTROPHYSICS Just a few decades ago, the word astronomy was a general term that described the science of the planets, moons, Sun and stars, and all other heavenly bodies. In other words, astronomy meant the study of anything beyond Earth. Although still an applicable term, modern astronomy, like most other sciences, has been divided and subdivided into many specialties. Disciplines that study the planets include planetary geology and planetary atmospheres. The study of the particles and fields in space is divided into magnetospheric physics, ionospheric physics, and cosmic and heliospheric physics. The Sun has its own solar physics discipline. The origin and evolution of the universe is the subject of cosmology. * Space Based Atronomy.b/w 2/28/01 8:54 AM Page 7
- 12. Teams of scientists began their studies in space close to home by exploring the Moon and the solar system. Encouraged by those successes, they have looked farther out to nearly the begin- ning of the universe. Observing the heavens from a vantage point above Earth is not a new idea. The idea of plac- ing telescopes in orbit came quite early—at least by 1923 when Hermann Oberth described the idea. Even before his time, there were a few attempts at space astronomy. In 1874, Jules Janseen launched a balloon from Paris with two aeronauts aboard to study the effects of the atmosphere on sunlight. Astronomers continue to use balloons from launch sites in the Antarctic; Palestine, Texas; and Alice Springs, Australia. After launch, scientists chase the balloon in a plane as the balloon follows the prevailing winds, traveling thousands of kilometers before sinking back to Earth. A typ- ical balloon launch yields many hours of astronomical observations. Rocket research in the second half of the 20th century developed the tech- nology for launching satellites. Between 1946 and 1951, the U.S. launched 69 V-2 rockets. The V-2 rockets were captured from the Germans after World War II and used for high altitude research. Several of those flights studied ultra- Space-Based Astronomy Activity Guide for Science, Mathematics, and Technology Education 9 A BRIEF HISTORY OF THE UNITED STATES ASTRONOMY SPACECRAFT AND CREWED SPACE FLIGHTS The early successes of Sputnik and the Explorer series spurred the United States to develop long-range programs for exploring space. Once the United States became comfortable with the technical demands of spacecraft launches, NASA quickly began scientific studies in space using both crewed and non-crewed spacecraft launches. U.S. V-2 rocket launch * Space Based Atronomy.b/w 2/28/01 8:54 AM Page 9
- 13. violet and x-ray emissions from the Sun. Today, sounding rockets are used primarily by universi- ties. They are inexpensive and quick, but provide only a few minutes of observations. To conduct its current research, NASA uses big rockets like Atlas, Delta, Titan, and the Space Shuttle as well as small rockets launched from a B- 52 aircraft to lift satellites into orbit. Except for the largest rockets, which are launched in Florida and California, rocket research and launches occur at many places around the United States. NASA also uses the Kuiper Airborne Observatory (KAO) that carries a 0.9-meter telescope inside a C-141 air- craft. It flies above the densest part of the atmos- phere and observes in the far-infrared and submil- limeter wavelengths. KAO flies approximately 80 times a year. KAO can reach an altitude of 13,700 meters with a normal flight time of 7.5 hours. In the near future, NASA will begin flying the Stratospheric Observatory for Infrared Astronomy (SOFIA). SOFIA is a 747 aircraft modified to accommodate a 2.5 meter reflecting telescope, which is slightly larger than the Hubble Space Telescope (HST) at 2.4 meters. Like KAO, SOFIA will conduct infrared astronomy and fly at an altitude of 13,000 meters for 8 hours. Over the years, NASA space probes have sent back detailed images of the planets Mercury, Venus, Mars, Jupiter, Saturn, Uranus, and Neptune. Mariner 2 was the first spacecraft to explore another planet when it flew past Venus in 1962. The missions to the planets have rede- fined the picture of our solar system. Scientists have an incredible set of data from almost every planet in the solar system. National Aeronautics and Space Administration10 NASA’s Kuiper Airborne Observatory Black Brandt sounding rocket ready for launch to study Supernova 1987A Final inflation of an instrument-carrying helium balloon before launch from Palestine, TX * Space Based Atronomy.b/w 2/28/01 8:54 AM Page 10
- 14. We learned that Venus is hotter than Mercury. Data from satellites in orbit around Venus have told us about the atmosphere and terrain of the planet. By monitoring Venus’ atmosphere, scien- tists can study the effects of a runaway green- house effect. Several Russian spacecraft have explored the surface of Venus as well as the Moon and Mars. Although spacecraft have mapped the surface of Mars, the Mars Viking mission gently deposit- ed two landers on the surface that sent back data. They still sit on the surface there. The two interplanetary travelers, Voyager 1 and 2 (launched in September and August 1977, respectively) visited Jupiter, Saturn, Uranus, and Neptune and are now leaving the solar sys- tem on their way into interstellar space. They sent back new data on these gas giant planets. Their discoveries included volcanoes on Io (a satellite of Jupiter), storms on Neptune, and ring shepherd satellites around Saturn. The two Voyager missions represent an incredible suc- cess story. They provided unique glimpses of the planets and redefined the history of our solar system. Beginning in 1962, NASA launched a series of nine orbiting observatories to observe the Sun. Astrophysicists began to understand the interior of our nearest star. In the 1970’s, Skylab astro- nauts brought back from orbit a wealth of data on the Sun, using x-rays to study its activity. In 1978, one of the most successful astronom- ical satellite missions, the International Ultraviolet Explorer (IUE), was launched. This satellite has an ultraviolet telescope that has been used to study the universe in the ultraviolet portion of the electromagnetic spectrum. Many scientists continue to use IUE simultaneously with other satellites and Earth telescopes to gather multi-wavelength data on astronomical objects. Other NASA satellites have carried x-ray detectors into space. One of the first (1970)— called Uhuru (Swahili for freedom)—mapped the entire sky in x-ray wavelengths. Later (1978), the second High Energy Astrophysics Observatory (HEAO-2), called Einstein, imaged many objects in x-ray light. Today a satellite called ROSAT (a name honoring the physicist who discovered x-rays, Dr. Wilhelm Roentgen) continues the study of individual sources of x-rays in the sky. All of these satel- lites added new objects to the astronomical zoo and helped scientists understand the processes that make x-rays in space. The sheer number of high-energy objects discovered by these satellites surprised and excited the scien- tific community. The Infrared Astronomical Satellite (IRAS) was launched in 1983. It mapped the sky in infrared wavelengths. IRAS scientists have dis- covered thousands of infrared sources never seen before. The infrared part of the spectrum tells about molecules in space and gas and dust clouds where new stars are hidden until they are bright enough to outshine their birth cloud. The Space Shuttle is used to introduce instru- ments into low Earth orbit. Satellites like the HST orbit about 600 kilometers above Earth’s surface. This is a low Earth orbit and accessible to the Shuttle. To put satellites into high Earth orbit, an upper stage must be carried in the Space-Based Astronomy Activity Guide for Science, Mathematics, and Technology Education 11 Skylab 4 picture of the Sun in ionized helium light * Space Based Atronomy.b/w 2/28/01 8:54 AM Page 11
- 15. Shuttle’s payload bay or the satellite is lofted with one of several different kinds of non- crewed launch vehicles. For example, the Geostationary Operational Environmental Satellite (GOES) orbits about 40,000 kilome- ters above Earth’s surface. A Delta rocket was used to put GOES into high orbit. The choice of altitude—high Earth orbit or low Earth orbit—depends on the data to be measured. Recent and Multi-Mission Programs Magellan In May 1989, the Magellan spacecraft was released from the Space Shuttle and sent on its way to orbit Venus. The atmosphere of Venus is unfriendly to humans with its thick sulfuric acid clouds, high pressures, and high temperatures. Magellan used radar to penetrate Venus’s dense atmosphere and map the planet’s surface. Galileo In October of that same year, another Shuttle mission launched Galileo on its way to visit the planet Jupiter. On its way out to Jupiter, Galileo (named after Galileo Galilei, an Italian astronomer of the 17th century) took pictures of several asteroids. The Galileo spacecraft was designed to study Jupiter’s atmosphere, satellites, and surrounding magnetosphere. The spacecraft is currently orbiting Jupiter and performing an extended study of the planet’s moons. Cosmic Background Explorer (COBE) Just a month later, in November 1989, the Cosmic Background Explorer (COBE) was launched from a Delta rocket. This satellite sur- veyed the entire sky in microwave wavelengths and provided the first precise measurement of variations in the background radiation of the uni- verse. The distribution of this radiation does not follow the predictions of the Big Bang Theory. The Hubble Space Telescope (HST) In April 1990, the crew of the Space Shuttle Discovery launched the HST. This telescope combines ultraviolet and optical imaging with spectroscopy to provide high quality data of a variety of astronomical objects. Although the primary mirror aboard the satellite was later dis- covered to be slightly flawed, astronomers were able to partially compensate for the slightly out- of-focus images through computer processing. In December 1993, the Hubble servicing mission National Aeronautics and Space Administration12 Top: Thermal background radiation measured by the COBE spacecraft Bottom: Image of the Milky Way taken by the COBE spacecraft The Hubble Space Telescope attached to the Space Shuttle Endeavour during the 1993 service mission * Space Based Atronomy.b/w 2/28/01 8:54 AM Page 12
- 16. permitted astronauts to add compensating devices to the flawed mirror, to readjust its focus, and to replace or repair other instruments and solar arrays. The servicing mission has led to images of unprecedented light sensitivity and clarity. Astro-1 and the Broad-Band X-ray Telescope (BBXRT) In December 1990, the crew of the Space Shuttle Columbia conducted two experiments during its flight. The Astro-1 instrument platform and the Broad-Band X-ray Telescope (BBXRT) both study the x-ray and ultraviolet emissions of astronomical objects. Compton Gamma Ray Observatory (CGRO) A few months later, in April 1991, the Compton Gamma Ray Observatory (CGRO) was launched from the Space Shuttle. CGRO is the second of NASA’s Great Observatories. During its lifetime, CGRO made some of the most important discoveries in the field of gamma-ray astronomy: • Gamma ray bursts (short-lived, but extreme- ly powerful explosions) are evenly distributed across the sky, and thus outside the Milky Way galaxy; • Gamma ray loud blazars (quasars with particle jets aimed at us) to be a new class of objects; and • The galactic center glows in antimatter radia- tion. CGRO was safely and flawlessly de-orbited over the Pacific Ocean on June 4, 2000. Extreme Ultraviolet Explorer (EUVE) In May 1992, a Delta rocket boosted the Extreme Ultraviolet Explorer (EUVE) into orbit. This satellite, which concluded its mission in December 2000, studied the far ultraviolet part of the spectrum. One unexpected result from this mission was the distances at which ultravio- let sources were seen. The scientists expected to see ultraviolet radiation only from within 50 light years of the Sun. EUVE detected extreme ultraviolet emissions from distant galaxies in its first year of operation. Cassini-Huygens Launched in October 1997, the Cassini-Huygens mission will do a detailed study of Saturn, its rings, its magnetosphere, its icy satellites, and its moon Titan. The Cassini Orbiter’s mission con- sists of delivering the Huygens probe (provided by the European Space Agency) to Titan to study its clouds, atmosphere, and surface, and then remaining in orbit around Saturn for detailed studies of the planet and its rings and satellites. Cassini will arrive at Saturn on July 1, 2004. Space-Based Astronomy Activity Guide for Science, Mathematics, and Technology Education 13 Deployment of the Compton Gamma Ray Observatory from the Space Shuttle Atlantis in 1991 Gamma ray bursts detected by the Compton Gamma Ray Observatory * Space Based Atronomy.b/w 2/28/01 8:54 AM Page 13
- 17. Chandra X-ray Observatory Launched in July of 1999, Chandra is the third of NASA’s Great Observatories, after the HST and CGRO. It is performing an exploration of the hot turbulent regions in space and has 8- times greater resolution than previous x-ray tele- scopes enabling it to detect sources more than 20-times fainter than previous observations. Chandra’s improved sensitivity will make possi- ble more detailed studies of black holes, super- novas, and dark matter and increase our under- standing of the origin, evolution, and destiny of the universe. The Discovery Program Discovery represents the implementation of “Faster, Better, Cheaper” planetary missions. The philosophy of Discovery is to solicit proposals for an entire mission, put together by consortia comprised of industry, small businesses, and uni- versities. The goal is to launch many, smaller missions that do focused science with fast turn- around times and for which the entire mission cost (design, development, launch vehicle, instruments, spacecraft, launch, mission opera- tions, and data analysis) is minimal. Discovery missions selected to date include: • Near Earth Asteroid Rendezvous (NEAR) • Mars Pathfinder • Lunar Prospector • Stardust • Genesis • Comet Nucleus Tour (CONTOUR) • ASPERA-3 • Deep Impact • Mercury Surface Space Environment Geochemistry and Ranging mission (MES- SENGER) The Explorer Program The Explorer Program began with the launch of Explorer 1 in 1958, and became a sustained pro- gram beginning in 1961. Over 70 “Explorer” missions have been launched successfully, pio- neering space research on micrometeoroids, the Earth’s magnetosphere, x-ray astrophysics, the cosmic microwave background and many other fields of space science investigation. In addition, the Explorer program has a long history of pro- viding scientific instruments as part of other nations’ missions. Current Explorer missions include: • Submillimeter Wave Astronomy Satellite (SWAS) • Advanced Composition Explorer (ACE) • Transition Region and Coronal Explorer (TRACE) • Fast Auroral Snapshot Explorer (FAST) • Solar Anomalous and Magnetospheric Particle Explorer (SAMPEX) • Far Ultraviolet Spectroscopic Explorer (FUSE) • Imager for Magnetopause-to-Aurora Global Exploration (IMAGE) • High Energy Transient Explorer-2 (HETE-2) • High Energy Solar Spectroscopic Imager (HESSI) • Microwave Anisotropy Probe (MAP) • Cooperative Astrophysics and Technology Satellite (CATSAT) • Galaxy Evolution Explorer (GALEX) • Cosmic Hot Interstellar Plasma Spectrometer (CHIPS) • Inner Magnetosphere Explorer (IMEX) • Two Wide-Angle Imaging Neutral-Atom Spectrometer (TWINS) • Swift • Full-Sky Astrometric Mapping Explorer (FAME) • Coupled Ion-Neutral Dynamics Investigations (CINDI) The Mars Surveyor Program The Mars Surveyor program reflects a long-term commitment to the exploration of the Red Planet. NASA intends to launch one or two spacecraft to Mars whenever Mars’ orbit allows, approximately every 26 months. The first space- craft in this series was the Mars Global Surveyor in 1996. The Mars ‘98 Orbiter and Lander were launched in December 1998 and January 1999 but were lost during their journey to Mars. The 2001 Mars Odyssey orbiter is scheduled to arrive at Mars in late 2001 and is expected to produce exceptional science mapping the mineralogy of the Martian surface. Currently under develop- ment are twin scientific exploration rovers sched- uled for launch in 2003. Each of the rovers will National Aeronautics and Space Administration14 * Space Based Atronomy.b/w 2/28/01 8:54 AM Page 14
- 18. be delivered to the surface protected by inflated airbags similar to the successful Mars Pathfinder. Each rover will be equipped with an integrated suite of instruments (cameras, spectrometers, microscopes, and abrasion tool) that will allow it to behave as a robotic field geologist. They will have an exploration range of up to 1 kilometer during their 90 days of operational life on the surface of Mars. In 2005, NASA plans to launch a powerful scientific orbiter. This mission, the Mars Reconnaissance Orbiter, will focus on ana- lyzing the surface at new spatial scales and in new spectral regions in an effort to follow the potential evidence of water from the Mars Global Surveyor images and to bridge the gap between surface observations and measurements from orbit. The next step in the Mars explo- ration program strategy will be to send a long- range, long-duration mobile science laboratory to Mars (at least by 2009, and as early as 2007). This “smart lander” will be a major leap in sur- face measurements and pave the way for a future sample return mission. New Millennium Program NASA has an ambitious plan for space explo- ration in the next century. It envisions a scenario in which spacecraft will have revolutionary new capabilities compared to those of today. Spacecraft are envisioned as flying in formation, or in fleets, or having artificial intelligence to provide the kind of capability that can answer the more detailed level of questions that scien- tists have about the universe. Missions include: • Deep Space 1 • Deep Space 2 • Starlight • Earth Observing 1 • Earth Observing 3 • Space Technology 5 • Space Technology 6 The goal of the New Millennium Program (NMP) is to identify and test advanced technologies that will provide spacecraft with the capabilities they need in order to achieve NASA’s vision. Space-Based Astronomy Activity Guide for Science, Mathematics, and Technology Education 15 Year Mission Target 1957 Stratoscope I Sun 1961 Explorer 11 gamma rays 1962 Arobee X-ray sources 1962 Mariner 2 Venus 1963 Mars 1 Mars 1965 Mariner 4 Mars 1967 OSO-3 gamma rays 1968 RAE-1 radio 1968 OAO-2 UV sky 1969 Vela 5A gamma rays 1969 Apollo 11 Moon 1970 SAS-1 X-ray sky 1971 Explorer 43 solar wind/ radio 1971 Mariner 9 Mars 1972 Pioneer 10 deep space 1972 Copernicus UV sky 1973 Pioneer 11 deep space 1973 Skylab Sun 1973 Explorer 49 radio sources 1974 Mariner 10 Mercury 1975 SAS-3 X-ray sources 1975 Viking 1 & 2 Mars 1976 Viking 1 & 2 Mars 1977 Voyager 2 outer planets 1977 Voyager 1 outer planets 1978 IUE UV sky 1978 Pioneer Venus-A radar studies 1978 HEAO-2 X-ray sky Astronomy Space Missions (partial list) Year Mission Target 1983 IRAS infrared sky 1985 Spacelab-2 infrared sky 1989 Magellan Venus 1989 Galileo Jupiter/asteroids/ Earth/Venus 1989 COBE microwave sky 1990 HST UV sky 1990 ROSAT X-ray sky 1990 Ulysses Sun 1990 ASTRO-1 X-ray and UV sky 1990 ROSAT X-ray sky 1991 Yohko Sun in X-rays 1992 Extreme UV Explorer X-ray sky 1994 Wind Solar wind 1994 Clemintine Moon 1995 Infrared Telescope in Space IR sky 1995 Infrared Space Observatory IR sky 1995 Rossi X-ray Timing Explorer X-ray sky 1995 Solar Heliospheric Observatory Sun 1995 ASTRO-2 UV sky 1996 Mars Global Surveyor Mars 1996 Near Earth Asteroid Rendezvous Asteroid 1996 Mars Pathfinder Mars 1997 Cassini Saturn 1998 Lunar Prospector Moon 1999 Stardust Comet 1999 Mars Climate Orbiter Mars 1999 Mars Polar Orbiter Mars 1999 Chandra X-ray Observatory X-ray sky * Space Based Atronomy.b/w 2/28/01 8:54 AM Page 15
- 19. National Aeronautics and Space Administration16 Technologies such as solar electric propulsion and artificial intelligence promise a great leap forward in terms of future spacecraft capability, but they also present a risk to missions that use them for the first time.Through a series of deep space and Earth orbiting flights, NMP will demonstrate these promising but risky technologies in space to prove that they work. Once validated, the technologies pose less of a risk to missions that would like to use them to achieve their scientific objectives. International Solar Terrestrial Physics (ISTP) Program Collaborative efforts by NASA, the European Space Agency (ESA), and the Institute of Space and Astronautical Science (ISAS) of Japan led to the International Solar-Terrestrial Physics pro- gram, consisting of a set of missions being carried out during the 1990’s and into the next century. This program combines resources and scientific communities on an international scale using a complement of several missions, along with com- plementary ground facilities and theoretical efforts, to obtain coordinated, simultaneous inves- tigations of the Sun-Earth space environment over an extended period of time. Missions include: • Wind • Polar • Geotail • The Solar and Heliospheric Observatory (SOHO) • Ulysses • Advanced Composition Explorer (ACE) • IMP-8 • EQUATOR-8 Living With A Star (LWS) Living With A Star (LWS) is a NASA initiative that will develop the scientific understanding necessary to effectively address those aspects of the coupled Sun-Earth system that directly affect life and society on Earth. LWS missions include: • Solar Dynamics Observatory (SDO) • Sentinels • Radiation Belt Mappers (RBM) • Ionospheric Mappers (IM) Scientific Balloon Program Balloons offer a low-cost, quick response method for doing scientific investigations. Balloons are mobile, meaning they can be launched where the scientist needs to conduct the experiment, and can be readied for flight in as little as six months. Balloon payloads provide us with information on the atmosphere, the universe, the Sun, and the near-Earth and space environment. NASA launch- es about 30 scientific balloons each year. Sounding Rocket Program Experiments launched on sounding rockets pro- vide a variety of information, including chemical makeup and physical processes taking place in the atmosphere; the natural radiation surrounding the Earth; and data on the Sun, stars, and galaxies. Sounding rockets provide the only means of mak- ing in-situ measurements at altitudes between the maximum altitudes for balloons (about 30 miles or 48 kilometers) and the minimum altitude for satellites (100 miles or 161 kilometers). Using space-borne instruments, scientists now map the universe in many wavelengths. Satellites and telescopes provide data in radio, microwave, infrared, visible, ultraviolet, x-ray, and gamma ray. By comparing data from an object in the sky, in all wavelengths, astronomers are learning more about the history of our universe. Visit http://spacescience.nasa.gov, for more information about NASA Space Science missions and programs. * Space Based Atronomy.b/w 2/28/01 8:54 AM Page 16
- 20. Yet the same atmosphere that makes life possible hinders our understanding of Earth’s place in the universe. Our only means for investigating dis- tant stars, nebulae, and galaxies is to collect and analyze the electromagnetic radiation these objects emit into space. However, most of this radiation is absorbed or distorted by the atmos- phere before it can reach a ground-based tele- scope. Only visible light and some radio waves, infrared, and ultraviolet light survive the passage from space to the ground. That limited amount of radiation has provided astronomers enough information to estimate the general shape and size of the universe and categorize its basic com- ponents, but there is much left to learn. It is essential to study the entire spectrum rather than just limited regions of it. Relying only on the radiation that reaches Earth’s surface is like lis- tening to a piano recital on a piano that has just a few of its keys working. Space-Based Astronomy Activity Guide for Science, Mathematics, and Technology Education 17 UNIT 1 THE ATMOSPHERIC FILTER Introduction Earth’s atmosphere is essential to life. This ocean of fluids and suspended particles surrounds Earth and protects it from the hazards of outer space. It insulates the inhabitants of Earth from the extreme temperatures of space and stops all but the larger meteoroids from reaching the surface. Furthermore, it filters out most radia- tion dangerous to life. Without the atmosphere, life would not be possible on Earth. The atmosphere contains the oxygen we breathe. It also has enough pressure so that water remains liquid at moderate temperatures. * Space Based Atronomy.b/w 2/28/01 8:54 AM Page 17
- 21. Unit Goal • To demonstrate how the components of Earth’s atmosphere absorb or distort incom- ing electromagnetic radiation. Teaching Strategy The following demonstrations are designed to show how components of Earth’s atmosphere filter or distort electromagnetic radiation. Since we can- not produce all of the different wavelengths of elec- tromagnetic radiation in a classroom, the light from a slide or overhead projector in a darkened room will represent the complete electromagnetic spec- trum. A projection screen will represent Earth’s sur- face and objects placed between the projector and the screen will represent various components of Earth’s atmosphere. All of the demonstrations can be conducted in a single class period. Place the pro- jector in the back of the classroom and aim it towards the screen at the front. Try to get the room as dark as possible before doing the demonstrations. ACTIVITY: Clear Air Description: Students observe some of the problems inherent in using astronomical telescopes on Earth’s sur- face through a series of brief demonstrations given by the teacher. Objectives: To demonstrate how Earth’s atmosphere interferes with the passage of electromagnetic radiation. National Education Standards: Science Evidence, models, & explanation Transfer of energy Technology Understand troubleshooting, R & D, invention, innovation, & experimentation Materials and Tools: For all demonstrations Darkened room Overhead or slide projector Worksheet for each student • Demonstration 1 Small sheet of clear glass or Plexiglass™ Emery paper (fine) to smooth sharp edges of glass or plastic • Demonstration 2 Shallow dish or pie tin Empty coffee can Ice Spray bottle and water Cloud cutout (cardboard or other material) • Demonstration 3 Stick matches Eye protection • Demonstration 4 Food warmer fuel (e.g. Sterno™) or elec- tric hotplate Matches if using fuel Eye protection if using fuel Aluminum foil Sewing pin • Demonstration 5 150 to 200 watt light bulb Uncovered light fixture Star slide (see demonstration 4) Background: Earth’s atmosphere appears to be clear to the naked eye. On a dark, cloud-free night far from city lights, thousands of stars are visible. It is hard to imagine a better view of the sky when the wisps of the Milky Way Galaxy are visible stretching from the north- ern to the southern sky. In spite of the apparent clarity, the view is flawed. Many wavelengths are blocked by the atmosphere and visible light is fil- tered and distorted. The demonstrations that follow are designed to show how Earth’s atmosphere interferes with the passage of electromagnetic radiation. Visible light is used as an example of all wavelengths since most other wavelengths of electromagnetic radiation are difficult and even dangerous to produce in the classroom. Make sure students understand that the demonstrations are examples of what happens across the entire electromagnetic spectrum. National Aeronautics and Space Administration18 * Space Based Atronomy.b/w 2/28/01 8:54 AM Page 18
- 22. Management and Tips: To make effective use of the demonstrations, it is necessary to have a room that can be dark- ened. A projection screen will represent Earth’s surface and the light cast by an overhead or slide projector will represent all the wavelengths of electromagnetic radiation coming to Earth from space. The demonstrations are things that you do between the screen and the projector to represent phenomena occurring in Earth’s atmosphere. The actual demonstrations will take approxi- mately 15 minutes to complete. Allow time to discuss the significance of each demonstration with your students. The most important thing to know is that Earth’s atmosphere only allows a small portion of the electromagnetic spectrum to reach Earth’s surface and astronomers’ telescopes. The information astronomers can collect is incomplete and thus the story of the universe they are able to construct from this information is also incomplete. Conclude the discussion with the question “What can astronomers do about it?” The answer is to move observatories off the surface of Earth into outer space. Procedures: Demonstration 1 – The Air Is Not Clear In this demonstration you will hold up a sheet of “clear” glass between the projector and screen. The glass represents the gases in Earth’s atmosphere. Light from the projector is inter- rupted by the glass in its passage to the screen. Notice the faint shadow the “clear” glass casts on the screen. The shadow is evidence of a small amount of absorption of light by the glass. Also look for a reflection from the glass back in the direction of space. Photographs of Earth from space show a thin bluish layer of gas surround- ing Earth. Being able to see the atmosphere from space indicates that some of the electro- magnetic radiation falling on it from space is reflected back out into space. Demonstration 2 – Water in the Air To begin this demonstration, fill a coffee can with ice cubes. The can is set in the middle of a dish or pie tin and left undisturbed. In a few minutes, the outer surface of the can will begin “sweating.” This is evidence that the air in the classroom holds moisture that condenses out when it comes in con- tact with a cold surface. In the second part of the demonstration, spray a fine mist of water in the air between the pro- jector and the screen. This illustrates how fine water droplets suspended in the air will block electromagnetic radiation. High humidity casts a haze in the sky that blocks incoming visible light. Space-Based Astronomy Activity Guide for Science, Mathematics, and Technology Education 19 * Space Based Atronomy.b/w 2/28/01 8:54 AM Page 19
- 23. Finally, hold up the cloud cutout.The cloud shows what happens when moisture condenses in the air around small dust particles. The shadow cast by the cloud shows how clouds can substantially block visible light coming to Earth from space. Demonstration 3 – Pollution While wearing eye protection, strike a match and then blow it out right away. The smoke particles released from the match head will produce a noticeable shadow on the screen. Pollution from a variety of sources (human-made and natural) block some of the incoming visible light. Demonstration 4 – Heat Currents Prior to the demonstration, create a star slide. If you are using a slide projector, obtain a plastic slide mount in which the film can be removed. Slip a small square of aluminum foil into the slide frame and use a pin to randomly prick about 30 holes into the foil. If you are using an overhead projector, prepare a star slide from a large square of aluminum foil. The square should cover the entire stage of the projector. Poke about 100 holes through the foil. Project light through the slide you prepared. A small star field will be displayed on the screen. While wearing eye protection (not necessary if using an electric hot plate), place the warmer very near and just below the beam of the projec- tor. Stars will show a twinkling effect on the screen. This demonstration shows how heat cur- rents in Earth’s atmosphere can distort the images of astronomical objects. Demonstration 5 – Day/Night Use the star slide you prepared in the previous activity. Hold up the lamp with the light bulb National Aeronautics and Space Administration20 Food warmer fuel or electric hotplate * Space Based Atronomy.b/w 2/28/01 8:54 AM Page 20
- 24. near the screen. Turn on the bulb. Many of the stars on the screen near the bulb will disappear. This demonstration shows how the Sun’s light overpowers the fainter stars. Sunlight brightens the gases, water, and particles in Earth’s atmos- phere so that the distant stars are not visible. If the Sun’s light could be dimmed, other stars would be visible at the same time. Assessment: Collect student sheets. Compare the answers the students have given but focus on the last ques- tion in which students must propose solutions to the atmospheric problems associated with Earth- based observatories. Students may be aware of new strategies for improving the observations of Earth-based telescopes such as adaptive mirrors that change their shape slightly many times each second to compensate for air currents. However, no advanced telescope design technique will make up for electromagnetic radiation that does not reach Earth’s surface. Extensions: • Have students research new Earth-based tel- escope designs on the Internet. Use search terms such as observatory, telescopes, and astronomy. Space-Based Astronomy Activity Guide for Science, Mathematics, and Technology Education 21 * Space Based Atronomy.b/w 2/28/01 8:54 AM Page 21
- 25. Name: 1. Earth’s atmosphere creates problems for astronomers. Identify and explain 3 ways Earth’s atmosphere interferes with astronomical observations. A. B. C. 2. How might these problems affect the discoveries and conclusions astronomers reach through their observations? 3. Why are most astronomical observatories built on remote mountains? 4. What can astronomers do to capture the missing electromagnetic radiation for study? Clear Air Student Work Sheet * Space Based Atronomy.b/w 2/28/01 8:54 AM Page 22
- 26. Like expanding ripples in a pond after a pebble has been tossed in, electromagnetic radiation travels across space in the form of waves. These waves travel at the speed of light—300,000 kilo- meters per second. Their wavelengths, the dis- tance from wave crest to wave crest, vary from thousands of kilometers across (in the case of the longest radio waves) to fractions of a nanometer, in the cases of the smallest x-rays and gamma rays. Electromagnetic radiation has properties of both waves and particles. What we detect depends on the method we use to study it.The beautiful colors that appear in a soap film or in the dispersion of light from a diamond are best described as waves. The light that strikes a solar cell to produce an electric current is best described as a particle. When described as particles, individual packets of electro- magnetic energy are called photons.The amount of energy a photon of light contains depends upon its wavelength. Electromagnetic radiation with long Space-Based Astronomy Activity Guide for Science, Mathematics, and Technology Education 23 Introduction Contrary to popular belief, outer space is not empty space. It is filled with electro- magnetic radiation that crisscrosses the universe. This radiation comprises the spectrum of energy ranging from radio waves on one end to gamma rays on the other. It is called the electromagnetic spectrum because this radiation is associat- ed with electric and magnetic fields that transfer energy as they travel through space. Because humans can see it, the most familiar part of the electromagnetic spectrum is visible light—red, orange, yellow, green, blue, and violet. UNIT 2 THE ELECTROMAGNETIC SPECTRUM * Space Based Atronomy.b/w 2/28/01 8:54 AM Page 23
- 27. wavelengths contains little energy. Electro-magnet- ic radiation with short wavelengths contains a great amount of energy. Scientists name the different regions of the elec- tromagnetic spectrum according to their wave- lengths. (See figure 1.) Radio waves have the longest wavelengths, ranging from a few centime- ters from crest to crest to thousands of kilometers. Micro-waves range from a few centimeters to about 0.1 cm. Infrared radiation falls between 700 nanometers and 0.1 cm. (Nano means one billionth. Thus 700 nanometers is a distance equal to 700 billionths or 7 x 10⁻⁷ meter.) Visible light is a very narrow band of radiation ranging from 400 to 700 nanometers. For comparison, it would take 50 visible light waves arranged end to end to span the thickness of a sheet of household plastic wrap. Below visible light is the slightly broader band of ultraviolet light that lies between 10 and 300 nanometers. X-rays follow ultraviolet light and diminish into the hundred-billionth of a meter range. Gamma rays fall in the trillionth of a meter range. The wavelengths of x-rays and gamma rays are so tiny that scientists use another unit, the electron volt, to describe them. This is the energy that an electron gains when it falls through a potential difference, or voltage, of one volt. It works out that one electron volt has a wavelength of about 0.0001 centimeters. X-rays range from 100 elec- tron volts (100 eV) to thousands of electron volts. Gamma rays range from thousands of elec- tron volts to billions of electron volts. Using the Electromagnetic Spectrum All objects in space are very distant and difficult for humans to visit. Only the Moon has been vis- ited so far. Instead of visiting stars and planets, astronomers collect electromagnetic radiation from them using a variety of tools. Radio dishes capture radio signals from space. Big telescopes on Earth gather visible and infrared light. Interplanetary spacecraft have traveled to all the planets in our solar system except Pluto and have landed on two. No spacecraft has ever brought back planetary material for study. They send back all their information by radio waves. Virtually everything astronomers have learned about the universe beyond Earth depends on the information contained in the electromagnetic radiation that has traveled to Earth. For example, when a star explodes as in a supernova, it emits energy in all wavelengths of the electromagnetic spectrum. The most famous supernova is the stellar explosion that became visible in 1054 and produced the Crab Nebula. Electromagnetic National Aeronautics and Space Administration24 These two views of the constellation Orion dramatically illustrate the differ- ence between what we are able to detect in visible light from Earth’s surface and what is detectable in infrared light to a spacecraft in Earth orbit. Photo Credits: Akira Fujii—visible light image; Infrared Astronomical Satellite— infrared image. * Space Based Atronomy.b/w 2/28/01 8:54 AM Page 24
- 28. radiation from radio to gamma rays has been detected from this object, and each section of the spectrum tells a different piece of the story. For most of history, humans used only visible light to explore the skies. With basic tools and the human eye, we developed sophisticated methods of time keeping and calendars. Telescopes were invented in the 17th century. Astronomers then mapped the sky in greater detail––still with visible light. They learned about the temperature, constituents, distribu- tion, and the motions of stars. In the 20th century, scientists began to explore the other regions of the spectrum. Each region provid- ed new evidence about the universe. Radio waves tell scientists about many things: the distribution of gases in our Milky Way Galaxy, the power in the great jets of material spewing from the centers of some other galaxies, and details about magnetic fields in space. The first radio astronomers unex- pectedly found cool hydrogen gas distributed throughout the Milky Way. Hydrogen atoms are the building blocks for all matter. The remnant radiation from the Big Bang, the beginning of the universe, shows up in the microwave spectrum. Infrared studies (also radio studies) tell us about molecules in space. For example, an infrared search reveals huge clouds of formaldehyde in space, each more than a million times more mas- sive than the Sun. Some ultraviolet light comes from powerful galaxies very far away. Astronomers have yet to understand the highly energetic engines in the centers of these strange objects. Ultraviolet light studies have mapped the hot gas near our Sun (within about 50 light years). The high energy end of the spectrum—x-rays and gamma rays—provide scientists with information about processes they cannot reproduce here on Earth because they lack the required power. Nuclear physicists use strange stars and galaxies as a laboratory. These objects are pulsars, neutron stars, black holes, and active galaxies. Their study helps scientists better understand the behavior of matter at extremely high densities and temperatures in the presence of intense electric and magnetic fields. Each region of the electromagnetic spectrum pro- vides a piece of the puzzle. Using more than one region of the electromagnetic spectrum at a time gives scientists a more complete picture. For example, relatively cool objects, such as star-form- ing clouds of gas and dust, show up best in the radio and infrared spectral region. Hotter objects, such as stars, emit most of their energy at visible and ultraviolet wavelengths. The most energetic objects, such as supernova explosions, radiate intensely in the x-ray and gamma ray regions. There are two main techniques for analyzing starlight. One is called spectroscopy and the other photometry. Spectroscopy spreads out the different wavelengths of light into a spectrum for study. Photometry measures the quantity of light in specific wavelengths or by combining all Space-Based Astronomy Activity Guide for Science, Mathematics, and Technology Education 25 Figure 1: Electromagnetic Spectrum * Space Based Atronomy.b/w 2/28/01 8:54 AM Page 25
- 29. wavelengths. Astronomers use many filters in their work. Filters help astronomers analyze par- ticular components of the spectrum. For exam- ple, a red filter blocks out all visible light wave- lengths except those that fall around 600 nanometers (it lets through red light). Unfortunately for astronomical research, Earth’s atmosphere acts as a filter to block most wave- lengths in the electromagnetic spectrum. (See Unit 1.) Only small portions of the spectrum actually reach the surface. (See figure 2.) More pieces of the puzzle are gathered by putting observatories at high altitudes (on mountain tops) where the air is thin and dry, and by flying instruments on planes and balloons. By far the best viewing location is outer space. Unit Goals • To investigate the visible light spectrum. • To demonstrate the relationship between energy and wavelength in the electromagnetic spectrum. Teaching Strategy Because of the complex apparatus required to study some of the wavelengths of the electromagnetic spectrum and the danger of some of the radiation, only the visible light spectrum will be studied in the activities that follow. Several different methods for displaying the visible spectrum will be presented. Some of the demonstrations will involve sunlight, but a flood or spotlight may be substituted. For best results, these activities should be conducted in a room where there is good control of light. National Aeronautics and Space Administration26 Figure 2: Transparency of Earth’s Atmosphere MICROWAVE INFARED VISIBLE UV X-RAYS GAMMA RAYS RADIO 400 200 50 12 6 3 SEA LEVEL 10 4 2 -2 -4 -6 -8 -10 -12 1 10 101010 10 10 10 Wavelengths (meters) Transparency of Earth’s Atmosphere * Space Based Atronomy.b/w 2/28/01 8:54 AM Page 26
- 30. ACTIVITY: Simple Spectroscope Description: A basic hand-held spectroscope is made from a diffraction grating and a paper tube. Objective: To construct a simple spectroscope with a dif- fraction grating and use it to analyze the colors emitted by various light sources. National Education Standards: Mathematics Measurement Connections Science Systems, order, & organization Change, constancy, & measurement Abilities necessary to do scientific inquiry Abilities of technological design Technology Understand engineering design Materials: Diffraction grating, 2-cm square (See man- agement and tips section.) Paper tube (tube from toilet paper roll) Poster board square (5 by 10-cm) Masking tape Scissors Razor blade knife 2 single-edge razor blades Spectrum tubes and power supply (See management and tips section.) Pencil Procedure: 1. Using the pencil, trace around the end of the paper tube on the poster board. Make two circles and cut them out. The circles should be just larger than the tube’s opening. 2. Cut a 2-centimeter square hole in the center of one circle. Tape the diffraction grating square over the hole. If students are making their own spectroscopes, it may be better if an adult cuts the squares and the slot in step 4 below. 3. Tape the circle with the grating inward to one end of the tube. 4. Make a slot cutter tool by taping two sin- gle-edge razor blades together with a piece of poster board between. Use the tool to make parallel cuts about 2 centimeters long across the middle of the second circle. Use the razor blade knife to cut across the ends of the cuts to form a narrow slot across the middle of the circle. 5. Place the circle with the slot against the other end of the tube. While holding it in place, observe a light source such as a fluorescent tube. Be sure to look through the grating end of the spectroscope. The spectrum will appear off to the side from the slot. Rotate the circle with the slot until the spectrum is as wide as possible. Tape the circle to the end of the tube in this position. The spectroscope is complete. Space-Based Astronomy Activity Guide for Science, Mathematics, and Technology Education 27 violet red Look through diffraction grating red violet Visible Spectrum appears to right and left of center line Light enters slot Light source (not the Sun!) * Space Based Atronomy.b/w 2/28/01 8:54 AM Page 27
- 31. 6. Examine various light sources with the spec- troscope. If possible, examine nighttime street lighting. Use particular caution when examin- ing sunlight. Do not look directly into the Sun. Background: Simple spectroscopes, like the one described here, are easy to make and offer users a quick look at the color components of visible light. Different light sources (incandescent, fluorescent, etc.) may look the same to the naked eye but will appear differently in the spectroscope. The colors are arranged in the same order but some may be missing and their intensity will vary. The appear- ance of the spectrum displayed is distinctive and can tell the observer what the light source is. Management and Tips: The analytical spectroscope activity that follows adds a measurement scale to the spectroscope design. The scale enables the user to actually measure the colors displayed. As will be described in greater detail in that activity, the specific location of the colors are like fingerprints when it comes to identifying the composition of the light source. Refer to the background and management tips section for the Analytical Spectroscope activity for information on how diffraction gratings produce spectra. Spectroscopes can be made with glass prisms but prisms are heavy. Diffraction grating spectro- scopes can do the same job but are much lighter. A diffraction grating can spread out the spec- trum more than a prism can. This ability is called dispersion. Because gratings are smaller and lighter, they are well suited for spacecraft where size and weight are important considerations. Most research telescopes have some kind of grat- ing spectrograph attached. Spectrographs are spectroscopes that provide a record, photograph- ic or digital, of the spectrum observed. Many school science supply houses sell dif- fraction grating material in sheets or rolls. One sheet is usually enough for every student in a class to have a piece of grating to build his or her own spectroscope. Holographic diffrac- tion gratings work best for this activity. Refer to the note on the source for holographic grat- ing in the next activity. A variety of light sources can be used for this activity, including fluorescent and incandescent lights and spec- tra tubes with power supplies. Spectra tubes and the power supplies are available from school science supply catalogs. It may be pos- sible to borrow tubes and supplies from anoth- er school if your school does not have them. The advantage of spectrum tubes is that they National Aeronautics and Space Administration28 * Space Based Atronomy.b/w 2/28/01 8:54 AM Page 28
- 32. provide spectra from different gases such as hydrogen and helium. When using the spec- troscope to observe sunlight, students should look at reflected sunlight such as light bounc- ing off clouds or light colored concrete. Other light sources include streetlights (mercury, low-pressure sodium, and high-pressure sodi- um), neon signs, and candle flames. Assessment: Compare student drawn spectra from different light sources. Extensions: • How do astronomers measure the spectra of objects in space? What do those spectra tell us about these objects? • Investigate other applications for the electro- magnetic spectrum. Space-Based Astronomy Activity Guide for Science, Mathematics, and Technology Education 29 * Space Based Atronomy.b/w 2/28/01 8:54 AM Page 29
- 33. Use your spectroscope to analyze the colors of light given off by diferent sources. Reproduce the spectra you observe with crayons or colored markers in the spaces below. Identify the light sources. (When using the Sun as a light source, do not look at it directly with your spectroscope. You can harm your eye. Instead, look at sunlight reflected from a white cloud or a sheet of white paper.) Light Source: ______________________ Light Source: ______________________ Light Source _______________________ 1. Describe how the spectra of the three light sources you studied differed from each other. How were they similiar? 2. Would you be able to identify the light sources if you only saw their visible spectra? Student Sheet - Simple Spectroscope Name: * Space Based Atronomy.b/w 2/28/01 8:54 AM Page 30
- 34. ACTIVITY: Projecting Visible Spectra Description: Two methods for projecting the visible spectrum are explained. Objective: To study the range of colors in the visible spec- trum. National Education Standards: Mathematics Measurement Connections Science Change, constancy, & measurement Abilities necessary to do scientific inquiry Materials: Method 1 Flashlight (focusing kind) Stiff poster board 2 single-edge razor blades tape Glass prism Projection screen Method 2 Overhead projector Holographic diffraction grating (See next page for sources.) 2 sheets of opaque paper Tape Projection screen Procedure: Method 1 1. Make a partition with a narrow slot in its center to block all but a narrow beam from the flashlight. Cut out a 4 by 1-centimeter vertical rectangle out from a 10 by 10-cen- timeter piece of poster board. Tape the two single-edge razor blades to the poster board so that their edges face each other and there is a 1- to 2-millimeter gap between them. 2. Darken the classroom (the darker the bet- ter). 3. Brace the partition so that it stands upright with the gap in the vertical direction. 4. Aim the flashlight beam at the screen and focus it into a tight beam. Direct the beam of the flashlight directly through the gap in the partition so that a narrow vertical slot of light falls on the screen. 5. Stand the glass prism upright and place it in the narrow beam of light on the opposite side of the partition. 6. Slowly rotate the prism until the narrow slot of light disperses the visible spectrum. Depending upon the exact alignment, the spectrum may fall on a wall rather than on the screen. Adjust the setup so that the spec- trum is displayed on the projection screen. Procedure: Method 2 1. For this method, you must obtain a piece of holographic diffraction grating—a grating produced by accurate holographic tech- niques. See page 33 for the source of the grating. Note: Method 2 will not work well with a standard transmission grating. 2. Place two pieces of opaque paper on the stage of an overhead projector so that they are almost touching. There should be a narrow gap between them that lets light through. Aim the projector so that a nar- row vertical beam of light falls on the pro- jection screen. 3. Hang a square of holographic grating over the projector lens with tape. 4. Darken the classroom (the darker the better). 5. Look for the color produced by the grat- ing. It will fall on the screen or the wall on both sides of the center line of the projec- tor. You may have to adjust the aiming of Space-Based Astronomy Activity Guide for Science, Mathematics, and Technology Education 31 Prism Partition Narrow gap * Space Based Atronomy.b/w 2/28/01 8:54 AM Page 31
- 35. the projector to have one of the two spec- tra produced fall on the screen. 6. If the spectra produced is a narrow line of color, rotate the holographic film 90 degrees and remount it to the projector lens so that a broad band of color is projected. Background: Visible light, passing through a prism at a suit- able angle, is dispersed into its component col- ors. This happens because of refraction. When visible light waves cross an interface between two media of different densities (such as from air into glass) at an angle other than 90 degrees, the light waves are bent (refracted). Different wavelengths of visible light are bent different amounts and this causes them to be dispersed into a continuum of colors. (See dia- gram.) Diffraction gratings also disperse light. There are two main kinds of gratings. One transmits light directly. The other is a mirror-like reflec- tion grating. In either case, diffraction gratings have thousands of tiny lines cut into their sur- faces. In both kinds of gratings, the visible col- ors are created by constructive and destructive interference. Additional information on how diffraction gratings work is found in the Analytical Spectroscope activity and in many physics and physical science textbooks. Management and Tips: When projecting spectra, be sure to darken the room as much as possible. If it is not possible to darken the room, a large cardboard box can be used as a light shield for method 1. Cut a small peep-hole to examine the spectra. Method 2 produces a much larger spectra than method 1. In both cases, the size of the spectral display can be enlarged by increasing the distance from the prism or diffraction grating to the screen. The disadvantage of enlarging the display is that only so much light is available from the light source and increasing its dispersion diminishes it intensity. A better light source for method 1 is the Sun. If you have a window with direct sunlight, you can block most of the light except for a narrow beam that you direct through the gap in the partition. You will probably have to place the partition with the slot on its side to display a visible spectra. A slide projector can also be used as a light source for method 1. Refer to the Analytical Spectroscope activity for more information on how the diffraction grat- ing works. National Aeronautics and Space Administration32 Off On Holographic Diffraction Grating Red Orange Yellow Green Blue Indigo Violet White Light * Space Based Atronomy.b/w 2/28/01 8:54 AM Page 32
- 36. Assessment: Have students use crayons or marker pens to sketch the visible spectrum produced. Ask students to identify each color present and to measure the widths of each color band. Have them determine which colors bend more and which bend less as they come through the prism or diffraction grating. Extensions: • Who discovered the visible spectrum? How many colors did the scientist see? • A compact disk acts like a reflection diffrac- tion grating. Darken the room and shine a strong beam of white light from a flashlight on the disk. The beam will be dispersed by the grating and be visible on a wall. • Construct a water prism out of four sheets of glass. Glue the sheets together as shown in the illustration with clear silicone aquarium cement. When the cement is dry, fill the V- shaped trough with water and check for leaks. Set the finished water prism in a window with direct sunlight. A visible spectrum will appear somewhere in the classroom. You can reposi- tion the visible spectrum by bouncing the sunlight off a mirror before it enters the prism in order to change the sunlight angle. • A pocket mirror placed in a shallow pan of water can also project a spectrum. Set up the mirror and pan as shown in the illustration. Sources: Diffraction gratings are available from most school science catalogs. Holographic diffraction grating are available from: Learning Technologies, Inc. 40 Cameron Avenue Somerville, MA 02144 Phone: 1-800-537-8703 Reference: Sadler, P. “Projecting Spectra for Classroom Investigations,” The Physics Teacher, October 1991, 29(7), pp423–427. Space-Based Astronomy Activity Guide for Science, Mathematics, and Technology Education 33 Sunlight Water Prism Sunlight Water * Space Based Atronomy.b/w 2/28/01 8:54 AM Page 33
- 37. Projecting Spectra Name Using colored markers or crayons and the chart below, reproduce the electromagnetic spectrum as you see it. Be sure to maintain the proportions of the color widths. Write the names of the colors beneath the chart. Which color bent the most after passing through the prism or diffraction grating? Why? Which color bent the least? Why? Student Work Sheet * Space Based Atronomy.b/w 2/28/01 8:54 AM Page 34
- 38. ACTIVITY: Cereal Box Analytical Spectroscope Description: A spectroscope is constructed (from a cereal box and diffraction grating) that permits the analysis of visible light. Objective: To construct an analytical spectroscope and ana- lyze the spectrum produced when various sub- stances are heated or excited with electricity. National Education Standards: Mathematics Measurement Data analysis, statistics, & probability Science Change, constancy, & measurement Abilities necessary to do scientific inquiry Abilities of technological design Understandings about science & technology Technology Understand relationships & connections among technologies & other fields Understand engineering design Materials: Cereal box (13-15 ounce size) Holographic diffraction grating (See the Projecting Spectra activity for the source.) Aluminum foil Measurement scale Marker pen Ruler Masking tape Scissors Razor blade knife Cutting surface Spectrum tubes and power supply (See the back- ground and management tips section for infor- mation on sources.) Procedure: 1. Cut a 2 by 2-centimeter window from the bottom lid of the cereal box. The window should be near one side. 2. Cut a second window from the upper box lid directly above the lower window. 3. Cut a third window in the upper lid. This window should be 1.5 by 10-centimeters in size. Refer to the cutting diagram for place- ment information of the window. 4. Cut a piece of diffraction grating large enough to cover the window in the box bot- tom. Handle the grating by the edges if pos- sible; skin oils will damage it. Look at a flu- orescent light through the grating. Turn the grating so that the rainbow colors you see appear in fat vertical bars to the right and left of the light. Tape the grating in place. Space-Based Astronomy Activity Guide for Science, Mathematics, and Technology Education 35 Frosted Falling Stars Breakfast of Astronomers 1.5 by 10-cm window 2 by 2-cm window 2 by 2-cm window * Space Based Atronomy.b/w 2/28/01 8:54 AM Page 35
- 39. 5. Place a 4 by 4-centimeter square of alu- minum foil on a cutting surface. Cut a nar- row slot into the foil with the razor blade knife. If you made the slot-cutting tool for the simple spectroscope activity, use it here for cutting slots as well. 6. Tape the foil over the upper 2 by 2-centime- ter hole in the box lid. The slot should be positioned directly over the hole and aligned perpendicular to the cereal box front. 7. Copy the black measurement ruler on an overhead projector transparency. Several rulers are reproduced in the guide to reduce the number of transparencies needed. 8. Lightly tape the measurement ruler over the rectangular window in the box lid. When you look through the diffraction grating into the box, you should be able to read the num- bers on the ruler with 400 on the right and 700 on the left. Adjusting and Calibrating the Spectroscope: 1. Aim the slot end of the spectroscope towards a fluorescent light. Look through the diffrac- tion grating. A continuous spectrum will be seen off to the side of the spectroscope falling under or partially on top of the meas- urement ruler. If the spectrum appears as a narrow rainbow-colored line, remove the diffraction grating from the window and rotate it 90 degrees. Tape it back in place. 2. While looking at the fluorescent light, check the position of the measurement ruler. There will be a bright green line in the green portion National Aeronautics and Space Administration36 700 500600 400 700 500600 400 700 500600 400 700 500600 400 700 500600 400 * Space Based Atronomy.b/w 2/28/01 8:54 AM Page 36
- 40. of the spectrum. Adjust the position of the ruler so that the line falls between 540 and 550 on the ruler. Tape the ruler permanently in place. The spectroscope is calibrated. Background: Unlike a prism, which disperses white light into the rainbow colors through refraction, the diffrac- tion grating used in this spectroscope disperses white light through a process called interference. The grating used in this activity consists of a trans- parent piece of plastic with many thousands of microscopic parallel grooves. Light passing between these grooves is dispersed into its compo- nent wavelengths and appears as parallel bands of color on the retina of the eye of the observer. Spectroscopes are important tools for astronomy. They enable astronomers to analyze starlight by providing a measure of the relative amounts of red and blue light a star gives out. Knowing this, astronomers can determine the star’s tempera- ture. They also can deduce its chemical compo- sition, estimate its size, and even measure its motion away from or toward Earth (See the activity Red Shift, Blue Shift.) Space-Based Astronomy Activity Guide for Science, Mathematics, and Technology Education 37 Continuous spectrum Bright-line spectrum Absorption-line spectrum Hot opaque source Hot transparent gas cloud Hot opaque source Cooler transparent gas cloud Basic Spectral Types * Space Based Atronomy.b/w 2/28/01 8:54 AM Page 37
- 41. Starlight (photons) originates from the interior of a star. There, pressures are enormous and nuclear fusion is triggered. Intense radiation is produced as atoms, consisting of a surrounded nucleus, collide with each other millions of times each second. The number of collisions depends upon the temperature of the gas. The higher the temperature, the greater the rate of collision. Because of these collisions, many electrons are boosted to higher energy levels. This process is called excitation. The electrons spontaneously drop back to their original energy level. In doing so, they release energy as photons. This is what happens to the filament of an electric light bulb or to an iron bar when it is heated in a furnace. As the temperature of the filament rises, it begins to radiate reddish light. When the filament becomes much hotter, it radiates bluish light. Thus, the color it radiates is an indicator of the filament’s temperature. Stars that radiate a great amount of red light are much cooler than stars that radiate a great amount of blue light. Stellar spectra therefore serve as star thermometers. Excitation of electrons can also occur if they absorb a photon of the right wavelength. This is what happens when certain materials are exposed to ultraviolet light. These materials then release new photons at different wavelengths. This is called fluorescence. One of the important applications of spectro- scopes is their use for identifying chemical ele- ments. Each element radiates light in specific wavelength combinations that are as distinctive as fingerprints. Knowing the “spectral signa- tures” of each element enables astronomers to identify the elements present in distant stars by analyzing their spectra. There are three kinds of spectra: continuous, absorption, and emission. The continuous spec- trum appears as a continuous band of color rang- ing from red to violet when observed through a spectroscope. An absorption spectrum occurs when the light from a star passes through a cloud of gas, hydrogen for example, before reaching the spectroscope. As a result, the hydrogen atoms absorb some wavelengths of light. This selective absorption produces a spectrum that is a broad band of color interrupted by dark lines repre- senting certain wavelengths of light that were absorbed by the hydrogen cloud. Such a situa- tion occurs when a star is located inside or behind a gas cloud or nebula. An emission spec- trum is observed when energy is absorbed by the gas atoms in a nebula and is re-radiated by those atoms at specific wavelengths. This spectrum consists of bright lines against a black back- ground. The light from fluorescent tubes and neon lights produce emission spectra. Stellar spectra allow astronomers to determine star temperature, chemical composition, and motion along the line of sight. This enables astronomers to classify stars into spectral cate- gories and estimate their age, reconstruct their histories, and postulate their future evolution. When available, astronomers prefer stellar spec- tra collected by orbiting spacecraft over spectra collected by Earth-based telescopes since they are not affected by atmospheric filtering and are therefore more accurate. Included in the spectra collected by spacecraft are infrared, ultraviolet, x- ray, and gamma ray bands that simply do not reach ground-based spectroscopes. Management and Tips: This spectroscope works better with a holo- graphic diffraction grating than with standard diffraction gratings. Refer to the source for holographic gratings listed in the Projecting Spectrums activity. The spectroscope can be used to analyze the wavelengths of light from many light sources. Compare incandescent light, fluorescent light, and sunlight. If you have spectrum tubes and a power supply (available from science supply houses), examine the wave- lengths of light produced by the different gases in the tubes. Many high school physics depart- ments have this equipment and it may be possi- ble to borrow it if your school does not. Use the spectroscope to examine neon signs and street- lights. Science supply houses sell spectrum flame kits consisting of various salts that are heated in the flame of a Bunsen burner. These kits are much less expensive than spectrum tubes but are National Aeronautics and Space Administration38 * Space Based Atronomy.b/w 2/28/01 8:54 AM Page 38
- 42. more difficult to work with because the flames do not last very long. This spectroscope can also be used to study the spectrum of the Sun. Do not look directly at the Sun with the spectroscope as this could damage your eye. Instead, look at reflected sunlight such as a white cloud or piece of white paper in sun- light (but not in a mirror!). When using the spectroscope in a very dark environment with spectrum tubes, it may be difficult to read the measurement scale. A small flashlight aimed at a white wall behind the spectrum power supply will provide just enough light to read the ruler. The first student page requires the use of spec- trum tubes and a power supply. Have students make spectrographs of five different spectrum tubes. Randomly select one of the five tubes and ask students to make a spectrograph of it. Tell the students to identify this unknown element from their previous spectrographs. The second student page shows several typical bright line spectra from spectrum tubes. This worksheet can be done with- out the tubes. It is important that students identi- fy more than one line from each element shown in the spectrograph. Some elements have several lines in common. It is the entire combination of lines that makes the identification possible. Work Sheet 2 answers: Spectrograph A: Hydrogen, Helium Spectrograph B: Sodium, Barium, Lithium Spectrograph C: Calcium, Helium, Hydrogen, Oxygen, Krypton Assessment: Examine student spectroscopes to see if the grat- ings are properly aligned and the measurement ruler is calibrated. Collect the student sheets and compare student answers. Extensions: • Compare the solar spectrum at midday and at sunset. Are there any differences? Caution: Be careful not to look directly at the Sun. • What do spectra tell us about the nature of stars and other objects in space? • Show how temperature and radiation are related by connecting a clear light bulb to a dimmer switch. Gradually increase the cur- rent passing through the filament by turn- ing up the dimmer. Observe the color and brightness of the filament as the tempera- ture of the filament climbs with increasing current. Space-Based Astronomy Activity Guide for Science, Mathematics, and Technology Education 39 * Space Based Atronomy.b/w 2/28/01 8:54 AM Page 39
- 43. Student Work Sheet 2 Mystery Spectra Name:______________ Use your spectroscope to examine the five elements displayed to you by your teacher. Make sketches of the bright lines visible in the spaces below. 400500600700 Element Name:______________ 400500600700 Element Name:______________ 400500600700 Element Name:______________ 400500600700 Element Name:______________ 400500600700 Element Name:______________ 400500600700 Element Name:______________ Use your spectroscope to examine the unknown element displayed to you by your teacher. Make a sketch of the bright lines visible in the space below. Compare your unknown element to the spectra above. Identify the element. * Space Based Atronomy.b/w 2/28/01 8:54 AM Page 40
- 44. 400500600700 Calcium Helium Hydrogen Lithium Sodium Krypton Argon Oxygen Nitrogen Barium Spectra A Elements:____________________________________________ Spectra C Elements:____________________________________________ Spectra B Elements:____________________________________________ Student Work Sheet 2 Mystery Spectra Name:______________ Identify the elements in spectra A, B, and C by comparing the bright lines present with the bright lines in the spectra for know elements. * Space Based Atronomy.b/w 2/28/01 8:54 AM Page 41
- 45. ACTIVITY: Red Shift, Blue Shift Description: A Whiffle® ball containing a battery-operated buzzer is twirled in a circle to demonstrate the Doppler effect. This same effect causes starlight to shift toward the blue or red end of the spectrum if a star is moving towards or away from us. Objective: To demonstrate how stellar spectra can be used to measure a star’s motion relative to Earth along the line of sight. National Education Standards: Mathematics Patterns, functions, & algebra Geometry & spatial sense Measurement Data Analysis, statistics, & probability Connections Science Change, constancy, & measurement Abilities necessary to do scientific inquiry Motions & forces Technology Understand relationships & connections among technologies & other fields Materials: Plastic Whiffle® ball (12-15 cm in diameter) Microswitch* Small buzzer* 9-volt battery* Cord (3 meters long) Solder and soldering iron Sharp knife or hacksaw blade Masking tape * See Management Tips note about electronic parts. Procedure: 1. Splice and solder the buzzer, battery clip, and microswitch in a series circuit. See the wiring diagram for details on the connections. Be sure to test the circuit before soldering. Many small buzzers require the electric current to flow in one direction and will not work if the current flows in the other direction. 2. Split the Whiffle® ball in half along the seam with the knife or saw blade. 3. Remove the nut from the microswitch and insert the threaded shaft through one of the holes as shown in the diagram. If a hole is not present in the location shown, use a drill to make one the correct diameter. Place the nut back over the threaded shaft on the microswitch and tighten. 4. Join the two halves of the ball together with the switch, buzzer, and battery inside. Tape the halves securely together. 5. Tie one end of the cord to the ball as shown. 6. Station students in a circle about 6 meters in diameter. Stand in the middle of the stu- dents, turn on the buzzer, and twirl the ball in a circle. Play out 2 to 3 meters of cord. 7. Ask the students to describe what they hear as the ball moves towards and away from them. 8. Let different students try twirling the ball. Ask them to describe what they hear. As an alternate suggestion to the Whiffle® ball, cut a cavity inside a foam rubber ball and insert the battery and buzzer. The ball can then be tossed from student to student while demon- strating the Doppler effect. National Aeronautics and Space Administration42 Buzzer Small toggle switch 9 volt battery and battery clip * Space Based Atronomy.b/w 2/28/01 8:54 AM Page 42
- 46. Background: This is a demonstration of the phenomenon called the Doppler effect. It results from the motion of a source (star) relative to the observer and causes its spectra to be shifted toward the red (going away) or toward the blue (coming towards) end of the spectra. Like light, sound travels in waves and therefore provides an excellent model of the wave behavior of light. The number of waves reaching an observer in one second is called the frequency. For a given speed, frequency depends upon the length of the wave. Long waves have a lower frequency than short waves. As long as the distance between the source of the waves and the observer remains con- stant, the frequency remains constant. However, if the distance between the observer and the source is increasing, the frequency will decrease. If the dis- tance is decreasing, the frequency will increase. Imagine that you are at a railroad crossing and a train is approaching. The train is ringing a bell. The sound waves coming from the bell are squeezed clos- er together than they would be if the train were still, because of the train’s movement in your direction. This squeezing of the waves increases the number of waves (increases the frequency) that reach your ear every second. But after the train’s engine passes the crossing, the frequency diminishes and the pitch lowers. In effect, the sound waves are stretched apart by the train’s movement in the opposite direction. As the observer, you perceive these frequency changes as changes in the pitch of the sound. The sound’s pitch is higher as the train approaches and lower as it travels away. The illustration below pro- vides a graphical representation of what happens. Vr - radial velocity of the source with respect to the observer. c - speed of light (3 x 10⁵ km/sec) ∆λ the amount of the shift in nanometers λ0- unshifted wavelength in nanometers For example, if a line in a spectrum should fall at 600.0 nanometers but instead lies at 600.1, what would the radial velocity be? The solution to this equation only tells us the veloc- ity of the source relative to the spectroscope. Whether the distance is increasing or decreasing is revealed by the direction of the shift to the red or blue end of the visible spectrum. It does not tell, however, if one or both objects are moving relative to some external reference point. Space-Based Astronomy Activity Guide for Science, Mathematics, and Technology Education 43 ∆λv c = λ r 0 Higher Frequency (Blue Shift) Lower Frequency (Red Shift) =vr 0.1 nm x 3x10 km /sec 5 600 nm = 50 km/sec * Space Based Atronomy.b/w 2/28/01 8:54 AM Page 43
- 47. Management and Tips: The amount of pitch change as the buzzer twirls is directly related to how fast you twirl the buzzer. Twirling the buzzer faster means that the buzzer approaches and travels away from the observer faster.The person twirling the buzzer does not hear the pitch change no matter how fast the buzzer is twirled; it remains the same distance from the twirler. The observers standing away from the twirler will hear the pitch change as the buzzer goes toward and away from the observer’s ear. Note About Electronic Parts: The electronic parts for this device are not spec- ified exactly since there are many combinations that will work. Go to an electronic parts store and select a buzzer, battery holder, battery, and switch from what is available. Remember to pur- chase parts that will fit in a Whiffle® ball. The store clerk should be able to help you make a workable selection if you need assistance. If pos- sible, test the buzzer before purchasing it to determine if it is loud enough. Test the buzzer and battery before soldering connections. The buzzer may be polarized. Reverse the connec- tions if you do not hear a sound the first time. Answers to Work Sheets: Sheet 1 1. The greater the difference in the pitch above or below the normal pitch, the faster the vehicle is moving. 2. A – lower, B – higher, C – the same 3. Stars moving toward us become slightly bluer. Stars moving away become slightly redder. 4. Astronomers look at the spectrograph of a star and compare the position of bright lines in the spectrograph with where the lines should be if the star were not moving at all. A shift to the red end of the spectrum indi- cates a star is moving away and a shift toward the blue end indicates the star is moving towards us. The amount of the shift indicates relative velocity. The greater the shift, the greater the velocity. 5. No. The movement can be determined if the distance to the star is known. How fast the star moves against the background of more distant stars can be measured and the speed of the star calculated. Sheet 2 Star 1 – 100 km/sec away Star 2 – 260.7 km/sec toward Star 3 – 418.6 km/sec away Assessment: Collect student worksheets and compare the answers. Extensions: • Can the red/blue shift technique be used for objects other than stars? Can you tell which way an emergency vehicle is traveling by the pitch of its siren? • Transverse velocity is a motion that is per- pendicular to radial velocity. Can this motion be detected by the Doppler effect? • What has the Doppler effect told astronomers about the size of the universe? National Aeronautics and Space Administration44 400 500 600 700450 550 650 750 Same star Red Shifted (moving away from us) Simplified Star Spectrum Same star Blue Shifted (moving toward us) * Space Based Atronomy.b/w 2/28/01 8:54 AM Page 44
- 48. 1. How can you estimate the speed of a car that has passed you just by listening to the pitch of its whine? 2. Label the diagram below and tell if the observer perceives a pitch that is higher, lower, or just the same as the pitch heard by the driver. 3. How does the doppler shift affect the color of a star? 4. Describe how astronomers can use the doppler shift to determine if a star is moving toward us or away and how fast? 5. If a star is moving perpendicular to our line of sight, can you use the doppler shift to determine its speed? If not, how might you determine its speed? Red Shift, Blue Shift Name: ________________ A: _________ B: _________ C: _________ Student Work Sheet 1 * Space Based Atronomy.b/w 2/28/01 8:54 AM Page 45
- 49. vr = radial velocity c = speed of light (3x10 km/sec or 300,000 km/sec) 5 = radial velocity ∆λ = amount of shift in nanometers λ0 = unshifted wavelength in nanometers Name: ________________ Use the equation below to determine the velocity of several stars whose spectra have shifted. Are the stars moving toward or away from us? Show your work on the back side of this page. Star 1: The spectrum has shifted from 600.0 to 600.2 nm Velocity = ________ km/sec Moving toward or away from us? ____________ Star 2: The spectrum has shifted from 575.3 to 574.8 nm Velocity = ________ km/sec Moving toward or away from us? ____________ Star 3: The spectrum has shifted from 501.6 to 502.3 nm Velocity = ________ km/sec Moving toward or away from us? ____________ vr = λ0 c∆λ x Student Work Sheet 2 Red Shift, Blue Shift * Space Based Atronomy.b/w 2/28/01 8:54 AM Page 46
- 50. ACTIVITY: Wavelength and Energy Description: Shaking a rope permits students to feel the rela- tionship between wavelength, frequency, and energy. Objective: To demonstrate the relationship between wave frequency and energy in the electromagnetic spectrum. National Education Standards: Mathematics Measurement Data analysis, statistics, & probability Science Evidence, models, & explanation Change, constancy, & measurement Abilities necessary to do scientific inquiry Motions & forces Transfer of energy Technology Understand relationships & connections among technologies & other fields Materials: Rope – 50-ft. length of cotton clothesline Tape measure Stopwatch or clock with second hand Procedure: 1. Select two students to hold the rope. Have each student stand in an aisle or in opposite corners of the classroom so that the rope is taut between them. 2. While one end of the rope is held still, have the other student shake the opposite end up and down at a moderate but steady rate. 3. Ask other students to observe the wave pat- terns created in the rope. Point out wave crests and troughs. Ask your students to measure the wavelength and frequency of waves reaching the other student. The wavelength is the distance from wave crest to wave crest (or wave trough to wave trough). The wavelength can be meas- ured by having one student stand next to the rope where a wave crest is repeatedly formed and having a second student stand where the next crest is formed. Measure the distance between the students. Frequency is the num- ber of waves reaching the far end of the rope each second. Frequency can be estimated by counting the number of times the student shakes the rope each second. 4. Tell the student shaking the rope to shake it faster. Again estimate the wavelength and frequency. 5. Tell the student shaking the rope to shake the rope as fast as he or she can. Again, esti- mate the wavelength and frequency. 6. Stop the demonstration and ask the student shaking the rope if it is easier to produce low frequency (long wavelength) or high fre- quency (short wavelength) waves. Background: This activity provides a graphic demonstration of the relationship between energy and wave- length. The student shaking the rope will find that creating many waves each second takes much more energy than producing only a few waves per second. High-frequency waves (short wavelength) represent more energy than low-fre- quency (long wavelength) waves. Astronomers find the relationship between wavelengths, fre- quency, and energy very useful. Radio waves Space-Based Astronomy Activity Guide for Science, Mathematics, and Technology Education 47 * Space Based Atronomy.b/w 2/28/01 8:54 AM Page 47
- 51. from astronomical objects have very long wave- lengths and low frequencies. The waves are gen- erated by relatively quiet processes. Gamma rays, on the other end of the electromagnetic spec- trum, have very short wavelengths and high fre- quencies and represent the most violent process- es in space. The frequency of electromagnetic energy coming from an object tells astronomers much about how that object was created and what was happening at the time the energy was emitted into space. Management and Tips: The quality of the demonstrations can be great- ly enhanced by using a wave demonstration spring. These springs are available from school science supply catalogs for a few dollars. The springs are long coils and when stretched and agitated, produce excellent waves. The increased mass of the spring over the cotton clothesline enhances the wave motions. If a strobe light is available, the appearance of the wave motions can be enhanced by playing the light on the moving rope or spring and adjusting the strobe frequency. A Slinky® can also be used to demon- strate wave motion but it will work best if the Slinky® is placed on a long table and the spring is shaken from side to side. Permit other students to shake the rope so they can feel, as well as see, the relationship between frequency, wavelength, and energy. Assessment: Make sure students understand the relationship between frequency and wavelength and the amount of energy required to produce the waves. Collect and compare the student sheets. Extensions: • Invite a hospital medical imaging specialist to talk to the class about the use of high-fre- quency electromagnetic waves in medical diagnosis. • Make an overhead projector transparency of the spectrum chart on page 00. Ask the stu- dents to relate energy to the electromagnetic wavelengths depicted. National Aeronautics and Space Administration48 E = hf λ λ is the wavelength in meters E = hc f is the frequency in hertz Planck’s Constant = 6.63 x 10 J s.--34 * Space Based Atronomy.b/w 2/28/01 8:54 AM Page 48