

Empfohlen
Weitere ähnliche Inhalte
Was ist angesagt?
Was ist angesagt? (20)
Andere mochten auch
Andere mochten auch (14)
Ähnlich wie The photoshop element book revised 2013 uk
Ähnlich wie The photoshop element book revised 2013 uk (20)
Kürzlich hochgeladen
Kürzlich hochgeladen (20)
The photoshop element book revised 2013 uk
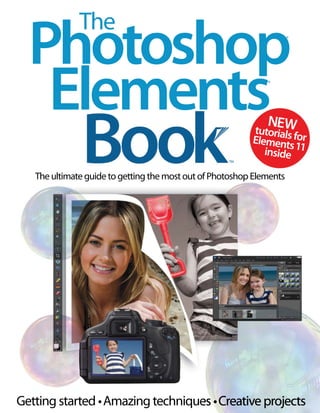
- 1. The Photoshop Elements ® ® NEW tut TM oria s Elemenltsfor inside 11 The ultimate guide to getting the most out of Photoshop Elements Getting started • Amazing techniques • Creative projects
- 3. Welcome to Photoshop Elements The ® ® TM We’re very excited to have an entire book dedicated to this fantastic image-editing software aimed at consumers, particularly as it’s often overshadowed by its CC sibling. Sharing many of the features the professional version boasts, the revised edition of The Photoshop Elements Book explores updates to Elements 11. Discover how to edit your images, create digital art and share your projects with the wider world. Providing you with an in-depth guide and step-by-step tutorials to fine-tune your techniques, this book also comes with a free disc so you can follow along and experiment with free resources.
- 5. Photoshop Elements The ® ® TM Imagine Publishing Ltd Richmond House 33 Richmond Hill Bournemouth Dorset BH2 6EZ % +44 (0) 1202 586200 Website: www.imagine-publishing.co.uk Head of Publishing Aaron Asadi Head of Design Ross Andrews Production Editor Sarah Harrison Senior Art Editor Greg Whitaker Design Perry Wardell-Wicks Printed by William Gibbons, 26 Planetary Road, Willenhall, West Midlands, WV13 3XT Distributed in the UK & Eire by Imagine Publishing Ltd, www.imagineshop.co.uk. Tel 01202 586200 Distributed in Australia by Gordon & Gotch, Equinox Centre, 18 Rodborough Road, Frenchs Forest, NSW 2086. Tel + 61 2 9972 8800 Distributed in the Rest of the World by Marketforce, Blue Fin Building, 110 Southwark Street, London, SE1 0SU Disclaimer The publisher cannot accept responsibility for any unsolicited material lost or damaged in the post. All text and layout is the copyright of Imagine Publishing Ltd. Nothing in this bookazine may be reproduced in whole or part without the written permission of the publisher. All copyrights are recognised and used specifically for the purpose of criticism and review. Although the bookazine has endeavoured to ensure all information is correct at time of print, prices and availability may change. This bookazine is fully independent and not affiliated in any way with the companies mentioned herein. Photoshop is either a registered trademark or trademark of Adobe Systems Incorporated in the United States and/or other countries and is used with express permission. The Photoshop Elements Book Volume 1 Revised Edition © 2013 Imagine Publishing Ltd ISBN 978-1909372726 Part of the ® bookazine series
- 6. PAGE 76 Contents 08 Ultimate guide Explore all Photoshop Elements has to ofer, from editing images, creating projects and sharing masterpieces PAGE 154 Techniques Clone objects 26 Duplicate people in your photos 28 Get started with selections 46 Sharpen your images Remove subtle blurring 72 48 Improve exposure Bring life back into images with curves 74 Fix images as far as you can Push contrast 52 Make creative panoramas 76 Convert images to black and white Use the Photomerge function Manipulate your images 30 Master selections and masking Create the out-of-bounds efect 32 Retouch photos Touch up your portraits 34 Control colour of photos Improve the colour know Gradients 36 Get tothis essential tool Master Photo editing Make one-click fixes 58 Discover auto options the Lomo 78 Get colour limits effect Push 80 Edit colours with Photo Filter Fix white-balance problems 64 Make essential adjustments 88 Fix heavy shadows Bring back some light Use blend modes for this efect effectively 44 Use brushesuse the Brush Discover how to with 70 Add drama Burn Dodge and 6 The Photoshop Elements Book From colour to monochrome 84 Perfect macro efects Add layered macro 66 Edit portraits shots Improve your portrait palette to its full potential Fake the HDR look 62 Top guided edits Make your editing easier 40 Rescue old photos Restore faded family photos Master HDR toning Adjust lighting 90 Create exposure effects Make a layered composition 94 Light up your seascapes Create some atmosphere
- 7. PAGE 26 PAGE 30 PAGE 36 PAGE 166 98 Improve your landscapes 134 Adjust colour and exposure PAGE 58 PAGE 90 Create a family portrait Fake a painted-portrait efect with your family snaps 100 Create the Dragan effect 140 Create an art-deco style Master the Mezzotint filter 104 144 Design an abstract tool Control the Custom Shape Get creative with this efect Retouch for classic effects Create a vintage portrait efect 110 Use the Lighting Effects filter Add stunning lighting efects 114 Add emphasis to eyes 116 Selective colour creations Apply a rainbow efect Bring out the tones Digital art 122 Create a comicbook effect Use the Color Halftone filter 126 Use Elements for stunning effects Make the most of Elements 130 Smudge your way to an oil painting Create an oil portrait with the Smudge tool for abstract artwork 148 Mix tradition with digital Paint portraits 154 Re-create Andy Warhol's work Create instant pop art 156 Make your own watercolour Merge traditional art efects 160 Turn photos to sketches Get creative with your images 162 Customise brushes Create eye-catching art splatter 166 Create brushes andeffects Combine assets 170 Apply textures Add some texture to your shots effects 174 Make waterblend modes Use filters and 180 Design ancient patterns Create some ancient designs for use in a variety of projects PAGE 140 Photo project 184 Create underwater scenes Use filters and blend modes to create a photomontage 188 Play with Perspective Create a miniature efect 192 Design your own holiday postcard Send a modern-day postcard the digital way a photo album 194 Build your own virtual album Create 196 Compose a piece mixed-media Create a musical composition with a variety of media 200 Create a planet panoramic Make a 360-degree planet 202 Compose surreal artwork Create a bizarre composite 206 Achieve a retro photo effect Send your photos back in time with a retro efect The Photoshop Elements Book 7
- 8. Photoshop Elements The ultimate guide to Photoshop Elements Explore Photoshop Elements and find out how it can transform your photos T he CS6 version of Photoshop is a wonderful program, packed with tools, filters and advanced facilities for performing an enormously wide range of adjustments on your images. However, though its breadth and depth is its biggest strength, it can be rather too much when you just want to do some simple image editing and create some straightforward effects. Sometimes, Photoshop CS6 is a bit more than you need. This is where Photoshop Elements 11 comes to the rescue. It contains a large number of the features that 8 The Photoshop Elements Book make its big brother such an impressive piece of software, but strips away some of the more complex aspects, resulting in a program that is both sleek and easy to use. It’s still an extremely powerful program that can enable you to produce some incredible effects, so you’ll need to spend some time getting to grips with everything that it has to offer. Over the next few pages, we’ve prepared an easy-to-follow guide to help you uncover some of the many ways in which Photoshop Elements 11 can help you to make the very best of your favourite images in no time at all.
- 9. Ultimate guide The Photoshop Elements Book 9
- 10. Photoshop Elements Toolbar Access a range of very powerful editing tools via the Toolbar thatÕs on the left-hand side of the screen. How many tools you have access to will vary, depending on which editing mode you are using in Elements 11. Edit mode Within the Photo Editor interface, choose between Quick, Guided and Expert editing modes, depending on your skill level and how in-depth the editing will be. Each mode functions very differently. “Select between Full edit, Quick edit or Guided edit depending on skill level and intent” Layers palette When editing an image, you can use the Layers palette to build up the enhancements non-destructively. You need to be working in Expert mode in order to access the range of Layers options available in Elements 11. Photo Bin When working in the Photo Editor, the images youÕve opened to edit will appear in the Photo Bin along the bottom. This means you have quick access to images and can view a sequence of images easily. Main menu The top bar of the Photo Editor interface has the main menu options you might need to access during editing. Advanced features include image and canvas size adjustments, image adjustments, filters and view options. 10 The Photoshop Elements Book
- 11. Ultimate guide Tool adjustment panel Whenever you select a tool from the Toolbar, adjust its settings by clicking on Tool Options at the bottom of the interface. If youÕre using the paintbrush, for example, this panel will allow you to change brush-size settings and strength to suit your needs. Layout Click on the Layout button at the bottom of the interface in order to change the way the images are arranged within the Photo Editor. This is great if youÕre looking to replicate a specific effect across several images. Share mode Click on the Share tab to explore the many ways of sharing your shots with family members and friends. You need to be in the Organizer interface to access this in Elements 11. Create tab Click on the Create tab to output images into personalised keepsakes and products. YouÕll be able to construct and customise photo books, greeting cards, calendars and collages. There are extra Create options when you are working in the Organizer interface. The Organizer At the bottom left of the Photo Editor, you can access the Organizer. The Photo Editor wonÕt close down; instead the Organizer will open in a separate window. The Photoshop Elements Book 11
- 12. Photoshop Elements Edit W Discover how you can transform your images using filters, frames, text and more, right in the Photo Editor in Elements 11 hen you load up Elements 11, you’ll see a splash screen that enables you to choose between the Organizer and Photo Editor. These two main choices offer completely different functions, but retouching your images and adding effects is one of the first things that you’ll want to do so we’re going to take a look at the incredible range of editing possibilities on offer in Elements 11. Simply click on the Photo Editor tab to start working on your images. Elements 11 will load up and you can begin to edit, enhance and add effects to your photographs. If you want to access the Organizer simultaneously, click on the relevant button at the bottom of the Photo Editor interface and you can have the two windows open up at once. 12 The Photoshop Elements Book To make things as straightforward and user-friendly as possible, the Photo Editor provides you with three separate tabs to choose from at the top centre of the interface; the choice you make will be informed by the complexity of editing and retouching that you wish to carry out. For very basic image touch-ups, the Quick tab is definitely the best option. Here, you are restricted to six quick editing tools at the left-hand side of the interface, with just the Quick Selection Tool, Red Eye Removal Tool, Whiten Teeth Tool, Horizontal Type Tool, Spot Healing Brush Tool and Crop Tool at your disposal. If you just want to remove a few blemishes from a family snap or make some very simple improvements to an image, the Quick tab will be all that you need. The Guided tab, meanwhile, works very differently. In this tab, the Tools palette disappears from the left-hand side of the interface, but there’s actually a much wider range of options available for retouching your images than found in the Quick tab. The image-editing tools in the Guided tab are divided into three subsections at the right-hand side of the interface. As the name implies, when you click on each of these, Elements 11 provides a clear set of instructions to ensure you know what each slider and control will do, allowing you to create some quite advanced effects with a minimum level of difficulty. The Touchups menu allows you to perform a dozen different basic image corrections, some of which, like the Crop Photo facility and the Sharpen feature,
- 13. Ultimate guide Guided edits The Perfect Portrait feature allows you to easily make the most of your people photos, taking you through the retouching process. Use features such as Enhance Colors in Elements’ Photo Editor to improve the appearance of colours in your images. are fairly basic, but others are much more in-depth and powerful, like the Perfect Portrait feature and the Recompose option. If you want to get creative with your images, the Photo Effects subsection has plenty of fun on offer. There are ten effects to choose from, including a feature to help create an Old Fashioned Photo, a Line Drawing effect and the ability to add Depth of Field, Tilt-Shift and Vignette effects. Photo Play is the third and final subsection, featuring four fairly advanced effects that would otherwise be difficult to reproduce. Out Of Bounds allows you to create the illusion of a part of your image, such as someone’s leg kicking a ball, coming out of the bounds of the image. Picture Stack allows you to present your image as four, eight, or twelve individual tiles, similar to a jigsaw puzzle. Pop Art allows you to If you’re a complete beginner to Photoshop Elements 11, use the Guided edits section to ensure you get the image results you want. Easy to access via the main Photo Editor interface, you can explore a whole range of semiautomated editing options. Elements 11 will guide you through the entire editing process, even showing you how to customise each effect’s result. Guided edits are a great way to get familiar with image editing and ensure professionallooking results. Add impact and get creative with your presentation by adding a frame around the edges of your images within the Expert editing tab. choose from two different, Warhol-esque Pop Art effects, while the Reflection option allows you to create a reflection effect completely from scratch. If you want to take things further, visit the Expert tab. This is similar to the main Photoshop interface, and offers significant levels of creative control once your imageediting confidence grows. There is an extensive Tools palette at the left-hand side of the interface, with four different selection tools, six enhancing tools, eight drawing tools and four modifying tools. Over on the right-hand side of the interface, there’s a Layers palette. When combined with blending modes, this allows you to take very extensive control over your image adjustments, and it’s not too difficult to get to grips with after a little bit of experimentation. Quick The Quick edit tab restricts you to a very limited range of Tools, allowing you to make minor, simple adjustments with a minimum of fuss. Guided Guided editing allows you to produce some really great effects without even needing to be particularly experienced with Photoshop or even with Photoshop Elements. Expert Create incredible artistic effects using the Guided editing tab, including professional-looking treatments such as this Pop Art look. Not just for beginners, you can use Guided edits to learn how to apply specific styles to a shot such as Lomo or Orton. Use this mode when you want to take full creative control of your images. You have access to the full range of Tools and you can also make use of Layers. The Photoshop Elements Book 13
- 14. Photoshop Elements Create T he Create tab can be found in both the Photo Editor section and the Organizer section in Elements 11, although the Organizer version features two additional options: Instant Movie and DVD With Menu. In both cases though, the Create tab is designed to make it easy for you to take your images beyond the editing stage and incorporate them into fun, creative and practical projects that you can enjoy with friends and family. As you start to explore the Create tab, youÕll find that there are plenty of userfriendly and powerful options for each project, enabling you to make all of the creative decisions when it comes to page 14 The Photoshop Elements Book Output your images to a range of fun creative projects using the Create section of Elements 11 design, text and image layouts without the need to be an experienced user. You begin by first selecting a design theme or basic template, which you can then customise and develop as the project progresses. Once youÕve selected a project, you can then start to work on it to build it up until you have produced the desired result. You can select the Page tab to work with the individual pages in your project or use the Layouts tab to select from an array of ready-made page template designs. The Graphics tab provides options for backgrounds and frames, allowing you to add artwork onto the design for creative background effects or photo framing, and thereÕs even an option to include customisable text. Drag and drop is all thatÕs required to position images within the project that you are creating. Traditional photo prints can also be prepared for home printing Ð and for extra convenience ordered via online services Ð using the Create tab. As with everything in Photoshop Elements 11, the Create tab offers plenty of guidance along the way so whether you are making a detailed photo book or a one-page collage, youÕll be able to do so with absolute ease. In fact, itÕs incredible how much you can actually achieve with the Create tab in a relatively short space of time.
- 15. Ultimate guide Creating a photo book A photo book is a fantastic keepsake that can take far less time to put together than a photo album, full of prints. Easy to design and customisable in the Create tab of Elements 11, you can decide on page layouts, design and text as you go. There are plenty of starter themes and optional book sizes you can select from before you begin too. To get started on your own photo-book project, select the Photo Book option from the available projects in the Create tab. You can now follow along with us as we take you through the basic steps of putting together your own personalised photo book in Elements 11. Create a photo book Click on the Create button and locate the Photo Book option from the drop-down menu. In the dialog box select a Photo Book style that you would like, add in the page amount and then un-check ÔAutofill with Selected imagesÕ. Inside page Using the arrows along the bottom, scroll through to the inside pages. If text is not available on the layout but you would like to add some, go to the Create tab and text then click Add Text Block and apply anywhere on the page. Add in text Design your cover You can now begin designing your cover. Drag an image from the Project Bin up or double-click on the space to open one from a separate file. Drag to the space allocated. Design layout You can scroll through the Create tab options and add in additional artwork to your photo book design or alternatively change the page layouts by selecting a new page template from the Layouts tab. Click on the text space to activate and adjust the text font, size, style and alignment within the Create tab. You can also adjust colour here and warp text for more creative results. Now type in your photo book title. Add in pages You may need more pages than you originally intended. To add more into your photo book, go to Pages in the Create tab and select the + sign to add more in. The Photoshop Elements Book 15
- 16. Photoshop Elements Share O ne of the joys of photography, and indeed one of the chief reasons for actually taking photos, is to share the images you’ve captured with other people, particularly family and friends to whom the images may have a meaning. Where once upon a time this was largely restricted to leafing through a family album, thanks to the development of the internet and social networking sites such as Facebook, Twitter and Flickr, there’s no longer a need to have our photos printed before we share them. This instant process means all of us are sharing more images, more 16 The Photoshop Elements Book Discover how to really enjoy your favourite images with friends and relatives using the Share tab in Elements 11 frequently. To fulfil the need for this, and to make the shoot-edit-share process a fully integrated one, Elements 11 features a dedicated Share tab in its interface. Once you’ve finished making all of your final editing tweaks, head to the Organizer interface where you can then simply click on the share tab to upload your images straight to the likes of Facebook, Flickr or Adobe Revel, Adobe’s own cloud-based storage, editing and browsing service. You can also opt to share them via an online album, separately as an email attachment or alternatively, burn them onto a CD or DVD. The Organizer allows you to add in keywords and tags to your images, which is an ideal way to keep track of your shots as you can specify who’s in them, where they were taken and at what event. Portrait and groupshot images can even be tagged using your Facebook friends’ names to save you the trouble of having to do it separately on the online social networking site. Depending on how you’ve opted to share your images, the Organizer will take you step-by-step through the entire upload process. To share your images via the likes of Flickr and Facebook, you
- 17. Ultimate guide will have to have already registered with either site and set up a viable account. You can then begin editing and adding images directly onto your online profile through the software. Sharing images by email is also easy, as Elements 11 gives you the option to either email shots directly or embed them within an existing email. You can adjust image sizes within the email preferences and even opt to create and send shots as a PDF. The Organizer also enables you to set up a contacts book, which will allow you to input and then search for contacts so that you can send shots more efficiently. The online album-sharing option will enable you to export images onto a Hard Disk or alternatively share them via Showcase online. Photoshop Showcase is a mediahosting gallery site that lets users upload and share their images and videos directly through Photoshop software. Once youÕve The big share created a profile on the site, you can send family members and friends a link to your online gallery and share your latest Elements creations. Keen videographers will also appreciate the video sharing options within the OrganizerÕs Share tab. Here, youÕll be able to upload and share video files on YouTube, burn them onto a DVD or BluRay disc, and even upload them onto mobile phones or other portable video playing devices. “Share precious moments and memories with your friends and family” Share to Flickr Keep your online portfolio up-to-date by sharing and uploading edited images instantly onto your Flickr profile. You are able to add relevant image tags within the Organizer. Share to Facebook You can share your images via your own Facebook account through the software. Go to the Share tab, choose Facebook and then tag people/places within the Organizer before uploading. Email images ItÕs easy to attach or embed images into an email directly through Elements 11; simply follow the on-screen instructions for correct image sizes. Online album Create an album that you can share online via the Create tab. Once completed, you can upload it to Photoshop Showcase. Alternatively, you can export the album onto a Hard Disk, CD or DVD. The Photoshop Elements Book 17
- 18. Photoshop Elements Manage You can sort, rate, tag and keyword your images in Elements 11 A fter shooting hundreds or thousands of images, it can be all too easy to upload images onto your computer or portable hard drive and then just leave them there, disorganised in various folders without being edited or even correctly named. To help you get into the habit of managing your workflow, the Organizer interface in Elements 11 has been designed to make it easy to sort, rate, tag and keyword your shots before filing them away. You can use the Organizer to import images, edit down a shoot size, create an album, create personalised photo or video keepsakes and instantly share shots. To save you the bother of loading up the Photo Editor interface, the Photo Fix Options tab allows you to make minor corrections to photos. In fact, thereÕs so much on hand, thereÕs now no excuse for not keeping on top of managing your photo masterpieces. Importing images If you have a batch of images to edit and enhance from a shoot, avoid opening them all in Elements 11 in one go. Unless you have a really powerful computer, this will cause a crash. First use the Organizer to help narrow down which shots are worth working with. This is also a time-saving way to import images into the software, as you wonÕt have to load them individually. YouÕll also be able to see them all clearly in one place; great if creating a series and you want to determine what images work together. If youÕre only looking to edit one or two specific shots, use the quicker File>Open process. You can use the Elements 11 Organizer to import media from multiple sources, whether itÕs image or video files from a digital camera, USB, mobile phone device, CD/DVD, scanner or even a separate hard drive and so on. By importing a batch of images from a portable device, youÕll be asked to create a catalogue, which you can opt to save in an existing file location on your computer desktop or documents folder. This will ensure your shots stay together and that the selected few can go through to editing in Elements 11 software. If however, you have already uploaded images onto your computer, you can simply select to open them all with this interface to edit without having to create a catalogue. 18 The Photoshop Elements Book
- 19. Ultimate guide Keyword Tags Keywording is an essential part of managing your workflow and organising your images. Once youÕve imported shots through the Elements 11 Organizer, you can insert relevant keywords using the Keyword Tag menu. This will help you to file and later find specific images on your computer. You can keyword tag people, places, events and other important things about the image, such as lighting style, effects or colours. Provided all of your keyword tags are relevant and useful they will help you to stay organised and make finding specific shots more efficient. To keyword your images correctly you need to focus on highlighting the most important elements within the shot. If youÕve got a portrait image for example, you can keyword tag the name and the word ÔportraitÕ. This will ensure the image appears in multiple portrait searches, including those that are not name related. The best thing about the Elements Keyword Tag system is that it then organises the rest for you. Searching for shots is much easier and results can be more specific, which makes the possibility of sharing images instantly more of a reality. ItÕs worth noting that the keyword tag system is not only great for images, but you can also use it to manage and tag video files, audio clips, PDFs and projects. Find images Select the green + symbol to create a tag. In the dialogue box, you can select a category and add in a keyword and notes. Once you’ve created the tag you can drag the tag icon onto any other image that the keyword applies to. Once youÕve built up a good imagemanagement system with the use of keywords and tags, youÕll be able to search for and find specific shots quite easily. Photoshop Elements 11 features a simple search-andfind function for efficiency. To find tagged images, you can simply enter a keyword into the search bar or alternatively, select one of the active key words from the lists of Keywords and Smart Tags to bring up the right results. Search bar Once Elements 11 is familiar with a face it will attempt to use people recognition in order to tag that person in multiple images. Simply click to confirm if it’s correct, as it saves extra tagging time. When searching using keywords in the search bar, you can enter multiple tags for more specific results. If youÕve tagged an image with a personÕs name and a place that the image was captured, you can search for both of these elements to get more accurate search results. Photo Bin You can opt to edit images through the Photo Bin by using the drop-down menu. Click Create to construct a project, Share to upload images online, Print to print all of the images within the bin, and Save to group all of the shots together in an album. To activate an image in the Photo Bin to edit, you’ll need to scroll through the options and double-click on a shot to expand in the main screen. Once youÕve imported images into the Organizer and selected the ones to edit, transfer them over to the Photo Editor in Elements 11. Your shots will appear automatically as thumbnails in the Photo Bin along the bottom of the interface. Just click the Photo Bin icon at the bottom left of the interface if the panel isnÕt visible. This is a fantastic tool if editing a series of images as you can see how well they work as a collection. To change the order of your shots for a different view, simply click and drag them into a new position. To change your editing screen view and activate a shot to edit, double-click on a thumbnail in the Photo Bin, it should then appear large on screen. You can also action some adjustments in the Photo Bin via the drop-down menu in the right-hand corner. Here, you can get a view of any images currently active in the Organizer, print all of the Photo Bin files or save them as an album. This is a great way to process multiple files quickly, rather than having to trawl through loads of images and save them individually. People recognition Once youÕve tagged a person within a portrait using a specific name, Elements 11 will attempt to recognise this person in other images. Once you open a shot it will ask you to confirm if itÕs correct. Keyword Tags panel Another way to find specific photos is to click on the box next to the relevant tag in the Keyword Tag panel. Elements 11 will then automatically bring up all of the images that carry this tag. The Photoshop Elements Book 19
- 20. Photoshop Elements Gallery Elements can help you achieve a wealth of different effects Ð here is a roundup of some of the possibilites open to you Filter and auto effects Just because something is easy doesn’t mean to say that it can’t be beautiful. The range of automatic efects in Elements is staggering and each one can be used to create something to be proud of. The obvious place to go for the auto options is the Filters menu. In here you can access filters to get a certain style efect or apply a set edit. You can enjoy a wealth of options here, from inky sketch efects through to getting creative with blur. The Artistic range of filters are a good place to start, as are the Render and Pixellate. For complete beginners, pay a trip to the Guided edits. These will let you edit photos and apply styles with just a few clicks of the mouse. Simply run through the steps and enjoy results such as sepia photos or popart-inspired prints. And once you’ve made your images, use the Share workspace to create a presentation package or to ready the images for print. 20 The Photoshop Elements Book
- 21. Ultimate guide Paint effects Digital painting is a fantastic way to turn your photos into something truly special, and with Elements you can paint even if you have no natural artistic talent. We’ve spoken about the filters, but the Smudge tool is also worth investigating. As you brush over a photo, it pulls up the colour information and uses it to make realistic brush strokes. Creative layers The Layers palette is your best friend when it comes to larger edits, as it enables you to control elements and separate them from others. Layer masks were introduced in Elements 10, which enables users to enjoy even more control. The layer blend modes are great for building up collages such as the one above. Photo edits Being able to transform your ordinary photos into something to be proud of is at the heart of Elements. Each version comes equipped with a range of powerful editing tools, allowing you to perfect aspects such as colour, lighting and sharpness. If you don’t feel confident, most editing tools come with Auto options. Traditional photo effects If you are a fan of traditional photography and want to bring some of the style to your own images, Elements can help. There are various options for bringing traditional efects such as depth of field or high contrast, in addition to colour and tone edits such as monochrome. These can be achieved through dedicated tools or through filters. The Photoshop Elements Book 21
- 22. Photoshop Elements 10 improvements to Photoshop Elements 11 Ten reasons why Photoshop Elements is better than ever GRAPHIC NOVEL The Graphic Novel filter, new to version 11, gives images a sketched effect. There are options to alter the mood of the effect, depending on the scene, by using the Painted Gray, Fine Detail, Hard Edges and Twisted Plot presets. LOW KEY EFFECT P hotoshop Elements 11 has been altered; not just in the way that it looks, but also in the effects and tools it has on offer. Here are ten improvements to the latest version of the beginner’s choice in photo-editing software. QUICK, GUIDED AND EXPERT MODES The three modes in Photoshop Elements 11 have taken centre stage. Edit images in either Quick, Guided or Expert mode. Quick contains a few of the basic tools for enhancing images, Guided guides you through some great creative effects, and Expert features the entire program. 01 A NEW LOOK The new version has been given a grey interface, which is different to their traditional black interface. The whole program has been refined to make it easier to follow, and effects can now be applied to images faster and more effectively. Icons and text are bigger and bolder, and the on-screen options and menus are much tidier too. 02 22 The Photoshop Elements Book New Guided Edits, such as this Low Key effect, provide quick ways of putting a creative spin on ordinary images. Low Key darkens the background and increases the overall mood of the image.
- 23. Ultimate guide ACCURATE SELECTIONS The improved Refine Edge is a blessing when it comes to selecting and cutting out tricky subjects. Plus, the Smart Radius comes with a brush that can be used to paint out unwanted areas around hair and other intricate subjects. MAPS It’s easy to remember where photos were shot by using Organizer’s new Places feature. It uses Google Maps and is perfect for travellers. PEOPLE, PLACES AND EVENTS The Organizer is where images are collated and shared. You can categorize and tag them depending on the people involved, where they were photographed and when they were created. People can be grouped quickly using the simple, icon-based approach and faces can be tagged ready for uploading straight to social networking sites. 03 LOCATION SPECIFIC If you’re a keen traveller and aim to capture moments as you go, then the Places section of the Organizer will prove invaluable. Photos and videos can be placed inside a world map with details of their exact location. This is great for keeping snapshots together and locating them at a later date. 04 COMIC FILTERS For more cartoon-like image effects, there are three new Sketch filters that can give images a range of fun finishes, including Comic, Graphic Novel and Pen and Ink. These are useful for imitating drawn effects, with colour, line thickness and shading all forming part of their adjustments. 06 ONLINE ALBUM There’s a new set of templates for printing and creating Online Albums. This feature, specific to the Organizer, lets you store images using a variety of layouts and creative designs, categorised under Family, Occasions and Interactive. 07 ACTIONS Actions are one-click solutions to creative effects. These are new to Elements in version 11, and include borders, resizing and cropping commands. They also include effects such as sepia toning, faded ink and instant Polaroid. 08 SHARE VIDEOS BETTER REFINE EDGE Photoshop Elements 11 lets you upload videos to online portals Vimeo and YouTube. Since every digital camera and mobile device has video capture available, there should be no reason why sharing these is left out of the frame. 05 GUIDED EDITS Reflecting Photoshop CS6, the Refine Edge command now has more options. Selections can be controlled using the full range of adjustments and sliders, including Decontaminate Colors, which is useful for sorting out those stray pixels between cutouts. Smart Radius makes selecting difficult outlines such as hair a breeze, along with the feathering, smoothing and contrast sliders for perfecting the overall area. 09 Unique to Photoshop Elements 11 is its range of Guided Edits. They now include four new effects: Miniature, Vignette, Low Key and High Key. Following step-by-steps, they only take minutes to apply, and this is one reason why Elements 11 has proved popular with artists looking for quick, fun effects. 10 The Photoshop Elements Book 23
- 24. PAGE 28 PAGE 52 PAGE 30 Techniques Enhance your skills and improve your projects with these techniques 26 Clone objects 28 Get started with selections 30 Master selections and masking 32 Retouch photos 34 Control colour 36 Get to know Gradients Duplicate people in your photos Manipulate your images Create the out-of-bounds efect Touch up your portraits Improve the colour of photos Master this essential tool photos 40 Rescue oldfamily photos Restore faded brushes 44 Usefor using theeffectively Tips Brush palette 46 48 24 The Photoshop Elements Book Improve exposure PAGE 150 into images Bring life back 52 PAGE 26 Sharpen your images Make creative panoramas Remove subtle blurring Get to grips with the Photomerge function
- 25. PAGE 40 The Photoshop Elements Book 25
- 26. Techniques Clone objects Duplicate the people in your photos using the Clone Stamp tool C loning is a feature that has been around since the early versions of Elements. It is a feature that is mainly used in retouching to remove blemishes, freckles and wrinkles, but can be adapted for creative purposes too. In fact, you can clone absolutely anything onto anything, so long as the tool has the right settings in the Tool Options bar. Using a soft-edged brush is fundamental when you are painting with the Clone Stamp tool, because this helps to blend the two areas together. There are other essential options to tick as well, such as Align, and we will cover how you can use masks in order to create a successful cloned subject. “You can clone absolutely anything onto anything, so long as the tool has the right settings in the Tool Options bar” Understand the effect Cloning subjects across your image Set up the tool Select Clone Stamp tool from Add layer 01 Toolbar,theyou straightSthere. Go tothe 02 a newThis enables100%toand tickthe Use Clone Stamp a clone of or press the key for a Keep Opacity set to To use the tool to create shortcut to take Aligned. you paint the Tool Options bar and click on the Brush cloned subject to any area of the image. Make 03 the subject, press Alt/Opt and click on the part of the subject you want to clone. preview thumbnail. Pick a soft-edged brush, sure Sample All Layers is ticked to account for with a diameter that is just larger than the subject you want to clone. 26 The Photoshop Elements Book any new layers. With this set, add a new layer above the Background image. Release Alt/Opt and then paint the subject back in to a different part of the scene.
- 27. Clone objects Clone options Alter the settings and combine with other Elements features Blur distant subjects Perspective Aligned No selection The smaller cloned subject in the distance has been given a slight Gaussian blur (Filter>Blur). This is to match the rest of the background elements, which are a little blurry. Create a new layer each time before the brush is applied, so the cloned area can be resized. We can use Image>Transform> Free Transform to shrink down the duplicate and stay in perspective. Tick the Aligned box in the Tool Options bar so that the Clone Stamp tool continues to work from where you left off. Otherwise, the tool will reset its position. Subjects can be cloned and flipped around as many times as you like. The best thing of all is that no selection is needed to create duplicates. What does it mean? Flip subject Retouch clone Once your subject has been completely cloned to the new position, go to Image>Rotate>Flip Layer Horizontal to mirror it. Rotate it for variation using Image>Rotate>Free Rotate Layer and dragging the corner points. the 05 To smarten uplayeredges of the the subject, add a mask (Layer>Layer Mask>Reveal All). Now use 04 Brush tool set to black to remove the rough edges and reveal the background around the subject. MODE When cloning objects, change the Mode setting (found in the Tool Options bar) to alter the way they appear and interact with your image. Overlay, for example, creates a high-contrast effect, whereas using Screen mode will reduce the contrast and turns objects into ghostlike figures. The Photoshop Elements Book 27
- 28. Techniques Get started with selections Streamline your selections with our overview of tools and tricks to control and manipulate the elements of your images S elections form one of the cornerstones of Photoshop editing, and mastering the skills to neatly isolate areas of your image opens up a host of possibilities for creative editing. Photoshop Elements has a number of built-in selection options ranging from the very basic to the more complex. We’ll be looking at the more simple options to get your selection skills up to scratch in this tutorial. Selection options are laid out in the Select menu with Photoshop ofering some additional choices to Elements that perform more complex functions. However, Elements has some fantastic options on ofer. The annotations walk you through the basic, need-toknow features in this menu to give you control over your selections from modifying, inverting and saving them. The selection tools are purpose-built and each is suited to a particular type of selection, from the Marquee tool that makes selections based on shapes to the Magic Wand tool which makes automatic selections based on colour. The software realises that freehand drawing is inaccurate but sometimes necessary, so a host of magnetic and smart tools assist you in tracing outlines and selecting only the part of an image that you need. Learning the option menus that go with each tool will help you better control it and get the most out of its functionality. Above all, knowing what a particular tool was built for will enable you to select the correct one for the correct purpose and be able to make seamless and accurate selections, time and time again. Tool Options Each selection tool comes with its own settings. These include the Add to Selection command that enables multiple selections to be made on the same image. Subtract from Selection excludes the new area from the current selection and Intersect with Selection will let only areas in your new selection that intersect with previous ones be highlighted. Refine Edge and Feather This set of commands is available when using any selection tool and gives you options to change the edges of your selection. The Smooth slider removes bumps along the selection line, Feather softens the edges in a uniform blur and Contract/Expand either increases or decreases the selection edge. Quick mode Marquee tool Options for speedy edits Shape-based selections Photoshop Elements 11 has three edit modes: Quick, Guided and Expert. If youÕre new to editing and choose the Quick mode, selection options are limited to the Quick Selection and Selection Brush tools. With one click the Quick Selection tool will read pixels and guess selection parameters depending on how similar the pixels are to each other. The Brush Selection tool offers more accurate results as you control the selection yourself. Change the brush size to suit your selection. If you require more intuitive tools, switch between the Guided and Expert modes while working on an image. Make selections based on shapes in your image with the Marquee tool. You can choose either the Rectangular or Elliptical tool to make a selection within your image. Begin at a point on the image and drag the tool across your target as you hold the mouse down. Hold down the Shift key to create a perfect square or circle with each tool respectively. Make the selection carefully, as you canÕt change dimensions once the selection is complete. This tool works best with simple elements in an image or to make precise and even selections. 28 The Photoshop Elements Book
- 29. Get started with Selections Anti-alias and Tolerance Anti-aliased is used with the Marquee tool and automatically smooths out the edges of circular or elliptical shapes. Keep the box ticked to have the function on. Tolerance controls the degree to which the automatic selections recognise similar or different pixels and gives a greater degree of control when using the automatic selection functions. Inverse and deselect The Inverse option enables you to choose the opposite part of the image from the selection you’ve made. This is useful when working with the Marquee tool to select borders. Deselecting is to come out of any area, and is the only command that can do this (Ctrl/Cmd+D). Enhance selected colour Use Elements to balance an image Isolating elements within an image enables you to inject enhancements where needed without affecting the whole of your shot. In this image the greens, yellows and browns are dynamic but the blues seem washed out against them. By selecting the sky and the water, the colour can be adjusted to marry perfectly with the rest of the image. Magic Wand 01 Select the Magic Wand tool and make a selection of the water by clicking in a dark blue area. Zoom in to ensure you select the right shade rather than the surrounding pigments such as the boat or riverbank. Add to Selection 02 In the Magic Wand’s Tool Options, select Add to Selection (two squares). With this selected, click in the sky area to make a second selection of those same-coloured pixels to be added to the first. Enhance colour 03 Go to Enhance> Adjust Color>Adjust Color Curves and increase the Midtone curve by half the available value. The adjustment will only be applied to the two blue selected areas. Save selection Save selections for later use by choosing Select>Save Selection, naming your file appropriately and then clicking OK to save. Access the saved data via Select>Load Selection and choosing it from the list. Your selection will then appear on your image. Lasso selections Magic Wand Freehand and magnetic options Automatic selections by colour The Lasso tools include the basic Lasso, Magnetic Lasso and Polygonal Lasso. The basic tools enable rough freehand selections, good for situations where precision isn’t required. The Polygonal tool lets you add reference points as you draw by clicking the mouse, which is especially handy for drawing straight lines. The Magnetic Lasso traces along the edges of objects with strong colour contrast and, as with the Polygonal, you can create reference points as you draw, pressing the Backspace key to return to the last reference point. Finish back at your start point or double-click to complete a selection. A single click and the Magic Wand makes an automatic selection within your image based on the colour that you clicked on. This tool gives fairly accurate results in images with strong, similar colours and varying accuracy in more complex images. To get better results with the tool, pay attention to the Tolerance level that appears in the Tool Options bar when the tool is selected. This determines how closely the selection will match the clicked colour. The higher the value, the wider the colour range. The Photoshop Elements Book 29
- 30. Techniques Before Source files available Use the files on the site to re-create this: http://blog. photoshopcreative. co.uk/tutorial-files Master selections and masking Explore the potential of masking and selections by creating this out of bounds effect in Photoshop Elements T he ‘out of bounds’ effect in Elements 11 is actually a Guided Edit. This only goes so far, however, and restricts the level of control that you have over the effect. To create our own version of the effect, we need to look at layers more closely in Expert Mode. With masking techniques, the water in our seascape can be made to look like it’s spilling out of the frame, and by making a selection, a part of the image can be made to emerge from the frame beneath 30 The Photoshop Elements Book this. We can even expand this out of the image, to make it look as though it’s coming right at us! Selections can be made quickly using a number of different tools. The first one that we use is the Polygonal Lasso tool, which draws straight selection lines – perfect for selecting the frame. Also, since the colour in the seascape is so vivid, we’ll remove colour from the background to improve the composition and give it more impact.
- 31. Master selections and masking Create the effect Nine steps to out of bounds magic! Polygonal Lasso tool Create selection New layer mask 01 02 03 Place image Quickly select Combine masks Open ‘Digital frame.jpg’ from blog. photoshop creative.co.uk/tutorialfiles. Enter Expert Mode. Grab the Polygonal Lasso tool (L) then tick Anti-aliasing in the Options panel. Set Feather to 0px. Zoom into the image a couple of times. Click on each corner of the digital frame using the Polygonal Lasso tool. Once all four lines are connected, a selection area will appear. Click on the Create a New Layer button in the Layers panel, then on the Add Layer Mask button. The selection area will disappear once you’ve done this, but will be stored as the layer mask. 04 05 06 Water spillage! Control opacity Desaturate Go to File>Place and upload ‘Seascape.jpg’ from the resources. Move the placed image up so in line with the top of the digital frame image. Holding Shift, drag the bottom-right box to enlarge it so it fits over the image. Press Enter to apply. 07 Go Select>Deselect. Locate Eraser tool (E) and set Size to 600px, Opacity to 100%, choose a soft tip, and make Foreground colour black. Paint over the seascape layer mask to reveal spillage. Use the Quick Selection tool (A), set to Size: 40px and Auto-Enhance in the Options panel, to select the part of the groyne on the beach. Turn its layer on and off to make sure the selection covers the digital frame. 08 Lower Opacity of the Eraser tool to 20% and reveal the water over the table the further out it goes. Drag Layer 1 (between the Seascape and Digital Frame layers) onto the trash icon to remove it. Click Add Layer Mask to apply this selection as a new mask to the seascape. Add the other mask by Cmd/ Ctrl+clicking on its thumbnail to reactivate it, then pressing Cmd/Ctrl+Backspace. Foreground colour must be black to do this. 09 Click Background layer and add Hue/Saturation adjustment. Reduce Saturation to -100 to remove colour from the Digital Frame. You should be left with just the colour groyne exiting the frame. The Photoshop Elements Book 31
- 32. Techniques The camera was set incorrectly here, causing the image to be overexposed. This harsh light has accentuated the woman’s lines. BEFORE We have applied a colour correction as well as using the Clone Stamp and Spot Healing Brush to tame the lines and wrinkles. AFTER Retouchphotos Don’t be intimidated by the thought of retouching portraits – Elements has a host of beginner-friendly tools that do most of the work for you E lements is the tool of choice for starting out with retouching. You are given the same tools as the pros to give your own portrait shots a desirable veneer. Before you flick past in horror, we aren’t going to suggest you spend your life airbrushing through your family photos. Even five-minute edits can suddenly bring a portrait to life and Elements users will find a lot of automated options for retouching tasks. However, we are going to look at the manual tools here and show you how easy it is to create the maximum impact. Common retouching tasks will focus on the face, whether it’s smoothing out skin or doing a touch of spot or blemish removal. Whitening the eyes or teeth is another easy edit that can really make a “Even five-minute edits can suddenly bring a portrait back to life” 32 The Photoshop Elements Book diference. The most important thing to remember, though, is to keep your edits subtle. Like it or not, wrinkles and wobbly bits give us character and if you wade in with a virtual plastic surgeon’s knife, you won’t improve an image. A light touch here and there is all you need for the best results. We’re also going to be covering another Elements skill within the ‘retouching’ monicker, and that is restoring old photos. Similar skills and tools can be transferred from something like removing wrinkles to removing creases and tears in scanned images, so the two really go hand in hand. It’s also worth pointing out that some of the other tools we’ve looked at can be called upon here. For example, if you want to whiten eyes or teeth, use one of the selection methods we suggested and then use the Color Curves command to target the highlights and brighten things up. As you use Elements more and more, you’ll see these repetitions pop up time and again.
- 33. Retouch photos Useful filters Spot Healing Brush Final touches for better images Remove blemishes easily In addition to the tools mentioned below, there are some filters than can help you make the perfect edit. For example, old photos tend to be blighted by noise, so a blast of the Despeckle filter (Filter>Noise) can work wonders. If you want to soften areas to draw attention to others, apply a very low Gaussian blur to a selected area, or use the Blur tool from the toolbar to paint blur on. Finally, Unsharp Mask (Enhance>Unsharp Mask) is good for adding clarity to important areas such as eyes. Clone Stamp is the king of ‘patching’ up unwanted areas but an easier option is the Spot Healing Brush. Pick a brush size 01 Pick a brush size that’s slightly larger than the area to be edited. This lets you perform a one-click fix, and gives you the most accurate results. The major retouching tools The toolbar delivers pretty much all you need Red Eye tool Even with fancy cameras, red eye is a really common problem that is thankfully very easy to fx. Simply pick the tool, place it over the ofending area and click. If it refuses to budge, go to Edit>Undo and use the Pupil Size and Darken Pupil settings to make adjustments and try again. Spot Healing Brush Good for smaller areas that need fxing. Again, you use a brush to dab over the area that needs fxing. Edits made with this tool should be made with one click. Clone Stamp tool The mother of all retouching tools, this allows you to sample parts of an image and transfer it to another part. This is achieved using a brush. Use the largest, softest brush you can and transfer the sampled area using small dabs. Set the tool 02 There are various options available. Proximity Match uses pixels from the edge as a Patch. Create Texture uses all pixels in the selection, while Content-Aware will create magic replacements! Healing Brush tool Like the Clone Stamp, this allows you to replace areas with information from other parts of an image. However, the Healing Brush also matches the texture, transparency, lighting and shading. This makes it easy to fx complicated areas. Use the lot 03 Achieve best results by selecting Sample All Layers from the Tool Options bar. This uses information from the whole image. To make the edit, click on the area and Elements will work its magic. The Photoshop Elements Book 33
- 34. Techniques Controlcolour Being able to control colour is an essential skill for improving images C olour is a vital part of any image. If you have a photo with weak colour, it doesn’t matter how impressive the composition or how sharp the detail – all anyone will see is the flat colour. As you should come to expect by now, Elements has many diferent options when it comes to adding and editing colour and most of them are really simple to use. For adding colour, you will spend most of your time in the Color Picker. This is activated by clicking the two little colour squares at the bottom of the toolbar. The top square is for the foreground colour (or the main colour) and the bottom square is the background. The Color Picker gives you access to all the diferent colours you could possibly want and selecting them is really easy. Just click on the bar to pick a colour and then position the little circle over the particular hue that you want. There are loads of other libraries and settings you can use, but you don’t have to go any further than clicking on a colour to select it. Editing colour in an image is also easy. Elements has Auto Color options (Enhance>Auto Color Correction). This is pretty much the easiest edit you can make and both flavours do a good job of fixing problem images. But there are plenty of alternatives if you want to have a bit more control over proceedings. Hue/Saturation is an excellent choice, allowing you to alter not only the colour of things, but also the intensity of the colour. In a similar vein is the Color Variations command. This is suited to beginners in particular because you click on preview images to make the changes, so you always know what the outcome will be. The Replace Color alters a chosen colour in your image, which can either be a simple case of improving one colour, or something more creative. Read on and discover how these tools work, how you can use them and how you can take your first steps to conquering colour! The Variations command Hue/Saturation See how your edit will look Go wild with your colour The Color Variations command isn’t high on a lot of users’ lists when it comes to altering the colour properties of an image, which is a shame because it’s a very intuitive way of editing, especially for beginners. It allows you to target the shadows, highlights and midtones and set what colour you want them to be. You need to go to Enhance>Adjust Color>Color Variations. Once open, you see a range of small thumbnails showing the image with a certain colour applied. The intensity can be adjusted to suit and you just click to apply. Have fun with the Hue/Saturation command. It works using sliders, and enables you to alter the colour of an entire image or just target a specific colour to change. You can also use the Saturation slider to increase or decrease the intensity of a colour, proving particularly useful in photo edits and also converting to black and white. It is very easy to overdo the Saturation slider, though, so always keep the Preview box ticked to keep on top of things. You’ll find Adjust Hue/Saturation under Enhance>Adjust Color. 34 The Photoshop Elements Book
- 35. Control colour In balance A useful tool for adjusting hues Chosen colour This is the colour you’ve picked. The Balance command lets you easily fix colour casts by adding complementary colour to an image. You will need to take a trip to the Quick mode to use the Balance slider. The edits 01 The Balance command adjusts the temperature and tint of a photo, with a slider for each. It’s just a case of moving the slider left or right to increase or decrease the effect. HSB values HSB (or HSL) values describe the colour in terms of its hue (wavelength), saturation (vividness) and lightness. Warm up 02 The plan is to warm this image up. We pushed the Temperature slider to the right, towards the red part of the slider. The colours underneath each slider will let you know what the effect is going to look like, so pay attention! # hex value The same RGB code expressed in hexadecimal, used for website design. Pick the shade Click here to select the exact shade that you want. The colour gets more saturated towards the right and lighter towards the top. Spectrum bar Choose a hue from the spectrum here. Rather than the real spectrum, it represents a colour wheel, flattened out – that’s how red gets to be at both the end and the beginning. Balance out RGB values These describe the colour as quantities of red, green and blue light, on a scale of 0-255. 03 Warm images look good if the shadows are contrasted and therefore cool in colour. We can do this by moving the Tint slider to the left, which represents the green end of the colour spectrum. This will inject green into the image. Replace Color Edit skin tone Don’t like a colour? No problem! Retouch with Adjust Color for Skin Tone Elements offers a quick way of replacing one colour with another and that is the aptly-named Replace Color command. Found in Enhance>Adjust Color, it works in a similar way to the Color Range command, in that you use an eyedropper to click on your image to select the colour to edit. There is a Fuzziness slider to control the selection and then it’s just a case of using the Hue, Saturation or Lightness sliders to make the new colour that you want to use. Thankfully the sliders make simple work of the whole process. Elements makes it really easy to adjust skin tone to ensure the best portraits. Open the Enahnce>Adjust Color menu and pick Adjust Color for Skin Tone. Click on the person’s skin and Elements will adjust the whole photo to improve the colour. If you need more correction, you can use the Tan slider to boost/ reduce warm tones or the Blush slider to boost/reduce redness. The Photoshop Elements Book 35
- 36. Techniques AFTER 36 The Photoshop Elements Book
- 37. Get to know gradients Get to know gradients BEFORE The Gradient tool can be extremely useful in all types of Photoshop scenarios so take a closer look T he Gradient tool can be a very exciting and underestimated feature. You shouldn’t be shy to use them, but if you are just use these tips and tricks to get to know them a bit better. They can be used in numerous ways to achieve several effects within your work, and when used cleverly they can help you soften transitions from one image or colour to another. The Gradient tool can be used on its own to build dynamic backgrounds and textures, and it can also be used to create masks and feathered edges. You can even fake depth of field through gradient masks for a photographic touch. Here we’ll show off the tool in full colour, as we teach you how to create a rainbow using the Radial Gradient preset. We’ve chosen a holiday snap from Thailand for this example and you can download that from the website, www.photoshopcreative.co.uk, but any image you want to jazz up with a beautiful rainbow will work. You’ll also learn how to use the Gradient tool to mask the cloudy sky, so let’s jump right in and explore some of the options. The Gradient Editor Use a gradient preset or load a new one GRADIENT PRESETS GRADIENT TYPE Choose your gradient type here, or double-click to open the Gradient Editor. Choose one of the gradient presets or load more via the toggle. They all create different levels and shading effects, so try them all out and get used to the many looks. PLAY WITH VARIANTS Adjust the colour stops to alter your gradient precisely. ThereÕs a lot of trial and error here, and playing with the variants can create different effects and outcomes. The Photoshop Elements Book 37
- 38. Techniques Make a rainbow Use the Gradient tool to create a simple rainbow Make a new layer Select the Gradient tool 01 To explore the Gradient tool, creating a rainbow is ideal practice. Download ‘Thailand.jpg’ from our site or use your own photo. Add a new blank layer by clicking the New Layer icon at the bottom of the palette and call it Rainbow. This will appear above the Background. 02 Select the Gradient tool from the Toolbar, click the drop-down arrow in the Options bar, then click the right pointing arrow to see another menu. Pick Special Effects to see new patterns appear. Radial Gradient option Russell’s Rainbow 03 Click on the Russell’s Rainbow gradient. Hover your cursor over the gradient thumbnail to find the correct one. 04 Click the Radial Gradient option. This works from the starting point to the ending point in a circular pattern and makes the rainbow appear as an arc. It is very important that Transparency is switched on. Create a rainbow 05 Click from outside the canvas on the left and drag to the right while holding down Shift to keep the angle straight. Let go when you are happy – this will be trial and error. Now position the rainbow where you want it on the image. Expert tip Remember shortcuts In the fast-paced world of Gradient mask 06 Select the Gradient tool again, but this time use the first gradient in the menu as shown. With the Rainbow layer selected, click the mask icon at the bottom of the palette. Click down and let go when you are happy with the angle. Have a play and if you make a mistake or are unhappy with the result, just press Ctrl/Cmd+Z. 38 The Photoshop Elements Book Final touches 07 To go further and make the rainbow more realistic, adjust two simple settings. Set the Rainbow layer to Screen in the Blend Modes menu, then set the Opacity to about 45%. Play with these options until you are happy with the result. creative design, it’s a good idea to get to know all the keyboard shortcuts. When the Gradient tool is selected (G), you can press the full stop or period key (.) to navigate through the gradient styles. To Help menu contains lists of shortcuts, or you can find them out by looking in menus or hovering over tools with your cursor. You obviously don’t have to use shortcuts, but they do speed things up with the tools and techniques you use the most.
- 39. Get to know gradients Custom gradients Making a gradient from scratch is often the best way to achieve an effect – and it’s easier than you might think Gradients explained The Gradient tool works by gradually blending different colours. To do that you begin by deciding what kind of blending effect you want – moving from the middle or the outer edges, for example. Choose an effect from the preset gradient fills or create your own. These are the presets most regularly used. Explore the options and be creative! Linear Gradient Gradient editor 01 Creating a gradient is often an essential trick for Photoshop users whether it’s for graphic design or photo editing. Select the tool and tick Radial Gradient. Click the Gradient Picker in the top menu to open the Gradient Editor. Blends from the starting point to the ending point in a straight line. Great for faking depth of field in a photo or adding in a blue sky. Radial Gradient Works outwards from a centre point to make a circle. Try a few different colours and see what happens with this popular effect. Change the colour 02 Alter the first colour of the gradient by double-clicking the bottom-left colour stop and changing it to blue. Colours fading together 03 Double-click the bottom-right colour stop and change it to red or a colour you like. You should now see your two chosen colours fading together. Click OK. Angle Gradient Works in a counterclockwise sweep from a starting point. Good for creating fake metal. Add some noise to grade and texture. Reflected Gradient Mirrors a gradient from the start point. Use it to Create metal bars/general metal effects and fake reflected surfaces. Alter the angle 04 Now click from the centre of the canvas and drag to the right holding Shift. Let go when you are happy with the angle. Finished radial gradient 05 You now have a radial gradient ready to use! Play with more colours by selecting a default gradient with more colour options or play with the final effect by adjusting the line and/or the angle. Diamond Gradient Creates a diamond-shape gradient from the start point. As the name might suggest, this one’s perfect for diamond shapes and patterns. The Photoshop Elements Book 39
- 40. Techniques Spot healing The Spot Healing Brush tool is a fast way to get rid of specks – just stamp and watch the mark leave the image’s surface. BEFORE Clone Stamp tool The Clone Stamp tool enables you to directly place good pixels over bad ones. This is an effective feature for those slightly larger areas. AFTER Dust & Scratches Chop it up Any spots or small marks will disappear instantly Where the image has been permanently using the Dust & Scratches filter. It’s found in the damaged in the corners, it’s time to cut and Filter menu under the Noise options. paste surrounding areas over the top. Rescue old photos How to edit and reduce image defects in your archived collection I mages of the past are not only filled with memories but can also give an interesting insight into what life was like back then. From the poses they made and the clothes people wore to the activities they got up to, these images deserve our care and attention. Retouching and rescuing damaged photos is quite simple. As long as you know which tool to 40 The Photoshop Elements Book call upon, removing marks and blemishes should be a breeze. Signs of aging come in the form of specks; both black and also white ones. These are commonly seen on images or negatives that have been scanned in. Here we show you quick ways to remove these artefacts and defects. But image degradation can take the shape of other kinds of marks, such as hairline fractures, fading and damaged corners, and much more. When you think an image is beyond help, however, there is always a technique that you can use in order to rescue it. By using just a handful of the very best tools that Elements has to offer, we are able to reveal their original and flawless states.
- 41. Rescue old photos Remove dust and scratches Dust & Scratches ElementÕs Dust & Scratches filter works like magic on most old images in order to clear up marks. Make light work of getting rid of unsightly marks Use the Dust & Scratches filter if your image is speckled all over with spots and scratches. What would otherwise be an arduous task using a tool such as the Spot Healing Brush becomes a two-minute job, and it’s all done for you! Radius Your best bet For this image the Radius amount was set to 2px. Look to remove the majority (ideally all) of the spots by increasing this slider. You may only need a 1px Radius. For removing lots of tiny specks of dust in one go, there really is no substitute option in Elements. Threshold Threshold will bring back image details that were lost after setting the Radius amount. A Threshold of 20px worked here. Start at 0 and work your way up gradually. BEFORE AFTER Spot Healing Brush tool Take control of images with a dedicated tool Tool setup Why this tool? 01 If you want to be more accurate when removing marks than a blanket filter effect can be, use the Spot Healing Brush tool. This is especially helpful for retouching damaged pixels around people, as details in other areas go unaffected. 02 Select the tool from the Toolbar and go to the Options bar at the top. If your image has a paper texture to it, tick the Create Texture option. Otherwise, tick Proximity Match. Zoom in by holding Ctrl/ Cmd and then tapping the + key. Open the Navigator palette from the Window menu to see how close you are. Paint away marks 03 Adjust the size of the brush using the [ and ] keys so that it’s just larger than the size of the mark being removed. Now it’s just a matter of clicking once over each speck to remove it. For longer marks, click and drag to paint over them and they should disappear. The Photoshop Elements Book 41
- 42. Techniques Clone, copy, paste Restore damaged corners Sometimes the corners and edges of an old image can end up faded or even completely destroyed, whether that’s because of the way they were stored or just general wear and tear over the years. We can restore these areas, though, and to do so we need to combine the Clone Stamp tool with the copy and paste commands, which will cover these with existing parts of the image. What does it mean? BEFORE AFTER DUPLICATE LAYERS ThereÕs no limit to how times a layer can be duplicated. We can continually select, copy and paste parts of the image and transform it until the damaged area has been covered. When using the Polygonal Lasso, select different areas for variation. Set opacity and hardness Stamp with the tool 02 03 Click on the Clone Stamp Tool in the toolbar. Drag the Background onto the Create a New Layer button to duplicate it. This preserves the original. Keep the tool’s Opacity in the Options bar set to 100% to create a solid stamp of pixels on your image. Click the brush mark icon in the Options bar and then select a soft-edged brush. This keeps the results nice and smooth. Set the brush size to slightly bigger than the area you want to clone. Polygonal Marquee tool Copy and paste Transform to fit 04 05 06 Pick the Clone Stamp 01 For the corners of an image that are completely destroyed, select the Polygonal Marquee tool from the Toolbar. This enables us to make a selection of an area in the image to copy and paste over the corners. 42 The Photoshop Elements Book Make a selection with this tool by clicking and drawing lines over an area of good pixels. Join the ends together to complete the selection and then press Ctrl/Cmd+C. Now press Ctrl/Cmd+V and you should notice a new layer appear. To use the Clone Stamp tool, hold Alt/Opt and then click on a part of your image that’s next to the damaged area. Release Alt/Opt and click once over the damaged pixels to replace them with your sample. Repeat this process until the entire area has been covered up. This new layer contains the pasted pixels. Use the Move tool to drag this new patch over the damaged area. Press Ctrl/Cmd+T to activate the Transform command. Hold Shift and click and drag on a corner of the area to enlarge it.
- 43. Rescue old photos Merge layers Duplicate patch Blend new area 07 After resizing and placing the new area, select the Eraser tool. Pick a nice, soft brush and then paint away the hard sides of the new section to blend it into the image for a seamless appearance. 08 Drag the layer of this patched area onto the Create a New Layer icon in the Layers palette to duplicate it. Move the area to a new position and erase any obviously repeating pixels. By duplicating layers and resizing them, you should end up with a good section over the damaged area. New layer When you’ve selected the subject for sharpening, place the area onto a new layer by pressing Ctrl/ Cmd+J. Quick Selection We used the Quick Selection tool to apply a selection to the boy in this old image. The Magic Wand tool is also handy for quickly laying down a selection. Sharpening You access the Unsharp Mask feature by going to Enhance>Unsharp Mask. 09 Each time you copy and paste a selected area, it will be given its own layer. Once this has been positioned and blended in using the Eraser tool, you can press Ctrl/Cmd+E to merge the layer with the one below. By repeatedly merging these areas, they’ll be included in the next selection with the Polygonal Marquee tool. Unsharp Mask Reduce blurriness in an old image Sharpening images is also an important part of the retouching process and should be done as the last few steps after cloning and patching up areas. This is because if you sharpen before you have completely cleaned up the picture, you will end up sharpening and enhancing the defects. With the help of a selection over the main subject, you can selectively apply sharpening to the image and bring out what’s important. “With the help of a selection… selectively apply sharpening to bring out what’s important” Unsharp Mask By setting the Amount to 114 in the filter and Radius to 1.8, more edges are sharpened. Depending on the size of the subject, you’ll need to adjust these two carefully. The Photoshop Elements Book 43
- 44. Techniques What does it mean? Use the slider to alter the size of the brush. Click this arrow to see more options and to load or replace the current brush set. APPEND If you’ve selected a brush set beyond the basics, Elements will ask if you want to append or replace. Appending keeps the basic set visible, adding the new tips to it. Click on the brush preview to access the different brush tips. Use brushes effectively Brushes crop up everywhere in Elements so it is important to understand how they work B rushes are obviously linked with digital painting, but they are also vital to a lot of other Elements tools. They are incredibly powerful and thankfully enable you to create a lot of different effects. 44 The Photoshop Elements Book The Elements brush tips vary dramatically. You have the choice of simple round or square ones, all the way up to ones that mimic the kind of paintbrushes you’d find in an art shop. It’s really easy to change which tip you are using and the Brush options enables you to control what they look like. You can even make your own. Here, we will show you how to select, load and edit a brush to do whatever you wish it to do.
- 45. Use brushes effectively Select and control brushes Show the brush who is boss Pick a brush Make a change 01 02 The first step in picking a brush is selecting the Brush tool from the Toolbar. It is easy to spot – it looks like a brush! Click the brush preview in the Tool Options bar to select the brush you want. You can also use the Tool Options bar to control how a brush looks. The setting you will use most is Size, which uses a slider. Simply drag left to make smaller and right to make bigger. More options 03 You have other choices for controlling brushes in the Tool Options bar as well. For example, you can pick a blend mode for the brush to work in, set the Opacity and also pick controls for working with a graphics tablet. Change a brush set Pick and choose Get to the sets Your new brushes Go back to before 01 02 03 With the Brush tool selected, go to the Tool Options bar and click on the Brush Picker. Once it opens, click the Brushes drop-down arrow and scroll down the brush choices. Click one to pick it. The new brushes will appear in your Brush Picker. Simply click on one to pick it. If you hover over the brushes, a descriptive name will pop up helping you to decide exactly which to use. If you ever get swamped in the different brushes you have picked, click the right-pointing arrows in the Brush Picker and then select the Reset Brushes option. This takes you back to the default. Load brushes Add to the collection Permanent fixture Load and go 01 With your Brush tool active, click the right arrow in the Brush Picker and select Load Brushes. Pick it 02 Navigate to the brush file, click it and then press the Load button. You are looking for an .abr file. 03 The brush (or brushes) will appear in the Brush Picker. To make it a permanent resident, add it to the Brush Support Files folder, found within the Elements Applications folder. The Photoshop Elements Book 45
- 46. Techniques Sharpen your images Use two simple techniques in Photoshop Elements to remove subtle blurring Blurred shot BEFORE ✗Without sharpening, the bird’s feathers lack definition and the overall image is softer than it should be. AFTER After sharpening up the image, the highlights have much more detail and the outline of the bird is far more defined. 46 The Photoshop Elements Book
- 47. Sharpen your images N ot every image you take will come out the camera pin-sharp. The chances are that they may still come out slightly soft, or even with blurred subjects in some cases. This is where sharpening comes in, bringing back essential crispness to the shot. Photoshop Elements 10 has some of the best tools to counteract blurring. The two methods described here require little to no knowledge of the software, learned skill, or artistic aptitude. The best way to see how sharp your image looks is by zooming in. Zoom until you reach 100% magnification, as this shows how each pixel appears when printed out. When taking your photos, be aware of over-blurring images because sometimes the blurring is too severe and can’t be rescued. The techniques shown here use two diferent filters and approaches. The High Pass filter uses an extra grey layer on top of the photo. This layer is given a blend mode and a touch of filter to bring details into your images. The Unsharp Mask filter is a similar method, but instead, the filter is applied directly on to the image, where you can see the results straight away. So open an image and get cracking with these quick steps. 3 of the best Ways to avoid blurry shots Keep steady Avoid camera shake and keep your camera still by resting it on a hard surface or by using a tripod if you have one. “Some images might come out soft, but sharpening brings back crispness to the shot” Sharpening methods Easy ways to sharpen shots Use autofocus Half press your shutter before you take the shot to ensure your camera’s autofocus has time to lock onto the subject. Duplicate the layer Apply filter The first and most important step when using this method is to make a copy of the image’s layer. In Elements 10, find the Layers panel and simply drag and drop the Background layer on to the Create A New Layer button at the base of the panel. 01 02 Change blend mode Unsharp method Set variables 03 04 05 When you’re happy with the amount of Radius in the High Pass dialog, hit OK. The photograph will be completely grey at this point. To apply this sharpening, go to the Layers panel and change the Mode from Normal to Hard Light. To apply the High Pass filter, go to the Filter menu at the top. Select High Pass, which is found inside Other. The High Pass dialog pops up, and you need to adjust the Radius slider until you see strong definition in the edges of subjects. Another way to sharpen a photo is using the Unsharp Mask option. With a blurry image open, in Photoshop Elements 10 go to the top of the interface into the Enhance menu. The Unsharp Mask is found at the bottom of this menu. Select the focus If your camera has them, use your autofocus selection points to more accurately select what the camera focuses on. In the Unsharp Mask dialog, tick Preview. Set Amount to 100%, Radius to 2.0 pixels, and Threshold to 0 levels. This gives an average amount of sharpening for slightly-blurred images. For extreme blurring, push the amounts further. The Photoshop Elements Book 47
- 48. Techniques Levels adjustment The Levels adjustment shows the balance of exposure through your image. Shadows are dealt with on the left and the highlights on the right. Brightness/Contrast The Brightness/Contrast adjustment is split into two. Brightness first, then Contrast second. This gives a quick boost to the overall exposure. Shadows/ Highlights Use Shadows/Highlights to target specific areas and alter exposure. The results are more instant than the others, but it’s harder to work with. Shadow areas Adjustments can help lighten up areas steeped in dark shadow, such as the grass in this image. Improve exposure Adjustments and masks can produce stunning changes to images E xposure is not easy to get right, and even with your camera set to autopilot it can still produce mixed results for the final image. The term exposure is a way of describing how much light has been captured. For an image to looks its best, correct exposure is key and there are a number of ways to ensure this and create a better balance of lighting throughout compositions. 48 The Photoshop Elements Book Problems can quickly arise when images have either too much light (overexposed) or too little light (underexposed). There are even images that can have both, which prove difficult to adjust and turn into a normallooking shot. The techniques we take you through in this tutorial range from using a basic adjustment, such as the Brightness/Contrast, to a slightly more difficult method using multiple masks We suggest giving all three a try and experimenting in order to find out exactly which one has the desired effect. Whether you want to make the subject of a portrait brighter or lighten up a landscape, we’re sure there’s a technique here for you that will put your exposure right. Take a closer look and decide for yourself.
- 49. Improve exposure Get off the ground Start with the Brightness/Contrast adjustment Brightness The Brightness slider determines how much light is added into the image. Contrast The Contrast slider changes the intensity of the light that’s in the image. Your first port of call for improving exposure should be the Brightness/Contrast adjustment. Using only two sliders, the adjustment provides the essential edits for altering the strength of light and contrast of highlights and shadows. It’s the easiest adjustment out of them all, and results can be seen very quickly. Shadows The Contrast slider will darken shadows. Look for the darkest part of your image and decide on how much detail needs to be there. Highlights Look to bring the highlights in your image to a bright white, but not bleached out. Bring life back into images Brightness and contrast improved in no time Load adjustment Adjust brightness Boost contrast 01 02 03 Find the Brightness/Contrast adjustment from inside the Enhance menu under Adjust Lighitng. Usually, if an image needs brightening up then it needs an increase in contrast too. The first thing to do is boost the Brightness slider. This affects the entire image in terms of exposure. Take this slider up to a point where the highlights start to lose detail, but not entirely. With the Brightness set, you’re now ready to increase the Contrast slider. Start by moving this to the same value. This gives an even balance, but it won’t do it any harm pushing it up more for extra impact. The Photoshop Elements Book 49
- 50. Techniques Improve exposure with Levels and masks BEFORE The Levels adjustment is ideal for balancing lighting in your image There is absolutely nothing stopping you from using two or more adjustments in one image to alter lighting. In this portrait, the background was considerably lighter than the person in the foreground, so its exposure needed to be balanced. By using a mask we were able to darken the background and lighten the person in separate stages. Masks and more AFTER Have extra control over exposure The Quick Selection tool 01 The Quick Selection tool is available in Elements 6 and above. Select the tool and tick Auto-Enhance in the Options bar. Diameter can be set to 50px to begin with. Select the person 02 Load Levels Adjust Levels 04 Draw over the main person or object in your image to form a selected area. The tool will find the edges of your subject and wherever you draw with the tool. Lower the Diameter value for smaller parts. 03 Load and flip selection Levels number two Darken background 05 06 07 To reload the selection around the main subject, Ctrl/Cmd-click on the layer mask of the Levels adjustment. Go to Select>Inverse to flip the area over to the background, ready for the next adjustment. 50 The Photoshop Elements Book From inside the Layers palette, open up the adjustment options. Pick on the Levels adjustment and you should see the selection added to the adjustment mask. With the background now highlighted as a selection, add another Levels adjustment. You’ll see a new adjustment layer with a mask but this time the white areas are black and vice versa. The main subject should be singled out and the Levels adjustment can be edited. Move the far-right marker under the graph to brighten the subject. Move the middle of the three to boost brightness. Darken or lighten the background parts of your image using the Levels adjustment layer. If it needs darkening, slide the far-left marker over to the right, and the middle marker to the right too.
- 51. Improve exposure AFTER Recover underexposure Rescue dull photographs Slider control Make the edits using the three sliders. The Shadows/Highlights adjustment is another one of Photoshop’s exposurecorrection features, designed to retrieve lost details in under and overexposed parts of an image. The adjustment works instantly to adjust both the brightest and darkest areas. This one’s a bit easier than the previous method, but it’s worth trying out both to see which works best. Control shadows Because there are lots of shadows across the building as well as on the ground, this adjustment affects all these areas in one go. Better lighting Dealing with difficult exposure BEFORE Open the command 01 To open up the Shadows/Highlights command you need to visit Enhance>Adjust Lighting>Shadows/Highlights. Instant effect 02 The adjustment goes to work straightaway on your image by giving a default effect. Assess the effect of this on your shot as in a lot of cases it will suffice. Readjust shadows Highlight control 03 04 Depending on how dark your shadows are, boost the Lighten Shadows slider up gradually to bring back details into the areas. With Preview ticked you can see how the changes will affect your image. If the highlight areas of your image look too bright as a result of the changes, slide the Darken Highlights up to lower the exposure and balance things out. This is usually necessary to get the perfect look. The Photoshop Elements Book 51
- 52. Techniques Make creative panoramas The Photomerge function in Elements makes generating stunning panoramas a piece of cake H ow many panoramas do you own? WeÕre guessing not very many. For some reason, people either forget about the format or just donÕt think they can create one. This is a shame, as the format enables you to capture large scenes with the kind of detail not possible with a single lens. A panorama is an image created by stitching together individual photos. There is a bit of thinking needed at the photo-taking stage, but if you can hold a camera steady you can take the necessary shots. Keep the same settings and then start to snap while slowly rotating. You need to keep the camera level and ensure thereÕs overlap on each image to be joined. Once you have your images, open up Elements and use the Photomerge function. WeÕll show you how easy it is to do and since itÕs so simple, weÕll even make some colour adjustment to the final image for an extra bit of pop. 52 The Photoshop Elements Book Use Photomerge Transform individual photos to achieve lovely panoramas Gather your files 01 You can use images from a designated folder, add them individually or use those currently open. This is our preferred method and it can be done by dragging the images in. Light prep work 02 The Photomerge function blends images together but check to see if major edits are needed. Since the images have been dragged into the workspace, just cycle through each one. With these we’ll use the Crop tool to cut a bystander out.
- 53. Make creative panoramas Source files available Use the images provided to re-create this Original images Enter Photomerge 03 The other photos are fine, so enter Photomerge. Go to File>New and you’ll see Photomerge options. The one we want is Photomerge Panorama. Once you select it, a new window will appear. Panorama options Wait and be amazed The Photomerge window is where you decide on the type of panorama you want and set photos to use. Click the Auto option, select Add Open Files, ensure Blend Images is ticked and click OK. 05 04 Your images will be stitched together. There will be lots of space around the final image and you’ll be asked if you would like Elements to fill this space. If you prefer to use the Crop tool, just click No. The Photoshop Elements Book 53
- 54. Techniques Crop to the edges Prepare for the edit 06 Pick the Crop tool from the toolbar and then click and drag to draw a rough rectangle. Now release this and use the corner anchor points to click and drag out so as much of the image is kept as possible, while all the white space is deleted. Getting smart 08 It was a bright day when this photo was taken, but we want some drama. Head over to the Smart Brush tool from the toolbar and pick the Blue Skies from the Nature set. Now click and drag over the entire image with a large brush. Brighten up 09 Hit Cmd/Ctrl+D to deselect, then with the Smart Brush tool, pick the Sunset brush from the Nature set. Sticking with a large brush, click and drag over the entire image once more. Things are much fresher now, but we aren’t finished yet. Deselect once more and click the New Adjustment Layer icon in the Layers palette (the half black-and-white circle). Choose Levels, then set the white slider to 210 and the grey to 1.11. 54 The Photoshop Elements Book Now the basic panorama has been created. You can either stop here or apply further edits (which is what we are going to do). Go to the Layers palette and click the dropdown options. Choose Merge Visible to work on just the one file. Sunset effect Adjust the tone 11 07 10 Deselect, pick the Brighter brush from the Lighting set and do the same as before, clicking and dragging across the whole image. This pulls the image out of the dirge realm it was in. Final touchups 12 Take a last look at the image. You might notice areas with dark lines – this is where an original overlap has been highlighted by the colour tweaks. To fix this, merge layers as before, pick the Spot Healing Brush set to Proximity Match in the Options bar and apply.
- 55. Make creative panoramas Get the perfect panorama Combine several photos into one impressive result START THE PANORAMA Kick things off using the Photomerge Panorama option from the File>New menu. SMART MOVES CROP THE EXCESS FROM MANY TO ONE LAYER CONTROL The Smart Brush tool makes it easy to add colour and lighting tweaks to make panoramas sing. The final panorama will have untidy edges. Tidy up by using the Crop tool to delete excess edges. To make a panorama you need a series of overlapping photos, as our example shows here. Once the panorama is complete, the Layers palette holds each image so you can make any edits. Photomerge window When you select the Photomerge function, you will be greeted with a window. From here you can select the images, whether theyÕre the currently open files or a folder of files. You also get to choose the type of panorama you want. The Auto option will be fine most of the time, but you can pick different finishes from the left-hand side. These show a little preview of the effect. The bottom of the window holds three options, the most important being Blend Images Together. Create a manual panorama If you revel in panoramas, you may prefer to take the manual route. Go to File>New>Photomerge Panorama as usual but tick Interactive Layout as your Layout option. This opens another dialog that enables you to manually move your source files into the right position, as well as dictate the vanishing point. Elements will still blend between the images and once you click OK the panorama will open as a new file. The Photoshop Elements Book 55
- 56. PAGE 62 PAGE 66 PAGE 72 Photo editing Learn how to fix, edit and retouch your photos for better effects 58 Make one-click fixes Discover auto options 88 Fix heavy shadows Bring back some light 62 Top guided edits Make your editing easier 90 Create exposure effects Make a layered composition 64 Make essential adjustments up your seascapes 94 Light some atmosphere Create Use blend modes for this efect 66 Edit portraits shots Improve your portrait PAGE 110 drama 70 AddBurn with Dodge and Adjust lighting landscapes 98 Improve your exposure Adjust colour and 100 Create the Dragan effect Get creative with this efect effects 104 Retouch for classicefect Create a vintage portrait HDR toning 72 MasterHDR look Fake the the Lighting Effects 110 Usestunning lighting efects filter Add with curves 74 Fix images as far as you can Push contrast 114 Add emphasis to eyes Apply a rainbow efect 76 Convert images to black and white creations 116 Selective colouryour images Bring out the best in From colour to monochrome the Lomo 78 Get colour limits effect Push 80 Edit colours with Photo Filter Combat white-balance problems PAGE 76 56 The Photoshop Elements Book 84 Perfect macro efects Add layered macro PAGE 90
- 57. PAGE 58 The Photoshop Elements Book 57
- 58. Photo editing COLOUR BOOST The blues in the original were a little reserved, but a blast of the Color option has sorted this out. SHARP EDGES The original suffered from soft edges, which were easily fixed with the Sharpen option. FINAL SWEEP Once you have targeted certain areas, it doesn’t do any harm to treat the final image to a sweep of the Smart Fix option. This tidies anything you may have missed. SEE DETAIL The distant hills were originally in deep shadow, but a Levels layer has brought detail to the fore. Make one-click fixes Get to know the Auto options in Elements and improve images with just a click of the mouse W e will always encourage that you take some time to explore the different commands and techniques in Elements, as they give you all you need to create outstanding images. However, time is precious for most, so the prospect of spending ages editing one image when you have a whole stack to get through could often mean you leave them as they are. Even a well-designed interface like Elements can be a bewildering maze of menus and tools. So, thank goodness for the Quick Edit section of the program, where you have a complete environment in which to make all 58 The Photoshop Elements Book the edits you need to improve most images. There are options for tackling exposure, colour, blurriness, colour casts and tone. Each edit automatically makes a series of corrections using different settings, then presents you with the result of each. What this means is that you have a kind of editing market, where you get to browse the final images and pick the one you want. Simply open the fix you want by clicking on the arrow next to its title, scroll over an option to see what it looks like and then click the one you want. This will be outlined in blue, so commit to the edit by closing the arrow.