1. Section4 .0 Student’s information
Section 4. 1 Students
How add new student to Student Master?
How to update the Students details?
How to delete a Student?
How to search for a student?
Section 4.2. Subject’s marks
How to enter student‘s subject marks?
Section 4.3 Attendances
How to enter student‘s attendance?.
Section 4.4 Promote Students
How to promote the students?
Section 4 .0 Student’s information
MarvelSoft School Admin is the powerful student information database that
seamlessly integrates all modules in the masters. The database's flexibility, ease-of-
use, 100% customizable report writers, and unsurpassed features make it ideal for
schools. Whether your school needs to collect and manage student information,
analyze your school data, produce reports, or quickly generate correspondence and
labels.
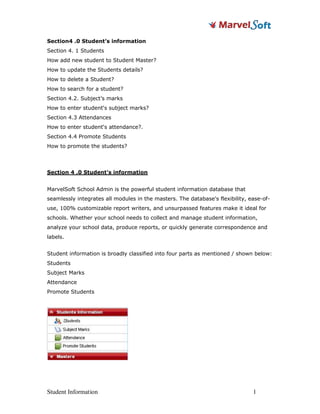
Student information is broadly classified into four parts as mentioned / shown below:
Students
Subject Marks
Attendance
Promote Students
Student Information 1
2. The module manages the registration and admission process of both new and the old
students. Fully integrated with other section, this module allows admission and
registration manageable and removes complications arising from human errors.
Information on classes, section, attendances, marks and promotion etc can be
maintained independently for each school year.
This module is a convenient and a time saving provision to handle and track sales of
prospectus, student registrations.
Section 4. 1 Students
The student module enables you to store all personal, academic, and professional
and history data regarding a student, and his/her parents. The student module can
generate reports for current student, dropouts and transferred students; data
regarding alumni students is also maintained for future reference.
User can effortlessly view all accessible Student Records including parental
information, contacts details, student records and more! Student photograph can be
updated every year. Students are enrolled once, then placed in a new class for each
school year until they leave or promoted.
How add new student to Student Master?
Select student’s information menu item to enter all information about each student
with respect to class and section.
(Please make sure that class, and section are created before going ahead with theses
steps-you can refer section 4.5 and section 4.6)
Student Information 2
3. Following Steps to be followed-
1. Click on add (+) button for adding new student to Students masters
2. Enter first name*, class*, section*, Admission number*, joining class*, sex*,
and Date of birth * which are mandatory field in personal details *.
3. Enter address* and city * which are mandatory field in address details*.
4. All details in demography details and students history are optional.
5. Click on add button and automatically message is generates as “added
successfully”.
6. Repeat same steps for adding next new student.
Note-1. (*) Symbol indicates that this particular field should to be filled. Else it will
not proceed further. And also throw an error message as “Validation Error: Value is
required.”
2. Date of birth*-should be more than 2.6years from the current date.
Student Information 3
4. 3. Caste field should be selected else, that particular student won’t appear while
generating reports.
4. Joining class*- it is from which class that particular student has joined your
school. (Not which class is going to promote next or belonging to.)
5. Images should be in jpg, gif, png, bmp but not .jpeg format.
How to update the Students details?
Steps:
1. Click on Student information-->students-->action column.
2. Select edit icon for any editing any student’s details.
3. After every action, it will display corresponding result as “Updated
Successfully”
How to delete a Student?
Steps:
1. Click on Student information-->students-->action column.
2. Select delete icon for deleting any student from the database.
3. After every action, it will display corresponding result as “Deleted
Successfully”.
How to search for a student?
Student functions such as admission, attendance, grading, marks and family
information efficiently managed. Just feeding in Student ID Number can search data
of any student.
There are two ways:
• You can select class and/ or section and select filter. It display list of students
name for selected class & section.
• Using student ID you can search. Since student ID is unique number, it is
easy to use it. (Class and section can vary but not student id for a particular
student)
Student Information 4
5. Section 4.2. Subject’s marks
The Subject marks module covers planning, execution, maintenance and monitoring
progress. It enables you to monitor progresses at different levels for various
combinations of subjects, tests, terms and years for single/all students as well as
class/section.
Alternatively, teachers may use marks throughout each term to record detailed
progress of students on individual tests & terms to gain access to information on
their respective student, and all students in classes for which they teach one or more
subject components. Mark dynamically computes weighted averages for all tests etc
based on weights assigned by the teacher. By the end of the term, final marks
already exist, and need not be transferred manually.
At the end of each term, each teacher’s weighted average marks and comments can
then be imported automatically from the Reports databases into the school’s main
database for final editing and printing of report cards by a user.
Teachers who use this may track the detailed progress of students during each term,
and thereby avoid the manual data entry task at the end of each term. Each Grades
database contains a set of files for each term which may be used to record test
scores and anecdotal information on the progress of all students in all classes taught
by the teacher.
Given all this information, all we need to enter are the details of marks obtained for
each class as the tests are taken. This software will take care of the rest and
generate the detailed final and intermediate result sheets.
How to enter student‘s subject marks?
Student Information 5
6. Steps to be followed-
1. Select class*, section*, subject* and Max.marks* for which user want to
enter the marks.
2. Enable select term exam to specify it as term or test.
3. By default, Min marks is set. User can edit the min.marks manually also.
(Optional)
4. Press filter button. If you want to change the data then, press reset button.
5. It displays the student’s name, selected subject name, selected test number
and specify the max.marks and min. marks in subject mark master.
6. Enter the marks obtained by the selected student in Marks column.
7. Click on update button and automatically it displays the results as “Subject
Marks Updated Successfully”.
8. Repeat same steps for next class.
Note-
Student Information 6
7. 1. After update button is selected, min.marks can’t be changed.
2. If an entered mark is more than max.marks- it display warning message as”
an entered mark is greater than max.marks”.
3. Please enter any negative marks (say -10), if a student not taken any test. So
that it will appear as absent in marks card (or by default it will appear as zero
marks).
Section 4.3 Attendances
This module is used to identify irregularities in the academic interests of the students
and also to assess the student and give individual attention to the causes of
repetitive or long absences.
It gives an option of selecting each student’s attendance details with respect to class
& section. In additional to that we can calculate attendance in terms of percentage.
Alternatively, attendances may be logged at the end of each term. In all cases, term
attendance statistics will automatically be transferred to student report cards.
How to enter student‘s attendance?.
(Please make sure that class, section and student’s name are created before going
ahead with theses steps-you can refer section 3.5, section 3.6 and section 2.1)
Steps to be followed-
1) Select class, section and month for which we want to enter the attendance.
2) Enter total classes conducted for selected month and press filter button. If
you want to change the data then, press reset button.
3) It displays the student’s name and total classes conducted in Attendance
master.
4) Enter the number of classes attended by the selected student in present days.
5) Click on update button and automatically it calculates the attendance ratio in
terms of percentage and displays the results in the percentage column.
i.e., percentage (%) = present days/total classes.
6) Repeat same steps for next student.
Student Information 7
8. Note -Attendance, after entering present class, section, month, total classes. You can
enter total class once and can’t be changed after selecting update button say in next
month.
Note –
• Attendance, after entering present class, section, month, total classes. You
can enter total class once and can’t be changed after selecting update button.
• If present days are more than total days- it display warning message as”
Please Enter Present Days Not More Than No. Of Classes Conducted”.
Section 4.4 Promote Students
This menu is created for promotion /demotion of students from the current class.
Here, user can promote students from the current to the next class. In this module
gives an option of selecting each student’s details with different aspects like class-
wise, section-wise etc.
How to promote the students?
Student Information 8
9. (Please make sure that class, section and student’s name are created before going
ahead with theses steps-you can refer section 3.5, section 3.6 and section 2.1 for
class, section & students)
Steps to be followed-
1. Select class and section from the drop-down menu of From class* and From
section*.
2. And specify to which class the students to be promoted in To class* and To
section *.
3. Press filter button. If users want to change the data then, press reset button.
4. It displays the student’s name from selected class and section.
5. Enable the promote student button, if the user want to promote that
particular student to next class. (Disabled students will remain in same class)
6. Click on update button and automatically it get updated and displays as”
students are promotes successfully”.
7. Repeat same steps for next student.
Student Information 9
10. In above figure, selected student of class IX std, section ’A’ is promoted to class X
standard, section ‘A’.
Note:
Case 1-During the academic year also student can be promoted from one section to
another section.
Following steps to be followed.
• Select class and section from the drop-down menu of From class* and From
section*.
• And specify to which class the students to be promoted in To class* and To
section *.
• Press filter button. If users want to change the data then, press reset button.
• It displays the student’s name from selected class and section.
• Enable the promote student button, if the user want to promote that
particular student to another section class. (Disabled students will remain in
same class)
• Click on update button and automatically it get updated and displays as”
students are promotes successfully”.
Student Information 10
11. Case 2-While switching academic year, following steps to be followed.
• In case of X STD students who are leaving the school, you have to transfer
the students from the current school.
• Go to student’s informationà studentà student’s history.
• Enable the “Has student transferred from the School” button.
• Select Update button and close.
• Now go to promote student, select next higher class i.e. IX STD students,
select the student and click on promote button.
• Similarly select next higher class i.e. VIII STD students, select the student
and click on promote button.
• Please do promoting by selecting and promoting higher class student first
(order should be first X std ,IX std, VIII std, VII std, VI std, V std, IV std, III
std, II std, I std,)
• Go to switch academic year in settings panel.
• Add new academic year with all correct details like specify the range of the
academic year.
• Set the current academic year. (Switching to next academic year).
• Now log-out & log-in.
Please do take a backup of the current data before promoting student.
Student Information 11