

Empfohlen
Weitere ähnliche Inhalte
Was ist angesagt?
Was ist angesagt? (15)
Andere mochten auch
Andere mochten auch (15)
Ähnlich wie Module 003 i pad basics
Ähnlich wie Module 003 i pad basics (20)
Module 003 i pad basics
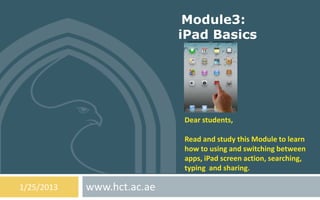
- 1. Module3: iPad Basics Dear students, Read and study this Module to learn how to using and switching between apps, iPad screen action, searching, typing and sharing. 1/25/2013 www.hct.ac.ae
- 2. Module3: Objectives 2 Upon successful completion of this lesson you would be able to : Using, opening and switching between apps. Customizing iPad . Typing on iPad. Using Dictation . Searching on your iPad. Managing iPad Notifications. Sharing data. Connecting iPad to a TV or other device. Printing with AirPrint. Connecting Bluetooth devices. How to sharing files? Egyptian E-Learning University 1/25/2013
- 3. Module 3: iPad Basics. 3 Lesson 1: Using, opening and switching between apps. Lesson 2: Customizing iPad . Lesson 3: Typing in your iPad. Lesson 4: Dictation Feature. Lesson 5: Searching. Lesson 6: Notifications. Lesson 7: Sharing. Lesson 8: Connecting iPad to a TV or other device. Lesson 9: Printing with AirPrint. Lesson 10: Bluetooth devices. Lesson 11: File sharing. Egyptian E-Learning University 1/25/2013
- 4. Module3: iPad Basics / Lesson 1: Using, opening and switching between apps. 4 You interact with iPad using your fingers to tap, double-tap, swipe, and pinch objects on the touch screen. Opening and switching between apps To go to the Home screen, press the Home button Open an app: Tap it. To return to the Home screen, press the Home button again. View recently used apps: Double-click the Home button to reveal the multitasking bar. Tap an app to use it again. Swipe left to see more apps. Egyptian E-Learning University
- 5. Module3: iPad Basics / Lesson 1: Using, opening and switching between apps. 5 Scrolling Drag up or down to scroll. On some screens such as WebPages, you can also scroll side to side. Dragging your finger to scroll doesn’t choose or activate anything on the screen. Move Up or Down Egyptian E-Learning University
- 6. Module3: iPad Basics / Lesson 1: Using, opening and switching between apps. 6 Scrolling Flick to scroll quickly. You can wait for the scrolling to come to a stop, or touch anywhere on the screen to stop it immediately. To quickly go to the top of a page, tap the status bar at the top of the screen. Egyptian E-Learning University
- 7. Module3: iPad Basics / Lesson 1: Using, opening and switching between apps. 7 Lists, Tap and Hold Depending on the list, choosing an item can do different things—for example, it may open another list, play a song, open an email, or show someone’s contact information. Choose an item in a list: Tap it. Some lists have an index along the side to help you navigate quickly. Find items in an indexed list: Tap a letter to jump to items starting with that letter. Or, drag your finger along the index to scroll quickly through the list. Return to a previous list or screen: Tap the back button in the upper-left corner. Egyptian E-Learning University
- 8. Module3: iPad Basics / Lesson 1: Using, opening and switching between apps. 8 Zooming in or out Depending on the app, you may be able to zoom in to enlarge, or zoom out to reduce the image on the screen. When viewing photos, webpages, mail, or maps, for example, pinch two fingers together to zoom out or spread them apart to zoom in. For photos and webpages, you can also double- tap (tap twice quickly) to zoom in, then double- tap again to zoom out. For maps, double-tap to zoom in and tap once with two fingers to zoom out. Egyptian E-Learning University
- 9. Module3: iPad Basics / Lesson 1: Using, opening and switching between apps. 9 Multitasking gestures You can use multitasking gestures on iPad to return to the Home screen, reveal the multitasking bar, or switch to another app. Return to the Home screen: Pinch four or five fingers together. Reveal the multitasking bar: Swipe up with four or five fingers. Switch apps: Swipe left or right with four or five fingers. Turn multitasking gestures on or off: Go to Settings > General > Multitasking Gestures. Egyptian E-Learning University
- 10. Module3: iPad Basics / Lesson 1: Using, opening and switching between apps. 10 Portrait and landscape orientation You can view many iPad apps in either portrait or landscape orientation. Rotate iPad and the screen rotates too, adjusting to fit the new orientation. • Lock the screen orientation: Double- click the Home button , swipe the multitasking bar from left to right, then tap . The orientation lock icon appears in the status bar when the screen orientation is locked. You can also set the Side Switch to lock the screen orientation instead of silencing sound effects and notifications. Go to Settings > General, and under “Use Side Switch to,” tap Lock Rotation. Egyptian E-Learning University
- 11. Module3: iPad Basics / Lesson 1: Using, opening and switching between apps. 11 Adjusting the screen brightness You can manually adjust the brightness of the screen, or turn on Auto-Brightness to have iPad use the built-in ambient light sensor to automatically adjust the brightness. Adjust the screen brightness: Double-click the Home button , swipe the multitasking bar from left to right, then drag the brightness slider. Turn Auto-Brightness on or off: Go to Settings > Brightness & Wallpaper. Egyptian E-Learning University
- 12. Module3: iPad Basics /Lesson 2: Customizing iPad . 12 Customizing iPad You can customize the layout of your apps on the Home screen, organize them in folders, and change the wallpaper. Rearranging apps Customize your Home screen by rearranging apps, moving apps to the Dock along the bottom of the screen, and creating additional Home screens. Rearrange apps: Touch and hold any app on the Home screen until it jiggles, then move apps around by dragging them. Press the Home button to save your arrangement. Egyptian E-Learning University
- 13. Module3: iPad Basics /Lesson 2: Customizing iPad . 13 Create a new Home screen: While arranging apps, drag an app to the right edge of the rightmost screen until a new screen appears. You can create up to 11 Home screens. The dots above the Dock show the number of screens you have, and which screen you’re viewing. Switch between Home screens: Swipe left or right. Go to the first Home screen: Press the Home button . Egyptian E-Learning University
- 14. Module3: iPad Basics /Lesson 2: Customizing iPad . 14 Organizing with folders: You can use folders to organize the apps on your Home screens. Rearrange folders—just as you do apps—by dragging them around your Home screens or to the Dock. Create a folder: Touch and hold an app until the Home screen icons begin to jiggle, then drag an app onto another. iPad creates a new folder that includes the two apps, and names the folder based on the type of apps. To enter a different name, tap the name field. Open a folder: Tap the folder. To close a folder, tap outside the folder, or press the Home button . Organize with folders: While arranging apps (the icons are jiggling): Add an app to a folder: Drag the app onto the folder. Remove an app from a folder: Open the folder if necessary, then drag the app out. Delete a folder: Move all apps out of the folder. The folder is automatically deleted. Rename a folder: Tap to open the folder, then tap the name and enter a new one. When you finish, press the Home button . Egyptian E-Learning University
- 15. Module3: iPad Basics / Lesson 2: Customizing iPad . 15 Changing the wallpaper You can customize both the Lock screen and the Home screen by choosing an image or photo to use as wallpaper. Choose one of the supplied images, or a photo from your Camera Roll or another album on iPad. Change the wallpaper: Go to Settings > Brightness & Wallpaper. iPad Help with backgrounds iPad Customization: Backgrounds and Picture Frame Mode How To Change iPad Wallpaper Tutorial Video Egyptian E-Learning University
- 16. Module3: iPad Basics / Lesson 3: Typing in your iPad. 16 The onscreen keyboard lets you type when you need to enter text. Entering text Use the onscreen keyboard to enter text, such as contact information, mail, and web addresses. Depending on the app and the language you’re using, the keyboard may correct misspellings, predict what you’re typing, and even learn as you use it. Enter text: Tap a text field to bring up the keyboard, then tap keys on the keyboard. As you type, each letter appears above your thumb or finger. If you touch the wrong key, you can slide your finger to the correct key. The letter isn’t entered until you release your finger from the key. Egyptian E-Learning University
- 17. Module3: iPad Basics / Lesson 3: Typing in your iPad. 17 Type uppercase: Tap the Shift key before tapping a letter. Or touch and hold the Shift key, then slide to a letter. Quickly type a period and space: Double-tap the space bar. Turn on caps lock: Double-tap the Shift key . To turn caps lock off, tap the Shift key. Enter numbers, punctuation, or symbols: Tap the Number key . To see additional punctuation and symbols, tap the Symbol key . Enter accented letters or other alternate characters: Touch and hold a key, then slide to choose one of the options. Hide the onscreen keyboard: Tap the Keyboard key . Set options for typing: Go to Settings > General > Keyboard. iPad Text Input iPad text editing with keyboard selection Egyptian E-Learning University
- 18. Module3: iPad Basics / Lesson 3: Typing in your iPad. 18 Editing text If you need to edit text, an onscreen magnifying glass lets you position the insertion point where you need it. You can select text, and cut, copy, and paste text. Position the insertion point: Touch and hold to bring up the magnifying glass, then drag to position the insertion point. Select text: Tap the insertion point to display the selection buttons. Tap Select to select the adjacent word, or tap Select All to select all text. You can also double-tap a word to select it. Drag the grab points to select more or less text. In read-only documents, such as webpages, touch and hold to select a word. iPad Keyboard Prototype SwipeSelection - Type Faster on iPad with Cursor & Keyboard Swipes Egyptian E-Learning University
- 19. Module3: iPad Basics / Lesson 3: Typing in your iPad. 19 Cut or copy text: Select text, then tap Cut or Copy. Paste text: Tap the insertion point, then tap Paste to insert the last text that you cut or copied. To replace text, select it before tapping Paste. Undo the last edit: Shake iPad, then tap Undo. Make text bold, italic, or underlined: Select text, tap , then tap B/I/U (not always available). Get the definition of a word: Select the word, then tap Define (not always available). Get alternative words: Select a word, then tap Suggest (not always available). Justify text: Select the text, then tap the left or right arrow (not always available). iPad Basics - Keyboard Part 1 iPad Basics - Keyboard Part 2 Egyptian E-Learning University
- 20. Module3: iPad Basics / Lesson 3: Typing in your iPad. 20 Auto-correction and spell checking Accept the suggestion: Type a space, punctuation mark, or return character. Reject a suggestion: Tap the “x” next to the suggestion. Each time you reject a suggestion for the same word, iPad becomes more likely to accept the word. iPad may also underline words you’ve already typed that might be misspelled. Replace a misspelled word: Tap the underlined word, then tap the correct spelling. If the word you want doesn’t appear, just retype it. Turn auto-correction or spell checking on or off: Go to Settings > General > Keyboard. Ipad auto correct iPad Tutorial - Auto Correction and Spell Checking on the iPad Egyptian E-Learning University
- 21. Module3: iPad Basics / Lesson 3: Typing in your iPad. 21 Keyboard layouts: On iPad, you can type with a split keyboard that’s at the bottom of the screen, or undocked and in the middle of the screen. Adjust the keyboard: Touch and hold , then: Use a split keyboard: Slide your finger to Split, then release. Move the keyboard to the middle of the screen: Slide your finger to Undock, then release. Return to a full keyboard: Slide your finger to Dock and Merge, then release. Return a full keyboard to the bottom of the screen: Slide your finger to Dock, then release. Turn Split Keyboard on or off: Go to Settings > General > Keyboard > Split Keyboard. Egyptian E-Learning University
- 22. Module3: iPad Basics / Lesson 4: Dictation Feature. 22 Dictation On an iPad that supports it, you can dictate text instead of typing. To use dictation, Siri must be turned on and iPad must be connected to the Internet. You can include punctuation and give commands to format your text. Note: Dictation may not be available in all languages or in all areas, and features may vary. Cellular data charges may apply. Turn on dictation: Go to Settings > General > Siri, then turn on Siri. Dictate text: From the onscreen keyboard, tap , then speak. When you finish, tap . iPad 3 : Siri Dictation Demo The New iPad Voice Dictation 5 Tips to Master Dictation On You New iPad The New iPad Dictation iPad 3 Test & Review & Siri Egyptian E-Learning University
- 23. Module3: iPad Basics / Lesson 4: Dictation Feature. 23 Add punctuation or format text: Say the punctuation or formatting command. For example, “Dear Mary comma the check is in the mail exclamation mark” results in “Dear Mary, the check is in the mail!” Punctuation and formatting commands include: quote … end quote new paragraph cap—to capitalize the next word caps on … caps off—to capitalize the first character of each word all caps—to make the next word all uppercase all caps on … all caps off—to make the enclosed words all uppercase no caps on … no caps off—to make the enclosed words all lowercase no space on … no space off—to run a series of words together smiley—to insert :-) frowny—to insert :-( winky—to insert ;-) Egyptian E-Learning University
- 24. Module3: iPad Basics / Lesson 5: Searching. 24 Searching You can search many of the apps on iPad, as well as Wikipedia and the web. Search an individual app, or search all the apps at once using Spotlight. Spotlight also searches the names of apps on iPad—if you have a lot of apps, you might want to use Spotlight to locate and open them. Search an individual app: Enter text in the search field. Search iPad using Spotlight: Swipe right from your first Home screen, or press the Home button from any Home screen. Enter text in the search field. Search results appear as you type. To dismiss the keyboard and see more results, tap Search. Tap an item in the list to open it. The icons let you know which apps the results are from. iPad may display a top hit for you, based on previous searches. Egyptian E-Learning University
- 25. Module3: iPad Basics / Lesson 5: Searching. 25 Spotlight searches the following: Contacts—All content Apps—Titles Music—Names of songs, artists, and albums, and the titles of podcasts and videos Podcasts—Titles Videos—Titles Audiobooks—Titles Notes—Text of notes Calendar (Events)—Event titles, invitees, locations, and notes Mail—To, From, and Subject fields of all accounts (the text of messages isn’t searched) Reminders—Titles Messages—Names and text of messages Search the web or Wikipedia from Spotlight: Scroll to the bottom of the search results, then tap Search Web or Search Wikipedia. Open an app from Search: Enter all or part of the app name, then tap the app. Searching - An iPad Mini Tutorial Choose which items are searched, and the order they’re searched: Go to Settings > How to Use Search on The iPad General > Spotlight Search. Egyptian E-Learning University
- 26. Module3: iPad Basics / Lesson 6: Notifications. 26 Notifications To help make sure you don’t miss important events, many iPad apps can provide alerts. An alert can appear briefly as a banner at the top of the screen, which goes away if you don’t respond to it, or as a notice in the center of the screen that remains until you acknowledge it. Some apps can also display badges on their icons on the Home screen, to let you know how many new items await—for example, how many new email messages you have. If there’s a problem—such as a message that couldn’t be sent—an exclamation mark appears on the badge. A numbered badge on a folder shows the total number of alerts for all the apps in the folder. Respond to an alert when iPad is locked: Swipe it from left to right. Notification Center displays all your alerts in one place. So if you weren’t able to respond when you first received an alert, you can use Notification Center to respond when you’re ready. Alerts can include: Missed FaceTime calls New email New text messages Alerts can also Reminders appear on the Lock Calendar events screen. Friend requests (Game Center) You can also get the local weather, Egyptian E-Learning University
- 27. Module3: iPad Basics / Lesson 6: Notifications. 27 You can also get the local weather, and display your personal stock ticker. If you’ve signed in to your Twitter and your Facebook accounts, you can post and tweet to those accounts from Notification Center. View Notification Center: Swipe down from the top of the screen. Respond to an alert: Tap it. Remove an alert: Tap , then tap Clear. Manage alerts for your apps: Go to Settings > Notifications. Choose alert sounds, adjust the alert volume, or turn vibrate on or off: Go to Settings > Sounds. Proper Notification Banners on your iPad Managing Notifications Push Notifications for iPad Egyptian E-Learning University
- 28. Module3: iPad Basics / Lesson 7: Sharing. 28 iPad gives you lots of way to share with other people. Sharing within apps In many apps, tapping displays options for sharing, as well as other actions such as printing or copying. The options vary depending on the app you’re using. Egyptian E-Learning University
- 29. Module3: iPad Basics / Lesson 7: Sharing. 29 Face book Sign in to your Facebook account (or create a new account) in Settings to enable posting directly from many of the apps on iPad. Sign in to or create a Facebook account: Go to Settings > Facebook. Post from Notification Center: Tap “Tap to Post.” To turn this feature on, go to Settings > Notifications > Share Widget. Post using Siri: Say “Post to Facebook ….” Post an item from an app: In most apps, tap . In Maps, tap , tap Share Location, then tap Facebook. Set options for Facebook: Go to Settings > Facebook to: Update Contacts on iPad with Facebook names and photos Allow App Store, Calendar, Contacts, or iTunes to use your account Install the Facebook app: Go to Settings > Facebook, then tap Install. Hands-on: Facebook for iPad App iPad Face book Application Leaked Facebook iPad App (Demo and How To Install) Egyptian E-Learning University
- 30. Module3: iPad Basics / Lesson 7: Sharing. 30 Twitter Sign in to your Twitter account (or create a new account) in Settings to enable Tweets with attachments from many of the apps on iPad. Sign in to or create a Twitter account: Go to Settings > Twitter. Tweet from Notification Center: Tap “Tap to Tweet.” To turn this feature on, go to Settings > Notifications > Share Widget. Tweet using Siri: Say “Tweet ….” Tweet an item from an app: View the item, tap , then tap Twitter. If isn’t showing, tap the screen. To include your location, tap Add Location. Tweet a location in Maps: Tap the location pin, tap , tap Share Location, then tap Twitter. When you’re composing a Tweet, the number in the lower-right corner of the Tweet screen shows the number of characters remaining that you can enter. Attachments use some of a Tweet’s 140 characters. Add Twitter user names and photos to your contacts: Go to Settings > Twitter, then tap Update Contacts. Set options for Twitter: Go to Settings > Twitter. Twitter for iPad Install the Twitter app: Go to Settings > Twitter, then tap Install. Egyptian E-Learning University
- 31. Module3: iPad Basics / Lesson 8: Connecting iPad to a TV or other device. 31 Connecting iPad to a TV or other device You can use Air Play with Apple TV to stream content to an HDTV, or connect iPad to your TV using cables. AirPlay With AirPlay, you can stream music, photos, and video wirelessly to Apple TV and other AirPlay-enabled devices. The AirPlay controls appear when an AirPlay-enabled device is available on the same Wi-Fi network that iPad is connected to. You can also mirror the contents of your iPad screen on a TV. Stream content to an Air Play-enabled device: Tap and choose the device. Access the AirPlay and volume controls while using any app: When the screen is on, double-click the Home button and scroll to the left end of the multitasking bar. Egyptian E-Learning University
- 32. Module3: iPad Basics / Lesson 8: Connecting iPad to a TV or other device. 32 Switch playback back to iPad: Tap and choose iPad. Mirror the iPad screen on a TV: Tap at the left end of the multitasking bar, choose an Apple TV, and tap Mirroring. A blue bar appears at the top of the iPad screen when AirPlay mirroring is turned on. Everything on the iPad screen appears on the TV. Connecting iPad to a TV using a cable Apple cables and adapters (available separately) may be used to connect iPad to a TV, Connecting your iPad to a TV How to Connect iPad to TV How To Connect iPad to HD TV/External Display How to connect an, iPad to your TV Egyptian E-Learning University
- 33. Module3: iPad Basics / Lesson 9: Printing with AirPrint. 33 AirPrint lets you print wirelessly to AirPrint- enabled printers from the following iOS apps: Mail—email messages and attachments that can be viewed in Quick Look Photos and Camera—photos Safari—web pages, PDFs, and other attachments that can be viewed in Quick Look iBooks—PDFs Maps—the portion of the map showing on the screen Notes—the currently displayed note Other apps available from the App Store may also support AirPrint. Egyptian E-Learning University
- 34. Module3: iPad Basics / Lesson 9: Printing with AirPrint. 34 See the status of a print job: Double-click the Home button , then tap Print Center in the multitasking bar. The badge on the icon shows how many documents are ready to print, including the current one. Cancel a print job: In Print Center, select the print job, if necessary, then tap Cancel Printing. How to Print with AirPrint on the iPad iOS AirPrint Demo (Any Printer) AirPrint On iOS From ANY PRINTER Egyptian E-Learning University
- 35. Module3: iPad Basics / Lesson 10: Bluetooth devices. 35 You can use iPad with the Apple Wireless Keyboard and other Bluetooth devices, such as a Bluetooth headset. Pairing Bluetooth devices Before you can use a Bluetooth device with iPad, you must first pair it with iPad. Pair a Bluetooth device with iPad: 1 Make the device discoverable. See the documentation that came with the device. For an Apple Wireless Keyboard, press the power button. 2 Go to Settings > Bluetooth and turn Bluetooth on. 3 Select the device and, if prompted, enter the passkey or PIN. For information about using an Apple Wireless Keyboard, To use a Bluetooth headset with iPad, see the documentation that came with the device. Return audio output to iPad when a Bluetooth headset is connected: Turn off or unpair the device, or turn off Bluetooth in Settings > Bluetooth. Audio output returns to iPad whenever the device is out of range. You can also use AirPlay to switch audio output to iPad. Egyptian E-Learning University
- 36. Module3: iPad Basics / Lesson 10: Bluetooth devices. 36 Bluetooth status After you pair a device with iPad, the Bluetooth icon appears in the status bar at the top of the screen: (white): Bluetooth is on and paired with a device. (gray): Bluetooth is on and paired with a device, but the device is out of range or turned off. No Bluetooth icon: Bluetooth is not paired with a device. Unpairing a Bluetooth device from iPad You can unpair a Bluetooth device if you don’t want to use it with iPad any more. Unpair a Bluetooth device: Go to Settings > Bluetooth and turn on Bluetooth. Tap next to the device name, then tap Forget This Device. Apple iPad 2 Bluetooth pairing iPad Bluetooth keyboard pairing How To Un-pair Bluetooth Devices Egyptian E-Learning University
- 37. Module3: iPad Basics / Lesson 11: File sharing. 37 File sharing You can use iTunes to transfer files between iPad and your computer. You can also view files received as email attachments on iPad. If you have the same iCloud-enabled apps on more than one device, you can use iCloud to automatically keep your documents up to date across all your devices. Transfer files using iTunes: Connect iPad to your computer using the included cable. In iTunes on your computer, select iPad, then click the Apps button. Use the File Sharing section to transfer documents between iPad and your computer. Apps that support file sharing appear in the File Sharing Apps list in iTunes. To delete a file, select the file in the Files list, then press the Delete key. iPad File Sharing Goodreader File Sharing On Ipad How to transfer files from a computer to iTunes How to Add Files to iTunes Library File Transfer to ITunes Egyptian E-Learning University
- 38. Revision / Lesson 1: Using, opening and switching between apps. 38 Opening and switching between apps To go to the Home screen, press the Home button Open an app: Tap it. To return to the Home screen, press the Home button again. View recently used apps: Double-click the Home button to reveal the multitasking bar. Tap an app to use it again. Swipe left to see more apps. Egyptian E-Learning University
- 39. Revision / Lesson 1: Using, opening and switching between apps. 39 Scrolling Egyptian E-Learning University
- 40. Revision / Lesson 1: Using, opening and switching between apps. 40 Scrolling Egyptian E-Learning University
- 41. Revision / Lesson 3: Typing in your iPad. 41 Type uppercase: Tap the Shift key before tapping a letter. Or touch and hold the Shift key, then slide to a letter. Quickly type a period and space: Double-tap the space bar. Turn on caps lock: Double-tap the Shift key . To turn caps lock off, tap the Shift key. Enter numbers, punctuation, or symbols: Tap the Number key . To see additional punctuation and symbols, tap the Symbol key . Enter accented letters or other alternate characters: Touch and hold a key, then slide to choose one of the options. Hide the onscreen keyboard: Tap the Keyboard key . Set options for typing: Go to Settings > General > Keyboard. Egyptian E-Learning University
- 42. Revision / Lesson 4: Dictation Feature. 42 Dictation On an iPad that supports it, you can dictate text instead of typing. To use dictation, Siri must be turned on and iPad must be connected to the Internet. You can include punctuation and give commands to format your text. Note: Dictation may not be available in all languages or in all areas, and features may vary. Cellular data charges may apply. Turn on dictation: Go to Settings > General > Siri, then turn on Siri. Dictate text: From the onscreen keyboard, tap , then speak. When you finish, tap . Egyptian E-Learning University
- 43. Revision / Lesson 5: Searching. 43 Searching Search an individual app: Enter text in the search field. Search iPad using Spotlight: Swipe right from your first Home screen, or press the Home button from any Home screen. Enter text in the search field. Search results appear as you type. To dismiss the keyboard and see more results, tap Search. Tap an item in the list to open it. The icons let you know which apps the results are from. iPad may display a top hit for you, based on previous searches. Egyptian E-Learning University
- 44. Revision / Lesson 6: Notifications. 44 Notifications Respond to an alert when iPad is locked: Swipe it from left to right. Notification Center displays all your alerts in one place. So if you weren’t able to respond when you first received an alert, you can use Notification Center to respond when you’re ready. Alerts can include: Missed FaceTime calls New email New text messages Reminders Calendar events Friend requests (Game Center) You can also get the local weather, Alerts can also appear on the Lock screen. Egyptian E-Learning University
- 45. Revision / Lesson 7: Sharing. 45 iPad gives you lots of way to share with other people. Sharing within apps In many apps, tapping displays options for sharing, as well as other actions such as printing or copying. The options vary depending on the app you’re using. Egyptian E-Learning University
- 46. Revision / Lesson 8: Connecting iPad to a TV or other device. 46 AirPlay Stream content to an Air Play-enabled device: Tap and choose the device. Access the AirPlay and volume controls while using any app: When the screen is on, double-click the Home button and scroll to the left end of the multitasking bar. Switch playback back to iPad: Tap and choose iPad. Mirror the iPad screen on a TV: Tap at the left end of the multitasking bar, choose an Apple TV, and tap Mirroring. A blue bar appears at the top of the iPad screen when AirPlay mirroring is turned on. Everything on the iPad screen appears on the TV. Egyptian E-Learning University
- 47. Revision / Lesson 9: Printing with AirPrint. 47 AirPrint lets you print wirelessly to AirPrint-enabled printers from the following iOS apps: Mail—email messages and attachments that can be viewed in Quick Look Photos and Camera—photos Safari—web pages, PDFs, and other attachments that can be viewed in Quick Look iBooks—PDFs Maps—the portion of the map showing on the screen Notes—the currently displayed note Egyptian E-Learning University
- 48. Revision / Lesson 10: Bluetooth devices. 48 You can use iPad with the Apple Wireless Keyboard and other Bluetooth devices, such as a Bluetooth headset. Pairing Bluetooth devices Before you can use a Bluetooth device with iPad, you must first pair it with iPad. Pair a Bluetooth device with iPad: 1 Make the device discoverable. See the documentation that came with the device. For an Apple Wireless Keyboard, press the power button. 2 Go to Settings > Bluetooth and turn Bluetooth on. 3 Select the device and, if prompted, enter the passkey or PIN. For information about using an Apple Wireless Keyboard, To use a Bluetooth headset with iPad, see the documentation that came with the device. Return audio output to iPad when a Bluetooth headset is connected: Turn off or unpair the device, or turn off Bluetooth in Settings > Bluetooth. Audio output returns to iPad whenever the device is out of range. You can also use AirPlay to switch audio output to iPad. Egyptian E-Learning University
- 49. Revision / Lesson 11: File sharing. 49 File sharing Transfer files using iTunes: Connect iPad to your computer using the included cable. In iTunes on your computer, select iPad, then click the Apps button. Use the File Sharing section to transfer documents between iPad and your computer. Apps that support file sharing appear in the File Sharing Apps list in iTunes. To delete a file, select the file in the Files list, then press the Delete key. Egyptian E-Learning University
- 50. 50 THANK YOU! By: Moustafa Ahmed Al Ashery Egyptian E-Learning University - 1/25/2013