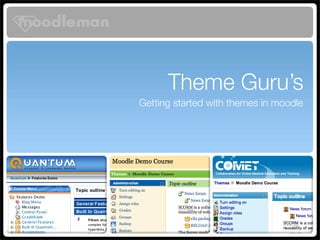
2. Aim of this workshop
We Will
๏ Provide background on themes in moodle
๏ Demonstrate theme design ‘best practice’
๏ Show tools helpful to theme design
We Won'
๏ This is NOT a technical workshop
๏ No prior experience expected
๏ HTML and CSS not covered
3. Getting started
Why use themes?
Build local, deploy global
Tools you need
Don’t re-invent the wheel!
4. Getting started - Why use themes?
๏ Meet brand requirements
๏ Match an existing site
๏ Present a more engaging
design for your particular
audience
๏ Establish a unique look and
feel for your site. be a Stand
out!
5. Getting started - Build locally, deploy globally
๏ There is no Moodle ‘theme
dev development’ tool
๏ Building in Dreamweaver is
extremely difficult. I usually
edit using a text editing tool.
๏ Easiest to deploy a moodle
on your machine and edit this
directly. See changes instantly
as you make them
๏ When finished local build,
then upload to your server
6. Getting started - Tools you will be needing
๏ Firefox web browser
๏ Firefox Web Developer plugin
๏ http://chrispederick.com/work/web-developer
๏ A Text editor
๏ Textpad (Windows)
๏ Smutron (OSX) & CSSEdit (OSX)
๏ Local Webserver Application
๏ XAMPP (Win & OSX)
๏ http://www.apachefriends.org
7. Getting started - Don’t re-invent the wheel
Themes are very time consuming to build from scratch
Best Practice Tips
๏ Small Scale changes When creating your own theme
folder the name needs to be in lower
๏ Create a new theme using standardsheets case. If it is not then the Moodle
smartpix will not function
๏ Large Scale changes
๏ Start with a theme that is similar to your need
๏ Just duplicate it’s folder and rename to use
9. Moodle theme setup - Admin settings
Theme Settings
Best Practice Tips
๏ Theme list
๏ Allow User Themes You don’t have to drill down through
the Administration to hunt down
๏ Allow Category Themes theme settings. Just type in ‘theme’
into the admin search field to see the
๏ Allow users to hide blocks available options.
๏ Allow blocks on module pages
๏ Hide activity type navigation
What theme goes where?
Theme Selector
There is a new setting you can put in
The theme selector allows you to apply a selected theme at a your sites config.php
site level.
$CFG->themeorder = array('page', 'course',
'category', 'session', 'user', 'site');
Set how you want themes displayed
10. Moodle theme setup - Files in a typical theme
Themes are always stored in the ‘themes’ folder in your moodle directory
๏ PHP files ๏ CSS files
๏ config.php ๏ syles_layout.css
๏ styles.php ๏ styles_fonts.css
๏ docstyles.php ๏ styles_color.css
๏ meta.php
๏ Other files
๏ HTML files ๏ favicon.ico
๏ header.html ๏ screenshot.jpg
๏ footer.html
๏ readme.html
11. Creating a theme
The PHP files
config.php
styles.php
docstyles.php
meta.php
12. Creating a theme - Config.php
This file contains a few configuration variables that control
Best Practice Tips
how Moodle uses this theme.
Tags Used: Don’t create this from scratch. It
needs to be exact, so copying an
๏ $THEME->sheets existing config file is a good way of
๏ $THEME->standardsheets making sure you do not miss
anything
๏ $THEME->parent
๏ $THEME->parentsheets
๏ $THEME->modsheets
๏ $THEME->blocksheets
๏ $THEME->langsheets
๏ $THEME->custompix
๏ $THEME->layouttable
13. Creating a theme - Config.php
Config.php variables
Best Practice Tips
$THEME->sheets
While you can call your stylesheets
Definition: anything you like, or even just have
This variable is an array containing the names of all the stylesheet files you want one, the listed example is considered
included in this theme, and in what order ‘best practice’ to make the theme
easier to edit if passed around the
Demo Use: community.
$THEME->sheets = array('styles_layout','styles_color','styles_fonts');
14. Creating a theme - Config.php
Config.php variables
$THEME->standardsheets
Definition:
This variable can be set to an array containing filenames from the *STANDARD* theme. If the array exists, it will be used to
choose the files to include in the standard style sheet.
When false, then no files are used.
When ‘true’ or NON-EXISTENT, then ALL standard files are used.
This parameter can be used, for example, to prevent having to override too many classes.
Note that the trailing .css should not be included
Demo Use:
$THEME->standardsheets = ‘true’;
this would also generate the same result
$THEME->standardsheets = array('styles_layout','styles_fonts','styles_color');
15. Creating a theme - Config.php
Config.php variables
Best Practice Tips
$THEME->parent
Don’t reference ‘standard’ as your
Definition: parent theme. this won’t kill your
This variable can be set to the name of a parent theme which you want to have theme, but it is doubling up if parent
included before the current theme. has been set to ‘true’.
This can make it easy to make modifications to another theme without having to
actually change the files.
If this variable is empty or ‘false’ then a parent theme is not used.
Demo Use:
$THEME->parent = 'wood';
16. Creating a theme - Config.php
Config.php variables
$THEME->parentsheets
Definition:
This variable can be set to an array containing filenames from a chosen *PARENT* theme. If the array exists, it will be used
to choose the files to include in the standard style sheet.
When ‘false’, then no files are used.
When ‘true’ or NON-EXISTENT, then ALL standard files are used.
This parameter can be used, for example, to prevent having to override too many classes.
Note that the trailing .css should not be included
Demo Use:
$THEME->parentsheets = array('styles_layout','styles_color','styles_fonts');
17. Creating a theme - Config.php
Config.php variables
$THEME->modsheets, $THEME->blocksheets and $THEME->langsheets
Definition:
When any of these are enabled, then this theme will search for files named quot;styles.phpquot; inside all Activity modules, blocks
and/or language folders and include them.
This allows modules to provide some basic layouts needed by these tools so that they work out of the box.
It is HIGHLY recommended to leave this enabled.
Demo Use:
$THEME->modsheets = true;
$THEME->blocksheets = true;
$THEME->langsheets = false;
18. Creating a theme - Config.php
Config.php variables
!!WARNING!!
$THEME->custompix If this is enabled you will need to
make sure you have every image in
Definition: Moodle’s pix folder replicated inside
If true, then this theme must have a quot;pixquot; subdirectory that contains copies of all your theme.
files from the moodle/pix directory, plus a quot;pix/modquot; directory containing all the
If any images are missing they will
icons for all the activity modules. appear as broken on your theme.
Demo Use:
Best Practice Tips
$THEME->custompix = true;
Instead of using custompix use the
new SmartPix search built into
Moodle 1.8 and above.
This searches for images in your
theme and if absent it then uses
standard moodle images.
19. Creating a theme - Config.php
Config.php variables
Version Notice
$THEME->layouttable This is a new tag that will only
operate in versions 1.8 and above.
Definition:
This new variable gives the designer the ability to change the order of how
columns are displayed. Typically blocks are displayed in left and right columns
with content in the middle. The layouttable tag allows block columns to be
re-ordered in any combination.
Demo Use:
$THEME->layouttable = array('middle', 'left', 'right');
20. Creating a theme - meta.php
Best Practice Tips
Definition:
This file contains any meta data that you may need to put into your sites header.
Don’t create this from scratch. It
More often than not this file is empty
needs to be exact, so copying an
existing config file is a good way of
making sure you do not miss
anything
Demo Use:
<!--[if IE 6]>
<link rel=quot;stylesheetquot; type=quot;text/cssquot; href=quot;<?php echo $CFG->httpswwwroot ?>/theme/funky/styles_ie6.cssquot; />
<![endif]-->
21. Creating a theme - styles.php/docstyles.php
These are two files used by moodle, pulling data from your config file to generate your theme as based on your settings.
There is nothing you need to do with these files.
22. Creating a theme
The HTML files
header.html
footer.html
readme.html
23. Creating a theme - The HTML Files
Header and Footer .html files
These contain your logo, the login, the ‘jumpto’ menu, the breadcrumb navigation, the
moodle logo etc. Within these files you can give Moodle your individual look at the top and
the bottom of all pages
Readme.html
This contains details entered by the author of the theme. It can contain anything you like.
Typically it includes the authors name, license type and contact details.
24. Creating a theme - The header and footer
Creating the container
The header.html and footer.html files essentially create a container within which your
moodle site resides.
Header
Footer
25. Creating a theme - The header and footer
What goes in the header and footer.html files <!DOCTYPE html PUBLIC quot;-//W3C//DTD XHTML 1.0 Strict//ENquot; quot;http://www.w3.org/TR/xhtml1/
DTD/xhtml1-strict.dtdquot;>
<html<?php echo $direction ?>>
As the name suggests, these are both html files
<head>
<?php echo $meta ?>
<meta name=quot;keywordsquot; content=quot;moodle, <?php echo $title ?> quot; />
and therefore contain raw html. <title><?php echo $title ?></title>
<link rel=quot;shortcut iconquot; href=quot;<?php echo $CFG->themewww .'/'. current_theme() ?>/
favicon.icoquot; />
<?php include(quot;$CFG->javascriptquot;); ?>
Designers can use any HTML they like. Most </head>
<body <?php
today use CSS rather than html design elements. echo quot; $bodytagsquot;;
if ($focus) {
echo quot; onload=quot;setfocus()quot;quot;;
}
However, this HTML is also augmented with ?>>
<center>
specific php code. <div id=quot;pagequot;>
<div class=quot;wrapperquot;>
<div id=quot;page-topquot;></div>
<div id=quot;page-middlequot;>
<?php if ($home) { ?>
<div id=quot;header-homequot; class=quot;clearfixquot;>
<h1 class=quot;headermainquot;></h1>
<div id=quot;header-descriptionquot;><?php echo $COURSE->summary ?>
</div>
</div>
<?php } else if ($heading) { ?>
<div id=quot;headerquot; class=quot;clearfixquot;>
<a href=quot;<?php echo quot;$CFG->wwwrootquot; ?>quot;><h1 class=quot;headermainquot;></h1></a>
<div class=quot;headermenuquot;><?php echo $menu ?></div>
26. Creating a theme - The header and footer
PHP Tags you need to know
๏ <?php echo $title ?>
๏ <?php echo $CFG->themewww .'/'. current_theme() ?>
๏ <?php echo $COURSE->summary ?>
๏ <?php print_navigation(quot;$navigationquot;); ?>
๏ <?php echo $button; ?>
๏ <?php echo $menu; ?>
๏ <?php echo $loggedinas; ?> *footer.html only
๏ <?php echo $homelink; ?> *footer.html only
27. Creating a theme - The header and footer
PHP Tags you need to know
๏ <?php echo $title ?>
Definition:
This generates the title of the page.
Demo Use:
<title><?php echo $title ?></title>
28. Creating a theme - The header and footer
PHP Tags you need to know
Best Practice Tips
๏ <?php echo $CFG->themewww .'/'. current_theme() ?>
Try and keep all images in a folder
called ‘pix’.
Definition:
This generates an absolute path to your theme. This must be used if this
Makes them easier to identify and
theme is going to be used in more than one install. It is best practice to
replace as you move on.
always be used to save you issues in the future when URL’s may change.
Demo Use:
<img src=quot;<?php echo $CFG->themewww .'/'. current_theme() ?>/pix/logo.gifquot;>
29. Creating a theme - The header and footer
PHP Tags you need to know
๏ <?php echo $COURSE->summary ?>
Definition:
This generates the summary of the page. This is either pulled from the course or frontpage summary fields
Demo Use:
<div id=quot;header-descriptionquot;><?php echo $COURSE->summary ?></div>
30. Creating a theme - The header and footer
PHP Tags you need to know
๏ <?php print_navigation(quot;$navigationquot;); ?>
Definition:
This generates breadcumb navigation that goes across the top of the screen.
Additional Notes:
Should typically be surrounded with a “breadcrumb” div class tag.
Demo Use:
<div class=quot;breadcrumbquot;><?php print_navigation(quot;$navigationquot;); ?></div>
31. Creating a theme - The header and footer
PHP Tags you need to know
๏ <?php echo $menu; ?>
Definition:
This changes based on login status. If not logged in it will display “you are not logged in” text. If the user is logged in it
displays the “Jump to” menu
Additional Notes:
Should typically be surrounded with a “ headermenu” div class tag.
Demo Use:
<div class=quot;headermenuquot;><?php echo $menu ?></div>
32. Creating a theme - The header and footer
PHP Tags you need to know
๏ <?php echo $button; ?>
Definition:
This generates the editing buttons that moodle uses. These include the “turn editing on” button as well as function
specific buttons like ‘Update this forum’ and others.
Additional Notes:
Should typically be surrounded with a “navbutton” div class tag.
Demo Use:
<div class=quot;navbuttonquot;><?php echo $button; ?></div>
33. Creating a theme - The header and footer
PHP Tags you need to know
๏ <?php echo $loggedinas; ?>
Definition:
This generates the text either prompting for the user to log in or showing that they are logged in.
Additional Notes:
This tag only works when placed in footer.html.
Demo Use:
<?php echo $loggedinas ?>
34. Creating a theme - The header and footer
PHP Tags you need to know
๏ <?php echo $homelink; ?>
Definition:
This generates a ink back to the sites homepage. Very useful for those wanting a quick jump back to the site’s main
page.
Additional Notes:
This tag only works when placed in footer.html.
Demo Use:
<?php echo $homelink ?>
35. Creating a theme - The header and footer
Useful conditional tags
๏ <?php if ($home) { ?>
<?php } else if ($heading) { ?>
<?php } ?>
๏ <?php if ($navigation) { ?>
<?php } else if ($heading) { ?>
<?php } ?>
๏ <?php if (!empty($performanceinfo)) {
echo $performanceinfo;
} ?>
36. Creating a theme - The header and footer
Useful conditional tags
๏ <?php if ($home) { ?>
<?php } else if ($heading) { ?>
<?php } ?>
Definition:
This is a very useful conditional. It allows for certain content to just be displayed on the homepage.
Demo Use:
<?php if ($home) { ?>
<div id=quot;header-homequot; class=quot;clearfixquot;>
<h1 class=quot;headermainquot;></h1>
<div id=quot;header-descriptionquot;><?php echo $COURSE->summary ?></div>
</div>
<?php } else if ($heading) { ?>
<div id=quot;headerquot; class=quot;clearfixquot;>
<a href=quot;<?php echo quot;$CFG->wwwrootquot; ?>quot;><h1 class=quot;headermainquot;></h1></a>
<div class=quot;headermenuquot;><?php echo $menu ?></div>
</div>
<?php } ?>
37. Creating a theme - The header and footer
Useful conditional tags
๏ <?php if ($navigation) { ?>
<?php } else if ($heading) { ?>
<?php } ?>
Definition:
This conditional detects if there are breadcrumbs to show. If not, it can then display something else of your choosing
Demo Use:
<?php if ($navigation) { ?>
<div class=quot;navbar clearfixquot;>
<div class=quot;breadcrumbquot;><?php print_navigation(quot;$navigationquot;); ?></div>
<div class=quot;navbuttonquot;><?php echo $button; ?></div>
</div>
<?php } else if ($heading) { ?>
<hr />
<?php } ?>
38. Creating a theme - The header and footer
Useful conditional tags
๏ <?php if (!empty($performanceinfo)) {
echo $performanceinfo;
} ?>
Definition:
This conditional detects if performance info has been set to be displayed by the site’s admin settings. If so, various
performance details are displayed.
Demo Use:
<?php if (!empty($performanceinfo)) {
echo $performanceinfo;
} ?>
39. Creating a theme
The CSS files
styles_layout.css
styles_fonts.css
styles_color.css
styles_moz.css
40. Creating a theme - The CSS Files
Moodle and CSS
Best Practice Tips
Moodle themes use style sheets to describe the Moodle
quot;lookquot; by controlling the layout, fonts and colors. These are Always refer to the ‘standard’ theme
constructed by a PHP script called quot;styles.phpquot; in each as a parent theme.
theme directory, and controlled by a file called quot;config.phpquot; Separate your css in lyout, font and
in the same place. colors to make it easier to edit
Moodle has a quot;standardquot; theme which is very plain and
provides a basic layout for other themes to build on. Each
theme may also have a quot;parentquot; theme, which will be
included before the current theme.
Theme designers can define and add any CSS stylesheets
and name them any way as needed for this theme.
41. Creating a theme - The CSS Files
The Confusion of the Cascading Style Sheet (CSS)
Take advantage of the cascading style sheets. Only change what you need to!
43. Creating a theme - Additional Files
favicon.ico
Don’t feel that you need to always have the moodle icon listed in the browser bar or
bookmarks.
Store your own favicon in your theme and it will be used instead.
screenshot.jpg
Display a screenshot of how the theme will look in the moodle admin ‘Theme Selector’
If no screenshot is there, moodle will try and render the page as best it can as a preview.
44. Creating a theme
Tips’N’Tricks
Using your own icons
Parent themes
Using Labels
45. Tips’N’Tricks - Using your own Icons
An alternate icon set may be used with any Moodle theme.
!!WARNING!!
An icon set consists of a pix directory containing copies of all If this is enabled you will need to
files from the moodle/pix directory plus a pix/mod directory make sure you have every image in
containing all activity module icons. Moodle’s pix folder replicated inside
your theme.
To use the alternate icon set
If any images are missing they will
1. Amend $THEME->custompix = false; to appear as broken on your theme.
$THEME->custompix = true;
in theme/yourtheme/config.php
Get an icon head start
2. Copy the pix directory to the theme folder
Nuvola is an additional icon set
That is, in order to use an alternate icon set associated to a made for modle and released under
specific theme, you need to make a whole tree of icons in GPL license.
the pix subdirectory of the theme. Your pix folder will look
like the example below, probably with some more theme-
specific pictures included: Download it from here:
http://www.moodlezengarden.com/index.php?
2006/09/06/6-nuvola-iconset-16
46. Tips’N’Tricks - Using labels
Homepage design becomes
nearly unlimited when you add
labels to the homepage.
You can click on the <>
symbol and add html directly
into the label. This is good for
code to generate forms.
47. body {
color: #ffffff;
background: url(pix/bg/bg_red.jpg) 50% 0 no-repeat;
background-color: #67161c;
Getting started - Parent Themes
}
a:link,
a:visited,
a:hover
{
color: #ff9900;
Parent themes are great for}
.navbar {
creating ‘variations on a border-color:#666666;
background: url(pix/bg/nav_header_bg.png) repeat-x;
theme’
}
.sideblock .header {
background: url(pix/bg/block_header_bg.png);
}
๏ Use parent theme’s to input
{
identify areas of your site.
background: #eebaba;
}
.article_seperator {
background-color: #6c3434;
}
๏ Only build one theme, then
#header-description {
position: absolute;
use sub-themes to create top: 40px;
text-align: left;
width: 400;
variations. right: 120px;
font-size: 1.3em;
line-height: 135%;
}
.breadcrumb ul li .sep {
๏ Updates to the parent color: #dddddd;
}
theme are immediatly applied
a#corner {
background: url(pix/moodle_donate.png) top right no-repeat !important;
to all it’s “children”.
}