SlideShare ist ein Scribd-Unternehmen logo
1 von 24
Downloaden Sie, um offline zu lesen
How to Set Up Your
   Projector
           August 2012

Click for Projector Brochure pdf file
First, you need to find your projector box.
Open the box and this is what you'll find.
Out of the box, these are the only pieces you
will need. A black VGA/audio cable and
projector remote control.
Here is what the back of your computer
should look like. Pay attention to the vertical
(video port) slot on the left.
On the wall, there should be a new wall
outlet.
You will also need a Black & White signal
splitter cable.
Connect the Black end of the splitter into
the vertical video port which is in the back of
your computer.
You will also need a white DVI/VGA
Adapter.
This end of the adapter
will connect to one end
of the cable that was in
the projector box.


                           This end of the adapter
                           will connect to one of
                           the two output
                           connectors on the Y
                           cable
Connect the white DVI/VGA adapter to one
of the ends of the splitter.
Connect the
end of the splitter
(Y cable) that
does not have an
adapter attached
to the existing
monitor cable.
Connect the black long VGA cable to the
end of the Y cable with the white DVI/VGA
adapter.
Connect the audio cord to the green outlet
jack in the back of the computer.
Connect the other end of the VGA black
cord to the wall.
Connect
the black
audio cord
to the wall
outlet.
Now you can turn on your computer!
Here is a picture of all the features on your
remote.
                          1. Power button
                          2 Computer button (cycles through connected computer
                          sources)
                          3. Video button (cycles through connected video sources)
                          4. Numeric buttons (enter numbers)
                          5. Auto button (automatically adjusts position, tracking, and
                          sync settings)
                          6. Aspect button (selects the image aspect ratio)
                          7. Num button (when held down, switches numeric buttons
                          to number function)
                          8 . Menu button (accesses projector menu system)
                          9. Arrow buttons (move through on-screen options and
                          control wireless mouse functions)
                          10. Enter button (selects options and controls wireless
                          mouse functions)
                          11. User button (customizable for different functions)
                          12. Page up/down buttons (control presentation slides)
                          13. E-Zoom +/– buttons (zoom into and out of the image)
                          14. A/V Mute button (turns off picture and sound)
                          15. Help button (accesses projector help information)
                          16. Freeze button (stops video action)
                          17. Volume up/down buttons (adjust speaker volume)
                          18. Pointer button (activates on-screen pointer)
                          19. Esc button (cancels/exits functions and controls wireless
                          mouse functions)
                          20. Color Mode button (selects display modes)
                          21. LAN button (cycles between network and optional Quick
                          Wireless Connection Key sources)
                          22. USB button (cycles through connected USB sources)
                          23. Source Search button (searches for connected sources)
Turn on your projector with your remote, be
sure to point to the board, not the projector.
If you have an WindowsXP as your
operating system, you will need to right click
on the screen to open the NVIDIA control
panel.
On an XP computer you will see this screen after you click the NVIDIA . You need to check “The
same on both displays (Clone)”
A Windows 7 computer uses the keystroke combination of the windows key and P to select “duplicate
screen”
Dual screen shot
Congratulations, You are done!
Credits:

                  Margaret DeFazio
                    Julie Dutczak
                 Adrianne Fedorchuk
                       Jeff Gay
                  Jeanne Gutowski
                   Sean Mahoney
                  Christine Randall
                  Cathy Rosenstock


2012 MPS Summer Institute Enhancing Your Curriculum with Projectors Course

Weitere ähnliche Inhalte

Andere mochten auch

Andere mochten auch (10)

How Teachers and Professors Can Use Social Media
How Teachers and Professors Can Use Social MediaHow Teachers and Professors Can Use Social Media
How Teachers and Professors Can Use Social Media
 
Engaging Teachers With Social Media
Engaging Teachers With Social MediaEngaging Teachers With Social Media
Engaging Teachers With Social Media
 
Engaged Teachers: Using Social Media Tools to Capture the Imagination and Eng...
Engaged Teachers: Using Social Media Tools to Capture the Imagination and Eng...Engaged Teachers: Using Social Media Tools to Capture the Imagination and Eng...
Engaged Teachers: Using Social Media Tools to Capture the Imagination and Eng...
 
A day in the life of a Connected Teacher
A day in the life of a Connected TeacherA day in the life of a Connected Teacher
A day in the life of a Connected Teacher
 
Using your projector in your classroom
Using your projector in your classroomUsing your projector in your classroom
Using your projector in your classroom
 
Complete WordPress Step-By-Step Training System In A WordPress Plugin
Complete WordPress Step-By-Step Training System In A WordPress PluginComplete WordPress Step-By-Step Training System In A WordPress Plugin
Complete WordPress Step-By-Step Training System In A WordPress Plugin
 
Teacher development
Teacher developmentTeacher development
Teacher development
 
Digital Media in Teaching and Learning
Digital Media in Teaching and LearningDigital Media in Teaching and Learning
Digital Media in Teaching and Learning
 
Basic Wordpress PPT
Basic Wordpress PPT Basic Wordpress PPT
Basic Wordpress PPT
 
Digital Transformation: What it is and how to get there
Digital Transformation: What it is and how to get thereDigital Transformation: What it is and how to get there
Digital Transformation: What it is and how to get there
 

Kürzlich hochgeladen

The basics of sentences session 3pptx.pptx
The basics of sentences session 3pptx.pptxThe basics of sentences session 3pptx.pptx
The basics of sentences session 3pptx.pptx
heathfieldcps1
 
Jual Obat Aborsi Hongkong ( Asli No.1 ) 085657271886 Obat Penggugur Kandungan...
Jual Obat Aborsi Hongkong ( Asli No.1 ) 085657271886 Obat Penggugur Kandungan...Jual Obat Aborsi Hongkong ( Asli No.1 ) 085657271886 Obat Penggugur Kandungan...
Jual Obat Aborsi Hongkong ( Asli No.1 ) 085657271886 Obat Penggugur Kandungan...
ZurliaSoop
 

Kürzlich hochgeladen (20)

TỔNG ÔN TẬP THI VÀO LỚP 10 MÔN TIẾNG ANH NĂM HỌC 2023 - 2024 CÓ ĐÁP ÁN (NGỮ Â...
TỔNG ÔN TẬP THI VÀO LỚP 10 MÔN TIẾNG ANH NĂM HỌC 2023 - 2024 CÓ ĐÁP ÁN (NGỮ Â...TỔNG ÔN TẬP THI VÀO LỚP 10 MÔN TIẾNG ANH NĂM HỌC 2023 - 2024 CÓ ĐÁP ÁN (NGỮ Â...
TỔNG ÔN TẬP THI VÀO LỚP 10 MÔN TIẾNG ANH NĂM HỌC 2023 - 2024 CÓ ĐÁP ÁN (NGỮ Â...
 
Understanding Accommodations and Modifications
Understanding  Accommodations and ModificationsUnderstanding  Accommodations and Modifications
Understanding Accommodations and Modifications
 
General Principles of Intellectual Property: Concepts of Intellectual Proper...
General Principles of Intellectual Property: Concepts of Intellectual  Proper...General Principles of Intellectual Property: Concepts of Intellectual  Proper...
General Principles of Intellectual Property: Concepts of Intellectual Proper...
 
Accessible Digital Futures project (20/03/2024)
Accessible Digital Futures project (20/03/2024)Accessible Digital Futures project (20/03/2024)
Accessible Digital Futures project (20/03/2024)
 
Graduate Outcomes Presentation Slides - English
Graduate Outcomes Presentation Slides - EnglishGraduate Outcomes Presentation Slides - English
Graduate Outcomes Presentation Slides - English
 
Towards a code of practice for AI in AT.pptx
Towards a code of practice for AI in AT.pptxTowards a code of practice for AI in AT.pptx
Towards a code of practice for AI in AT.pptx
 
The basics of sentences session 3pptx.pptx
The basics of sentences session 3pptx.pptxThe basics of sentences session 3pptx.pptx
The basics of sentences session 3pptx.pptx
 
Interdisciplinary_Insights_Data_Collection_Methods.pptx
Interdisciplinary_Insights_Data_Collection_Methods.pptxInterdisciplinary_Insights_Data_Collection_Methods.pptx
Interdisciplinary_Insights_Data_Collection_Methods.pptx
 
Exploring_the_Narrative_Style_of_Amitav_Ghoshs_Gun_Island.pptx
Exploring_the_Narrative_Style_of_Amitav_Ghoshs_Gun_Island.pptxExploring_the_Narrative_Style_of_Amitav_Ghoshs_Gun_Island.pptx
Exploring_the_Narrative_Style_of_Amitav_Ghoshs_Gun_Island.pptx
 
Jamworks pilot and AI at Jisc (20/03/2024)
Jamworks pilot and AI at Jisc (20/03/2024)Jamworks pilot and AI at Jisc (20/03/2024)
Jamworks pilot and AI at Jisc (20/03/2024)
 
2024-NATIONAL-LEARNING-CAMP-AND-OTHER.pptx
2024-NATIONAL-LEARNING-CAMP-AND-OTHER.pptx2024-NATIONAL-LEARNING-CAMP-AND-OTHER.pptx
2024-NATIONAL-LEARNING-CAMP-AND-OTHER.pptx
 
How to Create and Manage Wizard in Odoo 17
How to Create and Manage Wizard in Odoo 17How to Create and Manage Wizard in Odoo 17
How to Create and Manage Wizard in Odoo 17
 
Python Notes for mca i year students osmania university.docx
Python Notes for mca i year students osmania university.docxPython Notes for mca i year students osmania university.docx
Python Notes for mca i year students osmania university.docx
 
Fostering Friendships - Enhancing Social Bonds in the Classroom
Fostering Friendships - Enhancing Social Bonds  in the ClassroomFostering Friendships - Enhancing Social Bonds  in the Classroom
Fostering Friendships - Enhancing Social Bonds in the Classroom
 
Holdier Curriculum Vitae (April 2024).pdf
Holdier Curriculum Vitae (April 2024).pdfHoldier Curriculum Vitae (April 2024).pdf
Holdier Curriculum Vitae (April 2024).pdf
 
How to Manage Global Discount in Odoo 17 POS
How to Manage Global Discount in Odoo 17 POSHow to Manage Global Discount in Odoo 17 POS
How to Manage Global Discount in Odoo 17 POS
 
Google Gemini An AI Revolution in Education.pptx
Google Gemini An AI Revolution in Education.pptxGoogle Gemini An AI Revolution in Education.pptx
Google Gemini An AI Revolution in Education.pptx
 
Unit 3 Emotional Intelligence and Spiritual Intelligence.pdf
Unit 3 Emotional Intelligence and Spiritual Intelligence.pdfUnit 3 Emotional Intelligence and Spiritual Intelligence.pdf
Unit 3 Emotional Intelligence and Spiritual Intelligence.pdf
 
NO1 Top Black Magic Specialist In Lahore Black magic In Pakistan Kala Ilam Ex...
NO1 Top Black Magic Specialist In Lahore Black magic In Pakistan Kala Ilam Ex...NO1 Top Black Magic Specialist In Lahore Black magic In Pakistan Kala Ilam Ex...
NO1 Top Black Magic Specialist In Lahore Black magic In Pakistan Kala Ilam Ex...
 
Jual Obat Aborsi Hongkong ( Asli No.1 ) 085657271886 Obat Penggugur Kandungan...
Jual Obat Aborsi Hongkong ( Asli No.1 ) 085657271886 Obat Penggugur Kandungan...Jual Obat Aborsi Hongkong ( Asli No.1 ) 085657271886 Obat Penggugur Kandungan...
Jual Obat Aborsi Hongkong ( Asli No.1 ) 085657271886 Obat Penggugur Kandungan...
 

Setting up your classroom projector

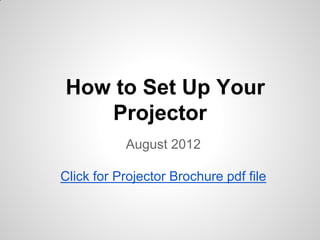
  • 1. How to Set Up Your Projector August 2012 Click for Projector Brochure pdf file
  • 2. First, you need to find your projector box.
  • 3. Open the box and this is what you'll find.
  • 4. Out of the box, these are the only pieces you will need. A black VGA/audio cable and projector remote control.
  • 5. Here is what the back of your computer should look like. Pay attention to the vertical (video port) slot on the left.
  • 6. On the wall, there should be a new wall outlet.
  • 7. You will also need a Black & White signal splitter cable.
  • 8. Connect the Black end of the splitter into the vertical video port which is in the back of your computer.
  • 9. You will also need a white DVI/VGA Adapter.
  • 10. This end of the adapter will connect to one end of the cable that was in the projector box. This end of the adapter will connect to one of the two output connectors on the Y cable
  • 11. Connect the white DVI/VGA adapter to one of the ends of the splitter.
  • 12. Connect the end of the splitter (Y cable) that does not have an adapter attached to the existing monitor cable.
  • 13. Connect the black long VGA cable to the end of the Y cable with the white DVI/VGA adapter.
  • 14. Connect the audio cord to the green outlet jack in the back of the computer.
  • 15. Connect the other end of the VGA black cord to the wall.
  • 17. Now you can turn on your computer!
  • 18. Here is a picture of all the features on your remote. 1. Power button 2 Computer button (cycles through connected computer sources) 3. Video button (cycles through connected video sources) 4. Numeric buttons (enter numbers) 5. Auto button (automatically adjusts position, tracking, and sync settings) 6. Aspect button (selects the image aspect ratio) 7. Num button (when held down, switches numeric buttons to number function) 8 . Menu button (accesses projector menu system) 9. Arrow buttons (move through on-screen options and control wireless mouse functions) 10. Enter button (selects options and controls wireless mouse functions) 11. User button (customizable for different functions) 12. Page up/down buttons (control presentation slides) 13. E-Zoom +/– buttons (zoom into and out of the image) 14. A/V Mute button (turns off picture and sound) 15. Help button (accesses projector help information) 16. Freeze button (stops video action) 17. Volume up/down buttons (adjust speaker volume) 18. Pointer button (activates on-screen pointer) 19. Esc button (cancels/exits functions and controls wireless mouse functions) 20. Color Mode button (selects display modes) 21. LAN button (cycles between network and optional Quick Wireless Connection Key sources) 22. USB button (cycles through connected USB sources) 23. Source Search button (searches for connected sources)
  • 19. Turn on your projector with your remote, be sure to point to the board, not the projector.
  • 20. If you have an WindowsXP as your operating system, you will need to right click on the screen to open the NVIDIA control panel.
  • 21. On an XP computer you will see this screen after you click the NVIDIA . You need to check “The same on both displays (Clone)” A Windows 7 computer uses the keystroke combination of the windows key and P to select “duplicate screen”
  • 24. Credits: Margaret DeFazio Julie Dutczak Adrianne Fedorchuk Jeff Gay Jeanne Gutowski Sean Mahoney Christine Randall Cathy Rosenstock 2012 MPS Summer Institute Enhancing Your Curriculum with Projectors Course