1. Art Quilting 101 with Wendy Butler Berns
Welcome
01
TABLE OF
CONTENTS
02
03
Wendy Butler Berns
Why,yes!It’ another quality course from…
s
Projects & Techniques
22
Index
23
I look forward to exploring art quilting with you on Craftsy.com. The
Art Quilt continuum runs from those just straddling the fence of traditional quilting to others creating completely avant-garde work, and everything in between! Art quilts can incorporate traditional techniques,
but many quilt artists challenge the traditional definition of the quilt.
We innovate by applying art principles, using techniques like drawing,
painting and sculpting, while working with the tactile richness of fabric
and threads. Like all art, art quilts are individual, subjective expressions. I will take you through simple steps to prepare you for creativity
and create a safe environment. I invite each of you to remember when
we were in kindergarten, playing and experimenting in very spontaneous fashion. Each of you will explore your own direction and find inspiration that will charge your creative energies. So let’s begin playing
and exploring!
Guest Artists
11
Let me introduce this course with my definition of an art quilt: A creative,
joyous and spontaneous journey that touches the heart and soul through
texture, color and design. Our quilted creations explore and express our
feelings and ideas.
Materials & Tools
08
WELCOME
Session Overviews
04
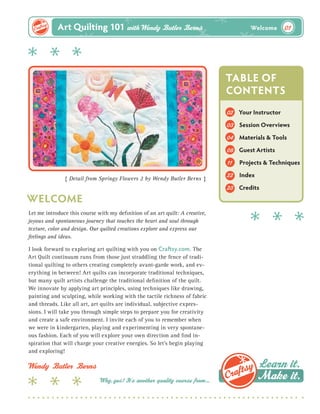
{ Detail from Springy Flowers 2 by Wendy Butler Berns }
Your Instructor
Credits
2. Art Quilting 101 with Wendy Butler Berns
YOUR INSTRUCTOR
Wendy Butler Berns is an award-winning quilt artist
who found her passion for quilting in 1993. Since 1997,
she has taught and lectured about the art of quilting at
conferences, guilds and retreats across the country.
Wendy’s original art quilts are noted for their bold
use of color, unusual fabrics and a combination of
unconventional techniques. Her quilts tell stories
of people, places and journeys that have shaped her
life. Her work has appeared in regional, national and
international juried shows, including the International
Quilt Festival in Houston, American Quilter’s Society
show in Paducah, Ky., Mid-Atlantic Quilt Festival in
Hampton, Va., and Pacific International Quilt Festival
in Santa Rosa, Calif. She regularly participates in
group exhibitions, has curated numerous exhibitions
and has been honored with solo shows as well.
In October 2009, Wendy
received the Jewel Pearce
Patterson Scholarship for
quilting teachers, awarded
annually by International
Quilt Market. Along with her
book, Photo Album Quilts
(Lark Books, 2008), she has
contributed articles to such
publications as Quilting Arts, Quilters Newsletter,
National Quilt Association Quarterly and Fons &
Porter’s Love of Quilting.
Find out more about Wendy at wendybutlerberns.com
Your Instructor
02
3. Art Quilting 101 with Wendy Butler Berns
Session Overviews
03
SESSION OVERVIEWS
Introduction
Thread Talk
Do you know what an art quilt is? Meet your instructor, Wendy Butler Berns, as she introduces you to the
fascinating world of creating art quilts with originality, spontaneity and inspiration.
Learn the best thread to attach the design elements
to your quilt. Then see the vast array of threads to
add color, shine, design and glitter to your artwork.
Wendy also talks about bobbins, needles and general
troubleshooting while quilting.
Getting Started
Art quilts are about playing – combining colors,
shapes and textures. Wendy will walk you through
what you need to create your masterpiece, from
selecting background materials to applying fusible
webbing to your design pieces. Then arrange, rearrange and learn to play again on your quilt.
Texturing Ideas
Thread Embellishments
Wendy reviews some design principles to help you
incorporate drama and interest into your masterpiece.
She reviews the aspects of balance, unity and variety,
and shows examples of how these are used in other
artists’ work.
It’s time to doodle – not just on paper, but also
with thread and yarn. You will be introduced to
free-motion quilting, the process of adding pattern and dimension to your quilt with colorful and
unique thread.
{ Geometric Explosion by Wendy Butler Berns }
Go beyond standard thread designs with yarn couching and bobbin drawing that make your pieces pop.
Create a collage to add interest and definition to a
section of the quilt.
Principles of Design
To Border or Not To Border
Wendy gives you some guidelines on whether to add
a border, binding or other finishing technique. Then
follow her step-by-step methods to audition materials
and square up the fabric.
Machine Quilting & Binding
After you decide on batting and backing, learn techniques to machine quilt all the layers together. Learn
how to prepare and attach the binding to your quilt.
Finalize your masterpiece with a wall hanger and label.
Postcards & Finishing Details
Learn novelty finishing techniques, such as yarn bindings and zigzag edging, while creating quilted postcards.
4. Art Quilting 101 with Wendy Butler Berns
Materials & Tools
04
MATERIALS & TOOLS
HANDY CHECKLIST
Sewing machine with darning, walking,
regular & zigzag feet
Fabric shears
Scissors
Bobbins to wind cotton, MonoPoly &
colored threads
Sewing machine needles – Schmetz
Topstitch No. 90/14, Microtex No. 80/12
Several lengths of thread
Rotary cutter & cutting board
Rotary ruler, preferably 6 ½ ” by 24 ”
Design board
Iron & ironing surface
Teflon press cloth
SUPPLIES
Monofilament thread, YLI or Superior, clear
and smoke
MonoPoly thread
Cotton, 40-weight rayon, metallic and
decorative threads
½ yard each of several background fabrics
½ to 1 yard Pellon Décor-Bond No. 809
heavy fusible stabilizer
Scraps, 6 to 8 inches each, of many values
and patterns
Iron cleaner
Water-soluble stabilizer, Sulky Solvy or
Superior Threads Dissolve
½ yard tulle, black or gray
½ yard backing
½ yard batting
{ continued next page }
5. Art Quilting 101 with Wendy Butler Berns
Materials & Tools
05
MATERIALS & TOOLS
Tips to Remember
> A portion of these supplies will be used for your
practice piece and a portion for your sampler.
> The more colors of thread you have,
the more intricate your design can be.
> Start with empty bobbins.
> Try out MonoPoly thread in bobbins, too.
> For background fabrics, have tone-on-tone,
solid and hand-dyed in an array of colors.
> For design elements, include light, medium and
dark values; various scale prints; plaids, stripes
and favorite fabrics from your stash.
> Fuse Wonder-Under onto the design elements
ahead of time.
> In place of Wonder-Under, you can use
Lite Steam-a-Seam II; it is slightly tacky and can
be pressed in place.
> Leave fusible protective paper on the back of
the fabric to trace designs.
> In place of iron cleaner, a fabric softener dryer
sheet works to clean a hot iron.
> Heavier threads that only go in the bobbin:
Glamour by Madeira; YLI Pearl Crown Rayon;
YLI Candlelight; and Razzle Dazzle by
Superior Threads
> For machine bobbin drawing: If your machine
uses a separate bobbin case and you want to
try the technique, you will need a second
bobbin case for your machine. You will adjust
the tension. This is a larger investment you may
or may not be ready to make.
{ continued next page }
6. Art Quilting 101 with Wendy Butler Berns
Materials & Tools
06
WHERE TO PURCHASE
Threads
Other Items
Threads, bobbin drawing thread, needles,
water-soluble stabilizer
Teflon/craft press sheet, lots of fun specialty
embellishments, iron cleaner
All That Thread
JoAnn Fabrics
Threads including Aurifil cotton
Batting, Décor-Bond, Wonder Under and tulle by the
yard; Solvy Water-Soluble Stabilizer
Superior Threads
YLI Corporation
Embellishment Village
Monofilament thread, clear and smoke,
many other threads
Quilter’s Rule
Sulky Threads and Stabilizers
Freezer Paper
Rayon embellishing threads, many variegated threads.
Check their store locator for your local retailer
Look in the plastic wrap aisle at your grocery store
Rotary ruler I like to use
Madeira Threads
Bobbin drawing threads, rayon embellishing threads
Robison-Anton Threads
I use their rayon threads. See store locator for
your local retailer
Red Rock Threads
Online thread retailer
Art Fabrik
Lovely hand-dyed threads for hand and
machine stitching
{ continued next page }
7. Art Quilting 101 with Wendy Butler Berns
REFERENCES & RESOURCES
Art and Quilt: Design Principles and Creativity Exercises,
Lyric Kinard (Interweave, 2009)
Color and Composition for the Creative Quilter,
Katie Pasquini Masopust & Brett Barker (C&T, 2005)
Design Explorations for the Creative Quilter,
Katie Pasquini Masopust (C&T, 2008)
Design Essentials: The Quilter’s Guide,
Lorraine Torrence (That Patchwork Place, 1998)
Fearless Design for Every Quilter,
Lorraine Torrence and Jean B. Mills (C&T, 2009)
The Quilter’s Book of Design,
Ann Johnston (Second edition, self-published, 2008)
Materials & Tools
07
8. Art Quilting 101 with Wendy Butler Berns
Guest Artists
08
GUEST ARTISTS
As I indicated in my introduction, the spectrum of
styles and techniques varies extensively. Since I have
only touched the surface of the techniques that have
allowed me to find my own voice, I invited guest
quilters to send their work for you to see. Enjoy this
amazing work and be inspired to explore the many
different directions there are. My guests are colleagues
I travel and teach with, who have been mentors to me
throughout my journey. They are all masters of the
techniques and processes they use. Have fun
exploring their websites and blogs!
Art Cloth
Maggie Weiss
One is figurative images on silk broadcloth in
rusty earth tones with crows, created by dying &
discharging using deconstructed silk screening and
Thermofax silkscreens. The other is sueded rayon
dyed in blue greens via screen printing and
Thermofax silkscreening with abstract images.
Surface Design
Lyric Kinard
Three Shells: Hand dyed, screen printed, foiled, hand
stitched. This piece was inspired by the beauty and
symmetry of the sliced shells that I found in my
mother’s sewing kit. Many techniques were used in
this simple composition using the beautiful linear
forms of the shell print.
{ Under the Spreading... by Nancy Price }
Thread Painting & Embellishing
Nancy Prince
Under the Spreading… Thread painted and custompainted background. The inspiration for the quilt came
from a photograph I took. I loved the serenity of the area.
Painted Surface
Maria Elkins
Windblown: Hand painted wholecloth quilt,
Tsukineko All-Purpose Ink, Jacquard Colorless
Extender, fabric, gel pen. “Windblown” is a tribute to
a dear friend who has stood firm and remained joyful
despite the various challenges she has had to face in
her young life.
Rust: Dyed cloth. Synthetic organza is fused to the
surface, then zapped with a heat gun to melt away
parts and beaded. The textures of the natural world
are a great inspiration for me. The complex process
of decay can be beautiful. My interpretation with
cloth and beads brings attention to the process of
manmade materials returning to nature.
{ continued next page }
9. Art Quilting 101 with Wendy Butler Berns
Guest Artists
09
GUEST ARTISTS
Multiple TechniquesEnhanced Photo Imagery
Denise Tallon Havlan
Little Juggler: Photo imagery enhanced with fabric
paint, pen and Prismacolor pencils. Machine
appliquéd and machine quilted. Her granddaughter
is her inspiration for this piece, imagining her in a
dance costume, thus a circus juggler.
Snapshot: Shannon’s Bantam - Photo transfer,
textile paints, colored pencil, machine embroidery,
hand and machine appliquéd, and machine quilted.
Again inspired by images of her granddaughter.
2009 IQA Show in Houston, $5,000 Fairfield’s
Master Award for Contemporary Artistry. This
quilt continues to travel to many shows and has
garnished numerous prestigious awards.
Hand-Dyed Fabric
Frieda Anderson
Frieda dyes fabrics in luscious colors using
Procion MX dyes, then uses her own dyed cotton,
silks and silk/rayon fabrics in her fused art quilts.
Hand Embellishment & More
Laura Wasilowski
Kay’s Bouquets #2: Hand-dyed cotton fabric and
thread, fused appliqué, hand embroidered and
machine quilted. Laura hand dyes all her fabrics
for her art quilts as well as luscious hand dyed
threads. Her garden is an inspiration for so much
of her work.
{ Kay’s Bouquets #2 by Laura Wasilowski }
Beading
Lisa S. Binkley
Midsummer Convocation: Machine pieced and
quilted; raw-edge appliqué; hand embroidered
with beads, buttons and silk embroidery thread.
This quilt was exhibited in the 2010 fall quilt and
flower show at Olbrich Botanical Gardens. “I love
the colors and images that appear in this quilt.
Dragonflies, leaves, flowers, and faces appear
frequently in my work, and I think the faces in
particular add a spark of ‘life’ to my fiber work
that wouldn’t otherwise be there. I created the
quilt to celebrate summer and also as a teaching
tool for my bead embroidery workshops that I
offer around the country. Part of what I tried to
do with the bead embroidery in the quilt was
to create a lot of variations on bead embroidery
techniques including embellishing a set of six
vintage lime-green buttons in six different ways.”
{ continued next page }
10. Art Quilting 101 with Wendy Butler Berns
Guest Artists
10
GUEST ARTISTS
Judy Coates Perez
Black and Bloom All Over: Techniques: Whole
cloth painted cotton sheeting with Acrylic inks,
textile paints, hand carved stamps, stencils with
Shiva Paintstiks, printed tea bags adhered with gel
medium, free-motion quilted. This quilt appeared in
the International Quilt Festival, Long Beach, part of
the Between the Spaces traveling exhibit. The year
following the end of my marriage had some dark and
difficult times (represented by black thorny weeds)
but also in the space between there was growth,
blossoming, renewal, light and life.
{ Corona 2: Solar Eclipse by Caryl Bryer Fallert }
Hand Embellishment & More
Caryl Bryer Fallert
(cont.)
Illusion #46: This quilt is part of a series exploring
the illusion of overlapping transparent triangles. The
quilting was done with polyester topstitching thread,
beginning with a series of horizontal and diagonal
feathered plumes crossing the quilt from top to
bottom. The feathers are quilted in lighter colored
threads that contrast with the background, and the
negative spaces between the feathers are quilted in
concentric loops, with variegated thread that blends
with the underlying fabrics.
Corona 2: Solar Eclipse: Hand-dyed and painted,
machine pieced and quilted, asymmetrical design.
This is more a portrayal of my feelings about the
power of the sun than an exact representation of
what a scientist might see through a telescope. This
quilt is in the permanent collection of the National
Quilt Museum in Paducah, Ky., after winning the
Best of Show $10,000 Purchase Award at the 1989
American Quilter’s Society Show. It was named one
of the “Hundred Best Quilts of the 20th Century” at
the 2000 International Quilt Festival in Houston.
{ Detail from Black and Bloom All Over
by Judy Coates Perez }
11. Art Quilting 101 with Wendy Butler Berns
Projects & Techniques
11
DESIGN ELEMENTS
DESIGN PRINCIPLES
Line
Balance
A thin continuous mark. A line makes the eye follow
it. A tool to denote direction and movement.
Visual balance is grounded in our understanding of
physical balance. Visual weight is created by size,
value and placement of elements in the quilt design.
Shape
A two-dimensional form distinguished from its
surroundings by its outline. Shapes are created by
contrast within their surroundings.
Value
Lightness or darkness of color. Contrast. Despite the
appeal of color it is the primary values that define
the design’s composition.
Color
Color is what we see first and foremost. It provides
the personality, sets the mood for our design.
Pattern
A repetitive design. It is created when the viewer is
led to anticipate the same elements in the design.
Scale within pattern is the relative size of one object
to another.
Texture
Surface and tactile quality of an object. Tactile
texture is what one can actually feel. Visual texture
is the appearance of texture, but no actual difference
in surface can be felt.
Unity
Creating like elements and connections between
them. This can be achieved throughout the design
by repeating colors or fabrics, pattern or shape, or
techniques.
Variety
An element of the whole that differs from the rest.
This can be achieved with change in line, size, color,
value, texture or placement.
12. Art Quilting 101 with Wendy Butler Berns
Projects & Techniques
12
PROJECTS & TECHNIQUES
Embellishing with Threads
HANDY CHECKLIST
Presser Feet
Darning foot, regular zigzag foot,
walking foot
Threads
40 to 50 wt. threads for embellishing, in
rayon, cotton & polyester. Choose different values that will contrast with your background fabrics.
Metallic threads (optional)
Monofilament thread
Bobbins with monofilament thread &/or
neutral cotton or rayon
Variegated thread for zigzagged edging
Thicker yarns for couching (optional)
Notions
80/12 Microtex Sharp needles
90/14 Topstitch needles
(if using metallic threads)
Fabrics
Be sure the fabrics you choose for your
design elements contrast well with each
other as well as the background fabric
Background fabric 12” x 14”
Sun 6” x 10” large scrap
Moon 6”x 10” large scrap
Facial Features: A variety of small scraps for
eyelashes, cheeks & lips
Eyes: 3 different values of blues for open eye,
one scrap for winking eye
12”x 14” piece fusible stabilizer (Décor-Bond)
Fusible web -½ yard
(I prefer Wonder-Under)
Backing: Fat quarter
Paper for pattern
Compass
Measuring tape
Paper scissors
Fabric shears
{ continued next page }
13. Art Quilting 101 with Wendy Butler Berns
Projects & Techniques
13
PROJECTS & TECHNIQUES
Embellishing with Threads
(cont'd)
INSTRUCTIONS
Make A Face Playtime with “Winkin & Blinkin”
What fun it is to play! As we engage our playful spirit,
it challenges us to work more spontaneously, thus
awakening the creative energies hidden inside us.
"Make a Face Playtime" begins as you work small, using
mix-and-match design elements, fusible web and freemotion embellishing. Approx. finished size: 11” x 13”
Preparing Background
> I like to do a lot of embellishing across the body of
my quilt top, so I prefer to do this extra free-motion
embellishing on a quilt top that has been stabilized
with a fusible stabilizer such as Décor-Bond. With
this method, the extra stitching created with the
doodling and embellishing only appears on the back
of the fusible stabilizer and is then hidden when I
layer the project for machine quilting. As long as the
embellishing is not too dense, the fusible stabilizer
is an alternative to using a hoop, and helps to reduce
the puckering that occurs when doing denser embellishing stitches.
> Cut a 12-inch by 14-inch piece of background
{ Layout 1 }
Creating Facial Features with Fusible Web
> I have included several different facial designs for
you to choose to individualize your design. Mix and
match the facial design features to your liking. (Fig.
1 and 2)
fabric and fusible stabilizer.
> Trace the different parts of the facial features to
> Fuse the stabilizer to the back of the background
the paper side of the fusible web. For design parts that
overlap, such as the different parts of the eye, mouth,
or sun and moon, add an extra 1⁄8 inch to accommodate the overlap. (Note: When working with fusible
web, your design will be reversed; it may be necessary
to reverse the original design before tracing.) When
completed, cut the traced sections out of the paperbacked web with a ¼-inch surplus all around.
fabric using a hot iron. Start in the center, moving
the iron slowly to the outer edges (about 10-12 seconds per section or until you see the fusible adhering to the fabric) across the surface. Watch out for
bubbles or puckers as you press. Also be careful not
to touch the hot iron to the fusible directly.
{ continued next page }
14. Art Quilting 101 with Wendy Butler Berns
Projects & Techniques
14
PROJECTS & TECHNIQUES
Embellishing with Threads
(cont'd)
INSTRUCTIONS
> Next, using the manufacturer’s instructions, bond
the paper-backed traced web designs to the back sides
of the chosen fabrics with your iron. When the fusible
is cool, cut the designs out directly on the traced lines
and peel the paper backing off. Last, position fused
design elements onto your stabilized background and
iron the fused fabrics in place according to the manufacturer’s instructions.
Embellishing with Threads
> Now it is time to play with decorative threads,
doodles and your darning foot or Bernina stitch regulator (BSR). I love adding extra dimension and texture
to my quilts by incorporating many of the specialty
threads, yarns and fibers available. I would describe
my machine embellishing as drawing and doodling
with my free-motion darning foot. Simple machine
embellishing with threads enhances the facial features
by creating a more pronounced line. See examples
for ideas you can use to embellish the various facial
features for your “Winkin’ and Blinkin” (Fig. 3).
> Use a Microtex 80/12 needle in your machine and
thread it with a decorative thread that blends or contrasts with your fused design elements. (Use a Topstitch 90/14 for metallic and other shiny threads.)
> Prepare your bobbin with monofilament, a neutral
color thread or similar thread color used in the top of
the machine.
> Attach presser foot of your choice, or the darning
foot for the free-motion embellishing.
Couching with Decorative Cording & Yarn
Using yarn couched in place with a MonoPoly thread
and a small zigzag stitch allows me to add more visual
texture to my work. You can include this textural
embellishment as well if you choose.
> Choose a yarn that compliments your project and
place it over the edge of your fused design.
> Set the zigzag width to the width of the yarn and
use monofilament thread in the top and bobbin of your
machine.
> Prepare your presser foot. There are numerous
presser feet choices you can consider using. You can
use your darning foot, a couching foot or your regular
zigzag foot for this process.
> Leaving a ½-inch tail, zigzag in place several
stitches, then slowly stitch the yarn in place. Continue
stitching a few inches at a time, stopping to readjust
the position of the yarn along the way.
> Refer to Machine Embellishing ideas featured in Fig.
3 (see page 17) to inspire you and try a few ideas of
your own.
> Free-motion embellish each of the design elements
as desired.
{ continued next page }
15. Art Quilting 101 with Wendy Butler Berns
Projects & Techniques
15
PROJECTS & TECHNIQUES
Embellishing with Threads
(cont'd)
> When you return to the beginning, cut the original
tail off, and overlap the yarn about ½ inch and continue to stitch another ½ inch. Trim off the yarn and
zigzag in place to secure your stitches.
Layer & Machine Quilt
Once you have completed your embellishing, it is time
to prepare the quilt for quilting.
> Steam your quilt top to smooth any puckering that
may have occurred while embellishing.
> Square the edges of your quilt top.
> Cut your batting and backing about 1 inch larger
than the quilt top.
> Pin baste with safety pins about every 4 inches.
> Stitch in the ditch around each of the design elements using your darning foot No. 9, No. 26 or BSR.
Once the three layers are secured with your stitch in
the ditch around the primary design elements, you can
remove your basting pins.
> Continue to quilt the background as desired.
What, No Binding? Quick Finishing Technique
Here’s a quick and easy edge finish for a small quilt.
> With your rotary cutter, trim all three layers flush
with each other. You can either trim your little quilt
with squared corners and straight edges, or with slight
undulating curves along the edges.
> Set your machine to stitch width of 5.5 and stitch
length of 1.
> Put on your machine’s walking foot No. 50.
> Choose a fun variegated thread that will enhance
your project.
> Stitch all around the trimmed edge once with stitch
width of 5.5 and stitch length of 1. Then stitch around
the trimmed edge again with the stitch width of 5.5
and the stitch length of 2. This stitch will finish off
your little quilt without using a formal binding!
Hanging Pocket and Label
Add a small hanging pocket at the top back of your
little quilt for easy hanging. Do not forget to create a
label with the quilt name, details about the quilt, your
name as the quilter and date you completed the project.
An alternative project to consider with this design
Create two to four blocks and stitch them together for
a larger wall quilt.
16. Art Quilting 101 with Wendy Butler Berns
Projects & Techniques
16
PROJECTS & TECHNIQUES
Machine Embellishing – Taming those Threads
HANDY CHECKLIST
Tools
Sewing machine in good working order.
You need to be familiar with how your
machine works!
Darning foot a must
A good pair of quilting gloves with grips on
the fingertips (Machingers size S or XS) can
be helpful for gripping the fabric
Needles
Microtex 12/80 - I use this for all my piecing
and machine quilting, until my thread starts
breaking.
Top stitch 14/90 - For specialty threads–
metallics, hologram threads and some rayons.
Heavier threads of 30- and 28-weight all
need the larger eyed needle of the Top
Stitch 14/90.
Threads
The choices of threads on the market are
endless. Beware: You will soon have a thread
collection as large as your fabric stash.
Threads for embellishing
Egyptian long-staple cotton such as Aurifil or
Masterpiece by Superior are wonderful for
machine quilting and come in hundreds of
colors. Most of these are 50 weight.
Rayon threads are beautiful but are not as
strong, so work best on wall quilts. Most are
40 weight.
Trilobal polyesters have a lovely sheen to
them. 40 and 30 weight.
Monofilament threads: YLI Wonder or
MonoPoly brands, clear and smoke
Sparkly threads: Metallics, Silver, hologram
threads. Can be fussy. Stitch slowly and use
the Topstitch 14/90 needle.
Bobbin threads: Cotton, rayon, monofilament thread or Bottom Line by Superior. To
deal with tension issues, I most often use
monofilament thread in my bobbin or a color
similar to my top thread in a cotton or rayon.
I change top thread colors often, so with
monofilament in the bobbin, I do not have to
change the bobbin thread when I change the
top thread. When using monofilament in the
bobbin, wind slowly!
Threads for bobbin drawing: Most machines
need a second bobbin case for these heavier
threads. Threads for bobbin drawing include
Glamour, Candlelight, Perle Cotton, Razzle
Dazzle. Other threads and yarns to try are
ones with a smooth surface, not too nubby –
silk ribbon, embroidery floss types or handdyed heavier threads.
{ continued next page }
17. Art Quilting 101 with Wendy Butler Berns
Projects & Techniques
17
PROJECTS & TECHNIQUES
Machine Embellishing –Taming those Threads (cont'd)
Top Tension
Stabilizing
You will need to fiddle with your top tension as you
change threads, as each one will respond differently
to each other. Keep a practice piece next to your machine to test your tension and threads before starting
on your project. Make notes as to what works!
For heavy embroidery/thread painting projects
Iron your quilt top to Pellon Décor-Bond, a fusible
stabilizer. It is not removed and becomes a fourth
layer in your piece. It will offer enough support to
prevent puckering for light to medium embellishing.
Use an embroidery hoop in addition to Décor-Bond if
you will be doing concentrated heavy embroidery in
an area larger than 2 inches.
Cross-Wound and Straight-Wound Threads
Threads that are cross-wound on the spool can stand
up straight or lie flat on the spindle. Threads that are
straight-wound on the spool must stand up straight
on the spindle. That includes monofilament threads.
{ Fig. 3. See page 14 }
Practice Piece
Keep a practice piece next to your machine to test
your tension and threads before starting on your
project. The practice piece should be layered similarly
to your project. Example: for embellishing, layer quilt
top with Décor-Bond. If testing threads for quilting,
then have a layered practice piece with top fabric,
batting and backing fabric.
18. Art Quilting 101 with Wendy Butler Berns
18
PROJECTS
Creating Postcard-Size Tiny Art Quilts
INSTRUCTIONS
> When working with small projects, I always lay out
my fabrics ½ inch to 1 inch larger than the finished
piece, so there is room to trim after the embellishing
process and before I layer the project for quilting.
> Take background fabric and fuse Décor-Bond to the
back to stabilize piece.
> Create design on the front of the background fabric.
Use fused design elements or decorative threads. The
sky is the limit to what you can create.
{ Three Pines by Wendy Butler Berns }
> Place the piece of batting on the back of the fused
and decorated piece.
SUPPLIES
Background fabric, 4 ½” x by 6 ½”
Décor-Bond Fusible Stabilizer,
same size as above
Piece of batting, same size as above
Backing or a second piece of
Décor-Bond, same size as above
Fused design elements or a design you
wish to create on front of tiny art quilt
Threads to embellish design
> With the little postcards, I do my thread embellishing and the simple quilting all as one step, so the
next step is to do some simple embellishment of your
design with complimentary threads. Not much is
needed since the piece is so small.
> Next, use a piece of background fabric or another
piece of Décor-Bond and place on the back. If using
the Décor-Bond, it can be fused in place. If you are
using a piece of backing fabric, simply lay it over the
back. With this technique, the decorative stitching
will be hidden behind the backing piece.
> Time to trim the little piece to the finished size. I
trim to about 6 inches by 4 inches.
{ continued next page }
19. Art Quilting 101 with Wendy Butler Berns
PROJECTS
Creating Postcard-Size Tiny Art Quilts
(cont'd)
> For a quick finish, zigzag around the tiny quilt
with a wide zigzag stitch and a fun thread. Set machine to a width of 4 and a stitch length of just under
1. I use my walking foot for this process. This will not
be a solid satin stitch, but I like a bit of space between
my stitches.
> Stitch two times around little piece with the zigzag
stitch set at your preferred width and length. I like
using a variegated thread or one that complements the
colors in the design. Use the same thread in the bobbin.
There are so many ideas to play with. Try a new technique, experiment with a new thread, create little gifts
for friends, practice your machine quilting, add embellishments such as yarn, beads, charms, etc. Enjoy!!
Another Idea
This technique can be used to create tinier artist trading cards the size of a business card. The finished size
is 2 inches x 3½ inches. Start with fabrics, batting and
stabilizer approximately ½ inch larger all around than
finished piece.
19
20. Art Quilting 101 with Wendy Butler Berns
Index
22
INDEX
Introduction
Texturing Ideas
>
>
>
>
>
>
>
>
>
>
>
About Wendy Butler Berns
The Craftsy Platform
What Is an Art Quilt?
Key Aspects
Originality, Spontaneity, Inspiration
Techniques
Design Principles
Getting Started
>
>
>
>
Learning To Play
Selecting the Background
Adding Fusible Web
Playing with Design
Thread Embellishments
>
>
>
>
Doodling with Thread
Free-motion Doodling
Moving with Thread
Your Practice Piece
Thread Talk
>
>
>
>
>
>
Thread Addiction
Bobbins and Such
The Point of Needles
Troubleshooting
Time to Play
3-D Design Elements
Couching
Bobbin Drawing
Collage with Water Soluble Stabilizer
Adding Tulle
Principles & Elements of
Design
>
>
>
>
Aspects of Balance
Aspects of Unity
Aspects of Variety
Design Elements
To Border or
Not To Border
> Auditioning Borders and Bindings
> Squaring Up the Fabric
> Adding the Border
Machine Quilting
& Binding
>
>
>
>
>
>
Quilt Batting
Machine Quilting Techniques
Preparing the Binding
Attaching Binding
Turning and Topstitching
Create Your Label
Postcards &
Finishing Details
> Yarn Binding
> Postcards
> Zigzag Edging