SlideShare a Scribd company logo
1 of 156
Download to read offline
MxCC 2.0: Manual
EN


                                                                                                  The HiRes Video Company

                                                                                                                                      HiRes

                                                                                                                              3 Megapixel
                                                                                                                                2048 x 1536


                                                                                             EN
                                                                                                                               Software zoom


                   Professional IP Video-Management
                    Professionelles IP Video-Management                                                                              Skyline

                                                                                                                               Format free
                                                                                                                             Each image format
                                                                                                                               freely definable


                                                                                                                              30 Frames/s
                                                                                                                               VGA (640 x 480)
                                                                                                                                30 F/s Mega


                                                                                                                                Virtual PTZ
                                                                                                                               Digital pan, tilt,
                                                                                                                                    zoom


                                                                                                                                 Backlight
                                                                                                                              Safe using CMOS
                                                                                                                            without mechanical iris


                                                                                                                              Internal DVR
                                                                                                                            Internal via SD card,
                                                                                                                            external via Network


                                                                                                                                  Win/Lin/Mac

                                                                                                                                Recording
                                                                                                                              via Network on PC
                                                                                                                                up to 1 Terabyte

                                                                                                                              Microphone & speaker

                                                                                                                                    Audio
                                                                                                                             bi-directional via IP,
                                                                                                                             variable framerates

                                                                                                                               SIP-Client with video

                                                                                                                              IP Telephony
                                                                                                                                Alarm notify,
                                                                                                                             cam remote control


                                                                                                                              VideoMotion

                                        MOBOTIX: Control Center.                                                              Multiple windows
                                                                                                                            precision pixel-based
  V 2.0- 09/2009


                                                                                                                                 -22°F ... +140°F

                                                                                                                              Weatherproof
                                                                                                                            - 30° ... +60°C, IP65,
                                         Free software download: www.mobotix.de > Support > Software-Downloads              no heating necessary
                                                             Current PDF File: www.mobotix.de > Support > Manuals
                                                                     Version: 2.0, Last updated: June 15, 2009                     IEEE 802.3af

                                                                                                                                      PoE
                                                                                                                               Network power
                                                                                                                               even in winter
www.mobotix.com
www.mobotix.com


                   HiRes Video Innovations
                                                                                                                                   Robust
                   The German company MOBOTIX AG is known as the leading pioneer in network camera technology and its          No moving parts
                                                                                                                             fiber glass housing
                   decentralized concept has made high-resolution video systems cost efficient.
                                                                                                                                 MxCC/MxEasy

                   MOBOTIX AG • D-67722 Langmeil • Tel: +49-6302-9816-103 • Fax: +49-6302-9816-190 • sales@mobotix.com         Licence free
                                                                                                                            Video-Management-
                                                                                                                                  Software
MxControlCenter Manual


Notes


          © MOBOTIX AG • Security-Vision-Systems • Made in Germany

                              www.mobotix.com • sales@mobotix.com
Contents                                                                                  3/152
                                       COnTenTS

1       Concept                                                                      8
1.1     What Is MxControlCenter?                                                     8
1.2     Application examples                                                         9
1.2.1   Example: Installing And Starting Up A Small Video Monitoring System          9
1.2.2   Example: Live Monitoring Of A Parking Garage                                 9
1.2.3   Example: Live Monitoring Of Spectators In A Soccer Stadium                  10
1.2.4   Example: Live Monitoring Inside A Train Station                             10
1.2.5   Example: Monitoring An Isolated Parking Lot With An Alarm System Linked To
        The Main Office Of A Security Company                                        11
1.2.6   Example: Review Of Images And Alarms After A Burglary Occurred In An Office
        Building                                                                     11


2       Getting Started                                                             13
2.1     Installation                                                                13
2.2     Finding And Configuring Video Sources                                       14
2.2.1   Connecting MOBOTIX Cameras                                                  14
2.2.2   Finding MOBOTIX Cameras                                                     15
2.2.3   Adding Video Sources Manually                                               18
2.2.4   Using Video Sources In MxControlCenter                                      18
2.3     User Interface And Operation                                                20
2.3.1   Elements Of The Main Window                                                 20
2.3.2   Layout Manager                                                              22
2.3.3   Alarm List                                                                  23
2.3.4   Camera Configuration                                                        24
2.3.5   Update Assistant                                                            25
2.3.6   Program Settings                                                            26
2.4     Live Monitoring With numerous Cameras                                       27
2.4.1   Monitoring In Predefined Layouts                                            27
2.4.2   Monitoring The Camera Connection                                            29
2.4.3   Creating Layouts                                                            30
2.4.4   Procedure                                                                   30
2.4.5   Using The Sequencer Features                                                31
2.4.6   Using The vPTZ Features                                                     32
2.5     Alarm Management                                                            34
2.5.1   Preparing MxControlCenter                                                   34
2.5.2   Preparing The Cameras                                                       36
2.5.3   Alarm Display                                                               37
2.5.4   Alarm Acknowledgement                                                       38
2.6     Video Searches And export Features                                          39
2.6.1   Switching Display Windows In Player Mode                                    39

© MOBOTIX AG • Security-Vision-Systems • Made in Germany

www.mobotix.com • sales@mobotix.com
4/152   MxControlCenter Manual: Contents


        2.6.2 Defining Player Windows                                                41
        2.6.3 Using Video Search                                                     43
        2.6.4 Export List And Data Export                                            44
        2.7     Video Processing                                                     47
        2.7.1 Image Post-Processing                                                  47
        2.7.2 Image Distortion Correction                                            47
        2.8     Control Center And Management Features                               48
        2.8.1 Integrating Third-Party Digital/Analog Cameras                         48
        2.8.2 Controlling PTZ Cameras And Mechanical Pan/Tilt Heads                  50
        2.9     Configuring MxControlCenter                                           51
        2.9.1   Modifying, Saving And Loading Program Options                        51
        2.9.2   Customizing The User Interface                                       51
        2.9.3   Managing MxControlCenter Configurations                              52
        2.9.4   Editing Camera Configurations                                        53
        2.9.5   Managing Camera Configurations                                       53


        3       Advanced Features                                                    57
        3.1     MxControlCenter Controls                                             57
        3.1.1   Buttons On The Toolbar                                               57
        3.1.2   The "Layouts" Sidebar Panel                                          60
        3.1.3   The "Player" Sidebar Panel                                           61
        3.1.4   The "PTZ Controls" Sidebar Panel                                     65
        3.2     editing Layouts                                                      73
        3.2.1 Grid Layouts                                                           73
        3.2.2 Background Layouts                                                     79
        3.2.3 Additional Options For Editing Layouts                                 83
        3.3     Alarm Processing                                                     84
        3.3.1 Alarm List                                                             86
        3.3.2 Displaying Stored Alarms                                               87
        3.4     Video Searches And export Features                                   89
        3.5     Remote Control Using network Messages                                92
        3.6     Saving The Configuration Of MxControlCenter Cameras                  95
        3.6.1 Global And Local Folders                                               95
        3.6.2 Storing The Program Settings                                           95
        3.7     Users And Passwords                                                  97
        3.7.1 Access Levels Of MxControlCenter                                       97
        3.7.2 Activating Password Protection In MxControlCenter                      97
        3.8     Security Considerations                                              98
        3.8.1   General Thoughts On Network Security                                 98
        3.8.2   Restricting Public Access                                            98
        3.8.3   Camera Settings (In The Browser)                                     98
        3.8.4   Settings In MxControlCenter                                          99

                         © MOBOTIX AG • Security-Vision-Systems • Made in Germany

                                                     www.mobotix.com • sales@mobotix.com
Contents                                                                   5/152
3.9      Image Post-Processing                                      100
3.9.1 Overview                                                      100
3.9.2 Configuring Image Post-Processing                              101
3.9.3 Activating/Deactivating Image Post-Processing                  101
3.10     Third-Party Cameras With PTZ Controls And Pan/Tilt Heads   102
3.10.1   Overview                                                   102
3.10.2   Connecting Third-Party IP And Analog Cameras               102
3.10.3   Activating Integrated PTZ Units And Pan/Tilt Heads         103
3.10.4   Using MOBOTIX Cameras With Pan/Tilt Heads                  103
3.10.5   Using Analog Cameras In MxServer                           107


4        Configuring MOBOTIX Cameras                                111
4.1      The "Camera Configuration" Dialog Box                       111
4.2      The "Overview" Tab                                         113
4.3      The "Image Settings" Tab                                   114
4.4      The "exposure" Tab                                         116
4.5      The "Recording" Tab                                        117
4.6      Updating The Camera Software                               120
4.6.1 Preparing The Software Update                                 120
4.6.2 Updating System Software                                       121
4.7      Saving And Importing Camera Configurations                 122

5        MxControlCenter Options                                    123
5.1      Overview                                                   123
5.2      The "General" Tab                                          124
5.3      The "Alarm List" Tab                                       130
5.4      The "Remote Control" Tab                                   132
5.4.1 General Remote Control And Camera IP Notify                   133
5.4.2 Camera IP Notify Only Port                                    134
5.4.3 Camera IP Notify Options                                      135
5.5      Camera Tabs                                                136
5.5.1 Camera Access                                                 136
5.5.2 Layout And Display Options                                    137
5.5.3 PTZ/Rotor Control                                             139

A        MOBOTIX Glossary                                           141

Index                                                               147


© MOBOTIX AG • Security-Vision-Systems • Made in Germany

www.mobotix.com • sales@mobotix.com
6/152   MxControlCenter Manual: Contents


        Typographic Conventions
        We use the following formatting to indicate special elements in this manual:

         • User Interface elements: This formatting is used for all user interface elements of
           MxControlCenter: Click on the PTZ Views button.
         • Values in Selection Boxes: If you are expected to select values in selection boxes,
           these values are formatted as in this example: ... and highlight Unlimited in the
           selection box.
         • User Input: Input in text entry boxes is formatted as in this example: Double-click
           the camera name and enter the desired name (for example, Back Entrance).
         • Keys on the Computer Keyboard: The following format is used if you are expected
           to press any keys on the keyboard: Press the HasH key (#) to reset the zoom settings.
         • File names: If the text refers to file and folder (directory) names, they are format-
           ted as in this example: Double-click the MxControlCenter.msi file to install it.
         • Cross References: The following formatting is used when referring to other sections
           in this manual: For more information on this topic, see Section 3.2 Backing Up And
           Restoring Settings.
         • Web Links: Hyperlinks in the text are formatted as follows: For additional information,
           see our www.mobotix.com website.
         • explanations: They are presented as follows:

              An image series includes all the images (or the entire video sequence) that have
              been saved for an event (alarm). In addition, ...

         • examples: They are presented as follows:

              http://192.168.1.182:8001/?fullscreen=1
              (minimizes MxControlCenter to the taskbar)


        Manuals For MOBOTIX Products
        All MOBOTIX products have corresponding manuals that you can download as *.pdf files
        at www.mobotix.com under Support > Manuals:

         • Camera Manual Part 1: This camera manual is different for each camera model
           and describes the specific features for mounting and operating the camera model
           in question.
         • Camera Software Manual Part 2: This software manual describes the software
           features of the browser-based user interface for all MOBOTIX cameras.


                        © MOBOTIX AG • Security-Vision-Systems • Made in Germany

                                                   www.mobotix.com • sales@mobotix.com
Contents                                                                                        7/152
Notes On MOBOTIX Hardware Products
 • RoHS Declaration: The products of MOBOTIX AG are in full compliance with Art. 5 of
   the German Electrical and Electronic Equipment Act and the E.U. Directive 2002/95/
   EC on the Restriction of the Use of Certain Hazardous Substances in Electrical and
   Electronic Equipment (RoHS) as far as they are subject to these regulations. (You
   can find the RoHS Declaration of www.mobotix.com under www.mobotix.com/
   eng_US/Support/Spec-Sheets.)
 • Disposal: Electrical and electronic products contain many reusable materials. For
   this reason, we would ask that you dispose of MOBOTIX products at the end of their
   service life in accordance with all legal requirements and regulations (or deposit
   these products at a municipal collection center).
     MOBOTIX products may not be disposed of with household waste!
     If the product contains a battery, please dispose of the battery separately (the corre-
     sponding product manuals contain specific directions if the product contains a battery).


Disclaimer
MOBOTIX AG does not assume any responsibility for damage resulting from improper use
or failure to comply with the manuals or the applicable rules and regulations. Our General
Terms and Conditions apply. You can download the current version of the General Terms
and Conditions on our website at www.mobotix.com.


Copyright
All rights reserved. MOBOTIX, MxControlCenter, MxEasy, ExtIO and CamIO are interna-
tionally protected trademarks of MOBOTIX AG. Microsoft, Windows, Windows Server and
the Windows logo are registered trademarks of Microsoft Corporation. Apple, the Apple
logo, Macintosh, OS X and Bonjour are trademarks of Apple Inc. Linux is a trademark of
Linus Torvalds. All other brand names mentioned herein may be trademarks or registered
trademarks of the respective owners.

Copyright © 1999-2009 MOBOTIX AG, Langmeil, Germany.

Information subject to change without notice!


© MOBOTIX AG • Security-Vision-Systems • Made in Germany

www.mobotix.com • sales@mobotix.com
8/152   MxControlCenter Manual: Concept


        1      CONCEPT

        1.1    What Is MxControlCenter?
        MOBOTIX MxControlCenter is a free application that provides the ideal multifunctional
        solution for all your security needs. MxControlCenter allows you to easily connect MOBOTIX
        cameras and third-party cameras to a video security system. It provides a very simple
        method for adding new cameras to a system and viewing the live images they capture.
        A wide variety of viewing options is also available for displaying images from one or
        more cameras.

        As a professional video management system, MxControlCenter also acts as a tool for
        handling video and audio data in IP networks. It not only lets you view the images from
        a connected camera in real time, you can also edit them. Note that editing in this context
        means that both the camera and MxControlCenter are capable of manipulating displayed
        images using a number of functions. For example, you can zoom in on one of the images
        supplied by the camera to get a closer look at an area of possible interest or adjust the
        brightness of an image without changing the image settings of the camera.


        Furthermore MxControlCenter provides you with the ability to subsequently view and
        search alarm images that have been recorded externally on a file server or internally in
        the cameras. A camera alarm, for example, triggered by the camera's motion detection,
        can initiate a specific action at the control center. Such actions may include bringing the


                        © MOBOTIX AG • Security-Vision-Systems • Made in Germany

                                                    www.mobotix.com • sales@mobotix.com
Application examples                                                                          9/152
current live images from the alarm-triggering camera to the foreground and having an
acoustic signal emitted over the viewer's computer.

In addition to these features, MxControlCenter also allows you to independently display
and store the alarms of all monitoring cameras. The program can therefore be used
to perform a subsequent analysis of events that have been recorded within the visual
range of multiple cameras. Sequencing these image recordings can help you trace the
events surrounding a burglary, for example. Using the integrated export list, you can then
combine the video and audio data recorded by one or more cameras into a clip that can
be exported as an *.avi file for further analysis.

This is just one of the many MxControlCenter features that are explained in this manual
in a clear and concise manner. The following section contains examples of how to use
MOBOTIX cameras in conjunction with MxControlCenter.


1.2     Application examples
Examples of how to use MxControlCenter are provided in the following sections.

1.2.1   example: Installing And Starting Up A Small Video Monitoring System

The director of a small automobile museum asks an in-house technician to install a surveil-
lance camera to monitor an area of valuable exhibits during opening hours. The in-house
technician has very little experience with configuring computers and networks. Yet once
the technician connects the camera to the existing Ethernet network, and installs and
runs MxControlCenter on the director's computer, they are able to carry out the necessary
configurations without any difficulty. The camera is detected automatically on the network
under its own name and is quickly configured in a few easy steps. Even the director's wish
for after-hours surveillance of the exhibit rooms and notification of the night watchman
in the event of any irregularities now appears as a manageable task to the technician.

1.2.2 example: Live Monitoring Of A Parking Garage

MOBOTIX cameras are used to monitor a three-level parking garage. During opening
hours, a security guard in the parking garage's control room uses MxControlCenter to
monitor the parking levels in real time. The live monitoring feature is set up to include a
predefined view (a layout) of each parking level based on all the camera images of that
parking level. MxControlCenter automatically cycles through the parking level views at
preset intervals (the layout sequencer feature).


© MOBOTIX AG • Security-Vision-Systems • Made in Germany

www.mobotix.com • sales@mobotix.com
10/152   MxControlCenter Manual: Concept


         1.2.3 example: Live Monitoring Of Spectators In A Soccer Stadium

         To obtain the best images from the MOBOTIX cameras installed at the various ticket
         counters, entrances, and exits of the soccer stadium, the system administrator creates a
         layout beforehand that is specifically adapted to the situation at hand. To that end the
         system administrator positions the individual cameras on a layout of the stadium accord-
         ing to their location. Before a game begins, MxControlCenter is launched by security
         personnel in the control center and it automatically displays the right layout for each
         workstation. The head of security can watch live images of the ticket counters and entrances
         before the game, switch to the cameras inside the stadium during the game, and then
         monitor the exits after the game. In critical situations, the security personnel can open an
         alarm plan specifically set up for each camera, which lists the radio call frequencies for
         the responsible guard in the area of the camera.


         1.2.4 example: Live Monitoring Inside A Train Station

         The platforms of a train station are to be monitored with MOBOTIX cameras. Four cam-
         eras are installed on each platform for that purpose. Life monitoring is carried out using
         MxControlCenter. A grid layout for each platform is created in the program based on
         the live camera images of that platform (see Section 3.2.1, Grid Layouts). The program
         interface is configured so that security personnel can only access the buttons for switching
         layout views (see Section 2.9.2, Customizing The User Interface). It is also configured to
         provide visual notification in the image when a connection error occurs or the maximum
         permitted latency time between image creation and display is exceeded (see Section 5.4,
         The “Remote Control” Tab).


                          © MOBOTIX AG • Security-Vision-Systems • Made in Germany

                                                     www.mobotix.com • sales@mobotix.com
Application examples                                                                            11/152
1.2.5 example: Monitoring An Isolated Parking Lot With An Alarm System
      Linked To The Main Office Of A Security Company

An auto dealership installs MOBOTIX cameras in isolated parking lots where vehicles
have been damaged repeatedly in the past. A technician defines a display layout for each
parking lot with the cameras that are installed there. Each camera is configured to detect
any movement near the fence surrounding the parking lots.

The infrared sensors of the night cameras also trigger an alarm when heat is detected. If a
camera detects a movement, a network message sent from the camera to MxControlCenter
automatically opens the layout of the relevant parking lot in the main office of the employed
security company. An alarm sound is simultaneously emitted until it is acknowledged
by a staff member. After acknowledging the alarm, the staff member can initiate the
necessary measures.


1.2.6 example: Review Of Images And Alarms After A Burglary Occurred In An
      Office Building

In addition to live monitoring of the main entrance by the receptionist during regular office
hours, the MOBOTIX cameras installed on the floors, the staircases, and the parking lots
in front of and behind the building are configured to detect and alert of any movement
or changes in brightness at night. Furthermore, the manager will receive an e-mail every
time a camera triggers an alarm.


© MOBOTIX AG • Security-Vision-Systems • Made in Germany

www.mobotix.com • sales@mobotix.com
12/152   MxControlCenter Manual: Concept


          Once notified, the manager can search through the video recordings of the cameras in
          the morning without exposing himself or herself to any danger. The route taken by the
          burglar from the parking lot to the actual break-in in the server room can be plotted. A
         "video" can be compiled using these recordings and show the entire burglary up to the
          point when, for example, a stolen computer and printer are loaded into the trunk, includ-
          ing the license plate number of that vehicle. It can thus provide valuable evidence for
          further criminal investigation.


                          © MOBOTIX AG • Security-Vision-Systems • Made in Germany

                                                     www.mobotix.com • sales@mobotix.com
Installation                                                                                        13/152
2       GeTTInG STARTeD
This chapter describes the main tasks of MxControlCenter and how to perform them.
Chapter 3, Advanced Features offers a more detailed description of the individual features
while also discussing advanced features that go beyond "normal" installations.


2.1     Installation
If you have an MxControlCenter installation CD, insert it into the DVD drive of your computer.

If you do not have the installation CD or would just like to install an update, you can down-
load the latest Windows installer from the MOBOTIX website as an *.msi file and install
it manually. The latest versions are available at www.mobotix.com under Support >
Software Downloads > MxControlCenter.

If you insert the installation CD, the installation process will start automatically and you
will be guided through the necessary steps. If you have downloaded the latest Windows
installer, double-click the *.msi file to initiate the installation process.


The Installer (currently only available in English) copies the application files to your computer
and then creates the designated shortcuts (Desktop, Start Menu, etc.) during the installation
process. If you have any older program versions installed, the Installer will automatically
update them without changing your existing configurations.


© MOBOTIX AG • Security-Vision-Systems • Made in Germany

www.mobotix.com • sales@mobotix.com
14/152   MxControlCenter Manual: Getting Started


                                                  Caution

           MxControlCenter will attempt to find all MOBOTIX cameras in the physically connected
           network (i.e., every MOBOTIX cameras with a factory IP address of 10.x.x.x). Make
           sure that the firewall settings on your computer do not block network traffic with
           MxControlCenter. If MOBOTIX cameras are found, MxControlCenter. can automati-
           cally reconfigure them so that they are available on your computer.

           If you do not have permission to modify these settings on your computer, contact
           your system administrator for assistance.

           For detailed information on the automatic camera search feature and manual con-
           figuration, refer to Section 2.2.2, Finding MOBOTIX Cameras.


         2.2    Finding And Configuring Video Sources

         Video sources not only refer to MOBOTIX cameras, but also to third-party IP cameras, file
         server paths, MxPEG clips and analog cameras connected via MxServer (for example,
         analog dome cameras). Video sources unrelated to MOBOTIX cameras are not found
         automatically and need to be added manually.


         2.2.1 Connecting MOBOTIX Cameras

         MxControlCenter provides you with a convenient tool for starting up and configuring new
         MOBOTIX cameras. You do not need extensive network knowledge to properly connect
         your camera. Simply connect the camera to either the Poe switch or the network Power
         Adapter as shown in the figures below.


                                                                          PoE Switch
                                                                         10/100 MBps
                                                                        Network (TCP/IP)


                                                 10.3.0.199


                                         Installation with PoE switch


                         © MOBOTIX AG • Security-Vision-Systems • Made in Germany

                                                      www.mobotix.com • sales@mobotix.com
Finding And Configuring Video Sources                                                             15/152
A PoE switch or the MOBOTIX Network Power Adapter provides the power supply and
network connection to your MOBOTIX camera over an Ethernet cable:
                                                                                 10.3.0.200


                      Switch
                   10/100 Mbps
                  Network (TCP/IP)


                                     Installation with MOBOTIX
                                     Network Power Adapter


Now make sure that your computer is connected to the same PoE switch or the Network
Power Adapter (the computer/power connection). When the camera is ready for use, the
top LeD glows and the two red LeDs blink for the M12 and D12 models and the green
LeD glows and the red LeD blinks for the M22M and D22M models.

More information on starting up your camera can be found in the respective camera manual.

2.2.2 Finding MOBOTIX Cameras

Launch MxControlCenter after successful installation (see Section 2.1, Installation) by double-
clicking the shortcut that was created by the Installer on your Desktop or the executable
MxCC.exe file in the installation directory.

When MxControlCenter is launched for the first time, the Add Cameras - Search and
Select dialog box opens and the application automatically searches for MOBOTIX cam-
eras in the local network. To perform a camera search at a later stage, select Camera >
Add from the menu.


© MOBOTIX AG • Security-Vision-Systems • Made in Germany

www.mobotix.com • sales@mobotix.com
16/152   MxControlCenter Manual: Getting Started


         If your MOBOTIX camera is properly connected, it should appear together with the exist-
         ing video sources in the following list:


         Detected Cameras Are Located In A Different Subnet

         The symbols in the first column and the legend in the dialog box indicate whether you
         can access a particular camera directly from MxControlCenter. Note that you can access
         any camera designated by the green OK symbol. Cameras designated by the yellow
         Different Subnet symbol are located in a different subnet. This usually applies to new
         cameras or cameras that have been reset to their factory settings.

                                                     Note

           MxControlCenter finds all MOBOTIX cameras provided that both your computer and
           the cameras are located in the same physical network .


         A physical network includes all devices that access a shared Ethernet network (for
         example, using switches) without having routers that segment the individual portions of
         the network. The actual transmission method (cable, wi-fi, etc.) is irrelevant in this regard.

         Select the cameras that you would like to display in a Layout (a view with cameras) and
         click Add selected cameras.


                         © MOBOTIX AG • Security-Vision-Systems • Made in Germany

                                                       www.mobotix.com • sales@mobotix.com
Finding And Configuring Video Sources                                                    17/152
The Add cameras dialog box now appears. You can choose to either create a new layout
with the cameras that have been found or simply add those cameras to MxControlCenter.


If some of the selected cameras are in different subnets, MxControlCenter displays the
following dialog box:


Click Yes to reconfigure the cameras for the subnet of your computer.

Reconfiguring Cameras In A Different Subnet

In most networks, a DHCP server will automatically assign the IP addresses for network
devices so that you can apply the default settings in the Configure camera dialog box
(Get IP address automatically). If you would like all cameras to obtain IP addresses
automatically, select the Apply to all selected cameras checkbox.

If the IP addresses for devices on the
network are permanently assigned,
ask your network administrator
for the appropriate IP addresses
for the cameras. Once you have
that information, enter the correct
IP address and subnet mask for
each camera in the Use this IP
address group.

Make sure that the Save configuration
permanently on camera checkbox
is selected so that the cameras
can be found at the designated
IP address when you restart your
computer. Then click OK.

Now wait until MxControlCenter has modified the network settings of the cameras and
restarted the computer. The status of the reconfigured cameras changes from Different


© MOBOTIX AG • Security-Vision-Systems • Made in Germany

www.mobotix.com • sales@mobotix.com
18/152   MxControlCenter Manual: Getting Started


         subnet (blue symbol) to OK. Close the Add Cameras- Search and Select dialog box by
         clicking OK.

                                                    Note

            You can open the Configure Camera dialog box for any video source by right-clicking
            the specific video source you want to configure in the Add Cameras - Search and
            Select dialog box and selecting Configure network from the pop-up menu.


         2.2.3 Adding Video Sources Manually

         In addition to MOBOTIX cameras that are found automatically, you can also manually add
         video sources to the list of video sources in MxControlCenter.

          • Camera: Here, you can enter the known IP address or DNS name of a MOBOTIX
            camera or a third-party IP camera if it was not found by the automatic search feature.
          • MxPeG Clip: Adds an MxPEG video clip previously recorded by a MOBOTIX camera
            as a video source.
          • Recording Path: Adds the path of an external file server where a MOBOTIX camera
            has recorded audio/video data. The videos or snapshots recorded at that location
            can now be played back using the Player or Video Search in MxControlCenter.

         2.2.4 Using Video Sources In MxControlCenter

         You can now use the list to select the video sources that you would like to display and
         manage in MxControlCenter..

         Camera Preview
                                                                              Entrance
         If you select one camera with the status OK, MxControlCenter
         automatically displays the live images from that camera in
         the preview window. If you are using CTrL-click to select
         several cameras, the image from the camera selected last is
         shown in the preview window. This feature makes it easier
         for you to identify the cameras that you would like to use.


                          © MOBOTIX AG • Security-Vision-Systems • Made in Germany

                                                      www.mobotix.com • sales@mobotix.com
Finding And Configuring Video Sources                                                       19/152
editing The Video Source List

Right-click this list to open a pop-up menu from which you
can select all video sources or cancel the selection. You
can also use this method to remove from the list some or
all of the video sources that you would not like to display
or manage in MxControlCenter.

If you have cancelled the camera configuration process
or need a password that differs from the camera's factory
default password, you can also configure the camera from the pop-up menu at a later
date and enter the user name and password required for reconfiguration at that time.

Adding Selected Video Sources In A new Layout

Click OK to add the selected cameras in MxControlCenter.
If you select the Generate new grid for selected cameras
option in the Add Cameras dialog box, MxControlCenter
will automatically create a grid layout that displays all
selected video sources in equal-sized windows.

Otherwise the selected video sources will only be added to
MxControlCenter and can later be used to create layouts.

 A layout can show multiple video sources (cameras, file server paths, MxPEG clips,
 etc.) either in a grid or in front of a background. A video source can be displayed in a
 background layout as a video window or a symbol. Layouts can be saved, renamed
 and arranged hierarchically.


© MOBOTIX AG • Security-Vision-Systems • Made in Germany

www.mobotix.com • sales@mobotix.com
20/152                  MxControlCenter Manual: Getting Started


                        2.3       User Interface And Operation
                        The main window of MxControlCenter appears after you select the first video sources
                        (MOBOTIX cameras, recording paths, MxPEG clips, etc.). This section introduces you to
                        the basic elements of the application.

                        2.3.1 elements Of The Main Window

                        After the video sources have been automatically defined during initial installation,
                        MxControlCenter opens the main window, which is divided into the following sections:


                                                                                  Display panel with a layout for
                               Menu bar             Alarm list      Toolbar          displaying the cameras


“Layouts” panel


 “Player” panel


   “PTZ” panel


                  Status bar              Sidebar                                             Date/time of the
                                                                                              current camera
                        The standard view of MxControlCenter is primarily intended for users who work with the
                        features set up for camera viewing and alarms.

                        Sections Of The Main Window

                          • Menu Bar: From the menu bar you can switch between views, open additional
                            dialog boxes and even execute all the features assigned to the various toolbar
                            buttons described below.
                          • Alarm List: This panel shows the alarm images of the cameras that the user normally
                            needs to acknowledge by clicking the appropriate title bar (red). Double-clicking an

                                            © MOBOTIX AG • Security-Vision-Systems • Made in Germany

                                                                   www.mobotix.com • sales@mobotix.com
Finding And Configuring Video Sources                                                         21/152
    alarm image opens the Video Search dialog box where you can view the alarms and
    then compile them for later analysis (also for a camera-wide analysis).
 • Toolbar: The toolbar contains buttons for important features. To see what a particular
   button does, simply place your mouse pointer over it and read the tooltip that appears.
   The toolbar can be configured to quickly switch between layouts (the Layout buttons
   in toolbar checkbox) or appear at the bottom of the main window (the Show toolbar
   at bottom checkbox) in Tools > Settings > General.
 • Display Panel: This panel shows the cameras of the currently selected layout. The
   current camera appears with a yellow frame and is the "active camera" whose time
   and date are indicated in the status bar in the bottom right-hand corner. Besides the
   standard camera windows, which contain the live images of a specific camera, you
   can also define player and focus windows in a layout for displaying the recorded
   images of one or more cameras.
 • Status Bar: MxControlCenter uses the status bar to display specific runtime information.
 • Sidebar: The sidebar contains different information depending on the context. Normally
   it displays the information relating to available layouts or the controls for the active
   camera in the current layout. If the Layout Manager is active, only the panels you
   need to use will be shown (see Section 2.3.2, Layout Manager).

Sidebar Panels

 • Layouts: This sidebar panel contains a hierarchical list of all the existing layouts of
   an MxControlCenter installation. With the Layout Sequencer (see Section 2.4.5, Using
   The Sequencer Features), you can set MxControlCenter to automatically cycle through
   the displayed layouts at a defined interval. For each layout you can define separate
   video sources that can be displayed in either a grid or background layout:


                                                   Background layout with camera icons
                 Grid layout

 • Player: This sidebar panel controls the playback of recorded video sequences or
   images. Synchronized playback based on the time of the recording is available for
   either the current camera only or all the cameras of a grid layout.
 • PTZ Control: This panel is used to control the pan/tilt features (PTZ = Pan/Tilt/Zoom)
   of a camera and is visible at all times. It may also contain other features depending
   on which camera and lens you are using. If the current camera can use vPTZ features


© MOBOTIX AG • Security-Vision-Systems • Made in Germany

www.mobotix.com • sales@mobotix.com
22/152   MxControlCenter Manual: Getting Started


              (the virtual pan, tilt and zoom features of a MOBOTIX Q22M, for example), then this
              panel will be expanded accordingly
         For more information on the various elements of the main window, see Section 3.1,
         MxControlCenter Controls.

         2.3.2 Layout Manager

         The Layout Manager provides features for creating and managing layouts in the sidebar.
         These features, however, are typically only used to set up an MxControlCenter installation.
         To activate or deactivate the Layout Manager, click the adjacent button in the toolbar.

                                                  Caution

           Activating the Layout Manager does not open an extra window. Instead, the main
           window of MxControlCenter switches to a special view that contains all the features
           necessary for creating and editing layouts.


          A layout can show multiple video sources (cameras, file server paths, MxPEG clips,
          etc.) either in a grid or in front of a background. A video source can be displayed in a
          background layout as a video window or a symbol. Layouts can be saved, renamed
          and arranged hierarchically.


                          © MOBOTIX AG • Security-Vision-Systems • Made in Germany

                                                     www.mobotix.com • sales@mobotix.com
Finding And Configuring Video Sources                                                      23/152
When activated, the Layout Manager offers three other panels for creating and editing
layouts:

 • Layouts: Here, you can create, rename and move new
   layouts to form hierarchical structures. This panel shows
   grid and background layouts with different symbols.
 • Cameras and Devices: This panel displays the video
   sources that have already been added to MxControlCenter.
   You can drag and drop the video sources into a grid
   box or onto a background image.
 • Grid/Background Images: In this panel you can select
   or add grid or background images for the current layout,
   depending on the layout type. These images will then be
   used to display the video sources. You can also create
   your own grids (the edit grid button) in addition to the
   predefined grids and the Auto grid (see below).


 Auto grid is a special grid where the display panel is automatically split into smaller
 sections to show the various video sources.

More information on editing layouts is available in Section 2.4.3, Creating Layouts.

2.3.3 Alarm List

The alarm list contains the alarms of the MOBOTIX cameras defined
in a layout, provided that alarm recording has been enabled on those
cameras and the alarm list has been activated in MxControlCenter
(Tools > Options > Alarm List).

If new alarms are detected, MxControlCenter adds the alarm image
of the triggering camera to the top of the alarm list and changes
the title bar to red. This alarm can now be acknowledged by click-
ing the title bar of the alarm window (title bar changes to blue).


                                      Unacknowledged alarm

                                      Unacknowledged alarm from selected camera

                                      Acknowledged alarm

                                      Acknowledged alarm from selected camera


© MOBOTIX AG • Security-Vision-Systems • Made in Germany

www.mobotix.com • sales@mobotix.com
24/152   MxControlCenter Manual: Getting Started


         If the alarm list contains unacknowledged alarms, the alarm box in the upper right-hand
         corner will remain red. If all the alarms are acknowledged, the alarm box changes to
         green as depicted in the figure.


         Besides the cameras in the current layout, other cameras can also send alarm mes-
         sages to MxControlCenter by transmitting a network message to the computer running
         MxControlCenter.

         More information on this and other alarm list features can be found in Section 2.5, Alarm
         Management.

         2.3.4 Camera Configuration

         To change the configuration of the connected cameras, open the Camera Configuration
         dialog box in MxControlCenter by clicking Change the camera settings from MxCC or
         choosing Video Source > Properties > Configure from the menu.


         The Camera Configuration dialog box contains the following sections:

          • Overview: This section of the dialog box lists all MOBOTIX cameras along with their
            most important settings and also includes an additional preview window for the cur-
            rently selected camera. If login data that differs from the default login data (admin
            user, meinsm password) is required, you can use the pop-up menu (right-click) to
            authenticate yourself for the selected camera. From the same pop-up menu you can
            also open a dialog box with additional information on this camera.
          • Image Settings: You can view and modify the main image settings for the selected
            camera in this section.


                         © MOBOTIX AG • Security-Vision-Systems • Made in Germany

                                                    www.mobotix.com • sales@mobotix.com
Finding And Configuring Video Sources                                                       25/152
 • exposure: The exposure windows are one of the most important camera tools for
   creating properly exposed images. In this section you can select different exposure
   windows or customize them based on your requirements (move, change size, etc.).
 • Recording: You can control the camera's recording features in this section of the
   dialog box by activating the recording feature and the camera sensors that are set
   to trigger an alarm. You can also use this panel to define which files the camera will
   save (full or live image) and where the alarms will be saved (internally, on an SD/
   CF card, or on a file server).

                                         Note

  All changes made in the Camera Configuration dialog box will take effect imme-
  diately and can be checked in the preview image. When leaving this section, this
  dialog box will prompt you to save any unsaved changes to the permanent flash
  memory of the camera.


For more information on working with the Camera Configuration dialog box, see Section 4,
Configuring MOBOTIX Cameras.

2.3.5 Update Assistant

MOBOTIX offers software updates that contain new features and enhancements for its
cameras on a regular basis. You can easily transfer new software to all selected cameras
with the Update Assistant.


© MOBOTIX AG • Security-Vision-Systems • Made in Germany

www.mobotix.com • sales@mobotix.com
26/152   MxControlCenter Manual: Getting Started


         Besides automatically updating the camera software, the Update Assistant also saves the
         current configuration of the cameras so that it can be restored on some or all of the cameras.

         Furthermore the automatic search feature for new cameras and the way detected cameras
         are organized into various camera lists also provide a number of additional options for
         managing large-scale installations.

         To launch the Update Assistant, open the Tools > Assistants > Update camera software
         menu.

         For more information on the update assistant, see Section 4.6, Updating The Camera
         Software.

         2.3.6 Program Settings

         You can edit the program options of MxControlCenter and the options of the cameras
         connected to MxControlCenter in the Tools > Options dialog box.


         The dialog box contains the following tabs:

          • General: You can define the various program options that affect the display and
            operation of MxControlCenter on this tab. In addition to the security settings for
            MxControlCenter (administrator and user passwords), you can also define a global
            camera user and corresponding password to simplify access to the cameras.


                          © MOBOTIX AG • Security-Vision-Systems • Made in Germany

                                                       www.mobotix.com • sales@mobotix.com
Live Monitoring With numerous Cameras                                                          27/152
 • Alarm List: Here, you can define the alarm list options that affect the alarm list itself
   (size, save as a separate file, auto acknowledge). You can also use this tab to specify
   the sounds that can be used to signal new alarms.
 • Remote Control: The options on this tab determine whether and how MxControlCenter
   responds to network messages that are sent to the designated port of the MxControlCenter
   computer.
 • <Camera Tabs>: Each of these tabs shows the name and IP address of a specific
   camera and allows you to define options of that camera. Besides a special user
   name and password, you can also define how MxControlCenter can access the
   images recorded by the camera, which instruction file is linked to this camera, and
   which preferred layout the camera will use.
For more information on this dialog box and the various program options, refer to Chapter 5,
MxControlCenter Options.


2.4    Live Monitoring With Numerous Cameras

2.4.1 Monitoring In Predefined Layouts

Your monitoring requirements can be met using only a few cameras in a single layout.
However for more complex monitoring tasks, a single layout will not suffice.


If you are using a large number of cameras, you would ideally have a customized view of
the currently displayed camera images in different sizes (CIF, VGA, etc.) and an option to
toggle between various views so that the numerous cameras can be assigned to various
views depending on their location.

© MOBOTIX AG • Security-Vision-Systems • Made in Germany

www.mobotix.com • sales@mobotix.com
28/152   MxControlCenter Manual: Getting Started


         Predefined grid layouts are available for this purpose and can be generated and edited
         provided you have enabled the Layout Manager (see Section 2.4.3, Creating Layouts
         and the following sections).

         Display Windows For Layouts

         For live monitoring, different types of dis-
         play windows that can be used in a grid or
         background layout are available. The size of
         all windows used to display a live stream is
         limited to 2560 x 960 pixels (double MEGA)
         for grid layouts and 640 x 480 pixels (VGA)
         for background layouts.

          • Live: These "standard windows" show
            the current live video stream of a cam-
            era,- normally at the full frame rate. In
            grid layouts, these windows can have a maximum size of 2560 x 960 pixels (double
            MEGA resolution). For display purposes, the single images from the live stream are
            scaled to match the size of the display window.

                                                        Note

                 A high camera resolution increases both the bandwidth required to retrieve
                 the live stream as well as the load imposed on the MxControlCenter computer
                 for decoding and displaying the data.


              The live windows are typically used in monitoring scenarios such as the ones described
              in Example: Live Monitoring of a Parking Garage given in Section 1.2.2, Example: Live
              Monitoring Of A Parking Garage.
          • Preview: A "reduced" live stream with low resolution and frame rate can be retrieved
            from the camera with this display window. This is particularly well-suited for remote
            applications with low network bandwidth.
          • Sequencer Window: This window is not assigned to one specific camera, but rather
            switches between the cameras at preset time intervals. The sequencer window is
            very effective when used in conjunction with status icons, particularly in background
            layouts. For example, you can create an overview layout using the building floor
            plan and status icons as "placeholders" for the individual cameras together with a
            sequencer window in the middle of the layout.
          • Focus Window: This window is not tied to a specific camera and only displays the
            live video stream of the camera whose status icon is selected using the mouse.
         The layouts and display windows that are best suited for live monitoring depend on a
         variety of factors such as the:

          • Number of monitoring cameras

                         © MOBOTIX AG • Security-Vision-Systems • Made in Germany

                                                     www.mobotix.com • sales@mobotix.com
Live Monitoring With numerous Cameras                                                         29/152
 • Bandwidth of the monitoring network
 • Number and workflow of the security personnel

2.4.2 Monitoring The Camera Connection

While running, MxControlCenter automatically checks whether the cameras integrated
into the system are accessible. If the connection to a camera is lost, MxControlCenter will
display an error message in the relevant camera window.

The options for this feature can be found in both sections of the General tab in the Tools
> Options dialog box:

 • Sound for errors/Connection errors: MxControlCenter can play back either a stan-
   dard sound or an audio file of your choosing (*.wav) if a connection error occurs.
 • error Display for Connection errors: This option displays an error message or a
   graphics file you specify in the image of the missing video source.
 • error Display on Latency Timeout: If the latency between image capture and the
   camera display exceeds the value specified here, MxControlCenter can display an
   appropriate error message or a graphics file you choose in the image of the video
   source in question.
More information on this topic can be found in Section 5.2, The “General” Tab.


© MOBOTIX AG • Security-Vision-Systems • Made in Germany

www.mobotix.com • sales@mobotix.com
30/152   MxControlCenter Manual: Getting Started


         2.4.3 Creating Layouts

         You can proceed as described in Section 2.2, Finding And
         Configuring Video Sources to automatically create layouts
         for different video sources (MOBOTIX cameras, file server
         paths, MxPEG clips and third-party network cameras). If
         you want more customized layouts, you will need to use
         the Layout Manager.

         Click the Layout Manager button on the MxControlCenter
         control panel. The sidebar now contains the three panels,
         Layouts, Video sources and Grid or Background images,
         that were described in Section 2.3.2, Layout Manager.

         2.4.4 Procedure

          • Right-click the empty space in the Layout panel and
            select new Layout from the pop-up menu.
          • Choose whether you would like to create a background
            layout (for site plans, floor plans, etc.) or a grid layout
            (display window only).
          • Select an image (*.jpg, *.bmp or *.gif) for a background layout or a grid for a
            grid layout:


               Auto grid is a special grid where the display panel is automatically split into smaller
               sections to show the various video sources.

               The auto grid has a square or rectangular structure: Display windows are automati-
               cally added until the next larger square or rectangle of windows appears when
               adding cameras. In the case of rectangles, the rows always contain more display
               windows than the columns.

          • Click OK to close the dialog box. MxControlCenter creates the new layout and labels
            it with the appropriate symbol.
          • You can now rename the new layout by double-clicking the name or right-clicking
            the relevant command from the pop-up menu.


                          © MOBOTIX AG • Security-Vision-Systems • Made in Germany

                                                       www.mobotix.com • sales@mobotix.com
Live Monitoring With numerous Cameras                                                       31/152
 • If you would like to create a hierarchical layout structure, move and reorder the
   layouts based on your requirements.

Additional editing Options For Grid Layouts

 • Moving Display Windows: You can switch display window locations by simply mov-
   ing one window to another one.
 • Adding Video Sources: These video sources are moved from the Video Sources
   panel of the sidebar to the display field you choose. They will replace any video
   sources that may already exist in that field.
 • Right-Clicking a Display Window: Opens a pop-up menu with additional commands
   for editing or deleting video sources, for example.

Additional editing Options For Background Layouts


                      Camera OK,       Camera OK,     No connection to
                       detected        not detected       camera


 • Moving Display Windows: Display windows can be arranged any way you want. If
   you want to switch display window locations, simply move one window to another
   one. Note that the windows will automatically be resized if they are near the window
   frame or other display windows.
 • Adding Video Sources: These video sources are moved from the Cameras and
   Devices panel of the sidebar to any location you choose.
 • Displaying as Icons: Video sources can be displayed for overview plans as icons
   that indicate the viewing direction, number of objects, their bandwidth and the status
   of the cameras:
     Double-clicking an icon shows the corresponding camera in a separate display window.
 • Right-Clicking a Display Window or Icon: Opens a pop-up menu with additional
   commands for, among other things, editing or deleting video sources.
 • Right-Clicking an empty Space: Opens a pop-up menu that allows you to insert
   an additional element.
For more information on working with layouts, see Section 3.2, Editing Layouts.

2.4.5 Using The Sequencer Features

Since MOBOTIX cameras are also able to use low-bandwidth connections to transfer
low-quality preview images, MxControlCenter offers the ideal means for establishing a
remote control center.


© MOBOTIX AG • Security-Vision-Systems • Made in Germany

www.mobotix.com • sales@mobotix.com
32/152   MxControlCenter Manual: Getting Started


         Sequencer Of MxControlCenter

         The functions of the integrated sequencers for automatically cycling through the defined
         cameras or layouts and the hierarchically structured layouts support these features since
         they allow for the effective display of connected video sources.

         Some network connections do not have sufficient bandwidth to display the live stream
         from multiple cameras at the same time. Nevertheless, you would still like to see, at least
         sequentially, the images of all cameras. The sequencer features are provided for this
         purpose and work on two levels:

          • The layout sequencer switches between the layouts of the current configuration at
            specified intervals.
          • The camera sequencer switches between the specified cameras within a grid layout
            and displays the images they capture at their maximum size in the display panel.
          • You can define a sequencer window inside a layout that cycles through the individual
            cameras of the layout.

         2.4.6 Using The vPTZ Features

         The M12D, D12, V12, M22M, D22M and Q22M models
         of MOBOTIX cameras and software versions 3.4.5 or
         higher now include enhanced virtual PTZ features.
         These features allow you to use a mouse or joystick to
         zoom in on images from the selected video source and
         "virtually" move the enlarged image section within the
         entire image sensor area.


                          © MOBOTIX AG • Security-Vision-Systems • Made in Germany

                                                     www.mobotix.com • sales@mobotix.com
Live Monitoring With numerous Cameras                                                          33/152
The Q22M camera merits special attention in this regard: A spherical image of the environ-
ment is captured by the 180° lens of the camera. By selecting the appropriate live image
mode of the camera (see below), this image can be corrected for distortion by the camera
itself and then saved and displayed in MxControlCenter in its corrected form. Alternatively,
the camera can simply save the complete distorted image and send it to MxControlCenter.
In this case MxControlCenter can subsequently correct the images for distortion. For more
information on this topic, see Section 3.1.4, The “PTZ Controls” Sidebar Panel.


Note that the views and features available for use will vary depending on where the Q22M
is installed (on the wall or the ceiling). If this particular cam-
era model is selected in the layout, the PTZ Controls panel
will be expanded so that you can specify the installation
type and set the North direction of Q22M.

Using The Virtual PTZ Features

To control the vPTZ features, the sidebar contains a number of control elements that you
can operate with a mouse and that function just like a joystick:

 • Turning the Joystick or Using the Slider Bar +/-: Adjusts the
   zoom setting of the selected video source.
 • Tilting the Joystick: Rotates or pans the image in the direction
   you choose until you return the joystick to its home position.
Make sure that the lock icon in the PTZ features sidebar panel is
unlocked or else the features of the virtual joystick will be blocked.

You can use the mouse the execute certain vPTZ features by simply clicking the position
you would like in the image and scrolling the mouse wheel to zoom in and out.

The numeric field at the bottom of the sidebar is used to save frequently used positions
(a longer click saves a position, while a
shorter click opens it). The 1x Zoom and
Center pan buttons are used to reset
the image position while the buttons in
the Auto mode panel control the automatic
camera movements as if you were con-
trolling a PTZ camera mechanically.


© MOBOTIX AG • Security-Vision-Systems • Made in Germany

www.mobotix.com • sales@mobotix.com
34/152   MxControlCenter Manual: Getting Started


         Correct Distortion In MxControlCenter Or The MOBOTIX Camera?

         These two drop-down lists define how work is allocated between
         the camera and MxControlCenter when processing images:

          • Camera Live Image: Controls image generation on the
            camera itself (the display modes offered by this camera
            model are always available for selection).
          • MxCC Display: Allows you to set MxControlCenter to
            either accept the images in their original form or apply
            distortion correction to the images.
         These two settings are all you need to have the camera deliver and save full images while
         MxControlCenter displays the distortion-corrected area and adds the zoom feature in the
         live image. This feature can be set separately for each camera in the layout.


         2.5    Alarm Management

         2.5.1 Preparing MxControlCenter

         If an event occurs (a MOBOTIX camera detects movement or any changes), the camera
         can notify you by triggering an alarm. The type of event detection and the method of the
         resulting alarm can be configured in a number of different ways. For example, you can
         configure a MOBOTIX camera to send an e-mail if the ambient temperature falls below
         a specific value. A detailed description of all the alarm methods can be found in the
         MOBOTIX Software Manual.


         Once armed, a MOBOTIX camera in its default configuration will detect any motion within
         a defined area of the displayed image and highlight such motion by adding a red border
         around the image.


                          © MOBOTIX AG • Security-Vision-Systems • Made in Germany

                                                     www.mobotix.com • sales@mobotix.com
Alarm Management                                                                                  35/152
This alarm can be sent to MxControlCenter in multiple ways:

 • Camera Alarm Messages: Alarms are "streamed" together with the relevant live
   images to MxControlCenter, which can then use this image data to obtain the neces-
   sary information about the triggering event.
 • Remote Control by Cameras: A MOBOTIX camera can also send this alarm to
   MxControlCenter as a network message (notification in the network based on the
   IP protocol).
The first type of alarm can only be transferred if the live image in the current view or layout
is also displayed. A network message, however, can be received at any time, even if the
sending IP camera is defined in a layout that is not currently being displayed.

Configuring How network Messages Are Received

To be able to receive these messages, the Camera IP notify only port needs to be enabled
in the Remote Control tab of the Options dialog box and needs to match the port when
configured for the MxCC Alarm transfer profile on the camera (Admin Menu > Transfer
Profiles > IP notify Profiles in the browser interface of the camera).


Now a specific view will be activated whenever this camera sends an alarm that needs
to be defined. To do so, open the Layout editor and specify the last defined preferred
layout. Alternatively, you can specify the preferred layout in the camera tab of the Options
dialog box.

 The preferred layout of a camera determines which layout will be used to display this
 camera when a network message is sent to the MxControlCenter computer. You can
 thus have cameras displayed immediately ("connected") if they are not currently being
 displayed.


Activating The Alarm List

First activate the alarm list in the Options dialog box
(the Alarm list tab). MxControlCenter will now archive all
incoming alarms in a list in chronological order. When an
IP camera sends a network message, MxControlCenter
can now switch to the preferred layout defined for this
specific camera, if necessary.

More visualization options are offered by the Alarm window
(described in the previous section as a special grid element of a layout) and Player window.

Ultimately, however, having an alarm visualized by a computer program like MxControlCenter
is not enough. There is usually a human being present at the end of the alarm chain and

© MOBOTIX AG • Security-Vision-Systems • Made in Germany

www.mobotix.com • sales@mobotix.com
36/152   MxControlCenter Manual: Getting Started


         they should respond appropriately when an alarm goes off. Once proper measures have
         been initiated, the user can then acknowledge the alarm so that the "alarm" visualization
         can be cancelled.

         2.5.2 Preparing The Cameras

         A MOBOTIX camera needs to be properly configured before it is able to detect an event,
         trigger an alarm and then send that alarm to MxControlCenter where it is visualized.

         Launch your browser and enter the IP address of the camera, or select the camera you
         would like to configure in the current view of MxControlCenter and then click the Open
         browser button. Follow the paths through the menu structure of the page for the indi-
         vidual items.

         Showing An Alarm Message In The Data Stream Of A Displayed Live Image

          • General Activation (Setup Menu > event Control > General event Settings): Check
            whether camera activation is enabled .
          • Video Motion Window (Setup Menu > event Control > event Settings > events):
            The video motion window (VM) needs to be activated and its coordinates defined.
         Proceed as follows to send an alarm to MxControlCenter as a network message:

          • Transfer Profile (Admin Menu > Transfer Profiles > IP notify Profiles): Use a profile
            called MxCC Alarm: simple. The target address of this profile needs to contain
            the IP address of your local computer and the port number used by MxControlCenter to
            receive network messages (see Section 3.5, Remote Control Using Network Messages).
          • Activate Messages (Setup Menu > event Control > Messaging > General Settings):
            The message profile should be activated.
          • IP notify (Setup Menu > event Control > Messaging > Actions): The selection for
            a network message (IP) needs to be set to MxCC Alarm.
         To grant the required permissions for MxControlCenter:

          • Assign Permissions (Admin Menu > Group Access Control Lists and Admin Menu >
            Users and Passwords): The MxCC permission should be enabled for the group who
            are authenticated by MxControlCenter as their members.


                         © MOBOTIX AG • Security-Vision-Systems • Made in Germany

                                                    www.mobotix.com • sales@mobotix.com
Alarm Management                                                                             37/152
2.5.3 Alarm Display

As previously mentioned, there are a number of ways
to respond to an alarm message. The easiest form of
visualization is provided by the camera itself when it
displays the current live image with a red border. This
"momentary" visualization does not last very long, which
is why MxControlCenter can save all alarms in the alarm
list for subsequent viewing.

Choose Tools > Options from the menu and then activate
the list in the Alarm List tab to activate the alarm list. If
you have configured everything properly, any motion in
front of the camera in the current view should cause the
first alarm image to appear in the alarm list. Additional
options for sending visual or audio alarms can be found
in Section 3.3, Alarm Processing.

In addition to the alarm list, special window elements in a view can be defined to display
alarms:

  • An alarm window within a view displays the live image from the camera that actually
    reported the last alarm (graphic).
  • A player window is not tied to one specific camera. It shows the saved alarms from
    any camera that you select from the alarm list. The saved alarms are not displayed
    in a list, but rather as a video from a video recorder. You therefore have the option
    to fast forward or rewind through the alarms and the recorded image sequences of
    each alarm (graphic). For more information on these search options, see Section 2.6,
    Video Searches And Export Features.
To define an alarm or player window in a view, you first need to activate the Layout
Manager and then define the element you want to use in the Define Grid element dialog
box (for more information, see Section 3.2.1, Grid Layouts).

If the alarm-triggering camera is not shown in the current view, note that we have already
configured the camera to send a network message to MxControlCenter (see Section 2.5.2,
Preparing The Cameras).


© MOBOTIX AG • Security-Vision-Systems • Made in Germany

www.mobotix.com • sales@mobotix.com
38/152   MxControlCenter Manual: Getting Started


         2.5.4 Alarm Acknowledgement

         MxControlCenter is able to record and display alarms from an IP camera, the next step is
         to determine how these alarms can be acknowledged by security personnel or, in other
         words, human beings who are actually sitting in front of the computer and are required
         to respond appropriately.

         The easiest way to acknowledge an alarm is to just
         click the red bar above the alarm image. This also
         stops the acoustic signals, which can be configured, if
         necessary. For example, you can set the alarms to be
         acknowledged automatically if displaying them is no
         longer relevant after a preset time elapses.

         In critical situations, you can use an instruction file to give security personnel instructions
         on how to respond to an alarm. This instruction file, which can be a text message, an
         image or a video clip, can be defined in the relevant camera tab of the Options dialog
         box. You can open this file by selecting the Show alarm instructions of selected camera
         icon.


                          © MOBOTIX AG • Security-Vision-Systems • Made in Germany

                                                       www.mobotix.com • sales@mobotix.com
Alarm Management                                                                              39/152
2.6    Video Searches And export Features
As you have already seen, there are a number of ways to archive live images from an IP
camera. You can use these recordings in a comprehensive video search whether this occurs
as a continuous recording or as an event-controlled recording - with MxControlCenter.

Image Recording, event Recording, Continuous Recording

MOBOTIX cameras provide three modes for recording video data. These modes can be
set for each camera on the Recording tab of the Camera Configuration dialog box:

 • Snapshot Recording: Saves the individual *.jpg images without audio as an image
   series based on pre-alarm images, the alarm image itself and post-alarm images.
 • event Recording: Saves an alarm as an MxPEG clip with the audio channel of the
   camera (optional).
 • Continuous Recording: Saves continuous video and audio data as MxPEG clips where
   the recording frame rate is reduced and can be increased automatically when an
   event occurs. This continuous recording mode is only available if you have a sufficient
   amount of storage capacity (on an SD/CF card or file server).
More information on the recording modes offered by MOBOTIX cameras can be found in
Chapter 8 Recording of the Software Manual.

2.6.1 Switching Display Windows In Player Mode

Displaying the event images recorded by a camera in
Player mode offers the easiest way to search through
video data. To do so, first click the live image of a
specific camera and then select the Toggle Player
mode button or right-click the relevant command
from the pop-up menu.
If any alarms from this camera are present, the buttons
in the Player panel of the sidebar become available
and you can view the recorded video sequences
using the playback, fast forward and rewind buttons.
In addition to these controls, you can also access the buttons that appear at the bottom
edge of the display window when you place your mouse pointer over this sidebar panel.

 An image series includes all the images (or the entire video sequence) that have been
 saved for an event (alarm). This normally includes the video data including any audio data
 that has been recorded before, during (the "event image") and after the event occurs.

You can play back either the entire image series or only the event images:
 • Play Back entire Image Series: These Player buttons allow you to play back all
   recorded images either individually or consecutively.
 • Play Back event Images Only: These Player buttons are used to show the event
   image only and are indicated by a red lightning bolt.

© MOBOTIX AG • Security-Vision-Systems • Made in Germany

www.mobotix.com • sales@mobotix.com
40/152   MxControlCenter Manual: Getting Started


         Simultaneous Playback Of All Cameras

         The All button in the Player sidebar panel switches all display windows to Player mode
         and activates the Player buttons. Playback starts simultaneously for all video sources
         regardless of when the recording was made.

         Time Synchronized Playback Of All Cameras


         You can access the options offered by the Synch. Mode list in the Player sidebar panel for
         the time-synchronized playback of recorded sequences from all displayed video sources.
         Playback can be started at the specified time if this list is compiled in Real Time or at
         Reduced Speed.

         Enter the date and time and then click the Goto button to set all cameras to the correct
         time. Now click the Playback button and all the images will be played back according to
         the setting in the Synch. Mode drop-down list:

          • Real Time: All video sequences are played back in real time. If the images cannot
            be transferred fast enough, MxControlCenter will skip individual images.
          • Reduced Speed: Playback is performed at a slightly reduced speed, if necessary,
            and even image synchronization is somewhat more flexible. This method also allows
            for smooth playback of all recorded images if the data for a real-time display cannot
            be read fast enough (for example, due to low network bandwidth).

         Quick event Search

         Select a display window in Player mode. The slider
         bar in the Player sidebar panel provides a quick
         and intuitive way to search through events.

         You can specify any date within the recorded video
         sequences to find sequences as quickly as possible.
         Click Search to jump to the next event based on
         the specified time.


                          © MOBOTIX AG • Security-Vision-Systems • Made in Germany

                                                     www.mobotix.com • sales@mobotix.com
Alarm Management                                                                             41/152
exporting Video Sequences

Right-click the Player sidebar panel and
enter the start and end positions to define
an export range. The range you selected
now appears in green.

If you click the export button, the export
list will open and the selected time range will be added as a new entry at the end of the
list. This procedure can be repeated as often as needed to add other interesting video
sequences to the export list.

More information on this topic can be found in Section 2.6.4, Export List And Data Export.

2.6.2 Defining Player Windows

 In contrast to a display window in Player mode, a player window is a special layout
 element that displays the last event image of any video source that was selected from
 the alarm list.

You first need to activate the Layout Manager to define a player window.

Defining Player Windows In A Grid Layout

 • If there is no empty display field available, select a different grid that can display
   more fields on the existing display area.
 • Right-click an empty field and select Edit from the pop-up menu.
 • Select the Player window item from the element type list and click OK.

Defining Player Windows In A Background Layout

 • Right-click an empty area and select Insert from the pop-up menu.
 • Select the Player window item from the element type list and specify the particular
   size you would like to use.
 • Click OK to close the dialog box.
 • Move the new window to a suitable position.


© MOBOTIX AG • Security-Vision-Systems • Made in Germany

www.mobotix.com • sales@mobotix.com
42/152   MxControlCenter Manual: Getting Started


         Right-click the element in question while the Layout Manager is enabled and select Edit
         from the pop-up menu to modify the properties of a player window at a later time.


         Deactivate the Layout Manager to save the settings of the current layout.


                         © MOBOTIX AG • Security-Vision-Systems • Made in Germany

                                                   www.mobotix.com • sales@mobotix.com
Alarm Management                                                                                 43/152
2.6.3 Using Video Search

If you have defined an external recording target (file server) for the relevant video source
or the MOBOTIX camera has an SD/CF card, large amounts of data will be saved for an
extended period depending on the memory storage capacity.

A more comprehensive search option that is not limited to a single camera like the basic
player window is provided by the Video Search dialog box, which appears when you click
Open event Search.


The Search dialog box can be used to browse through the recordings from all the cameras
defined in the current view. In the Cameras tab, select the camera whose recordings you
would like to browse through. MxControlCenter now shows you all recorded events in
chronological order in the Events tab.

The vertical slider bar next to the events list provides a visual indication of the time range
during the entire recording period in which events are displayed in the list. By selecting
an event in the list, the image associated with that event is displayed in the area of the
player window that was described in the previous section.


© MOBOTIX AG • Security-Vision-Systems • Made in Germany

www.mobotix.com • sales@mobotix.com
44/152   MxControlCenter Manual: Getting Started


         If you have identified an event as relevant, the time of the event can be defined as the
         Reference time , which is used to automatically display the time difference from the other
         events during the search.

         Filtering events

         If you would like to search for special event types
         (for example, motion detection only), you can
         define an event filter. To do so, click Set event
         filter and activate the events you would like to
         filter.

         This button is only relevant for searching and
         playing back continuous recordings:

              • If the button is enabled (yellow), the
                event list will only show "real events"
                (VM, UC, IR, etc.).
              • If the button is disabled (crossed out), the
                events list will also include the "pseudo
                events" of the continuous recording, which means the images that are generated
                every minute at the beginning of a new recording sequence will be displayed.
         More information on the video search options can be found in Section 3.4, Video Searches
         And Export Features.

         Printing event Images

         Click Print current and post-processed image to print the currently displayed event image.
         MxControlCenter now shows a print preview of the currently displayed image. If this image
         has been corrected by post-processing, the original, non-processed image will be added
         as well.

         You can also print event images as *.pdf files using the integrated PDF export feature for
         easy sending and archiving of printouts.

         2.6.4 export List And Data export

         Click export or Add to export list to open the export dialog box or add previously selected
         events or time ranges to the export list. Select an event from the events list and click Add
         to export list to add the individual event. To define a time range, set the Player to the exact
         time you would like and then specify the start time by selecting Set start position from
         the pop-up menu for the Player panel. After searching for the last scene to be exported,
         select Set end position from the pop-up menu to define the end time.


                            © MOBOTIX AG • Security-Vision-Systems • Made in Germany

                                                       www.mobotix.com • sales@mobotix.com
Alarm Management                                                                            45/152
                                               Note

   The time range defined in this manner can include any number of events. If an explicit
   time range for the export has not been defined, the entire time range is automatically
   added to the export list dialog box here as well.


export List

You can compile all the video sequences that you would like to export in the export list.
These particular sequences are added by defining a time range (right-click > Set start
position/end position) and then incorporating this range into the export list.

Adding Video Sequences To The export List

The following options are available for this purpose:

 • The "Player" Sidebar Panel: Define an export range (right-click > Set start position/
   end position) and then click export.
 • The "Video Search" Dialog Box: Define an export range (right-click the slider bar >
   Set start position/end position) and then click Add to export list.
Video sequences can be added multiple
times and even if the export list is closed.
Click export in the Video Search dialog
box or select Recording > export from
the menu to display the list.


© MOBOTIX AG • Security-Vision-Systems • Made in Germany

www.mobotix.com • sales@mobotix.com
46/152   MxControlCenter Manual: Getting Started


         editing The export List

         If the export list is open, you can select items individually or in groups (sHIFT-CLICk) and
         then move them with the mouse or delete them with the DeLeTe key


         Data export

         MxControlCenter provides a number of different formats for exporting recorded video and
         audio data. Choose a format from the export as selection box in the export list:

          • AVI File: This format can be displayed on all standard video players and not only
            contains the video data, but also the audio data of the video source (if included in
            the recording).
          • MxPeG Clip: This format can be integrated and played back in MxControlCenter as
            a video source. This format also includes the audio data of the video sources in the
            export (if included in the recording).
          • File Server Structure: This format can also be integrated and played back in
            MxControlCenter as a video source. It also contains the audio channel of the video
            sources (if it was included in the recording).
         Exporting as an *.avi file or an MxPEG clip activates the
         Settings button, which can be used to open the export
         Format Options dialog box. From this dialog you can
         define the options for the export (for example, maximum
         file size).


                          © MOBOTIX AG • Security-Vision-Systems • Made in Germany

                                                      www.mobotix.com • sales@mobotix.com
Alarm Management                                                                                47/152
2.7     Video Processing

2.7.1 Image Post-Processing

MxControlCenter normally displays all live video images and the images of an archived
recording in their original unedited form. This also applies to live images from integrated
third-party cameras and analog cameras in particular (see Section 2.8.2, Controlling PTZ
Cameras And Mechanical Pan/Tilt Heads).

You are certainly familiar with the term "post-processing" in
digital photography, which in this case refers to the software-
based methods offered by MxControlCenter for the subsequent
"improvement" of images. In the standard camera view, select
the camera whose image display you would like to optimize
and then click the arrow to the right of the Switch image post-
processing on/off > Options button.

You can adjust the settings for saturation, brightness, backlight and
sharpness in the Post-processing panel of the Image Processing
dialog box. By clicking the Switch image post-processing on/
off button in the main view, you can quickly switch back and
forth between viewing the original image from the camera and
the improved, post-processed image.

This type of post-processing also offers a useful tool for viewing
low-quality archived images at a later date for search purposes,
for example. This is why you will find the same controls for adjusting saturation, bright-
ness, backlight and sharpness in the Video Search dialog box (see Section 2.6, Video
Searches And Export Features).

More information on this topic can be found in Section 3.9, Image Post-Processing.

2.7.2 Image Distortion Correction

In addition to the options described in Section 2.4.6, Using The vPTZ Features for correct-
ing the distortion of currently displayed images in the PTZ Control sidebar panel, the
Image Processing dialog box can also be used to control how image distortion is cor-
rected. To open this dialog box, click Switch image processing on/off.

The automatic distortion correction features of MxControlCenter are used to fix the distorted
view caused by the wide-angle lenses of the cameras. Although the lens is specified for
some camera models (Q22M, for example), for older camera
models you need to clearly indicate which lens is being used
and how the camera is installed in the Image Processing
dialog box. The results of distortion correction are immediately
visible as it straightens any vanishing lines that were crooked
due to distortion.


© MOBOTIX AG • Security-Vision-Systems • Made in Germany

www.mobotix.com • sales@mobotix.com
48/152   MxControlCenter Manual: Getting Started


         A perfect example of where this distortion correction feature can be used is in a ceiling-
         mounted Q22M camera whose 180° lens captures "spherical" images.


         2.8    Control Center And Management Features

         2.8.1 Integrating Third-Party Digital/Analog Cameras

         MxControlCenter is the ideal solution when used in conjunction with MOBOTIX cameras.
         Note, however, that you can easily connect the network cameras or even analog cam-
         eras of third-party manufacturers to a MxControlCenter video management system also.

         Displaying Live Images

         Adding third-party IP cameras to the system is extremely easy and is done using the
         previously described Add Cameras: Search and Select dialog box. Select the manufac-
         turer type and enter the IP address and access data as usual.


           Third party
         IP PTZ camera


            MOBOTIX
            IP camera


            MOBOTIX
            IP camera


         Integrating analog cameras requires an intermediary step in which the analog video data
         is converted to a digital format that is compatible with MxControlCenter (MxPEG or M-JPEG).


                          © MOBOTIX AG • Security-Vision-Systems • Made in Germany

                                                     www.mobotix.com • sales@mobotix.com
Mx m lmxcc_en_090916

More Related Content

Similar to Mx m lmxcc_en_090916

B.whitepaper latest advances_in_megapixel_surveillance
B.whitepaper latest advances_in_megapixel_surveillanceB.whitepaper latest advances_in_megapixel_surveillance
B.whitepaper latest advances_in_megapixel_surveillanceTSOLUTIONS
 
User Interface for Visually Impaired People
User Interface for Visually Impaired PeopleUser Interface for Visually Impaired People
User Interface for Visually Impaired PeopleIOSRJECE
 
Mobile Video Architecture project
Mobile Video Architecture projectMobile Video Architecture project
Mobile Video Architecture projectTransit-Protect
 
Dukane Camera 445
Dukane Camera 445Dukane Camera 445
Dukane Camera 445MEAV
 
Reaching a Broader Audience
Reaching a Broader AudienceReaching a Broader Audience
Reaching a Broader AudienceVideoguy
 
Nokia E6 Data Specs
Nokia E6 Data SpecsNokia E6 Data Specs
Nokia E6 Data SpecsAbe Olandres
 
Micronics Mobility Brochure
Micronics Mobility BrochureMicronics Mobility Brochure
Micronics Mobility BrochuredCORE
 
2011_12_4K research in PSNC
2011_12_4K research in PSNC2011_12_4K research in PSNC
2011_12_4K research in PSNCmglowiak
 
The smartphone opportunity-r3
The smartphone opportunity-r3The smartphone opportunity-r3
The smartphone opportunity-r3Brian Richards
 
Document Scanner | VAMAA
Document Scanner | VAMAA Document Scanner | VAMAA
Document Scanner | VAMAA VAMAA
 
מיתוג ועיצוב לתחום הייטק חברות טכנולוגיה
מיתוג ועיצוב לתחום הייטק חברות טכנולוגיהמיתוג ועיצוב לתחום הייטק חברות טכנולוגיה
מיתוג ועיצוב לתחום הייטק חברות טכנולוגיהTitan
 

Similar to Mx m lmxcc_en_090916 (20)

m4-out-20027
m4-out-20027m4-out-20027
m4-out-20027
 
m4-out-20027
m4-out-20027m4-out-20027
m4-out-20027
 
m4-out-20027
m4-out-20027m4-out-20027
m4-out-20027
 
B.whitepaper latest advances_in_megapixel_surveillance
B.whitepaper latest advances_in_megapixel_surveillanceB.whitepaper latest advances_in_megapixel_surveillance
B.whitepaper latest advances_in_megapixel_surveillance
 
Nokia+6280+specification
Nokia+6280+specificationNokia+6280+specification
Nokia+6280+specification
 
User Interface for Visually Impaired People
User Interface for Visually Impaired PeopleUser Interface for Visually Impaired People
User Interface for Visually Impaired People
 
Data Sheet Nokia N97
Data Sheet Nokia N97Data Sheet Nokia N97
Data Sheet Nokia N97
 
Mobile Video Architecture project
Mobile Video Architecture projectMobile Video Architecture project
Mobile Video Architecture project
 
Dukane Camera 445
Dukane Camera 445Dukane Camera 445
Dukane Camera 445
 
Reaching a Broader Audience
Reaching a Broader AudienceReaching a Broader Audience
Reaching a Broader Audience
 
V Point8.1 Ds
V Point8.1 DsV Point8.1 Ds
V Point8.1 Ds
 
Nokia E6 Data Specs
Nokia E6 Data SpecsNokia E6 Data Specs
Nokia E6 Data Specs
 
Micronics Mobility Brochure
Micronics Mobility BrochureMicronics Mobility Brochure
Micronics Mobility Brochure
 
2011_12_4K research in PSNC
2011_12_4K research in PSNC2011_12_4K research in PSNC
2011_12_4K research in PSNC
 
Sony PMW-200
Sony PMW-200 Sony PMW-200
Sony PMW-200
 
Aktifmob mob ads_product_updates
Aktifmob mob ads_product_updatesAktifmob mob ads_product_updates
Aktifmob mob ads_product_updates
 
The smartphone opportunity-r3
The smartphone opportunity-r3The smartphone opportunity-r3
The smartphone opportunity-r3
 
Document Scanner | VAMAA
Document Scanner | VAMAA Document Scanner | VAMAA
Document Scanner | VAMAA
 
Web Based Cctv
Web Based CctvWeb Based Cctv
Web Based Cctv
 
מיתוג ועיצוב לתחום הייטק חברות טכנולוגיה
מיתוג ועיצוב לתחום הייטק חברות טכנולוגיהמיתוג ועיצוב לתחום הייטק חברות טכנולוגיה
מיתוג ועיצוב לתחום הייטק חברות טכנולוגיה
 

Recently uploaded

Polkadot JAM Slides - Token2049 - By Dr. Gavin Wood
Polkadot JAM Slides - Token2049 - By Dr. Gavin WoodPolkadot JAM Slides - Token2049 - By Dr. Gavin Wood
Polkadot JAM Slides - Token2049 - By Dr. Gavin WoodJuan lago vázquez
 
Boost PC performance: How more available memory can improve productivity
Boost PC performance: How more available memory can improve productivityBoost PC performance: How more available memory can improve productivity
Boost PC performance: How more available memory can improve productivityPrincipled Technologies
 
2024: Domino Containers - The Next Step. News from the Domino Container commu...
2024: Domino Containers - The Next Step. News from the Domino Container commu...2024: Domino Containers - The Next Step. News from the Domino Container commu...
2024: Domino Containers - The Next Step. News from the Domino Container commu...Martijn de Jong
 
A Domino Admins Adventures (Engage 2024)
A Domino Admins Adventures (Engage 2024)A Domino Admins Adventures (Engage 2024)
A Domino Admins Adventures (Engage 2024)Gabriella Davis
 
Apidays New York 2024 - The Good, the Bad and the Governed by David O'Neill, ...
Apidays New York 2024 - The Good, the Bad and the Governed by David O'Neill, ...Apidays New York 2024 - The Good, the Bad and the Governed by David O'Neill, ...
Apidays New York 2024 - The Good, the Bad and the Governed by David O'Neill, ...apidays
 
Cloud Frontiers: A Deep Dive into Serverless Spatial Data and FME
Cloud Frontiers:  A Deep Dive into Serverless Spatial Data and FMECloud Frontiers:  A Deep Dive into Serverless Spatial Data and FME
Cloud Frontiers: A Deep Dive into Serverless Spatial Data and FMESafe Software
 
Partners Life - Insurer Innovation Award 2024
Partners Life - Insurer Innovation Award 2024Partners Life - Insurer Innovation Award 2024
Partners Life - Insurer Innovation Award 2024The Digital Insurer
 
Deploy with confidence: VMware Cloud Foundation 5.1 on next gen Dell PowerEdg...
Deploy with confidence: VMware Cloud Foundation 5.1 on next gen Dell PowerEdg...Deploy with confidence: VMware Cloud Foundation 5.1 on next gen Dell PowerEdg...
Deploy with confidence: VMware Cloud Foundation 5.1 on next gen Dell PowerEdg...Principled Technologies
 
MINDCTI Revenue Release Quarter One 2024
MINDCTI Revenue Release Quarter One 2024MINDCTI Revenue Release Quarter One 2024
MINDCTI Revenue Release Quarter One 2024MIND CTI
 
Automating Google Workspace (GWS) & more with Apps Script
Automating Google Workspace (GWS) & more with Apps ScriptAutomating Google Workspace (GWS) & more with Apps Script
Automating Google Workspace (GWS) & more with Apps Scriptwesley chun
 
🐬 The future of MySQL is Postgres 🐘
🐬  The future of MySQL is Postgres   🐘🐬  The future of MySQL is Postgres   🐘
🐬 The future of MySQL is Postgres 🐘RTylerCroy
 
Data Cloud, More than a CDP by Matt Robison
Data Cloud, More than a CDP by Matt RobisonData Cloud, More than a CDP by Matt Robison
Data Cloud, More than a CDP by Matt RobisonAnna Loughnan Colquhoun
 
Scaling API-first – The story of a global engineering organization
Scaling API-first – The story of a global engineering organizationScaling API-first – The story of a global engineering organization
Scaling API-first – The story of a global engineering organizationRadu Cotescu
 
Top 10 Most Downloaded Games on Play Store in 2024
Top 10 Most Downloaded Games on Play Store in 2024Top 10 Most Downloaded Games on Play Store in 2024
Top 10 Most Downloaded Games on Play Store in 2024SynarionITSolutions
 
Top 5 Benefits OF Using Muvi Live Paywall For Live Streams
Top 5 Benefits OF Using Muvi Live Paywall For Live StreamsTop 5 Benefits OF Using Muvi Live Paywall For Live Streams
Top 5 Benefits OF Using Muvi Live Paywall For Live StreamsRoshan Dwivedi
 
ProductAnonymous-April2024-WinProductDiscovery-MelissaKlemke
ProductAnonymous-April2024-WinProductDiscovery-MelissaKlemkeProductAnonymous-April2024-WinProductDiscovery-MelissaKlemke
ProductAnonymous-April2024-WinProductDiscovery-MelissaKlemkeProduct Anonymous
 
GenAI Risks & Security Meetup 01052024.pdf
GenAI Risks & Security Meetup 01052024.pdfGenAI Risks & Security Meetup 01052024.pdf
GenAI Risks & Security Meetup 01052024.pdflior mazor
 
Apidays Singapore 2024 - Building Digital Trust in a Digital Economy by Veron...
Apidays Singapore 2024 - Building Digital Trust in a Digital Economy by Veron...Apidays Singapore 2024 - Building Digital Trust in a Digital Economy by Veron...
Apidays Singapore 2024 - Building Digital Trust in a Digital Economy by Veron...apidays
 
Apidays New York 2024 - The value of a flexible API Management solution for O...
Apidays New York 2024 - The value of a flexible API Management solution for O...Apidays New York 2024 - The value of a flexible API Management solution for O...
Apidays New York 2024 - The value of a flexible API Management solution for O...apidays
 
Manulife - Insurer Innovation Award 2024
Manulife - Insurer Innovation Award 2024Manulife - Insurer Innovation Award 2024
Manulife - Insurer Innovation Award 2024The Digital Insurer
 

Recently uploaded (20)

Polkadot JAM Slides - Token2049 - By Dr. Gavin Wood
Polkadot JAM Slides - Token2049 - By Dr. Gavin WoodPolkadot JAM Slides - Token2049 - By Dr. Gavin Wood
Polkadot JAM Slides - Token2049 - By Dr. Gavin Wood
 
Boost PC performance: How more available memory can improve productivity
Boost PC performance: How more available memory can improve productivityBoost PC performance: How more available memory can improve productivity
Boost PC performance: How more available memory can improve productivity
 
2024: Domino Containers - The Next Step. News from the Domino Container commu...
2024: Domino Containers - The Next Step. News from the Domino Container commu...2024: Domino Containers - The Next Step. News from the Domino Container commu...
2024: Domino Containers - The Next Step. News from the Domino Container commu...
 
A Domino Admins Adventures (Engage 2024)
A Domino Admins Adventures (Engage 2024)A Domino Admins Adventures (Engage 2024)
A Domino Admins Adventures (Engage 2024)
 
Apidays New York 2024 - The Good, the Bad and the Governed by David O'Neill, ...
Apidays New York 2024 - The Good, the Bad and the Governed by David O'Neill, ...Apidays New York 2024 - The Good, the Bad and the Governed by David O'Neill, ...
Apidays New York 2024 - The Good, the Bad and the Governed by David O'Neill, ...
 
Cloud Frontiers: A Deep Dive into Serverless Spatial Data and FME
Cloud Frontiers:  A Deep Dive into Serverless Spatial Data and FMECloud Frontiers:  A Deep Dive into Serverless Spatial Data and FME
Cloud Frontiers: A Deep Dive into Serverless Spatial Data and FME
 
Partners Life - Insurer Innovation Award 2024
Partners Life - Insurer Innovation Award 2024Partners Life - Insurer Innovation Award 2024
Partners Life - Insurer Innovation Award 2024
 
Deploy with confidence: VMware Cloud Foundation 5.1 on next gen Dell PowerEdg...
Deploy with confidence: VMware Cloud Foundation 5.1 on next gen Dell PowerEdg...Deploy with confidence: VMware Cloud Foundation 5.1 on next gen Dell PowerEdg...
Deploy with confidence: VMware Cloud Foundation 5.1 on next gen Dell PowerEdg...
 
MINDCTI Revenue Release Quarter One 2024
MINDCTI Revenue Release Quarter One 2024MINDCTI Revenue Release Quarter One 2024
MINDCTI Revenue Release Quarter One 2024
 
Automating Google Workspace (GWS) & more with Apps Script
Automating Google Workspace (GWS) & more with Apps ScriptAutomating Google Workspace (GWS) & more with Apps Script
Automating Google Workspace (GWS) & more with Apps Script
 
🐬 The future of MySQL is Postgres 🐘
🐬  The future of MySQL is Postgres   🐘🐬  The future of MySQL is Postgres   🐘
🐬 The future of MySQL is Postgres 🐘
 
Data Cloud, More than a CDP by Matt Robison
Data Cloud, More than a CDP by Matt RobisonData Cloud, More than a CDP by Matt Robison
Data Cloud, More than a CDP by Matt Robison
 
Scaling API-first – The story of a global engineering organization
Scaling API-first – The story of a global engineering organizationScaling API-first – The story of a global engineering organization
Scaling API-first – The story of a global engineering organization
 
Top 10 Most Downloaded Games on Play Store in 2024
Top 10 Most Downloaded Games on Play Store in 2024Top 10 Most Downloaded Games on Play Store in 2024
Top 10 Most Downloaded Games on Play Store in 2024
 
Top 5 Benefits OF Using Muvi Live Paywall For Live Streams
Top 5 Benefits OF Using Muvi Live Paywall For Live StreamsTop 5 Benefits OF Using Muvi Live Paywall For Live Streams
Top 5 Benefits OF Using Muvi Live Paywall For Live Streams
 
ProductAnonymous-April2024-WinProductDiscovery-MelissaKlemke
ProductAnonymous-April2024-WinProductDiscovery-MelissaKlemkeProductAnonymous-April2024-WinProductDiscovery-MelissaKlemke
ProductAnonymous-April2024-WinProductDiscovery-MelissaKlemke
 
GenAI Risks & Security Meetup 01052024.pdf
GenAI Risks & Security Meetup 01052024.pdfGenAI Risks & Security Meetup 01052024.pdf
GenAI Risks & Security Meetup 01052024.pdf
 
Apidays Singapore 2024 - Building Digital Trust in a Digital Economy by Veron...
Apidays Singapore 2024 - Building Digital Trust in a Digital Economy by Veron...Apidays Singapore 2024 - Building Digital Trust in a Digital Economy by Veron...
Apidays Singapore 2024 - Building Digital Trust in a Digital Economy by Veron...
 
Apidays New York 2024 - The value of a flexible API Management solution for O...
Apidays New York 2024 - The value of a flexible API Management solution for O...Apidays New York 2024 - The value of a flexible API Management solution for O...
Apidays New York 2024 - The value of a flexible API Management solution for O...
 
Manulife - Insurer Innovation Award 2024
Manulife - Insurer Innovation Award 2024Manulife - Insurer Innovation Award 2024
Manulife - Insurer Innovation Award 2024
 

Mx m lmxcc_en_090916

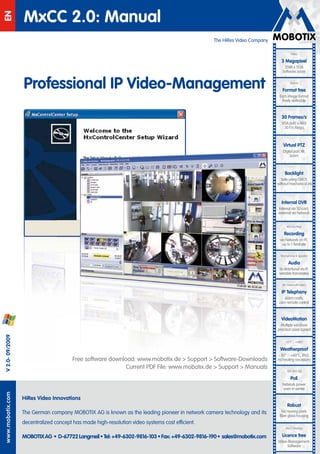
  • 1. MxCC 2.0: Manual EN The HiRes Video Company HiRes 3 Megapixel 2048 x 1536 EN Software zoom Professional IP Video-Management Professionelles IP Video-Management Skyline Format free Each image format freely definable 30 Frames/s VGA (640 x 480) 30 F/s Mega Virtual PTZ Digital pan, tilt, zoom Backlight Safe using CMOS without mechanical iris Internal DVR Internal via SD card, external via Network Win/Lin/Mac Recording via Network on PC up to 1 Terabyte Microphone & speaker Audio bi-directional via IP, variable framerates SIP-Client with video IP Telephony Alarm notify, cam remote control VideoMotion MOBOTIX: Control Center. Multiple windows precision pixel-based V 2.0- 09/2009 -22°F ... +140°F Weatherproof - 30° ... +60°C, IP65, Free software download: www.mobotix.de > Support > Software-Downloads no heating necessary Current PDF File: www.mobotix.de > Support > Manuals Version: 2.0, Last updated: June 15, 2009 IEEE 802.3af PoE Network power even in winter www.mobotix.com www.mobotix.com HiRes Video Innovations Robust The German company MOBOTIX AG is known as the leading pioneer in network camera technology and its No moving parts fiber glass housing decentralized concept has made high-resolution video systems cost efficient. MxCC/MxEasy MOBOTIX AG • D-67722 Langmeil • Tel: +49-6302-9816-103 • Fax: +49-6302-9816-190 • sales@mobotix.com Licence free Video-Management- Software
  • 2. MxControlCenter Manual Notes © MOBOTIX AG • Security-Vision-Systems • Made in Germany www.mobotix.com • sales@mobotix.com
  • 3. Contents 3/152 COnTenTS 1 Concept 8 1.1 What Is MxControlCenter? 8 1.2 Application examples 9 1.2.1 Example: Installing And Starting Up A Small Video Monitoring System 9 1.2.2 Example: Live Monitoring Of A Parking Garage 9 1.2.3 Example: Live Monitoring Of Spectators In A Soccer Stadium 10 1.2.4 Example: Live Monitoring Inside A Train Station 10 1.2.5 Example: Monitoring An Isolated Parking Lot With An Alarm System Linked To The Main Office Of A Security Company 11 1.2.6 Example: Review Of Images And Alarms After A Burglary Occurred In An Office Building 11 2 Getting Started 13 2.1 Installation 13 2.2 Finding And Configuring Video Sources 14 2.2.1 Connecting MOBOTIX Cameras 14 2.2.2 Finding MOBOTIX Cameras 15 2.2.3 Adding Video Sources Manually 18 2.2.4 Using Video Sources In MxControlCenter 18 2.3 User Interface And Operation 20 2.3.1 Elements Of The Main Window 20 2.3.2 Layout Manager 22 2.3.3 Alarm List 23 2.3.4 Camera Configuration 24 2.3.5 Update Assistant 25 2.3.6 Program Settings 26 2.4 Live Monitoring With numerous Cameras 27 2.4.1 Monitoring In Predefined Layouts 27 2.4.2 Monitoring The Camera Connection 29 2.4.3 Creating Layouts 30 2.4.4 Procedure 30 2.4.5 Using The Sequencer Features 31 2.4.6 Using The vPTZ Features 32 2.5 Alarm Management 34 2.5.1 Preparing MxControlCenter 34 2.5.2 Preparing The Cameras 36 2.5.3 Alarm Display 37 2.5.4 Alarm Acknowledgement 38 2.6 Video Searches And export Features 39 2.6.1 Switching Display Windows In Player Mode 39 © MOBOTIX AG • Security-Vision-Systems • Made in Germany www.mobotix.com • sales@mobotix.com
  • 4. 4/152 MxControlCenter Manual: Contents 2.6.2 Defining Player Windows 41 2.6.3 Using Video Search 43 2.6.4 Export List And Data Export 44 2.7 Video Processing 47 2.7.1 Image Post-Processing 47 2.7.2 Image Distortion Correction 47 2.8 Control Center And Management Features 48 2.8.1 Integrating Third-Party Digital/Analog Cameras 48 2.8.2 Controlling PTZ Cameras And Mechanical Pan/Tilt Heads 50 2.9 Configuring MxControlCenter 51 2.9.1 Modifying, Saving And Loading Program Options 51 2.9.2 Customizing The User Interface 51 2.9.3 Managing MxControlCenter Configurations 52 2.9.4 Editing Camera Configurations 53 2.9.5 Managing Camera Configurations 53 3 Advanced Features 57 3.1 MxControlCenter Controls 57 3.1.1 Buttons On The Toolbar 57 3.1.2 The "Layouts" Sidebar Panel 60 3.1.3 The "Player" Sidebar Panel 61 3.1.4 The "PTZ Controls" Sidebar Panel 65 3.2 editing Layouts 73 3.2.1 Grid Layouts 73 3.2.2 Background Layouts 79 3.2.3 Additional Options For Editing Layouts 83 3.3 Alarm Processing 84 3.3.1 Alarm List 86 3.3.2 Displaying Stored Alarms 87 3.4 Video Searches And export Features 89 3.5 Remote Control Using network Messages 92 3.6 Saving The Configuration Of MxControlCenter Cameras 95 3.6.1 Global And Local Folders 95 3.6.2 Storing The Program Settings 95 3.7 Users And Passwords 97 3.7.1 Access Levels Of MxControlCenter 97 3.7.2 Activating Password Protection In MxControlCenter 97 3.8 Security Considerations 98 3.8.1 General Thoughts On Network Security 98 3.8.2 Restricting Public Access 98 3.8.3 Camera Settings (In The Browser) 98 3.8.4 Settings In MxControlCenter 99 © MOBOTIX AG • Security-Vision-Systems • Made in Germany www.mobotix.com • sales@mobotix.com
  • 5. Contents 5/152 3.9 Image Post-Processing 100 3.9.1 Overview 100 3.9.2 Configuring Image Post-Processing 101 3.9.3 Activating/Deactivating Image Post-Processing 101 3.10 Third-Party Cameras With PTZ Controls And Pan/Tilt Heads 102 3.10.1 Overview 102 3.10.2 Connecting Third-Party IP And Analog Cameras 102 3.10.3 Activating Integrated PTZ Units And Pan/Tilt Heads 103 3.10.4 Using MOBOTIX Cameras With Pan/Tilt Heads 103 3.10.5 Using Analog Cameras In MxServer 107 4 Configuring MOBOTIX Cameras 111 4.1 The "Camera Configuration" Dialog Box 111 4.2 The "Overview" Tab 113 4.3 The "Image Settings" Tab 114 4.4 The "exposure" Tab 116 4.5 The "Recording" Tab 117 4.6 Updating The Camera Software 120 4.6.1 Preparing The Software Update 120 4.6.2 Updating System Software 121 4.7 Saving And Importing Camera Configurations 122 5 MxControlCenter Options 123 5.1 Overview 123 5.2 The "General" Tab 124 5.3 The "Alarm List" Tab 130 5.4 The "Remote Control" Tab 132 5.4.1 General Remote Control And Camera IP Notify 133 5.4.2 Camera IP Notify Only Port 134 5.4.3 Camera IP Notify Options 135 5.5 Camera Tabs 136 5.5.1 Camera Access 136 5.5.2 Layout And Display Options 137 5.5.3 PTZ/Rotor Control 139 A MOBOTIX Glossary 141 Index 147 © MOBOTIX AG • Security-Vision-Systems • Made in Germany www.mobotix.com • sales@mobotix.com
  • 6. 6/152 MxControlCenter Manual: Contents Typographic Conventions We use the following formatting to indicate special elements in this manual: • User Interface elements: This formatting is used for all user interface elements of MxControlCenter: Click on the PTZ Views button. • Values in Selection Boxes: If you are expected to select values in selection boxes, these values are formatted as in this example: ... and highlight Unlimited in the selection box. • User Input: Input in text entry boxes is formatted as in this example: Double-click the camera name and enter the desired name (for example, Back Entrance). • Keys on the Computer Keyboard: The following format is used if you are expected to press any keys on the keyboard: Press the HasH key (#) to reset the zoom settings. • File names: If the text refers to file and folder (directory) names, they are format- ted as in this example: Double-click the MxControlCenter.msi file to install it. • Cross References: The following formatting is used when referring to other sections in this manual: For more information on this topic, see Section 3.2 Backing Up And Restoring Settings. • Web Links: Hyperlinks in the text are formatted as follows: For additional information, see our www.mobotix.com website. • explanations: They are presented as follows: An image series includes all the images (or the entire video sequence) that have been saved for an event (alarm). In addition, ... • examples: They are presented as follows: http://192.168.1.182:8001/?fullscreen=1 (minimizes MxControlCenter to the taskbar) Manuals For MOBOTIX Products All MOBOTIX products have corresponding manuals that you can download as *.pdf files at www.mobotix.com under Support > Manuals: • Camera Manual Part 1: This camera manual is different for each camera model and describes the specific features for mounting and operating the camera model in question. • Camera Software Manual Part 2: This software manual describes the software features of the browser-based user interface for all MOBOTIX cameras. © MOBOTIX AG • Security-Vision-Systems • Made in Germany www.mobotix.com • sales@mobotix.com
  • 7. Contents 7/152 Notes On MOBOTIX Hardware Products • RoHS Declaration: The products of MOBOTIX AG are in full compliance with Art. 5 of the German Electrical and Electronic Equipment Act and the E.U. Directive 2002/95/ EC on the Restriction of the Use of Certain Hazardous Substances in Electrical and Electronic Equipment (RoHS) as far as they are subject to these regulations. (You can find the RoHS Declaration of www.mobotix.com under www.mobotix.com/ eng_US/Support/Spec-Sheets.) • Disposal: Electrical and electronic products contain many reusable materials. For this reason, we would ask that you dispose of MOBOTIX products at the end of their service life in accordance with all legal requirements and regulations (or deposit these products at a municipal collection center). MOBOTIX products may not be disposed of with household waste! If the product contains a battery, please dispose of the battery separately (the corre- sponding product manuals contain specific directions if the product contains a battery). Disclaimer MOBOTIX AG does not assume any responsibility for damage resulting from improper use or failure to comply with the manuals or the applicable rules and regulations. Our General Terms and Conditions apply. You can download the current version of the General Terms and Conditions on our website at www.mobotix.com. Copyright All rights reserved. MOBOTIX, MxControlCenter, MxEasy, ExtIO and CamIO are interna- tionally protected trademarks of MOBOTIX AG. Microsoft, Windows, Windows Server and the Windows logo are registered trademarks of Microsoft Corporation. Apple, the Apple logo, Macintosh, OS X and Bonjour are trademarks of Apple Inc. Linux is a trademark of Linus Torvalds. All other brand names mentioned herein may be trademarks or registered trademarks of the respective owners. Copyright © 1999-2009 MOBOTIX AG, Langmeil, Germany. Information subject to change without notice! © MOBOTIX AG • Security-Vision-Systems • Made in Germany www.mobotix.com • sales@mobotix.com
  • 8. 8/152 MxControlCenter Manual: Concept 1 CONCEPT 1.1 What Is MxControlCenter? MOBOTIX MxControlCenter is a free application that provides the ideal multifunctional solution for all your security needs. MxControlCenter allows you to easily connect MOBOTIX cameras and third-party cameras to a video security system. It provides a very simple method for adding new cameras to a system and viewing the live images they capture. A wide variety of viewing options is also available for displaying images from one or more cameras. As a professional video management system, MxControlCenter also acts as a tool for handling video and audio data in IP networks. It not only lets you view the images from a connected camera in real time, you can also edit them. Note that editing in this context means that both the camera and MxControlCenter are capable of manipulating displayed images using a number of functions. For example, you can zoom in on one of the images supplied by the camera to get a closer look at an area of possible interest or adjust the brightness of an image without changing the image settings of the camera. Furthermore MxControlCenter provides you with the ability to subsequently view and search alarm images that have been recorded externally on a file server or internally in the cameras. A camera alarm, for example, triggered by the camera's motion detection, can initiate a specific action at the control center. Such actions may include bringing the © MOBOTIX AG • Security-Vision-Systems • Made in Germany www.mobotix.com • sales@mobotix.com
  • 9. Application examples 9/152 current live images from the alarm-triggering camera to the foreground and having an acoustic signal emitted over the viewer's computer. In addition to these features, MxControlCenter also allows you to independently display and store the alarms of all monitoring cameras. The program can therefore be used to perform a subsequent analysis of events that have been recorded within the visual range of multiple cameras. Sequencing these image recordings can help you trace the events surrounding a burglary, for example. Using the integrated export list, you can then combine the video and audio data recorded by one or more cameras into a clip that can be exported as an *.avi file for further analysis. This is just one of the many MxControlCenter features that are explained in this manual in a clear and concise manner. The following section contains examples of how to use MOBOTIX cameras in conjunction with MxControlCenter. 1.2 Application examples Examples of how to use MxControlCenter are provided in the following sections. 1.2.1 example: Installing And Starting Up A Small Video Monitoring System The director of a small automobile museum asks an in-house technician to install a surveil- lance camera to monitor an area of valuable exhibits during opening hours. The in-house technician has very little experience with configuring computers and networks. Yet once the technician connects the camera to the existing Ethernet network, and installs and runs MxControlCenter on the director's computer, they are able to carry out the necessary configurations without any difficulty. The camera is detected automatically on the network under its own name and is quickly configured in a few easy steps. Even the director's wish for after-hours surveillance of the exhibit rooms and notification of the night watchman in the event of any irregularities now appears as a manageable task to the technician. 1.2.2 example: Live Monitoring Of A Parking Garage MOBOTIX cameras are used to monitor a three-level parking garage. During opening hours, a security guard in the parking garage's control room uses MxControlCenter to monitor the parking levels in real time. The live monitoring feature is set up to include a predefined view (a layout) of each parking level based on all the camera images of that parking level. MxControlCenter automatically cycles through the parking level views at preset intervals (the layout sequencer feature). © MOBOTIX AG • Security-Vision-Systems • Made in Germany www.mobotix.com • sales@mobotix.com
  • 10. 10/152 MxControlCenter Manual: Concept 1.2.3 example: Live Monitoring Of Spectators In A Soccer Stadium To obtain the best images from the MOBOTIX cameras installed at the various ticket counters, entrances, and exits of the soccer stadium, the system administrator creates a layout beforehand that is specifically adapted to the situation at hand. To that end the system administrator positions the individual cameras on a layout of the stadium accord- ing to their location. Before a game begins, MxControlCenter is launched by security personnel in the control center and it automatically displays the right layout for each workstation. The head of security can watch live images of the ticket counters and entrances before the game, switch to the cameras inside the stadium during the game, and then monitor the exits after the game. In critical situations, the security personnel can open an alarm plan specifically set up for each camera, which lists the radio call frequencies for the responsible guard in the area of the camera. 1.2.4 example: Live Monitoring Inside A Train Station The platforms of a train station are to be monitored with MOBOTIX cameras. Four cam- eras are installed on each platform for that purpose. Life monitoring is carried out using MxControlCenter. A grid layout for each platform is created in the program based on the live camera images of that platform (see Section 3.2.1, Grid Layouts). The program interface is configured so that security personnel can only access the buttons for switching layout views (see Section 2.9.2, Customizing The User Interface). It is also configured to provide visual notification in the image when a connection error occurs or the maximum permitted latency time between image creation and display is exceeded (see Section 5.4, The “Remote Control” Tab). © MOBOTIX AG • Security-Vision-Systems • Made in Germany www.mobotix.com • sales@mobotix.com
  • 11. Application examples 11/152 1.2.5 example: Monitoring An Isolated Parking Lot With An Alarm System Linked To The Main Office Of A Security Company An auto dealership installs MOBOTIX cameras in isolated parking lots where vehicles have been damaged repeatedly in the past. A technician defines a display layout for each parking lot with the cameras that are installed there. Each camera is configured to detect any movement near the fence surrounding the parking lots. The infrared sensors of the night cameras also trigger an alarm when heat is detected. If a camera detects a movement, a network message sent from the camera to MxControlCenter automatically opens the layout of the relevant parking lot in the main office of the employed security company. An alarm sound is simultaneously emitted until it is acknowledged by a staff member. After acknowledging the alarm, the staff member can initiate the necessary measures. 1.2.6 example: Review Of Images And Alarms After A Burglary Occurred In An Office Building In addition to live monitoring of the main entrance by the receptionist during regular office hours, the MOBOTIX cameras installed on the floors, the staircases, and the parking lots in front of and behind the building are configured to detect and alert of any movement or changes in brightness at night. Furthermore, the manager will receive an e-mail every time a camera triggers an alarm. © MOBOTIX AG • Security-Vision-Systems • Made in Germany www.mobotix.com • sales@mobotix.com
  • 12. 12/152 MxControlCenter Manual: Concept Once notified, the manager can search through the video recordings of the cameras in the morning without exposing himself or herself to any danger. The route taken by the burglar from the parking lot to the actual break-in in the server room can be plotted. A "video" can be compiled using these recordings and show the entire burglary up to the point when, for example, a stolen computer and printer are loaded into the trunk, includ- ing the license plate number of that vehicle. It can thus provide valuable evidence for further criminal investigation. © MOBOTIX AG • Security-Vision-Systems • Made in Germany www.mobotix.com • sales@mobotix.com
  • 13. Installation 13/152 2 GeTTInG STARTeD This chapter describes the main tasks of MxControlCenter and how to perform them. Chapter 3, Advanced Features offers a more detailed description of the individual features while also discussing advanced features that go beyond "normal" installations. 2.1 Installation If you have an MxControlCenter installation CD, insert it into the DVD drive of your computer. If you do not have the installation CD or would just like to install an update, you can down- load the latest Windows installer from the MOBOTIX website as an *.msi file and install it manually. The latest versions are available at www.mobotix.com under Support > Software Downloads > MxControlCenter. If you insert the installation CD, the installation process will start automatically and you will be guided through the necessary steps. If you have downloaded the latest Windows installer, double-click the *.msi file to initiate the installation process. The Installer (currently only available in English) copies the application files to your computer and then creates the designated shortcuts (Desktop, Start Menu, etc.) during the installation process. If you have any older program versions installed, the Installer will automatically update them without changing your existing configurations. © MOBOTIX AG • Security-Vision-Systems • Made in Germany www.mobotix.com • sales@mobotix.com
  • 14. 14/152 MxControlCenter Manual: Getting Started Caution MxControlCenter will attempt to find all MOBOTIX cameras in the physically connected network (i.e., every MOBOTIX cameras with a factory IP address of 10.x.x.x). Make sure that the firewall settings on your computer do not block network traffic with MxControlCenter. If MOBOTIX cameras are found, MxControlCenter. can automati- cally reconfigure them so that they are available on your computer. If you do not have permission to modify these settings on your computer, contact your system administrator for assistance. For detailed information on the automatic camera search feature and manual con- figuration, refer to Section 2.2.2, Finding MOBOTIX Cameras. 2.2 Finding And Configuring Video Sources Video sources not only refer to MOBOTIX cameras, but also to third-party IP cameras, file server paths, MxPEG clips and analog cameras connected via MxServer (for example, analog dome cameras). Video sources unrelated to MOBOTIX cameras are not found automatically and need to be added manually. 2.2.1 Connecting MOBOTIX Cameras MxControlCenter provides you with a convenient tool for starting up and configuring new MOBOTIX cameras. You do not need extensive network knowledge to properly connect your camera. Simply connect the camera to either the Poe switch or the network Power Adapter as shown in the figures below. PoE Switch 10/100 MBps Network (TCP/IP) 10.3.0.199 Installation with PoE switch © MOBOTIX AG • Security-Vision-Systems • Made in Germany www.mobotix.com • sales@mobotix.com
  • 15. Finding And Configuring Video Sources 15/152 A PoE switch or the MOBOTIX Network Power Adapter provides the power supply and network connection to your MOBOTIX camera over an Ethernet cable: 10.3.0.200 Switch 10/100 Mbps Network (TCP/IP) Installation with MOBOTIX Network Power Adapter Now make sure that your computer is connected to the same PoE switch or the Network Power Adapter (the computer/power connection). When the camera is ready for use, the top LeD glows and the two red LeDs blink for the M12 and D12 models and the green LeD glows and the red LeD blinks for the M22M and D22M models. More information on starting up your camera can be found in the respective camera manual. 2.2.2 Finding MOBOTIX Cameras Launch MxControlCenter after successful installation (see Section 2.1, Installation) by double- clicking the shortcut that was created by the Installer on your Desktop or the executable MxCC.exe file in the installation directory. When MxControlCenter is launched for the first time, the Add Cameras - Search and Select dialog box opens and the application automatically searches for MOBOTIX cam- eras in the local network. To perform a camera search at a later stage, select Camera > Add from the menu. © MOBOTIX AG • Security-Vision-Systems • Made in Germany www.mobotix.com • sales@mobotix.com
  • 16. 16/152 MxControlCenter Manual: Getting Started If your MOBOTIX camera is properly connected, it should appear together with the exist- ing video sources in the following list: Detected Cameras Are Located In A Different Subnet The symbols in the first column and the legend in the dialog box indicate whether you can access a particular camera directly from MxControlCenter. Note that you can access any camera designated by the green OK symbol. Cameras designated by the yellow Different Subnet symbol are located in a different subnet. This usually applies to new cameras or cameras that have been reset to their factory settings. Note MxControlCenter finds all MOBOTIX cameras provided that both your computer and the cameras are located in the same physical network . A physical network includes all devices that access a shared Ethernet network (for example, using switches) without having routers that segment the individual portions of the network. The actual transmission method (cable, wi-fi, etc.) is irrelevant in this regard. Select the cameras that you would like to display in a Layout (a view with cameras) and click Add selected cameras. © MOBOTIX AG • Security-Vision-Systems • Made in Germany www.mobotix.com • sales@mobotix.com
  • 17. Finding And Configuring Video Sources 17/152 The Add cameras dialog box now appears. You can choose to either create a new layout with the cameras that have been found or simply add those cameras to MxControlCenter. If some of the selected cameras are in different subnets, MxControlCenter displays the following dialog box: Click Yes to reconfigure the cameras for the subnet of your computer. Reconfiguring Cameras In A Different Subnet In most networks, a DHCP server will automatically assign the IP addresses for network devices so that you can apply the default settings in the Configure camera dialog box (Get IP address automatically). If you would like all cameras to obtain IP addresses automatically, select the Apply to all selected cameras checkbox. If the IP addresses for devices on the network are permanently assigned, ask your network administrator for the appropriate IP addresses for the cameras. Once you have that information, enter the correct IP address and subnet mask for each camera in the Use this IP address group. Make sure that the Save configuration permanently on camera checkbox is selected so that the cameras can be found at the designated IP address when you restart your computer. Then click OK. Now wait until MxControlCenter has modified the network settings of the cameras and restarted the computer. The status of the reconfigured cameras changes from Different © MOBOTIX AG • Security-Vision-Systems • Made in Germany www.mobotix.com • sales@mobotix.com
  • 18. 18/152 MxControlCenter Manual: Getting Started subnet (blue symbol) to OK. Close the Add Cameras- Search and Select dialog box by clicking OK. Note You can open the Configure Camera dialog box for any video source by right-clicking the specific video source you want to configure in the Add Cameras - Search and Select dialog box and selecting Configure network from the pop-up menu. 2.2.3 Adding Video Sources Manually In addition to MOBOTIX cameras that are found automatically, you can also manually add video sources to the list of video sources in MxControlCenter. • Camera: Here, you can enter the known IP address or DNS name of a MOBOTIX camera or a third-party IP camera if it was not found by the automatic search feature. • MxPeG Clip: Adds an MxPEG video clip previously recorded by a MOBOTIX camera as a video source. • Recording Path: Adds the path of an external file server where a MOBOTIX camera has recorded audio/video data. The videos or snapshots recorded at that location can now be played back using the Player or Video Search in MxControlCenter. 2.2.4 Using Video Sources In MxControlCenter You can now use the list to select the video sources that you would like to display and manage in MxControlCenter.. Camera Preview Entrance If you select one camera with the status OK, MxControlCenter automatically displays the live images from that camera in the preview window. If you are using CTrL-click to select several cameras, the image from the camera selected last is shown in the preview window. This feature makes it easier for you to identify the cameras that you would like to use. © MOBOTIX AG • Security-Vision-Systems • Made in Germany www.mobotix.com • sales@mobotix.com
  • 19. Finding And Configuring Video Sources 19/152 editing The Video Source List Right-click this list to open a pop-up menu from which you can select all video sources or cancel the selection. You can also use this method to remove from the list some or all of the video sources that you would not like to display or manage in MxControlCenter. If you have cancelled the camera configuration process or need a password that differs from the camera's factory default password, you can also configure the camera from the pop-up menu at a later date and enter the user name and password required for reconfiguration at that time. Adding Selected Video Sources In A new Layout Click OK to add the selected cameras in MxControlCenter. If you select the Generate new grid for selected cameras option in the Add Cameras dialog box, MxControlCenter will automatically create a grid layout that displays all selected video sources in equal-sized windows. Otherwise the selected video sources will only be added to MxControlCenter and can later be used to create layouts. A layout can show multiple video sources (cameras, file server paths, MxPEG clips, etc.) either in a grid or in front of a background. A video source can be displayed in a background layout as a video window or a symbol. Layouts can be saved, renamed and arranged hierarchically. © MOBOTIX AG • Security-Vision-Systems • Made in Germany www.mobotix.com • sales@mobotix.com
  • 20. 20/152 MxControlCenter Manual: Getting Started 2.3 User Interface And Operation The main window of MxControlCenter appears after you select the first video sources (MOBOTIX cameras, recording paths, MxPEG clips, etc.). This section introduces you to the basic elements of the application. 2.3.1 elements Of The Main Window After the video sources have been automatically defined during initial installation, MxControlCenter opens the main window, which is divided into the following sections: Display panel with a layout for Menu bar Alarm list Toolbar displaying the cameras “Layouts” panel “Player” panel “PTZ” panel Status bar Sidebar Date/time of the current camera The standard view of MxControlCenter is primarily intended for users who work with the features set up for camera viewing and alarms. Sections Of The Main Window • Menu Bar: From the menu bar you can switch between views, open additional dialog boxes and even execute all the features assigned to the various toolbar buttons described below. • Alarm List: This panel shows the alarm images of the cameras that the user normally needs to acknowledge by clicking the appropriate title bar (red). Double-clicking an © MOBOTIX AG • Security-Vision-Systems • Made in Germany www.mobotix.com • sales@mobotix.com
  • 21. Finding And Configuring Video Sources 21/152 alarm image opens the Video Search dialog box where you can view the alarms and then compile them for later analysis (also for a camera-wide analysis). • Toolbar: The toolbar contains buttons for important features. To see what a particular button does, simply place your mouse pointer over it and read the tooltip that appears. The toolbar can be configured to quickly switch between layouts (the Layout buttons in toolbar checkbox) or appear at the bottom of the main window (the Show toolbar at bottom checkbox) in Tools > Settings > General. • Display Panel: This panel shows the cameras of the currently selected layout. The current camera appears with a yellow frame and is the "active camera" whose time and date are indicated in the status bar in the bottom right-hand corner. Besides the standard camera windows, which contain the live images of a specific camera, you can also define player and focus windows in a layout for displaying the recorded images of one or more cameras. • Status Bar: MxControlCenter uses the status bar to display specific runtime information. • Sidebar: The sidebar contains different information depending on the context. Normally it displays the information relating to available layouts or the controls for the active camera in the current layout. If the Layout Manager is active, only the panels you need to use will be shown (see Section 2.3.2, Layout Manager). Sidebar Panels • Layouts: This sidebar panel contains a hierarchical list of all the existing layouts of an MxControlCenter installation. With the Layout Sequencer (see Section 2.4.5, Using The Sequencer Features), you can set MxControlCenter to automatically cycle through the displayed layouts at a defined interval. For each layout you can define separate video sources that can be displayed in either a grid or background layout: Background layout with camera icons Grid layout • Player: This sidebar panel controls the playback of recorded video sequences or images. Synchronized playback based on the time of the recording is available for either the current camera only or all the cameras of a grid layout. • PTZ Control: This panel is used to control the pan/tilt features (PTZ = Pan/Tilt/Zoom) of a camera and is visible at all times. It may also contain other features depending on which camera and lens you are using. If the current camera can use vPTZ features © MOBOTIX AG • Security-Vision-Systems • Made in Germany www.mobotix.com • sales@mobotix.com
  • 22. 22/152 MxControlCenter Manual: Getting Started (the virtual pan, tilt and zoom features of a MOBOTIX Q22M, for example), then this panel will be expanded accordingly For more information on the various elements of the main window, see Section 3.1, MxControlCenter Controls. 2.3.2 Layout Manager The Layout Manager provides features for creating and managing layouts in the sidebar. These features, however, are typically only used to set up an MxControlCenter installation. To activate or deactivate the Layout Manager, click the adjacent button in the toolbar. Caution Activating the Layout Manager does not open an extra window. Instead, the main window of MxControlCenter switches to a special view that contains all the features necessary for creating and editing layouts. A layout can show multiple video sources (cameras, file server paths, MxPEG clips, etc.) either in a grid or in front of a background. A video source can be displayed in a background layout as a video window or a symbol. Layouts can be saved, renamed and arranged hierarchically. © MOBOTIX AG • Security-Vision-Systems • Made in Germany www.mobotix.com • sales@mobotix.com
  • 23. Finding And Configuring Video Sources 23/152 When activated, the Layout Manager offers three other panels for creating and editing layouts: • Layouts: Here, you can create, rename and move new layouts to form hierarchical structures. This panel shows grid and background layouts with different symbols. • Cameras and Devices: This panel displays the video sources that have already been added to MxControlCenter. You can drag and drop the video sources into a grid box or onto a background image. • Grid/Background Images: In this panel you can select or add grid or background images for the current layout, depending on the layout type. These images will then be used to display the video sources. You can also create your own grids (the edit grid button) in addition to the predefined grids and the Auto grid (see below). Auto grid is a special grid where the display panel is automatically split into smaller sections to show the various video sources. More information on editing layouts is available in Section 2.4.3, Creating Layouts. 2.3.3 Alarm List The alarm list contains the alarms of the MOBOTIX cameras defined in a layout, provided that alarm recording has been enabled on those cameras and the alarm list has been activated in MxControlCenter (Tools > Options > Alarm List). If new alarms are detected, MxControlCenter adds the alarm image of the triggering camera to the top of the alarm list and changes the title bar to red. This alarm can now be acknowledged by click- ing the title bar of the alarm window (title bar changes to blue). Unacknowledged alarm Unacknowledged alarm from selected camera Acknowledged alarm Acknowledged alarm from selected camera © MOBOTIX AG • Security-Vision-Systems • Made in Germany www.mobotix.com • sales@mobotix.com
  • 24. 24/152 MxControlCenter Manual: Getting Started If the alarm list contains unacknowledged alarms, the alarm box in the upper right-hand corner will remain red. If all the alarms are acknowledged, the alarm box changes to green as depicted in the figure. Besides the cameras in the current layout, other cameras can also send alarm mes- sages to MxControlCenter by transmitting a network message to the computer running MxControlCenter. More information on this and other alarm list features can be found in Section 2.5, Alarm Management. 2.3.4 Camera Configuration To change the configuration of the connected cameras, open the Camera Configuration dialog box in MxControlCenter by clicking Change the camera settings from MxCC or choosing Video Source > Properties > Configure from the menu. The Camera Configuration dialog box contains the following sections: • Overview: This section of the dialog box lists all MOBOTIX cameras along with their most important settings and also includes an additional preview window for the cur- rently selected camera. If login data that differs from the default login data (admin user, meinsm password) is required, you can use the pop-up menu (right-click) to authenticate yourself for the selected camera. From the same pop-up menu you can also open a dialog box with additional information on this camera. • Image Settings: You can view and modify the main image settings for the selected camera in this section. © MOBOTIX AG • Security-Vision-Systems • Made in Germany www.mobotix.com • sales@mobotix.com
  • 25. Finding And Configuring Video Sources 25/152 • exposure: The exposure windows are one of the most important camera tools for creating properly exposed images. In this section you can select different exposure windows or customize them based on your requirements (move, change size, etc.). • Recording: You can control the camera's recording features in this section of the dialog box by activating the recording feature and the camera sensors that are set to trigger an alarm. You can also use this panel to define which files the camera will save (full or live image) and where the alarms will be saved (internally, on an SD/ CF card, or on a file server). Note All changes made in the Camera Configuration dialog box will take effect imme- diately and can be checked in the preview image. When leaving this section, this dialog box will prompt you to save any unsaved changes to the permanent flash memory of the camera. For more information on working with the Camera Configuration dialog box, see Section 4, Configuring MOBOTIX Cameras. 2.3.5 Update Assistant MOBOTIX offers software updates that contain new features and enhancements for its cameras on a regular basis. You can easily transfer new software to all selected cameras with the Update Assistant. © MOBOTIX AG • Security-Vision-Systems • Made in Germany www.mobotix.com • sales@mobotix.com
  • 26. 26/152 MxControlCenter Manual: Getting Started Besides automatically updating the camera software, the Update Assistant also saves the current configuration of the cameras so that it can be restored on some or all of the cameras. Furthermore the automatic search feature for new cameras and the way detected cameras are organized into various camera lists also provide a number of additional options for managing large-scale installations. To launch the Update Assistant, open the Tools > Assistants > Update camera software menu. For more information on the update assistant, see Section 4.6, Updating The Camera Software. 2.3.6 Program Settings You can edit the program options of MxControlCenter and the options of the cameras connected to MxControlCenter in the Tools > Options dialog box. The dialog box contains the following tabs: • General: You can define the various program options that affect the display and operation of MxControlCenter on this tab. In addition to the security settings for MxControlCenter (administrator and user passwords), you can also define a global camera user and corresponding password to simplify access to the cameras. © MOBOTIX AG • Security-Vision-Systems • Made in Germany www.mobotix.com • sales@mobotix.com
  • 27. Live Monitoring With numerous Cameras 27/152 • Alarm List: Here, you can define the alarm list options that affect the alarm list itself (size, save as a separate file, auto acknowledge). You can also use this tab to specify the sounds that can be used to signal new alarms. • Remote Control: The options on this tab determine whether and how MxControlCenter responds to network messages that are sent to the designated port of the MxControlCenter computer. • <Camera Tabs>: Each of these tabs shows the name and IP address of a specific camera and allows you to define options of that camera. Besides a special user name and password, you can also define how MxControlCenter can access the images recorded by the camera, which instruction file is linked to this camera, and which preferred layout the camera will use. For more information on this dialog box and the various program options, refer to Chapter 5, MxControlCenter Options. 2.4 Live Monitoring With Numerous Cameras 2.4.1 Monitoring In Predefined Layouts Your monitoring requirements can be met using only a few cameras in a single layout. However for more complex monitoring tasks, a single layout will not suffice. If you are using a large number of cameras, you would ideally have a customized view of the currently displayed camera images in different sizes (CIF, VGA, etc.) and an option to toggle between various views so that the numerous cameras can be assigned to various views depending on their location. © MOBOTIX AG • Security-Vision-Systems • Made in Germany www.mobotix.com • sales@mobotix.com
  • 28. 28/152 MxControlCenter Manual: Getting Started Predefined grid layouts are available for this purpose and can be generated and edited provided you have enabled the Layout Manager (see Section 2.4.3, Creating Layouts and the following sections). Display Windows For Layouts For live monitoring, different types of dis- play windows that can be used in a grid or background layout are available. The size of all windows used to display a live stream is limited to 2560 x 960 pixels (double MEGA) for grid layouts and 640 x 480 pixels (VGA) for background layouts. • Live: These "standard windows" show the current live video stream of a cam- era,- normally at the full frame rate. In grid layouts, these windows can have a maximum size of 2560 x 960 pixels (double MEGA resolution). For display purposes, the single images from the live stream are scaled to match the size of the display window. Note A high camera resolution increases both the bandwidth required to retrieve the live stream as well as the load imposed on the MxControlCenter computer for decoding and displaying the data. The live windows are typically used in monitoring scenarios such as the ones described in Example: Live Monitoring of a Parking Garage given in Section 1.2.2, Example: Live Monitoring Of A Parking Garage. • Preview: A "reduced" live stream with low resolution and frame rate can be retrieved from the camera with this display window. This is particularly well-suited for remote applications with low network bandwidth. • Sequencer Window: This window is not assigned to one specific camera, but rather switches between the cameras at preset time intervals. The sequencer window is very effective when used in conjunction with status icons, particularly in background layouts. For example, you can create an overview layout using the building floor plan and status icons as "placeholders" for the individual cameras together with a sequencer window in the middle of the layout. • Focus Window: This window is not tied to a specific camera and only displays the live video stream of the camera whose status icon is selected using the mouse. The layouts and display windows that are best suited for live monitoring depend on a variety of factors such as the: • Number of monitoring cameras © MOBOTIX AG • Security-Vision-Systems • Made in Germany www.mobotix.com • sales@mobotix.com
  • 29. Live Monitoring With numerous Cameras 29/152 • Bandwidth of the monitoring network • Number and workflow of the security personnel 2.4.2 Monitoring The Camera Connection While running, MxControlCenter automatically checks whether the cameras integrated into the system are accessible. If the connection to a camera is lost, MxControlCenter will display an error message in the relevant camera window. The options for this feature can be found in both sections of the General tab in the Tools > Options dialog box: • Sound for errors/Connection errors: MxControlCenter can play back either a stan- dard sound or an audio file of your choosing (*.wav) if a connection error occurs. • error Display for Connection errors: This option displays an error message or a graphics file you specify in the image of the missing video source. • error Display on Latency Timeout: If the latency between image capture and the camera display exceeds the value specified here, MxControlCenter can display an appropriate error message or a graphics file you choose in the image of the video source in question. More information on this topic can be found in Section 5.2, The “General” Tab. © MOBOTIX AG • Security-Vision-Systems • Made in Germany www.mobotix.com • sales@mobotix.com
  • 30. 30/152 MxControlCenter Manual: Getting Started 2.4.3 Creating Layouts You can proceed as described in Section 2.2, Finding And Configuring Video Sources to automatically create layouts for different video sources (MOBOTIX cameras, file server paths, MxPEG clips and third-party network cameras). If you want more customized layouts, you will need to use the Layout Manager. Click the Layout Manager button on the MxControlCenter control panel. The sidebar now contains the three panels, Layouts, Video sources and Grid or Background images, that were described in Section 2.3.2, Layout Manager. 2.4.4 Procedure • Right-click the empty space in the Layout panel and select new Layout from the pop-up menu. • Choose whether you would like to create a background layout (for site plans, floor plans, etc.) or a grid layout (display window only). • Select an image (*.jpg, *.bmp or *.gif) for a background layout or a grid for a grid layout: Auto grid is a special grid where the display panel is automatically split into smaller sections to show the various video sources. The auto grid has a square or rectangular structure: Display windows are automati- cally added until the next larger square or rectangle of windows appears when adding cameras. In the case of rectangles, the rows always contain more display windows than the columns. • Click OK to close the dialog box. MxControlCenter creates the new layout and labels it with the appropriate symbol. • You can now rename the new layout by double-clicking the name or right-clicking the relevant command from the pop-up menu. © MOBOTIX AG • Security-Vision-Systems • Made in Germany www.mobotix.com • sales@mobotix.com
  • 31. Live Monitoring With numerous Cameras 31/152 • If you would like to create a hierarchical layout structure, move and reorder the layouts based on your requirements. Additional editing Options For Grid Layouts • Moving Display Windows: You can switch display window locations by simply mov- ing one window to another one. • Adding Video Sources: These video sources are moved from the Video Sources panel of the sidebar to the display field you choose. They will replace any video sources that may already exist in that field. • Right-Clicking a Display Window: Opens a pop-up menu with additional commands for editing or deleting video sources, for example. Additional editing Options For Background Layouts Camera OK, Camera OK, No connection to detected not detected camera • Moving Display Windows: Display windows can be arranged any way you want. If you want to switch display window locations, simply move one window to another one. Note that the windows will automatically be resized if they are near the window frame or other display windows. • Adding Video Sources: These video sources are moved from the Cameras and Devices panel of the sidebar to any location you choose. • Displaying as Icons: Video sources can be displayed for overview plans as icons that indicate the viewing direction, number of objects, their bandwidth and the status of the cameras: Double-clicking an icon shows the corresponding camera in a separate display window. • Right-Clicking a Display Window or Icon: Opens a pop-up menu with additional commands for, among other things, editing or deleting video sources. • Right-Clicking an empty Space: Opens a pop-up menu that allows you to insert an additional element. For more information on working with layouts, see Section 3.2, Editing Layouts. 2.4.5 Using The Sequencer Features Since MOBOTIX cameras are also able to use low-bandwidth connections to transfer low-quality preview images, MxControlCenter offers the ideal means for establishing a remote control center. © MOBOTIX AG • Security-Vision-Systems • Made in Germany www.mobotix.com • sales@mobotix.com
  • 32. 32/152 MxControlCenter Manual: Getting Started Sequencer Of MxControlCenter The functions of the integrated sequencers for automatically cycling through the defined cameras or layouts and the hierarchically structured layouts support these features since they allow for the effective display of connected video sources. Some network connections do not have sufficient bandwidth to display the live stream from multiple cameras at the same time. Nevertheless, you would still like to see, at least sequentially, the images of all cameras. The sequencer features are provided for this purpose and work on two levels: • The layout sequencer switches between the layouts of the current configuration at specified intervals. • The camera sequencer switches between the specified cameras within a grid layout and displays the images they capture at their maximum size in the display panel. • You can define a sequencer window inside a layout that cycles through the individual cameras of the layout. 2.4.6 Using The vPTZ Features The M12D, D12, V12, M22M, D22M and Q22M models of MOBOTIX cameras and software versions 3.4.5 or higher now include enhanced virtual PTZ features. These features allow you to use a mouse or joystick to zoom in on images from the selected video source and "virtually" move the enlarged image section within the entire image sensor area. © MOBOTIX AG • Security-Vision-Systems • Made in Germany www.mobotix.com • sales@mobotix.com
  • 33. Live Monitoring With numerous Cameras 33/152 The Q22M camera merits special attention in this regard: A spherical image of the environ- ment is captured by the 180° lens of the camera. By selecting the appropriate live image mode of the camera (see below), this image can be corrected for distortion by the camera itself and then saved and displayed in MxControlCenter in its corrected form. Alternatively, the camera can simply save the complete distorted image and send it to MxControlCenter. In this case MxControlCenter can subsequently correct the images for distortion. For more information on this topic, see Section 3.1.4, The “PTZ Controls” Sidebar Panel. Note that the views and features available for use will vary depending on where the Q22M is installed (on the wall or the ceiling). If this particular cam- era model is selected in the layout, the PTZ Controls panel will be expanded so that you can specify the installation type and set the North direction of Q22M. Using The Virtual PTZ Features To control the vPTZ features, the sidebar contains a number of control elements that you can operate with a mouse and that function just like a joystick: • Turning the Joystick or Using the Slider Bar +/-: Adjusts the zoom setting of the selected video source. • Tilting the Joystick: Rotates or pans the image in the direction you choose until you return the joystick to its home position. Make sure that the lock icon in the PTZ features sidebar panel is unlocked or else the features of the virtual joystick will be blocked. You can use the mouse the execute certain vPTZ features by simply clicking the position you would like in the image and scrolling the mouse wheel to zoom in and out. The numeric field at the bottom of the sidebar is used to save frequently used positions (a longer click saves a position, while a shorter click opens it). The 1x Zoom and Center pan buttons are used to reset the image position while the buttons in the Auto mode panel control the automatic camera movements as if you were con- trolling a PTZ camera mechanically. © MOBOTIX AG • Security-Vision-Systems • Made in Germany www.mobotix.com • sales@mobotix.com
  • 34. 34/152 MxControlCenter Manual: Getting Started Correct Distortion In MxControlCenter Or The MOBOTIX Camera? These two drop-down lists define how work is allocated between the camera and MxControlCenter when processing images: • Camera Live Image: Controls image generation on the camera itself (the display modes offered by this camera model are always available for selection). • MxCC Display: Allows you to set MxControlCenter to either accept the images in their original form or apply distortion correction to the images. These two settings are all you need to have the camera deliver and save full images while MxControlCenter displays the distortion-corrected area and adds the zoom feature in the live image. This feature can be set separately for each camera in the layout. 2.5 Alarm Management 2.5.1 Preparing MxControlCenter If an event occurs (a MOBOTIX camera detects movement or any changes), the camera can notify you by triggering an alarm. The type of event detection and the method of the resulting alarm can be configured in a number of different ways. For example, you can configure a MOBOTIX camera to send an e-mail if the ambient temperature falls below a specific value. A detailed description of all the alarm methods can be found in the MOBOTIX Software Manual. Once armed, a MOBOTIX camera in its default configuration will detect any motion within a defined area of the displayed image and highlight such motion by adding a red border around the image. © MOBOTIX AG • Security-Vision-Systems • Made in Germany www.mobotix.com • sales@mobotix.com
  • 35. Alarm Management 35/152 This alarm can be sent to MxControlCenter in multiple ways: • Camera Alarm Messages: Alarms are "streamed" together with the relevant live images to MxControlCenter, which can then use this image data to obtain the neces- sary information about the triggering event. • Remote Control by Cameras: A MOBOTIX camera can also send this alarm to MxControlCenter as a network message (notification in the network based on the IP protocol). The first type of alarm can only be transferred if the live image in the current view or layout is also displayed. A network message, however, can be received at any time, even if the sending IP camera is defined in a layout that is not currently being displayed. Configuring How network Messages Are Received To be able to receive these messages, the Camera IP notify only port needs to be enabled in the Remote Control tab of the Options dialog box and needs to match the port when configured for the MxCC Alarm transfer profile on the camera (Admin Menu > Transfer Profiles > IP notify Profiles in the browser interface of the camera). Now a specific view will be activated whenever this camera sends an alarm that needs to be defined. To do so, open the Layout editor and specify the last defined preferred layout. Alternatively, you can specify the preferred layout in the camera tab of the Options dialog box. The preferred layout of a camera determines which layout will be used to display this camera when a network message is sent to the MxControlCenter computer. You can thus have cameras displayed immediately ("connected") if they are not currently being displayed. Activating The Alarm List First activate the alarm list in the Options dialog box (the Alarm list tab). MxControlCenter will now archive all incoming alarms in a list in chronological order. When an IP camera sends a network message, MxControlCenter can now switch to the preferred layout defined for this specific camera, if necessary. More visualization options are offered by the Alarm window (described in the previous section as a special grid element of a layout) and Player window. Ultimately, however, having an alarm visualized by a computer program like MxControlCenter is not enough. There is usually a human being present at the end of the alarm chain and © MOBOTIX AG • Security-Vision-Systems • Made in Germany www.mobotix.com • sales@mobotix.com
  • 36. 36/152 MxControlCenter Manual: Getting Started they should respond appropriately when an alarm goes off. Once proper measures have been initiated, the user can then acknowledge the alarm so that the "alarm" visualization can be cancelled. 2.5.2 Preparing The Cameras A MOBOTIX camera needs to be properly configured before it is able to detect an event, trigger an alarm and then send that alarm to MxControlCenter where it is visualized. Launch your browser and enter the IP address of the camera, or select the camera you would like to configure in the current view of MxControlCenter and then click the Open browser button. Follow the paths through the menu structure of the page for the indi- vidual items. Showing An Alarm Message In The Data Stream Of A Displayed Live Image • General Activation (Setup Menu > event Control > General event Settings): Check whether camera activation is enabled . • Video Motion Window (Setup Menu > event Control > event Settings > events): The video motion window (VM) needs to be activated and its coordinates defined. Proceed as follows to send an alarm to MxControlCenter as a network message: • Transfer Profile (Admin Menu > Transfer Profiles > IP notify Profiles): Use a profile called MxCC Alarm: simple. The target address of this profile needs to contain the IP address of your local computer and the port number used by MxControlCenter to receive network messages (see Section 3.5, Remote Control Using Network Messages). • Activate Messages (Setup Menu > event Control > Messaging > General Settings): The message profile should be activated. • IP notify (Setup Menu > event Control > Messaging > Actions): The selection for a network message (IP) needs to be set to MxCC Alarm. To grant the required permissions for MxControlCenter: • Assign Permissions (Admin Menu > Group Access Control Lists and Admin Menu > Users and Passwords): The MxCC permission should be enabled for the group who are authenticated by MxControlCenter as their members. © MOBOTIX AG • Security-Vision-Systems • Made in Germany www.mobotix.com • sales@mobotix.com
  • 37. Alarm Management 37/152 2.5.3 Alarm Display As previously mentioned, there are a number of ways to respond to an alarm message. The easiest form of visualization is provided by the camera itself when it displays the current live image with a red border. This "momentary" visualization does not last very long, which is why MxControlCenter can save all alarms in the alarm list for subsequent viewing. Choose Tools > Options from the menu and then activate the list in the Alarm List tab to activate the alarm list. If you have configured everything properly, any motion in front of the camera in the current view should cause the first alarm image to appear in the alarm list. Additional options for sending visual or audio alarms can be found in Section 3.3, Alarm Processing. In addition to the alarm list, special window elements in a view can be defined to display alarms: • An alarm window within a view displays the live image from the camera that actually reported the last alarm (graphic). • A player window is not tied to one specific camera. It shows the saved alarms from any camera that you select from the alarm list. The saved alarms are not displayed in a list, but rather as a video from a video recorder. You therefore have the option to fast forward or rewind through the alarms and the recorded image sequences of each alarm (graphic). For more information on these search options, see Section 2.6, Video Searches And Export Features. To define an alarm or player window in a view, you first need to activate the Layout Manager and then define the element you want to use in the Define Grid element dialog box (for more information, see Section 3.2.1, Grid Layouts). If the alarm-triggering camera is not shown in the current view, note that we have already configured the camera to send a network message to MxControlCenter (see Section 2.5.2, Preparing The Cameras). © MOBOTIX AG • Security-Vision-Systems • Made in Germany www.mobotix.com • sales@mobotix.com
  • 38. 38/152 MxControlCenter Manual: Getting Started 2.5.4 Alarm Acknowledgement MxControlCenter is able to record and display alarms from an IP camera, the next step is to determine how these alarms can be acknowledged by security personnel or, in other words, human beings who are actually sitting in front of the computer and are required to respond appropriately. The easiest way to acknowledge an alarm is to just click the red bar above the alarm image. This also stops the acoustic signals, which can be configured, if necessary. For example, you can set the alarms to be acknowledged automatically if displaying them is no longer relevant after a preset time elapses. In critical situations, you can use an instruction file to give security personnel instructions on how to respond to an alarm. This instruction file, which can be a text message, an image or a video clip, can be defined in the relevant camera tab of the Options dialog box. You can open this file by selecting the Show alarm instructions of selected camera icon. © MOBOTIX AG • Security-Vision-Systems • Made in Germany www.mobotix.com • sales@mobotix.com
  • 39. Alarm Management 39/152 2.6 Video Searches And export Features As you have already seen, there are a number of ways to archive live images from an IP camera. You can use these recordings in a comprehensive video search whether this occurs as a continuous recording or as an event-controlled recording - with MxControlCenter. Image Recording, event Recording, Continuous Recording MOBOTIX cameras provide three modes for recording video data. These modes can be set for each camera on the Recording tab of the Camera Configuration dialog box: • Snapshot Recording: Saves the individual *.jpg images without audio as an image series based on pre-alarm images, the alarm image itself and post-alarm images. • event Recording: Saves an alarm as an MxPEG clip with the audio channel of the camera (optional). • Continuous Recording: Saves continuous video and audio data as MxPEG clips where the recording frame rate is reduced and can be increased automatically when an event occurs. This continuous recording mode is only available if you have a sufficient amount of storage capacity (on an SD/CF card or file server). More information on the recording modes offered by MOBOTIX cameras can be found in Chapter 8 Recording of the Software Manual. 2.6.1 Switching Display Windows In Player Mode Displaying the event images recorded by a camera in Player mode offers the easiest way to search through video data. To do so, first click the live image of a specific camera and then select the Toggle Player mode button or right-click the relevant command from the pop-up menu. If any alarms from this camera are present, the buttons in the Player panel of the sidebar become available and you can view the recorded video sequences using the playback, fast forward and rewind buttons. In addition to these controls, you can also access the buttons that appear at the bottom edge of the display window when you place your mouse pointer over this sidebar panel. An image series includes all the images (or the entire video sequence) that have been saved for an event (alarm). This normally includes the video data including any audio data that has been recorded before, during (the "event image") and after the event occurs. You can play back either the entire image series or only the event images: • Play Back entire Image Series: These Player buttons allow you to play back all recorded images either individually or consecutively. • Play Back event Images Only: These Player buttons are used to show the event image only and are indicated by a red lightning bolt. © MOBOTIX AG • Security-Vision-Systems • Made in Germany www.mobotix.com • sales@mobotix.com
  • 40. 40/152 MxControlCenter Manual: Getting Started Simultaneous Playback Of All Cameras The All button in the Player sidebar panel switches all display windows to Player mode and activates the Player buttons. Playback starts simultaneously for all video sources regardless of when the recording was made. Time Synchronized Playback Of All Cameras You can access the options offered by the Synch. Mode list in the Player sidebar panel for the time-synchronized playback of recorded sequences from all displayed video sources. Playback can be started at the specified time if this list is compiled in Real Time or at Reduced Speed. Enter the date and time and then click the Goto button to set all cameras to the correct time. Now click the Playback button and all the images will be played back according to the setting in the Synch. Mode drop-down list: • Real Time: All video sequences are played back in real time. If the images cannot be transferred fast enough, MxControlCenter will skip individual images. • Reduced Speed: Playback is performed at a slightly reduced speed, if necessary, and even image synchronization is somewhat more flexible. This method also allows for smooth playback of all recorded images if the data for a real-time display cannot be read fast enough (for example, due to low network bandwidth). Quick event Search Select a display window in Player mode. The slider bar in the Player sidebar panel provides a quick and intuitive way to search through events. You can specify any date within the recorded video sequences to find sequences as quickly as possible. Click Search to jump to the next event based on the specified time. © MOBOTIX AG • Security-Vision-Systems • Made in Germany www.mobotix.com • sales@mobotix.com
  • 41. Alarm Management 41/152 exporting Video Sequences Right-click the Player sidebar panel and enter the start and end positions to define an export range. The range you selected now appears in green. If you click the export button, the export list will open and the selected time range will be added as a new entry at the end of the list. This procedure can be repeated as often as needed to add other interesting video sequences to the export list. More information on this topic can be found in Section 2.6.4, Export List And Data Export. 2.6.2 Defining Player Windows In contrast to a display window in Player mode, a player window is a special layout element that displays the last event image of any video source that was selected from the alarm list. You first need to activate the Layout Manager to define a player window. Defining Player Windows In A Grid Layout • If there is no empty display field available, select a different grid that can display more fields on the existing display area. • Right-click an empty field and select Edit from the pop-up menu. • Select the Player window item from the element type list and click OK. Defining Player Windows In A Background Layout • Right-click an empty area and select Insert from the pop-up menu. • Select the Player window item from the element type list and specify the particular size you would like to use. • Click OK to close the dialog box. • Move the new window to a suitable position. © MOBOTIX AG • Security-Vision-Systems • Made in Germany www.mobotix.com • sales@mobotix.com
  • 42. 42/152 MxControlCenter Manual: Getting Started Right-click the element in question while the Layout Manager is enabled and select Edit from the pop-up menu to modify the properties of a player window at a later time. Deactivate the Layout Manager to save the settings of the current layout. © MOBOTIX AG • Security-Vision-Systems • Made in Germany www.mobotix.com • sales@mobotix.com
  • 43. Alarm Management 43/152 2.6.3 Using Video Search If you have defined an external recording target (file server) for the relevant video source or the MOBOTIX camera has an SD/CF card, large amounts of data will be saved for an extended period depending on the memory storage capacity. A more comprehensive search option that is not limited to a single camera like the basic player window is provided by the Video Search dialog box, which appears when you click Open event Search. The Search dialog box can be used to browse through the recordings from all the cameras defined in the current view. In the Cameras tab, select the camera whose recordings you would like to browse through. MxControlCenter now shows you all recorded events in chronological order in the Events tab. The vertical slider bar next to the events list provides a visual indication of the time range during the entire recording period in which events are displayed in the list. By selecting an event in the list, the image associated with that event is displayed in the area of the player window that was described in the previous section. © MOBOTIX AG • Security-Vision-Systems • Made in Germany www.mobotix.com • sales@mobotix.com
  • 44. 44/152 MxControlCenter Manual: Getting Started If you have identified an event as relevant, the time of the event can be defined as the Reference time , which is used to automatically display the time difference from the other events during the search. Filtering events If you would like to search for special event types (for example, motion detection only), you can define an event filter. To do so, click Set event filter and activate the events you would like to filter. This button is only relevant for searching and playing back continuous recordings: • If the button is enabled (yellow), the event list will only show "real events" (VM, UC, IR, etc.). • If the button is disabled (crossed out), the events list will also include the "pseudo events" of the continuous recording, which means the images that are generated every minute at the beginning of a new recording sequence will be displayed. More information on the video search options can be found in Section 3.4, Video Searches And Export Features. Printing event Images Click Print current and post-processed image to print the currently displayed event image. MxControlCenter now shows a print preview of the currently displayed image. If this image has been corrected by post-processing, the original, non-processed image will be added as well. You can also print event images as *.pdf files using the integrated PDF export feature for easy sending and archiving of printouts. 2.6.4 export List And Data export Click export or Add to export list to open the export dialog box or add previously selected events or time ranges to the export list. Select an event from the events list and click Add to export list to add the individual event. To define a time range, set the Player to the exact time you would like and then specify the start time by selecting Set start position from the pop-up menu for the Player panel. After searching for the last scene to be exported, select Set end position from the pop-up menu to define the end time. © MOBOTIX AG • Security-Vision-Systems • Made in Germany www.mobotix.com • sales@mobotix.com
  • 45. Alarm Management 45/152 Note The time range defined in this manner can include any number of events. If an explicit time range for the export has not been defined, the entire time range is automatically added to the export list dialog box here as well. export List You can compile all the video sequences that you would like to export in the export list. These particular sequences are added by defining a time range (right-click > Set start position/end position) and then incorporating this range into the export list. Adding Video Sequences To The export List The following options are available for this purpose: • The "Player" Sidebar Panel: Define an export range (right-click > Set start position/ end position) and then click export. • The "Video Search" Dialog Box: Define an export range (right-click the slider bar > Set start position/end position) and then click Add to export list. Video sequences can be added multiple times and even if the export list is closed. Click export in the Video Search dialog box or select Recording > export from the menu to display the list. © MOBOTIX AG • Security-Vision-Systems • Made in Germany www.mobotix.com • sales@mobotix.com
  • 46. 46/152 MxControlCenter Manual: Getting Started editing The export List If the export list is open, you can select items individually or in groups (sHIFT-CLICk) and then move them with the mouse or delete them with the DeLeTe key Data export MxControlCenter provides a number of different formats for exporting recorded video and audio data. Choose a format from the export as selection box in the export list: • AVI File: This format can be displayed on all standard video players and not only contains the video data, but also the audio data of the video source (if included in the recording). • MxPeG Clip: This format can be integrated and played back in MxControlCenter as a video source. This format also includes the audio data of the video sources in the export (if included in the recording). • File Server Structure: This format can also be integrated and played back in MxControlCenter as a video source. It also contains the audio channel of the video sources (if it was included in the recording). Exporting as an *.avi file or an MxPEG clip activates the Settings button, which can be used to open the export Format Options dialog box. From this dialog you can define the options for the export (for example, maximum file size). © MOBOTIX AG • Security-Vision-Systems • Made in Germany www.mobotix.com • sales@mobotix.com
  • 47. Alarm Management 47/152 2.7 Video Processing 2.7.1 Image Post-Processing MxControlCenter normally displays all live video images and the images of an archived recording in their original unedited form. This also applies to live images from integrated third-party cameras and analog cameras in particular (see Section 2.8.2, Controlling PTZ Cameras And Mechanical Pan/Tilt Heads). You are certainly familiar with the term "post-processing" in digital photography, which in this case refers to the software- based methods offered by MxControlCenter for the subsequent "improvement" of images. In the standard camera view, select the camera whose image display you would like to optimize and then click the arrow to the right of the Switch image post- processing on/off > Options button. You can adjust the settings for saturation, brightness, backlight and sharpness in the Post-processing panel of the Image Processing dialog box. By clicking the Switch image post-processing on/ off button in the main view, you can quickly switch back and forth between viewing the original image from the camera and the improved, post-processed image. This type of post-processing also offers a useful tool for viewing low-quality archived images at a later date for search purposes, for example. This is why you will find the same controls for adjusting saturation, bright- ness, backlight and sharpness in the Video Search dialog box (see Section 2.6, Video Searches And Export Features). More information on this topic can be found in Section 3.9, Image Post-Processing. 2.7.2 Image Distortion Correction In addition to the options described in Section 2.4.6, Using The vPTZ Features for correct- ing the distortion of currently displayed images in the PTZ Control sidebar panel, the Image Processing dialog box can also be used to control how image distortion is cor- rected. To open this dialog box, click Switch image processing on/off. The automatic distortion correction features of MxControlCenter are used to fix the distorted view caused by the wide-angle lenses of the cameras. Although the lens is specified for some camera models (Q22M, for example), for older camera models you need to clearly indicate which lens is being used and how the camera is installed in the Image Processing dialog box. The results of distortion correction are immediately visible as it straightens any vanishing lines that were crooked due to distortion. © MOBOTIX AG • Security-Vision-Systems • Made in Germany www.mobotix.com • sales@mobotix.com
  • 48. 48/152 MxControlCenter Manual: Getting Started A perfect example of where this distortion correction feature can be used is in a ceiling- mounted Q22M camera whose 180° lens captures "spherical" images. 2.8 Control Center And Management Features 2.8.1 Integrating Third-Party Digital/Analog Cameras MxControlCenter is the ideal solution when used in conjunction with MOBOTIX cameras. Note, however, that you can easily connect the network cameras or even analog cam- eras of third-party manufacturers to a MxControlCenter video management system also. Displaying Live Images Adding third-party IP cameras to the system is extremely easy and is done using the previously described Add Cameras: Search and Select dialog box. Select the manufac- turer type and enter the IP address and access data as usual. Third party IP PTZ camera MOBOTIX IP camera MOBOTIX IP camera Integrating analog cameras requires an intermediary step in which the analog video data is converted to a digital format that is compatible with MxControlCenter (MxPEG or M-JPEG). © MOBOTIX AG • Security-Vision-Systems • Made in Germany www.mobotix.com • sales@mobotix.com