SlideShare a Scribd company logo
1 of 18
Download to read offline
1
Created By: Amy Beauchemin Source: office.microsoft.com 1/13/11
Microsoft Word 2010 Tutorial
Microsoft Word 2010 is a word-processing program, designed to help you create professional-quality documents. With the finest document-
formatting tools, Word helps you organize and write your documents more efficiently. Word also includes powerful editing and revising tools
so that you can collaborate with others easily.
The Ribbon
Understanding the Ribbon is a great way to help understand the changes between Microsoft 2003 to Microsoft 2010. The ribbon holds all of
the information in previous versions of Microsoft Office in a more visual stream line manner through a series of tabs that include an immense
variety of program features.
Home Tab
This is the most used tab; it incorporates all text formatting features such as font and paragraph changes.
Insert Tab
This tab allows you to insert a variety of items into a document from pictures, clip art, tables and headers and footers.
Page Layout Tab
This tab has commands to adjust page elements such as margins, orientation, inserting columns, page backgrounds and themes.
2
Created By: Amy Beauchemin Source: office.microsoft.com 1/13/11
Reference Tab
This tab has commands to use when creating a Table of Contents and citation page for a paper. It provides you with many simple solutions to
create these typically difficult to produce documents.
Mailing Tab
This tab allows you to create documents to help when sending out mailings such as printing envelopes, labels and processing mail merges.
Review Tab
This tab allows you to make any changes to your document due to spelling and grammar issues. It also holds the track changes feature
which provides people with the ability to make notes and changes to a document of another person.
View Tab
This tab allows you to change the view of your document to a different two page document or zoom.
3
Created By: Amy Beauchemin Source: office.microsoft.com 1/13/11
Getting Started
Now that you have an understanding of where things are located, let’s look at the steps needed to create
a document.
Opening Outlook
You may have a shortcut to Word on your desktop, if so double click the
icon and Word will open. If not
follow the steps below:
1. Click on the Start button
2. Highlight Programs
3. Highlight Microsoft Office
4. Click on Microsoft Word 2010
Create a New Document
1. Click the File tab and then click
New.
2. Under Available Templates,
click Blank Document.
3. Click Create.
Using Templates
Word 2010 allows you to apply built-in templates from a wide selection of popular Word templates,
including resumes, agendas, business cards, and faxes.
To find and apply a template in Word, do the following:
1. On the File tab, click New.
2. Under Available Templates, do one of the following:
To use one of the built-in templates, click Sample Templates, click the template that you want,
and then click Create.
To reuse a template that you’ve recently used, click Recent Templates, click the template that
you want, and then click Create.
To find a template on Office.com, under Office.com Templates, click the template category that
you want, click the template that you want, and click Download to download the template from
Office.com to your computer.
3. Once you have selected your template you can modify it in any way to create the document you
want.
NOTE: You can also search for templates on Office.com from within Word. In the Search Office.com
for templates box, type one or more search terms, and then click the arrow button to search.
Opening a document
1. Click the File tab, and then click Open.
2. In the left pane of the Open dialog box, click the drive or folder that contains the document.
3. In the right pane of the Open dialog box, open the folder that contains the document that you want.
4. Click the document and then click Open.
4
Created By: Amy Beauchemin Source: office.microsoft.com 1/13/11
Cut, Copy and Paste
If you would like to remove text from your document you can copy or cut the text
from the document. Simply highlight the text and go to the Home tab in the
Clipboard group and click Cut or Copy. You can also right click on your mouse
and select Cut or Copy.
Pasting Text
If you Copy text, you typically need to Paste it somewhere. The Paste feature in
2010 is much more detailed than in previous versions of Word. When you paste content, the Paste
Options button provides different options, depending on the source of the content.
Keep Source Formatting: This option preserves the look of the original text.
Keep Text Only: This option removes all the original formatting from the text.
Link & Keep Source Formatting: This option preserves the look of the original text, and it
maintains a link to the source file and updates the pasted text with any changes that are made to the
source file.
Link & Use Destination Styles: This option formats the text to match the style that’s applied where
the text is pasted. It also maintains a link to the source file and updates the pasted text with any
changes that are made to the source file.
Merge Formatting: This option changes the formatting so that it matches the text that surrounds it.
Picture: This option inserts the text as an image.
Use Destination Styles: This option formats the text to match the style that’s applied where the text
is pasted.
Use Destination Theme: This option formats the text to match the theme that’s applied to the
document where the text is pasted.
To Paste, click on the area you want your information to be inserted and either go to the Home tab in the
Clipboard group and click Paste or right click on your mouse and select Paste.
Undo
The Quick Access Toolbar holds a variety of commands right at you finger tips. It is located in the top
left of the document above the File and Home tab.
You can add or remove command by clicking on the arrow
to the right of the Quick Access Toolbar.
If you make an error in your document click on the Undo command and it will remove the last
thing you did.
Show/Hide Formatting Marks
The Show/Hide command allows you to see every time you hit the space bar, hit enter or tab. This
feature can be quite useful when creating documents to understand where everything is placed within
your document and see if any errors have been made.
On the Home tab, in the Paragraph group, click
Show/Hide.
5
Created By: Amy Beauchemin Source: office.microsoft.com 1/13/11
Formatting Text
Formatting a document can range from modifying text size to adding graphics. It is easy to add creative
touches to any document with the options Microsoft Word has to offer.
Modifying Fonts
The Font Group allows you to change your text font style,
size, color and many other elements.
1. Highlight the text you would like to modify.
2. Click on the drop down arrow of font style and font size
and select the changes you would like to make.
3. While text is highlighted you can also click on the color, bold, italics or underline commands to modify
the text even more.
Change Text Case
You can change the case of selected text in a document by clicking a single button called Change Case
on the ribbon.
1. Highlight the text for which you want to change the case.
2. On the Home tab, in the Font group, click Change Case.
3. Choose an option from the dropdown list, which includes
Sentence case, lowercase, UPPERCASE, Capitalize
Each Word, and tOGGLE cASE.
Adding text effects
1. Select the text that you want to add an effect to.
2. On the Home tab, in the Font group, click Text Effect.
3. Click the effect that you want.
For more choices, point to Outline, Shadow,
Reflection, or Glow, and then click the effect that you
want to add.
Remove text effects
1. Select the text that you want to remove an effect from.
2. On the Home tab, in the Font group, click Clear
Formatting.
Format Painter
The Format Painter feature allows you to quickly copy a format that you have applied
to text already in your document.
1. Select the text or graphic that has the formatting that you want to copy.
2. On the Home tab, in the Clipboard group, single click Format Painter. The pointer
will change to a paintbrush icon.
3. Bring your cursor to the text or graphic that you want to format and click on the text.
4. To stop formatting, press ESC or click on the Format Painter command again.
NOTE: Double-click the Format Painter button if you want to change the format of
multiple selections in your document.
6
Created By: Amy Beauchemin Source: office.microsoft.com 1/13/11
Clear Formatting
To get rid of all the styles, text effects, and font formatting in your document, do the following:
1. Select the text that you want to clear the formatting from. Or press CTRL+A to select everything in
the document.
2. On the Home tab, in the Font group, click Clear Formatting.
NOTE: The Clear Formatting command will not
remove highlighting from your text. To clear
highlighting, select the highlighted text, and then click
the arrow next to Text Highlight Color and click No
Color.
Formatting Documents
Adjusting Line Spacing
The default spacing is 1.15 line spacing and 10 points after each paragraph. The default spacing in
Office Word 2003 documents is 1.0 between lines and
no blank line between paragraphs.
The easiest way to change the line spacing for an entire
document is to highlight the paragraphs or entire
document that you want to change the line spacing on.
1. On the Home tab, in the Paragraph group, click
Line Spacing.
2. Do one of the following:
Click the number of line spaces that you want.
For example, click 1.0 to single-space with the spacing that is used in earlier
versions of Word. Click 2.0 to double-space the selected paragraph. Click
1.15 to single-space with the spacing that is used in Word 2010.
Click Remove Space Before Paragraph to remove any additional
lines added after each paragraph as a default
NOTE: If a line contains a large text character, graphic, or formula, Word
increases the spacing for that line. To space all lines evenly within a
paragraph, use exact spacing and specify an amount of space that is large
enough to fit the largest character or graphic in the line. If items appear cut
off, increase the amount of spacing.
Page Orientation You can choose either portrait (vertical) or landscape (horizontal) orientation for all or
part of your document.
Change Page Orientation
1. On the Page Layout tab, in the Page Setup group,
click Orientation.
2. Click Portrait or Landscape.
7
Created By: Amy Beauchemin Source: office.microsoft.com 1/13/11
Different Page Orientations on Same Document
1. Highlight the pages or paragraphs that you
want to change to portrait or landscape
orientation.
2. On the Page Layout tab, in the Page Setup
group, click Margins.
1. Click Custom Margins at the bottom of the
drop down menu.
2. A Page Setup dialog box will appear.
3. On the Margins tab, click Portrait or
Landscape.
4. In the Apply to list, click Selected text or This
point forward.
NOTE: If you select some but not all of the text on
a page to change to portrait or landscape
orientation, Word places the selected text on its
own page, and the surrounding text on separate
pages.
Page Margins
Page margins are the blank space around the edges of the page. In general, you insert text and graphics
in the printable area inside the margins When you change a document’s page margins, you change
where text and graphics appear on each page. You can change the page margins either by choosing
from one of Word’s predefined settings in the Margins gallery or by creating custom margins.
Setting Predefined Page Margins
1. On the Page Layout tab, in the Page Setup group, click
Margins. The Margins gallery drop down menu will appear.
2. Click the margin type that you want to apply.
Create Custom Margins
1. On the Page Layout tab, in the Page Setup group, click
Margins.
2. At the bottom of the Margins gallery drop down menu, click
Custom Margins.
3. The Page Setup dialog box will appear.
4. Enter new values for the margins in all or some of the Top,
Bottom, Left or Right text boxes.
5. Click OK
8
Created By: Amy Beauchemin Source: office.microsoft.com 1/13/11
NOTE: Most printers require a minimum width for margin settings, because they can't print all the way to
the edge of the page. If you try to set margins that are too narrow, Microsoft Word displays the message
One or more margins are set outside the printable area of the page.
Page Breaks
Word automatically inserts a page break when you reach the end of a page. If you want the page to
break in a different place, you can insert a manual page break.
Inserting a Page Break
1. Click where you want to start a new page.
2. On the Insert tab, in the Pages group, click Page Break.
NOTE: You can also insert breaks into your document by going to the Page
Layout tab, Page Setup group and clicking on the Breaks command to view a
variety of page and section breaks you can insert into your document.
Deleting a Page Break
You cannot delete the page breaks that Word inserts automatically; you can only delete a page break
that you insert manually.
1. Go to the page break you would like to remove.
2. Select the page break by clicking in the margin next to the dotted line.
3. Press the DELETE key on your keyboard.
Headers, Footers, and Page Numbers
You can add headers, footers and page
numbers numerous ways. The simplest way is
to double click on the top or bottom of the page
and the header and footer area will appear.
Enter the text you wish to be displayed at the
top or bottom of every page.
Add Page Numbers
If you want a page number on each page, you can quickly add a page
number from the gallery.
1. On the Insert tab, in the Header & Footer group, click Page Number.
2. Click the page number location that you want.
3. In the gallery, scroll through the options, and then click the page
number format that you want.
4. To return to the body of your document, click
Close Header and Footer on the Design tab (under
Header & Footer Tools).
9
Created By: Amy Beauchemin Source: office.microsoft.com 1/13/11
Add Header or Footer
1. On the Insert tab, in the Header & Footer group, click Header or
Footer.
2. Click the header or footer that you want to add to your document and
your header or footer area will open.
3. Type text in the header or footer area.
4. To return to the body of your document, click Close Header and Footer on the Design tab (under
Header & Footer Tools).
Remove page numbers, headers, and footers
1. Click on the Header, Footer or Page Number Command.
2. A drop down menu will appear.
3. Click Remove at the bottom of the menu.
Bulleted or Numbered List
You can quickly add bullets or numbers to existing lines
of text, or Word can automatically create lists as you
type. By default, if you start a paragraph with an asterisk
or a number 1., Word recognizes that you are trying to
start a bulleted or numbered list. If you don't want your
text turned into a list, you can click the AutoCorrect
Options button that appears.
Bullets Command
Numbering Command
Insert Bulleted or Numbered List
1. Click on the area where you would like your
list to appear or highlight the text you would
like to be in a list.
2. Go to the Home tab, in the Paragraph group,
click Bullets or Numbering.
3. A bullet(s) or number(s) will be inserted.
Select Bullets or Numbering Style
1. Select the items that you want to add bullets
or numbering to.
2. On the Home tab, in the Paragraph group,
click the arrow next to the Bullets or
Numbering command.
3. Select the bullet or number format you would like to be inserted.
Move a List Left or Right
If you do not like the location of your bullets or numbers you can easily
move them to a preferred location.
1. Click a bullet or number in the list to highlight the list.
2. Drag the list to a new location. The entire list moves as you drag.
The numbering levels do not change.
10
Created By: Amy Beauchemin Source: office.microsoft.com 1/13/11
Document Ruler
You can use the horizontal and vertical rulers in Word to align text, graphics, tables,
and other elements in your document. To view the horizontal ruler across the top of
your Word document and the vertical ruler along the left edge of your document, you
must be in Print Layout view.
1. To show or hide the horizontal and vertical rulers, click View Ruler at the top of the
vertical scroll bar.
Tab Stops
Creating tab stops can be helpful when creating a large number of documents such as flyers, table of
contents or even when creating a resume. They help you to display and line up information correctly.
Setting Manual Tab Stops
1. Click the tab selector at the left end of the ruler until it displays the type of tab that you want.
2. Then click in the ruler at the top of your page, where you want to set the tab stop.
The different types of tab stops found on the ruler are:
A Left Tab stop sets the start position of text that will then run to the right as you type.
A Center Tab stop sets the position of the middle of the text. The text centers on this position as you
type.
A Right Tab stop sets the right end of the text. As you type, the text moves to the left.
A Decimal Tab stop aligns numbers around a decimal point. Independent of the number of digits, the
decimal point will be in the same position. (You can align numbers around a decimal character only)
A Bar Tab stop doesn't position text. It inserts a vertical bar at the tab position.
NOTE: You can drag existing tab stops left or right along the ruler to a different position. Just Click and
hold on the tab stop on the ruler then drag it to where ever you would like it to be.
Setting Detailed Tab Stops
If you want your tab stops at precise positions that you can't
get by clicking the ruler, or if you want to insert a specific
character (leader) before the tab, you can use the Tabs
dialog box.
1. Click the Home tab, click the Paragraph Dialog Box
Launcher
2. A Paragraph box will appear, click on the Tabs button at the bottom left of the dialog box.
3. A Tabs dialog box will appear.
4. Under Tab stop position area, type the location where you want
to set the tab stop. Hit enter.
5. Under Alignment, click the type of tab stop that you want. See
the table above for an explanation of the different types of tab
stops.
6. To add dots with your tab stop, or to add another type of leader,
click the option that you want under Leader.
7. Click Set.
8. Repeat steps 4-5 to add another tab stop, or click OK.
9. The Tabs dialog box will disappear and you should see your tabs
set on the document ruler.
11
Created By: Amy Beauchemin Source: office.microsoft.com 1/13/11
Clear Tab Stops
You can clear tab stops in a variety of ways, the simplest is going to the ruler, click and hold on the tab
stop and drag in down towards the document. The tab stop will disappear. To quickly clear multiple tab
stops and start fresh:
1. Click the Home tab, click the Paragraph Dialog Box Launcher
2. A Paragraph box will appear, click on the Tabs button at the bottom left of the dialog box.
3. A Tabs dialog box will appear.
4. In the list under Tab stop position, click the tab stop position that you want to clear, and then click
Clear. To remove the spacing from all manual tab stops, click Clear All.
5. Click OK.
Working with Graphics
Inserting Shapes
You can add one shape to your file or combine multiple shapes to
make a drawing or a more complex shape. Available shapes include
lines, basic geometric shapes, arrows, equation shapes, flowchart
shapes, stars, banners, and callouts. After you add one or more
shapes, you can add text, bullets, numbering, and Quick Styles to
them.
1. On the Insert tab, in the Illustrations group, click Shapes.
2. A drop down menu will appear, click the shape that you want.
3. Click anywhere in the document, and then drag to place the
shape.
Insert Text to Shapes
Once you have added a shape, you may want to add text inside the
shape. All you have to do is click on the inside of the shape and start
typing.
NOTE: The text that you add becomes part of the shape — if you
rotate or flip the shape, the text rotates or flips also.
Format Shapes
After you insert a shape a new tab called Drawing Tools Format will
appear every time you click on the shape.
1. Click the shape that you want to apply a new or different Quick
Style to.
2. Go to the Drawing Tools Format tab, in the Shape Styles group, click the style that you want to be
applied.
3. To see more Quick Styles, click the More button .
The Drawing Tools Format Tab also allows you to change the shape fill, outline, effects and select how
the text in your document is wrapped around the shape.
12
Created By: Amy Beauchemin Source: office.microsoft.com 1/13/11
Delete Shapes
If you decide you no longer want the shape in your document then click on the shape and then press
DELETE.
Inserting Text Boxes
A text box is an object that lets you put and type text anywhere in your file.
1. On the Insert tab, in the Text group, click Text Box and a drop down menu will appear.
2. Click on a text box template or click Draw Text Box at the bottom of the drop down menu to draw
your own text box.
3. If you elect to draw your own text box you need to click in the document, and then drag to draw the
text box the size that you want.
4. To add text to a text box, click inside the text box, and then type or paste text.
To format text in the text box, select the text, and then use the formatting options in the Font
group on the Home tab.
To position the text box, click it, and then when the pointer becomes a , drag the text box to a
new location.
NOTE: If you have problems printing text boxes, make sure that the Print drawings created in
Word check box is selected. To do this, click the File tab, click Options, click Display, and then
under Printing Options, select the Print drawings created in Word check box.
Deleting Text Boxes
To remove a text box just click the border of the text box that you want to delete, and then press
DELETE. Make sure that the pointer is not inside the text box, but rather on the border of the text box. If
the pointer is not on the border, pressing DELETE will delete the text inside the text box and not the text
box.
WordArt
WordArt can be used to add special text effects to your document. For example, you can stretch a title,
skew text, make text fit a preset shape, or apply a gradient fill. This WordArt becomes an object that you
can move or position in your document to add decoration or emphasis. You can modify or add to the text
in an existing WordArt object whenever you want. To add WordArt to text in your document, complete
the following steps:
1. On the Insert tab, in the Text group, click
WordArt,
2. A Drop down menu will appear, click the WordArt
style that you want.
3. A Text Box will appear with the words” Enter your
text here”, Enter your text.
Insert Picture/Clip Art
Pictures and clip art can be inserted or copied into a document from many different sources, including
downloaded from a clip art Web site provider, copied from a Web page, or inserted from a folder where
you save pictures.
13
Created By: Amy Beauchemin Source: office.microsoft.com 1/13/11
Insert Clip Art
1. On the Insert tab, in the Illustrations group, click Clip Art.
2. A Clip Art task pane will appear on the right of your screen, in the Search for box, type a word or
phrase that describes the clip art that you want.
3. Click Go.
4. In the list of results, double click on the clip art to insert it into your document.
Insert Picture from Web
1. Open the document.
2. From the Web page, drag the picture that you want into the Word document.
Insert Picture from File
To insert a picture saved in your computer, insert it by following these steps.
1. Click where you want to insert the picture in your document.
2. On the Insert tab, in the Illustrations group, click Picture.
3. Locate the picture that you want to insert. For example, you might have a picture file located in My
Documents.
4. Double-click the picture that you want to insert and it will appear in your document.
NOTE: To resize a picture, select the picture you've inserted in the document. To increase or decrease
the size in one or more directions, drag a sizing handle away from or toward the center, while you do one
of the following:
Sizing Graphics
You can easily resize pictures, text boxes, shapes, and WordArt in your file. You can also crop pictures
or return them to their original size.
Manually Resize Graphics
1. Click the pictureshape, text box or WordArtthat you want to resize.
2. Small circles or squares, also known as sizing handles, will appear at the
corners and sides of a selected object.
3. Click and hold on a sizing handle away from or toward the center to increase or decrease the size of
the picture.
Cropping a Picture
Cropping reduces the size of a pictureby removing vertical or horizontal edges. Cropping is often used to
hide or trim a part of a picture, either for emphasis or to remove unwanted portions.
1. Click on the picture that you want to crop.
2. Go to Picture Tools, on the Format tab, in the Size group, click Crop.
3. Black dotted lines will appear around your picture. Then drag the center
cropping handle on that side inward.
4. As you drag the cropping handle you will notice the
area of your graphic you want removed will become
gray.
5. Once you have cropped out everything you want,
click outside of the graphic for the gray area you want removed to disappear.
14
Created By: Amy Beauchemin Source: office.microsoft.com 1/13/11
Uncrop a Picture
You can always restore a resized or a cropped picture to its original appearance.
1. Click on your picture
2. Go to Picture Tools, on the Format tab, in the Size group, click Crop.
3. Black dotted lines will appear around your picture. Drag the black lines away from the center of the
picture and the original picture will appear.
Advanced Formatting Techniques
Create Columns
Columns can be used in documents such as brochures, newsletters or to save
space when creating lists.
Add columns before entering text:
1. Go to the Page Layout tab, in the Page Setup group, click Columns.
2. Click the layout that you want. Your document will be formatted in columns.
NOTE: To add a vertical line between the columns, click Columns again, click
More Columns, and then select the Line between check box. You can also
adjust the column width and spacing.
Add columns to part of a document
To do that highlight the text you want formatted in columns, or place your cursor
where you want columns to begin.
1. On the Page Layout tab, in the Page Setup group, click Columns.
2. Click More Columns.
3. Click the number of columns that you want.
4. In the Apply to list, click Selected text or This point forward.
NOTE: To change the layout again further on in your document, select text or click where you want to
change the layout, and then follow the same steps. For example, you can change from one column to a
two-column layout, and then you can change back to the single-column layout on a later page.
SmartArt Graphic
A SmartArt graphic is a visual representation of your information that you can quickly and easily create,
choosing from among many different layouts, to effectively communicate your message or ideas. You
can create SmartArt graphics in Excel,
Outlook, PowerPoint, and Word.
SmartArt graphics enables you to create
designer-quality illustrations with only a
few clicks of your mouse. When you
create a SmartArt graphic, you are
prompted to choose a type of SmartArt
graphic, such as Process, Hierarchy,
Cycle, or Relationship. Each type of
SmartArt graphics contains several
different layouts. After you choose a
layout, it is easy to switch the layout or
type of a SmartArt graphic. Most of your text and other content, colors, styles, effects, and text formatting
are automatically carried over to the new layout.
15
Created By: Amy Beauchemin Source: office.microsoft.com 1/13/11
When you select a layout, placeholder text (such as [Text]) is displayed, so that you can see how your
SmartArt graphic looks, nor is it displayed during a slide show. However, the shapes are always
displayed and printed, unless you delete them. You can replace the placeholder text with your own
content.
Create a SmartArt Graphic
1. On the Insert tab, in the Illustrations group, click SmartArt.
2. In the Choose a SmartArt Graphic dialog box, click the type and layout that
you want.
3. Enter your text by doing one of the following:
Click [Text] in the Text pane, and then type your text.
Copy text from another location, click [Text] in the Text pane, and then paste your text.
Add or Delete Shapes in SmartArt Graphic
1. Click the SmartArt graphic that you want to add another shape to.
2. Click the existing shape that is located closest to where you want to add the new shape.
3. Under SmartArt Tools, on the Design tab, in the Create Graphic group, click the arrow under Add
Shape.
4. Do one of the following:
To insert a shape after the selected shape, click Add
Shape After.
To insert a shape before the selected shape, click Add
Shape Before.
NOTE: To delete a shape from your SmartArt graphic, click the shape you want to delete, and
then press DELETE. To delete your entire SmartArt graphic, click the border of your SmartArt
graphic, and then press DELETE.
Format SmartArt Graphic
You can apply color variations to the shapes in your SmartArt
graphic.
1. Click your SmartArt graphic.
2. Under SmartArt Tools, on the Design tab, in the
SmartArt Styles group,
3. Select the SmartArt Style you wish to apply to add line
styles, bevels or 3-D effects.
4. In the SmartArt Styles group you can also click Change Colors to further modify your SmartArt
graphic.
16
Created By: Amy Beauchemin Source: office.microsoft.com 1/13/11
NOTE: If you don't see the SmartArt Tools or Design tabs, make sure that you've selected a SmartArt
graphic. You may have to double-click the SmartArt graphic to open the Design tab.
5. Click the color variation that you want.
Tables
Using tables in Word can provide you with additional elements to any document. Tables can be used to
create lists or format text in an organized fashion.
Inserting a Table
1. Click where you want to insert a table.
2. On the Insert tab, in the Tables group, click Table
3. A drop down box will appear; click and hold your mouse then drag to
select the number of rows and columns that you want inserted into
your document. You will see your table appearing in your document
as you drag on the grid.
4. Once you have highlighted the rows and columns you would like let
go of your mouse and the table will be in your document
Add Row/Column to Table
1. Click on the table.
2. Under Table Tools, go to the Layout tab
3. Click on the Insert Above or Insert Below to add a row, Click on
Insert Left or Insert Right to insert a column.
4. Click on Delete to remove a column, row or cell.
Delete a Table
1. Rest the pointer on the table until the table move handle appears, and then click the table move
handle.
2. Press BACKSPACE on your keyboard.
Delete Table Contents.
You can delete the contents of a cell, a row, a column, or the whole table. When you delete the contents
of a table, the table's rows and columns remain in your document.
1. Select the contents that you want to clear by following the table below:
TO SELECT DO THIS
The entire table In Print Layout view, rest the pointer over the table until the table move handle
appears, and then click the table move handle.
A row or rows
Click to the left of the row.
A column or
columns
Click the column's top gridline or border.
A cell
Click the left edge of the cell.
2. Press DELETE.
17
Created By: Amy Beauchemin Source: office.microsoft.com 1/13/11
Finalizing a Document
Using the "Spell Check" Feature
As you type your document, red wavy lines will appear under any word that is spelled incorrectly. The
fastest way to fix spelling errors is to:
1. Put your cursor over the misspelled word and right click.
2. A drop down box will appear with correct spellings of the
word.
3. Highlight and left click the word you want to replace the
incorrect word with.
To complete a more comprehensive Spelling and Grammar check, you can use the Spelling and
Grammar feature.
1. Click on the Review tab
2. Click on the Spelling & Grammar command (a
blue check mark with ABC above it).
3. A Spelling and Grammar box will appear.
4. You can correct any Spelling or Grammar issue
within the box.
Print Preview
Print Preview automatically displays when you click
on the Print tab. Whenever you make a change to
a print-related setting, the preview is automatically updated.
1. Click the File tab, and then click Print. To go back to your document, click the File tab.
2. A preview of your document automatically appears. To view each page, click the arrows below the
preview.
Print
The Print tab is the place to go to make sure you are printing what you want.
Click the File tab.
Click the Print command to print a
document.
Click the Print button to print your
document.
This dropdown shows the currently
selected printer. Clicking the
dropdown will display other available
printers.
These dropdown menus show
currently selected Settings. Rather
than just showing you the name of a
feature, these dropdown menus show
you what the status of a feature is and
describes it. This can help you figure
out if you want to change the setting
from what you have.
TIP: To go back to your document
and make changes before you print it,
click the File tab.
2.
18
Created By: Amy Beauchemin Source: office.microsoft.com 1/13/11
Save a document
To save a document in the format used by Word 2010 and Word 2007, do the following:
1. Click the File tab.
2. Click Save As.
3. In the File name box, enter a name for your document.
4. Click Save.
To save a document so that it is compatible with Word 2003 or earlier, do the following:
1. Click the File tab.
2. Click Save As.
3. In the Save as type list, click Word 97-2003 Document. This changes the file format to .doc.
4. In the File name box, type a name for the document.
5. Click Save.
Help
If you need additional assistance when completing your document you can use the help feature.
1. Click on the blue circle with the white question mark command
2. A Help box will appear.
3. Click in the Search Help textbox and type what you need help with
4. Click the magnifying glass next to the text box and the possible solutions will appear.
For additional information Microsoft Office has a great online resource that provides you with step by
step instructions in a variety of topics. This link will bring you directly to the Word 2010 Help and How-To
page: http://office.microsoft.com/en-us/word-help/CL010256357.aspx

More Related Content

What's hot (19)

Microsoft Word Advance Features
Microsoft Word Advance FeaturesMicrosoft Word Advance Features
Microsoft Word Advance Features
 
Word 2016
Word 2016Word 2016
Word 2016
 
Word 2010 tutorial
Word 2010 tutorialWord 2010 tutorial
Word 2010 tutorial
 
MS Word Intermediate Training
MS Word Intermediate TrainingMS Word Intermediate Training
MS Word Intermediate Training
 
Ms word 2010 by sachin sharma
Ms word 2010 by sachin sharmaMs word 2010 by sachin sharma
Ms word 2010 by sachin sharma
 
Word2010 advanced
Word2010 advancedWord2010 advanced
Word2010 advanced
 
Word2007 tutorial
Word2007 tutorialWord2007 tutorial
Word2007 tutorial
 
MS Word Basics Training
MS Word Basics TrainingMS Word Basics Training
MS Word Basics Training
 
Microsoft Word 2007 PDF
Microsoft Word 2007 PDFMicrosoft Word 2007 PDF
Microsoft Word 2007 PDF
 
Microsoft word 2007 part 1
Microsoft word 2007 part 1Microsoft word 2007 part 1
Microsoft word 2007 part 1
 
Ms word
Ms wordMs word
Ms word
 
Ms office 2007 complete
Ms office 2007 completeMs office 2007 complete
Ms office 2007 complete
 
Microsoft word basics
Microsoft word basicsMicrosoft word basics
Microsoft word basics
 
Microsoft office word 2007
Microsoft office word 2007Microsoft office word 2007
Microsoft office word 2007
 
Task 2
Task 2Task 2
Task 2
 
PowerPoint for Introduction to Office 2010
PowerPoint for Introduction to Office 2010PowerPoint for Introduction to Office 2010
PowerPoint for Introduction to Office 2010
 
Microsoft word 2007
Microsoft word 2007Microsoft word 2007
Microsoft word 2007
 
Word processing in english ms word
Word processing in english   ms wordWord processing in english   ms word
Word processing in english ms word
 
Microsoft word features
Microsoft word featuresMicrosoft word features
Microsoft word features
 

Viewers also liked

Tutorial word 2010 luisa fernanda granada bueno
Tutorial word 2010  luisa fernanda granada buenoTutorial word 2010  luisa fernanda granada bueno
Tutorial word 2010 luisa fernanda granada buenofernanda8881
 
Ara membuat seleksi rambut pada photoshop dengan detil
Ara membuat seleksi rambut pada photoshop dengan detilAra membuat seleksi rambut pada photoshop dengan detil
Ara membuat seleksi rambut pada photoshop dengan detilMara Sutan Siregar
 
MS PowerPoint 2010 tutorial 4
MS PowerPoint 2010 tutorial 4MS PowerPoint 2010 tutorial 4
MS PowerPoint 2010 tutorial 4Khalfan Alshuaili
 
Media enhanced project
Media enhanced projectMedia enhanced project
Media enhanced projectMike4532
 
Marvel fortuna khanza hazzelia
Marvel fortuna khanza hazzeliaMarvel fortuna khanza hazzelia
Marvel fortuna khanza hazzeliaHassan Khomeini
 
Ed480 use of computer simulations and gaming to enhance learning
Ed480 use of computer simulations and gaming to enhance learningEd480 use of computer simulations and gaming to enhance learning
Ed480 use of computer simulations and gaming to enhance learningAlvin Jesse Borja
 
Pertemuan 1-fungsi-invers-eksponensial-logaritma-dan-trigonometri
Pertemuan 1-fungsi-invers-eksponensial-logaritma-dan-trigonometriPertemuan 1-fungsi-invers-eksponensial-logaritma-dan-trigonometri
Pertemuan 1-fungsi-invers-eksponensial-logaritma-dan-trigonometriadi darmawan
 
Ms office 2010 notes
Ms office 2010 notesMs office 2010 notes
Ms office 2010 notesSirajRock
 
Ms project 2010 tutorial 2
Ms project 2010 tutorial   2Ms project 2010 tutorial   2
Ms project 2010 tutorial 2learningquotient
 
Microsoft office hindi notes
Microsoft office hindi notesMicrosoft office hindi notes
Microsoft office hindi notesSirajRock
 
MS OFFICE 2010 VS 2007
MS OFFICE 2010 VS 2007MS OFFICE 2010 VS 2007
MS OFFICE 2010 VS 2007Gurpreet Singh
 
Intro to Microsoft Word 2010 for Kids
Intro to Microsoft Word 2010 for Kids Intro to Microsoft Word 2010 for Kids
Intro to Microsoft Word 2010 for Kids Queens Library
 

Viewers also liked (20)

Tutorial word 2010 luisa fernanda granada bueno
Tutorial word 2010  luisa fernanda granada buenoTutorial word 2010  luisa fernanda granada bueno
Tutorial word 2010 luisa fernanda granada bueno
 
TUTORIAL WORD
TUTORIAL WORDTUTORIAL WORD
TUTORIAL WORD
 
Tutorial microsoft excel_2007
Tutorial microsoft excel_2007Tutorial microsoft excel_2007
Tutorial microsoft excel_2007
 
Ara membuat seleksi rambut pada photoshop dengan detil
Ara membuat seleksi rambut pada photoshop dengan detilAra membuat seleksi rambut pada photoshop dengan detil
Ara membuat seleksi rambut pada photoshop dengan detil
 
Tutorial microsoft office
Tutorial microsoft officeTutorial microsoft office
Tutorial microsoft office
 
MS PowerPoint 2010 tutorial 4
MS PowerPoint 2010 tutorial 4MS PowerPoint 2010 tutorial 4
MS PowerPoint 2010 tutorial 4
 
Media enhanced project
Media enhanced projectMedia enhanced project
Media enhanced project
 
Marvel fortuna khanza hazzelia
Marvel fortuna khanza hazzeliaMarvel fortuna khanza hazzelia
Marvel fortuna khanza hazzelia
 
MS Word 2010 tutorial 3
MS Word 2010 tutorial 3MS Word 2010 tutorial 3
MS Word 2010 tutorial 3
 
Edit foto
Edit fotoEdit foto
Edit foto
 
Amazing vedic epic ppt
Amazing vedic epic pptAmazing vedic epic ppt
Amazing vedic epic ppt
 
Tutorial De Word
Tutorial De WordTutorial De Word
Tutorial De Word
 
Ed480 use of computer simulations and gaming to enhance learning
Ed480 use of computer simulations and gaming to enhance learningEd480 use of computer simulations and gaming to enhance learning
Ed480 use of computer simulations and gaming to enhance learning
 
Pertemuan 1-fungsi-invers-eksponensial-logaritma-dan-trigonometri
Pertemuan 1-fungsi-invers-eksponensial-logaritma-dan-trigonometriPertemuan 1-fungsi-invers-eksponensial-logaritma-dan-trigonometri
Pertemuan 1-fungsi-invers-eksponensial-logaritma-dan-trigonometri
 
Ms office 2010 notes
Ms office 2010 notesMs office 2010 notes
Ms office 2010 notes
 
Siraj rock
Siraj rockSiraj rock
Siraj rock
 
Ms project 2010 tutorial 2
Ms project 2010 tutorial   2Ms project 2010 tutorial   2
Ms project 2010 tutorial 2
 
Microsoft office hindi notes
Microsoft office hindi notesMicrosoft office hindi notes
Microsoft office hindi notes
 
MS OFFICE 2010 VS 2007
MS OFFICE 2010 VS 2007MS OFFICE 2010 VS 2007
MS OFFICE 2010 VS 2007
 
Intro to Microsoft Word 2010 for Kids
Intro to Microsoft Word 2010 for Kids Intro to Microsoft Word 2010 for Kids
Intro to Microsoft Word 2010 for Kids
 

Similar to Word 2010 tutorial

Advanced Microsoft word seminar
Advanced Microsoft word seminarAdvanced Microsoft word seminar
Advanced Microsoft word seminarM'mama Sawaneh
 
ms-word-2010-tutorial.pptx best way to understand
ms-word-2010-tutorial.pptx best way to understandms-word-2010-tutorial.pptx best way to understand
ms-word-2010-tutorial.pptx best way to understandMarrietaAyson
 
Word2022 (1).pptx4c
Word2022 (1).pptx4cWord2022 (1).pptx4c
Word2022 (1).pptx4cmagicbus5
 
Introduction to Microsoft Office
Introduction to Microsoft OfficeIntroduction to Microsoft Office
Introduction to Microsoft Officejeffrey233617
 
chapter1computers2-160923133049.pdf
chapter1computers2-160923133049.pdfchapter1computers2-160923133049.pdf
chapter1computers2-160923133049.pdfjhoncarlvaldez
 
Microsoft Word 2010
Microsoft Word 2010Microsoft Word 2010
Microsoft Word 2010home
 
chapter1computers2-160923133049.pptx
chapter1computers2-160923133049.pptxchapter1computers2-160923133049.pptx
chapter1computers2-160923133049.pptxMirzaAARIF1
 
Microsoft Word Basic Features
Microsoft Word Basic FeaturesMicrosoft Word Basic Features
Microsoft Word Basic FeaturesAkashMeghwar2
 

Similar to Word 2010 tutorial (20)

Advanced Microsoft word seminar
Advanced Microsoft word seminarAdvanced Microsoft word seminar
Advanced Microsoft word seminar
 
Word2016.pptx
Word2016.pptxWord2016.pptx
Word2016.pptx
 
ms-word-2010-tutorial.pptx best way to understand
ms-word-2010-tutorial.pptx best way to understandms-word-2010-tutorial.pptx best way to understand
ms-word-2010-tutorial.pptx best way to understand
 
Word2016.ppt
Word2016.pptWord2016.ppt
Word2016.ppt
 
awert.pptx
awert.pptxawert.pptx
awert.pptx
 
Word2022 (1).pptx4c
Word2022 (1).pptx4cWord2022 (1).pptx4c
Word2022 (1).pptx4c
 
Word2016.pptx
Word2016.pptxWord2016.pptx
Word2016.pptx
 
Word2016.pptx
Word2016.pptxWord2016.pptx
Word2016.pptx
 
Word2016.pptx
Word2016.pptxWord2016.pptx
Word2016.pptx
 
Word2016.pptx
Word2016.pptxWord2016.pptx
Word2016.pptx
 
Word2016.pptx
Word2016.pptxWord2016.pptx
Word2016.pptx
 
Explore MS Word2016.pptx
Explore MS Word2016.pptxExplore MS Word2016.pptx
Explore MS Word2016.pptx
 
Introduction to Microsoft Office
Introduction to Microsoft OfficeIntroduction to Microsoft Office
Introduction to Microsoft Office
 
MS word.pptx
MS word.pptxMS word.pptx
MS word.pptx
 
Word.pptx
Word.pptxWord.pptx
Word.pptx
 
Welcome to word 2016
Welcome to word 2016Welcome to word 2016
Welcome to word 2016
 
chapter1computers2-160923133049.pdf
chapter1computers2-160923133049.pdfchapter1computers2-160923133049.pdf
chapter1computers2-160923133049.pdf
 
Microsoft Word 2010
Microsoft Word 2010Microsoft Word 2010
Microsoft Word 2010
 
chapter1computers2-160923133049.pptx
chapter1computers2-160923133049.pptxchapter1computers2-160923133049.pptx
chapter1computers2-160923133049.pptx
 
Microsoft Word Basic Features
Microsoft Word Basic FeaturesMicrosoft Word Basic Features
Microsoft Word Basic Features
 

More from Mara Sutan Siregar

Efek grid pada foto tamara bleszynski
Efek grid pada foto tamara bleszynskiEfek grid pada foto tamara bleszynski
Efek grid pada foto tamara bleszynskiMara Sutan Siregar
 
Langkah pembuatan efek bayangan di air
Langkah pembuatan efek bayangan di airLangkah pembuatan efek bayangan di air
Langkah pembuatan efek bayangan di airMara Sutan Siregar
 
Langkah pembuatan seleksi dengan menggunakan channel
Langkah pembuatan seleksi dengan menggunakan channelLangkah pembuatan seleksi dengan menggunakan channel
Langkah pembuatan seleksi dengan menggunakan channelMara Sutan Siregar
 
Membuat animasi berubah bentuk dengan photoshop
Membuat animasi berubah bentuk dengan photoshopMembuat animasi berubah bentuk dengan photoshop
Membuat animasi berubah bentuk dengan photoshopMara Sutan Siregar
 
Membuat anyaman dari foto dengan photoshop tentunya
Membuat anyaman dari foto dengan photoshop tentunyaMembuat anyaman dari foto dengan photoshop tentunya
Membuat anyaman dari foto dengan photoshop tentunyaMara Sutan Siregar
 
Membuat efek bola kristal dengan mudah
Membuat efek bola kristal dengan mudahMembuat efek bola kristal dengan mudah
Membuat efek bola kristal dengan mudahMara Sutan Siregar
 
Membuat efek foto 1000 bayangan
Membuat efek foto 1000 bayanganMembuat efek foto 1000 bayangan
Membuat efek foto 1000 bayanganMara Sutan Siregar
 
Membuat effect keren dalam 1 menit
Membuat effect keren dalam 1 menitMembuat effect keren dalam 1 menit
Membuat effect keren dalam 1 menitMara Sutan Siregar
 
Membuat wallpaper dian sastro pake efek futuristik
Membuat wallpaper dian sastro pake efek futuristikMembuat wallpaper dian sastro pake efek futuristik
Membuat wallpaper dian sastro pake efek futuristikMara Sutan Siregar
 
Menguruskan badan dengan mudah
Menguruskan badan dengan mudahMenguruskan badan dengan mudah
Menguruskan badan dengan mudahMara Sutan Siregar
 

More from Mara Sutan Siregar (20)

Efek dream photoshop
Efek dream photoshopEfek dream photoshop
Efek dream photoshop
 
Efek foto terbakar
Efek foto terbakarEfek foto terbakar
Efek foto terbakar
 
Efek grid pada foto tamara bleszynski
Efek grid pada foto tamara bleszynskiEfek grid pada foto tamara bleszynski
Efek grid pada foto tamara bleszynski
 
Fire man
Fire manFire man
Fire man
 
Lady in the fire
Lady in the fireLady in the fire
Lady in the fire
 
Langkah pembuatan efek bayangan di air
Langkah pembuatan efek bayangan di airLangkah pembuatan efek bayangan di air
Langkah pembuatan efek bayangan di air
 
Langkah pembuatan seleksi dengan menggunakan channel
Langkah pembuatan seleksi dengan menggunakan channelLangkah pembuatan seleksi dengan menggunakan channel
Langkah pembuatan seleksi dengan menggunakan channel
 
Membuat animasi berubah bentuk dengan photoshop
Membuat animasi berubah bentuk dengan photoshopMembuat animasi berubah bentuk dengan photoshop
Membuat animasi berubah bentuk dengan photoshop
 
Membuat anyaman dari foto dengan photoshop tentunya
Membuat anyaman dari foto dengan photoshop tentunyaMembuat anyaman dari foto dengan photoshop tentunya
Membuat anyaman dari foto dengan photoshop tentunya
 
Membuat efek bola kristal dengan mudah
Membuat efek bola kristal dengan mudahMembuat efek bola kristal dengan mudah
Membuat efek bola kristal dengan mudah
 
Membuat efek foto 1000 bayangan
Membuat efek foto 1000 bayanganMembuat efek foto 1000 bayangan
Membuat efek foto 1000 bayangan
 
Membuat effect keren dalam 1 menit
Membuat effect keren dalam 1 menitMembuat effect keren dalam 1 menit
Membuat effect keren dalam 1 menit
 
Membuat kayak foto beneran
Membuat kayak foto beneranMembuat kayak foto beneran
Membuat kayak foto beneran
 
Membuat wallpaper dian sastro pake efek futuristik
Membuat wallpaper dian sastro pake efek futuristikMembuat wallpaper dian sastro pake efek futuristik
Membuat wallpaper dian sastro pake efek futuristik
 
Memperhalus kulit dengan
Memperhalus kulit denganMemperhalus kulit dengan
Memperhalus kulit dengan
 
Menguruskan badan dengan mudah
Menguruskan badan dengan mudahMenguruskan badan dengan mudah
Menguruskan badan dengan mudah
 
Photo effect
Photo effectPhoto effect
Photo effect
 
Photo in a box
Photo in a boxPhoto in a box
Photo in a box
 
Realistic photo object
Realistic photo objectRealistic photo object
Realistic photo object
 
Tool1
Tool1Tool1
Tool1
 

Recently uploaded

GenCyber Cyber Security Day Presentation
GenCyber Cyber Security Day PresentationGenCyber Cyber Security Day Presentation
GenCyber Cyber Security Day PresentationMichael W. Hawkins
 
From Event to Action: Accelerate Your Decision Making with Real-Time Automation
From Event to Action: Accelerate Your Decision Making with Real-Time AutomationFrom Event to Action: Accelerate Your Decision Making with Real-Time Automation
From Event to Action: Accelerate Your Decision Making with Real-Time AutomationSafe Software
 
Understanding the Laravel MVC Architecture
Understanding the Laravel MVC ArchitectureUnderstanding the Laravel MVC Architecture
Understanding the Laravel MVC ArchitecturePixlogix Infotech
 
#StandardsGoals for 2024: What’s new for BISAC - Tech Forum 2024
#StandardsGoals for 2024: What’s new for BISAC - Tech Forum 2024#StandardsGoals for 2024: What’s new for BISAC - Tech Forum 2024
#StandardsGoals for 2024: What’s new for BISAC - Tech Forum 2024BookNet Canada
 
Neo4j - How KGs are shaping the future of Generative AI at AWS Summit London ...
Neo4j - How KGs are shaping the future of Generative AI at AWS Summit London ...Neo4j - How KGs are shaping the future of Generative AI at AWS Summit London ...
Neo4j - How KGs are shaping the future of Generative AI at AWS Summit London ...Neo4j
 
Automating Business Process via MuleSoft Composer | Bangalore MuleSoft Meetup...
Automating Business Process via MuleSoft Composer | Bangalore MuleSoft Meetup...Automating Business Process via MuleSoft Composer | Bangalore MuleSoft Meetup...
Automating Business Process via MuleSoft Composer | Bangalore MuleSoft Meetup...shyamraj55
 
A Domino Admins Adventures (Engage 2024)
A Domino Admins Adventures (Engage 2024)A Domino Admins Adventures (Engage 2024)
A Domino Admins Adventures (Engage 2024)Gabriella Davis
 
08448380779 Call Girls In Greater Kailash - I Women Seeking Men
08448380779 Call Girls In Greater Kailash - I Women Seeking Men08448380779 Call Girls In Greater Kailash - I Women Seeking Men
08448380779 Call Girls In Greater Kailash - I Women Seeking MenDelhi Call girls
 
Human Factors of XR: Using Human Factors to Design XR Systems
Human Factors of XR: Using Human Factors to Design XR SystemsHuman Factors of XR: Using Human Factors to Design XR Systems
Human Factors of XR: Using Human Factors to Design XR SystemsMark Billinghurst
 
Transforming Data Streams with Kafka Connect: An Introduction to Single Messa...
Transforming Data Streams with Kafka Connect: An Introduction to Single Messa...Transforming Data Streams with Kafka Connect: An Introduction to Single Messa...
Transforming Data Streams with Kafka Connect: An Introduction to Single Messa...HostedbyConfluent
 
Salesforce Community Group Quito, Salesforce 101
Salesforce Community Group Quito, Salesforce 101Salesforce Community Group Quito, Salesforce 101
Salesforce Community Group Quito, Salesforce 101Paola De la Torre
 
Swan(sea) Song – personal research during my six years at Swansea ... and bey...
Swan(sea) Song – personal research during my six years at Swansea ... and bey...Swan(sea) Song – personal research during my six years at Swansea ... and bey...
Swan(sea) Song – personal research during my six years at Swansea ... and bey...Alan Dix
 
SIEMENS: RAPUNZEL – A Tale About Knowledge Graph
SIEMENS: RAPUNZEL – A Tale About Knowledge GraphSIEMENS: RAPUNZEL – A Tale About Knowledge Graph
SIEMENS: RAPUNZEL – A Tale About Knowledge GraphNeo4j
 
IAC 2024 - IA Fast Track to Search Focused AI Solutions
IAC 2024 - IA Fast Track to Search Focused AI SolutionsIAC 2024 - IA Fast Track to Search Focused AI Solutions
IAC 2024 - IA Fast Track to Search Focused AI SolutionsEnterprise Knowledge
 
SQL Database Design For Developers at php[tek] 2024
SQL Database Design For Developers at php[tek] 2024SQL Database Design For Developers at php[tek] 2024
SQL Database Design For Developers at php[tek] 2024Scott Keck-Warren
 
My Hashitalk Indonesia April 2024 Presentation
My Hashitalk Indonesia April 2024 PresentationMy Hashitalk Indonesia April 2024 Presentation
My Hashitalk Indonesia April 2024 PresentationRidwan Fadjar
 
Kotlin Multiplatform & Compose Multiplatform - Starter kit for pragmatics
Kotlin Multiplatform & Compose Multiplatform - Starter kit for pragmaticsKotlin Multiplatform & Compose Multiplatform - Starter kit for pragmatics
Kotlin Multiplatform & Compose Multiplatform - Starter kit for pragmaticscarlostorres15106
 
How to Remove Document Management Hurdles with X-Docs?
How to Remove Document Management Hurdles with X-Docs?How to Remove Document Management Hurdles with X-Docs?
How to Remove Document Management Hurdles with X-Docs?XfilesPro
 
FULL ENJOY 🔝 8264348440 🔝 Call Girls in Diplomatic Enclave | Delhi
FULL ENJOY 🔝 8264348440 🔝 Call Girls in Diplomatic Enclave | DelhiFULL ENJOY 🔝 8264348440 🔝 Call Girls in Diplomatic Enclave | Delhi
FULL ENJOY 🔝 8264348440 🔝 Call Girls in Diplomatic Enclave | Delhisoniya singh
 
08448380779 Call Girls In Civil Lines Women Seeking Men
08448380779 Call Girls In Civil Lines Women Seeking Men08448380779 Call Girls In Civil Lines Women Seeking Men
08448380779 Call Girls In Civil Lines Women Seeking MenDelhi Call girls
 

Recently uploaded (20)

GenCyber Cyber Security Day Presentation
GenCyber Cyber Security Day PresentationGenCyber Cyber Security Day Presentation
GenCyber Cyber Security Day Presentation
 
From Event to Action: Accelerate Your Decision Making with Real-Time Automation
From Event to Action: Accelerate Your Decision Making with Real-Time AutomationFrom Event to Action: Accelerate Your Decision Making with Real-Time Automation
From Event to Action: Accelerate Your Decision Making with Real-Time Automation
 
Understanding the Laravel MVC Architecture
Understanding the Laravel MVC ArchitectureUnderstanding the Laravel MVC Architecture
Understanding the Laravel MVC Architecture
 
#StandardsGoals for 2024: What’s new for BISAC - Tech Forum 2024
#StandardsGoals for 2024: What’s new for BISAC - Tech Forum 2024#StandardsGoals for 2024: What’s new for BISAC - Tech Forum 2024
#StandardsGoals for 2024: What’s new for BISAC - Tech Forum 2024
 
Neo4j - How KGs are shaping the future of Generative AI at AWS Summit London ...
Neo4j - How KGs are shaping the future of Generative AI at AWS Summit London ...Neo4j - How KGs are shaping the future of Generative AI at AWS Summit London ...
Neo4j - How KGs are shaping the future of Generative AI at AWS Summit London ...
 
Automating Business Process via MuleSoft Composer | Bangalore MuleSoft Meetup...
Automating Business Process via MuleSoft Composer | Bangalore MuleSoft Meetup...Automating Business Process via MuleSoft Composer | Bangalore MuleSoft Meetup...
Automating Business Process via MuleSoft Composer | Bangalore MuleSoft Meetup...
 
A Domino Admins Adventures (Engage 2024)
A Domino Admins Adventures (Engage 2024)A Domino Admins Adventures (Engage 2024)
A Domino Admins Adventures (Engage 2024)
 
08448380779 Call Girls In Greater Kailash - I Women Seeking Men
08448380779 Call Girls In Greater Kailash - I Women Seeking Men08448380779 Call Girls In Greater Kailash - I Women Seeking Men
08448380779 Call Girls In Greater Kailash - I Women Seeking Men
 
Human Factors of XR: Using Human Factors to Design XR Systems
Human Factors of XR: Using Human Factors to Design XR SystemsHuman Factors of XR: Using Human Factors to Design XR Systems
Human Factors of XR: Using Human Factors to Design XR Systems
 
Transforming Data Streams with Kafka Connect: An Introduction to Single Messa...
Transforming Data Streams with Kafka Connect: An Introduction to Single Messa...Transforming Data Streams with Kafka Connect: An Introduction to Single Messa...
Transforming Data Streams with Kafka Connect: An Introduction to Single Messa...
 
Salesforce Community Group Quito, Salesforce 101
Salesforce Community Group Quito, Salesforce 101Salesforce Community Group Quito, Salesforce 101
Salesforce Community Group Quito, Salesforce 101
 
Swan(sea) Song – personal research during my six years at Swansea ... and bey...
Swan(sea) Song – personal research during my six years at Swansea ... and bey...Swan(sea) Song – personal research during my six years at Swansea ... and bey...
Swan(sea) Song – personal research during my six years at Swansea ... and bey...
 
SIEMENS: RAPUNZEL – A Tale About Knowledge Graph
SIEMENS: RAPUNZEL – A Tale About Knowledge GraphSIEMENS: RAPUNZEL – A Tale About Knowledge Graph
SIEMENS: RAPUNZEL – A Tale About Knowledge Graph
 
IAC 2024 - IA Fast Track to Search Focused AI Solutions
IAC 2024 - IA Fast Track to Search Focused AI SolutionsIAC 2024 - IA Fast Track to Search Focused AI Solutions
IAC 2024 - IA Fast Track to Search Focused AI Solutions
 
SQL Database Design For Developers at php[tek] 2024
SQL Database Design For Developers at php[tek] 2024SQL Database Design For Developers at php[tek] 2024
SQL Database Design For Developers at php[tek] 2024
 
My Hashitalk Indonesia April 2024 Presentation
My Hashitalk Indonesia April 2024 PresentationMy Hashitalk Indonesia April 2024 Presentation
My Hashitalk Indonesia April 2024 Presentation
 
Kotlin Multiplatform & Compose Multiplatform - Starter kit for pragmatics
Kotlin Multiplatform & Compose Multiplatform - Starter kit for pragmaticsKotlin Multiplatform & Compose Multiplatform - Starter kit for pragmatics
Kotlin Multiplatform & Compose Multiplatform - Starter kit for pragmatics
 
How to Remove Document Management Hurdles with X-Docs?
How to Remove Document Management Hurdles with X-Docs?How to Remove Document Management Hurdles with X-Docs?
How to Remove Document Management Hurdles with X-Docs?
 
FULL ENJOY 🔝 8264348440 🔝 Call Girls in Diplomatic Enclave | Delhi
FULL ENJOY 🔝 8264348440 🔝 Call Girls in Diplomatic Enclave | DelhiFULL ENJOY 🔝 8264348440 🔝 Call Girls in Diplomatic Enclave | Delhi
FULL ENJOY 🔝 8264348440 🔝 Call Girls in Diplomatic Enclave | Delhi
 
08448380779 Call Girls In Civil Lines Women Seeking Men
08448380779 Call Girls In Civil Lines Women Seeking Men08448380779 Call Girls In Civil Lines Women Seeking Men
08448380779 Call Girls In Civil Lines Women Seeking Men
 

Word 2010 tutorial

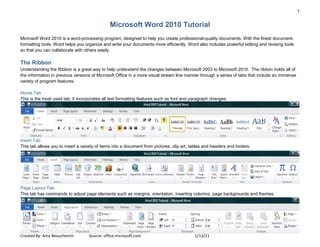
  • 1. 1 Created By: Amy Beauchemin Source: office.microsoft.com 1/13/11 Microsoft Word 2010 Tutorial Microsoft Word 2010 is a word-processing program, designed to help you create professional-quality documents. With the finest document- formatting tools, Word helps you organize and write your documents more efficiently. Word also includes powerful editing and revising tools so that you can collaborate with others easily. The Ribbon Understanding the Ribbon is a great way to help understand the changes between Microsoft 2003 to Microsoft 2010. The ribbon holds all of the information in previous versions of Microsoft Office in a more visual stream line manner through a series of tabs that include an immense variety of program features. Home Tab This is the most used tab; it incorporates all text formatting features such as font and paragraph changes. Insert Tab This tab allows you to insert a variety of items into a document from pictures, clip art, tables and headers and footers. Page Layout Tab This tab has commands to adjust page elements such as margins, orientation, inserting columns, page backgrounds and themes.
  • 2. 2 Created By: Amy Beauchemin Source: office.microsoft.com 1/13/11 Reference Tab This tab has commands to use when creating a Table of Contents and citation page for a paper. It provides you with many simple solutions to create these typically difficult to produce documents. Mailing Tab This tab allows you to create documents to help when sending out mailings such as printing envelopes, labels and processing mail merges. Review Tab This tab allows you to make any changes to your document due to spelling and grammar issues. It also holds the track changes feature which provides people with the ability to make notes and changes to a document of another person. View Tab This tab allows you to change the view of your document to a different two page document or zoom.
  • 3. 3 Created By: Amy Beauchemin Source: office.microsoft.com 1/13/11 Getting Started Now that you have an understanding of where things are located, let’s look at the steps needed to create a document. Opening Outlook You may have a shortcut to Word on your desktop, if so double click the icon and Word will open. If not follow the steps below: 1. Click on the Start button 2. Highlight Programs 3. Highlight Microsoft Office 4. Click on Microsoft Word 2010 Create a New Document 1. Click the File tab and then click New. 2. Under Available Templates, click Blank Document. 3. Click Create. Using Templates Word 2010 allows you to apply built-in templates from a wide selection of popular Word templates, including resumes, agendas, business cards, and faxes. To find and apply a template in Word, do the following: 1. On the File tab, click New. 2. Under Available Templates, do one of the following: To use one of the built-in templates, click Sample Templates, click the template that you want, and then click Create. To reuse a template that you’ve recently used, click Recent Templates, click the template that you want, and then click Create. To find a template on Office.com, under Office.com Templates, click the template category that you want, click the template that you want, and click Download to download the template from Office.com to your computer. 3. Once you have selected your template you can modify it in any way to create the document you want. NOTE: You can also search for templates on Office.com from within Word. In the Search Office.com for templates box, type one or more search terms, and then click the arrow button to search. Opening a document 1. Click the File tab, and then click Open. 2. In the left pane of the Open dialog box, click the drive or folder that contains the document. 3. In the right pane of the Open dialog box, open the folder that contains the document that you want. 4. Click the document and then click Open.
  • 4. 4 Created By: Amy Beauchemin Source: office.microsoft.com 1/13/11 Cut, Copy and Paste If you would like to remove text from your document you can copy or cut the text from the document. Simply highlight the text and go to the Home tab in the Clipboard group and click Cut or Copy. You can also right click on your mouse and select Cut or Copy. Pasting Text If you Copy text, you typically need to Paste it somewhere. The Paste feature in 2010 is much more detailed than in previous versions of Word. When you paste content, the Paste Options button provides different options, depending on the source of the content. Keep Source Formatting: This option preserves the look of the original text. Keep Text Only: This option removes all the original formatting from the text. Link & Keep Source Formatting: This option preserves the look of the original text, and it maintains a link to the source file and updates the pasted text with any changes that are made to the source file. Link & Use Destination Styles: This option formats the text to match the style that’s applied where the text is pasted. It also maintains a link to the source file and updates the pasted text with any changes that are made to the source file. Merge Formatting: This option changes the formatting so that it matches the text that surrounds it. Picture: This option inserts the text as an image. Use Destination Styles: This option formats the text to match the style that’s applied where the text is pasted. Use Destination Theme: This option formats the text to match the theme that’s applied to the document where the text is pasted. To Paste, click on the area you want your information to be inserted and either go to the Home tab in the Clipboard group and click Paste or right click on your mouse and select Paste. Undo The Quick Access Toolbar holds a variety of commands right at you finger tips. It is located in the top left of the document above the File and Home tab. You can add or remove command by clicking on the arrow to the right of the Quick Access Toolbar. If you make an error in your document click on the Undo command and it will remove the last thing you did. Show/Hide Formatting Marks The Show/Hide command allows you to see every time you hit the space bar, hit enter or tab. This feature can be quite useful when creating documents to understand where everything is placed within your document and see if any errors have been made. On the Home tab, in the Paragraph group, click Show/Hide.
  • 5. 5 Created By: Amy Beauchemin Source: office.microsoft.com 1/13/11 Formatting Text Formatting a document can range from modifying text size to adding graphics. It is easy to add creative touches to any document with the options Microsoft Word has to offer. Modifying Fonts The Font Group allows you to change your text font style, size, color and many other elements. 1. Highlight the text you would like to modify. 2. Click on the drop down arrow of font style and font size and select the changes you would like to make. 3. While text is highlighted you can also click on the color, bold, italics or underline commands to modify the text even more. Change Text Case You can change the case of selected text in a document by clicking a single button called Change Case on the ribbon. 1. Highlight the text for which you want to change the case. 2. On the Home tab, in the Font group, click Change Case. 3. Choose an option from the dropdown list, which includes Sentence case, lowercase, UPPERCASE, Capitalize Each Word, and tOGGLE cASE. Adding text effects 1. Select the text that you want to add an effect to. 2. On the Home tab, in the Font group, click Text Effect. 3. Click the effect that you want. For more choices, point to Outline, Shadow, Reflection, or Glow, and then click the effect that you want to add. Remove text effects 1. Select the text that you want to remove an effect from. 2. On the Home tab, in the Font group, click Clear Formatting. Format Painter The Format Painter feature allows you to quickly copy a format that you have applied to text already in your document. 1. Select the text or graphic that has the formatting that you want to copy. 2. On the Home tab, in the Clipboard group, single click Format Painter. The pointer will change to a paintbrush icon. 3. Bring your cursor to the text or graphic that you want to format and click on the text. 4. To stop formatting, press ESC or click on the Format Painter command again. NOTE: Double-click the Format Painter button if you want to change the format of multiple selections in your document.
  • 6. 6 Created By: Amy Beauchemin Source: office.microsoft.com 1/13/11 Clear Formatting To get rid of all the styles, text effects, and font formatting in your document, do the following: 1. Select the text that you want to clear the formatting from. Or press CTRL+A to select everything in the document. 2. On the Home tab, in the Font group, click Clear Formatting. NOTE: The Clear Formatting command will not remove highlighting from your text. To clear highlighting, select the highlighted text, and then click the arrow next to Text Highlight Color and click No Color. Formatting Documents Adjusting Line Spacing The default spacing is 1.15 line spacing and 10 points after each paragraph. The default spacing in Office Word 2003 documents is 1.0 between lines and no blank line between paragraphs. The easiest way to change the line spacing for an entire document is to highlight the paragraphs or entire document that you want to change the line spacing on. 1. On the Home tab, in the Paragraph group, click Line Spacing. 2. Do one of the following: Click the number of line spaces that you want. For example, click 1.0 to single-space with the spacing that is used in earlier versions of Word. Click 2.0 to double-space the selected paragraph. Click 1.15 to single-space with the spacing that is used in Word 2010. Click Remove Space Before Paragraph to remove any additional lines added after each paragraph as a default NOTE: If a line contains a large text character, graphic, or formula, Word increases the spacing for that line. To space all lines evenly within a paragraph, use exact spacing and specify an amount of space that is large enough to fit the largest character or graphic in the line. If items appear cut off, increase the amount of spacing. Page Orientation You can choose either portrait (vertical) or landscape (horizontal) orientation for all or part of your document. Change Page Orientation 1. On the Page Layout tab, in the Page Setup group, click Orientation. 2. Click Portrait or Landscape.
  • 7. 7 Created By: Amy Beauchemin Source: office.microsoft.com 1/13/11 Different Page Orientations on Same Document 1. Highlight the pages or paragraphs that you want to change to portrait or landscape orientation. 2. On the Page Layout tab, in the Page Setup group, click Margins. 1. Click Custom Margins at the bottom of the drop down menu. 2. A Page Setup dialog box will appear. 3. On the Margins tab, click Portrait or Landscape. 4. In the Apply to list, click Selected text or This point forward. NOTE: If you select some but not all of the text on a page to change to portrait or landscape orientation, Word places the selected text on its own page, and the surrounding text on separate pages. Page Margins Page margins are the blank space around the edges of the page. In general, you insert text and graphics in the printable area inside the margins When you change a document’s page margins, you change where text and graphics appear on each page. You can change the page margins either by choosing from one of Word’s predefined settings in the Margins gallery or by creating custom margins. Setting Predefined Page Margins 1. On the Page Layout tab, in the Page Setup group, click Margins. The Margins gallery drop down menu will appear. 2. Click the margin type that you want to apply. Create Custom Margins 1. On the Page Layout tab, in the Page Setup group, click Margins. 2. At the bottom of the Margins gallery drop down menu, click Custom Margins. 3. The Page Setup dialog box will appear. 4. Enter new values for the margins in all or some of the Top, Bottom, Left or Right text boxes. 5. Click OK
  • 8. 8 Created By: Amy Beauchemin Source: office.microsoft.com 1/13/11 NOTE: Most printers require a minimum width for margin settings, because they can't print all the way to the edge of the page. If you try to set margins that are too narrow, Microsoft Word displays the message One or more margins are set outside the printable area of the page. Page Breaks Word automatically inserts a page break when you reach the end of a page. If you want the page to break in a different place, you can insert a manual page break. Inserting a Page Break 1. Click where you want to start a new page. 2. On the Insert tab, in the Pages group, click Page Break. NOTE: You can also insert breaks into your document by going to the Page Layout tab, Page Setup group and clicking on the Breaks command to view a variety of page and section breaks you can insert into your document. Deleting a Page Break You cannot delete the page breaks that Word inserts automatically; you can only delete a page break that you insert manually. 1. Go to the page break you would like to remove. 2. Select the page break by clicking in the margin next to the dotted line. 3. Press the DELETE key on your keyboard. Headers, Footers, and Page Numbers You can add headers, footers and page numbers numerous ways. The simplest way is to double click on the top or bottom of the page and the header and footer area will appear. Enter the text you wish to be displayed at the top or bottom of every page. Add Page Numbers If you want a page number on each page, you can quickly add a page number from the gallery. 1. On the Insert tab, in the Header & Footer group, click Page Number. 2. Click the page number location that you want. 3. In the gallery, scroll through the options, and then click the page number format that you want. 4. To return to the body of your document, click Close Header and Footer on the Design tab (under Header & Footer Tools).
  • 9. 9 Created By: Amy Beauchemin Source: office.microsoft.com 1/13/11 Add Header or Footer 1. On the Insert tab, in the Header & Footer group, click Header or Footer. 2. Click the header or footer that you want to add to your document and your header or footer area will open. 3. Type text in the header or footer area. 4. To return to the body of your document, click Close Header and Footer on the Design tab (under Header & Footer Tools). Remove page numbers, headers, and footers 1. Click on the Header, Footer or Page Number Command. 2. A drop down menu will appear. 3. Click Remove at the bottom of the menu. Bulleted or Numbered List You can quickly add bullets or numbers to existing lines of text, or Word can automatically create lists as you type. By default, if you start a paragraph with an asterisk or a number 1., Word recognizes that you are trying to start a bulleted or numbered list. If you don't want your text turned into a list, you can click the AutoCorrect Options button that appears. Bullets Command Numbering Command Insert Bulleted or Numbered List 1. Click on the area where you would like your list to appear or highlight the text you would like to be in a list. 2. Go to the Home tab, in the Paragraph group, click Bullets or Numbering. 3. A bullet(s) or number(s) will be inserted. Select Bullets or Numbering Style 1. Select the items that you want to add bullets or numbering to. 2. On the Home tab, in the Paragraph group, click the arrow next to the Bullets or Numbering command. 3. Select the bullet or number format you would like to be inserted. Move a List Left or Right If you do not like the location of your bullets or numbers you can easily move them to a preferred location. 1. Click a bullet or number in the list to highlight the list. 2. Drag the list to a new location. The entire list moves as you drag. The numbering levels do not change.
  • 10. 10 Created By: Amy Beauchemin Source: office.microsoft.com 1/13/11 Document Ruler You can use the horizontal and vertical rulers in Word to align text, graphics, tables, and other elements in your document. To view the horizontal ruler across the top of your Word document and the vertical ruler along the left edge of your document, you must be in Print Layout view. 1. To show or hide the horizontal and vertical rulers, click View Ruler at the top of the vertical scroll bar. Tab Stops Creating tab stops can be helpful when creating a large number of documents such as flyers, table of contents or even when creating a resume. They help you to display and line up information correctly. Setting Manual Tab Stops 1. Click the tab selector at the left end of the ruler until it displays the type of tab that you want. 2. Then click in the ruler at the top of your page, where you want to set the tab stop. The different types of tab stops found on the ruler are: A Left Tab stop sets the start position of text that will then run to the right as you type. A Center Tab stop sets the position of the middle of the text. The text centers on this position as you type. A Right Tab stop sets the right end of the text. As you type, the text moves to the left. A Decimal Tab stop aligns numbers around a decimal point. Independent of the number of digits, the decimal point will be in the same position. (You can align numbers around a decimal character only) A Bar Tab stop doesn't position text. It inserts a vertical bar at the tab position. NOTE: You can drag existing tab stops left or right along the ruler to a different position. Just Click and hold on the tab stop on the ruler then drag it to where ever you would like it to be. Setting Detailed Tab Stops If you want your tab stops at precise positions that you can't get by clicking the ruler, or if you want to insert a specific character (leader) before the tab, you can use the Tabs dialog box. 1. Click the Home tab, click the Paragraph Dialog Box Launcher 2. A Paragraph box will appear, click on the Tabs button at the bottom left of the dialog box. 3. A Tabs dialog box will appear. 4. Under Tab stop position area, type the location where you want to set the tab stop. Hit enter. 5. Under Alignment, click the type of tab stop that you want. See the table above for an explanation of the different types of tab stops. 6. To add dots with your tab stop, or to add another type of leader, click the option that you want under Leader. 7. Click Set. 8. Repeat steps 4-5 to add another tab stop, or click OK. 9. The Tabs dialog box will disappear and you should see your tabs set on the document ruler.
  • 11. 11 Created By: Amy Beauchemin Source: office.microsoft.com 1/13/11 Clear Tab Stops You can clear tab stops in a variety of ways, the simplest is going to the ruler, click and hold on the tab stop and drag in down towards the document. The tab stop will disappear. To quickly clear multiple tab stops and start fresh: 1. Click the Home tab, click the Paragraph Dialog Box Launcher 2. A Paragraph box will appear, click on the Tabs button at the bottom left of the dialog box. 3. A Tabs dialog box will appear. 4. In the list under Tab stop position, click the tab stop position that you want to clear, and then click Clear. To remove the spacing from all manual tab stops, click Clear All. 5. Click OK. Working with Graphics Inserting Shapes You can add one shape to your file or combine multiple shapes to make a drawing or a more complex shape. Available shapes include lines, basic geometric shapes, arrows, equation shapes, flowchart shapes, stars, banners, and callouts. After you add one or more shapes, you can add text, bullets, numbering, and Quick Styles to them. 1. On the Insert tab, in the Illustrations group, click Shapes. 2. A drop down menu will appear, click the shape that you want. 3. Click anywhere in the document, and then drag to place the shape. Insert Text to Shapes Once you have added a shape, you may want to add text inside the shape. All you have to do is click on the inside of the shape and start typing. NOTE: The text that you add becomes part of the shape — if you rotate or flip the shape, the text rotates or flips also. Format Shapes After you insert a shape a new tab called Drawing Tools Format will appear every time you click on the shape. 1. Click the shape that you want to apply a new or different Quick Style to. 2. Go to the Drawing Tools Format tab, in the Shape Styles group, click the style that you want to be applied. 3. To see more Quick Styles, click the More button . The Drawing Tools Format Tab also allows you to change the shape fill, outline, effects and select how the text in your document is wrapped around the shape.
  • 12. 12 Created By: Amy Beauchemin Source: office.microsoft.com 1/13/11 Delete Shapes If you decide you no longer want the shape in your document then click on the shape and then press DELETE. Inserting Text Boxes A text box is an object that lets you put and type text anywhere in your file. 1. On the Insert tab, in the Text group, click Text Box and a drop down menu will appear. 2. Click on a text box template or click Draw Text Box at the bottom of the drop down menu to draw your own text box. 3. If you elect to draw your own text box you need to click in the document, and then drag to draw the text box the size that you want. 4. To add text to a text box, click inside the text box, and then type or paste text. To format text in the text box, select the text, and then use the formatting options in the Font group on the Home tab. To position the text box, click it, and then when the pointer becomes a , drag the text box to a new location. NOTE: If you have problems printing text boxes, make sure that the Print drawings created in Word check box is selected. To do this, click the File tab, click Options, click Display, and then under Printing Options, select the Print drawings created in Word check box. Deleting Text Boxes To remove a text box just click the border of the text box that you want to delete, and then press DELETE. Make sure that the pointer is not inside the text box, but rather on the border of the text box. If the pointer is not on the border, pressing DELETE will delete the text inside the text box and not the text box. WordArt WordArt can be used to add special text effects to your document. For example, you can stretch a title, skew text, make text fit a preset shape, or apply a gradient fill. This WordArt becomes an object that you can move or position in your document to add decoration or emphasis. You can modify or add to the text in an existing WordArt object whenever you want. To add WordArt to text in your document, complete the following steps: 1. On the Insert tab, in the Text group, click WordArt, 2. A Drop down menu will appear, click the WordArt style that you want. 3. A Text Box will appear with the words” Enter your text here”, Enter your text. Insert Picture/Clip Art Pictures and clip art can be inserted or copied into a document from many different sources, including downloaded from a clip art Web site provider, copied from a Web page, or inserted from a folder where you save pictures.
  • 13. 13 Created By: Amy Beauchemin Source: office.microsoft.com 1/13/11 Insert Clip Art 1. On the Insert tab, in the Illustrations group, click Clip Art. 2. A Clip Art task pane will appear on the right of your screen, in the Search for box, type a word or phrase that describes the clip art that you want. 3. Click Go. 4. In the list of results, double click on the clip art to insert it into your document. Insert Picture from Web 1. Open the document. 2. From the Web page, drag the picture that you want into the Word document. Insert Picture from File To insert a picture saved in your computer, insert it by following these steps. 1. Click where you want to insert the picture in your document. 2. On the Insert tab, in the Illustrations group, click Picture. 3. Locate the picture that you want to insert. For example, you might have a picture file located in My Documents. 4. Double-click the picture that you want to insert and it will appear in your document. NOTE: To resize a picture, select the picture you've inserted in the document. To increase or decrease the size in one or more directions, drag a sizing handle away from or toward the center, while you do one of the following: Sizing Graphics You can easily resize pictures, text boxes, shapes, and WordArt in your file. You can also crop pictures or return them to their original size. Manually Resize Graphics 1. Click the pictureshape, text box or WordArtthat you want to resize. 2. Small circles or squares, also known as sizing handles, will appear at the corners and sides of a selected object. 3. Click and hold on a sizing handle away from or toward the center to increase or decrease the size of the picture. Cropping a Picture Cropping reduces the size of a pictureby removing vertical or horizontal edges. Cropping is often used to hide or trim a part of a picture, either for emphasis or to remove unwanted portions. 1. Click on the picture that you want to crop. 2. Go to Picture Tools, on the Format tab, in the Size group, click Crop. 3. Black dotted lines will appear around your picture. Then drag the center cropping handle on that side inward. 4. As you drag the cropping handle you will notice the area of your graphic you want removed will become gray. 5. Once you have cropped out everything you want, click outside of the graphic for the gray area you want removed to disappear.
  • 14. 14 Created By: Amy Beauchemin Source: office.microsoft.com 1/13/11 Uncrop a Picture You can always restore a resized or a cropped picture to its original appearance. 1. Click on your picture 2. Go to Picture Tools, on the Format tab, in the Size group, click Crop. 3. Black dotted lines will appear around your picture. Drag the black lines away from the center of the picture and the original picture will appear. Advanced Formatting Techniques Create Columns Columns can be used in documents such as brochures, newsletters or to save space when creating lists. Add columns before entering text: 1. Go to the Page Layout tab, in the Page Setup group, click Columns. 2. Click the layout that you want. Your document will be formatted in columns. NOTE: To add a vertical line between the columns, click Columns again, click More Columns, and then select the Line between check box. You can also adjust the column width and spacing. Add columns to part of a document To do that highlight the text you want formatted in columns, or place your cursor where you want columns to begin. 1. On the Page Layout tab, in the Page Setup group, click Columns. 2. Click More Columns. 3. Click the number of columns that you want. 4. In the Apply to list, click Selected text or This point forward. NOTE: To change the layout again further on in your document, select text or click where you want to change the layout, and then follow the same steps. For example, you can change from one column to a two-column layout, and then you can change back to the single-column layout on a later page. SmartArt Graphic A SmartArt graphic is a visual representation of your information that you can quickly and easily create, choosing from among many different layouts, to effectively communicate your message or ideas. You can create SmartArt graphics in Excel, Outlook, PowerPoint, and Word. SmartArt graphics enables you to create designer-quality illustrations with only a few clicks of your mouse. When you create a SmartArt graphic, you are prompted to choose a type of SmartArt graphic, such as Process, Hierarchy, Cycle, or Relationship. Each type of SmartArt graphics contains several different layouts. After you choose a layout, it is easy to switch the layout or type of a SmartArt graphic. Most of your text and other content, colors, styles, effects, and text formatting are automatically carried over to the new layout.
  • 15. 15 Created By: Amy Beauchemin Source: office.microsoft.com 1/13/11 When you select a layout, placeholder text (such as [Text]) is displayed, so that you can see how your SmartArt graphic looks, nor is it displayed during a slide show. However, the shapes are always displayed and printed, unless you delete them. You can replace the placeholder text with your own content. Create a SmartArt Graphic 1. On the Insert tab, in the Illustrations group, click SmartArt. 2. In the Choose a SmartArt Graphic dialog box, click the type and layout that you want. 3. Enter your text by doing one of the following: Click [Text] in the Text pane, and then type your text. Copy text from another location, click [Text] in the Text pane, and then paste your text. Add or Delete Shapes in SmartArt Graphic 1. Click the SmartArt graphic that you want to add another shape to. 2. Click the existing shape that is located closest to where you want to add the new shape. 3. Under SmartArt Tools, on the Design tab, in the Create Graphic group, click the arrow under Add Shape. 4. Do one of the following: To insert a shape after the selected shape, click Add Shape After. To insert a shape before the selected shape, click Add Shape Before. NOTE: To delete a shape from your SmartArt graphic, click the shape you want to delete, and then press DELETE. To delete your entire SmartArt graphic, click the border of your SmartArt graphic, and then press DELETE. Format SmartArt Graphic You can apply color variations to the shapes in your SmartArt graphic. 1. Click your SmartArt graphic. 2. Under SmartArt Tools, on the Design tab, in the SmartArt Styles group, 3. Select the SmartArt Style you wish to apply to add line styles, bevels or 3-D effects. 4. In the SmartArt Styles group you can also click Change Colors to further modify your SmartArt graphic.
  • 16. 16 Created By: Amy Beauchemin Source: office.microsoft.com 1/13/11 NOTE: If you don't see the SmartArt Tools or Design tabs, make sure that you've selected a SmartArt graphic. You may have to double-click the SmartArt graphic to open the Design tab. 5. Click the color variation that you want. Tables Using tables in Word can provide you with additional elements to any document. Tables can be used to create lists or format text in an organized fashion. Inserting a Table 1. Click where you want to insert a table. 2. On the Insert tab, in the Tables group, click Table 3. A drop down box will appear; click and hold your mouse then drag to select the number of rows and columns that you want inserted into your document. You will see your table appearing in your document as you drag on the grid. 4. Once you have highlighted the rows and columns you would like let go of your mouse and the table will be in your document Add Row/Column to Table 1. Click on the table. 2. Under Table Tools, go to the Layout tab 3. Click on the Insert Above or Insert Below to add a row, Click on Insert Left or Insert Right to insert a column. 4. Click on Delete to remove a column, row or cell. Delete a Table 1. Rest the pointer on the table until the table move handle appears, and then click the table move handle. 2. Press BACKSPACE on your keyboard. Delete Table Contents. You can delete the contents of a cell, a row, a column, or the whole table. When you delete the contents of a table, the table's rows and columns remain in your document. 1. Select the contents that you want to clear by following the table below: TO SELECT DO THIS The entire table In Print Layout view, rest the pointer over the table until the table move handle appears, and then click the table move handle. A row or rows Click to the left of the row. A column or columns Click the column's top gridline or border. A cell Click the left edge of the cell. 2. Press DELETE.
  • 17. 17 Created By: Amy Beauchemin Source: office.microsoft.com 1/13/11 Finalizing a Document Using the "Spell Check" Feature As you type your document, red wavy lines will appear under any word that is spelled incorrectly. The fastest way to fix spelling errors is to: 1. Put your cursor over the misspelled word and right click. 2. A drop down box will appear with correct spellings of the word. 3. Highlight and left click the word you want to replace the incorrect word with. To complete a more comprehensive Spelling and Grammar check, you can use the Spelling and Grammar feature. 1. Click on the Review tab 2. Click on the Spelling & Grammar command (a blue check mark with ABC above it). 3. A Spelling and Grammar box will appear. 4. You can correct any Spelling or Grammar issue within the box. Print Preview Print Preview automatically displays when you click on the Print tab. Whenever you make a change to a print-related setting, the preview is automatically updated. 1. Click the File tab, and then click Print. To go back to your document, click the File tab. 2. A preview of your document automatically appears. To view each page, click the arrows below the preview. Print The Print tab is the place to go to make sure you are printing what you want. Click the File tab. Click the Print command to print a document. Click the Print button to print your document. This dropdown shows the currently selected printer. Clicking the dropdown will display other available printers. These dropdown menus show currently selected Settings. Rather than just showing you the name of a feature, these dropdown menus show you what the status of a feature is and describes it. This can help you figure out if you want to change the setting from what you have. TIP: To go back to your document and make changes before you print it, click the File tab. 2.
  • 18. 18 Created By: Amy Beauchemin Source: office.microsoft.com 1/13/11 Save a document To save a document in the format used by Word 2010 and Word 2007, do the following: 1. Click the File tab. 2. Click Save As. 3. In the File name box, enter a name for your document. 4. Click Save. To save a document so that it is compatible with Word 2003 or earlier, do the following: 1. Click the File tab. 2. Click Save As. 3. In the Save as type list, click Word 97-2003 Document. This changes the file format to .doc. 4. In the File name box, type a name for the document. 5. Click Save. Help If you need additional assistance when completing your document you can use the help feature. 1. Click on the blue circle with the white question mark command 2. A Help box will appear. 3. Click in the Search Help textbox and type what you need help with 4. Click the magnifying glass next to the text box and the possible solutions will appear. For additional information Microsoft Office has a great online resource that provides you with step by step instructions in a variety of topics. This link will bring you directly to the Word 2010 Help and How-To page: http://office.microsoft.com/en-us/word-help/CL010256357.aspx