1. Drawing and Cutting Out My Clover Key Tag
Marley Emerich February 17th
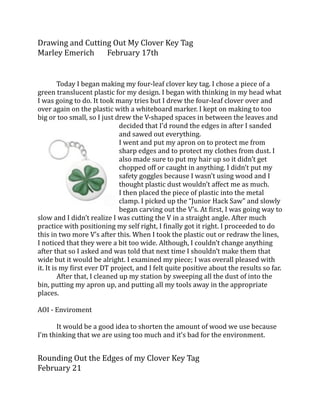
Today I began making my four‐leaf clover key tag. I chose a piece of a
green translucent plastic for my design. I began with thinking in my head what
I was going to do. It took many tries but I drew the four‐leaf clover over and
over again on the plastic with a whiteboard marker. I kept on making to too
big or too small, so I just drew the V‐shaped spaces in between the leaves and
decided that I’d round the edges in after I sanded
and sawed out everything.
I went and put my apron on to protect me from
sharp edges and to protect my clothes from dust. I
also made sure to put my hair up so it didn’t get
chopped off or caught in anything. I didn’t put my
safety goggles because I wasn’t using wood and I
thought plastic dust wouldn’t affect me as much.
I then placed the piece of plastic into the metal
clamp. I picked up the “Junior Hack Saw” and slowly
began carving out the V’s. At Oirst, I was going way to
slow and I didn’t realize I was cutting the V in a straight angle. After much
practice with positioning my self right, I Oinally got it right. I proceeded to do
this in two more V’s after this. When I took the plastic out or redraw the lines,
I noticed that they were a bit too wide. Although, I couldn’t change anything
after that so I asked and was told that next time I shouldn’t make them that
wide but it would be alright. I examined my piece; I was overall pleased with
it. It is my Oirst ever DT project, and I felt quite positive about the results so far.
After that, I cleaned up my station by sweeping all the dust of into the
bin, putting my apron up, and putting all my tools away in the appropriate
places.
AOI ‐ Enviroment
It would be a good idea to shorten the amount of wood we use because
I’m thinking that we are using too much and it’s bad for the environment.
Rounding Out the Edges of my Clover Key Tag
February 21
2. What I did:
Today I walked into the studio and
Figure 1
got out my clover. I began with Junior Hack putting on
my apron to endure I wouldn’t Saw get any dust
on my clothes and to protect me from any
sharp objects that I might come across. Then,
I put my hair up to make sure it didn’t get
caught in any machine or
get cut off.
After I made sure I was ready, I took out my
clover piece and inserted it in the metal clamp
so I could cut out my last two V’s. I chose the
“Junior Hack Saw” for this because my clover
is plastic. I began cutting out one of the V’s,
but I was told I was cutting at an angle. After
some feedback, I Oinally Oinished cutting out
one V, and then I cut out the other.
After I Oinished cutting out V’s, I began
rounding out all the edges with a half‐round
Oile. I had trouble at Oirst, so I asked. I then
proceeded to Oile each and every end and
corner. After the rest of the class Oilling and
rounding, my clover looked almost like a real
clover!
Emotion:
I felt very, very positive about today. I
really put a lot of effort and concentration on rounding. I made immense
progress during today’s lesson because my key tag went from looking like and
X to looking like an almost clover.
AOI and Learner ProOile –
4. Marley Emerich January 23
Tools I Used:
Half‐round Oile to smooth the edges
of my clover.
Pedestal drill to drill a hole in my key chain
Engraver to engrave a hole on my clover
Buffer
What I Did:
Today I did many things. The Oirst thing I did was put my apron on to
protect me from sharp edges and to protect my clothes from dust. I also made
sure to put my hair up so it didn’t get chopped off or caught in anything. I
5. didn’t put my safety goggles because I wasn’t using wood and I thought plastic
dust wouldn’t affect me as much.
Then, I got out the small half‐round Oile and began to smooth out the
more jagged edges of my clover. I spent about ten to Oifteen minutes doing this.
After I checked with the teacher, I started doing it again because the half‐
round Oile I had wasn’t working correctly. After doing it again for around the
same amount of time, I Oinally Oiled my edges correctly.
After rounding out the
edges, I gave the plastic tot the
teacher and he buffed the
plastic’s edges for me. When it came
out, my four‐leaf clover looked
clean, sleek, and very professional.
Almost all of the plastic was
completely translucent, and
the plastic paper on top was almost
completely gone.
I then proceeded to
draw the location of my keyhole in
the corner. I checked with the teacher and then positioned my clover under
the drill in the clamp. I put on my safety glasses to ensure I wouldn’t get
anything on my clothes or any dust in my eyes. I made sure to put my hand on
the clamp, but nowhere near the drill so I didn’t hurt myself. I moved the
platform up so the drill was near the clover. I pressed the green button to turn
the drill on and lowered it very slowly. I watched carefully as the drill went
through the plastic, watching for wooden chips to tell me to stop. When I
Oinished, I turned off the drill, took off my glasses, and very carefully to my
clover out.
I removed the plastic from the clamp and took off all the remaining
plastic. I cleaned off my clover and decided it would look more like a clover if I
added a little center to it.
I practiced engraving the center on wood and plastic more than once. I
Oinally got it right and engraved it on my clover. Finally I added the key chain to
the hole and I Oinished! I put all my tools and apron away and was done!
Why?
6. The reason I rounded the edges to my clover with a small “Half‐round”
Oile was because some of the edges were a bit sharp and if I had kept it like
that, when its on my keys, it might tear up my jeans or possibly poke myself.
The reason I buffed the edges of my clover was so I could give it a more
professional and clean look. Also, the reason why I engraved the small hole in
the clover was to give it more of a shape and look.
Emotion:
I felt very positive about my clover in the end. I would’ve liked it to look more
round and not as wide and long, but in the end I felt I did the best I could’ve
done with what I had. I put a lot of effort into this clover because it was my
very Oirst design technology project and I felt that it was quite good for a Oirst
time.
What’s Next?
Because I’m done with this project, I will be deciding what to do with it now.
Because I tend to lose my keys for my house and locker all the time. I will but
both keys on the chain for good luck. I will be careful not to overuse it our
move it in my pocket a lot because I don’t want or ruin or scratch the plastic.
AOI & Learner ProMile
I think that I am an Approacher to Learning because this is one of my Oirst D.T.
classes in school and therefore everything I am doing is a new experience.
I was a risk taker and knowledgeable because I used new tools like the
“Pedestal Drill” and the engraver. I was knowledgeable because I used the little
knowledge of rounding that I had before to help my clover get its shape.
7. Drawing and Starting to Cut Out the Shape of My Toy
Whale Wednesday, March 23, 2011
These are the tools I used today:
I used a tenon saw to cut long strokes of wood instead of
short pieces.
I used the gent saw to cut shorter or
smaller pieces of wood.
What I did:
Today we began or moving toy project. We Oirst started off by reading
two worksheets about different woods ant tools used to cut and shape them.
These worksheets help me brainstorm and get an idea of what I should be
doing when in the workshop. We then went over what tools to use for our
project and how to use them. We were told and showed how to use a coping
saw correctly which was very useful because I’ve never used a coping saw
before and they are very fragile. After we made sure we knew how to use the
different drills and saws, we learned about the types of woods we had,
hardwood and softwood. The softwood boards were very tall and wide but not
very thick and they are easy to cut. Hardwood boards are harder to cut,
shorter, and a lot thicker.
8. We then got to work.
Today I did many things. The Oirst thing I
did was put my apron on to protect me from
sharp edges and to protect my clothes from
dust. I also made sure to put my hair up so it
didn’t get chopped off or caught in anything. I
didn’t put my safety goggles because I wasn’t
using a drill or anything that shed a lot of dust in
the air so I thought it wouldn’t affect me as
much. I then looked at both woods, thinking
about which wood is best for my whale. I ended up choosing the long, thinner,
and wider softwood. I then opened the metal clamp and began drawing my
whale’s body and water spout on the wood.
Drawing the shape of the whales body on the
wood.
After I drew the whale on, I made sure it was okay
with the teacher and then drew lines around the
round shaped (the tail and spout) so I could later use
a coping saw to cut out the curves.
Then, I used a tri‐square to Oinish drawing equal and exactly 90
degree lines on both sides of the wood. These would
be the chunks or blocks of wood I would cut out
because they were not needed. I made sure that
on both sides, the lines were identical and then I
put the piece of wood in the clamp and began to
cut the pieces off.
In the last apart of the lesson, I began cutting off the chunks of wood that I
didn’t need. This cutting also gave a most of the shape to the toy. I didn’t get to
Oinish cutting the pieces off, but I got most of it. After this I took off my apron,
put my tools away, and cleaned up my station.
Why?
9. I chose the long but not thick piece softwood
instead of the thick and short hardwood
because the
longer wood is
more ideal for
shape. I don’t
want my whale
to look
squished or
distorted, even
if the thickness was ideal. That’s why I chose
the long wood instead, because my whale will
look better.
I used the tenon saw to cut the big portions of wood because the tenon saw is
stronger and longer and cuts longer pieces of wood better. I chose the gents
saw for the shorter pieces of wood because it’s smaller and easier to control
for a small amount of wood.
What’s Next?
Next class, I will try to Oinish cutting out the shape of my whale. First, I will
Oinish cutting off the chunk of wood I don’t need. After that I will more or less
have the body rough body shape besides the tail and spout. M next job is to use
the coping saw to cut out these round edges. This is what I anticipate I will get
done in the next lesson. After that, comes sanding and rounding and
eventually the wheels and axels, holes for them, trail assembly, and paint.
Emotion:
I felt okay about today’s lesson. Considering we just started I think I did pretty
good, but I had some trouble as usual with cutting out the shape of the whale. I
cut a little too close to the line and it was a bit crooked at Oirst but I Oixed it
later. I did feel better than I did about the cutting than the clover project
11. Tenon saw. I used this to cut out the body of my
whale.
Today we continued working on our moving toy project.
The Oirst thing I did was put my apron on to protect me
from sharp edges and to protect my clothes from dust. I
also made sure to put my hair up so it didn’t get
chopped off or caught in anything. I didn’t put my safety goggles because I
wasn’t using a drill or anything that shed a lot of dust in the air so I thought it
wouldn’t affect me as much.
Then I took out my piece of hardwood and positioned it in the holding
clamp so I could Oinish using the tendon saw to
cut one of the unnecessary straight pieces off.
After I Oinished that, I
put away the tenon
saw and checked
with the
teacher.
This is a wooden
vice
Figure 2 Drawing the lines near
My next step was to the round edges of my whale cut off the round edges of
the whale. But, instead of just using a coping saw to
simply cut out the round edges, I drew straight
lines near them to
cut out so I
wouldn’t have
to cut out more
round edges.
Then I positioned
the piece
Figure 1 Using a gents saw to cut the small
lines near the round edges of wood in
the
wooden
vice so the Oirst line I need to cut it standing straight up. Once, I made sure the
wooden vice was tight, I then began cutting slowly with the gents saw. I
frequently checked to line to make4 sure the line wasn’t cutting sideways. I got
about ¼ of the job done until it was time to pack up.
12. I put my apron away and put up my tools. I then re‐wrote my name on
my piece of wood and put I tin the Grade 8 Moving Toy project box. Finally, I
cleaned dup my station and made sure everything was in order.
Why?
I used a tenon saw to cut the longer piece of wood in the beginning of
the lesson because a tenon saw is larger and will cut longer pieces of wood a
lot faster. I drew the straight lines to cut out near the round edges of my whale
shape so I wouldn’t have to cut out so many rounder edges. I cut the shorter
pieces of wood around the round edges with a gents saw instead of a tenon
saw because a gents saw is easier to maneuver with smaller pieces.
What’s Next?
Because I have two periods in the next lesson, I plan to Oinish cutting out
the small pieces of wood near the round edges with a gents saw. I also plan
getting a good amount of cutting the round edges with a coping saw done.
Although, because this would be my Oirst time using a coping saw and the fact
that it’s a slow process and they are very delicate, it might take longer than
tomorrow’s two periods. Although, I think I can get it done.
Emotion
I felt pretty good about today’s lesson. I Oinished cutting some big parts
of the whale out; giving it it’s shape. I also began cutting out yet another part
of the whale’s body. So, I did get a good amount done in only one period and I
felt I did it well. In summary, I felt very good about today’s lesson.
AOI & Learner ProMile
13. I was knowledgeable because I took the past of experience of cutting
with a tenon and gents saw and from my key chain project I had and used it to
cut out my pieces of wood properly today.
14. Cutting Out the Body of My Whale
Monday, March 28, 2011
What I Did:
Today I continued working on
cutting out my whale for my animal moving
toy project. The Oirst thing I did was put my
apron on to protect me from sharp edges and to
protect my clothes from dust. I also made sure to
put my hair up so it didn’t get chopped off
or caught in anything. I didn’t put my safety
goggles because I wasn’t using a drill or anything
that shed a lot of dust in
the air so I thought it wouldn’t affect me as much.
Using a gents saw to cut off the extra small
pieces of wood.
I Oirst cut out the piece of my body that I still needed
to get off. This part of the process was very time
consuming. I had to cut pieces of wood off where
there were some lines. The problem was, I needed to
turn the piece of wood so it wasn’t standing
sideways but up straight on the wooden vice. I then began cutting with a gents
saw. I had some issues because I didn’t
want to cut a sideways or crooked line.
Also, I had to constantly change the
position of the wood in the wooden vice
because I had to cut different lines.
Using a pull saw to cut the pieces of wood
a gents saw couldn’t
In the end, I got all the last pieces off
like I thought I would. I also had to use a pull saw once because the “back‐
bone” or “spine” of my gents saw reached the to of the table and wouldn’t
Finally, I used a coping saw to begin cutting the edges between the tail
and body, the tail Oins, and the waterspout. This was my Oirst time using a
15. coping saw so I began to cut the easier edges very slowly and softly. I moved
my body as the teacher said so the saw would move as well, creating a rounder
shape. Although, I didn’t Oinish the whole thing because the lesson ended. I
began using the coping saw, but I didn’t Oinish the whole thing.
I put my apron away and put up my tools. I then re‐wrote my name on
my piece of wood and put I tin the Grade 8 Moving Toy project box. Finally, I
cleaned dup my station and made sure everything was in order.
Using a coping saw to cut out the round
edges of my whale’s body.
Why?
I used a gents saw to cut the shorter and smaller pieces of wood in the
beginning of the lesson because a gents saw is smaller and easier to control
when cutting short pieces. I drew the straight lines to cut out near the round
edges of my whale shape so I wouldn’t have to cut out so many round edges. I
positioned the piece of hardwood in the wooden vice in different positions
with the drawn lines facing straight so I wouldn’t have to cut side ways. I used
a coping saw to cut the round edges because a coping saw can cut in curves
that can later be sanded and smoothed.
What’s Next?
Because I have a double period in the next lesson, I plan on getting most,
if not all of the whale’s shape done. I plan on cutting out all of the round edges
17. Cutting Out the Round Spaces and Edges of My Whale’s
Body
Marley Emerich
Wednesday, March 30, 2011
What I Did:
Today I did mostly the same thing. The Oirst thing I did was put my
apron on to protect me from sharp edges and to protect my clothes from dust.
I also made sure to put my hair up so it didn’t get chopped off or caught in
anything. I didn’t put my safety goggles because I wasn’t using a drill or
anything that shed a lot of dust in the air so I thought it
wouldn’t affect me as much.
I put my almost totally shaped whale out, and placed it in
the wooden vice so the drawn lines on the hardwood
were facing parallel to the table.
This is a wooden vice. I put my piece of wood in there
to cut.
I began cutting with the coping saw down the line. This
was a very new experience for me because I’ve never used
a coping saw before. I cut slowly and hard down the
curves. The shape was between the tail and body so it looked like a teardrop.
This was a very hard shape to cut out because
it’s so small and at odd angles. I got the right
side done easily and some of the left. But as I
cut out the left side, my coping saw’s blade got
stuck and snapped in half.
Using a coping saw to cut out the “teardrop”
piece of wood.
Once I discussed with the teacher and
got my coping saw Oixed. I moved on to the left
Oin, which hadn’t been cut out yet. This part was easy. All I had to do was cut
off an edge with a pull saw and curve it quickly with a coping saw.
Cutting off the unnecessary edge of wood with a pull saw.
18. Cutting out the spaces on top of the water
spout to give it shape
The teacher then shoed us how to make
wheels with the * We learned how much
pressure to apply to the piece of wood when in
the machine, how fast we should lower the
drill, and the safety issues with the drill. This
will help me in the future when I need to make
my
wheels.
I ended the lesson with Oinishing
one oval shaped space in between the
waterspout and starting the last one with
my coping saw. I had to get some help
form the teacher though. In the
waterspout I had no trouble because the
spaces are easier to access then the other.
Although, I didn’t get to Oinish the last
spout.
Here, I
am
cutting
the
edges
in
between the spout with a coping saw.
I then took off my apron and put up my
tools. I then re‐wrote my name on my piece of wood and put I tin the Grade 8
Moving Toy project box. Finally, I cleaned up my station and made sure
everything was in order.
Why?
21. Today I began a whole new step in my toy making process. First, I
put my apron on to protect me from sharp edges and to protect my clothes
from dust. I also made sure to put my hair up so it didn’t get chopped off or
caught in anything. I didn’t put my safety goggles because I wasn’t using a drill
or anything that shed a lot of dust in the air so I thought it wouldn’t affect me
as much. I also made sure I was wearing
closed toed shoes so if I dropped anything
heavy or a sharp objects on my feet, it
wouldn’t affect me that badly.
A wooden vice. I placed my whale’s body
here so I can cut or Cile it without it moving
and at different angles.
I opened the wooden vice and placed my
whale’s (hardwood) body inside. I used a
coping saw to cut off some easy edges that I
wouldn’t be able to round out with the disc
sander. These were the edges around the thinner parts of the whale’s shape
like the waterspout and tail. I also cut just the
tiniest piece of wood
of the whale’s lower
body (where the
wheels will later go)
so the disc sander
could easily smooth
and round it out.
Using a coping saw
to get off the Cinal
tiny edges of my
whale’s shape.
This was a quick process, after I was
done with that, it took me about Oive
minutes to simply round out the body (not
the thin parts) with the disc sander. I was
careful to put the piece of wood on the
marked area so I could damage my wood
and I was also made sure I was wearing
safety glasses so no dust got in my eyes. I
was also careful not to touch the disc while
it was moving. This gave my whale’s
body a smooth and round shape.
22. After this, the period had ended, and it was time to pack up. I put my
apron away and put up my tools. I then re‐wrote my name on my piece of
wood and put I tin the Grade 8 Moving Toy project box. Finally, I cleaned dup
my station and made sure everything was in order.
Why?
I used a coping saw to cut the small edges off a 4the beginning of the
lesson because the edges where curved, and a coping saw will cut curved
edges. I also used a coping saw instead of directly using a disc sander because
it was easier to sand the edges it if I cut off the sharp ends.
I used a disc sander to round and smooth the edges of my whale because
if I had used a Oile for the entire whale, it would have been time consuming.
Although, I didn’t use the disc sander on the water spout or tail (or the small
“in between” spaces) because a disc sander either couldn’t reach the places or
the area is to thin, and there would be a risk of a piece breaking off.
What’s Next?
Because I have two periods next class, I intend to get a lot done. I know
for sure I will be Oiling the spaces and scares of my whale’s body that I didn’t
get with the disc sander. This process will smooth and shape the body of my
whale so it’s safe and desirable for children. Although, this will take most
likely longer than the next two periods. Although, after sanding, I will make my
wheels and axles.
Emotion:
I would have been happier getting more done, but I think I did well for
one period. I was happy to know that I started a whole new part of the my toy
making process. I was glad I was done with cutting out the body and I’m
moving on with Oiling and smoothing. I think I did a pretty good job and I look
forward to making the wheels and painting it!