

Empfohlen
Weitere ähnliche Inhalte
Kürzlich hochgeladen
Kürzlich hochgeladen (20)
Empfohlen
Empfohlen (20)
Model management ( Artex )
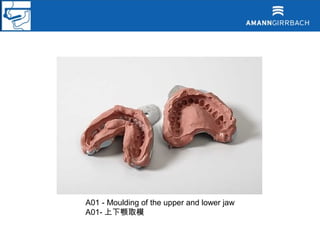
- 1. A01 - Moulding of the upper and lower jaw A01- 上下颚取模
- 2. A02 - Cutting of the mould (working model) A02 – 修整印模上部使其平整並割除多餘部位 ( 工作模 )
- 3. A03 - Cutting of the mould (dorsal) A03 – 修整印模顶部,背部及边缘部分
- 4. A04 - Cutting of the mould (palatinal) A04 – 修整切掉模型 ( 上颚側部分 ) 印模
- 5. A05 - Impression carrier A05 – 印模托盘
- 6. A06 - Giroform the putty overlay wall large A06 – 将印模材紧贴放置在托盘较高一边 > go to Giroform System
- 7. A07 - Giroform the putty overlay wall small A07 – 在靠托盘较低处放置小印模材
- 8. A08 - Mould is placed onto giroform putty on the impression carrier A08 – 将模型放置在托盘上的印模材上
- 9. A09 - Mark out middle line A09 – 画出中线
- 10. A10 - Set on adjustment plate A10 – 放在调整盘上
- 11. A11 - Set up mould according to plate contours A11 – 根据调整盘轮廓放置模型
- 12. A12 - Set up mould upon impression carrier (control the horizontal set up here) A12 – 将模型放在印模盘上(注意垂直放置)
- 13. A13 - Set up rear insulation A13 – 将模型后部用印模材隔离
- 14. A14 - Set up external insulation A14 – 再用印模材将周边隔离
- 15. A15 - Set up middle insulation A15 - 最后将模型中间放上印模材隔离
- 16. A16 - Cut putty parallel to the upper edge of the impression carrier A16 – 用小刀将黄色印模材消到与印模托盘上部边缘平行
- 17. A17 - Cut putty parallel to the lower edge of the impression carrier A17 - 用小刀将黄色印模材消到与印模托盘下部边缘平行
- 18. A18 - Horizontal lining up of the adjustment plate A18 – 放置与调整盘水平
- 19. A19 - Height control of the crown of the tooth o Giroform pin, so that the pins to not disturb the impression A19 – 用 giroform 种钉针固定牙冠高度,这样不会影响模型
- 20. A20 - Set the giroform base plate in the middle of the plate support – place the front edge of the base plate onto the ball pressure piece A20 – 将底盘放置在托盘中间固定
- 21. A21 - Slide the base plate over the retral inclined plane - apply a little pressure A21 – 小小地用点力将底盘固定在后部
- 22. A22 - Base plate placed into plate support A22 – 将底盘固定
- 23. A23 - Base plate placed into plate support (view from above) A23 – 像上面一样固定底盘
- 24. A24 - Fix base plate in with screw A24 – 再用螺丝固定底盘
- 25. A25 - Set impression carrier onto the base plate A25 – 将托盘固定在底盘上
- 26. A26 - Impression carrier set onto the base plate A26 – 将托盘固定在底盘上
- 27. A27 - Mark out segments in putty A27 – 用小刀将黄色印模材划分部分
- 28. A28 - Mark out segments in putty A28 – 用小刀将每个部分划分小块
- 29. A29 - Mark out segments in putty - 2 pins per segment A29 - 用小刀将每个部分划分小块 - 每个部分 2 个种钉针
- 30. A30 - Preparation of impression complete A30 – 准备完模型
- 31. B1 - Precise drilling - laser beam identifies drill bit B1 – 精确打孔 – 用镭射线来找准打孔位置
- 32. B2 - Position drilling hole with the aid of the laser point and follow drilling procedure B2 – 用镭射点找准打孔位置进行打孔
- 33. B 3- Position drilling hole with the aid of the laser point (upon primed tooth) B 3 - 用镭射点找准打孔位置进行打孔
- 34. B4 - Initiate drilling procedure by pressing a button B4 – 通过按开关来逐个打孔
- 35. B5 - Removal of the impression carrier B5 – 取出印模托盘
- 36. B6 - Drilled base plate in plate support B6 – 已经打好种钉的底盘
- 37. B7 - Detach screws B7 – 取出螺丝
- 38. B8 - Removal of the base plate B8 – 取出底盘
- 39. B9 - Adjust pin friction using thumb pressure B9 – 用大拇指调整钉的位置
- 40. B10 - Place remaining pins B10 – 将其他钉也放进去
- 41. B11 - Base plate with inlaid pins from below - identical drill depth for all pins B11 – 底盘翻面看钉的位置,确认所有钉都在一个高度
- 42. B12 - Park position for pinned base plate (important when multiple models are produced in parallel B12 – 用钉固定的底盘可以让多个模型在一个平行上
- 43. C1 - Smartbox with beaker and selected programme C1 – 选定 Smartbox 程序
- 44. C2 - Smartbox programme selection C2 – 选择一个程序
- 45. C3 - Begin smartbox mixing procedure C3 – 根据选定程序开始混合
- 46. C4 - Smartbox water measure C4 – 按比例量出水量
- 47. C5 - Smartbox plaster measure C5 – 再量出粉的量
- 48. D1 - Premix by hand in mixing beaker D4 – 在搅拌碗里先用手预先混合
- 49. D2 - Smartmix programme selection D2 – 选定一个混合程序
- 50. D3 - Smartmix display report D3 – 显示屏
- 51. D4 - Adduct the startmix into the mixing beaker and begin the stirring process D4 – 将调拌杯放进去,开始搅拌
- 52. E1 - Trim the mould of the opposite jaw E1 – 修整模型
- 53. E2 - Align the mould of the opposite jaw onto the impression carrier E2 – 将另一个模型也放在托盘上
- 54. E3 - Insulation the mould E3 – 隔离模型
- 55. E4 - Used giroform. Base plate as a base for the opposite jaw model (multiple use of the base plate) E4 – 将用过的底盘也用来做另一个模型的底盘
- 56. E5 - Set the base plate into the plate support E5 – 固定底盘
- 57. E6 - Place the impression carrier onto the plate support E6 – 将托盘固定
- 58. E7 - Locate the first drill point E7 – 找准第一个打孔点
- 59. E8 - Following removal of the impression carrier, select suitable readily available drill hole for pin E8 – 取下托盘后,选择合适植入钉的孔
- 60. E9 - Mark out the selected hole E9 – 标示选出的孔
- 61. E10 - Locate the next drill point E10 – 固定下一个打孔点
- 62. E11 - Following removal of the impression carrier, select a suitable readily available drill hole for pin E11 - 取下托盘后,选择合适植入钉的孔
- 63. E12 - Mark out the selected hole E12 - 标示选出的孔
- 64. E13 - Following removal of the impression carrier, select a suitable readily available drill hole for pin E13 - 取下托盘后,选择合适植入钉的孔
- 65. E14 - If there is no suitable drilled hole available at the position – carry out drilling procedure E14 – 如果这个位置没有合适的地方打孔 --- 按照打孔程序来完成
- 66. E15 - Mark out the set drill holes E15 – 划出选定的孔
- 67. E16 - Locate the next drill point E16 - 固定下一个打孔点
- 68. E17 - Following removal of the impression carrier, select a suitable readily available drilled hole for pin E17 - 取下托盘后,选择合适植入钉的孔
- 69. E18 - Mark out the next selected drill hole E18 – 划出下一个打孔点
- 70. E19 - Base plate from below with marked drill holes and the inlaid pins E19 – 从背面看底盘,有划出打孔点的和放入里面的钉
- 71. E20 - Base plate with the inlaid pins E20 – 放入钉的底盘
- 72. F1 - Upper and lower jaw before the effusion with the base plate and its respective pins F1 – 在从底盘取出前的上下颌模型,还有相对应植出钉
- 73. F2 - Place impression carrier with the upper jaw mould upon the jogger F2 – 将放置在托盘上的上颚模型放在???
- 74. F3 - Effuse the mould under jogger effect with alpenrock (start on retral end of the mould) F3 – 将石膏注入模型中
- 75. F4 - Fill in the alpenrock without any voids - only to the top of the putty insulation F4 – 填满石膏,无缝隙—直至黄色印泥隔离处
- 76. F5 - Place impression carrier with lower jaw mould (counter bite) upon the jogger F5 – 将托盘上下颚模型也放在???
- 77. F6 - Effuse the mould under jogger effect with alpenrock (start on retral end of the mould) F6 - 将石膏注入模型中
- 78. F7 - Wet the pins on the retention area of the base plate with alpenrock F7 – 将底盘固定区域的钉也用石膏盖满
- 79. F8 - Wet the pins on the retention area of the base plate with alpenrock F8 - 将底盘固定区域的钉也用石膏盖满
- 80. F9 - Set the wetted base plate for the upper jaw model into the dovetail channel F9 – 将做好的种钉底盘放置在上颚模型上密合
- 81. F10 - Lower the base plate into plaster F10 – 将底盘放入模型石膏里
- 82. F11 - Using thumb pressure, lower the base plate into the plaster to the level of the putty (reference height) F11 – 用大拇指轻压,使底盘压下去与黄色印模材平行高度
- 83. F12 - Set the wetted base plate for the lower jaw counter bite model into the dovetail channel F12 - 将做好的种钉底盘放置在下颚模型上密合
- 84. F13 - Using thumb pressure, lower the base plate into the plaster upto the edge of the mould (reference height) F13 - 用大拇指轻压,将底盘放入模型边缘的石膏内
- 85. F14 - Run a thin probe around the base plate in order to create the plaster's predetermined breaking points F14 – 用细的探针在底盘周围找出石膏预先的断裂点
- 86. G1 - After 30 minutes alepenrock has the neccessary solidity to be removed Detach putty insulation from model G1 – 30 分钟后,石膏足够固定,可以取出模型外的黄色印泥
- 87. G2 - Remove model with mould from the impression carrier G2 – 取出托盘里的模型
- 88. G3 - Detach the model from the mould - apply a leverage effect through the plaster knife onto the model plaster, not on the base plate G3 – 将模子里的模型取出,运用杠杆原理用石膏刀削模型石膏
- 89. G4 - Remove the model from the mould G4 – 将模子里的模型取出
- 90. G5 - Upper jaw model after removal from mould G5 – 模子里取出的上颚模型
- 91. H1 - Detach tooth arch from base plate - lightly tap on the base plate with a small hammer to achieve this H1 – 用小锤子取出模型
- 92. H2 - The tooth arch is detachd from the base plate - visible above the crack formation H2 – 从底盘里取出的牙模,清晰可见裂缝
- 93. H3 - Tooth arch is detached from base plate H3 – 拱形牙模
- 94. H4 - Opposite jaw model: tooth arch detached from base plate – procedural method as explained above H4 – 相对应的另一个从底盘里取出的模型
- 95. H5 - Opposite jaw model: tooth arch (basal) detached from base plate – procedural method as explained above H5 - 相对应的另一个从底盘里取出的基本模型
- 96. I1 - Dry grind both teeth crowns Important: Only dry grind crowns in order to avoid recording any additional expansions brought about through water absorption 11 – 干打磨牙冠,只能干磨,不能有水会膨胀
- 97. I2 - Partition / saw tooth arch 将牙模型从中间分开 (Tip: in oder not to damage the tooth arch, first separate the tooth arch in the middle)
- 98. I3 - Replace the first segment 13 – 放置第一个部分
- 99. I4 - Replace the second segment 14 – 放置第二个部分
- 100. I5 - Close off the partitioned model area cleanly with the base plate The unpartitioned tooth arch part will not (depending on the expansion) reposition onto the base plate - visible crack between tooth arch and base plate 15 将分开的模型干净地与底盘扣合,没有分开的模型与底盘不能稳合,有明显的裂缝
- 101. I6 - Completed giroform model 16 – 完全放置好的模型 l
- 102. J1 - Determine boundary lines with a rose-head bur / ball-head bur J1 – 用圆头车针打磨边缘线
- 103. J2 - Markieren der Präparationsgrenze
- 104. J3 - Harden the prepped stump and also beyond the boundary of the prepped area (hardener diffuses into the plaster) J3 – 硬化备牙及其周围区域
- 105. J4 - Apply Die Link varnish (here blue) to cover (no drop build-up) J4 – 将蓝色 Die Link varnish 涂在备牙上面,不能将下面也涂上
- 106. K1 - Giroform upper jaw model complete K1 – 做好的上颚模型
- 107. K2 - Giroform upper jaw model complete K2 – 做好的上颚模型
- 108. K3 - Giroform upper jaw model complete K3– 做好的上颚模型
- 109. K4 - Giroform model pair K4 – 一对模型
- 110. L1 - Place the giroform secondary plate onto the underside of the model L1 – 将 secondary plate 放在模型下面
- 111. L2 - Secondary plate is placed - retention model visible L2 – 清晰可见的固定模型
- 112. L3 - Insert retention disk into the Splitex counterplate L3 – 将固位圆盘插入 Splitex counterplate
- 113. L4 - Splitex counterplate with inserted retention disk L4 – 放好固位圆盘的 Splitex counterplate
- 114. L5 - Insert the Splitex counterplate into the base of the Artex CR – articulator L5 – 将 Splitex counterplate 放置在 CR 咬合器底部上
- 115. L6 - Counterplate inserted into base L6 – 插入底部的 counterplate
- 116. L7 - Insert the Splitex counterplate into the top of the Artex CR – articulator L7 – 将 Splitex counterplate 插入 CR 咬合器顶部
- 117. L8 - Counterplate inserted into top L8 – 插入顶部的 counterplate
- 118. M1 - Position the giroform putty into the base of the Artex CR for the median insertion of the model in the articulator M1 – 将印泥放置在 CR 咬合器底部,便于咬合器中间的模型插入
- 119. M2 - Place the giroform lower jaw model (here the opposite bite model) onto putty M2 – 将下颚模型放置在黄色印泥上
- 120. M3 - Hook rubber band in backwards groove and into the groove on the front tooth guidance - the rubber band marks the occlusion level M3 – 用橡皮筋来作为调整牙模咬合位置的引导
- 121. M4 - Align the giroform lower jaw model based on the occlusion level and the incisal pin M4 – 通过咬合位置和边缘钉来调整下颚位置
- 122. M5 - Lower jaw model is aligned relative to the occlusion level (rubber band and incisal pin) M5 – 下颚模型已经调整到咬合位置
- 123. M6 - Align the upper jaw model in maximal intercuspidation to the lower jaw model M6 – 调整上颚模型位置,达到与下颚模型的最大牙尖吻合
- 124. M7 - Upper jaw model attached to lower jaw model M7 – 上下颚模型吻合
- 125. M8 - Mix articulation plaster (artifix) till creamy. 加入石膏 Artikulationsgips (Artifix) auf dem Retentionsbereich der Giroform-Sekundärplatte plazieren
- 126. M9 - Mix articulation plaster (artifix) till creamy Position articulation plaster (artifix) on the retention area of the giroform secondary plate 将石膏涂上 secondary plate 上的固定区域
- 127. M10 - Mix articulation plaster (artifix) till creamy Position articulation plaster (artifix) on the retention area of the giroform secondary plate 将石膏涂上 secondary plate 上的固定区域
- 128. M11 - Mix articulation plaster (artifix) till creamy Position articulation plaster (artifix) on the retention area of the giroform secondary plate 将石膏涂上 secondary plate 上的固定区域
- 129. M12 - Position articulation plaster (artifix) on the retention area of the Splitex counterplate 将石膏涂上 the Splitex counterplate 上的固定区域
- 130. M13 - Position articulation plaster (artifix) on the retention area of the Splitex counterplate 将石膏涂上 the Splitex counterplate 上的固定区域
- 131. M14 - Position articulation plaster (artifix) on the retention area of the Splitex counterplate 将石膏涂上 the Splitex counterplate 上的固定区域
- 132. M15 - Position articulation plaster (artifix) on the retention area of the Splitex counterplate 将石膏涂上 the Splitex counterplate 上的固定区域
- 133. M16 - Position articulation plaster (artifix) on the retention area of the Splitex counterplate 将石膏涂上 the Splitex counterplate 上的固定区域
- 134. M17 - Close the top of the articulator 将咬合器顶部与上部石膏扣合
- 135. M18 - Close the top of the articulator 将咬合器顶部与下面石膏扣合
- 136. M19 - Tap finger multiple times on the top of the Artex to release the tension in the articulation plaster 用手指在咬合器顶部轻敲几次,放松咬合器上的石膏紧度
- 137. M20 - Remove / unscrew the support pin from the top of the Artex 将咬合器顶部的支撑针取出
- 138. M21 - After the articulation plaster has hardened, place the articulator upside-down on the table (on its head) 等石膏固定后,将咬合器倒过来
- 139. M22 - Open Artex articulator and remove putty 打开咬合器,取出印泥
- 140. M23 - Open Artex articulator and remove putty 打开咬合器,取出印泥
- 141. M24 - Artex articulator before the lower jaw model has been put into plaster 下颚模型还未放入石膏前的咬合器
- 142. M25 - Mix articulation plaster (artifix) till creamy Position articulation plaster (artifix) on the retention area of the giroform secondary plate 混合石膏,将其涂在 secondary plate 上的固定区域
- 143. M26 - Mix articulation plaster (artifix) till creamy Artikulationsgips (Artifix) auf dem Retentionsbereich der Giroform-Sekundärplatte plazieren
- 144. M27 - Mix articulation plaster (artifix) till creamy Position articulation plaster (artifix) on the retention area of the giroform secondary plate 混合石膏,将其涂在 secondary plate 上的固定区域
- 145. M28 - Position articulation plaster (artifix) on the retention area of the Splitex counterplate
- 146. M29 - Position articulation plaster (artifix) on the retention area of the Splitex counterplate 将石膏涂上 the Splitex counterplate 上的固定区域
- 147. M30- Position articulation plaster (artifix) on the retention area of the Splitex counterplate 将石膏涂上 the Splitex counterplate 上的固定区域
- 148. M31 - Position articulation plaster (artifix) on the retention area of the Splitex counterplate 将石膏涂上 the Splitex counterplate 上的固定区域
- 149. M32 - Close the top of the articulator 将咬合器顶部与上部石膏扣合
- 150. M33 - Close the top of the articulator 将咬合器顶部与上部石膏扣合
- 151. M34 - Close the top of the articulator 将咬合器顶部与上部石膏扣合
- 152. M35 - Close the top of the articulator 将咬合器扣合
- 153. M36 - Tap finger multiple times on the top of the Artex to release the tension in the articulation plaster 用手指在咬合器顶部轻敲几次,放松咬合器上的石膏紧度
- 154. M37 - Model is inserted into the CR median 放入 CR 咬合器的模型
- 155. N1 - First comparison: Upper jaw model after facebow registration in Artex CR, Lower jaw model in medial position in the articulator –the massive different between the two positions - more than anything in relation to the axel of tha articulator - is clearly recognisable. 第一次比较:上颚模型是通过面弓测试获得数据后放入咬合器上的,下颚模型是放在 咬合器中线位置的。二者位置的不同,与咬合器的轴有关,且清晰可见
- 156. N2 - Second comparison: Lower jaw model in position according to facebow registration Upper jaw model placed medially. The two positions do not match up to each other. 第二个比较:如果下颚模型用面弓测试数据摆放,而上颚模型放置在咬合器中间 位置。二者还是无法咬合。
- 157. Using the Transfer Jig technique 1 - Articulator centric is closed. Loosen the holding screw of the anterior guidance pin 锁住中线,并松开前牙导引针的固定螺丝
- 158. 2 - Remove anterior guidance pin from the top part of the Artex articulator 取出咬合器上面部分的前牙导引针
- 159. 3 - Remove anterior guidance pin from the top part of the Artex articulator 取出咬合器上面部分的前牙导引针
- 160. 4 - Loosen the holding screw on the front tooth guidance dish 松开前牙 导引盘中的固定螺丝
- 161. 5 - Remove the front tooth guidance dish from base of the Artex articulator 从咬合器底部取出前牙导引盘
- 162. 6 - Insert the front tooth guidance dish backwards into the top of the Artex (high edge is visible from the front) 将前牙导引盘从咬合器顶部倒插进去
- 163. 7 - Fix the holding screw on the front tooth guidance dish 将 固定螺丝固定在前牙导引盘内
- 164. 8 - Insert the transfer jig into the front groove in the base of the Artex up to the stop position 将转移钩插入咬合器底部前面的凹槽
- 165. 9 - Fix the holding screw of the transfer jig 并固定转移钩的螺丝
- 166. 10 - Open the holding screw of the front tooth guidance dish and slide the plate to the front, till there is a stop on the high edge of the transfer jig. Refix the holding screw 打开前牙导引盘的固定螺丝,轻划动底盘,直至 转移钩边缘,并固定
- 167. 11 - Place bite fork support into the base part of the Artex 将咬叉放置在咬合器底部
- 168. 12 - Insert the joint support into the receptacle on the transfer jig 将连接杆插入转移钩里
- 169. 13 - Insert the joint support into the receptacle on the transfer jig 将连接杆插入转移钩里
- 170. 14 - Fix the joint support into the transfer jig with the adapter bolt on the joint support 用连接杆上的栓使两者固定
- 171. 15 - Detach the support pin and place the articulator upon its head. Detach the screws on the bite fork support 取出支撑针,将咬合器扣过来。取出咬叉 的螺丝
- 172. 16 - Bring the crossbar on the bite fork support into contact with the bite fork - fix the screw on the bite fork support. The crossbar stabilises the bite fork 用横杆固定咬叉
- 173. 17 - Replace the articulator in working position, open and insert Splitex counterplate>> Artex Facebow Homepage 重新调置咬合器工作位置,打开并插入 Splitex counterplate
- 174. 18 - Opened articulator before insertion of the upper jaw model 放入上颚模型前的打开的咬合器
- 175. 19 - Insertion of the upper jaw model (with attached secondary plate) in the impression of the bite fork 将上颚模型放置在咬叉上
- 176. 20 - Insertion of the upper jaw model (with attached secondary plate) in the impression of the bite fork 将上颚模型放置在咬叉上
- 177. 21 - Upper jaw model inserted 上颚模型已放置好
- 178. 22 - Examine available space between the model and top of the Artex with closed articulator top 将咬合器上部与模型扣合,检查它们之间的空隙
- 179. 23 - Mix articulation plaster (artifix) till creamy. Position articulation plaster (artifix) on the retention area of the giroform secondary plate 在 secondary plate 固定位置上涂上石膏
- 180. 24- Mix articulation plaster (artifix) till creamy. Position articulation plaster (artifix) on the retention area of the giroform secondary plate 在 secondary plate 固定位置上涂上石膏
- 181. 25 - Mix articulation plaster (artifix) till creamy. Position articulation plaster (artifix) on the retention area of the giroform secondary plate 在 secondary plate 固定位置上涂上石膏
- 182. 26 - Position articulation plaster (artifix) on the retention area of the Splitex counterplate 将石膏涂上 the Splitex counterplate 上的固定区域
- 183. 27 - Position articulation plaster (artifix) on the retention area of the Splitex counterplate 将石膏涂上 the Splitex counterplate 上的固定区域
- 184. 28 - Position articulation plaster (artifix) on the retention area of the Splitex counterplate 将石膏涂上 the Splitex counterplate 上的固定区域
- 185. 29 - Close the top of the articulator till the front tooth guidance dish is in contact with the transfer plate 扣合咬合器顶部,直至前牙导引盘与转移盘接触
- 186. 30 - Close the top of the articulator till the front tooth guidance dish is in contact with the transfer plate 扣合咬合器顶部,直至前牙导引盘与转移盘接触
- 187. 31 - Close the top of the articulator till the front tooth guidance dish is in contact with the transfer plate 扣合咬合器顶部,直至前牙导引盘与转移盘接触
- 188. 32 - Tap finger multiple times on the top of the Artex to release the tension in the articulation plaster 用手指在咬合器顶部轻敲几次,放松咬合器上的石膏紧度
- 189. 33 - After hardening of the articulation plaster. Open the centric locking device on the Artex CR - turn the centric lever to the top 在石膏硬化后,打开咬合器中间的锁,将其转到顶部
- 190. 34 - Centric on the top of the Artex CR is open - central locking lever is open 咬合器顶部中心已经打开
- 191. 35 - Raise the top of the Artex CR, thereby detaching the model from the impression on the bite fork 提高咬合器顶部,使模型和咬叉分离
- 192. 36 - Top of the Artex CR is detached from the base 咬合器顶部与底部分离
- 193. 37 - Loosen the adapter bolt on the joint support 松开连接支柱上的横杆
- 194. 38 - Remove the joint support from the transfer jig with the bite fork 取出转移钩上面的连接支柱
- 195. 39 - Remove the joint support from the transfer jig with the bite fork 取出转移钩上面的连接支柱
- 196. 40 - The anterior guidance table is removed from the top and replaced into the articulator base 前部导引台从顶部取出,放置到底部
- 197. 41 - The anterior guidance table is removed from the top and repaced into the articulator base 前部导引台从顶部取出,放置到底部
- 198. 42 - Replace anterior guidance pin in the top of the Artex 重新将前部 导引针放置在咬合器顶部
- 199. 43 - Replace anterior guidance pin in the top of the Artex 重新将前部 导引针放置在咬合器顶部
- 200. 44 - anterior guidance pin is set to 0 并将值设为 0
- 201. 45 - Top part of the Artex CR with inserted upper jaw model 咬合器上部已经放置好上颚模型
- 202. 46 - Insert the Splitex counterplate into the base of the CR articulator 将 the Splitex counterplate 插入咬合器底部
- 203. 47 - Place articulator upon its head 将咬合器倒过来
- 204. 48 - Align the lower jaw model in maximal intercuspidation to the lower jaw model 调整下颚模型,达到最大牙尖吻合
- 205. 49 - Align the lower jaw model in maximal intercuspidation to the lower jaw model 调整下颚模型,达到最大牙尖吻合
- 206. 50 - Mix articulation plaster (artifix) till creamy. Position articulation plaster (artifix) on the retention area of the giroform secondary plate 将石膏涂上 secondary plate 上的固定区域
- 207. 51 - Position articulation plaster (artifix) on the retention area of the Splitex counterplate 将石膏涂上 the Splitex counterplate 上的固定区域
- 208. 52 - Close top of the articulator, while securing the lower jaw model with hand 将咬合器顶部与模型扣合,同时用手稳住下颚模型
- 209. 53 - Close top of the articulator, while securing the lower jaw model with hand 将咬合器顶部与模型扣合,同时用手稳住下颚模型
- 210. 54 - Close top of the articulator, while securing the lower jaw model with hand 将咬合器顶部与模型扣合,同时用手稳住下颚模型
- 211. 55 - Tap finger multiple times on the top of the Artex to release the tension in the articulation plaster 用手指在咬合器顶部轻敲几次,放松咬合器上的石膏紧度
- 212. 56 - Result: With the aid of facebow registration the model is inserted into Artex CR 通过面弓测试获得数据后放入咬合器上的模型
- 213. 台倢企業有限公司 Tel : (02)29995960 Fax : (02)29951033 台北縣三重市光復路一段 83 巷 1 號 5 樓 E-mail : teijel@ms53.hinet.net 網址 : http://www.teijel.com.tw
- 214. Using the Transfer stand technique 转移台使用技术
- 215. P1 – Using the Transfer stand technique 转移台使用技术
- 216. P2 - Put joint support with the bite fork on the transfer stand receptacle 将带有咬叉的连接支柱放在转移台上
- 217. P3 - Insert joint support tilted into the transfer stand receptacle 并插入固定
- 218. P4 - Secure the joint support in the transfer stand using the adapter bolt on the joint support 用横杆固定
- 219. P5 - Transfer stand with inserted bite fork - a large crack is visible between transfer dish and bite fork 插入咬叉的转移台—清晰可见之间的裂缝
- 220. P6 - Loosen the screw for height adjustment on the transfer dish 松开转移盘下的螺丝来调整高度
- 221. P7 - Lift up the transfer dish plate - Put the dish plate on the bite fork. There is space between the retention screws and the bite fork 将转移盘往上提到咬叉处,可见 . 螺丝和咬叉之间的空间
- 222. P8 - Lift up the transfer dish plate - Put the dish plate on the bite fork. There is space between the retention screws and the bite fork. 将转移盘往上提到咬叉处,可见 . 螺丝和咬叉之间的空间
- 223. P9 - Remove joint support from transfer stand, completely open the adapter bolt, tilt the bite fork upwards 取出连接支柱,完全打开调整横杆,将咬叉向上提
- 224. P10 - Mix articulation plaster (Artifix) till creamy and apply in two portions along the retention screw on the transfer table plate 在空隙处涂上石膏
- 225. P11 - Mix articulation plaster (Artifix) till creamy and apply in two portions along the retention screw on the transfer table plate 在空隙处涂上石膏
- 226. P12 - Guide joint support with the tilted bite fork onto the transfer stand. Thereby freeing the clamping bolt with the aid of one's finger 调整连接支柱
- 227. P13 - Secure the joint support on the stop position of the receptacle on the transfer tand and lower the bite fork into the soft plaster slurry by pulling tightly on the adapter screw 将连接支柱调到固定位置,并将咬叉放下与软石膏契合
- 228. P14- Secure the joint support on the stop position of the receptacle on the transfer tand and lower the bite fork into the soft plaster slurry by pulling tightly on the adapter screw 将连接支柱调到固定位置,并将咬叉放下与软石膏契合
- 229. P15- Secure the joint support on the stop position of the receptacle on the transfer tand and lower the bite fork into the soft plaster slurry by pulling tightly on the adapter screw 将连接支柱调到固定位置,并将咬叉放下与软石膏契合
- 230. P16 - Allow articulation plaster to set 固定石膏
- 231. P17 –After the articulation plaster has hardened, loosen the adapter screw 待石膏硬化,松开调整螺丝
- 232. P18 - After the articulation plaster has hardened, loosen the shouldering screw on the bite fork 待石膏硬化,松开咬叉上的螺丝
- 233. P19 - Remove joint support from transfer stand 取出连接支柱
- 234. P20 - Remove joint support from transfer stand 取出连接支柱
- 235. P21 - Transfer stand after transfer of facebow registration 在面弓数据下调整后的转移台
- 236. Q1 - Remove transfer table from the transfer stand and place in articulator or plastering apparatus 取出转移台上的转移桌放置在咬合器上
- 237. Q2 - Remove transfer table from the transfer stand and place in articulator or plastering apparatus 取出转移台上的转移桌放置在咬合器上
- 238. Q3 - Close articulator - in cases of space problems move the anterior guidance pin a little to the front - set the anterior guidance pin to 0 扣合咬合器,将前部导引针前移一点并设置为 0 ,减少造成的缝隙问题
- 239. Q4 - Close articulator - in cases of space problems move the anterior guidance pin a little to the front - set the anterior guidance pin to 0 扣合咬合器,将前部导引针前移一点并设置为 0 ,减少造成的缝隙问题
- 240. Q5 - Insert the Splitex counterplate into the top of the Artex CR – articulator 插入 the Splitex counterplate
- 241. Q6 - Insert the Splitex counterplate into the top of the Artex CR – articulator 插入 the Splitex counterplate
- 242. Q7 - Insert the upper jaw model with secondary plate attached into the impressions of the bite fork 将上颚模型放置在调好的咬叉上
- 243. Q8 - Insert the upper jaw model with secondary plate attached into the impressions of the bite fork 将上颚模型放置在调好的咬叉上
- 244. Q9 - Upper jaw model is attached onto the bite fork 放置在咬叉上的上颚模型
- 245. Q10 - Mix articulation plaster (artifix) till creamy Position articulation plaster (artifix) on the retention area of the giroform secondary plate 混合石膏,将其涂在 secondary plate 上的固定区域
- 246. Q11- Mix articulation plaster (artifix) till creamy Position articulation plaster (artifix) on the retention area of the giroform secondary plate 混合石膏,将其涂在 secondary plate 上的固定区域
- 247. Q12 - Position articulation plaster (artifix) on the retention area of the Splitex counterplate 将石膏也涂在 the Splitex counterplate 上的固定区域
- 248. Q13 - Position articulation plaster (artifix) on the retention area of the Splitex counterplate 将石膏也涂在 the Splitex counterplate 上的固定区域
- 249. Q14 - Close the top of the articulator until the anterior front pin of the guidance table is in contact with the transfer plate of the front tooth 扣合咬合器上部,使导引针和前牙转移台接触
- 250. Q15- Close the top of the articulator until the anterior front pin of the guidance table is in contact with the transfer plate of the front tooth 扣合咬合器上部,使导引针和前牙转移台接触
- 251. Q16 - Close the top of the articulator until the anterior front pin of the guidance table is in contact with the transfer plate of the front tooth 扣合咬合器上部,使导引针和前牙转移台接触
- 252. Q17 - Tap finger multiple times on the top of the Artex to release the tension in the articulation plaster 用手指在咬合器顶部轻敲几次,放松咬合器上的石膏紧度
- 253. Q18 - Top of Artex CR with inserted upper jaw model 放置好上颚模型的咬合器
- 254. Q19 - Open the centric locking device - turn the centric lever to the top 打开咬合器中间的锁,将其转到顶部
- 255. Q20 - Artex CR is open - centric locking lever is above 中间锁定已经打开,如上
- 256. Q21 - Raise the top of the Artex CR, thereby detaching the model from the impression on the bite fork 提高咬合器顶部,使模型和咬叉分离
- 257. Q22 - Top of Artex CR removed from base 咬合器顶部与底部分离
- 258. Q23 - Remove transfer dish from Artex base 从咬合器底部取出转移盘
- 259. Q24 - Insert the Splitex counterplate into the base of the Artex CR – articulator 将 the Splitex counterplate 插入咬合器底部
- 260. Q25- Insert the Splitex counterplate into the base of the Artex CR – articulator 将 the Splitex counterplate 插入咬合器底部
- 261. Q26 - Reattach top of artex to model 再次让模型和咬合器顶部扣合
- 262. Q27 - Close the Artex CR centric, push down centric lever 锁住中线,推下中心杠杆
- 263. Q28 - Centric closed, lever is down 中心锁定,杠杆下移
- 264. Q29 - Place the articulator upon its head 将咬合器倒放
- 265. Q30 - Align the lower jaw model in maximal intercuspidation to the lower jaw model 调整下颚模型,达到最大牙尖吻合
- 266. Q31 - Align the lower jaw model in maximal intercuspidation to the lower jaw model 调整下颚模型,达到最大牙尖吻合
- 267. Q32- Align the lower jaw model in maximal intercuspidation to the lower jaw model 调整下颚模型,达到最大牙尖吻合
- 268. Q33 - Mix articulation plaster (artifix) till creamy Position articulation plaster (artifix) on the retention area of the giroform secondary plate 将石膏涂上 secondary plate 上的固定区域
- 269. Q34 - Mix articulation plaster (artifix) till creamy Position articulation plaster (artifix) on the retention area of the giroform secondary plate 将石膏涂上 secondary plate 上的固定区域
- 270. Q35 - Position articulation plaster (artifix) on the retention area of the Splitex counterplate 将石膏涂上 the Splitex counterplate 上的固定区域
- 271. Q36 - Apply the required quantity of articulation plaster 涂上一定量的石膏
- 272. Q37 - Close top of the articulator, while securing the lower jaw model with hand 将咬合器顶部与模型扣合,同时用手稳住下颚模型
- 273. Q38- Tap finger multiple times on the top of the Artex to release the tension in the articulation plaster 用手指在咬合器顶部轻敲几次,放松咬合器上的石膏紧度
- 274. Q39 - Result: With the aid of facebow registration the model is inserted into Artex CR 通过面弓测试获得数据后放入咬合器上的模型
- 275. R1 - Initial situation variant 1: Giroform model is articulated with facebow registration into the central occlusion 用 giroform 作出的模型,再通过面弓测试数据放置在咬合器达到中心咬合的状态
- 276. R2 - Initial situation variant 2: Girogorm model is articulated medially into the central occlusion 用 giroform 作出的模型,放置在咬合器达到中心咬合的状态
- 277. S1 - Survey and analysis of the actual occlusion situation of the patient in opposite bite.Thereby pay particular attention to the grinding facets and centric contacts 在对病人真实咬合情况的调查和分析下的咬合,找出磨损点和中央咬合点
- 278. S2 - Survey and analysis of the actual occlusion situation of the patient in opposite bite. There by pay particular attention to the grinding facets and centric contacts 在对病人真实咬合情况的调查和分析下 的咬合,找出磨损点和中央咬合点
- 279. S3 - Survey and analysis of the patient's actual occlusion situation in working model.Thereby pay particular attention to the grinding facets and centric contacts, that exhibit the patient's occlusion - particular attention in the analysis is owed to the condition of the neighbouring teeth of the manufactured restoration. Mark out the grinding facets of the centric 在对病人真实咬合情况的调查和分析下的咬合,找出磨损点和中央咬合点; 通过临牙的咬合状况找出磨损点和中央咬合点进行修复,并用笔标示出来
- 280. S4 - Mark out the grinding facet in pencil 用铅笔标出磨损点
- 281. S5 - Mark out the grinding facet in pencil 用铅笔标出磨损点
- 282. T1 - Flatten down the master model for height analysis. Remove all segments up to the neighbouring teeth from the model. 将其他部分取出,只留备牙及临牙
- 283. T2 - Flatten down the master model for height analysis. Remove all segments up to the quadrents from the model. Flattening the model only on one quadrant is often enough and offers additional security to the static support. 将其他部分取出,只留备牙及临牙,并分析其高度
- 284. T3- Artex CR condyle with standard settings (SKN 35°; wetting angle 10°, ISS 0mm) Condyle( 髅状突起 )的运动数据的基本设定
- 285. T4 - Open the sideshift and wetted positioning screw, in order to open the ISS 打开螺丝,打开设定瞬间侧向移动的 ISS 值
- 286. T5 - Set the ISS value to 0.5mm - insulation is hereby provided to the side of the condyle 将 ISS 设定为 0.5mm ,向 condyle 运动一边隔离设定
- 287. T 6 - With the centric of the articulator closed, the frontal pin is in contact with the frontal tooth plate 咬合器中央已经锁定,则前部导引针可以和前牙盘接触
- 288. T 7 - Fix with positioning screw 固定螺丝
- 289. T 8 - ISS on 0.5mm right condyle Condyle 向右运动的 ISS 值 0.5mm
- 290. T 9 - ISS on 0.5mm left condyle Condyle 向左运动的 ISS 值 0.5mm
- 291. T 10 - Front tooth guidance is still set at 0mm 前牙导引值仍是 0mm
- 292. T 11 - Place the flattened working model into the articulator 将模型放在咬合器上
- 293. T 12 - When articulator centric is closed the anterior guidance pin is in contact with the anterior guidance dish 咬合器中央已经锁定,则前部导引针可以和前牙导引盘接触
- 294. T 13 - When articulator centric is closed the anterior guidance pin is in contact with the anterior guidance dish 咬合器中央已经锁定,则前部导引针可以和前牙盘接触
- 295. T 14 - Artex CR centric is closed 咬合器中心已经锁定
- 296. T 15 - Take the anterior guidance pin out of contact with the front tooth guidance dish (block) 调整前部导引针,使之不与导引盘接触
- 297. T 16 - Take the anterior guidance pin out of contact with the front tooth guidance dish (block) 调整前部导引针,使之不与导引盘接触
- 298. T 17 - The anterior guidance pin is out of contact with the plate 前部导引针与导引盘接触
- 299. T 18 - Open the articulator centric 打开咬合中心
- 300. T 19 - Open the articulator centric 打开咬合中心
- 301. T 20 - To determine the height the antagonists are put into their deepest position alongside one another (slide into deepest position) 为了确认高度,上下颚模型相互调到最深位置
- 302. T 21 - To determine the height the antagonists are put into their deepest position alongside one another (slide into deepest position) 为了确认高度,上下颚模型相互调到最深位置
- 303. T 22 - To determine the height the antagonists are put into their deepest position alongside one another (slide into deepest position) 为了确认高度,上下颚模型相互调到最深位置
- 304. T 23 - Relower anterior guidance pin into contact with the front tooth guidance dish 再把前部导引针放下来与导引盘接触
- 305. T 24 - Fix this height on the anterior guidance pin with a locking screw 用螺丝固定高度
- 306. T 25 - The new reference height is determined (here, 0.2 mm), the alignment on the anterior guidance pin has been altered. This reference height should preferably be recorded in writing in the working documentation. 产生新的参考高度 0.2mm
- 307. T 26 - The remaining segments of the models are put back into the model 再放回刚刚取出的牙模部分
- 308. T 27 - The remaining segments of the models are put back into the model 再放回刚刚取出的牙模部分
- 309. T 28 - The remaining segments of the models are put back into the model 再放回刚刚取出的牙模部分
- 310. T 29 - Control view, whether the idividual segments sit in position and have contact to the model plate - no recognisable crack 观察各部分是否已经归位,和模型盘是否接触,无明显裂痕
- 311. T 30 - Reset sideshift on both sides to 0 (sideshift is removed) 再次设定侧向移动值为 0
- 312. T 31 - Reset sideshift on both sides to 0 (sideshift is removed) 再次设定侧向移动值为 0
- 313. T 32 - Close articulator centric 锁定中心
- 314. T 33 - Close articulator and bring the model into contact with it. The anterior guidance pin is nearly out of contact with the plate – the front tooth guidance is blocked 锁定咬合器再将模型上下扣合,发现前部导引针未和底部接触
- 315. T 34 - The difference identifiable here would normally be grinded down later in patients in the new restoration 这个地方见到的误差,往往在稍后病人口中进行新的修复
- 316. T 35 - The visible crack exhibts the deepest position difference that the neighbouring teeth for restoration have to each other,to the deepest position that exists in the normally centric occlusion with the whole working model (without model management and without systematic segmentation of the working and opposite bite models) - the difference 这明显的缝隙,表示要修复临牙到最深位置来达到中心咬合
- 317. T 36 - Removal of the neighbouring teeth / segments for restoration, which will be used for height determination 取出临牙来确认高度
- 318. T 37 - Removal of the neighbouring teeth / segments for restoration, which will be used for height determination 取出临牙来确认高度
- 319. T 38 - Mark out the early contacts with occlusion foil - by closed articulator centric 锁定咬合器中心,用测试纸来找出最初的接触点
- 320. T 39 - Mark out the early contacts with occlusion foil - by closed articulator centric 锁定咬合器中心,用测试纸来找出最初的接触点
- 321. T 40 - Mark out the early contacts with occlusion foil - by closed articulator centric 锁定咬合器中心,用测试纸来找出最初的接触点
- 322. T 41 - Systematically etch in the early contacts with a scalpel following the known grinding rules 根据打磨方法用小刀细心地雕刻接触点
- 323. T 42 - Mark out and etch - repeat this process till the anterior guidance pin is in contact with the front tooth guidance place again - The examination can be carried out here on the anterior guidance pin above the occlusion foil 不停的标示和雕刻,直至前牙导引针和底部接触
- 324. T 43 - The defined reference height is reached - see here through achieving contact in the front 已经达到参考高度,可见新的接触点
- 325. T 44 - Replace the neighbouring teeth and segments into the model 再将临牙和其他部分放回模型中
- 326. T 45 - The reinsertion of the neighbouring teeth with a closed articulator centric can also lead to a light blockage.This blockage is considerably smaller than the blockage at the height control with the remaining segments. 再次放入临牙,在锁定咬合器后也会产生小的缝隙
- 327. T 46 - Mark out the early contact to the neighbouring teeth with the help of occlusion foil.Because also in the neighbouring teeth there are minimal changes in comparison to the patient position. 再通过刚刚正确咬合的参考数据来标示出临牙的咬合点,可以使病人手中 更小的咬合变化
- 328. T 47 - Take care with early contact to the neighbouring teeth; minimal, only perform selective etching, till the anterior guidance pin is in contact with the front tooth guide plate 在雕刻临牙接触点时,要细心,有选择的雕刻直至导引针和底部接触
- 329. U 1 - Examination of the movement dynamic All segments are placed into model. 所有部分都放入模型,检测其动力运动
- 330. U 2 - Test front canine tooth guidance (right-lateral movement) Corner tooth leads with its grinding facet 向右运动检测犬齿。角牙会有打磨面
- 331. U 3 - Test front canine tooth guidance (right-lateral movement) Corner tooth leads with its grinding facet 向左运动检测犬齿。角牙会有打磨面
- 332. U 4 - The clearly identifiable grinding facet of the first premolar, however, has no contact, and therefore no guidance 可清晰辨认第一个前臼齿的打磨点没有接触和导引
- 333. U 5 - The clearly identifiable grinding facet of the first premolar, however, has no contact, and therefore no guidance 可清晰辨认第一个前臼齿的打磨点没有接触和导引
- 334. U 6 - Remove objectionable (objectionable in regard to movement dynamics) segments 取出有异议的部分(动力运动中)
- 335. U 7 - Remove objectionable (objectionable in regard to movement dynamics) segments 取出有异议的部分(动力运动中)
- 336. U 8 - Remove objectionable (objectionable in regard to movement dynamics) segments 取出有异议的部分(动力运动中)
- 337. U 9 - Fresh examination of the movement dynamics - sidewards movement Examine whether the grinding facets now guide 再次侧向动力运动检测,检测打磨点是否正确
- 338. U 10 - Fresh examination of the movement dynamics - sidewards movement Examine whether the grinding facets now guide 再次侧向动力运动检测,检测打磨点是否正确
- 339. U 11 - If there is an existing guidance, the coloured pencil on the grinding facets will define the antagonists 如果有存在,则有颜色的铅笔会在打磨处显示
- 340. U 12 - Examination of the movement dynamic left-lateral - opposite direction - the channel is missing here 检测左边移动和右边移动—已经没有缝隙
- 341. U 13 - Remove objectionable (objectionable in regard to movement dynamics) segments 再次取出干扰部分
- 342. U 14 - Remove objectionable (objectionable in regard to movement dynamics) segments 再次取出干扰部分
- 343. U 15 - Remove objectionable (objectionable in regard to movement dynamics) segments 再次取出干扰部分
- 344. U 16 - Fresh examination of the movement dynamics - sidewards movement. Examine whether the grinding facets guide now If there is a slide, the coloured pencil on the grinding facets will define the antagonists. 再次检测侧向动力运动,看打磨点是否正确,如果有小滑动,有颜色的铅笔会标示出来
- 345. U 17 - Fresh examination of the movement dynamics - sidewards movement. Examine whether the grinding facets guide now If there is a slide, the coloured pencil on the grinding facets will define the antagonists. 再次检测侧向动力运动,看打磨点是否正确,如果有小滑动,有颜色的铅笔会标示出来
- 346. V 1 - Remove model segments up to the molars on the primed side 将臼齿部分放在最初位置
- 347. V 2 - In order to determine how much free space can and should be included in the model, only molars are ever used. The molars have less individual movement in the tooth alveole. They form a reference for the space and show the space most accurately. 因为臼齿运动中变化小,更精确
- 348. V 3 - Open sideshift settings 打开侧向移动设定
- 349. V 4 - Hold the top of the articulator secure with the hand to ensure the teeth (antagonists) remain in contact with one another Direct the horizontal sidewards movement of the top of the articulator with the thumb and start with the space on top of the occlusion and retrace. The existing space is presented in the ISS settings and can be read from 用手托住咬合器保持牙齿咬合位置,用大拇指水平侧向移动。可以参考 ISS 数值
- 350. V 5 - Hold the top of the articulator secure with the hand to ensure the teeth (antagonists) remain in contact with one another.Direct the horizontal sidewards movement of the top of the articulator with the thumb and start with the space on top of the occlusion and retrace. The existing space is presented in the ISS settings and can be read from 用手托住咬合器保持牙齿咬合位置,用大拇指水平侧向移动。可以参考 ISS 数值
- 351. V 6 - Fix the sideshift settings in this position (fix the secure screw in place) 用螺丝固定这个位置的侧向移动值
- 352. W 1 - Representation of the retral free space with retral grinding facets 后部打磨点的标示
- 353. W 2- Representation of the retral free space with retral grinding facets 后部打磨点的标示
- 354. W 3 - Set Bennett angle to 0° 设置 Bennett 角度为 0
- 355. W 4 - Removal of the ground facets with an open retrusion 通过牙齿 后移状态去除接触面
- 356. W 5 - Removal of the ground facets with an open retrusion 通过牙齿 后移状态去除接触面
- 357. W 6 - Removal of the ground facets with an open retrusion 通过牙齿 后移状态去除接触面
- 358. W 7 - Restriction of retral movement - here, up to 1.5 mm 后部运动的限制数据 --- 可达 1.5mm