1. Signing Up With Facebook
Facebook is an online site that lets you find people. Find
people you used to know with Facebook or find out who's
living around you. Create groups and events with Facebook
too.
.
There are three sections on Facebook; high school, college and work. To register for the high
school section of Facebook you need to be in high school. To register for the college section of
Facebook you need to be in a participating college. To register for the work section of Facebook
you need to use your work email address and work for a company that is recognized by
Facebook.
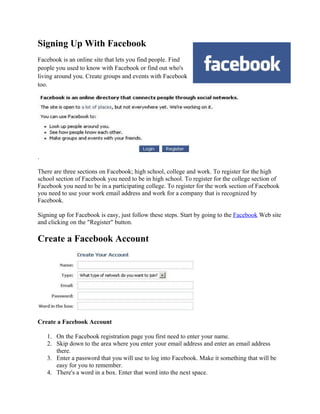
Signing up for Facebook is easy, just follow these steps. Start by going to the Facebook Web site
and clicking on the "Register" button.
Create a Facebook Account
Create a Facebook Account
1. On the Facebook registration page you first need to enter your name.
2. Skip down to the area where you enter your email address and enter an email address
there.
3. Enter a password that you will use to log into Facebook. Make it something that will be
easy for you to remember.
4. There's a word in a box. Enter that word into the next space.
2. 5. Next, choose which kind of network you want to join: high school, college, work. If you
choose high school then you need to enter some other information.
1. Enter your birthday.
2. Enter your high school name.
6. Read and agree to the terms of service then click on "Register Now!".
7. Confirm Email Address
8.
9. Confirm Email Address for Facebook
10. Open your email program and find the email from Facebook. Click on the link in the
email to continue registering.
Facebook Security
Facebook Security
Choose a security question and answer the question. This is for your own security so no one else
can get your password.
Upload a Profile Photo
3. Upload Your Facebook Profile Photo
1. Click on the link that says "Upload an image".
2. Choose the photo you want to use from your computer by using the "Browse" button.
3. Certify that you have the right to use this photo and that it is not pornography.
4. Click the "Upload Picture" button.
Add Friends
Find Facebook Friends
1. Click the "home" link at the top of the page to go back to the set up page.
2. Click the "Add education" link to start finding your old classmates.
3. Add the name of the school you want to add and the year you graduated.
4. Add what your majors/minors were.
5. Add your high school name.
6. Click "Save Changes".
Change Contact Email
Change Facebook Contact email
1. Again click the "home" link at the top of the page to go back to the setup page.
2. Click where it says "Add a contact email".
3. Add a contact email address. This is the email address you want to use to have people
contact you.
4. Click the button that says "Change Contact Email".
5. You will now need to go to your email and confirm your email address.
6. From this page you can also change other things. Change your password if you want to,
security question, time zone or your name.
4. 7. My Profile
8. Facebook Left Menu
9. Click on the "My Profile" link on the left side of the page. You can now see what your
Facebook profile looks like and change any part of it if you want.
Facebook Groups
A Facebook Group is a way for like minded people to interact with each other. If you enjoy a topic there
is probably someone in this world that enjoys it too. It works just like any other social group member
interaction.
Everyone has interests in subjects they know in and out with great detail and so creating a group
is like opening up a membership where others who like the same topics could get together and
message each other about the topics, therefore having an online debate and discussion about
interesting and related subjects. As such for instance, if you belong to a ministry within the
Church, you can create a group for that ministry which will be a forum for reaching out to other
members within that ministry to interact.
But this is just one of many possible uses of a facebook group as there is the posibility of using
them as a networking tool, to build up future contacts and business prospects and joint ventures,
if you was into the business angle of using the group features in this way.
The pages and the groups feature work well combined together as they can promote sub topics
under your main group where the pages act like mini topics for the main group subject.
5. The endless potential for a facebook group is limitless as there are millions of facebook members
online now and loads more joining the site every single day, like Myspace it is a great place to
network and find others that are interested in the same stuff as you, for business or for friendship
online.
Step One of Creating the Group
All you need is a Facebook account and it's a good idea to build up your profile page there first,
before creating a group, people will always look at the profile of someone first before deciding to
join a group as it backs up the notion to join a related group.
The first step in creating a Facebook group is to login to your Facebook account. You can't create a
Facebook group unless you're a member of Facebook and are logged in. You should have a 100%
completed profile and add your friends. You don't want to be lonely on Facebook.
Note: For steps to sign up an account with facebook is stated above.
Step Two of Creating the Group
Click on the "Groups" link in the main menu on the left side of the page, this should be under
application settings.
There is an icon that looks like two people. If you hover over that it should say Groups. You can click on
that. This will bring you to the groups page. You can also enter "Groups" into the search box at the top
of the page to get there.
6. Step Three of Creating the Group
Click on "Create a New Group" icon at the top right of the page.
Step Four of Creating the Group
Fill out the Facebook group creation form. It asks you questions to help you build your new
Facebook group. The group name, group description and the groups category all are required so
enter them there, but the rest on the form fields on that page are not important such as email and
city/town, just leave these blank. When done, click "Create Group" at the bottom of the page.
For Instance, for the purpose of our MFM religious activities we can choose Common Interest with
Religion & Spirituality under Group Type field of the form.
7. Step Five of Creating the Group
You want to customize the group by adding a picture, website address.
Uploading a photo that will be your groups avatar and one that will be associated with your group. Once
you have a good photo to add check the box above the upload button to certify that your photo is yours
and doesn't violate copyright etc, then click the upload button.
In the next box, you have the option of adding your website if it's related which it should be to
what ever your group is going to be about, because you want to direct some traffic your way to
your website.
All the check boxes you are presented with leave them all checked and the options like members
adding photos, videos and links would leave checked or enabled because you want to add a great
deal of interactivity to your group or what's the point.
Once you are done customizing the group then select Save or Save and continue.
At the end of this, step2 of the whole process comes up which has to do with customizing the settings.
You either adjust these settings or accept the defaults as they are. Save and Continue.
8. Once you are done then you will want to invite other like minded people to your group. This can be your
friends or coworkers. You can also make your friends officers of the group.
To Invite People to your Group, the system loads all the contact within your profile/address book to
choose from. This is shown below:
9. You are not limited to choosing from your facebook list, you can equally invite other people from else
where by entering their email addresses separated by commas and add a personal message as reason
for inviting them to join the group as members. This is shown below:
Access to your group could be one of three depending on the circumstances to which you need to
have the group
10. How to Choose Who Can Access Your Group
3 Levels of Group Privacy
When you create a group, you have the option of making it as open or exclusive as you wish. Group
administrators can change these options at any time by clicking on "Edit Group Profile."
1. Open: For "global" groups, everyone on Facebook can view the group and join. If the group is
exclusive to a specific network, only the people on that network can become a member. The
Wall, discussion board, and photos are all visible.
2. Closed: For "global" groups, everyone on Facebook can see the group, but the administrators
must approve all membership requests. If the group is exclusive to one network, only people on
that network can see the group. Only group members can view the Wall, discussion board, and
photos. If you are not a member, you will not receive News Feed stories about closed groups.
3. Secret: These groups cannot be found in searches or viewed by non-members. The name of the
group will not display on the profiles of members. Membership is by invitation only. Non-
members will not receive News Feed stories about secret groups.
Now go to save, a box will appear that says you can publish, click publish!
Your group is now finished depending on one of the three options you entered in your set up.
11. Now lets go over what you can add to your facebook group.
Links - Adding useful and related links to your group is easy and this is important as you want to
provide value to your members when they join and having somewhere to go within your group
just provides a sticky point for your group, make your links highly relevant and useful.
Videos - Also the same applies to videos, the most useful and engaging videos works the best,
humorous, instructional, news, insightful and any other video type can be created and uploaded,
so try lots of variations.
Photos - Photos related to your sites content work quite well too and these could be tied into
your links and videos and provide insights into you or some area that your group relates to.
12. Now when you go to your groups home page, you will have your photo as the first member of
the group and then a section called the discussion board and the wall, which anyone could write
anything in, but this is mainly for you to add any updates and other useful stuff, but later on this
will be your communication area, where you will be kept up to date by all the other members
that join your group who choose to bring discussions to you either by the board or the wall.
The only thing with groups is, you have to keep updating them and keep active in them or else
people will get bored and not come back, so the trick is to be just yourself, be polite and friendly
and reply to anyone who leaves a link or photo or a wall comment.
Below your groups picture you have a few options to edit your group and other features, lets go
through each of them!
Message all members - This is exactly what it says, you can keep people updated with what's
going on with your group with a simple message, you could have events going on, or a
newsletter or something else of great importance for your group to announce, so do it here!
Promote Group with an ad - This is where you can create a facebook ad, of course you have to
pay for this, but it could be worth doing later down the road if you are serious about building up
your group, a little paid promotion works wonders every now and then.
Edit Group - This is your option to change or add things to the group, mainly the name and
description of your group and your group picture, also you can make members into officers
within your group which mainly means adding labels to your best contributors in your group.
Edit Members - This is your chance to edit the members that you have and you can locate any
one member here, get rid of the idiots and generally an admin area for the members fo your
group.
Invite People To Join - You can invite others to join, maybe you have facebook friends
elsewhere who may be interested in your group, this is your chance to invite them here.
Create Related Event - Here you can create a related event that may be of interest to anyone
else, maybe you've organized a get together in person at a selected venue or an online video chat
or something that relates to your group, this is the option to announce it directly to your group
members all in one with specific dates and times.
Leave Group - This only applies to others really so don't click it!
13. Share + - You can email or send group stuff to your profile on facebook which makes it helpful
to reach a wider audience, only if you have related contacts in your groups subject.
And there we have it really, making a Facebook group is very easy and one that should'nt be
stressed over, just remember to build interactivity into your groups and make them a place to go
for your topic, also you could create other related sub topic groups and link them all together,
making your facebook group become a super group on a topic with lots of other topics under
your main one.
Top 2 Mistakes Made When Creating a Facebook Group
1. Choosing the wrong name. Once you choose a name, it can't be changed.
2. Selecting the wrong network. When you create a group, you must choose who can see your
group--everyone in Facebook (Global) or just the people in one of your networks. This is a
permanent choice and can't be changed.
Tips on Creating a Successful Facebook Group
Are You A Lion Or A Sheep?
A Facebook group needs strong leadership and clear direction if you want it to succeed. If you
14. act like a sheep, the herd might follow you for a moment and then lose interest or move in a
different direction.
Launching a successful Facebook group is a definite art. If you are thinking of starting a new
group or already have an existing group, here are a few essential pointers to get you going viral
and effortlessly attract new members.
1) Choose a Killer Title For Your Group Name
Without a memorable name that is both colorful and sticky your group will fail right from the
beginning. It has to be compelling and dynamic and press people’s emotional hot buttons. For
Ideas look at the groups that have grown to over 1000 members and compare the names to those
that that are still stuck at around 150 members. If your name is boring most people automatically
assume your group will be too.
2) Pick A Graphic That Captures The Essence Of Your Group
A picture speaks a thousand words, does the image you choose convey the essence of your
group. Get a striking image and then use photo shop to add some text on top of the picture. Make
sure it can still be read when it is reduced in size. Many groups make their Logo much longer
than its width it then becomes a full banner of advertisement and takes up more space when its
listed on the group page giving it more prominence.
3) Leverage Your Friends
You can’t grow a group huge without the help of other people. Groups go viral because people
invite their friends to join. If your initial network hasn’t reach 500 people you will have a hard
time getting enough momentum for your group to take off. In that case find another friend and
launch together. Make them a group admin too. Its much more fun launching a group with
several people than having to do all the work on your own.
15. 4) Target Your Initial Members
Having powerful and influential friends as core members of the group is vital. Hand select the
people who you want to be there and send them personal invitations. Make them feel special.
You need to choose people who are dynamic on Facebook or Twitter, people who are famous,
people who have huge followings, people who have large networks and people who are already
experts and leaders within your niche. Having these people as initial members instantly gives
your group credibility. Honor those who first join by making them officers and ask them what
title they would like under their name.
5) Create A Whisper Campaign
Tell your friends about the group in an indirect way long before you are going to launch, hint
about it in blog posts, in tele-seminars and in wall posts and in all your communications with
your potential core members. Get them excited and they will start to talk about your new group
even before you open the doors. Get your favorite bloggers to write an article about your group.
Start a discussion using Facebook Notes and make your group the logical solution to a problem
that people might face. Create the content for your group before you launch and tell people what
you are doing.
6) Turn Your Group Launch Into An Event
By turning your group launch into an event you automatically stand out and get noticed. Plan it
the same way you would a big party, you want all your guests to arrive at the same time so that
the dance floor is packed. People won’t join if they turn up to your group page and find a cold
empty room with no music and no refreshments.
Use Facebook Events and hold a teleseminar to publicize it and/or write Facebook notes and tag
all your initial members, get them interacting with each other and keep sending them back to the
group page to post on the wall and participate in the discussions.
Groups are not just confined to a single location, they spill out all over the place. Like a crowded
house party that ends up with lots of people milling about on the front lawn. Anyone who drives
down the street will always know which house to go to.
7) Include an Irresistible Offer
Offer an incentive for people to join, give away a free ebook, mp3 recording or video straight
away.
Promise to supply more exclusive content in the future for those who join the group early and
become active participants. Identify those special members by signing them up to your option list
or joining your Fan page.
Focus on adding value and encourage your group members to share their own talents. Your
group will become a valuable resource instead of a derelict notice board for spammers
8) Aim for Viral Visibility
The more activity you generate the bigger your viral foot print will be in Facebook’s newsfeed.
16. You want to get your group to 500 members as quickly as possible so that it maintains its
growth velocity. After this point it will hit critical mass and continue to grow on its own.
Stimulate activity on the group wall and discussion board, ask questions and continue to supply
fresh content on a regular basis. You want your members to keep returning and posting within
the group.
9) Make Your Group Interactive
Use the group discussion board
Group discussion boards are the best way to encourage group conversations.
To start a new topic, click the "Start Topic" link under the "Discussion Board" header. Enter a
title and write your post.
To join an ongoing discussion, click on the topic name. You can then see all posts on the topic.
Next, select either "Reply to Topic" or reply to a specific post.
Group administrators can turn the discussion board can be turned on or off from the "Edit Group
Profile" page. If the group is closed or secret, only members can see and post item on the board.
10) Advertise Your Group
If you are holding a party you need to put up some posters and give out flyers. Use your status
updates wisely; be creative, use humor, and learn about link baiting. Attract members from a
whole range of social media platforms, like Twitter, YouTube, Upstream, Friend Feed, Ning.
Advertise in other similar groups and online forums. Get your group members to help you and
reward those who put in the most effort by helping them to promote themselves using your group
as a platform. Self promotion before contributing value should be discouraged.
11) Launch Strategically And In Several Stages
Have a clearly defined and mapped out strategy. Create a revolving door Pre launch, launch,
post launch, relaunch. Sequence. After initial activity your group may need restimulating. By
holding regular events you keep your group in the public eye and your members will continue to
feel connected. Get your active members to participate in your relaunch process, and make it a
win win situation for all involved