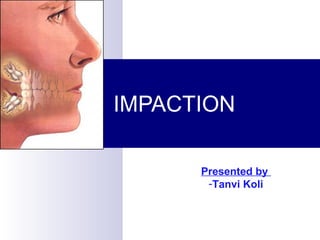
Dental Impaction Guide - Causes, Symptoms, Treatment & Classification
•
866 gefällt mir•147,887 views

1) The document discusses impacted teeth, which are teeth that fail to fully erupt. It describes common causes and locations of impactions as well as classification systems. 2) Surgical removal of impacted teeth involves asepsis, anesthesia, incisions, bone removal, tooth sectioning, elevation and extraction while protecting surrounding structures. 3) Radiographs aid in determining the depth, orientation and relationship to nearby anatomy to assess difficulty prior to surgery. Careful treatment planning is important for safe and effective removal of impacted teeth.

Empfohlen
Weitere ähnliche Inhalte
Was ist angesagt?
Was ist angesagt? (20)
Andere mochten auch
Andere mochten auch (13)
Ähnlich wie Dental Impaction Guide - Causes, Symptoms, Treatment & Classification
Ähnlich wie Dental Impaction Guide - Causes, Symptoms, Treatment & Classification (20)
Kürzlich hochgeladen
Kürzlich hochgeladen (20)
Dental Impaction Guide - Causes, Symptoms, Treatment & Classification
- 2. TERMINOLOGIES Impacted tooth Unerupted tooth Malposed tooth
- 3. IMPACTED TOOTH It is the tooth that has failed to erupt completely or partially to its correct position in the dental arch and its eruption potential has been lost.
- 4. UNERUPTED TOOTH It is a tooth that is in the process of eruption and is likely to erupt based on clinical and radiographic findings.
- 5. MALPOSED TEETH A tooth unerupted or erupted which is in an abnormal position in the maxilla or in the mandible.
- 6. COMMONLY IMPACTED TEETH 1. Mandibular third molar 2. Maxillary third molar 3. Maxillary canine 4. Mandibular premolar 5. Maxillary premolar 6. Mandibular canine 7. Maxillary central incisor 8. Maxillary lateral incisor.
- 7. THEORIES OF IMPACTION 1. Phylogenic theory 2. Mendelian theory 3. Orthodontic theory.
- 8. CAUSES OF IMPACTION LOCAL CAUSE Obstruction for eruption Lack of space Ankylosis of primary or permanent tooth Nonabsorbing, over retained tooth Nonabsorbing alveolar bone Ectopic position of tooth bud Dilaceration of roots Soft tissue or bony lesions- fibrosis Habits.
- 9. SYSTEMIC FACTOR Prenatal causes- heredity Postnatal-tuberculosis, anaemia, ricketts, malnutrition. Endocrinal disorders of thyroid, parathyroid, pit.gland. Hereditary- linked disorders- osteoporesis, cleft palate.
- 10. INDICATION for removal of impacted teeth Tooth in line of fracture. Tooth in line of fire.
- 11. Recurrent pericoronitis - is the inflammation of the gingiva surrounding a crown of a partially erupted tooth.
- 12. Deep periodontal pocket - associated with partially erupted tooth. Prior to orthodontic treatment - to control the tooth crowding in the mandible.
- 13. Prevention of root resorption and caries Prevention of pathological fractures.
- 14. Management of cysts and tumors. Abscess of odontogenic origin Management of preprosthetic concerns Prophylactic removal
- 15. CONTRAINDICATION Extremes of age Compromised medical status Excessive risk of damage to adjacent structure When there is question about the future status of the second molar Uncontrolled active pericoronal infection Socioeconomic status Fracture of atrophic mandible may occur Abutment selection
- 16. SIGN AND SYMPTOMS Pain Difficulty in mastication Paraesthesia of lip Swelling of retro-molar tissue Soreness Erythemia of overlaying soft tissue or operculum Trismus Facial swelling of the affected side Raised temperature Regional lymphodenopathy.
- 17. RISK OF NONINTERVENTION Crowding of dentition Resorption of adjacent tooth and periodontal status Development of pathological conditions such as infection, cysts, tumors.
- 18. RISK OF INTERVENTION Minor transient- sensory nerve alteration, alveolitis, trismus and infection. Haemorrhage, dentoalveolar fracture and displacement of tooth. Minor permanent- periodontal injury, adjacent tooth injury, temporomandibular joint injury. Major – altered sensation, vital organ infection, fracture of mandible, maxillary tuberosity.
- 19. CLASSIFICATION OF IMPACTED TOOTH 1. WINTER’S CLASSIFICTION Acc to angulation 1. mesioangular 2. horizontal/ transverse/ inverted 3. vertical 4. distoangular 5. buccoangular 6. linguoangular
- 20. Winter’s classification acc to angulation
- 21. Acc to depth 1. Position A : highest position of the tooth is on a level with or above the occlusal line. 2. Position B : highest position is below the occlusal plane, but above the cervical level of the second molar. 3. Position C : highest position is below the cervical level of the second molar.
- 22. acc to depth Position A Position B Position C
- 23. Pell and Gregory’s classification relationship of the impacted lower third molar to ramus of the mandible and the second molar. 1. Class I : sufficient space available between the anterior border of the ascending ramus and the distal side of the second molar for the eruption of the third molar. 2. Class II : the space available between the anterior border of the ramus and the distal side of the second molar is less than the mesiodistal width of the crown of the third molar. 3. Class III : the third molar is totally embedded in the bone from the ascending ramus because of absolute lack of space.
- 24. Pell and Gregory’s classification Class I Class II Class III
- 25. Maxillary third molar classification acc to relation to the floor of maxillary sinus. 1. Sinus approximation (SA)- no bone or thin bony partition present between impacted maxillary third molar and the floor of the maxillary sinus. 2. No sinus approximation (NSA)- 2mm or more bone is present between the sinus floor and the impacted maxillary third molar.
- 26. Maxillary third molar classification NSA SA
- 27. Classification of impacted maxillary canines 1. class I : palatally placed maxillary canine a. Horizontal b. Vertical c. semivertical 2. class II : labially or buccally placed maxillary canine a. Horizontal b. Vertical c. semivertical
- 28. 3. class III : involving both buccal and palatal bone 4. class IV : impacted in the alveolar process between the incisors and first premolar. 5. class V : impacted in edentulous maxilla.
- 29. Classification of impacted maxillary canines
- 30. DIFFICULTY INDEX Pederson difficulty index angulationangulation - mesioangular : 1 - horizontal-transverse : 2 - vertical : 3 - distoangular : 4 depthdepth - level A : 1 - level B : 2 - level C : 3
- 31. ramus relationship/ space available - class I : 1 - class II : 2 - class III : 3 Difficulty index Very difficult : 7 to 10 Moderately difficult : 5 to 7 Minimally difficult : 3 to 4
- 32. Wharfe assessment six factor chosen for scoring are Winter’s classification - horizontal : 3 - distoangular : 2 - mesioangular : 1 - vertical : 0 Height of mandible - 1 to 30 mm : 0 - 31 to 34 mm : 1 - 35 to 39 mm : 2
- 33. Angulation of third molar - 1 to 59 degrees : 0 - 60 to 69 : 1 - 70 to 79 : 2 - 80 to 89 : 3 - 90 + : 4 Root shape - favorable curvature : 1 - unfavorable curvature : 2 - complex : 3
- 34. Follicle - normal : 1 - possibly enlarged : 2 - enlarged : 3 Path of exit - space available : 0 - distal cusp covered : 1 - mesial cusp covered : 2 - both covered : 3
- 35. Radiographic examination Radiographic views Intraoral - IOPA - Occlusal view Extraoral - OPG - Lateral oblique view - PA Water’s view
- 36. Radiological assessment aids in determining Classification of impacted tooth Orientation of impacted tooth Depth of the tooth Root shape Relation to inferior alveolar canal Localization of impacted tooth
- 37. 1. Darkening of root 2. Deflection of root 3. Narrowing of root 4. Dark and bifid apex 1 2 3 4
- 38. 5. Interruption of white line of the canal 6. Diversion of canal 7. Narrowing of canal 5 6 7
- 39. Winter’s lines
- 40. Winter’s lines White line – corresponds to occlusal plane. - indicates the difference in occlusal level of second and third molar. Amber line – represents the bone level. - denotes the alveolar bone covering the impacted tooth and the portion of tooth not covered by the bone. Red line – represents depth of the tooth in bone and the difficulty encountered in removing the tooth. - indicates the amount of bone that has to be remover before elevation. - if the length of red line is more than 5 mm then extraction is difficult. - every additional mm renders the removal of the impacted tooth three times more difficult.
- 42. Assessment of third molar Case history Intraoral and Extraoral examination Examination of site of impacted tooth Analysis- IOPA and OPG Structure -inferior alveolar nerve -Lingual nerve -Pterygomandibular space -Facial artery -External oblique ridge -Retromolar pad -Retromolar triangle
- 43. SURGICAL REMOVAL OF IMPACTED TEETH 1. Asepsis and isolation 2. Local anaesthesia/ sedation+ LA/ general anaesthesia. 3. Incision – flap design. 4. Reflection of mucoperiosteal flap. 5. Bone removal. 6. Sectioning (division) of tooth. 7. Elevation. 8. Extraction. 9. Debridement and smoothening of bone. 10. Control of bleeding. 11. Closure – suturing. 12. Medication – antibiotics, analgesics, etc. 13. Follow-up.
- 44. Instruments Mouth mirror Probe No 15 blade on a Bard Parker handle. Mosquito artery forceps Retractors Chisel Bur: rose head, straight fissure Elevators forceps Bone file Needle holder Tissue forceps Scissors Drape Syringe
- 45. Instruments
- 46. Asepsis and Isolation Scrubbing + painting of skin and oral mucosa - Cetrimide + absolute alcohol or cetrimide + povidine+ iodine - Cetrimide + absolute alcohol + chlorhexidine. Cleaning solution- used on skin to remove residual soap solution. - Normal saline -Alcohol – spirit Painting solution – act topically to inhibit further growth of microbes - Povidine – iodine 5% for skin, 1% for oral mucosa - Chlorhexidine gluconate - 7.5% for skin, 0.2% for rinsing oral cavity. Drape the patient
- 48. Local anaesthesia For mandibular molar and canines – pterygomandibular nerve block. For maxillary molars – posterior superior alveolar nerve block and palatine nerve block or infiltration. For maxillary canines – infraorbital nerve block + palatal infiltration of incisive canal and bilateral palatine nerve blocks.
- 49. Infraorbital nerve block Posterior superior alveolar nerve block
- 50. Incision (flap design) Incision should be away from surgical site. Not on vital structure. Should be perpendicular to tissue Triangular flap recommended for adequate blood supply.
- 51. For Mandibular Molars Vertical mucoperiosteal flap Envelope flap
- 53. For Maxillary Canine Gingival crevicular incision Palatally placed canine
- 55. Bone removal Aim 1. To expose the crown by removing the bone overlying it. 2. To remove the bone obstructing the pathway for removal of a tooth. Two ways of bone removal 1. High speed, high torque handpiece and technique 2. Chisel and mallet technique. Adequate amount of bone should be removed to enable for elevation
- 56. Bur technique No. 7/8 round bur or a straight no. 703 fissure bur is used. Sealed bearing handpieces or surgical handpieces with extra ball bearing must be used. Medium speed drills(12000- 20000r.p.m) are preferred for dento -alveolar surgery. The bur is used in sweeping motion around the occlusal , buccal and distal aspect of the crown to exposed it. Once the crown has been located, the buccal surface of the tooth is exposed with the bur to the cervical level of the crown and a buccal trough or gutter is created. Continuous irrigation with 1% povidine -iodine or with normal saline to reduce the thermal necrosis of bone.
- 57. MOOR AND GLIBSON’S COLLAR TECHNIQUE
- 58. Lingual split bone technique It is described by Sir William Kelsey Fry. Later popularized by T. Ward. Quick and clean technique. Creates saucerization of the socket, thereby reduces the size of residual blood clot. Used for mandibular third molar especially those are placed lingually.
- 59. Steps 1. 3mm wide or 5mm wide chisel is used 2. Vertical stop cut is made by placing the chisel with the bevel facing posteriorly, distal to second molar. 3. With the chisel bevel downward, a horizontal cut is made backward from the lower end of vertical limiting stop cut. 4. The buccal bone plate is removed above the horizontal cut. 5. The distolingual bone is then fractured inward by placing the cutting edge of the chisel. Bevel side of chisel facing upward and cutting edge is parallel to the external oblique ridge. 6. Finally small wedge of bone , which then remaining distal to the tooth and between the buccal and lingual cut, is excised and removed.
- 60. 6. A sharp straight elevator is then applied and minimum force is used to elevate the tooth, as the tooth moves upward and backward, the lingual plate gets fractured and facilitates the delivery of the tooth. 7. After the tooth is removed , the lingual plate is grasped with the hemostat and freed from the soft tissue and removed 8. Smoothening of the edges is done with bone file. 9. Wound irrigated and sutured
- 61. Lingual split bone technique
- 62. Tooth sectioning, elevation and extraction Reduces amount of bone removal required prior to elevation of the tooth. Reduces the risk of damage to the neighboring teeth. The direction in which impacted tooth should be sectioned is dependent on the angulation of the impacted tooth, based on line of draw of the segments. Can be performed either with bur or chisel. The bur is used in controlled fashion to avoid damage to the vital structures and surrounding teeth and soft issue. The tooth is sectioned one-half to three-fourths with bur and then it is completely sectioned with the elevator.
- 63. Tooth sectioning, elevation and extraction Sectioning of the 1. Horizontally placed lower third molar 2. Mesiobuccally placed molar 3. Vertically placed molar 4. Distobuccally placed molar
- 64. Elevation 1. Coupland elevator- placed at the base of the crown. 2. Winter cryer’s – may be used in wedging action/ buccal elevation. Wedging action is useful, when molar crown is split vertically down to bifurcation of roots
- 65. Coupland elevator Winter cryer’s elevator
- 66. Debridement and smoothening of bone margins Irrigation of the socket. Curetting to remove any remaining dental follicle and epithelium. Look for piece of coronal portion, check for remnants of bone /granulation tissue, bleeding points. Check for caries/ erosion/damage to the adjacent teeth. Round off the margins of the socket with large vulcanite round bur or bone file. Irrigate the socket again. Control bleeding before suturing.
- 67. closure 3-0 black silk and 21or 22mm half circle or 1 25 mm, 5/8 circle cutting needle is commonly used. Interrupted sutures given and maintained for 7 days. In case of molars, suture distal to second molar should be placed first and should water tight to prevent pocket formation. In case of palatally placed canines, incisive papilla should be sutured carefully to reduce postoperative bleeding.
- 68. Principle of suturing Use few suture as possible Should not be excessively tight. Suture should penetrate the lingual flap close to and behind the third molar and the buccal flap further distally
- 70. Post Operative instruction Pressure pack for 1hr. Ice application Soft diet for 1st two days 1st dose of analgesic should be taken before the anesthetic effect of LA wears off Avoid gargling / spitting / smoking / drinking with straw warm water saline gargling after 24 hrs + mouth wash regularly thereafter Suture removal after 7 days.
- 71. COMPLICATION Intraoperative complications During Incision - for molars- facial vessel or buccal vessel may be cut. - for lower canines- mental vessel may e damaged. - for upper canines- incisive canal or greater palatine vessel may be damaged. During Bone Removal - damage to the second molar, damage to the roots of overlying teeth, slipping of the bur into soft tissues, fracture of the mandible when using chisel and mallet
- 72. During Elevation - Luxation o neighboring/ overlying tooth - Fracture of the adjoining bone - Fracture of the tuberosity - Slipping of the tooth into pterygomandibular/ temporal spaces, sublingual pouch and/ maxillary sinus - Damage to nasal wall/ overlying teeth/ lingual, inferior alveolar or mental nerve. During Debridement - damage to inferior alveolar nerve /lingual nerve - damage to maxillary sinus.
- 73. Postoperative Complications - pain - swelling - trismus - sensitivity - loss of vitality of neighboring teeth - pocket formation - sinus tract formation - oroantral fistula - oronasal fistula
- 74. Thank you