
Empfohlen
Weitere ähnliche Inhalte
Was ist angesagt?
Was ist angesagt? (20)
Ähnlich wie Digital Photography 1 for libguide
Ähnlich wie Digital Photography 1 for libguide (20)
Mehr von jspeir
Mehr von jspeir (15)
Kürzlich hochgeladen
Kürzlich hochgeladen (20)
Digital Photography 1 for libguide
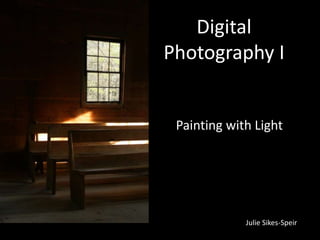
- 1. Digital Photography I Painting with Light Julie Sikes-Speir
- 2. Why take pictures? • To tell a story • To share information • To change someone’s mind or heart • To show the world as you see it
- 3. Lewis Hine This photo helped make child labor illegal in the US
- 4. When were the first photographs taken?
- 5. 1900
- 6. 1864
- 7. Antietam Md. Allan Pinkerton, President Lincoln, Maj. Gen. John A. McClernand 1862
- 8. First successful Permanent Photograph “View from the Window at La Gras” by the French inventor, Joseph Nicéphore Niépce. 1826 It was produced on a polished pewter plate in 1826. Niépce captured the photo with a camera obscura focused onto a sheet of 20 × 25 cm oil-treated bitumen. As a result of the 8-hour exposure, sunlight illuminates the buildings on both sides.
- 9. This presentation is not a replacement for Study of your camera manual. Instead, it will assist you in learning how to understand the general functioning of digital cameras as well as compositional strategies to help you take better photographs. Every type and model of camera is different, therefore you must study your own individual manual in order to glean the most benefit from this course.
- 10. Don’t forget Charge Battery and Insert Memory Card Be sure your camera battery is charged. Insert a memory card and format it before use in a new or different camera. Formatting will permanently erase all Information from the card.
- 11. Viewfinder An SLR cameral will show about 95% of the entire picture. Cameras other than SLR cameras will show only show 80 to 90 percent of entire picture. Viewfinders are handy when there's too much glare on LCD screen.
- 12. Shutter Release Button When pressing the shutter release button It is important to make every effort to prevent camera shake. Plant feet squarely on the ground, elbows down and hold a still as possible when pressing the shutter and waiting for the camera to finish taking the picture by closing the shutter. A good rule of thumb to prevent blurry photographs is to never use a shutter speed of more than 1/60 of a second when using a hand held camera.
- 13. Light
- 14. Light •The best light is natural light.. •The best time of day to take photographs is during the “Golden Hours” which are an hour after sunrise and an hour before sunset. • Overcast skies create an giant light box which make color bolder and cuts down on the intense shadows created by the sun when it is high in the sky.
- 15. Pop up on camera flash On Camera Flash •Can cast strong shadows •Can flatten or blowout a photograph If a sharp picture can be taken without flash, the photo will look more natural without the flash. If the natural light is not sufficient to create a sharp image then flash must be used to “freeze’ the image and prevent It from being fuzzy.
- 16. On Camera Flash •Flash can be activated by a button On the side of the lens. •Flash can be cut off by using the mode selection dial on the top of the camera
- 17. Outdoor Backlighting Sunset Backlighting Sunlight shining from behind the subject can give a very pleasing effect. If intense, it creates a silhouette. Tahiti
- 18. Outdoor Backlighting Daylight backlighting Sunlight shining from behind the subject can give a very pleasing effect. If intense, it creates a silhouette. Chattanooga, TN
- 19. Indoor Backlighting Sunlight shining from behind the subject can give a very pleasing effect. If intense, it creates a silhouette.
- 20. Indoor Backlighting Artificial indoor backlighting adds drama to this shot
- 21. Backlighting and Fill Flash To avoid silhouetting of people, set your camera to auto flash and make sure the subject is within flash range. Flash used in bright conditions to eliminate facial shadows is called fill flash. Evidence of Backlighting Fill flash removes the dark shadows from her Face.
- 22. Backlighting and Lens Flare Shooting into the light can also cause lens flare. To avoid lens flare use a lens hood or your hand to shade the lens when shooting into the sun.
- 23. Backlighting Caution: Shooting directly at a bright sun can damage your camera sensor as well as your eyes. Telephoto lens (zoom) intensify this. When shooting sunset, wait until the sun is low in ht sky. Sanibel Island
- 24. Intense Sunlight Undesirable for people and pets because it causes squinting. Sun was so intense that it blacked the background. at midday.
- 25. Bright Midday Sun Shadows Blowout It can also cause harsh shadows. The higher the sun is in the sky, the harsher the shadows will be.
- 26. Outdoor Front Light Font light is good for architecture shots.
- 27. Indoor Front Light Flash that is too close to the subject can cause a blown out photograph.
- 28. Side Light Shadows are not always bad Side light is the best light for portraits. The shadows give a 3-D effect to the face.
- 29. Side Light Dark Side Light Side Side light gives dimension to the face
- 30. Shadows Shadows can add drama to a photograph.
- 31. Shadows Shadows can add drama to a photograph.
- 32. Indoor Low Light If there is not enough light and you cannot use a flash, use a higher ISO if possible or a tripod. We will discuss ISO next week. A higher ISO was used to eliminate the flash.
- 33. Shutter Speed •Shutter Speed controls the length of time the camera allows in light. •Shutter speeds slower then 1/60 second requires a tripod or other camera support. •To freeze action set the shutter at a higher speed… 1/250 or 1/500 or higher.
- 34. Autofocus (AF) Camera focuses on what it thinks is the main subject. This is usually what is in the middle of the frame. In order to focus Autofocus may be turned off using the auto/ manual switch button on the lens of most cameras.
- 35. What if your want your main subject not to be in the center of the photograph? Reframe
- 36. Reframing •Place your meter point where you want to meter. •Hold the shutter release halfway down. •Place your autofocus point over your subject. •Wait until autofocus locks on. •Press and hold the AF-lock button. •Recompose •Fully depress the shutter release to take the picture
- 37. Reframing Oakhurst, West Point, GA
- 38. Camera Modes Point and Shoot Modes Creative Modes
- 39. Portrait Mode Produces softly focused backgrounds for flattering portraits
- 40. Portrait Mode The portrait mode can be selected by rotating the dial on top of your Canon camera. This normally has a picture of a face. This is ideal for photographing people. Portrait mode can be used to set the color tones so that they are perfect for skin tones.
- 41. Landscape Mode Designed to keep both near and far object in sharp focus
- 42. Landscape Mode Infinity Mode Landscape mode is also available on all Canon cameras. This can be selected by choosing the option which looks like mountains. This is used when photographing landscapes such as mountains or beaches. Large depth of field and puts everything into focus.
- 43. Macro Mode Close-up Mode Produces softly focused backgrounds especially Suitable for close-up of flowers and other nature subjects
- 44. Macro Mode Macro or Close up can be used to photograph something small up close. If you want to take a photo of a flower, for example, which fills the whole frame then you will need to use this mode. This allows you to capture small objects in outstanding detail. Macro mode is almost always shown as a small flower. For taking photos of from 1” to 1’ from the subject. ( check camera manual)
- 45. Sports Mode Selects a faster shutter speed to capture moving subjects without blur.
- 46. Spots Mode It's also possible to select sports mode which can be used to capture fast moving objects. This is perfect for people running or animals moving quickly. Sports mode is normally shown by a picture of a man running. Freezes the action.
- 47. Spots Mode Light freezes action. One photo was taken in bright daylight and the other at night. The daylight picture is sharper
- 48. Night Portrait Mode Same as Portrait mode, but combines flash with a slow shutter speed to produce softer lighting and brighter backgrounds. Use a tripod to avoid camera shake.
- 49. Night Mode If you want to photograph people at night or in low light conditions then you will need to use night portrait mode.
- 50. Night Mode If you want to photograph people or objects at night or in low light conditions then you will need to use night portrait mode. Tripods or other camera support are almost necessary to get quality night shots. This was a time lapse photo.
- 51. Flash Off Mode Same as full automatic except there is no flash
- 52. Flash Off Mode There are many different modes which can control the flash. This is perhaps the most useful. By putting the camera in this mode you will be able to force the flash to never switch on. This is useful when you are not allowed to use the flash or do not want to use it to achieve a desired effect.
- 53. On Camera Flash •Flash can be activated by a button On the side of the lens. •Flash can be cut off by using the mode selection dial on the top of the camera
- 54. Flash on (Speed light flash) Flash is on but I used the zoom and was about 4 feet away from the subject. This distance allows uniform lighting but does not “blowout” the subject.
- 55. Full Automatic Mode Completely automatic photography. The camera analyzes the scene and tries to choose settings that produce the best results.
- 56. Automatic Mode This makes your camera a Point and Shoot camera.
- 57. Homework Take photographs using semi-automatic settings: •Portrait mode •Landscape mode •Sport mode – Motion •Macro mode •Night portrait mode •Flash Off mode •Flash on (built in flash) If possible, send photos in low resolution (72 dpi) to me and we will look at them next week. julie@julieartstudios.com
- 58. Next Lesson Manual Modes These AV preset modes are available on all Canon cameras. These make using the camera very quick and easy. However, it's also possible to make various adjustments to manual settings. Put your camera in a completely manual mode. Then you will be able to adjust the ISO, shutter speed and aperture as desired. If you do ever experience problems then you can always reset the camera to its default settings. This makes it possible to restart your camera back to the state when you brought it.
Hinweis der Redaktion
- It was produced on a polished pewter plate in 1826. Niépce captured the photo with a camera obscura focused onto a sheet of 20 × 25 cm oil-treated bitumen. As a result of the 8-hour exposure, sunlight illuminates the buildings on both sides.
- Ghostly patterns of the lens diaphragm