
Empfohlen
Weitere ähnliche Inhalte
Was ist angesagt?
Ähnlich wie Herramienta rotativa de velocidad variable 300 lista de partes
Ähnlich wie Herramienta rotativa de velocidad variable 300 lista de partes (20)
Herramienta rotativa de velocidad variable 300 lista de partes
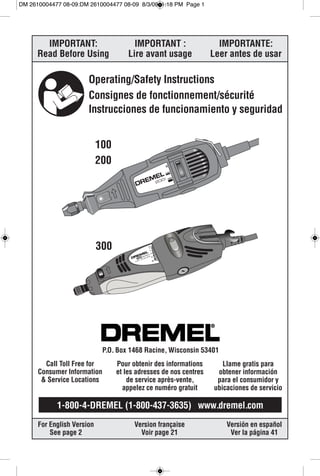
- 1. DM 2610004477 08-09:DM 2610004477 08-09 8/3/09 1:18 PM Page 1 IMPORTANT: IMPORTANT : IMPORTANTE: Read Before Using Lire avant usage Leer antes de usar Operating/Safety Instructions Consignes de fonctionnement/sécurité Instrucciones de funcionamiento y seguridad 100 200 300 P.O. Box 1468 Racine, Wisconsin 53401 Call Toll Free for Pour obtenir des informations Llame gratis para Consumer Information et les adresses de nos centres obtener información & Service Locations de service après-vente, para el consumidor y appelez ce numéro gratuit ubicaciones de servicio 1-800-4-DREMEL (1-800-437-3635) www.dremel.com For English Version Version française Versión en español See page 2 Voir page 21 Ver la página 41
- 2. DM 2610004477 08-09:DM 2610004477 08-09 8/3/09 1:18 PM Page 2 Power Tool Safety Rules ! WARNING Read and understand all instructions. Failure to follow all instructions listed below, may result in electric shock, fire and/or serious personal injury. SAVE THESE INSTRUCTIONS Work Area When operating a power tool outside, use Keep your work area clean and well lit. an outdoor extension cord marked "W-A" Cluttered benches and dark areas invite or "W." These cords are rated for outdoor use accidents. and reduce the risk of electric shock. Refer to “Recommended sizes of Extension Cords” in Do not operate power tools in explosive the Accessory section of this manual. atmospheres, such as in the presence of flammable liquids, gases, or dust. Power Personal Safety tools create sparks which may ignite the dust Stay alert, watch what you are doing and or fumes. use common sense when operating a Keep by-standers, children, and visitors power tool. Do not use tool while tired or away while operating a power tool. under the influence of drugs, alcohol, or Distractions can cause you to lose control. medication. A moment of inattention while operating power tools may result in serious Electrical Safety personal injury. Double Insulated tools are equipped with a Dress properly. Do not wear loose clothing polarized plug (one blade is wider than the or jewelry. Contain long hair. Keep your other.) This plug will fit in a polarized outlet hair, clothing, and gloves away from only one way. If the plug does not fit fully moving parts. Loose clothes, jewelry, or long in the outlet, reverse the plug. If it still does hair can be caught in moving parts. Keep not fit, contact a qualified electrician to handles dry, clean and free from oil and install a polarized outlet. Do not change grease. the plug in any way. Double Insulation eliminates the need for the three wire Avoid accidental starting. Be sure switch is grounded power cord and grounded power “OFF” before plugging in. Carrying tools with supply system. Before plugging in the tool, be your finger on the switch or plugging in tools certain the outlet voltage supplied is within the that have the switch “ON” invites accidents. voltage marked on the nameplate. Do not use Remove adjusting keys or wrenches before “AC only” rated tools with a DC power supply. turning the tool “ON”. A wrench or a key that Avoid body contact with grounded is left attached to a rotating part of the tool may surfaces such as pipes, radiators, ranges result in personal injury. and refrigerators. There is an increased risk Do not overreach. Keep proper footing and of electric shock if your body is grounded. If balance at all times. Proper footing and operating the power tool in damp locations is balance enables better control of the tool in unavoidable, a Ground Fault Circuit Interrupter unexpected situations. must be used to supply the power to your tool. Electrician’s rubber gloves and footwear will Use safety equipment. Always wear eye further enhance your personal safety. protection. Dust mask, non-skid safety shoes, hard hat, or hearing protection must be used Don't expose power tools to rain or wet for appropriate conditions. conditions. Water entering a power tool will increase the risk of electric shock. Tool Use and Care Use clamps or other practical way to Do not abuse the cord. Never use the cord secure and support the workpiece to a to carry the tools or pull the plug from an stable platform. Holding the work by hand or outlet. Keep cord away from heat, oil, sharp against your body is unstable and may lead to edges or moving parts. Replace damaged loss of control. cords immediately. Damaged cords increase the risk of electric shock. Do not force tool. Use the correct tool for your application. The correct tool will do the 2
- 3. DM 2610004477 08-09:DM 2610004477 08-09 8/3/09 1:18 PM Page 3 job better and safer at the rate for which it is serviced before using. Many accidents are designed. caused by poorly maintained tools. Develop a Do not use tool if switch does not turn it periodic maintenance schedule for your tool. “ON” or “OFF”. Any tool that cannot be Use only accessories that are controlled with the switch is dangerous and recommended by the manufacturer for must be repaired. your model. Accessories that may be suitable Disconnect the plug from the power source for one tool, may become hazardous when before making any adjustments, changing used on another tool. accessories, or storing the tool. Such Service preventive safety measures reduce the risk of Tool service must be performed only by starting the tool accidentally. qualified repair personnel. Service or Store idle tools out of reach of children and maintenance performed by unqualified other untrained persons. Tools are personnel could result in a risk of injury. For dangerous in the hands of untrained users. example: internal wires may be misplaced or pinched, safety guard return springs may be Maintain tools with care. Keep cutting tools improperly mounted. sharp and clean. Properly maintained tools, with sharp cutting edges are less likely to bind When servicing a tool, use only identical and are easier to control. Any alteration or replacement parts. Follow instructions in modification is a misuse and may result in a the Maintenance section of this manual. dangerous condition. Use of unauthorized parts or failure to follow Maintenance Instructions may create a risk of Check for misalignment or binding of electric shock or injury. Certain cleaning agents moving parts, breakage of parts, and any such as gasoline, carbon tetrachloride, other condition that may affect the tools ammonia, etc. may damage plastic parts. operation. If damaged, have the tool Safety Rules for Rotary Tools Accessories must be rated for at least the Be aware of the switch location, when speed recommended on the tool warning placing the tool down or when picking the label. Wheels and other accessories running tool up. You may accidentally activate the over rated speed can fly apart and cause switch. injury. Always hold the hand piece firmly in your Hold tool by insulated gripping surfaces hands during the start-up. The reaction when performing an operation where the torque of the motor, as it accelerates to full cutting tool may contact hidden wiring or speed, can cause the shaft to twist. its own cord. Contact with a "live" wire will Always wear safety goggles and dust make exposed metal parts of the tool "live" mask. Use only in well ventilated area. and shock the operator. If cutting into existing Using personal safety devices and working in walls or other blind areas where electrical safe environment reduces risk of injury. wiring may exist is unavoidable, disconnect all fuses or circuit breakers feeding this worksite. After changing the bits or making any adjustments, make sure the collet nut and Do not operate the flexible shaft with a any other adjustment devices are securely sharp bend. Over bending the shaft can tightened. Loose adjustment device can generate excessive heat on the jacket or hand unexpectedly shift, causing loss of control, piece. The recommended minimum is 5" loose rotating components will be violently radius. thrown. Always disconnect the power cord from Do not reach in the area of the spinning the power source before making any bit. The proximity of the spinning bit to your adjustments or attaching any accessories. hand may not always be obvious. You may unexpectedly cause the tool to start leading to serious personal injury. 3
- 4. DM 2610004477 08-09:DM 2610004477 08-09 8/3/09 1:18 PM Page 4 Safety Rules for Rotary Tools - (cont.) Allow brushes to run at operating speed in the workpiece. Nails or foreign objects can for at least one minute before using wheel. cause the bit to jump. During this time no one is to stand in front Never start the tool when the bit is or in line with the brush. Loose bristles or engaged in the material. The bit cutting wires will be discharged during the run-in time. edge may grab the material causing loss of Wire and bristle brushes must never be control of the cutter. operated at speeds greater than Avoid bouncing and snagging the wheel, 15,000/min. Direct the discharge of the especially when working corners, sharp spinning wire brush away from you. Small edges etc. This can cause loss of control and particles and tiny wire fragments may be kick-back. discharged at high velocity during the “cleaning” action with these brushes and may The direction of feed with the bit into the become imbedded in your skin. Bristles or material when carving, routing or cutting is wires will be discharged from the brush at high very important. Always feed the bit into speeds. the material in the same direction as the cutting edge is exiting from the material Wear protective gloves and face shield (which is the same direction as the chips with wire or bristle brushes. Apply wire or are thrown). Feeding the tool in the wrong bristle brushes lightly to the work as only direction, causes the cutting edge of the bit to the tips of the wire/bristles do the work. climb out of the work and pull the tool in the “Heavy” pressure on bristles will cause the direction of this feed. wire or bristle to become overstressed, resulting in a wiping action and will cause the If the workpiece or bit becomes jammed or bristles/wire to be discharged. bogged down, turn the tool “OFF” by the switch. Wait for all moving parts to stop Carefully handle both the tool and and unplug the tool, then work to free the individual grinding wheels to avoid jammed material. If the switch to the tool is chipping or cracking. Install a new wheel if left “ON” the tool could restart unexpectedly tool is dropped while grinding. Do not use causing serious personal injury. a wheel that may be damaged. Fragments from a wheel that bursts during operation will Do not leave a running tool unattended, fly away at great velocity possibly striking you turn power off. Only when tool comes to a or bystanders. complete stop is it safe to put it down. Never use dull or damaged bits. Sharp bits Do not grind or sand near flammable must be handled with care. Damaged bits materials. Sparks from the wheel could ignite can snap during use. Dull bits require more these materials. force to push the tool, possibly causing the bit Do not touch the bit or collet after use. to break. After use the bit and collet are too hot to be Use clamps to support workpiece touched by bare hands. whenever practical. Never hold a small Regularly clean the tool's air vents by workpiece in one hand and the tool in the compressed air. Excessive accumulation of other hand while in use. Allow for powdered metal inside the motor housing may sufficient space, at least 6", between your cause electrical failures. hand and the spinning bit. Round material Do not allow familiarity gained from such as dowel rods, pipes or tubing have a frequent use of your rotary tool to become tendency to roll while being cut, and may commonplace. Always remember that a cause the bit to “bite” or jump toward you. careless fraction of a second is sufficient to Clamping a small workpiece allows you to use inflict severe injury. both hands to control the tool. Do not alter or misuse tool. Any alteration or Inspect your workpiece before cutting. modification is a misuse and may result in When cutting irregularly shaped serious personal injury. workpieces, plan your work so it will not slip and pinch the bit and be torn from This product is not intended for use as a your hand. For example, if carving wood, dental drill, in human or veterinary medical make sure there are no nails or foreign objects 4
- 5. DM 2610004477 08-09:DM 2610004477 08-09 8/3/09 1:18 PM Page 5 applications. Serious personal injury may Some dust created by result. ! WARNING power sanding, sawing, When using the steel saws, cutoff wheels, grinding, drilling, and other construction high speed cutters or tungsten carbide activities contains chemicals known to cutters, always have the work secure ly cause cancer, birth defects or other clamped. Never attempt to hold the work reproductive harm. Some examples of with one hand while using any of these these chemicals are: accessories. The reason is that these wheels • Lead from lead-based paints, will grab if they become slightly canted in the • Crystalline silica from bricks and cement and groove, and can kick back causing loss of other masonry products, and control resulting in serious injury. Your second hand should be used to steady and guide the • Arsenic and chromium from chemically hand holding the tool. When a cutoff wheel treated lumber. grabs, the wheel itself usually breaks. When Your risk from these exposures varies, the steel saw, high speed cutters or tungsten depending on how often you do this type of carbide cutter grab, it may jump from the work. To reduce your exposure to these groove and you could lose control of the tool. chemicals: work in a well ventilated area, and work with approved safety equipment, such as those dust masks that are specially designed to filter out microscopic particles. 5
- 6. DM 2610004477 08-09:DM 2610004477 08-09 8/3/09 1:18 PM Page 6 Symbols IMPORTANT: Some of the following symbols may be used on your tool. Please study them and learn their meaning. Proper interpretation of these symbols will allow you to operate the tool better and safer. Symbol Name Designation/Explanation V Volts Voltage (potential) A Amperes Current Hz Hertz Frequency (cycles per second) W Watt Power kg Kilograms Weight min Minutes Time s Seconds Time Diameter Size of drill bits, grinding wheels, etc. n No load speed Rotational speed, at no load .../min Revolutions or reciprocation per minute Revolutions, strokes, surface speed, orbits etc. per minute 0 Off position Zero speed, zero torque... 1, 2, 3, ... Selector settings Speed, torque or position settings. I, II, III, Higher number means greater speed 0 Infinitely variable selector with off Speed is increasing from 0 setting Arrow Action in the direction of arrow Alternating current Type or a characteristic of current Direct current Type or a characteristic of current Alternating or direct current Type or a characteristic of current Class II construction Designates Double Insulated Construction tools. Earthing terminal Grounding terminal Warning symbol Alerts user to warning messages Li-ion RBRC seal Designates Li-ion battery recycling program This symbol designates that This symbol designates this tool is listed by the that this tool is listed by Canadian Standards Underwriters Laboratories. Association, to United States and Canadian Standards. This symbol designates This symbol designates This symbol designates that that that this tool is listed by this tool is listed by this tool the Canadian Standards Underwriters Laboratories, to complies Association. United States and Canadian to NOM Standards. Mexican Standards. This symbol designates that this tool is listed by the Intertek Testing Services, to United States and Canadian Standards. 6
- 7. DM 2610004477 08-09:DM 2610004477 08-09 8/3/09 1:18 PM Page 7 Functional Description and Specifications Disconnect the plug from the power source before making any ! WARNING assembly, adjustments or changing accessories. Such preventive safety measures reduce the risk of starting the tool accidentally. Models 100 & 200 SWITCH High Speed Rotary Tools (100 SINGLE SPEED) (200 TWO SPEED) HANGER SHAFT LOCK BUTTON HOUSING CAP CORD COLLET COLLET NUT VENTILATION OPENINGS VENTILATION BRUSH COVER OPENINGS (one on each side) COLLET WRENCH ON/OFF HANGER WRENCH Model 300 SWITCH STORAGE High Speed Rotary Tool SHAFT LOCK BUTTON HOUSING CAP COLLET CORD COLLET NUT VENTILATION OPENINGS VENTILATION BRUSH COVER OPENINGS (one on each side) Model number 100 200 300 Voltage rating 120V 50 - 60Hz 120V 50 - 60Hz 120V 50 - 60Hz Amperage rating 1.15A HI 1.15A, LO 0,80A 1.15A No load speed n0 35,000/min n0 15,000/35,000/min n0 5,000-35,000/min Collet capacities 1/32, 1/16", 3/32", 1/8" 1/32, 1/16", 3/32", 1/8" 1/32, 1/16", 3/32", 1/8" 7
- 8. DM 2610004477 08-09:DM 2610004477 08-09 8/3/09 1:18 PM Page 8 Assembly Always unplug Rotary Tool ! WARNING COLLET IDENTIFICATION CHART before changing accessories, changing collets or servicing your Rotary Collet sizes can be identified by the rings on Tool. the back end of collet. 1/32" Collet has one (1) ring. COLLET SHAFT 1/16" Collet has two (2) rings. WRENCH LOCK 3/32" Collet has three (3) rings. BUTTON 1/8" Collet has no rings. (Included in most tool kits on the tool) 480 1/8" COLLET COLLET NUT TO TO COLLET TIGHTEN LOOSEN NUT COLLET NUT — To loosen, first press shaft IDENTIFICATION lock button and rotate the shaft by hand until RINGS the lock engages the shaft preventing further rotation. 481 Do not engage lock while 3/32" ! CAUTION the Rotary Tool is running. 483 COLLET 482 With the shaft lock engaged use the collet 1/32" 1/16" COLLET wrench to loosen the collet nut if necessary. COLLET The collet nut must be loosely threaded on when inserting an accessory. Change BALANCING ACCESSORIES — For accessories by inserting the new one into the precision work, it is important that all collet as far as possible to minimize runout and accessories be in good balance (much the unbalance. With the shaft lock engaged, finger same as the tires on your automobile). To true tighten the collet nut until the accessory shank up or balance an accessory, slightly loosen is gripped by the collet. Avoid excessive collet nut and give the accessory or collet a 1/4 tightening of the collet nut when there is no turn. Retighten collet nut and run the Rotary bit inserted. Tool. You should be able to tell by the sound COLLETS — Four different size collets (see and feel if your accessory is running in illustration), to accommodate different shank balance. Continue adjusting in this fashion until sizes, are available for your Rotary Tool. To best balance is achieved. To maintain balance install a different collet, remove the collet nut on abrasive wheel points, before each use, and remove the old collet. Insert the unslotted with the wheel point secured in the collet, turn end of the collet in the hole in the end of the on the Rotary Tool and run the 415 Dressing tool shaft. Replace collet nut on the shaft. Stone lightly against the revolving wheel point. This removes high spots and trues up the Always use the collet which ! CAUTION matches the shank size of wheel point for good balance. the accessory you plan to use. Never force The hanger is provided for the use of hanging a larger diameter shank into a collet. your tool while using the flex-shaft or for storage. If you do not use the hanger, remove Note: Most rotary tool kits do not include all it from the tool and snap it back into place four collets sizes. underneath the cord so it will be out of the way while the tool is in use. 8
- 9. DM 2610004477 08-09:DM 2610004477 08-09 8/3/09 1:18 PM Page 9 Operating Instructions The Rotary Tool is a handful of high-speed power. It serves as a carver, grinder, polisher, sander, cutter, power brush, drill and more. The Rotary Tool has a small, powerful electric universal motor, is comfortable in the hand, and is made to accept a large variety of accessories including abrasive wheels, drill bits, wire brushes, polishers, engraving cutters, router bits, cutting wheels and attachments. Sharpen Tools Drilling Accessories come in a variety of shapes and permit you to do a number of different jobs. As you be come familiar with the range of accessories and their uses, you will learn just how versatile the Rotary Tool is. You’ll see dozens of uses you hadn’t thought of before. The real secret of the Rotary Tool is its speed. To understand the advantages of its high speed, you have to know that the standard portable electric drill runs at speeds up to 2,800 revolutions per minute. The Rotary Tool Shape Wood Carve Wood operates at speeds up to 35,000 revolutions per minute. The typical electric drill is a low- speed, high torque tool; the Rotary Tool is just the opposite – a high-speed, low torque tool. The major difference to the user is that in the high speed tools, the speed combined with the accessory mounted in the collet does the work. You don’t apply pressure to the tool, but simply hold and guide it. In the low speed tools, you not only guide the tool, but also apply pressure to it, as you do, for example, when drilling a hole. Deburr Metal Cut Metal It is this high speed, along with its compact and can fly apart as they come up to speed. size and wide variety of special accessories This is not common, but it does happen. and attachments, that makes the Rotary Tool different from other tools. The speed enables it Practice on scrap materials first to see how the to do jobs low speed tools cannot do, such as Rotary Tool's high speed action performs. cutting hardened steel, engraving glass, etc. Keep in mind that the work is done by the Getting the most out of your Rotary Tool is a speed of the tool and by the accessory in the matter of learning how to let this speed work collet. You should not lean on or push the tool for you. To learn about more uses and the during use. versatility of Dremel accessories and Instead, lower the spinning accessory lightly to attachments refer to this Owner's Manual or the work and allow it to touch the point at check our website at www.Dremel.com. which you want cutting (or sanding or etching, Using the Rotary Tool etc.) to begin. Concentrate on guiding the tool The first step in learning to use the Rotary Tool over the work using very little pressure from is to get the “feel” of it. Hold it in your hand and your hand. Allow the accessory to do the work. feel its weight and balance. Feel the taper of Usually, it is best to make a series of passes the housing. This taper permits the Rotary Tool with the tool rather than attempt to do all the to be grasped much like a pen or pencil work in one pass. To make a cut, for example, (Figure A). pass the tool back and forth over the work, Always hold the tool away from your face. much as you would a small paint brush. Cut a Accessories can be damaged during handling, little material on each pass until you reach the 9
- 10. DM 2610004477 08-09:DM 2610004477 08-09 8/3/09 1:18 PM Page 10 desired depth. For most work, the gentle touch less likely to make errors, and will get the most is best. With it, you have the best control, are efficient work out of the accessory. Questions or Problems? Call 1-800-437-3635 or check our website at www.Dremel.com FIG. A FIG. B For best control in close work, grip the The “Golf Grip” method of holding the Rotary Tool like a pencil between your tool is used for more aggressive thumb and forefinger. operations such as grinding a flat surface or using cutoff wheels. WARNING Whenever you hold the tool, be careful ! CAUTION not to cover the air vents with your hand. This blocks the air flow and causes the motor to overheat. Wear Eye Protection Operating Speeds To select the right speed for each job, use a When the switch indicator is on the high practice piece of material. setting, the tool runs at about 35,000 RPM. NOTE: Speed is affected by voltage (MODEL 300) changes. A reduced incoming voltage will On the vari able speed model, there are slow the RPM of the tool. switch setting indicators marked with a line. Slide to the number on the housing to select (MODEL 100) the operating speed needed from 5,000 – On the single speed model, there is an ON- 35,000 RPM. You can refer to the charts OFF switch. When the switch is on, the tool on page 17, 18, 19 and 20 to determine the runs at 35,000 RPM. proper speed, based on the material being (MODEL 200) worked and the type of accessory being On the two-speed model, there is a LO and HI used. These charts enable you to select switch. When the switch indicator is on the low both the correct acces sory and the setting, the tool runs at about 15,000 RPM. optimum speed at a glance. 10
- 11. DM 2610004477 08-09:DM 2610004477 08-09 8/3/09 1:18 PM Page 11 The speed of Rotary Tool is controlled by The point to remember is this: You can do the setting this indicator on the housing. great majority of work with the single speed at its regular speed of 35,000 RPM. But for certain materials and types of work, you need slower speeds — which is the reason the variable speed models are available. To aid you in determining the optimum operational speed for different materials and different accessories, we have constructed a series of tables that appear on page 17, 18, 19 and 20. By referring to these tables, you can discover the recommended speeds for each The Settings for Approximate Revolutions type of accessory. Look these tables over and Per Minute on Rotary Tool Variable Speed become familiar with them. Model 300. Ultimately, the best way to determine the Switch Setting Speed Range correct speed for work on any material is to practice for a few minutes on a piece of scrap, 2 15,000 – 18,000 RPM even after referring to the chart. You can *4 19,000 – 11,000 RPM quickly learn that a slower or faster speed is 6 12,000 – 17,000 RPM more effective just by observing what happens as you make a pass or two at different speeds. 8 18,000 – 24,000 RPM When working with plastic, for example, start at 10 25,000 – 35,000 RPM a slow rate of speed and increase the speed until you observe that the plastic is melting at * 300 Wire Brush Setting. the point of contact. Then reduce the speed Needs for Slower Speeds slightly to get the optimum working speed. Certain materials, however, (some plastics and Some rules of thumb in regard to speed: precious metals, for ex ample) require a relatively slow speed because at high speed 1. Plastic and other materials that melt at low the friction of the accessory generates heat temperatures should be cut at low speeds. and may cause damage to the material. 2. Polishing, buffing and cleaning with any Slow speeds (15,000 RPM or less) usually are type of bristle brush must be done at best for polishing operations employing the felt speeds not greater than 15,000 RPM to polishing accessories. They may also be best prevent damage to the brush. for working on delicate projects as “eggery” 3. Wood should be cut at high speed. work, delicate wood carving and fragile model 4. Iron or steel should be cut at high speed. If parts. (All brushing applications require lower a high speed steel cutter starts to chatter — speeds to avoid wire discharge from the this normally means it is running too slow. holder.) 5. Aluminum, copper alloys, lead alloys, zinc If you need it, single-speed models also can have alloys and tin may be cut at various speeds, speed control by using a Model 221 foot control depending on the type of cutting being unit. done. Use paraffin or other suitable Not for use with variable lubricant on the cutter to prevent the cut ! CAUTION speed or two speed models material from adhering to the cutter teeth. 200 or 300. Use with external speed control will Increasing the pressure on the tool is not the damage the variable/two speed electronics. answer when it is not performing as you think it Higher speeds are better for carving, cutting, should. Perhaps you should be using a routing, shaping, cutting dadoes or rabbets in different accessory, and perhaps an wood. adjustment in speed would solve the problem. Leaning on the tool does not help. Hardwoods, metals and glass require high speed operation, and drilling should also be Let speed do the work! done at high speeds. Use only Dremel®, high-performance accessories. 11
- 12. DM 2610004477 08-09:DM 2610004477 08-09 8/3/09 1:18 PM Page 12 Maintenance Information Service contacts the commutator is rough and/or Preventive maintenance pitted, they should be replaced. Check both ! WARNING performed by unauthorized brushes (Figure D). per so n nel may result in misplacing of internal wires and components which could FIG. C cause serious hazard. We recommend that all tool service be performed by a Dremel Service Facility. To avoid injury from ! WARNING unexpected starting or electrical shock, always remove plug from wall outlet before performing service or cleaning. CARBON BRUSHES The brushes and commutator in your tool have been engineered for many hours of dependable service. In order to prepare your brushes for use, run your tool at full speed for 5 minutes under no load. This will properly “seat” your brushes, BRUSH FIG. D which extends the life of both your brushes CAP BRUSH and your tool. SPRING To maintain peak efficiency of the motor, we recommend every 40 - 50 hours the brushes be examined. Only genuine Dremel replace- ment brushes specially designed for your tool should be used. MAINTENANCE OF REPLACEABLE BRUSHES ON MODELS 100, 200 & 300 BRUSH The brushes should be inspected frequently when tools are used continuously. If your tool runs sporadically, loses power, makes unusual noises or runs at a reduced speed, check the CURVED END OF BRUSH MUST brushes. MATCH CURVATURE OF HOUSING ! CAUTION To continue using the tool in this condition will Usually the brushes will not wear out simul- taneously. If one brush is worn out, replace permanently damage your tool. both brushes. Make sure the brushes are Follow these steps to check/change the rotary installed as illustrated. The curved surface tool brushes: of the brush must match the curvature of 1. With the power cord unplugged, place the the commutator. tool on a clean surface. Use the tool 3. After replacing brushes the tool should be wrench as a screwdriver to remove the run at no-load; place it on a clean surface brush caps in a counter-clockwise direction and run it freely at full speed for 5 minutes (Figure C). before loading (or using) the tool. This will 2. Remove the brushes from the tool by allow the brushes to “seat” properly and will pulling on the spring that is attached to the give you more hours of life from each set of carbon brush. If the brush is less than 1/8" brushes. This will also extend the total life of long and the end surface of the brush that your tool since the commutator surface will “wear” longer. 12
- 13. DM 2610004477 08-09:DM 2610004477 08-09 8/3/09 1:18 PM Page 13 BEARINGS Ventilation openings and switch levers must be Models 100, 200 & 300 have double ball kept clean and free of foreign matter. Do not bearing construction. Under normal use they attempt to clean by inserting pointed objects will not require lubrication. through openings. Cleaning Certain cleaning agents and To avoid accidents always ! CAUTION sol vents damage plastic ! WARNING dis connect the tool from parts. Some of these are: gasoline, carbon the power supply before cleaning or tetrachloride, chlorinated cleaning solvents, performing any maintenance. The tool may ammonia and house hold detergents that be cleaned most effectively with compressed contain ammonia. dry air. Always wear safety goggles when cleaning tools with compressed air. Extension Cords RECOMMENDED SIZES OF EXTENSION CORDS If an extension cord is 120 VOLT ALTERNATING CURRENT TOOLS ! WARNING necessary, a cord with adequate size conductors that is capable Tool’s Cord Size in A.W.G. Wire Sizes in mm2 of carrying the current necessary for your Ampere Cord Length in Feet Cord Length in Meters Rating tool must be used. This will prevent 25 50 100 150 15 30 60 120 excessive voltage drop, loss of power or 3-6 18 16 16 14 0.75 0.75 1.5 2.5 overheating. Grounded tools must use 3-wire 6-8 18 16 14 12 0.75 1.0 2.5 4.0 extension cords that have 3-prong plugs and 8-10 18 16 14 12 0.75 1.0 2.5 4.0 receptacles. 10-12 16 16 14 12 1.0 2.5 4.0 — NOTE: The smaller the gauge number, the 12-16 14 12 — — — — — — heavier the cord. Dremel Accessories ® ! WARNING Use only Dremel , high-performance accessories. Other accessories are not designed for this tool and may lead to personal injury or property damage. The number and variety of accessories for the these so that you will have the proper size of Rotary Tool are almost limitless. There is a collet for any accessory or drill bit you want to category suited to almost any job you might use. Currently, the 1/8", 3/32",1/32" and have to do — and a variety of sizes and shapes 1/16" collets accommodate all of the avail - within each category which enables you to get able Dremel accessories. 1/8" collets are the perfect accessory for every need. included in most rotary tool kits. Refer to the DREMEL ACCESSORY ORDER Mandrels FORM for illustrations of the accessories A mandrel is a shank with a threaded or screw available. These accessories may be found head, which are required when you use at your local hardware, hobby or home polishing accessories, cutting wheels, sanding center dealers. discs, and pol ish ing points. The reason mandrels are used is that sanding discs, cutting wheels and similar accessories must be replaced frequently. The mandrel is a per- Collets manent shank, allowing you to replace only the If you expect to use a variety of accessories, worn head when necessary, thus saving the we recommend that in the beginning you expense of replacing the shaft each time. purchase a complete set of four collets. Store 13
- 14. DM 2610004477 08-09:DM 2610004477 08-09 8/3/09 1:18 PM Page 14 wheels, sanding discs and polishing wheels. 1/8" shank. Screw Mandrel N° 401 This is a screw mandrel used with the felt polishing tip and felt polishing wheels. 1/8" shank. EZ Lock Mandrel N° 402 The Dremel EZ Lock makes accessory changes easy as PULL - TWIST - RELEASE. Small Screw Mandrel N° 402 The one-piece mandrel design simplifies the This is a mandrel with a small screw at its tip, process of changing cutting wheels and makes and is used with emery and fiberglass cutting it easy to cut through plastic. High Speed Cutters Aluminum Oxide Grinding Stones Available in many shapes, high speed cutters (red/brown) are used in carving, cutting and slotting in Round, pointed, flat — you name the shape wood, plastics and soft metals such as and there is one available in this category. aluminum, copper and brass. These are the These are made of aluminum oxide and cover accessories to use for freehand routing or virtually every possible kind of grinding carving in wood or plastic, and for precision application. Use them for sharpening lawn cutting. Made of high quality steel. 1/8" shank. mower blades, screwdriver tips, knives, scissors, chisels and other cutting tools. Use to remove flash from metal castings, deburring any metal after cutting, smoothing welded Tungsten Carbide Cutters joints, grinding off rivets and removing rust. These are tough, long-lived cutters for use on These grinding stones can be resharped with a hardened steel, fired ceramics and other very dressing stone. In machine shops, high speed hard ma terials. They can be used for drills and cutters normally are ground with engraving on tools and garden equipment. 1/8" aluminum oxide wheels. 1/8" shank. shanks. Engraving Cutters This group has a wide variety of sizes and Silicon Carbide Grinding Stones shapes, and are made for intricate work on (blue/green) ceramics (greenware), wood carvings, jewelry Tougher than aluminum oxide points, these are and scrimshaw. They often are used in making made especially for use on hard materials complicat ed printed circuit boards. They such as glass and ce ramics. Typical uses should not be used on steel and other very might be the removal of stilt marks and excess hard materials but are excellent on wood, glaze on ceramics and engraving on glass. plastic and soft metals. 3/32" shank. 1/8" shank. Diamond Wheel Points Excellent for fine detail work on wood, jade, ceramic, glass and other hard material. Bits Structured Tooth Tungsten Carbide Cutters are covered with diamond particles. 3/32" Fast cutting, needle-sharp teeth for greater shanks. (Not recommended for drilling) material removal with minimum loading. Use on fiberglass, wood, plastic, epoxy and rubber. 1/8" shank. 14
- 15. DM 2610004477 08-09:DM 2610004477 08-09 8/3/09 1:18 PM Page 15 Dremel Accessories (Cont.) 3. Apply the brush to the work in such a way that as much of the brush face as possible is in full contact with the work. Applying the side or edge of the brush to the work will result in wire breakage and shortened brush life. Wire Brushes CORRECT: Three different shapes of wire brushes are Wire tips doing the work. available. For best results wire brushes should be used at speeds not greater than 15,000 RPM. Refer to Operating Speeds section for proper tool speed setting. The three shapes come in three different materials: stainless steel, brass and carbon wire. The stainless steel perform well on pewter, aluminum, stainless steel, and other metals, without leaving "after-rust". Brass brushes are non sparking, and softer than steel; making them good for use on soft metal like gold, cooper and brass. The carbon wire brushes are good for general purpose cleaning. Polishing Accessories These include an impregnated polishing point and an impregnated polishing wheel for bringing metal surfaces to smooth finish; a felt polishing tip and felt polishing wheel, and cloth Bristle Brushes polishing wheel, all used for polishing plastics, These are excellent cleaning tools on metals, jewelry and small parts. Also included silverware, jewelry and antiques. The three in this group is a polishing compound (No. 421) shapes make it possible to get into tight for use with the felt and cloth polishers. corners and other difficult places. Bristle brushes can be used with polishing compound Polishing points make a very smooth surface, for faster cleaning or polishing. but a high luster is obtained using felt or cloth wheels and polishing compound. For best Brushing Pressure results polishing accessories should be 1. Remember, the tips of a wire brush do the used at speeds not greater than 15,000 work. Operate the brush with the lightest RPM. pressure so only the tips of the wire come in contact with the work. No polishing compound is needed when using the 425 Polishing Wheel. 2. If heavier pressures are used, the wires will be overstressed, resulting in a wiping action; and if this is continued, the life of the brush will be shortened due to wire fatigue. INCORRECT: Excessive pressure can cause wire breakage. Aluminum Oxide Abrasive Wheels Use to remove paint, deburr metal, polish stainless steel and other metals. Available in fine and medium grits. 1/8" shank. 15
- 16. DM 2610004477 08-09:DM 2610004477 08-09 8/3/09 1:18 PM Page 16 Dremel Accessories (Cont.) operations. Use them for cutting off frozen bolt heads and nuts, or to reslot a screw head which has become so damaged that the Sanding Accessories screwdriver won’t work in it. Fine for cutting Sanding discs in fine, medium and coarse BX cable, small rods, tubing, cable and cutting grades are made to fit mandrel No. 402. They rectangular holes in sheet metal. can be used for nearly any small sanding job you might have, from model making to fine furniture finishing. In addition, there is the drum sander, a tiny drum which fits into the Rotary Drywall Cutting Bit Tool and makes it possible to shape wood, Gives you fast, clean cuts in drywall. smooth fiberglass, sand inside curves and other difficult places, and other sanding jobs. You replace the sanding bands on the drum as they become worn and lose their grit. Bands Tile Cutting Bit come in fine medium and coarse grades. Cuts ceramic wall tile, cement board, and Flapwheels grind and polish flat or contoured plaster. surfaces. They are used most effectively as a finishing sander after heavier surface sanding and material removal is completed. Flapwheels Spiral Cutting Bit come in fine and coarse grades. Buffs are a Cuts through all types of wood and wood great finishing accessory for cleaning and light composites. sanding. They work effectively on metal, glass, wood, aluminum and plastics. Coarse and medium buffs are sold together. Do not exceed 15,000 RPM in speed. 1/8" shank. High Speed Router Bits For routing, inlaying, and mortising in wood and other soft materials. Use with Dremel No. 335 Router attachment and No. 231 Grinding Wheel Shaper/Router table. Use for deburring, removing rust, and general purpose grinding. Use with Mandrel #402. Cutting Wheels These thin discs of emery or fiberglass are used for slicing, cutting off and similar 16
- 17. DM 2610004477 08-09:DM 2610004477 08-09 8/3/09 1:18 PM Page 17 Speed Settings * Speed for light cuts; Caution - burning on deep grooves. • Depending on cutting direction relative to grain. Not all speed settings can be achieved on 100 and 200 series tool. For certain applications, a variable speed tool is required. 2 = 5,000 - 8,000 RPM's 4 = 9,000 - 11,000 RPM's 6 = 12,000 - 17,000 RPM’s 8 = 18,000 - 24,000 RPM’s 10 = 25,000 - 35,000 RPM’s High Speed Cutters Catalog Soft Hard Laminates Steel Aluminum, Shell/ Ceramic Glass Number Wood Wood /Plastic Brass, etc. Stone 100, 121, 131 10 10 6 6 8 - - - 114, 124, 10 6 4 6 6 - - - 134, 144 190 10 10 4 6 10 - - - 118, 191, 192, 10 10 4 6 10 - - - 193, 194 116, 117, 10 6 4 6 6 - - - 125, 196 115 10 10 4 6 6 - - - 198 10 8 4 6 6 - - - 199 10 8 4 6 6 - - - Engraving Cutters Catalog Soft Hard Laminates Steel Aluminum, Shell/ Ceramic Glass Number Wood Wood /Plastic Brass, etc. Stone 105, 108 10 10 8 4 6 - - - 106, 109, 10 10 6 4 6 - - - 107, 110 10 10 6 4 6 - - - 111 10* 10* 8* 4 6 - - - 112 10* 10* 6* 4 6 - - - 113 10* 10* 6* 4 6 - - - Diamond Wheel Points Catalog Soft Hard Laminates Steel Aluminum, Shell/ Ceramic Glass Number Wood Wood /Plastic Brass, etc. Stone 7103, 7105, 10 8 - - - 10 10 10 7117, 7120, 7122, 7123, 7134, 7144 Structured Tooth Tungsten Carbide Cutters Catalog Soft Hard Laminates Steel Aluminum, Shell/ Ceramic Glass Number Wood Wood /Plastic Brass, etc. Stone 9931, 9932, 10 8 4 - 6 - - - 9933, 9934, 9935, 9936 17
- 18. DM 2610004477 08-09:DM 2610004477 08-09 8/3/09 1:18 PM Page 18 Speed Settings (Continued) * Speed for light cuts; Caution - burning on deep grooves. • Depending on cutting direction relative to grain. Not all speed settings can be achieved on 100 and 200 series tool. For certain applications, a variable speed tool is required. 2 = 5,000 - 8,000 RPM's 4 = 9,000 - 11,000 RPM's 6 = 12,000 - 17,000 RPM’s 8 = 18,000 - 24,000 RPM’s 10 = 25,000 - 35,000 RPM’s Tungsten Carbide Cutters Catalog Soft Hard Laminates Steel Aluminum, Shell/ Ceramic Glass Number Wood Wood /Plastic Brass, etc. Stone 9901, 9902, 10 8 4 10 6 8 8-10 8-10 9903, 9904, 9905, 9906, 9912 9909, 9910 8 8-10 8-10 9911 High Speed Router Bits Catalog Soft Hard Laminates Steel Aluminum, Shell/ Ceramic Glass Number Wood Wood /Plastic Brass, etc. Stone 612, 640 10* 8• - - - - - - 615, 617, 618, 10* 10 • - - - - - - 650, 652, 654 10* 8• - - - - - - Silicon Carbide Grinding Stones Catalog Soft Hard Laminates Steel Aluminum, Shell/ Ceramic Glass Number Wood Wood /Plastic Brass, etc. Stone 83142, 83322, - - 6 10 4 6 10 10 83702, 84922, 85422, 85602, 85622 Abrasive Points Catalog Soft Hard Laminates Steel Aluminum, Shell/ Ceramic Glass Number Wood Wood /Plastic Brass, etc. Stone 516, 517, 4-6 4-6 - 8 6 - - - 518 500 4-6 4-6 - 6-8 4-6 - - - Aluminum oxide grinding stones Catalog Soft Hard Laminates Steel Aluminum, Shell/ Ceramic Glass Number Wood Wood /Plastic Brass, etc. Stone 541,903, 911, 10 10 - 8 4 6 10 - 921, 932, 941, 945, 952, 953, 954, 971, 997, 8153, 8175, 8193, 8215 18
- 19. DM 2610004477 08-09:DM 2610004477 08-09 8/3/09 1:18 PM Page 19 Speed Settings (Continued) * Speed for light cuts; Caution - burning on deep grooves. • Depending on cutting direction relative to grain. Not all speed settings can be achieved on 100 and 200 series tool. For certain applications, a variable speed tool is required. 2 = 5,000 - 8,000 RPM's 4 = 9,000 - 11,000 RPM's 6 = 12,000 - 17,000 RPM’s 8 = 18,000 - 24,000 RPM’s 10 = 25,000 - 35,000 RPM’s Chain Saw Sharpening Stones Catalog Soft Hard Laminates Steel Aluminum, Shell/ Ceramic Glass Number Wood Wood /Plastic Brass, etc. Stone 453, 454, - - - 10 - - - - 455 Cutting Accessories Catalog Soft Hard Laminates Steel Aluminum, Shell/ Ceramic Glass Number Wood Wood /Plastic Brass, etc. Stone 409, 420, 426 - - 2-4 10 10 10 10 - 540, EZ409 542, EZ544 10 8-10 2-4 - - - - 545, EZ545 8-10 8 - - - 6-8 6-8 - 560 For use on drywall. For best results, use at 30,000 rpm. 561 6-10 6-10 2-4 - 10 - - - 562 - - - - - - 10 EZ456 - - - 10 10 - - - EZ476 - - 2-4 - - - - - Polishing Accessories Catalog Soft Hard Laminates Steel Aluminum, Shell/ Ceramic Glass Number Wood Wood /Plastic Brass, etc. Stone 461, 462, 463 - - - 8 8 8 8 8 414, 422, 429 - - - 6 6 6 6 6 425, 427 - - - 8 8 - - - 423E - - - 6-8 2 2 2 6-8 403, 404, 405 4 4 2-4 6 2 - - - 530, 531, 532 - 4 - 4 - - - - 428, 442, 443 4 4 2 4 4 - - - 535, 536, 537 4 4 - 4 4 4 - - Sanding Bands and Discs Catalog Soft Hard Laminates Steel Aluminum, Shell/ Ceramic Glass Number Wood Wood /Plastic Brass, etc. Stone 430, 431, 438 2-10 2-10 2-6 10 10 2-10 2-10 - 439, 440, 444 2-10 2-10 2-6 10 10 2-10 2-10 - 407, 408, 432 2-10 2-10 2-6 10 10 2-10 2-10 - 411, 412, 413 6 6 2 - 2 - - - 19
- 20. DM 2610004477 08-09:DM 2610004477 08-09 8/3/09 1:18 PM Page 20 Speed Settings (Continued) * Speed for light cuts; Caution - burning on deep grooves. • Depending on cutting direction relative to grain. Not all speed settings can be achieved on 100 and 200 series tool. For certain applications, a variable speed tool is required. 2 = 5,000 - 8,000 RPM's 4 = 9,000 - 11,000 RPM's 6 = 12,000 - 17,000 RPM’s 8 = 18,000 - 24,000 RPM’s 10 = 25,000 - 35,000 RPM’s Flapwheels Catalog Soft Hard Laminates Steel Aluminum, Shell/ Ceramic Glass Number Wood Wood /Plastic Brass, etc. Stone 502, 503, 504, 10 8 2 10 8-10 - - - 505 Finishing Abrasive Buffs Catalog Soft Hard Laminates Steel Aluminum, Shell/ Ceramic Glass Number Wood Wood /Plastic Brass, etc. Stone 511E, 512E 6 6 4 6 6 - - - Drill Bit Catalog Soft Hard Laminates Steel Aluminum, Shell/ Ceramic Glass Number Wood Wood /Plastic Brass, etc. Stone 150 10 8-10 2-4 - 6 - - - Grout Removal Bits Catalog Soft Hard Laminates Steel Aluminum, Shell/ Ceramic Glass Number Wood Wood /Plastic Brass, etc. Stone 569,570 For Use on Wall and Floor Grout 6-8 20
- 21. DM 2610004477 08-09:DM 2610004477 08-09 8/3/09 1:18 PM Page 21 Consignes générales de sécurité Vous devez lire et comprendre toutes les instructions. Le non-respect, même partiel, ! AVERTISSEMENT des instructions ci-après entraîne un risque de choc électrique, d'incendie et/ou de blessures graves. CONSERVEZ CES INSTRUCTIONS Aire de travail Reportez-vous aux « Dimensions recommandées des Veillez à ce que l'aire de travail soit propre et bien cordons de rallonge » dans la section Accessoires de ce éclairée. Le désordre et le manque de lumière favorisent manuel. les accidents. Sécurité des personnes N'utilisez pas d'outils électriques dans une atmosphère Restez alerte, concentrez-vous sur votre travail et faites explosive, par exemple en présence de liquides, de gaz preuve de jugement lorsque vous utilisez un outil ou de poussières inflammables. Les outils électriques électrique. N'utilisez pas un outil électrique si vous créent des étincelles qui pourraient enflammer les êtes fatigué ou sous l'influence de drogues, d'alcool ou poussières ou les vapeurs. de médicaments. Un instant d'inattention suffit pour Tenez à distance les curieux, les enfants et les visiteurs entraîner des blessures graves. pendant que vous travaillez avec un outil électrique. Ils Habillez-vous convenablement. Ne portez ni vêtements pourraient vous distraire et vous faire faire une fausse flottants ni bijoux. Confinez les cheveux longs. manoeuvre. N'approchez jamais les cheveux, les vêtements ou les Sécurité électrique gants des pièces en mouvement. Des vêtements Les outils à double isolation sont équipés d'une fiche flottants, des bijoux ou des cheveux longs risquent d'être polarisée (une des lames est plus large que l'autre), happés par des pièces en mouvement. Gardez les qui ne peut se brancher que d'une seule façon dans une poignées sèches, propres et exemptes d'huile et de prise polarisée. Si la fiche n'entre pas parfaitement graisse. dans la prise, inversez sa position ; si elle n'entre Méfiez-vous d'un démarrage accidentel. Avant de toujours pas bien, demandez à un électricien qualifié brancher l'outil, assurez-vous que son interrupteur est d'installer une prise de courant polarisée. Ne modifiez sur ARRÈT.Le fait de transporter un outil avec le doigt sur pas la fiche de l'outil. La double isolation élimine le la détente ou de brancher un outil dont l'interrupteur est besoin d'un cordon d'alimentation à trois fils avec mise à en position MARCHE peut mener tout droit à un accident. la terre ainsi que d'une prise de courant mise à la terre. Enlevez les clés de réglage ou de serrage avant de Avant de brancher l'outil, assurez-vous que la tension de démarrer l'outil. Une clé laissée dans une pièce la prise correspond à celle indiquée sur la plaque tournante de l'outil peut provoquer des blessures. signalétique. N'utilisez pas d'outils prévus pour courant alternatif seulement avec une source de courant continu. Ne vous penchez pas trop en avant. Maintenez un bon appui et restez en équilibre en tout temps. Un bonne Évitez tout contact corporel avec des surfaces mises à stabilité vous permet de mieux réagir à une situation la terre (tuyauterie, radiateurs, cuisinières, inattendue. réfrigérateurs, etc.).Le risque de choc électrique est plus grand si votre corps est en contact avec la terre. Si Utilisez des accessoires de sécurité. Portez toujours l'utilisation de l'outil électrique dans un endroit humide des lunettes ou une visière. Selon les conditions, portez est inévitable, un disjoncteur de fuite à la terre doit être aussi un masque antipoussière, des bottes de sécurité utilisé pour alimenter votre outil. Des chaussures et des antidérapantes, un casque protecteur et/ou un protecteur gants en caoutchouc d'électricien contribueront à d'oreille. accroître davantage votre sécurité personnelle. Utilisation et entretien des outils N'exposez pas les outils électriques à la pluie ou à Immobilisez le matériau sur une surface stable au l'eau. La présence d'eau dans un outil électrique moyen de brides ou de toute autre façon adéquate. Le augmente le risque de choc électrique. fait de tenir la pièce avec la main ou contre votre corps Ne maltraitez pas le cordon. Ne transportez pas l'outil offre une stabilité insuffisante et peut amener un par son cordon et ne débranchez pas la fiche en tirant dérapage de l'outil. sur le cordon. N'exposez pas le cordon à la chaleur, à Ne forcez pas l'outil. Utilisez l'outil approprié à la des huiles, à des arêtes vives ou à des pièces en tâche. L'outil correct fonctionne mieux et de façon plus mouvement. Remplacez immédiatement un cordon sécuritaire. Respectez aussi la vitesse de travail qui lui est endommagé. Un cordon endommagé augmente le propre. risque de choc électrique. N'utilisez pas un outil si son interrupteur est bloqué. Un Lorsque vous utilisez un outil électrique à l'extérieur, outil que vous ne pouvez pas commander par son employez une rallonge pour l'extérieur marquée « W-A interrupteur est dangereux et doit être réparé. » ou « W ». Ces cordons sont faits pour être utilisés à Débranchez la fiche de l'outil avant d'effectuer un l'extérieur et réduisent le risque de choc électrique. réglage, de changer d'accessoire ou de ranger l'outil. 21
- 22. DM 2610004477 08-09:DM 2610004477 08-09 8/3/09 1:18 PM Page 22 De telles mesures préventives de sécurité réduisent le N'utilisez que des accessoires que le fabricant risque de démarrage accidentel de l'outil. recommande pour votre modèle d'outil. Certains Rangez les outils hors de la portée des enfants et accessoires peuvent convenir à un outil, mais être d'autres personnes inexpérimentées. Les outils sont dangereux avec un autre. dangereux dans les mains d'utilisateurs novices. Réparation Prenez soin de bien entretenir les outils. Les outils de La réparation des outils électriques doit être confiée à coupe doivent être toujours bien affûtés et propres. Des un réparateur qualifié. L'entretien ou la réparation d'un outils bien entretenus, dont les arêtes sont bien outil électrique par un amateur peut avoir des tranchantes, sont moins susceptibles de coincer et plus conséquences graves. Ainsi, des fils internes peuvent être faciles à diriger.Toute altération ou modification constitue mal placés ou pincés, ou des ressorts de rappel de un usage erroné et peut causer un danger. protecteur peuvent être montés erronément. Soyez attentif à tout désalignement ou coincement des Pour la réparation d'un outil, n'employez que des pièces en mouvement, à tout bris ou à toute autre pièces de rechange d'origine. Suivez les directives condition préjudiciable au bon fonctionnement de données à la section « Réparation » de ce manuel. l'outil. Si vous constatez qu'un outil est endommagé, L'emploi de pièces non autorisées ou le non-respect des faites-le réparer avant de vous en servir. De nombreux instructions d'entretien peut créer un risque de choc accidents sont causés par des outils en mauvais état. électrique ou de blessures. Certains agents nettoyants Élaborez un calendrier d'entretien périodique de votre tels qu'essence, tétrachlorure de carbone, ammoniac, outil. etc., peuvent abîmer les pièces en plastique. Consignes de sécurité pour outils rotatifs Les accessoires doivent être prévus pour au moins la Portez toujours des lunettes de sécurité et un masque vitesse recommandée sur l'étiquette d'avertissement anti-poussières. N'utilisez l'outil qu'à un endroit bien de l'outil. Les meules et les autres accessoires utilisés à aéré. L'utilisation de dispositifs de sécurité personnelle une vitesse supérieure à la vitesse nominale peuvent se et le travail dans un environnement sûr réduisent les détacher et provoquer des blessures. risques de blessures. Tenez l'outil par les surfaces de préhension isolées en Après avoir changé les lames ou effectué quelque exécutant une opération lorsque l'outil de coupe peut réglage que ce soit, assurez-vous que l'écrou de la venir en contact avec des fils cachés ou son propre douille et tous les autres dispositifs de réglage sont cordon. Le contact avec un fil sous tension rendra les bien serrés. Un dispositif de réglage lâche peut bouger parties métalliques exposées de l'outil sous tension et soudainement et causer ainsi une perte de contrôle avec causera des secousses électriques à l'opérateur. Pour projection violente des composants en rotation. couper dans des murs existants ou autres endroits Ne placez pas la main à proximité de l'embout qui aveugles pouvant dissimuler des fils électriques, tourne. Vous ne vous rendrez pas toujours compte de débranchez tous les fusibles ou les disjoncteurs cette proximité. alimentant ce lieu de travail. Laissez les brosses tourner à la vitesse de fonctionne- Ne faites pas fonctionner l’arbre flexible avec une ment pendant au moins une minute avant d’utiliser la courbe prononcée. Lors du pliage, l’arbre peut produire meule. Durant cette période, personne ne doit se tenir une chaleur excessive sur la gaine ou la pièce manuelle. devant la meule ou en ligne avec celle-ci. Pendant la Le rayon minimum recommandé est de 127 mm. période de rodage, les poils ou fils de fer seront éjectés Débranchez toujours le cordon de la prise de courant de la brosse. avant d'effectuer quelque réglage que ce soit oude Les brosses (de soies de porc ou métalliques) ne monter des accessoires. L'outil pourrait se mettre en doivent jamais être utilisées au-dessus de 15 000 tr/mn. marche par mégarde et causer des blessures graves. Dirigez la décharge de la brosse métallique en Connaissez l'emplacement de l'interrupteur lorsque rotation en sens opposé à vous. Des petites particules vous déposez l'outil ou lorsque vous le reprenez. Vous et des petits fragments de fil peuvent être déchargés à risquez d'actionner l'interrupteur par mégarde. grande vitesse durant l'action de « nettoyage » de ces Maintenez toujours maintenez toujours fermement la brosses et peuvent se loger dans votre peau. À haute pièce manuelle dans vos mains pendant le vitesse, les poils ou fils de fer mal attachés seront démarrage. Lors de son accélération pour atteindre le éjectés. plein régime, le couple à réaction du moteur peut Portez des gants protecteurs et un masque de soudeur entraîner une torsion de l’arbre. avec les brosses métalliques ou de soies de porc. 22
- 23. DM 2610004477 08-09:DM 2610004477 08-09 8/3/09 1:18 PM Page 23 Consignes de sécurité pour outils rotatifs - (suite) Appliquez légèrement les brosses métalliques ou de l’embout de l'ouvrage et tire l'outil dans le sens de cette soies de porc sur votre ouvrage, puisque seules les avance. extrémités du fil métallique/des brosses font le Si le matériau ou l'embout se grippe ou se bloque, travail. Une « lourde » pression sur les brosses mettez l'outil hors tension « OFF » par l'interrupteur. entraînera une surcharge du fil métallique ou de la Attendez que toutes les pièces mobiles brosse, résultant en une action d’essuyage, et entraînera s'immobilisent et débranchez l'outil, et débloquez une décharge des brosses/du fil métallique. ensuite l'ouvrage bloqué. Si l'interrupteur de l'outil est Maniez soigneusement l'outil aussi bien que les laissé en position de marche « ON », l'outil pourrait se meules individuelles pour éviter les éclats ou les remettre en marche par mégarde et causer ainsi des fissurations. Posez une nouvelle meule si l'outil blessures graves. tombe pendant la rectification. N'utilisez pas une Ne laissez pas un outil en marche sans surveillance, meule qui peut être endommagée. Les fragments mettez-le hors tension. L'outil peut être déposé en d'une meule qui éclate durant le fonctionnement seront toute sécurité uniquement lorsqu'il s'est arrêté projetés à grande vitesse et pourraient frapper des complètement. personnes présentes ou vous-même. Ne rectifiez et ne poncez pas à proximité de matières N'utilisez jamais d'embouts émoussés ou abîmés. Les inflammables. Les étincelles provenant de la meule lames affilées doivent être maniées soigneusement. Les pourraient enflammer ces matières. embouts abîmés peuvent se rompre brusquement durant l'usage. Les embouts émoussés nécessitent plus Ne touchez pas l'embout ou la douille après usage. de force pour pousser l'outil, causant éventuellement un Après usage, l'embout et la douille sont trop chauds bris de l'embout. pour être touchés à mains nues. Utilisez des pinces pour supporter l'ouvrage autant Nettoyez régulièrement les prises d'air de l'outil à que possible. Ne tenez jamais un petit ouvrage d'une l'aide d'air comprimé. Une accumulation excessive de main et l'outil de l'autre main pendant que celui-ci est métal en poudre à l'intérieur du carter du moteur peut en usage. Prévoyez un espace suffisant, d'au moins causer des défaillances électriques. 150 mm, entre votre main et l'embout qui tourne. Les Ne soyez pas dupé par la familiarité acquise par un pièces rondes, telles que tiges cylindriques, tuyaux ou usage fréquent de votre outil rotatif. N'oubliez pas tubes, ont tendance à rouler pendant qu'on les coupe et, qu'une fraction de seconde d'insouciance suffit à de ce fait, l'embout peut « mordre » ou sauter vers infliger des blessures graves. vous. En fixant un petit ouvrage, vous pourrez utiliser vos deux mains pour contrôler l'outil. Ne modifiez pas l'outil et n'en faites pas un usage erroné. Toute altération ou modification constitue un Inspectez l'ouvrage avant de le couper. Avant de usage erroné et peut provoquer des blessures graves. couper un ouvrage de forme irrégulière, planifiez votre travail de manière à ce que l'ouvrage ne glisse Ce produit n’est pas destiné à être utilisé comme pas et ne vienne pas pincer l'embout qui sera arraché fraise dentaire dans des applications médicales de votre main. Ainsi, si vous taillez du bois, assurez- humaines ou vétérinaires. Des blessures graves vous de l'absence de clous ou de corps étrangers dans peuvent s’ensuivre. l'ouvrage. Sous l'effet du contact avec des clous ou Lorsque vous utilisez les scies en acier, les disques corps étrangers, l'embout peut sauter. de découpage, les couteaux à grande vitesse ou les Ne mettez jamais l'outil en marche alors que couteaux au carbure de tungstène, assurez-vous que l'embout est enfoncé dans le matériau. Le tranchant la pièce est toujours bien assujettie. Ne tentez jamais de l'embout peut se coincer dans le matériau et vous de tenir la pièce d’une seule main tout en utilisant faire perdre le contrôle de l'outil. l’un de ces accessoires. La raison en est que ces disques grippent lorsqu’ils sont même très légèrement Évitez de faire rebondir et de heurter la meule, surtout inclinés dans la rainure, et ils peuvent alors rebondir, en travaillant des coins, des arêtes vives, etc. Ceci vous faisant ainsi perdre le contrôle et causant des peut causer une perte de contrôle et un rebond. blessures graves. Votre autre main doit servir à Le sens d'avance de l’embout dans l'ouvrage lorsque stabiliser et guider la main qui tient l’outil. Lorsqu’un vous taillez, détourez ou coupez est très important. disque de découpage grippe, on peut généralement Avancez toujours l’embout dans l'ouvrage dans le s’attendre à ce qu’il se brise. Lorsque la scie en acier, les sens dans lequel le tranchant sort de l'ouvrage (ce qui couteaux à grande vitesse ou le couteau au carbure de correspond au sens d'éjection des copeaux). L'avance tungstène grippent, ils peuvent sauter hors de la rainure de l'outil dans le mauvais sens fait sortir le tranchant de et vous pouvez perdre le contrôle de l’outil. 23
- 24. DM 2610004477 08-09:DM 2610004477 08-09 8/3/09 1:18 PM Page 24 Les travaux à la machine • L’arsenic et le chrome provenant des bois traités ! AVERTISSEMENT tel que ponçage, sciage, chimiquement. meulage, perçage et autres travaux du bâtiment Le niveau de risque dû à cette exposition varie avec la peuvent créer des poussières contenant des produits fréquence de ces types de travaux. Pour réduire chimiques qui sont des causes reconnues de cancer, l’exposition à ces produits chimiques, il faut travailler de malformation congénitale ou d’autres problèmes dans un lieu bien ventilé et porter un équipement de reproductifs. Ces produits chimiques sont, par sécurité approprié tel que certains masques à poussière exemple : conçus spécialement pour filtrer les particules • Le plomb provenant des peintures à base de plomb, microscopiques. • Les cristaux de silices provenant des briques et du ciment et d’autres produits de maçonnerie, et 24