Metal ceramic and partial veneer crown/certified fixed orthodontic courses by Indian dental academy
•
41 gefällt mir•6,889 views

The Indian Dental Academy is the Leader in continuing dental education , training dentists in all aspects of dentistry and offering a wide range of dental certified courses in different formats. Indian dental academy provides dental crown & Bridge,rotary endodontics,fixed orthodontics, Dental implants courses.for details pls visit www.indiandentalacademy.com ,or call 0091-9248678078

Empfohlen
Empfohlen
Weitere ähnliche Inhalte
Was ist angesagt?
Was ist angesagt? (20)
Andere mochten auch
Andere mochten auch (20)
Ähnlich wie Metal ceramic and partial veneer crown/certified fixed orthodontic courses by Indian dental academy
Ähnlich wie Metal ceramic and partial veneer crown/certified fixed orthodontic courses by Indian dental academy (20)
Mehr von Indian dental academy
Mehr von Indian dental academy (20)
Metal ceramic and partial veneer crown/certified fixed orthodontic courses by Indian dental academy
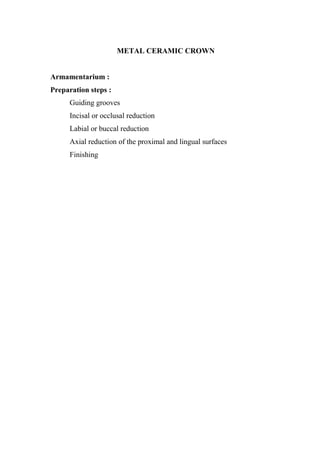
- 1. METAL CERAMIC CROWN Armamentarium : Preparation steps : Guiding grooves Incisal or occlusal reduction Labial or buccal reduction Axial reduction of the proximal and lingual surfaces Finishing
- 2. Metal ceramic crown Indications : 1. Extensive tooth destruction – caries, trauma or existing previous restorations 2. The need for superior retention and strength 3. An endodontically treated tooth in conjunction with a suitable supporting structure (a post and core) 4. To recontour axial surface or correct minor malinclinations 5. Esthetics 6. If all ceramic crown is contraindicated Contraindications : 1. Patients with active caries or untreated periodontal disease 2. Young patients with large pulp chambers 3. When more conservative retainer is technically feasible 4. Intact buccal wall Advantages : 1. Superior esthetics as compared to complete cast crown. 2. Strength of cast metal is combined with the esthetics of an all ceramic crown by reinforcing a brittle, more cosmetically pleasing material through support derived from the stronger qualities are excellent. 3. excellent retentive qualities Disadvantages : 1. Removal of substantial tooth structure. 2. Subject to fracture because porcelain is brittle. 3. Difficult to obtain accurate occlusion in glazed porcelain. 4. Shade selection can be difficult. 5. Inferior esthetics compared to all ceramic crown. 6. Expensive
- 3. 7. Potential for periodontal disease as the facial margin of an anterior restoration is often placed subgingivally. Preparation of tooth for porcelain fused to metal crown Armamentarium : 1. Round tipped rotary diamonds or carbides. 2. Foot ball or wheel shaped diamond 3. Flat – end tapered diamond 4. Finishing stones 5. Explorer and periodontal probe 6. Hatchet and chisel Step - by – step procedures : The preparation is divided into 4 major steps 1. Guiding grooves ( Depth orientation grooves) 2. Incisal or occlusal reduction 3. Labial or buccal reduction 4. Axial reduction of the proximal and lingual surfaces 5. Final finishing of all prepared surfaces Guiding grooves : Place 3 depth grooves one in the centre of the facial surface and one each in the approximate locations of the mesiofacial and distofacial line angles. Depth grooves in the facial wall are placed in2 directions. Incisally, parallel to the tooth contour cervically parallel to the path of withdrawal. The grooves should be 1.3mm deep to allow for additional reduction during finishing. Place 3 depth grooves about 1.8 mm in incisal edge of an anterior tooth to provide the needed reduction of 2 mm and allow finishing. Incisal or occlusal reduction : Tapered round-tipped diamond. The incisal reduction of an anterior tooth should be 2mm for adequate material thickness to permit translucency in the completed restoration. Posterior teeth generally require less (1.5mm) because esthetics is not as critical.
- 4. Labial (buccal) reduction : Tapered flat – tipped diamond. The reduction of the facial surface should have sufficient space to accommodate the metal substructure and porcelain veneer. A minimum of 1.2 mm is necessary to produce restoration with satisfactory appearance (1.5mm is preferable). The cervical shoulder is established at this stage. Axial reduction of the proximal and lingual surfaces : Sufficient tooth structure must be removed to provide a distinct smooth chamfer of about 0.5 mm width. Tapered round-tipped diamond is used to provide a taper of 6 degrees convergence from cervical to incisal or occlusal. As the lingual chamfer is developed extend it buccally into the proximal to blend with the interproximal shoulder placed earlier. A foot ball shaped diamond is used to reduce the lingual surface of ant teeth approx 1mm deep to provide clearance in all excursions. Finishing : The finishing of shoulder or beveled shoulder is done with a tapered flat – tipped diamond or hand instrument. must extend at least 1mm lingual to the proximal contact area. The bevel if selected should be as far incisal as possible relative to the epithelial attachment. Tapered round – tipped diamond or carbide is used to rounded all the line angles and the completed preparation should have a satin finish free from obvious diamond scratch masks. PARTIAL VENEER CROWN Definition, types Indications Contraindications Advantages Disadvantages Armamentarium
- 5. POSTERIOR PARTIAL VENEER CROWN Three quarter crown : Preparation steps : Occlusal reduction Axial reduction Proximal groove placement Buccocclusal contralevel Occlusal offset Finishing Seven eights crown : Preparation steps : Occlusal reduction Axial reduction Groove placement, flaring and contralevel Modified three – quarter crown : Preparation steps : Occlusal reduction Axial reduction Finishing Anterior partial veneer crown : Preparation steps : Incisal and lingual reduction Axial reduction and groove placement Incisal offset and lingual pinhole Finishing and flare Pinledge preparation : Indications Contraindications Advantages
- 6. Disadvantages Preparation steps : Design Proximal reduction Incisal and lingual reduction Ledges and indentations Pinhole preparation Finishing Inlays : Indications Contraindications Advantages Disadvantages Armamentarium Preparation steps : Occlusal outline Proximal box Caries removal Axiogingival groove Gingival and proximal bevels Occlusal bevel Onlay : Indications Contraindications Advantages Disadvantages Preparation steps : Occlusal outline
- 7. Proximal boxes Caries removal Occlusal reduction Centric cusp ledge Gingival and proximal bevels Occlusal bevel Partial veneer crown : An extracoronal metal restoration that covers only part of the clinical crown is considered to be a partial veneer crown. It can also be referred to as a partial coverage restoration. An intracoronal cast metal restoration is called an inlay or an onlay if one or more cusps are restored. Several types of partial veneers exist. For posterior teeth – three quarter, modified three – quarter, seven – eights crown. For anterior teeth – three quarter crown and pinledges Indications : 1. Sturdy clinical crown of average length or longer 2. Intact buccal surface not in need of contour modification and well supported by sound tooth structure. 3. No conflict between axial relationship of tooth and proposed path of withdrawal of FPD 4. Retainers for a FPD or where restoration or alteration of the occlusal surface is needed. Contraindications : 1. Short teeth 2. High caries Index 3. Extensive destruction 4. Poor alignment 5. Bulbous teeth 6. Thin teeth
- 8. Advantages : 1. Conservative of tooth structure 2. Easy access to margins 3. Less gingival involvement than with complete cast crown 4. Easy escape of cement and good seating 5. Verification of seating simple 6. Electric vitality test feasible Disadvantages : 1. Less retentive than complete cast crown 2. Limited adjustment of path of withdrawal 3. Some display of metal Armamentarium : 1. Narrow (approx 0.8mm) round – tipped, tapered diamond (regular or coarse grit) – Bulk reduction 2. Regular – size (approx 1.2 mm), round tipped, tapered diamond (fine grit) or carbide – finishing. 3. Football shaped or wheel shaped diamond (regular grit) 4. Tapered and straight carbide fissure burs – boxes and ledges 5. Small, round carbide bur 6. Small – diameter twist drill – pinholes 7. Inverted cone carbide bur – offsets 8. Finishing stones 9. Mirror 10. Explorer and periodontal probe – assessing the direction and dimension of the various steps. 11. Chisels – finish proximal flares and bevels.
- 9. POSTERIOR PARTIAL VENEER CROWN PREPARATION Maxillary premolars three – quarter crown The three – quarter crown preparation derives its name from the number of axial walls involved. Except for a slight bevel or chamfer placed along the buccocclusal line angle, the buccal tooth surface remains intact. The other surfaces are prepared to accommodate a casting in the same manner as a complete crown preparation, differing only in the need for axial retention grooves. Occlusal reduction : Place depth grooves for the occlusal reduction with a tapered carbide or narrow diamond in the development grooves of the mesial and distal fossae and in the crest of the triangular ridge. In the central groove they should be slight less (about 0.2 mm) than 1 mm deep to allow for finishing. On the centric (lingual) cusp they should slightly less than 1.5 mm deep in the location of the occlusal contacts. Upon completion of the occlusal reduction, a clearance of at least 1.5 mm should exist on the centric cusp and atleast 1.0 mm on the noncentric cusp and in the central groove. The buccal cusp may help obtain sufficient clearance while maintaining the original occlusocervical dimension of the tooth. Axial reduction : Place grooves for axial alignment on the center of the lingual surface and in the mesiolingual and distolingual transitional line angles. They should be parallel to the long axis of the tooth and should not exceed half the width of the tip of the diamond (chamfer depth of 0.5 mm) The proximal reduction is usually short of breaking the proximal contact. The resulting flanges should be parallel to the linguoaxial preparation, with the chamfer placed sufficiently cervical to provides atleast 0.6 mm of clearance with the adjacent tooth and the axial wall allowing for a proximal groove of at least 4 mm of length occlusocervically.
- 10. Proximal groove placement : Tapered carbide bur is positioned against the interproximal flange parallel to the path of withdrawal and a groove is made perpendicular to the axial surface. The groove need not be deeper than 1 mm at its cervical end but may be deeper near its occlusal end. Buccoocclusal contralevel : Connect the mesial and distal flares with a narrow contralevel that follows the buccal cusp ridges. The level should remain within the curvature of the cusp tip rather than extend on to the buccal wall which can be placed with a diamond, or carbide or even a hand instrument. Primary purpose : To remove any unsupported enamel and thereby protect the buccal cusp tip from chipping during function. If group function is planned, a heavier bevel, chamfer or occlusal offset will be needed. Occlusal offset : If additional bulk is needed to ensure rigidity of the restoration, it can be provided with an occlusal offset which extends from the proximal grooves along the buccal cusp. It is essential for the structural durability of ant partial veneer crown. Finishing : Round all sharp internal line angles with a fine – grit diamond or carbide. The flares should be straight and smooth with sufficient clearance (min about 6 mm) between than and the adjacent tooth. Maxillary molar three – quarter crown : The principles used in a premolar preparation can also apply for a maxillary molar with some additional leeway may exist for groove placement because more tooth structure is present on molars than on premolars. Because of their less prominent position in the dental arch, the mesioproximal flare can sometimes be extended onto the buccal surface without increasing esthetic liability.
- 11. Maxillary molar seven eights crown : This preparation includes in addition to the surfaces covered by the three quarter crown, the distal half of the buccal surface. Mesial aspect – Resemble three – quarter crown and is protected by a narrow contralevel or chamfer. Distal aspect – Resembles complete crown. A groove in the middle of the buccal surface is placed parallel to the path of withdrawal. Distal to this groove, the buccal surface is reduced in 2 planes. The cervical paralleling the path withdrawal. Occlusal following the normal anatomic contour. The lingual surface is also reduced in 2 planes and the centric cusp levels are incorporated. Occlusal reduction : Min measurement are the same as for the three quarter crown preparation. To delineate the extent of the lingual centric cusp bevel, they should extend onto the lingual surface of the tooth. On the lingual incline of the MB cups they will resemble depth cuts for the three – quarter crown. On the DB cusp they should be approx 0.8mm deep to provide sufficient occlusal clearance for this noncentric cusp. Concave shaping of the resulting MB incline may again prove useful because it will permit the occlusocervical height of the cusp to be maintained. When completed this bevel should provide 1.5 mm of clearance in the ICP as well as the excursive movements of the mandible. Axial reduction : Place 3 alignment groove in the lingual wall and transfer the selected path of withdrawal to the DB transitional line angle area, where a 4th alignment groove can be placed. Start the reduction in the middle of the lingual surface. The mesial half is prepared like a three – quarter crown the distal half like a complete crown.
- 12. Carry the facial reduction sufficiently mesial to include the buccal groove. Groove placement, flaring and contrabevel : Place the mesial groove like the three – quarter crown place the buccal groove parallel to the mesial groove and perpendicular to the buccoaxial wall. Connect the 2 grooves with a smooth contrabevel that follows the ridge of the MB cusp. Adequate clearance must be established interproximally upon completion. Mandibular premolar modified three – quarter crown : Mandibular partial veneer preparations are made more often on premolars than on molars. They differ from maxillary molar three – quarter crown preparations in 2 respect. Additional retention is required because of the shorter crown lengths of mandibular teeth. The axial surface that is not prepared (the buccal) includes one functional cusp. This means that additional tooth structure must be removed to provide sufficient bulk of metal for strength. Occlusal reduction : Place 0.8 mm depth grooves on the buccal inclines of the lingual cusps and 1.3 mm grooves on the lingual inclines of the buccal cusp. These guiding grooves are once again placed to follow the basic groove and fissure pattern of the occlusal surface. Arial reduction : Place guiding grooves on the lingual surface to parallel the proposed path of withdrawal and the long axis of the tooth. Prepare the mesial as already described for the three – quarter and seven - eights crown.
- 13. Reduce the distal surface as for a complete crown extending the preparation to the transitional line angle and onto the buccal surface. Finishing : Place the mesial and buccal grooves as described for the seven – eights crown. Another distal groove may be placed. To gain as much length as possible, the grooves of the three-quarter crown should be slightly buccal. Distal groove is slightly close to the center of the distal wall. Connect the mesial and buccal grooves with a centric cusp chamfer which must be heavy enough to allow 1.5 mm of clearance in the area of occlusal contact. A regular or thick diamond is used to place the chamfer which should provide a protective “staple” linkage of alloy in the completed restoration. Finally, all prepared surfaces are smoothed and the internal line angles rounded. Anterior partial veneer crown preparation : Maxillary canine three – quarter crown On a maxillary canine it involves the proximal and lingual surfaces and leaves the facial surface intact. Incisal and lingual reduction : Place depth grooves for both the incisal bevel and the lingual reduction. The incisal bevel makes an angle of approx 45 degrees with the long axis of the tooth. It is prepared with a round – tipped diamond which allows for metal thickness 0.7 mm. The design of the incisal bevel should prevent contact between opposing teeth and the incisal margin. The original configuration of the facial surface should be presented. The lingual reduction is done with a foot ball or wheel – shaped diamond and it should have 1mm of clearance for metal. Axial reduction and groove placement : To enhance the retention and resistance form, place a slightly exaggerated chamfer on the lingual aspect
- 14. of the tooth and a guiding groove in the middle of the lingual wall. The groove is placed with a round – tipped diamond which allows for 0.5 mm of metal thickness at margin. The axial reduction extends into interproximal about 0.4 mm lingual of contact area and it should be parallel to incisal two thirds of labial surface. Incisal offset and lingual pinhole : Anterior PVC require a means of reinforcement for preserving the casting’s integrity, so on incisal offset or groove is needed to create a band of thicker metal to provide a “staple configuration” which provides additional rigidity and resistance against bending of the casting. An inverted cone diamond or carbide is used to prepare the offset by connecting the mesial and distal groove. It prevent against lingual displacement and should have a V configuration. Pin-hole is placed in the cingulerm area lightly off enter to improve the retention and resistance of the preparation and it should be approx 2mm which is prepared with a tapered carbide fissure bur and half round bur. Proximal grooves should parallel to incisal two thirds of labial surface and it should resists lingual displacement. Lingual wall of groove meets proximal wall at angle of 900 degrees with a Tapered carbide. Fissure bur and half round bur. Finishing and flare : Fine – grit tapered diamonds (large and small) or carbide are used for finishing. All surfaces should be smooth and the buccal wall of groove flared to break proximal contact resulting is a cavosarface angle of 900 with no unsupported enamel remaining. Pinledge preparation : Indications : 1. Undamaged anterior teeth in caries – free mouth 2. Alteration of lingual contour of maxillary anterior teeth or alteration of occlusion.
- 15. 3. Anterior splinting Contain dictations : 1. Poor oral hygiene 2. Large pulps 3. Thin teeth 4. Nonvital teeth 5. Carious involvement 6. Problems with proposed path of withdrawal of FPD Advantages : 1. Minimal tooth reduction 2. Minimal margin length 3. Minimum gingival involvement 4. Optimum access for margin finishing and hygiene 5. Adequate retention Disadvantages : 1. Less retentive than complete coverage 2. Alignment can prove difficult 3. Technically demanding 4. Not usable on nonvital teeth Maxillary Central Incisor pinledge : Three designs of pinledge preparations 1. Conventional pinledge involving only the lingual surface of the tooth 2. Pinledge with a proximal slice 3. Pinledge with a proximal groove Design : A line is marked along the height of contour of the incisal edge and on the proximal wall to include the area needed for a connector, The lingual chamfer is placed immediately adjacent to the crest of the marginal ridge.
- 16. Proximal Reduction : Prepare the proximal slice with a tapered diamond. The primary purpose is to provide sufficient reduction to allow adequate metal in the area for a subsequent connector. Incisal and lingual reduction : Prepared the incisal bevel with the diamond inclined slightly toward the lingual. Sufficient clearance provides functional contact on metal rather than on the junction between metal and tooth structure. The desired metal thickness is 1mm, except in the area close to the margin. Perform the lingual reduction with a football – or wheel – shaped diamond. Metal thickness of 1mm is required in the ICP and throughout excursive movements. Ledges and indentations : The ledges are prepared with a straight carbide fissure bur with the ledges parallel to one another when viewed from lingual and from incisal. Maximum width is 1mm. The incisal edge is 2 to 2.5 mm cervical to the incisal edge or one fourth of the total height of the preparation from the incisal edge. The cervical ledge is placed on the crest of the cingulum at the centre of the cervical ¼ th of the of preparation. The indentations are prepared with a straight. Carbide fissure bur in the left and right sides of the incisal ledge and slightly off center in the cervical ledge to prevent subsequent pulp exposure when the pinholes are placed. The indentation should provide at lest 0.5 mm of space for metal reinforcement around opening of pinhole. Pinhole preparation : Sink pilot channels with either a small round bur or a small twist drill. Pinholes are prepared with a tapered carbide bur and it must be between 2 and 3 mm deep. The minimal width of ledge around pinholes is 0.5 mm
- 17. Bevel the junction between pinhole and indentation with a round bur slightly large than the largest diameter of the pinhole. Finishing : It is done with finishing stones on carbides. All surface must be as smooth as possible to facilitate removal of this delicate wax pattern from die. INLAYS Indications : 1. Small carious lesion in otherwise sound tooth 2. Adequate dentinal support 3. Low carries rate 4. Patient’s request for gold instead of amalgam or composite resin. Contraindications : 1. High caries Index 2. Poor plaque control 3. Small teeth 4. Adolescents 5. Poor dentinal support requiring a wide preparations Advantages : 1. Superior material properties 2. Longevity 3. No discoloration from corrosion 4. Least complex cast restoration Disadvantages : 1. Less conservative than amalgam 2. May display metal 3. Gingival extension beyond ideal 4. “Wedge” retention
- 18. Class II inlay preparation : Armamentarium : Carbide burs are usually used for inlay or only preparation, but diamonds can be substituted if preferred : 1. Tapered carbide burs 2. Round carbide burs 3. Cylindrical carbide burs 4. Finishing stones 5. Mirror 6. Explorer and periodontal probe 7. Chisels 8. Hatchet 9. Gingival margin trimmers 10. Excavators 11. High – and low – speed handpieces 12. Articulating film Occlusal outline : It is prepared with a tapered carbide which includes the central groove, avoids centric contacts, includes dovetail or pinhole for resistance, approx 1.8 mm deep. Proximal box : It is done with a tapered carbide bur and it follows the curvature of the original tooth structure. Caries removal ; Carries is removed with a excavator or round bur and a place a cement base to restore the excavated tissue in the axial wall or pulpal floor. Axiogingival groove : It is placed with a gingival margin trimmer at the junction of axial and gingival walls at the base of the proximal box to enhance resistance form and prevent distortion of the wax pattern during manipulation and is 0.2 mm deep. Gingival and proximal bevels : Are placed with a thin, tapered carbide or diamond. The gingival bevel is at 45 – degrees and it should be 0.8 mm
- 19. wide. Proximal bevels are prepared on the buccal and lingual walls with the tapered bur oriented in the path of withdrawal. Occlusal bevel : It is prepared with a round carbide or stone to create a hollow – ground bevel or chamfer and to avoid. Centric contacts. The occlusal bevel should improve marginal fit and allow finishing of the restorations. MOD Onlay: Indications : 1. Worn on carious teeth with intact buccal and lingual cusp. 2. MOD amalgam requiring replacement. 3. Low carries rate. 4. Patients; request for gold instead of amalgam Contraindications : 1. High caries Index. 2. Poor plaque control. 3. Short clinical crown or extruded teeth. 4. Lesions extending beyond transitional line angles. Advantages : 1. Support of cusps 2. High strength 3. Longevity Disadvantages : 1. Lacks retention 2. Less conservation than amalgam 3. May display metal 4. Gingival extension beyond ideal Mod onlay preparation : Occlusal outline : It includes the central, buccal and lingual grooves and it is about 1.8 mm deep and done with a tapered carbide bur.
- 20. Proximal bones : are prepared with a tapered carbide bur and it follows the curvature of the original tooth structure. Carries removal : Carries are removed by a excavator or round bur and the tissues are replaced with base and to allow adequate dentin for resistance and retention. Occlusal Reduction : It should follow anatomic contours and it is about 1.5 mm deep on centric cusp and 1.0 mm on the noncentric cusps and done with a tapered carbide bur. Centric cusp ledge : It should be about 1.00 mm wide (before beveling ) and about 1.0 mm apical to centric contact done with a tapered carbide bur. Gingival and proximal bevels : It is done with a thin, tapered carbide and should be about 45 degrees and 0.8 mm wide Bevel the noncentric and centric cusps. Where additional bulk at the margin is needed, a chamfer should be substituted for the straight bevel with a round – tipped diamond. Complete the preparation by rechecking the occlusal clearance in all excursions and assessing for smoothness