How to make a jeopardy sytle game
•Als PPTX, PDF herunterladen•
1 gefällt mir•3,113 views

How to create a Jeopardy-like game using PowerPoint, or a similar software. Intended for Librarians creating teen programs.

Empfohlen
Weitere ähnliche Inhalte
Ähnlich wie How to make a jeopardy sytle game
Ähnlich wie How to make a jeopardy sytle game (20)
Mehr von Shelly Longoria
Mehr von Shelly Longoria (13)
Kürzlich hochgeladen
Kürzlich hochgeladen (20)
How to make a jeopardy sytle game
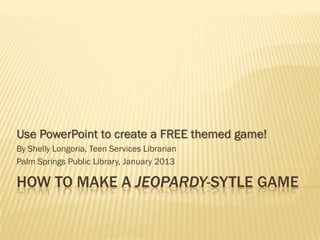
- 1. Use PowerPoint to create a FREE themed game! By Shelly Longoria, Teen Services Librarian Palm Springs Public Library, January 2013 HOW TO MAKE A JEOPARDY-SYTLE GAME
- 2. CREATE YOUR OWN SPECIALLY THEMED GAME! Creating a Jeopardy-like game using PowerPoint, or an equivalent, is actually easier than it seems. There are many instructions, templates, and examples online which I have boiled down to this easy method. The trick to creating a technically successful game is all in the proper hyperlinking of the slides. Here is an easy step-by-step tutorial.
- 3. WHAT YOU WILL NEED PowerPoint, or similar program, that allows linking between slides. At least 25 questions and answers, in five categories. There will be five questions in each category. Make them increase in difficulty, i.e., the 10 dollar/point question should be easier than the 50 dollar/point question. Use whatever terminology (dollar/point) you are comfortable with. For these instructions, I will use the term point.
- 4. WHAT YOU WILL NEED This will fill one Jeopardy board. If you need a longer game, repeat this entire process, adding a second game board (raising the point amounts) & more difficult questions for “Double Jeopardy.”
- 5. WHAT YOU WILL NEED Grahics A background image, or choose a preset Design from PowerPoint. A small image (thumbnail) to place in the corner of each slide. This will be your hyperlink spot to navigate through your slides and run the game. Any graphics you wish to add to question/answer slides. Prize(s) for correct answers and/or a grand prize for the overall winner. Now, the details!
- 6. TITLE CARD Your first slide will be a title card. The Summer Reading manuals usually have PowerPoint backgrounds to coordinate with the Program theme. I try to utilize any themed graphics available (such as logos for Teen Tech Week, Teen Read Week, etc.) where ever possible in the game.
- 7. GAME BOARD Your next slide will be the game board. This is just a large table; make it large enough to cover the entire slide. Give it FIVE columns, and SIX rows, and you will end up with a grid containing 30 squares.
- 8. GAME BOARD After setting up and sizing the table, experiment with PowerPoint’s “Table Tools” and “Design” for color selection, shading, cell borders and effects. In the “Table Tools” / “Layout” / “Alignment” for formatting cells, choose Center Alignment and Center Vertically so the numbers are in the center of each cell, as you see in the example on the previous slide. The first row will be your category names The remaining rows will be point amounts. You will enter the number 10 in each box across the first row, 20 in each box across the second row, etc. These are the point values for the questions.
- 9. QUESTION & ANSWER SLIDES Now make the question and answer slides. It does not matter what particular order they are in when you create them, it only matters that you link them correctly. (Linking instructions coming up.) Let’s say you were going to make all the question and answer slides for the first category. In this example, the first category is “There’s an app for that!” The next slide will be your 10 point question in the category, “There’s an app for that!” Create your slide with the question and a graphic if you’d like. Place your thumbnail image at the bottom corner of the slide. This will be where you (later) set your link point. I.e., the thumbnail image will be linked to another slide. You will click on these thumbnails to navigate through your slides and run the game. (Linking instructions coming up.)
- 10. QUESTION OPTIONAL GRAPHIC THUMBNAIL IMAGE (NOT OPTIONAL)
- 11. QUESTION & ANSWER SLIDES The following slide will be the answer to the above 10 point question. Create your slide with the answer and a graphic if you’d like. Place your thumbnail image at the bottom corner of the slide. ANSWER THUMBNAIL IMAGE OPTIONAL (NOT GRAPHIC OPTIONAL)
- 12. CREATE ALL YOUR SLIDES Continue making question and answer slides in this manner for all point values in all categories. Make the questions in each category increasingly difficult as the points go up. The slides do not have to be separated into categories within the slideshow. You will end up with 25 question slides and 25 answer slides. ALL of them should have your thumbnail image in the bottom corner.
- 13. JUST FOR MORE FUN… OPTIONAL You may place a single slide anywhere in the game for the “Daily Double.” If a player selects this square, you may ask them a unique question for a special prize, or just give them a special prize for finding the “Daily Double.”
- 14. NOW LET’S MAKE IT A GAME! You will be using the Insert menu, and the Hyperlink button. Linking is what makes the game work, so be careful to link the slides properly. If you used the “Daily Double” slide, it will link back to the game board slide. You will be attaching each hyperlink to the thumbnail image at the bottom of each of your slides. Areyou ready for the big secret to making this a game?! … HYPERLINKS!
- 15. 1) LINK FROM BOARD TO QUESTION Each POINT amount on the game board slide will link to the question in that category for that point value. On the game board, highlight 10 in the first column. Click Insert on the File Menu Click Hyperlink on the Insert Menu Choose Link to: Place in This Document Select the QUESTION slide for your first category, 10-point value
- 16. 2) LINK FROM QUESTION TO ANSWER Select your thumbnail, and navigate to the Insert Hyperlink menu. Link your thumbnail to the ANSWER slide for this question.
- 17. 3) LINK ANSWER BACK TO GAME BOARD Select your thumbnail, and navigate to the Insert Hyperlink menu. Link your thumbnail for EACH ANSWER slide back to the GAME BOARD & the game continues!
- 18. LINKING SUMMARY Link each point value to the slide with the QUESTION for that point value. Link each QUESTION slide to its ANSWER slide. Link each ANSWER slide back to the game board. If you included a Daily Double slide, link it back to the game board.
- 19. HOW TO PLAY Choose order of players however you’d like. When a player chooses a category & point amount, click on the point amount to go to that QUESTION slide. Click on the thumbnail on the QUESTION slide to reveal the ANSWER slide for that question. Click on the thumbnail on the ANSWER slide to go back to the game board. The next player chooses a category/point value, and the game continues until you run out of questions.
- 20. PRIZES There are different ways you can award prizes, depending on your budget, and the theme. If you have incentive items, you could give out items of increasing size for each point amount answered correctly. Forexample, for the “Teens Own the Night” SRP theme, I awarded a button for a correct 10-point answer, a slap bracelet for a correct 20-point question, a book for 30- point, a water bottle for 40-point, and a string backpack for 50. For the grand prize, I filled a string backpack with books, etc., I’d collected from our Friends’ donations.
- 21. PRIZES You should also keep track of players’ points for an overall grand prize. This may be the only prize awarded, depending on your budget. For FREE prizes, watch the donations coming in to your Friends group, or ask for donations from local retailers, etc.