SlideShare a Scribd company logo
1 of 10
Student Workbook Module: Modules as requirement specifications
Lab 3: Creating a module and converting it to a template
© Copyright IBM Corp. 2013 1
Course materials may not be reproduced in whole or in part without the prior written permission of IBM.
Lab 3: Creating a module and converting it to a
template
Objectives
At the end of this lab you will be able to:
► Create a new module
► Create new artifacts inside a module
► Hierarchically organize artifacts within a module
► Create a module template
► Remove an artifact from a module
► Create a module from a template
Given
► Automated Meter Reader (Water) project (AMR)
Description
► In this lab, you create a template for a vision document that the team will use. The team already created
templates for a hardware requirements specification and a software requirements specification.
► The final vision document template should look like this example:
Figure 1: Example of vision document template
Student Workbook Module: Modules as requirement specifications
Lab 3: Creating a module and converting it to a template
2 © Copyright IBM Corp. 2013
Course materials may not be reproduced in whole or in part without the prior written permission of IBM.
Exercise tasks
In this exercise, you complete these tasks:
 Task 1: Create a module artifact
 Task 2: Add new artifacts to the vision document and create sections
 Task 3: Organize artifacts hierarchically by using promote and demote
 Task 4: Move sections within the module
 Task 5: Remove and delete a new artifact
 Task 6: Create a template
 Task 7: Locate the base artifacts
 Task 8: Create a module from a template
Student Workbook Module: Modules as requirement specifications
Lab 3: Creating a module and converting it to a template
© Copyright IBM Corp. 2013 3
Course materials may not be reproduced in whole or in part without the prior written permission of IBM.
Task 1: Create a module artifact
1. You are in the lab environment All Projects page of the RM application (https://jazz-
server:9443/rm/web). You are logged in as bob with password bob.
2. Navigate to the Automated Meter Reader (Water) project Artifact page.
3. In the Automated Meter Reader (Water) project, open the Module Template folder. Notice the two templates:
a. Hardware Requirements Specification Template
b. Software Requirements Specification Template
4. From the edit options of the Module Template folder, click Create.
5. In the “Create an artifact with attributes” window, provide information about the new artifact:
a. Name: Vision Document Template
b. Artifact type: Requirements Specification
c. For the artifact format, ensure that the default format, which is Module, is selected.
d. For the description, type Template for vision documents
e. Ensure that the folder location is Module Template.
f. Select the Open Artifact check box.
Figure 2: Information about the new vision document template
Student Workbook Module: Modules as requirement specifications
Lab 3: Creating a module and converting it to a template
4 © Copyright IBM Corp. 2013
Course materials may not be reproduced in whole or in part without the prior written permission of IBM.
6. Click Finish. The vision document template opens for editing.
Figure 3: New module
Task 2: Add new artifacts to the vision document and create sections
1. From the navigation section of the module, click the arrow on the Create Artifact button, and ensure that the
Use One-click create check box is cleared. When that check box is cleared, you can create an artifact in a
specific location. Later, you will select the Use One-Click Create check box to continue creating similar
artifacts quickly.
Figure 4: The Use One-Click Create check box is cleared
2. From the main content of the module, click Create New Artifacts.
3. In the “Create an arifact with attributes” window, provide information about the new artifact:
a. Name: Introduction
Student Workbook Module: Modules as requirement specifications
Lab 3: Creating a module and converting it to a template
© Copyright IBM Corp. 2013 5
Course materials may not be reproduced in whole or in part without the prior written permission of IBM.
b. Artifact Type: Information
c. Artifact Format: Text
d. Ensure that the folder location is Vision Document Template artifacts.
Figure 5: Information about the new Introduction artifact
4. Click Finish. The new artifact is displayed in the module.
5. From the edit menu of the artifact you just create, select Display as Heading.
Figure 6: The Display as Heading menu item
The artifact becomes a numbered section.
Student Workbook Module: Modules as requirement specifications
Lab 3: Creating a module and converting it to a template
6 © Copyright IBM Corp. 2013
Course materials may not be reproduced in whole or in part without the prior written permission of IBM.
Figure 7: The artifact is displayed as a numbered section
6. Select section 1 and expand the edit menu. From the menu, click Create New Similar (information) > Below
(as a Child). A new artifact is displayed in the module.
7. In the new module, type Summary of this project and why we are doing it. Because you
created a similar artifact, this artifact is a heading. While you are editing the artifact, press Ctrl+H to change the
artifact from a heading to non-heading text.
8. Press Ctrl+N to create another similar artifact after the current artifact.
9. In the new artifact, type Intended Use. While you are editing the artifact, press Ctrl+H to display the
artifact as a heading.
10. Press Ctrl+N to create the following artifacts, all of which are headings:
a. Business Goals
b. Vision Statements
c. Scope
d. Product Solution
e. Special Requests
Your module should now look like this example:
Figure 8: A module with 8 artifacts that still need some hierarchical organization
Student Workbook Module: Modules as requirement specifications
Lab 3: Creating a module and converting it to a template
© Copyright IBM Corp. 2013 7
Course materials may not be reproduced in whole or in part without the prior written permission of IBM.
Task 3: Organize artifacts hierarchically by using promote and demote
1. Select 1.4 Scope and 1.5 Product Solution, and from the Edit option of one of the selected artifact, select
demote.
Figure 9: Demote two artifacts
2. Select sections 1.2, 1.3, and 1.4 and from the edit options of one of the selected artifact, select Promote
Artifacts.
Task 4: Move sections within the module
Move section 3, Vision Statements, and its two hierarchical children to come after the current section 4, Special
Requests. This task documents only one of several ways that you can move sections.
1. Select the check box for section 3, Vision Statement, and from its edit menu, click Cut Artifact.
Figure 10: Select section 3, and Cut the artifact.
Student Workbook Module: Modules as requirement specifications
Lab 3: Creating a module and converting it to a template
8 © Copyright IBM Corp. 2013
Course materials may not be reproduced in whole or in part without the prior written permission of IBM.
2. From the edit option of section 4. Special Requests, select Paste Special.
3. In the Past Special window, select Paste selection after this artifact. The resulting outline should look like this
example:
Figure 11: The Vision Statements section is moved after the Special Requests section
Task 5: Remove and delete a new artifact
The Special Requests section does not belong in the vision document. That section is part of the stakeholder
requirements. Remove the section and delete the artifact from the module
1. From within the module, open the section 3. Special Requests artifact. Notice that this requirement is not used
in other areas.
TIP: In addition to modules, an artifact can be part of collections. Such information would not appear in the rich
hover of the artifact.
Figure 12: The In Module section shows that the artifact is used in one module
Student Workbook Module: Modules as requirement specifications
Lab 3: Creating a module and converting it to a template
© Copyright IBM Corp. 2013 9
Course materials may not be reproduced in whole or in part without the prior written permission of IBM.
2. Use the breadcrumbs to return to the Vision Document Template module.
3. From the edit menu of Section 3, Special Requests, click Remove Artifact.
4. Confirm that you are removing the artifact from the module. When you remove an artifact, it is not deleted.
The artifact still exists as a base artifact.
5. Delete the base artifact by clicking Delete. You can delete the base artifact because this artifact was not used in
other modules. After the deletion, the subsequent sections are renumbered.
Task 6: Create a template
You can now finalize the module and create a template.
1. From the upper-right corner of the module, click the Create Artifact Template icon.
Figure 13: The Create Artifact Template icon
2. In the New Artifact Template window, provide information about the new artifact:
a. Ensure that the name of the template is Vision Document Template
b. For the duplication policy, select Duplicate no artifacts (re-use all artifacts). This option implies reuse.
3. Click Create, and then click Close.
Student Workbook Module: Modules as requirement specifications
Lab 3: Creating a module and converting it to a template
10 © Copyright IBM Corp. 2013
Course materials may not be reproduced in whole or in part without the prior written permission of IBM.
Task 7: Locate the base artifacts
1. Return to the Module Templates folder by using the breadcrumbs.
2. Find the Vision Document Template that Bob created, and then navigate to the Vision Document Template
artifacts folder.
3. Observe the base artifacts that were created and are used in the module.
Task 8: Create a module from a template
1. Navigate to the 01 Requirements folder.
2. Click the arrow on the Create Artifact button and select Requirements Specification
3. In the “Create an artifact with attributes” window, provide the following information:
a. For the name, type Test Vision template
b. For the Template, select Vision Document Template.
c. Select the Open Artifact check box.
Figure 14: Creating a module from a template
4. Click Finish.
5. After the module is displayed, open an artifact and observe which modules it is used in.
Figure 15: The In Module section shows two modules
6. Use the breadcrumbs to return to the Test Vision template module, and then to 01 Requirements folder.
7. Find the Test Vision template and delete it from the project by using its edit menu.

More Related Content

Viewers also liked

DOORS Tips and Tricks
DOORS Tips and TricksDOORS Tips and Tricks
DOORS Tips and TricksManageware
 
Oι φαναριώτες στην ελληνικη επανασταση. Εργασία στο μάθημα της ιστορίας. Γ΄Γυ...
Oι φαναριώτες στην ελληνικη επανασταση. Εργασία στο μάθημα της ιστορίας. Γ΄Γυ...Oι φαναριώτες στην ελληνικη επανασταση. Εργασία στο μάθημα της ιστορίας. Γ΄Γυ...
Oι φαναριώτες στην ελληνικη επανασταση. Εργασία στο μάθημα της ιστορίας. Γ΄Γυ...Εύα Ζαρκογιάννη
 
Five tips for improving the ROI of your software investments
Five tips for improving the ROI of your software investmentsFive tips for improving the ROI of your software investments
Five tips for improving the ROI of your software investmentsIBM Rational software
 
Sammenhæng i data på uc’erne
Sammenhæng i data på uc’erneSammenhæng i data på uc’erne
Sammenhæng i data på uc’erneJacob-Steen Madsen
 
Raport aktywności na facebooku Maj 2011
Raport aktywności na facebooku Maj 2011Raport aktywności na facebooku Maj 2011
Raport aktywności na facebooku Maj 2011NapoleonCat.com
 
Napoleon nowości 19.10.2011
Napoleon nowości 19.10.2011Napoleon nowości 19.10.2011
Napoleon nowości 19.10.2011NapoleonCat.com
 
Golden opportunity to invest 2011
Golden opportunity to invest 2011Golden opportunity to invest 2011
Golden opportunity to invest 2011Fausto Cuzco
 
Paper development
Paper developmentPaper development
Paper developmentmitchello44
 
How to accelerate your financial services compliance initiatives
How to accelerate your financial services compliance initiativesHow to accelerate your financial services compliance initiatives
How to accelerate your financial services compliance initiativesIBM Rational software
 
Fitxes castanyada 2010
Fitxes castanyada 2010Fitxes castanyada 2010
Fitxes castanyada 2010espems
 
Social media airing your literacy laundry
Social media airing your literacy laundrySocial media airing your literacy laundry
Social media airing your literacy laundryBonnie Zink
 
Spectra halfday pdf
Spectra halfday pdfSpectra halfday pdf
Spectra halfday pdfhtrdano
 
Conceptos básicos de historia no completo
Conceptos básicos de historia no completoConceptos básicos de historia no completo
Conceptos básicos de historia no completoaranferpra
 
A journey from 2012 to 2013 & forward
A journey from 2012 to 2013 & forwardA journey from 2012 to 2013 & forward
A journey from 2012 to 2013 & forwardVinod Sailes
 
RTC Migration for EM Services Offerings from Rational Lab Services
RTC Migration for EM Services Offerings from Rational Lab Services RTC Migration for EM Services Offerings from Rational Lab Services
RTC Migration for EM Services Offerings from Rational Lab Services IBM Rational software
 
I hate meth project overview
I hate meth project overviewI hate meth project overview
I hate meth project overviewDerek Douglas
 
Lepp | Design - CMID Presentation Phase 1
Lepp | Design - CMID Presentation Phase 1Lepp | Design - CMID Presentation Phase 1
Lepp | Design - CMID Presentation Phase 1pjsteenbergen
 

Viewers also liked (20)

DOORS Tips and Tricks
DOORS Tips and TricksDOORS Tips and Tricks
DOORS Tips and Tricks
 
Oι φαναριώτες στην ελληνικη επανασταση. Εργασία στο μάθημα της ιστορίας. Γ΄Γυ...
Oι φαναριώτες στην ελληνικη επανασταση. Εργασία στο μάθημα της ιστορίας. Γ΄Γυ...Oι φαναριώτες στην ελληνικη επανασταση. Εργασία στο μάθημα της ιστορίας. Γ΄Γυ...
Oι φαναριώτες στην ελληνικη επανασταση. Εργασία στο μάθημα της ιστορίας. Γ΄Γυ...
 
Five tips for improving the ROI of your software investments
Five tips for improving the ROI of your software investmentsFive tips for improving the ROI of your software investments
Five tips for improving the ROI of your software investments
 
Lecture 4
Lecture 4Lecture 4
Lecture 4
 
Sammenhæng i data på uc’erne
Sammenhæng i data på uc’erneSammenhæng i data på uc’erne
Sammenhæng i data på uc’erne
 
Raport aktywności na facebooku Maj 2011
Raport aktywności na facebooku Maj 2011Raport aktywności na facebooku Maj 2011
Raport aktywności na facebooku Maj 2011
 
Mitch pt3
Mitch pt3Mitch pt3
Mitch pt3
 
Napoleon nowości 19.10.2011
Napoleon nowości 19.10.2011Napoleon nowości 19.10.2011
Napoleon nowości 19.10.2011
 
Golden opportunity to invest 2011
Golden opportunity to invest 2011Golden opportunity to invest 2011
Golden opportunity to invest 2011
 
Paper development
Paper developmentPaper development
Paper development
 
How to accelerate your financial services compliance initiatives
How to accelerate your financial services compliance initiativesHow to accelerate your financial services compliance initiatives
How to accelerate your financial services compliance initiatives
 
Fitxes castanyada 2010
Fitxes castanyada 2010Fitxes castanyada 2010
Fitxes castanyada 2010
 
Social media airing your literacy laundry
Social media airing your literacy laundrySocial media airing your literacy laundry
Social media airing your literacy laundry
 
Spectra halfday pdf
Spectra halfday pdfSpectra halfday pdf
Spectra halfday pdf
 
Conceptos básicos de historia no completo
Conceptos básicos de historia no completoConceptos básicos de historia no completo
Conceptos básicos de historia no completo
 
A journey from 2012 to 2013 & forward
A journey from 2012 to 2013 & forwardA journey from 2012 to 2013 & forward
A journey from 2012 to 2013 & forward
 
RTC Migration for EM Services Offerings from Rational Lab Services
RTC Migration for EM Services Offerings from Rational Lab Services RTC Migration for EM Services Offerings from Rational Lab Services
RTC Migration for EM Services Offerings from Rational Lab Services
 
Phoneix AD
Phoneix ADPhoneix AD
Phoneix AD
 
I hate meth project overview
I hate meth project overviewI hate meth project overview
I hate meth project overview
 
Lepp | Design - CMID Presentation Phase 1
Lepp | Design - CMID Presentation Phase 1Lepp | Design - CMID Presentation Phase 1
Lepp | Design - CMID Presentation Phase 1
 

Similar to Lab 3: Creating a module and converting it to a template

Lab 3: Optional: Creating views at the module level (web client)
Lab 3: Optional: Creating views at the module level (web client)Lab 3: Optional: Creating views at the module level (web client)
Lab 3: Optional: Creating views at the module level (web client)IBM Rational software
 
Lab 3: Commenting on artifacts and customizing dashboards
Lab 3: Commenting on artifacts and customizing dashboardsLab 3: Commenting on artifacts and customizing dashboards
Lab 3: Commenting on artifacts and customizing dashboardsIBM Rational software
 
Lab 2: Optional: Creating requirements information
Lab 2: Optional: Creating requirements informationLab 2: Optional: Creating requirements information
Lab 2: Optional: Creating requirements informationIBM Rational software
 
Lab 2: Creating views at the project level in the web client
Lab 2: Creating views at the project level in the web clientLab 2: Creating views at the project level in the web client
Lab 2: Creating views at the project level in the web clientIBM Rational software
 
Lab 1: Importing a Microsoft Word file as a module
Lab 1: Importing a Microsoft Word file as a moduleLab 1: Importing a Microsoft Word file as a module
Lab 1: Importing a Microsoft Word file as a moduleIBM Rational software
 
Lab 1: Generating document-style reports
Lab 1: Generating document-style reportsLab 1: Generating document-style reports
Lab 1: Generating document-style reportsIBM Rational software
 
Creating an artifact at the project level
Creating an artifact at the project levelCreating an artifact at the project level
Creating an artifact at the project levelIBM Rational software
 
Lab 1: Import a rich text file and extract linked requirements
Lab 1: Import a rich text file and extract linked requirementsLab 1: Import a rich text file and extract linked requirements
Lab 1: Import a rich text file and extract linked requirementsIBM Rational software
 
Oracle Configurator Developer
Oracle Configurator DeveloperOracle Configurator Developer
Oracle Configurator DeveloperPritesh Mogane
 
Lab 2: Importing requirements artifacts from a CSV file
Lab 2: Importing requirements artifacts from a CSV file Lab 2: Importing requirements artifacts from a CSV file
Lab 2: Importing requirements artifacts from a CSV file IBM Rational software
 
CrossUI Tutorial - intermediate - reusable module
CrossUI Tutorial  - intermediate - reusable moduleCrossUI Tutorial  - intermediate - reusable module
CrossUI Tutorial - intermediate - reusable moduleJack Lee
 
Modules as requirement specifications
Modules as requirement specificationsModules as requirement specifications
Modules as requirement specificationsIBM Rational software
 
Industrial training solid works report by atharva mahalle (19 me001)
Industrial training solid works report by atharva mahalle (19 me001) Industrial training solid works report by atharva mahalle (19 me001)
Industrial training solid works report by atharva mahalle (19 me001) NSVines
 
Lab 1: Managing requirements by using suspect traceability -module
Lab 1: Managing requirements by using suspect traceability -moduleLab 1: Managing requirements by using suspect traceability -module
Lab 1: Managing requirements by using suspect traceability -moduleIBM Rational software
 
Bm0025 visual basic
Bm0025   visual basicBm0025   visual basic
Bm0025 visual basicsmumbahelp
 

Similar to Lab 3: Creating a module and converting it to a template (20)

Lab 3: Optional: Creating views at the module level (web client)
Lab 3: Optional: Creating views at the module level (web client)Lab 3: Optional: Creating views at the module level (web client)
Lab 3: Optional: Creating views at the module level (web client)
 
Lab 3: Commenting on artifacts and customizing dashboards
Lab 3: Commenting on artifacts and customizing dashboardsLab 3: Commenting on artifacts and customizing dashboards
Lab 3: Commenting on artifacts and customizing dashboards
 
Lab 2: Optional: Creating requirements information
Lab 2: Optional: Creating requirements informationLab 2: Optional: Creating requirements information
Lab 2: Optional: Creating requirements information
 
Lab 2: Creating views at the project level in the web client
Lab 2: Creating views at the project level in the web clientLab 2: Creating views at the project level in the web client
Lab 2: Creating views at the project level in the web client
 
Lab 2: Reusing requirements
Lab 2: Reusing requirementsLab 2: Reusing requirements
Lab 2: Reusing requirements
 
Lab 1: Importing a Microsoft Word file as a module
Lab 1: Importing a Microsoft Word file as a moduleLab 1: Importing a Microsoft Word file as a module
Lab 1: Importing a Microsoft Word file as a module
 
Lab 2: Creating and applying tags
Lab 2: Creating and applying tagsLab 2: Creating and applying tags
Lab 2: Creating and applying tags
 
Lab 1: Generating document-style reports
Lab 1: Generating document-style reportsLab 1: Generating document-style reports
Lab 1: Generating document-style reports
 
Creating an artifact at the project level
Creating an artifact at the project levelCreating an artifact at the project level
Creating an artifact at the project level
 
Lab 1: Import a rich text file and extract linked requirements
Lab 1: Import a rich text file and extract linked requirementsLab 1: Import a rich text file and extract linked requirements
Lab 1: Import a rich text file and extract linked requirements
 
Les04
Les04Les04
Les04
 
Oracle Configurator Developer
Oracle Configurator DeveloperOracle Configurator Developer
Oracle Configurator Developer
 
Lab 2: Importing requirements artifacts from a CSV file
Lab 2: Importing requirements artifacts from a CSV file Lab 2: Importing requirements artifacts from a CSV file
Lab 2: Importing requirements artifacts from a CSV file
 
CrossUI Tutorial - intermediate - reusable module
CrossUI Tutorial  - intermediate - reusable moduleCrossUI Tutorial  - intermediate - reusable module
CrossUI Tutorial - intermediate - reusable module
 
Modules as requirement specifications
Modules as requirement specificationsModules as requirement specifications
Modules as requirement specifications
 
Industrial training solid works report by atharva mahalle (19 me001)
Industrial training solid works report by atharva mahalle (19 me001) Industrial training solid works report by atharva mahalle (19 me001)
Industrial training solid works report by atharva mahalle (19 me001)
 
Lab 1: Managing requirements by using suspect traceability -module
Lab 1: Managing requirements by using suspect traceability -moduleLab 1: Managing requirements by using suspect traceability -module
Lab 1: Managing requirements by using suspect traceability -module
 
Bm0025 visual basic
Bm0025   visual basicBm0025   visual basic
Bm0025 visual basic
 
ArgoUML.ppt
ArgoUML.pptArgoUML.ppt
ArgoUML.ppt
 
Les04
Les04Les04
Les04
 

More from IBM Rational software

DMT-2467 Like the Features in Rational DOORS 9? Come Check Them Out in DOORS...
DMT-2467	Like the Features in Rational DOORS 9? Come Check Them Out in DOORS...DMT-2467	Like the Features in Rational DOORS 9? Come Check Them Out in DOORS...
DMT-2467 Like the Features in Rational DOORS 9? Come Check Them Out in DOORS...IBM Rational software
 
Dmt 5899 workshop - Learn to Collaborate, Trace, Review and Reuse Your Requir...
Dmt 5899 workshop - Learn to Collaborate, Trace, Review and Reuse Your Requir...Dmt 5899 workshop - Learn to Collaborate, Trace, Review and Reuse Your Requir...
Dmt 5899 workshop - Learn to Collaborate, Trace, Review and Reuse Your Requir...IBM Rational software
 
Steer at the Team Level with Rational Team Concert
Steer at the Team Level with Rational Team ConcertSteer at the Team Level with Rational Team Concert
Steer at the Team Level with Rational Team ConcertIBM Rational software
 
UrbanCode Deploy course and product overview slides
UrbanCode Deploy course and product overview slidesUrbanCode Deploy course and product overview slides
UrbanCode Deploy course and product overview slidesIBM Rational software
 
IBM InterConnect Speaker Proposal Tips
IBM InterConnect Speaker Proposal TipsIBM InterConnect Speaker Proposal Tips
IBM InterConnect Speaker Proposal TipsIBM Rational software
 
Factors to consider when starting a brand-new requirements management project...
Factors to consider when starting a brand-new requirements management project...Factors to consider when starting a brand-new requirements management project...
Factors to consider when starting a brand-new requirements management project...IBM Rational software
 
IBM DevOps Announcements - June 2014
IBM DevOps Announcements - June 2014IBM DevOps Announcements - June 2014
IBM DevOps Announcements - June 2014IBM Rational software
 
IBM Rational Developer for System z Quick Start Sales Presentation
IBM Rational Developer for System z Quick Start Sales PresentationIBM Rational Developer for System z Quick Start Sales Presentation
IBM Rational Developer for System z Quick Start Sales PresentationIBM Rational software
 
Rational consulting café to go menu
Rational consulting café to go menuRational consulting café to go menu
Rational consulting café to go menuIBM Rational software
 

More from IBM Rational software (20)

DMT-2467 Like the Features in Rational DOORS 9? Come Check Them Out in DOORS...
DMT-2467	Like the Features in Rational DOORS 9? Come Check Them Out in DOORS...DMT-2467	Like the Features in Rational DOORS 9? Come Check Them Out in DOORS...
DMT-2467 Like the Features in Rational DOORS 9? Come Check Them Out in DOORS...
 
Dmt 5899 workshop - Learn to Collaborate, Trace, Review and Reuse Your Requir...
Dmt 5899 workshop - Learn to Collaborate, Trace, Review and Reuse Your Requir...Dmt 5899 workshop - Learn to Collaborate, Trace, Review and Reuse Your Requir...
Dmt 5899 workshop - Learn to Collaborate, Trace, Review and Reuse Your Requir...
 
Deployment module slides
Deployment module slidesDeployment module slides
Deployment module slides
 
Security
SecuritySecurity
Security
 
Steer at the Team Level with Rational Team Concert
Steer at the Team Level with Rational Team ConcertSteer at the Team Level with Rational Team Concert
Steer at the Team Level with Rational Team Concert
 
Applications lab
Applications lab Applications lab
Applications lab
 
Application slides
Application slidesApplication slides
Application slides
 
Components lab
Components labComponents lab
Components lab
 
UCD components
UCD components UCD components
UCD components
 
Resource lab
Resource labResource lab
Resource lab
 
Resources slides
Resources slidesResources slides
Resources slides
 
UrbanCode Deploy course and product overview slides
UrbanCode Deploy course and product overview slidesUrbanCode Deploy course and product overview slides
UrbanCode Deploy course and product overview slides
 
IBM InterConnect Speaker Proposal Tips
IBM InterConnect Speaker Proposal TipsIBM InterConnect Speaker Proposal Tips
IBM InterConnect Speaker Proposal Tips
 
Factors to consider when starting a brand-new requirements management project...
Factors to consider when starting a brand-new requirements management project...Factors to consider when starting a brand-new requirements management project...
Factors to consider when starting a brand-new requirements management project...
 
IBM DevOps Announcements - June 2014
IBM DevOps Announcements - June 2014IBM DevOps Announcements - June 2014
IBM DevOps Announcements - June 2014
 
IBM Rational Developer for System z Quick Start Sales Presentation
IBM Rational Developer for System z Quick Start Sales PresentationIBM Rational Developer for System z Quick Start Sales Presentation
IBM Rational Developer for System z Quick Start Sales Presentation
 
Rational consulting café to go menu
Rational consulting café to go menuRational consulting café to go menu
Rational consulting café to go menu
 
Lab3 RTC Source Control
Lab3 RTC Source ControlLab3 RTC Source Control
Lab3 RTC Source Control
 
Lab2 RTC Work Items
Lab2 RTC Work ItemsLab2 RTC Work Items
Lab2 RTC Work Items
 
Lab4 RTC Builds
Lab4 RTC BuildsLab4 RTC Builds
Lab4 RTC Builds
 

Recently uploaded

Student Profile Sample - We help schools to connect the data they have, with ...
Student Profile Sample - We help schools to connect the data they have, with ...Student Profile Sample - We help schools to connect the data they have, with ...
Student Profile Sample - We help schools to connect the data they have, with ...Seán Kennedy
 
Integumentary System SMP B. Pharm Sem I.ppt
Integumentary System SMP B. Pharm Sem I.pptIntegumentary System SMP B. Pharm Sem I.ppt
Integumentary System SMP B. Pharm Sem I.pptshraddhaparab530
 
Textual Evidence in Reading and Writing of SHS
Textual Evidence in Reading and Writing of SHSTextual Evidence in Reading and Writing of SHS
Textual Evidence in Reading and Writing of SHSMae Pangan
 
Expanded definition: technical and operational
Expanded definition: technical and operationalExpanded definition: technical and operational
Expanded definition: technical and operationalssuser3e220a
 
INTRODUCTION TO CATHOLIC CHRISTOLOGY.pptx
INTRODUCTION TO CATHOLIC CHRISTOLOGY.pptxINTRODUCTION TO CATHOLIC CHRISTOLOGY.pptx
INTRODUCTION TO CATHOLIC CHRISTOLOGY.pptxHumphrey A Beña
 
Transaction Management in Database Management System
Transaction Management in Database Management SystemTransaction Management in Database Management System
Transaction Management in Database Management SystemChristalin Nelson
 
GRADE 4 - SUMMATIVE TEST QUARTER 4 ALL SUBJECTS
GRADE 4 - SUMMATIVE TEST QUARTER 4 ALL SUBJECTSGRADE 4 - SUMMATIVE TEST QUARTER 4 ALL SUBJECTS
GRADE 4 - SUMMATIVE TEST QUARTER 4 ALL SUBJECTSJoshuaGantuangco2
 
Inclusivity Essentials_ Creating Accessible Websites for Nonprofits .pdf
Inclusivity Essentials_ Creating Accessible Websites for Nonprofits .pdfInclusivity Essentials_ Creating Accessible Websites for Nonprofits .pdf
Inclusivity Essentials_ Creating Accessible Websites for Nonprofits .pdfTechSoup
 
Karra SKD Conference Presentation Revised.pptx
Karra SKD Conference Presentation Revised.pptxKarra SKD Conference Presentation Revised.pptx
Karra SKD Conference Presentation Revised.pptxAshokKarra1
 
ICS2208 Lecture6 Notes for SL spaces.pdf
ICS2208 Lecture6 Notes for SL spaces.pdfICS2208 Lecture6 Notes for SL spaces.pdf
ICS2208 Lecture6 Notes for SL spaces.pdfVanessa Camilleri
 
THEORIES OF ORGANIZATION-PUBLIC ADMINISTRATION
THEORIES OF ORGANIZATION-PUBLIC ADMINISTRATIONTHEORIES OF ORGANIZATION-PUBLIC ADMINISTRATION
THEORIES OF ORGANIZATION-PUBLIC ADMINISTRATIONHumphrey A Beña
 
4.16.24 Poverty and Precarity--Desmond.pptx
4.16.24 Poverty and Precarity--Desmond.pptx4.16.24 Poverty and Precarity--Desmond.pptx
4.16.24 Poverty and Precarity--Desmond.pptxmary850239
 
Visit to a blind student's school🧑‍🦯🧑‍🦯(community medicine)
Visit to a blind student's school🧑‍🦯🧑‍🦯(community medicine)Visit to a blind student's school🧑‍🦯🧑‍🦯(community medicine)
Visit to a blind student's school🧑‍🦯🧑‍🦯(community medicine)lakshayb543
 
4.16.24 21st Century Movements for Black Lives.pptx
4.16.24 21st Century Movements for Black Lives.pptx4.16.24 21st Century Movements for Black Lives.pptx
4.16.24 21st Century Movements for Black Lives.pptxmary850239
 
ClimART Action | eTwinning Project
ClimART Action    |    eTwinning ProjectClimART Action    |    eTwinning Project
ClimART Action | eTwinning Projectjordimapav
 
Active Learning Strategies (in short ALS).pdf
Active Learning Strategies (in short ALS).pdfActive Learning Strategies (in short ALS).pdf
Active Learning Strategies (in short ALS).pdfPatidar M
 
Grade 9 Quarter 4 Dll Grade 9 Quarter 4 DLL.pdf
Grade 9 Quarter 4 Dll Grade 9 Quarter 4 DLL.pdfGrade 9 Quarter 4 Dll Grade 9 Quarter 4 DLL.pdf
Grade 9 Quarter 4 Dll Grade 9 Quarter 4 DLL.pdfJemuel Francisco
 
ROLES IN A STAGE PRODUCTION in arts.pptx
ROLES IN A STAGE PRODUCTION in arts.pptxROLES IN A STAGE PRODUCTION in arts.pptx
ROLES IN A STAGE PRODUCTION in arts.pptxVanesaIglesias10
 

Recently uploaded (20)

Student Profile Sample - We help schools to connect the data they have, with ...
Student Profile Sample - We help schools to connect the data they have, with ...Student Profile Sample - We help schools to connect the data they have, with ...
Student Profile Sample - We help schools to connect the data they have, with ...
 
INCLUSIVE EDUCATION PRACTICES FOR TEACHERS AND TRAINERS.pptx
INCLUSIVE EDUCATION PRACTICES FOR TEACHERS AND TRAINERS.pptxINCLUSIVE EDUCATION PRACTICES FOR TEACHERS AND TRAINERS.pptx
INCLUSIVE EDUCATION PRACTICES FOR TEACHERS AND TRAINERS.pptx
 
Integumentary System SMP B. Pharm Sem I.ppt
Integumentary System SMP B. Pharm Sem I.pptIntegumentary System SMP B. Pharm Sem I.ppt
Integumentary System SMP B. Pharm Sem I.ppt
 
Textual Evidence in Reading and Writing of SHS
Textual Evidence in Reading and Writing of SHSTextual Evidence in Reading and Writing of SHS
Textual Evidence in Reading and Writing of SHS
 
Expanded definition: technical and operational
Expanded definition: technical and operationalExpanded definition: technical and operational
Expanded definition: technical and operational
 
INTRODUCTION TO CATHOLIC CHRISTOLOGY.pptx
INTRODUCTION TO CATHOLIC CHRISTOLOGY.pptxINTRODUCTION TO CATHOLIC CHRISTOLOGY.pptx
INTRODUCTION TO CATHOLIC CHRISTOLOGY.pptx
 
Transaction Management in Database Management System
Transaction Management in Database Management SystemTransaction Management in Database Management System
Transaction Management in Database Management System
 
YOUVE_GOT_EMAIL_PRELIMS_EL_DORADO_2024.pptx
YOUVE_GOT_EMAIL_PRELIMS_EL_DORADO_2024.pptxYOUVE_GOT_EMAIL_PRELIMS_EL_DORADO_2024.pptx
YOUVE_GOT_EMAIL_PRELIMS_EL_DORADO_2024.pptx
 
GRADE 4 - SUMMATIVE TEST QUARTER 4 ALL SUBJECTS
GRADE 4 - SUMMATIVE TEST QUARTER 4 ALL SUBJECTSGRADE 4 - SUMMATIVE TEST QUARTER 4 ALL SUBJECTS
GRADE 4 - SUMMATIVE TEST QUARTER 4 ALL SUBJECTS
 
Inclusivity Essentials_ Creating Accessible Websites for Nonprofits .pdf
Inclusivity Essentials_ Creating Accessible Websites for Nonprofits .pdfInclusivity Essentials_ Creating Accessible Websites for Nonprofits .pdf
Inclusivity Essentials_ Creating Accessible Websites for Nonprofits .pdf
 
Karra SKD Conference Presentation Revised.pptx
Karra SKD Conference Presentation Revised.pptxKarra SKD Conference Presentation Revised.pptx
Karra SKD Conference Presentation Revised.pptx
 
ICS2208 Lecture6 Notes for SL spaces.pdf
ICS2208 Lecture6 Notes for SL spaces.pdfICS2208 Lecture6 Notes for SL spaces.pdf
ICS2208 Lecture6 Notes for SL spaces.pdf
 
THEORIES OF ORGANIZATION-PUBLIC ADMINISTRATION
THEORIES OF ORGANIZATION-PUBLIC ADMINISTRATIONTHEORIES OF ORGANIZATION-PUBLIC ADMINISTRATION
THEORIES OF ORGANIZATION-PUBLIC ADMINISTRATION
 
4.16.24 Poverty and Precarity--Desmond.pptx
4.16.24 Poverty and Precarity--Desmond.pptx4.16.24 Poverty and Precarity--Desmond.pptx
4.16.24 Poverty and Precarity--Desmond.pptx
 
Visit to a blind student's school🧑‍🦯🧑‍🦯(community medicine)
Visit to a blind student's school🧑‍🦯🧑‍🦯(community medicine)Visit to a blind student's school🧑‍🦯🧑‍🦯(community medicine)
Visit to a blind student's school🧑‍🦯🧑‍🦯(community medicine)
 
4.16.24 21st Century Movements for Black Lives.pptx
4.16.24 21st Century Movements for Black Lives.pptx4.16.24 21st Century Movements for Black Lives.pptx
4.16.24 21st Century Movements for Black Lives.pptx
 
ClimART Action | eTwinning Project
ClimART Action    |    eTwinning ProjectClimART Action    |    eTwinning Project
ClimART Action | eTwinning Project
 
Active Learning Strategies (in short ALS).pdf
Active Learning Strategies (in short ALS).pdfActive Learning Strategies (in short ALS).pdf
Active Learning Strategies (in short ALS).pdf
 
Grade 9 Quarter 4 Dll Grade 9 Quarter 4 DLL.pdf
Grade 9 Quarter 4 Dll Grade 9 Quarter 4 DLL.pdfGrade 9 Quarter 4 Dll Grade 9 Quarter 4 DLL.pdf
Grade 9 Quarter 4 Dll Grade 9 Quarter 4 DLL.pdf
 
ROLES IN A STAGE PRODUCTION in arts.pptx
ROLES IN A STAGE PRODUCTION in arts.pptxROLES IN A STAGE PRODUCTION in arts.pptx
ROLES IN A STAGE PRODUCTION in arts.pptx
 

Lab 3: Creating a module and converting it to a template

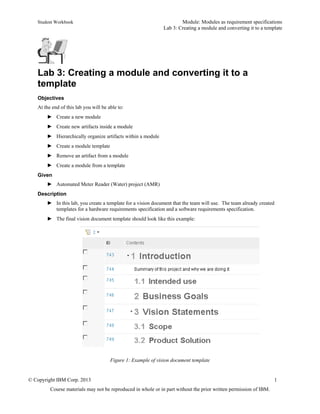
  • 1. Student Workbook Module: Modules as requirement specifications Lab 3: Creating a module and converting it to a template © Copyright IBM Corp. 2013 1 Course materials may not be reproduced in whole or in part without the prior written permission of IBM. Lab 3: Creating a module and converting it to a template Objectives At the end of this lab you will be able to: ► Create a new module ► Create new artifacts inside a module ► Hierarchically organize artifacts within a module ► Create a module template ► Remove an artifact from a module ► Create a module from a template Given ► Automated Meter Reader (Water) project (AMR) Description ► In this lab, you create a template for a vision document that the team will use. The team already created templates for a hardware requirements specification and a software requirements specification. ► The final vision document template should look like this example: Figure 1: Example of vision document template
  • 2. Student Workbook Module: Modules as requirement specifications Lab 3: Creating a module and converting it to a template 2 © Copyright IBM Corp. 2013 Course materials may not be reproduced in whole or in part without the prior written permission of IBM. Exercise tasks In this exercise, you complete these tasks:  Task 1: Create a module artifact  Task 2: Add new artifacts to the vision document and create sections  Task 3: Organize artifacts hierarchically by using promote and demote  Task 4: Move sections within the module  Task 5: Remove and delete a new artifact  Task 6: Create a template  Task 7: Locate the base artifacts  Task 8: Create a module from a template
  • 3. Student Workbook Module: Modules as requirement specifications Lab 3: Creating a module and converting it to a template © Copyright IBM Corp. 2013 3 Course materials may not be reproduced in whole or in part without the prior written permission of IBM. Task 1: Create a module artifact 1. You are in the lab environment All Projects page of the RM application (https://jazz- server:9443/rm/web). You are logged in as bob with password bob. 2. Navigate to the Automated Meter Reader (Water) project Artifact page. 3. In the Automated Meter Reader (Water) project, open the Module Template folder. Notice the two templates: a. Hardware Requirements Specification Template b. Software Requirements Specification Template 4. From the edit options of the Module Template folder, click Create. 5. In the “Create an artifact with attributes” window, provide information about the new artifact: a. Name: Vision Document Template b. Artifact type: Requirements Specification c. For the artifact format, ensure that the default format, which is Module, is selected. d. For the description, type Template for vision documents e. Ensure that the folder location is Module Template. f. Select the Open Artifact check box. Figure 2: Information about the new vision document template
  • 4. Student Workbook Module: Modules as requirement specifications Lab 3: Creating a module and converting it to a template 4 © Copyright IBM Corp. 2013 Course materials may not be reproduced in whole or in part without the prior written permission of IBM. 6. Click Finish. The vision document template opens for editing. Figure 3: New module Task 2: Add new artifacts to the vision document and create sections 1. From the navigation section of the module, click the arrow on the Create Artifact button, and ensure that the Use One-click create check box is cleared. When that check box is cleared, you can create an artifact in a specific location. Later, you will select the Use One-Click Create check box to continue creating similar artifacts quickly. Figure 4: The Use One-Click Create check box is cleared 2. From the main content of the module, click Create New Artifacts. 3. In the “Create an arifact with attributes” window, provide information about the new artifact: a. Name: Introduction
  • 5. Student Workbook Module: Modules as requirement specifications Lab 3: Creating a module and converting it to a template © Copyright IBM Corp. 2013 5 Course materials may not be reproduced in whole or in part without the prior written permission of IBM. b. Artifact Type: Information c. Artifact Format: Text d. Ensure that the folder location is Vision Document Template artifacts. Figure 5: Information about the new Introduction artifact 4. Click Finish. The new artifact is displayed in the module. 5. From the edit menu of the artifact you just create, select Display as Heading. Figure 6: The Display as Heading menu item The artifact becomes a numbered section.
  • 6. Student Workbook Module: Modules as requirement specifications Lab 3: Creating a module and converting it to a template 6 © Copyright IBM Corp. 2013 Course materials may not be reproduced in whole or in part without the prior written permission of IBM. Figure 7: The artifact is displayed as a numbered section 6. Select section 1 and expand the edit menu. From the menu, click Create New Similar (information) > Below (as a Child). A new artifact is displayed in the module. 7. In the new module, type Summary of this project and why we are doing it. Because you created a similar artifact, this artifact is a heading. While you are editing the artifact, press Ctrl+H to change the artifact from a heading to non-heading text. 8. Press Ctrl+N to create another similar artifact after the current artifact. 9. In the new artifact, type Intended Use. While you are editing the artifact, press Ctrl+H to display the artifact as a heading. 10. Press Ctrl+N to create the following artifacts, all of which are headings: a. Business Goals b. Vision Statements c. Scope d. Product Solution e. Special Requests Your module should now look like this example: Figure 8: A module with 8 artifacts that still need some hierarchical organization
  • 7. Student Workbook Module: Modules as requirement specifications Lab 3: Creating a module and converting it to a template © Copyright IBM Corp. 2013 7 Course materials may not be reproduced in whole or in part without the prior written permission of IBM. Task 3: Organize artifacts hierarchically by using promote and demote 1. Select 1.4 Scope and 1.5 Product Solution, and from the Edit option of one of the selected artifact, select demote. Figure 9: Demote two artifacts 2. Select sections 1.2, 1.3, and 1.4 and from the edit options of one of the selected artifact, select Promote Artifacts. Task 4: Move sections within the module Move section 3, Vision Statements, and its two hierarchical children to come after the current section 4, Special Requests. This task documents only one of several ways that you can move sections. 1. Select the check box for section 3, Vision Statement, and from its edit menu, click Cut Artifact. Figure 10: Select section 3, and Cut the artifact.
  • 8. Student Workbook Module: Modules as requirement specifications Lab 3: Creating a module and converting it to a template 8 © Copyright IBM Corp. 2013 Course materials may not be reproduced in whole or in part without the prior written permission of IBM. 2. From the edit option of section 4. Special Requests, select Paste Special. 3. In the Past Special window, select Paste selection after this artifact. The resulting outline should look like this example: Figure 11: The Vision Statements section is moved after the Special Requests section Task 5: Remove and delete a new artifact The Special Requests section does not belong in the vision document. That section is part of the stakeholder requirements. Remove the section and delete the artifact from the module 1. From within the module, open the section 3. Special Requests artifact. Notice that this requirement is not used in other areas. TIP: In addition to modules, an artifact can be part of collections. Such information would not appear in the rich hover of the artifact. Figure 12: The In Module section shows that the artifact is used in one module
  • 9. Student Workbook Module: Modules as requirement specifications Lab 3: Creating a module and converting it to a template © Copyright IBM Corp. 2013 9 Course materials may not be reproduced in whole or in part without the prior written permission of IBM. 2. Use the breadcrumbs to return to the Vision Document Template module. 3. From the edit menu of Section 3, Special Requests, click Remove Artifact. 4. Confirm that you are removing the artifact from the module. When you remove an artifact, it is not deleted. The artifact still exists as a base artifact. 5. Delete the base artifact by clicking Delete. You can delete the base artifact because this artifact was not used in other modules. After the deletion, the subsequent sections are renumbered. Task 6: Create a template You can now finalize the module and create a template. 1. From the upper-right corner of the module, click the Create Artifact Template icon. Figure 13: The Create Artifact Template icon 2. In the New Artifact Template window, provide information about the new artifact: a. Ensure that the name of the template is Vision Document Template b. For the duplication policy, select Duplicate no artifacts (re-use all artifacts). This option implies reuse. 3. Click Create, and then click Close.
  • 10. Student Workbook Module: Modules as requirement specifications Lab 3: Creating a module and converting it to a template 10 © Copyright IBM Corp. 2013 Course materials may not be reproduced in whole or in part without the prior written permission of IBM. Task 7: Locate the base artifacts 1. Return to the Module Templates folder by using the breadcrumbs. 2. Find the Vision Document Template that Bob created, and then navigate to the Vision Document Template artifacts folder. 3. Observe the base artifacts that were created and are used in the module. Task 8: Create a module from a template 1. Navigate to the 01 Requirements folder. 2. Click the arrow on the Create Artifact button and select Requirements Specification 3. In the “Create an artifact with attributes” window, provide the following information: a. For the name, type Test Vision template b. For the Template, select Vision Document Template. c. Select the Open Artifact check box. Figure 14: Creating a module from a template 4. Click Finish. 5. After the module is displayed, open an artifact and observe which modules it is used in. Figure 15: The In Module section shows two modules 6. Use the breadcrumbs to return to the Test Vision template module, and then to 01 Requirements folder. 7. Find the Test Vision template and delete it from the project by using its edit menu.