
Empfohlen
Empfohlen
Weitere ähnliche Inhalte
Was ist angesagt?
Was ist angesagt? (19)
Andere mochten auch
Ähnlich wie Hyperion Planning / Workspace / Essbase Part 5 - Hyperion Planning
Ähnlich wie Hyperion Planning / Workspace / Essbase Part 5 - Hyperion Planning (20)
Kürzlich hochgeladen
Kürzlich hochgeladen (20)
Hyperion Planning / Workspace / Essbase Part 5 - Hyperion Planning
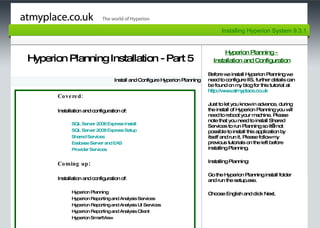
- 1. Page 1 Hyperion Planning Installation - Part 5 Install and Configure Hyperion Planning Hyperion Planning - Installation and Configuration Before we install Hyperion Planning we need to configure IIS, further details can be found on my blog for this tutorial at http:// www.atmyplace.co.uk Just to let you know in advance, during the install of Hyperion Planning you will need to reboot your machine. Please note that you need to install Shared Services to run Planning so it’s not possible to install this application by itself and run it. Please follow my previous tutorials on the left before installing Planning. Installing Planning: Go the Hyperion Planning install folder and run the setup.exe. Choose English and click Next. Installing Hyperion System 9.3.1 Covered: Installation and configuration of: SQL Server 2008 Express Install SQL Server 2008 Express Setup Shared Services Essbase Server and EAS Provider Services Coming up : Installation and configuration of: Hyperion Planning Hyperion Reporting and Analysis Services Hyperion Reporting and Analysis UI Services Hyperion Reporting and Analysis Client Hyperion SmartView
- 2. Page 4 Installing Hyperion System 9.3.1 Hyperion Planning - Installation and Configuration Click Next.
- 3. Page 4 Installing Hyperion System 9.3.1 Hyperion Planning - Installation and Configuration Click Next.
- 4. Page 4 Installing Hyperion System 9.3.1 Hyperion Planning - Installation and Configuration Select I AGREE and Click Next.
- 5. Page 4 Installing Hyperion System 9.3.1 Hyperion Planning - Installation and Configuration Click Next.
- 6. Page 4 Installing Hyperion System 9.3.1 Hyperion Planning - Installation and Configuration I’m installing this on the F: Drive but typically your should be on C: Click Next.
- 7. Page 4 Installing Hyperion System 9.3.1 Hyperion Planning - Installation and Configuration Click Next.
- 8. Page 4 Installing Hyperion System 9.3.1 Hyperion Planning - Installation and Configuration Review the summary and click Next.
- 9. Page 4 Installing Hyperion System 9.3.1 Hyperion Planning - Installation and Configuration Click Next.
- 10. Page 4 Installing Hyperion System 9.3.1 Hyperion Planning - Installation and Configuration Click Finish to restart the computer.
- 11. Page 4 Installing Hyperion System 9.3.1 Hyperion Planning - Installation and Configuration When your PC has rebooted you should have 4 new EPM Services available.
- 12. Page 4 Installing Hyperion System 9.3.1 Hyperion Planning - Installation and Configuration Run the Configuration Utility.
- 13. Page 4 Installing Hyperion System 9.3.1 Hyperion Planning - Installation and Configuration Click Next.
- 14. Page 4 Installing Hyperion System 9.3.1 Hyperion Planning - Installation and Configuration Select Hyperion Planning and it’s available components. Click Next.
- 15. Page 4 Installing Hyperion System 9.3.1 Hyperion Planning - Installation and Configuration Enter the Shared Services details as before. Click Next.
- 16. Page 4 Installing Hyperion System 9.3.1 Hyperion Planning - Installation and Configuration Select Microsoft SQL Server and click Next.
- 17. Page 4 Installing Hyperion System 9.3.1 Hyperion Planning - Installation and Configuration Enter the SQL Server database details and click Next.
- 18. Page 4 Installing Hyperion System 9.3.1 Hyperion Planning - Installation and Configuration Select Apache Tomcat5 with an automatic deployment. Click Next.
- 19. Page 4 Installing Hyperion System 9.3.1 Hyperion Planning - Installation and Configuration Click Next.
- 20. Page 4 Installing Hyperion System 9.3.1 Hyperion Planning - Installation and Configuration Review the summary and click Next.
- 21. Page 4 Installing Hyperion System 9.3.1 Hyperion Planning - Installation and Configuration Click Next.
- 22. Page 4 Installing Hyperion System 9.3.1 Hyperion Planning - Installation and Configuration Select Yes to go back to the product selection panel. Click Next.
- 23. Page 4 Installing Hyperion System 9.3.1 Hyperion Planning - Installation and Configuration We can now register a product instance. Select Planning > Product Instance Registration. Click Next.
- 24. Page 4 Installing Hyperion System 9.3.1 Hyperion Planning - Installation and Configuration Select Create Instance. Click Next.
- 25. Page 4 Installing Hyperion System 9.3.1 Hyperion Planning - Installation and Configuration Give your instance a name and enter your server name. Select Activate Instance. Click Next.
- 26. Page 4 Installing Hyperion System 9.3.1 Hyperion Planning - Installation and Configuration Click Next.
- 27. Page 4 Installing Hyperion System 9.3.1 Hyperion Planning - Installation and Configuration Click Next.
- 28. Page 4 Installing Hyperion System 9.3.1 Hyperion Planning - Installation and Configuration Select Yes and click Next.
- 29. Page 4 Installing Hyperion System 9.3.1 Hyperion Planning - Installation and Configuration Let’s configure the Datasource. Select Planning > Data Source Configuration. Click Next.
- 30. Page 4 Installing Hyperion System 9.3.1 Hyperion Planning - Installation and Configuration Select Create Datasource and click Next.
- 31. Page 4 Installing Hyperion System 9.3.1 Hyperion Planning - Installation and Configuration Give your Datasource a name and description. Click Next
- 32. Page 4 Installing Hyperion System 9.3.1 Hyperion Planning - Installation and Configuration Type in your instance name as created earlier. Click Next.
- 33. Page 4 Installing Hyperion System 9.3.1 Hyperion Planning - Installation and Configuration Select Microsoft SQL Server as your database source. Click Next.
- 34. Page 4 Installing Hyperion System 9.3.1 Hyperion Planning - Installation and Configuration Enter the SQL Server details. Click Next.
- 35. Page 4 Installing Hyperion System 9.3.1 Hyperion Planning - Installation and Configuration Enter the Essbase login details as defined in the Essbase tutorial. Click Next.
- 36. Page 4 Installing Hyperion System 9.3.1 Hyperion Planning - Installation and Configuration Click Next.
- 37. Page 4 Installing Hyperion System 9.3.1 Hyperion Planning - Installation and Configuration Click Next.
- 38. Page 4 Installing Hyperion System 9.3.1 Hyperion Planning - Installation and Configuration Select Yes. Click Next.
- 39. Page 4 Installing Hyperion System 9.3.1 Hyperion Planning - Installation and Configuration Time to configure EPMA. Select Oracle Hyperion Enterprise Performance Management Architect. Select the available configuration components. If you installed IES then you can configure the Datasource Interface now or later. Click Next.
- 40. Page 4 Installing Hyperion System 9.3.1 Hyperion Planning - Installation and Configuration Enter the Shared Services details. Click Next.
- 41. Page 4 Installing Hyperion System 9.3.1 Hyperion Planning - Installation and Configuration Select Microsoft SQL Server. Click Next.
- 42. Page 4 Installing Hyperion System 9.3.1 Hyperion Planning - Installation and Configuration Enter the SQL Server details. Click Next.
- 43. Page 4 Installing Hyperion System 9.3.1 Hyperion Planning - Installation and Configuration Select the Apache Tomcat5 with automatic deployment type. Click Next.
- 44. Page 4 Installing Hyperion System 9.3.1 Hyperion Planning - Installation and Configuration Click Next.
- 45. Page 4 Installing Hyperion System 9.3.1 Hyperion Planning - Installation and Configuration Click Next.
- 46. Page 4 Installing Hyperion System 9.3.1 Hyperion Planning - Installation and Configuration Click Next.
- 47. Page 4 Installing Hyperion System 9.3.1 Hyperion Planning - Installation and Configuration Click Next.
- 48. Page 4 Installing Hyperion System 9.3.1 Hyperion Planning - Installation and Configuration Click Next.
- 49. Page 4 Installing Hyperion System 9.3.1 Hyperion Planning - Installation and Configuration Click Next.
- 50. Page 4 Installing Hyperion System 9.3.1 Hyperion Planning - Installation and Configuration Select No. Click Next.
- 51. Page 4 Installing Hyperion System 9.3.1 Hyperion Planning - Installation and Configuration You have now completed the Planning install and configure process. To test your install, ensure all the services are start for Hyperion. Open Shared Services and provision user admin to: Administrator Dimension Editor Application Creator In a new browser type in the following case sensitive link. Please find the complete list of tutorials at: http://atmyplace.co.uk http://localhost:8300/HyperionPlanning/AppWizard.jsp