
Empfohlen
Empfohlen
Weitere ähnliche Inhalte
Was ist angesagt?
Was ist angesagt? (20)
Ähnlich wie Organic
Ähnlich wie Organic (20)
Kürzlich hochgeladen
Kürzlich hochgeladen (20)
Organic
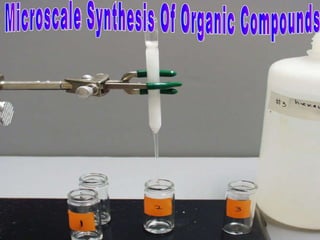
- 1. Microscale Synthesis Of Organic Compounds
- 2. Contents ........ What is Microscale Chemistry ? Why Microscale Chemistry ? Basic Equipment. Synthesis of Aspirin. Synthesis of E –Benzal Synthesis of Azodyes Synthesis of 1-Bromo-3-chloro-5-iodobenzene Separation Of Component Mixture
- 4. Microscale chemistry is an environmentally safe pollution prevention method of performing chemical processes using small quantities of chemicals with out compromising the quality and standard of chemical applications in education and industry. The best way to succeed in this effort is by eliminating chemical waste at the source. Reduction of chemical use to the minimum level at which experiments can be effectively performed
- 5. Microscale Chemistry is performed by using: 1-Drastically reduced amounts of chemicals 2-Safe and easy manipulative techniques 3-Miniature labware and high quality skills Microscale Chemistry amounts to a Total Quality Management (TQM) approach to the use of chemicals. Microscale Chemistry is recognized as Small scale Chemistry by the International Union of Pure and Applied Chemistry
- 11. 3-RECRYSTALLIZATION TUBES: Craig Tube: The Craig tube is used for small-scale recrystallization, which is a method for the purification of small quantities of solid compounds. It has two parts: an outer body, which functions like a vial or test tube; and an inner plunger, which fits partly into the body and rests on a ground-glass surface. The ground-glass joint is not greased, so that liquids can leak through it but solids cannot pass.
- 12. 4-DISTIALLATION HEADS: Claisen Head Hickman Head Claisen Head or Claisen Adaptor: allows introducing chemical reagents (usually liquids) into a reaction mixture without taking apart the whole apparatus. Hickman Distilling Head: The purpose of a still is to heat a liquid until is passes into the gas (vapor) phase, and then allow the vapor to cool and condense back into the liquid phase, with the condensed liquid trapped in a second container. The Hickman still functions like the air condenser in condensing vapors with the cool glass surface, but the liquid drips down the inside to be trapped in a small circular depression, or collar, in the lower part of the tube.
- 13. 5-DRYING TUBE: The tube is used to protect the reaction from moisture in the atmosphere while still allowing the passage of air to equalize pressure. To accomplish this the tube is packed with a glass wool plug, a quantity of moisture-absorbing solid (the "drying agent"), and another glass wool plug.
- 14. The flat, long blade can be used to weigh out solids, stir mixtures, remove "O" rings, scratch glass surfaces to induce crystallization 6-MICRO-SPATULA:
- 19. BACKGROUND (Cont.) : In commercial aspirin products, a small amount of ASA (300 to 400 mg) is bound together with a starch binder and sometimes caffeine and buffers to make an aspirin tablet. The basic conditions in the small intestine break down the ASA to yield salicylic acid, which is absorbed into the bloodstream. The addition of a buffer reduces the irritation caused by the carboxylic acid group of the aspirin molecule. Aspirin can be produced in a one step chemical process by reacting salicylic acid with acetyl chloride, according to the reaction:
- 20. Aspirin is a white solid that is almost completely insoluble in water. We will use this physical property of our product to separate it from the final solution. If time allows, we will synthesize methyl salicylate, which is another ester of salicylic acid. It occurs in a wide range of plants and is known as ‘oil of wintergreen’. It is still used in candies and in ointments for joint and muscle pains. Salicylic acid methanol Methyl salicylate (wintergreen). Thin layer chromatography (TLC) is used to separate and identify aspirin.
- 22. Procedure: 1. Place 150 mg (0.001 mol) of salicylic acid in a 10 mL test tube and add 0.1 mL of pyridine (just sufficient to dissolve it) while the tube rests in a ice-cold water bath. Keep the test tube in a hood while you are doing this. 2. For the next step, be sure that the open end of the tube is not pointing toward you or anybody else. Occasionally the reaction goes quickly and shoots material out of the tube! Add one-tenth milliliter of acetyl chloride (slight excess over 0.001 mol )in one portion to the test tube. Again, keep the mixture in a hood! 3. The mixture becomes viscous at this stage. Let the mixture sit in a beaker of cold water bath for 15 min. – it does not need to be in the hood. While waiting, set up a vacuum filter flask with a Buchner funnel and a piece of filter paper which just fits the bottom of the funnel 4. Now add 5 mL of cold water to the test tube and cap it with a rubber stopper. Shake the mixture. Do this cautiously at first until you are sure that no violent reaction is occurring. The mixture should turn cloudy. Shaking is continued until a white product appears (it may takes several minutes, be patient!)
- 23. 5. Turn on the water faucet all the way and check to be sure you have good suction. Break the suction by disconnecting the tube from the flask (leave the water running). Pour the mixture into the funnel,trying to get as much of the solid transferred as possible.Connect the hose and apply full suction for at least 30 seconds. Wash the crystals with cold water.Break the suction.Do not just turn off the water; Dry them on the filter paper for about 5 min. Part B- Recrystallization 6. Carefully scrape off most of your crystals into a 50 mL beaker. SAVE THE FILTER PAPER! Add about 3 mL of cold water and place the mixture on a hot plate in a hood. Heat until all of the crystals dissolve (check with the instructor if complete solution does not seem to be happening.) When the crystals are completely dissolved in the hot solution, remove the beaker and allow it to cool. You should see nice crystals of aspirin beginning to form! When the recrystallization is complete, filter again, and dry. SAVE THE FILTER PAPER for the next step! Part C- Oil of Wintergreen 1. Place 1.00 gram of salicylic acid in a test tube. (record the actual mass used) 2. Add 5 ml of methyl alcohol and 3 drops of concentrated sulfuric acid. 3. Heat this mixture in a boiling water bath for 15 min. 4. Note the odor of the liquid in your tube. Procedure (cont’d):
- 27. Safety Notes: Benzaldehyde is irritant,Hydroxyle amine hydrochloride is corrosive,Sodium hydroxyle pellets is corrosive & hygroscopic,Ethanoyic acid is corrosive,Diethyl ether is flammable & irritant. Procedure: VIAL e’ 0.12 ml water NAOH COOL 1-Benzaldehyde 2-hydroxylamine hydrochloride Stir vigorously Neutralize the mixture by the addition of ethanoic acid extracting with diethyl ether Dry with MgSO4
- 28. 1-Dissolve NaoH in water(0.12ml ) in 1ml reaction vial containing a spin value allow the solution to cool and add ca. 0.02ml of the benzaldehyde followed by ca. 20mg hydroxylamine hydrochloride . 2-Stopper the flack and stir vigorously, briefly stopping the stirring at 5min interval to add further position of benzaldehyde &hydroxylamine until both reagents have been added completely.The reaction mixture will become warm giving a homogenous solution with almond odor indicating the total consumption of the benzaldehyde. 3-Neutralize the mixture by the addition of ethanoic acid &allow the mixture to cool before extracting with diethyl ether. 4-Separate the organic extracts, dry by passing through a column of MgSo4 into a preweighed reaction vial and remove the solvent then record the yield of the product.
- 30. The reactions are: 1-Diazotization: 2-Coupling : azo dye
- 31. Procedure: 1-Put eight drops of aminobenzene in a 10 cm3 beaker and add 30 drops of deionised water followed by 15 drops of concentrated hydrochloric acid. Swirl the beaker and then put it in an ice bath. 2-Weigh 0.15 g of sodium nitrite into another beaker and add 1 cm3 of deionised water. Cool the beaker in the ice bath. Add one spatula of urea (this prevents side reactions occurring). 3-Mix the contents of the two beakers together and keep in the ice bath. 4-Weigh 0.45 g of 2-naphthol into another beaker and add 3 cm3 of sodium hydroxide solution. Swirl to dissolve. 5-Take a piece of cotton cloth 2 x 2 cm2 and, using tweezers, dip it into the 2-naphthol solution. Allow the solution to completely soak the cotton. 6-Dip the cloth completely into the diazonium salt solution. A red dye forms in the fibers, dyeing the cloth.
- 33. An Improved Deamination of 4-Bromo-2-chloro-6-iodoaniline Reductive deamination step---the final step
- 34. 1-Under a fume hood, 1.65 mL of a 0.75 M isoamyl nitrite_DMF solution is added to a 10-mL round-bottomed flask containing a magnetic spin vane. 2-A reflux condenser is placed on the flask and the flask is clamped in a sand bath heated to 65◦C. 3-With the isoamyl nitrite solution stirring rapidly, a solution of 4-bromo-2-chloro-6-iodoaniline (0.25g, 0.75 mmol) dissolved in a minimal amount of DMF (2mL) is added dropwise to the reaction solution over a period of 5 min.The evolution of nitrogen gas is immediate and continues until all of the aniline solution is added. 4-After the gas evolution is complete (15 min), the reaction mixture is allowed to cool to room temperature and then carefully transferred to a 25-mL Erlenmeyer flask. 5-15mL of 20% aqueous hydrochloric acid solution is added to the reaction mixture and the product is extracted from the reaction mixture into two, 10-mL portions of ether.The combined organic extract is washed with 15 mL of 10% aqueous hydrochloric acid solution, dried over anhydrous magnesium sulfate, filtered, and concentrated to yield the product as a pale copper-colored solid. 6-The crude product is recrystallized from methanol, using a ratio of 6 mL of methanol per gram of product, to give 1-bromo-3-chloro-5-iodobenzene as long, colorless needles (75–80%, m.p. 85–86 ◦C). Procedure:
- 35. Seperation of component mixture
- 36. Liquid-liquid extraction is one of the most used methods for isolating an organic compound from a mixture.This technique is commonly used to isolate and purify products from chemical reactions and is also used to isolate natural products.The process can be categorized into two types of liquid-liquid extraction: -The first type takes advantage of the polarity of compounds and uses water to extract or “wash” an organic mixture by removing highly polar materials, such as inorganic salts, strong acids or bases, etc. -Second, acid and base extraction, takes advantage of chemical properties of compounds. Acid extractions are intended to separate basic compounds from an organic mixture. Organic bases, amines, are converted to their corresponding cationic salts by reacting with acids. These salts are then soluble in water and can be separated from the organic mixture.
- 37. Base extractions have a concept similar to acid extractions. They are intended to separate acidic compounds from an organic mixture. Organic acids, carboxylic acids, are converted to their corresponding anionic salts by reacting with bases. These anionic salts are usually soluble in water and can be extracted from the organic mixture.
- 38. Purpose: In this experiment you will be given a three-component mixture, an acid (benzoic acid), a base (ethyl- 4-aminobenzoate) and a neutral organic compound (9-fluorenone). You will have to separate these three compounds individually from the mixture benzoic acid ethyl-4-aminobenzoate 9-fluorenone
- 41. Procedure (cont’d): 5-Combine the organic layer, dry the organic layer with Na2SO4 [i] [1] and evaporate solvent on the steam bath.3 6-The yellow ether solutions remaining in the vials are recombined into the 5 mL vial. Add 1 mL of pure water, shake its content and then allow the layers to settle. Remove and discard the bottom aqueous layer. 7-Add 1 mL of 3 M NaOH into the 5 mL conical vial that has the yellow ether solution (benzoic acid and 9-fluorenone). 8-Cap and thoroughly shake the vial to allow completion of the reaction and the dissolution of the compounds in their respective solvents. Allow the layers to separate. 9-Carefully transfer the bottom layer to a 3 mL conical vial using a Pasteur pipet.To the 3 mL vial add one ml of diethyl ether.Cap and shake its contents.As before, transfer the lower layer, this time to a 10 mL beaker.By now the contents of the beaker should be very pale or colorless.
- 42. 10-Add dropwise 6 M HCl to the beaker until the mixture is acidic to pH paper. 11-Transfer the acidic solution into the 5 mL conical vial and extract the aqueous solution three times with 1 mL of diethyl ether each. Combine the diethyl ether layers and dry over Na2SO4. 12-Combine the previous left yellow ether layers into a 5 mL conical vial. Add 1 mL of water, cap and shake its contents. Remove and discard the water layer with a pipette. Dry the organic layer with Na2SO4 and evaporate the ether on the steam bath. Procedure (cont’d):
- 43. Summary of the procedure: By Na2SO4 In 5 ml vial In beaker using a Hirsch funnel adding 1 mL of deionized water
- 44. Conclusion: The benefits of microscale are perhaps greatest for biology & biochemistry majors as microscale borrows techniques which are have been standard in biochemistry for years also,converting to microscale is one of the best ways to deal with the problem of chemical wastes in academic labs. The bottom line : Microscale is a cost effective, productive and pollution prevention program.
- 45. THANK YOU