
Empfohlen
Empfohlen
Weitere ähnliche Inhalte
Empfohlen
Empfohlen (20)
3 ppt tutorial for creating an activity with the smart notebook software and lesson activity toolkit 2.0
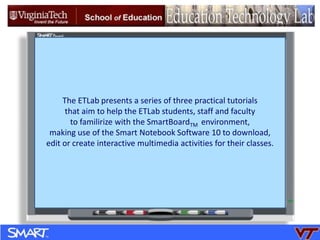
- 1. The ETLab presents a series of three practical tutorials that aim to help the ETLab students, staff and faculty to familirize with the SmartBoardTM environment, making use of the Smart Notebook Software 10 to download, edit or create interactive multimedia activities for their classes.
- 2. In this tutorial, you will learn: The Smart Notebook 10 interface. How to explore the Gallery Essentials. How to explore the Lesson Toolkit 2.0 folders and contents. How to find the necessary tools, buttons and effects to create your own interactive multimedia activities. Where to go for further training.
- 3. When you download Smart Notebook Software 10 you will see an icon like this one on either side of your desktop
- 4. When you click on it, you open up a floating tool bar Click here and it will hide again
- 5. To move it to the other side of the Desktop, click here and drag it.
- 6. Place the floating bar at a convenient side for you, if you have too many icons in your Desktop it may be confusing to have it on the left side.
- 7. To open the Smart Notebook Software and start working, click on the Gallery Icon.
- 8. This is the Smart Notebook Software 10 Interface Notice the Gallery is on your right
- 9. This is the Smart Notebook Software 10 Interface It could be on your left To change side, just click on these little arrows
- 10. The tool bar can also be on the top To change side, just click on these little arrows Or at the bottom of your window
- 11. Let’s take a look at the interface
- 12. The first nine buttons are pretty intuitive, we are not going to talk about them.
- 13. This is a screen that covers whatever picture or text you have in this work window and you can reveal parts of the content by moving the screen in all directions, as you wish.
- 14. This one shows full screen, hiding the Gallery Icons.
- 15. This one shows two pages at a time
- 17. the entire object ,
- 18. the window
- 20. This is a kind of webcam. requires a Smart Document Camera.
- 22. Click on each picture in the circle to see what you will be able to do when using these tools.
- 23. Take your time and play a little bit with these pens
- 24. 1 2 4 5 6 7 3 These icons are also very intuitive: Select Eraser Lines Basic geometric shapes Color Text Fill effects
- 25. 1 Shows all pages Launches the and Gallery Inserts files and hyperlinks, click on insert at the bottom and open the insert window 4. Fill effects Floating bar changes side Switch between previous or next pages Add a new page Delete a page 2 3 4 5 6 7 3 8
- 28. Notebook files and Pages
- 29. Ten different Categories of folders with lots of sub folders full of very rich and colorful material
- 30. The 1st subfolder in the Gallery Essentials, Administration and Evaluation, is actually a tools folder. It has 4 subfolders with themes, buttons, backgrounds. lots of flash files with sound and animation.
- 31. You can search pictures by Gallery Category
- 32. You can use the Search tool
- 34. Special effects
- 35. Flash files
- 36. Pictures
- 37. Themes
- 38. Action buttons to create, not only interesting, but effective instructional materials.
- 39. Each Toolkit folder has several sub folders containing pictures, interactive multimedia activities and Notebook pages that you can use to create your activities.
- 40. The Activities folder contains templates of ready-made pages that you can use. You can keep the same special effects but edit the content to create your own activity
- 41. The Pages Folder is divided into categories by the special effects and layout they contain Hot Spot Category Sort Time Line Sentence Arrange Multiple Choice
- 42. All activities have an “Edit” button, Click on it and open the editing page.
- 43. Edit the activity, click OK and save your activity You can also set a password to secure your activity, especially useful if the activity involves students’ manipulation of if you need to leave the Smart Board unattended for a while.
- 44. If you are not sure how to edit the template just by looking at the blank template, click on the Examples Folder, bellow the Activities Folder look for the same activity among the thumbnails and click on it. A completed sample activity will open up for you.
- 45. 1 2 Some activities in the Examples Folder have: Click to revel explanations or guides Pull-out tags Locks (locks the picture or tool in the same place) Video tutorials (especially if there are special effects or Flash files included). 3 4
- 46. It is a good idea to study the Examples before editing the template activities.
- 47. The Games Folder has board and card game templates. Most of the dices, cards and other tools for playing those games are animated: They have movement and sound and they are ready to use, just edit the content. Sudoku
- 48. When you Edit the template the puzzle automatically Changes form to fit your new words.
- 49. The Graphics Folder has ready-to-use and pull-out note tags, signs, rectangles and bars.
- 50. 1 2 3 Rotates the picture or tool Opens a menu with clone, save, order, lock and unlock, and many other important commands. 3. Resizes the picture or tool.
- 51. In the menu that opens when you click this arrow, there is a very important tool: Set Transparency. Click the area you want to disappear and click OK
- 52. The Pages Folder has three subfolders with ready-made pages that you can use and reuse again always keeping the same consistency.
- 53. The tools folder contains interactive Multimedia flash files with special effects for your activities Question flipper: Question on one side and answer on the other side Voting Machine, the numbers go up or down Click to reveal text, click again to auto hide Scrolling text banner
- 54. You have all the information you need to start creating your own Interactive Multimedia Activities!
- 58. Suggested hands-on activity This is what your could look like
- 59. Smart Notebook Education is a life long learning process. It is the combination of a very rich equipment with always evolving software. Here is where you can go for more opportunities to learn: www.Smarttech.com 2. http://education.smarttech.com/ste/en-us/ Ed+Resource/Lesson+activities/Notebook+activities/ 3. You tube Your feedback is highly appreciated: www.elzahsc@vt.edu
- 60. The information, screen captures and videos in this tutorial were taken from the Smart Technologies webpage at www.smarttech.com.