
Empfohlen
Weitere ähnliche Inhalte
Was ist angesagt?
Was ist angesagt? (20)
Ähnlich wie Lets talk soil
Ähnlich wie Lets talk soil (20)
Kürzlich hochgeladen
Kürzlich hochgeladen (9)
Lets talk soil
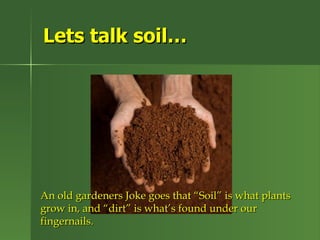
- 1. Lets talk soil… An old gardeners Joke goes that “Soil” is what plants grow in, and “dirt” is what’s found under our fingernails.
- 2. Guide to Soil and Soil Testing Importance of testing Ph for optimal nutrient uptake Soil Composition Home soil tests
- 3. Soil Testing Testing - Local Nurseries, State Extension Office, testing companies - Store bought test Types - Ph test - Nutrient test - Nitrogen, phosphorous, Potassium (NPK) Both are recommended yearly - I recommend PH testing yearly and Nutrient every 3-5years
- 4. PH for Dahlias Slightly Acidic – 6.2 to 6.8 Below 6.2 add Lime Optimal Nutrient uptake 6.3 Above 6.8 add sulfur
- 5. Nutrients - NPK Nitrogen (N) Stimulates Vegetative development. Necessary in production of leaves and stems. Phosphorus (P) Especially important in germination of seeds, metabolism of seedlings, ripening of seeds and fruits and general development of roots Potassium (K) Promotes general vigor. Contributes to disease resistance. Important to sturdy root formation and development
- 6. My Fertilization 1-2 lbs 20-20-20 to each 150 sq/ft bed prior to tilling At planting: each hole 1-2 tbsp. of a 20-20-20, bone meal and alfalfa meal mixture. Why Because that’s what we were taught by our club! General monthly fertilizing, after blooms begin reduce the nitrogen • To much Nitrogen can adversely effect the overall health of your plants, leaves may look like the plant has a virus.
- 7. Soil Composition Soil composition is the mixture of silt, clay, sand, and organic matter found in your soil. It’s important to know what the mix is within your garden because it will affect the type and amount of fertilizer you use, how well your soil drains, how well it holds what you plant in it, and how likely it is to wash away in heavy rains or blow away in high winds. Soil composition indicates how alive your soil is— and the more alive it is, the better it is for growing things!
- 8. Healthy soil starts with the right proportion of sand, silt, and clay Sandy Soil allows for water and oxygen to penetrate easily because sand particles are large. However, water drains away too quickly, taking with it any fertilizer you may apply. On the positive side, it holds plenty of oxygen, plant roots have no problem traveling through it, and it’s easy to dig. Amend Sphagnum Peat, Compost, Composted manures…retain moisture, prevent leaching
- 9. Healthy soil starts with the right proportion of sand, silt, and clay cont. Clay Soil opposite problem: because clay particles are so small, they make it hard for oxygen to get in, and whatever water gets in will have a hard time getting out, resulting in poor drainage. This type of soil is difficult for plant roots—as well as spades and hoes—to penetrate. But don’t despair: this type of soil is generally richer in nutrients than other types of soil, so once you break it up, you won’t need to fertilize as much. Amend Gypsum, Sphagnum Peat, Compost, Composted manures..…prevent compaction of the soil Note: Do Not add Sand to Clay Soil or Clay to Sandy Soil……this can create a natural cement-like soil structure!
- 10. Healthy soil starts with the right proportion of sand, silt, and clay cont. Silt Soil silt predominating in your soil is good news; such soil is ideal for gardening because silt particles are medium sized and usually result in good soil drainage and aeration. All you have to do is make sure your silty soil contains ample organic matter.
- 11. Simple Soil Tests #1 Ribbon Test Soil-texture test. Dig up a tablespoon or so of soil and add enough water that you can roll it into a ball If you can't form a ball, the soil is sandy. Next, squeeze the ball between your thumb and index finger to make a ribbon. The longer the ribbon goes before cracking, the more clay you've got. Less than 2 inches is a pretty good composition. More than 2 inches means the soil is clayish. The feel alone can also give you a clue ... sand feels gritty, clay feels sticky, and silt feels velvety slick.
- 12. Simple Soil Tests #2 The Squeeze Test To determine your soil type, take a handful of moist (but not wet) soil from your garden, and give it a firm squeeze. Then, open your hand. One of three things will happen: It will hold its shape, and when you give it a light poke, it crumbles. Lucky you—this means you have luxurious loam! It will hold its shape, and, when poked, sits stubbornly in your hand. This means you have clay soil. It will fall apart as soon as you open your hand. This means you have sandy soil. Now that you know what type of soil you have, you can work on improving it.
- 13. Simple Soil Test #3 The Percolation Test It is also important to determine whether you have drainage problems or not. Some plants, such as certain culinary herbs, will eventually die if their roots stay too wet. To test your soil’s drainage: Dig a hole about six inches wide and one foot deep. Fill the hole with water and let it drain completely. Fill it with water again. Keep track of how long it takes for the water to drain. If the water takes more than four hours to drain, you have poor drainage.
- 14. Simple Soil Test #4 The Worm Test Worms are great indicators of the overall health of your soil, especially in terms of biological activity. If you have earthworms, chances are that you also have all of the beneficial microbes and bacteria that make for healthy soil and strong plants. To do the worm test: Be sure the soil has warmed to at least 55 degrees, and that it is moist, but not soaking wet. Dig a hole one foot across and one foot deep. Place the soil on a tarp Sift through the soil with your hands as you place it back into the hole, counting the earthworms as you go. If you find at least ten worms, your soil is in pretty good shape. Less than that indicates that there may not be enough organic matter in your soil to support a healthy worm population, or that your soil is too acidic or alkaline.
- 15. Simple Soil Test #5 Soil Wash Test The soil wash is an easy test you can perform that will tell you the approximate proportion of sand, clay, and silt in your soil. Of course, you can pay a lot of money for a laboratory to perform a professional analysis, but or most gardeners this rough-and-ready test will tell you everything you need to know.
- 16. Simple Soil Test #5 cont. Dig 2 to 3 cups of soil from 6 to 8 inches deep in your soil. Let it dry on newspaper for 24 hours. Use a sieve or old metal colander to sift rocks, roots and other debris out of the soil. Crush lumps of soil to sift them through. Pour 2 cups of the sifted soil into a quart Mason jar or clean mayonnaise jar and add 1 tablespoon of powdered detergent. Then fill the jar with water, seal and shake vigorously for 3 minutes. After 1 hour, the biggest sand particles will settle out into a bottom layer. After 2 hours, the slightly smaller silt particles will settle out into a second layer. And after 24 hours, the smallest clay particles will settle out into a third layer. Measure the thickness of each layer and the total depth. To figure the percentage of each layer, divide that layer's thickness by the total depth. (Example: If all three layers total 3 inches and 2 inches of that is the clay layer, then about 66 percent of your soil is clay.) Ideally, all three layers will be about the same. When any of the three exceed 60 percent, that type is becoming undesirably dominant, and amending is advised.
- 17. Simple Soil Test #5 cont. Use results with chart. Sand 57% Silt 29% Clay 14% Analyzing the texture of soil is as important as studying the needs of the plants in your garden, and understanding the science behind soil texture makes that job much easier.
- 18. Questions We hope presentation will help you to better care for your soil through understanding its composition.