2013 1 arduino_datalogger
•Als PPTX, PDF herunterladen•
1 gefällt mir•1,051 views

This is my slide show for the 2013.1 Desert Code Camp Code should be posted to Github soon

Empfohlen
Empfohlen
Weitere ähnliche Inhalte
Was ist angesagt?
Was ist angesagt? (15)
Ähnlich wie 2013 1 arduino_datalogger
Ähnlich wie 2013 1 arduino_datalogger (20)
Mehr von Don Doerres
Kürzlich hochgeladen
Kürzlich hochgeladen (20)
2013 1 arduino_datalogger
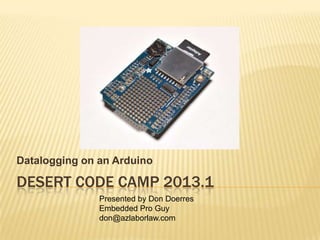
- 1. Datalogging on an Arduino DESERT CODE CAMP 2013.1 Presented by Don Doerres Embedded Pro Guy don@azlaborlaw.com
- 2. TODAY’S TAKEAWAYS The Arduino is a good starting point for a data logger, a device used to obtain and store data over a long period of time The Arduino with a few add-ins is capable of Storing data with time tags Displaying data in real time Doing these tasks without tying up a bigger computer
- 3. IDEA WAS TO LOG WEATHER I started with a barometer (BMP085) and a humidity sensor (DHT11) Both of these also provide temperature information Power came from a desktop computer through USB cable to Arduino, Arduino to breadboard
- 6. WEATHER WATCHING… Observing an approaching dust storm, I realized that I didn’t want to leave the computer or sensors outside Barometric pressure turned out to be adequate for storm tracking Indoors, humidity did not change much So, I decided to record barometric pressure and temperature
- 7. ORIGINALLY USED PC Used Tera Term (Terminal Emulator) to log data Tera Term added time stamp from PC clock Once prototype was working, wanted to move time keeping function and data logging to Arduino and not tie up PC
- 8. ARDUINO TIMING SIX MINUTES, WRITING TO SERIAL PORT Tera Term Screen Tera Term Log File—Adds Time Stamp
- 9. ORIGINAL PLAN: CHRONODOT & SD BREAKOUT Chronodot is a highly accurate clock with battery backup SD Breakout allows simple connection to SD card However, the combination would simply not fit on an Arduino breakout shield, let alone any sensors
- 10. DOT AND SD ON ARDUINO BREADBOARD Dot SD breakout This picture shows the Dot and the SD card breakout This works as a breadboard, but is too big for a shield
- 11. ADAFRUIT INTRODUCED A DATA LOGGER SHIELD About the time I realized that my logger would not fit on a prototype shield, Adafruit introduced their new logger shield This had a slightly lower accuracy clock than the Dot, but it had everything else in surface mount parts All I had to do was add the pressure sensor and a connection to a 16X2 LCD display
- 12. ADAFRUIT LOGGER SHIELD Battery Holder SD Holder DS1307 RTC Adafruit logger shield Surface mount parts left prototype area quite large enough for sensors Add an I2C 16X2 LCD display
- 13. SENSOR SELECTION This is the BMP085 pressure sensor This is a sensitive barometer/altimeter and temperature sensor It runs on 5V It has an I2C interface
- 14. I2C BUS This is a very simple serial Inter-Integrated Circuit connection bus, hence I2C The interface consists of Clock, Data, and ground Multiple devices can be hooked to the same bus as long as they have different addresses The devices I used, pressure sensor (address 0x77) and display (address 0), do have different addresses
- 15. BMP085 CONNECTION TO ARDUINO
- 16. 16X2 LCD DISPLAY WITH I2C BACKPACK This is a back view showing the four wire connections—same connections as BMP085 GND To GND DAT to A4 CLK to A5 5V To 5V
- 17. OTHER CONNECTIONS The SD breakout and the Clock are already wired up on the shield The pressure sensor I soldered to the I2C connection pads on the shield The LCD display I simply plugged in to the shield The BMP and the LCD display have different I2C addresses, so there is no conflict
- 18. TYPICAL DISPLAY Date (Year not shown), local time Temperature in F, Pressure in mmHG Display updates every 5 seconds Data is stored to SD card every 6 minutes
- 19. WHAT GOES ON THE SD CARD The log is Comma Separated Values (CSV) of Time, Temperature, Pressure Time is stored as a ‘C’ time stamp (more about this in two slides) Temperature is degrees F Pressure is in millimeters of Mercury (mmHg)
- 20. SAMPLE OF LOG FILE 1363516494,79.0,691.0 1363516868,79.0,691.0 1363517243,79.0,691.0 1363517617,79.1,691.1 1363517991,79.1,691.1 1363518365,79.1,691.1 1363518740,79.1,691.1 1363519114,79.2,691.2 1363519488,79.2,691.2 1363519862,79.2,691.2 1363520237,79.2,691.2 1363520611,79.1,691.1 1363520985,79.2,691.2 1363521359,79.1,691.1 1363521734,79.1,691.1 1363522108,79.2,691.2 1363522482,79.2,691.2 1363522857,79.2,691.2 1363523231,79.2,691.2 1363523605,79.2,691.2 1363523979,79.2,691.2 1363524354,79.2,691.2 1363524728,79.1,691.1 1363525102,79.1,691.1 1363525476,79.1,691.1
- 21. THE CTIME STAMP The C language uses as a time stamp the number of seconds since January 1, 1970 A 32 bit signed integer allows counting seconds until January 19, 2038 at 03:14:07 GMT …by then, we will likely switch to 64 bit integers And, yes, the value is a signed integer so that comparisons can be readily made
- 22. DISPLAYING IN EXCEL OR OTHER SPREADSHEET It is simple to convert ctime to Excel time The macro is, using ‘A2’ as a sample cell: =DATE(1970,1,1)+(A2)/86400 Display format is controlled with Excel formatting CTIME Increase Delta Day Date Time Deg F mmHg 1363504243 0 0 Sun Mar 17, 2013 07:10:43 74.2 691.2 1363506389 2146 2146 Sun Mar 17, 2013 07:46:29 75.4 691.4 1363506764 2521 375 Sun Mar 17, 2013 07:52:44 76.7 691.7 1363507138 2895 374 Sun Mar 17, 2013 07:58:58 77.5 691.5 1363507512 3269 374 Sun Mar 17, 2013 08:05:12 77.4 691.4 1363507886 3643 374 Sun Mar 17, 2013 08:11:26 77.3 691.3 1363508261 4018 375 Sun Mar 17, 2013 08:17:41 77.3 691.3
- 23. LIBRARIES
- 24. UNITS The units of the BMP085 pressure sensor are Degrees C and pressure in Pascals Conversions are in order tempy = bmp.readTemperature(); tempy = (tempy * 9.0 / 5.0) + 32.0; press = bmp.readPressure(); fpress = (float)press* 0.007500616827042;
- 25. TIMESET.INO, 1 OF 2 // timeSet.ino #include <Wire.h> #include <RTClib.h> #include <LiquidCrystal.h> LiquidCrystal lcd(0); RTC_DS1307 RTC; DateTime now; void setup() { Serial.begin(57600); Wire.begin(); RTC.begin(); RTC.adjust(DateTime(__DATE__, __TIME__)); lcd.begin(16, 2); lcd.setBacklight(HIGH); //HIGH is ON, LOW is OFF }
- 26. TIMESET.INO, 2 OF 2 void loop() { now = RTC.now(); lcd.setCursor(0, 0); lcd.print(now.year(), DEC); lcd.print('/'); if(now.month() < 10) lcd.print("0"); lcd.print(now.month(), DEC); lcd.print('/'); if(now.day() < 10) lcd.print("0"); lcd.print(now.day(), DEC); lcd.setCursor(0, 1); if(now.hour() < 10) lcd.print("0"); lcd.print(now.hour(), DEC); lcd.print(':'); if(now.minute() < 10) lcd.print("0"); lcd.print(now.minute(), DEC); lcd.print(':'); if(now.second() < 10) lcd.print("0"); lcd.print(now.second(), DEC); delay(2000); }
- 27. AUGUST 11, 2012 STORM IN PHOENIX About 10 hours of plot BMP_mmHg 719.60 719.40 719.20 719.00 718.80 718.60 718.40 718.20 0 100 200 300 400 500 600
- 28. 39 HOTEL FLOORS AT LAS VEGAS FOUR SEASONS Stepped up the logging rate to once per second Three round trips 706 704 702 700 698 696 694 692 -500 0 500 1000 1500 2000
- 29. FUTURE WORK Add time setting over serial while running Seems to be a small temperature rise of about 2 degrees F with the display running Add fancier display, perhaps a 1 hour plot of data on a dot matrix display
- 30. DCC_DATALOGGER_3.INO 1 OF 9 // DCC_DataLogger.ino #include <Wire.h> #include <RTClib.h> #include <Adafruit_BMP085.h> #include <LiquidCrystal.h> #include <SD.h> // On display, connect via i2c, default address #0 (A0-A2 not jumpered) LiquidCrystal lcd(0); RTC_DS1307 RTC; Adafruit_BMP085 bmp; const int chipSelect = 10; File dataFile; unsigned long int press; // press is a long float tempy; // temperature is a float float fpress; int loopSec = 0; int loopMin = 0; int num; // make a string for assembling the data to log: String dataString = ""; DateTime now;
- 31. DCC_DATALOGGER_3.INO 2 OF 9 void setup() { Serial.begin(57600); Wire.begin(); RTC.begin(); bmp.begin(); // set up the LCD's number of rows and columns: lcd.begin(16, 2); lcd.setBacklight(HIGH); //HIGH is ON, LOW is OFF if (! RTC.isrunning()) { Serial.println("RTC is NOT running!"); // following line sets the RTC to the date & time this sketch was compiled RTC.adjust(DateTime(__DATE__, __TIME__)); } Serial.print("Initializing SD card..."); // make sure that the default chip select pin is set to // output, even if you don't use it: pinMode(SS, OUTPUT);
- 32. DCC_DATALOGGER_3.INO 3 OF 9 // see if the card is present and can be initialized: if (!SD.begin(chipSelect)) { Serial.println("Card failed, or not present"); // don't do anything more: while (1) ; } Serial.println("card initialized."); // Open up the file we're going to log to! // This is an APPEND open dataFile = SD.open("datalog.txt", FILE_WRITE); if (! dataFile) { Serial.println("error opening datalog.txt"); // Wait forever since we can't write data while (1) ; } }
- 33. DCC_DATALOGGER_3.INO 4 OF 9 void loop() { static int i; if ( (loopSec % 5) == 0) { //Serial.println(__DATE__, __TIME__); tempy = bmp.readTemperature(); tempy = (tempy * 9.0 / 5.0) + 32.0; press = bmp.readPressure(); fpress = (float)press* 0.007500616827042; now = RTC.now(); Serial.print(now.year(), DEC); Serial.print('/'); if(now.month() < 10) Serial.print("0"); Serial.print(now.month(), DEC); Serial.print('/'); if(now.day() < 10) Serial.print("0"); Serial.print(now.day(), DEC); Serial.print(' ');
- 34. DCC_DATALOGGER_3.INO 5 OF 9 if(now.hour() < 10) Serial.print("0"); Serial.print(now.hour(), DEC); Serial.print(':'); if(now.minute() < 10) Serial.print("0"); Serial.print(now.minute(), DEC); Serial.print(':'); if(now.second() < 10) Serial.print("0"); Serial.print(now.second(), DEC); Serial.println(); Serial.print("C time is = "); Serial.println(now.unixtime()); lcd.setCursor(0, 0); // lcd.print(now.year(), DEC); // lcd.print('/'); if(now.month() < 10) lcd.print("0"); lcd.print(now.month(), DEC); lcd.print('/'); if(now.day() < 10) lcd.print("0"); lcd.print(now.day(), DEC); lcd.print(" ");
- 35. DCC_DATALOGGER_3.INO 6 OF 9 if(now.hour() < 10) lcd.print("0"); lcd.print(now.hour(), DEC); lcd.print(':'); if(now.minute() < 10) lcd.print("0"); lcd.print(now.minute(), DEC); lcd.print(':'); if(now.second() < 10) lcd.print("0"); lcd.print(now.second(), DEC); lcd.setCursor(0, 1); lcd.print(tempy,1); lcd.print("F"); lcd.print(" "); lcd.print(fpress,1); lcd.print("mmHg"); Serial.print(tempy,1); Serial.print(" Deg F, "); Serial.print(fpress,1); Serial.println(" mmHgn"); }
- 36. DCC_DATALOGGER_3.INO 7 OF 9 delay(1000); loopSec+=1; if(loopSec == 360) // 6 minutes { static bool lcdStatus = true; // LCD light on or off loopSec = 0; lcd.clear(); lcd.setCursor(0, 0); lcd.print("Writing SD..."); dataString = String(now.unixtime()); dataString += ","; num = tempy; dataString += String(num); dataString += "."; tempy-=num; tempy+=0.05; tempy*=10.0; num=tempy; dataString+=String(num); dataString += ","; num = fpress; dataString += String(num);
- 37. DCC_DATALOGGER_3.INO 8 OF 9 dataString += "."; fpress-=num; fpress+=0.05; fpress*=10.0; num = tempy; dataString +=String(num); dataFile.println(dataString); // The following line will 'save' the file to the SD card after every // line of data - this will use more power and slow down how much data // you can read but it's safer! // If you want to speed up the system, remove the call to flush() and it // will save the file only every 512 bytes - every time a sector on the // SD card is filled with data. dataFile.flush(); delay(1000); lcd.clear(); // To check out if display LED was causing warming, // cycle it off/on every six minutes // #define LEDONOFF #ifdef LEDONOFF lcdStatus = !lcdStatus;
- 38. DCC_DATALOGGER_3.INO 9 OF 9 if(lcdStatus) { lcd.setBacklight(HIGH); //HIGH is ON, LOW is OFF } else { lcd.setBacklight(LOW); //HIGH is ON, LOW is OFF } #endif } }
- 39. DOWNLOADS 1 Grateful to Lady Ada!!!! Adafruit SD library: https://github.com/adafruit/SD Adafruit RTC library: https://github.com/adafruit/RTClib Adafruit logging shield tutorial: http://learn.adafruit.com/adafruit-data-logger- shield
- 40. DOWNLOADS 2 LCD i2c backpack tutorial http://learn.adafruit.com/i2c-spi-lcd-backpack Liquid Crystal control library https://github.com/adafruit/LiquidCrystal
- 41. QUESTIONS? Find more slides from Don at www.slideshare.net/dondoerres