SlideShare ist ein Scribd-Unternehmen logo
1 von 52
Downloaden Sie, um offline zu lesen
Service                 54


ŠkodaOctavia
The second generation

Electrical components


Self-study programme
This self-study programme informs you about the design and
the function of certain components of the electrical compo-
nents for the second generation of ŠkodaOctavia.
Contents


            Onboard supply                                 4

            CAN databus system                             8

            LIN databus                                   13

            Gateway                                       15

            Onboard supply control unit                   19

            Dash panel insert                             20

            4th generation of immobiliser                 23

            Convenience electrics                         24

            Steering column switch                        33

            Light                                         35

            Windscreen wiper                              38

            Tyre inspection                               41

            Trailer detector control unit                 43

            Personalization                               44

            Coming Home/Leaving Home                      45

            Mobile phone-Voice control system             46

            Self-diagnosis                                50


     You will find detailed inspection, setting and
     repair instructions in the provided repair
     manuals.

     The time of going to press was on the
     22.3.2004. The contents are not updated.


GB                                                             3
Onboard supply

The fuse boxes and relay positions in
the onboard supply

The onboard supply in the second generation of
ŠkodaOctavia is designed decentralized.

Because of the diffferent installation conditions,
the fuse boxes and the relay positions are located
at different locations in the vehicle.

These components are mounted decentralized.
This means, they are located close to their rele-
vant components and functional groups.


The functioning of the entire system in the vehic-
le is controlled by a series of specialised control
units.

The communication between the control units
and other functional groups of the electrical sys-
tem is performed via CAN databus line.


                                                      Electric box in engine com-
                                                           partment (E-box)


4                                                                                   GB
Fuse box


                                      Onboard supply control
                                              unit


                                                  SP54_01
     Additional relay carrier below
            the dash panel


GB                                                             5
Onboard supply

The fitting locations in the onboard supply - overview and characteristics

The fuse box
The fuse box is located in the left dash panel.


                                                                             SP54_02


The relay
The additional relay carrier below the dash panel
comprises the following components:

• Thermal protection for the driver seat memory.
• Headlight washer system relay.
• Fuel pump relay.


                                                                             SP54_03


The following relays are located on the front side
of the onboard supply control unit:

• Terminal 30 voltage supply relay.
• Heated rear window relay J9.
• Dual tone horn relay J4.
• Double washer pump relay -1- J729.
• Double washer pump relay -2- J730.
• Terminal 75X X-contact relay.


                                                                             SP54_04


6                                                                                  GB
The electric box (E-box)

Because of a large number of electronic compo-
nents, a number of fuses and relays had to be in-
creased for better accessibility as well as the im-
provement of the self-diagnosis.

Certain fuses and relays are placed in the E-box
located on the left in the engine compartment.
The fuses and relays placed in the E-box assist
the function in particular of the electrical compo-
nents located in the engine compartment.


On the front side of the E-box are the main fuses
of the electrical system, which supply the current
to the following electrical components:


• Generator.                                          SP54_05

• Electro/mechanical power steering.
• Radiator fan.
• Terminal X.
• Electrical auxiliary air heater.
• Terminal 30.


Depending on the equipment, the fuses as well as
the following relays are placed in the E-box:


• Voltage supply relay terminal J329 (terminal 15).
• Voltage supply relay terminal J682 (terminal 50).
• Fuel pump relay J17.
• Glow plug relay -J52.
• Voltage supply relay terminal J317 (terminal 30).


                                                      SP54_06


 GB                                                             7
CAN databus networking

The CAN databus networking concept
                                                                K-wire

                                                   J533                                  J285
                          CAN databus                              CAN data-
                           diagnosis                               bus combi         Control unit
                                                  Gateway                           in dash panel
                                                                                        insert

                            CAN databus
 Diagnostic con-            infotainment                                           CAN databus drive
   nection T16
                             CAN databus convenience
          J503                      J543                       J386                     J527                 J743
      CU for display            CU for seat ad-                                     CU for steering       Direct shift
                                                             Driver door             column elec-
     unit for radio and         justment with                                                            gearbox me-
                                                             control unit               tronics
        navigation                 memory                                                                 chatronics*
                                                                                        G85
          J412                      J345                       J387                                          J217
                                                                                     Steering an-
    CU for operating
                                 CU for trailer           Front passenger             gle sender        CU for automatic
    electronics, mo-
                                  detector                door control unit                                 gearbox
       bile phone

                                                                              LIN databus
           R12                      J446                       J388                             E221         J587

                                CU for parking              Rear left door          Multi-function      CU for selector
        Amplifier
                                     aid                     control unit           steering wheel      lever sensors*


                                 J255/J301                     J389                     G273                  J...               J583
                              CU for Climatronic,
                                                          Rear right door          Interior monitor-     Engine control       CU for NOx
                               air conditioning
                                                           control unit                ing sensor             unit              sensor
                                    system


          J400                      J604                       J393                     H12                  J431
                                                            Convenience                                  CU for head-      Separate CAN
      CU for wiper              CU for auxiliary
                                                           system central            Alarm horn           light range        databus
        motor                     air heater
                                                             control unit                                   control

          LIN databus
                                                               LIN databus
          G397                      J519                                                G384                 J104                G419

     Rain and light            Onboard supply                                      Vehicle inclinati-
                                                                                                          CU for ABS        ESP sensor unit
    detector sensor             control unit                                          on sender


                                                                                                             J500

                                                                                                        CU for steering
                                                                                                             aid


                                                                                                            J234

                                                                                                         CU for airbag
* only on gearbox 02E
                                                                                                                           SP54_07


8                                                                                                                                       GB
The networking of the CAN databus cables

CAN databus combi                               CAN databus diagnosis
Transmission speed 500 kbit/s                   Transmission speed 500 kbit/s

Cable colour                                    Cable colour
CAN H - orange/purple                           CAN H - orange/black
CAN L - orange/brown                            CAN L - orange/brown


At the CAN databus combi, the communication     The CAN databus diagnosis serves as a data trans-
is only performed between the Gateway and the   fer between the diagnostic unit VAS 5051/5052
dash panel insert.                              and the Gateway


                                                        J285 CU for display unit in
                                                            dash panel insert


                                                                                 J533 Gateway
Diagnostic con-
  nection T16


                                                           SP54_08


 GB                                                                                             9
CAN databus networking

CAN databus drive
Transmission speed 500 kbit/s
Cable colour
CAN H - orange/black
CAN L - orange/brown
                                    J500 CU for steering aid


                                                                             J... Engine control unit

     J743 Direct shift gearbox
          mechatronics*


                                                                                        J104 CU for ABS
J217 CU for auto-
  matic gearbox


                                                                                       J431 CU for head-
J527 CU for steer-                                                                     light range control
 ing column elec-
      tronics


               J533 Gateway                                                      J234 CU for airbag


                                                                   SP54_09


                                 J587 CU for selector lever sen-
                                             sors*

* only on gearbox 02E


10                                                                                                      GB
CAN databus convenience
Transmission speed 100 kbit/s

Cable colour
CAN H - orange/green
CAN L - orange/brown


                                J604 CU for auxiliary air
                                        heater


                  J519 CU for                                   J533 Gateway
                 onboard sup-
                      ply


    J527 CU for steer-                                                     J393 Convenience
     ing column elec-                                                     system central con-
          tronics                                                               trol unit


    J386 - J389 Door                                                      J255 CU for Cli-
       control unit                                                       matronic or J301
                                                                          CU for air condi-
                                                                           tioning system


    J345 CU for trailer
        detector


                                                            J543 CU for seat adjustment
                                                                  with memory


                                  J446 CU for parking
                                         aid                    SP54_10


 GB                                                                                             11
CAN databus networking

CAN databus infotainment

Transmission speed 100 kbit/s
Cable colour
CAN H - orange/purple
CAN L - orange/brown


                                J533 Gateway


                                               J503 CU for display unit for radio and navi-
                                                                 gation


                                                               J412 CU for operating electron-
           R12 Amplifier                                             ics, mobile phone


                                                  SP54_11


12                                                                                            GB
LIN databus

The modern vehicles of today are equipped with a
lot of control units. In order to ensure their prop-
er function, a mutual data transfer is absolutely
necessary. The previous methods for transmitting
information via individual line connections are
already limited. The LIN databus (Local Intercon-
nect Network) is therefore used more frequently
together with the increasing number of control
units connected directly via the CAN databus ca-
ble.


In the second generation of ŠkodaOctavia, the
LIN databus is distributed in the following three
subsystems:

• Onboard supply control unit.
• Convenience system central control unit.
• Steering column electronics control unit.

In contrast to the CAN databus cable, only one ca-
ble is sufficient for the correct function. Another
one-wire purple cable with a white marking is
used. The cable has neither a screening nor an-                                              SP54_12
other malfunction protection.


                                                       E221   Operating unit in the steering wheel
                                                       G273   Interior monitoring sensor
                                                       G384   Vehicle inclination sender
                                                       G397   Rain and light detector sensor
                                                       H12    Alarm horn
                                                       J393   Convenience system central control unit
                                                       J400   Wiper motor control unit
                                                       J519   Onboard supply control unit
                                                       J527   Steering column electronics control unit


  GB                                                                                                   13
LIN databus

Its own communication is initiated exclusively by     Tasks of the master control unit
the master control unit, which is connected di-
rectly to the CAN databus cable. This control unit    • Ratio and data transmission between LIN and
is also independently self-diagnostic and controls      CAN databus.
simultaneously the complete communication             • Monitoring of the data ratio and the speed of
process. The slave control unit cannot respond          the data transmission.
without request for data transfer. It is fully de-
pendent on the master control unit.

The master control unit can control up to 16 con-
trol units. The transmission speed of the LIN data-
bus in the second generation of ŠkodaOctavia is
19.2 kbit/s.


                                                                     Message header con-
                                        Message header trans-        tent transmitter: LIN
                                         mitter: LIN master           master or LIN slave

                           U

                Battery
                voltage
 Recessive
voltage level


 Dominant
voltage level

                     0


                          SP54_13
                                                                                                 t


14                                                                                              GB
Gateway

The Gateway is an independent control unit,
which is fitted under the dash panel above the ac-
celerator pedal.

The function of the Gateway control unit is in prin-
cipal identical to the previous model.

The control unit transmits information between
the individual CAN databus cables.


                                                                                                  SP54_14


                         Combi wake-up                 CAN databus combi


        15
                                                                  CAN databus drive
        30
        30
                                                                                        CAN databus
        31                                                                              convenience
        31
                                                                  CAN databus info-
                                                                     tainment

                            CAN databus di-                                           SP54_15
                                    agnosis

                                                       Diagnostic con-
                                                       nection T16


  GB                                                                                                        15
Gateway

The control units connected to the CAN databus
are in home position when the ignition is switched
off. Through this it is possible to achieve a low cur-
rent consumption. The control of these conditions
is carried out by the Gateway control unit.
                                                         Sleep mode
                                                         As soon as the last control unit of the CAN databus
                                                         convenience and infotainment has transmitted its
Master functions                                         sleep mode readiness, the Gateway control unit
The Gateway control unit controls at the CAN da-         gives the sleep command.
tabus cable the following functions:
• Terminal 15 castor.                                    If the CAN databus drive does not go into sleep
• Sleep mode.                                            mode, the CAN databus convenience and the
• Wake-up mode.                                          CAN databus infotainment also do not go into
• Transport mode.                                        sleep mode. If the CAN databus convenience
                                                         does not go into sleep mode, the CAN databus in-
                                                         fotainment also does not go into sleep mode. This
                                                         is how a control unit can stop the vehicle from go-
Terminal 15 castor                                       ing into sleep mode.

Certain control units also need the possibility
to continue communicating after „ignition off“.
This is why a message for controlling the castor is      Wake-up mode
transmitted to the CAN databus cable. The control
                                                         If the control unit detects a pulse for activation, it
units switch internally a connection from terminal
                                                         sends a signal to the CAN databus cable.
30 to terminal 15 and continue to communicate.
                                                         The Gateway control unit finally activates the oth-
                                                         er control units at the CAN databus cable.

Control units which participate in the                   The CAN databus drive is activated after the ig-
castor:                                                  nition is switched on. The CAN databus conven-
                                                         ience and CAN databus infortainment are activat-
• Engine control unit.
                                                         ed by opening the doors, switching on the hazard
• ABS control unit.
                                                         warning system, opening the tailgate, switching
• Steering aid control unit.
                                                         on the ignition etc.
• Automatic gearbox control unit.
• Steering column electronics control unit.
• Control unit for selector lever sensors.


Control units which do not participate
in the castor:
• Airbag.
• Control unit for headlight range control.


16                                                                                                       GB
The coding of the Gateway
The coding of the Gateway control unit differs
completely from the previous coding of the Gate-
way or from the new long coding of the conven-
ience system central control unit and the onboard
supply control unit.

When coding the Gateway control unit, the me-
chanic must first of all have an overall view of the
control units connected to the CAN databus ca-
ble. Then he must inspect the control units or as-
sign them to the Gateway listed in the list. This
is required for the mutual communication of the
control units. Afterwards the manufacturer, the
body version, the steering type and the number of
doors have to be selected. However the end code
cannot be found. In case of an incorrect coding,
only one message regarding an incorrectly per-
formed coding is displayed in the fault memory.


   01 - Motor electronics                              coded
   02 - Gearbox electronics                            not coded
   22 - Four-wheel drive electronics                   not coded
   42 - Driver door electronics                        coded
   52 - Front passenger door electronics               coded
   62 - Rear left door electronics                     coded
   72 - Rear right door electronics                    coded
   03 - Brake electronics                              coded
   44 - Steering aid                                   coded
   15 - Airbag                                         coded
   25 - Immobiliser                                    coded
   55 - Headlight range control                        not coded
   65 - Tyre pressure monitoring                       not coded
   75 - Emergency call module                          not coded             SP54_17


coded - the Gateway control unit is coded for the                  SP54_16

communication with the respective control unit


  GB                                                                                   17
Gateway

The battery transport mode
The transport mode enables a reduction of the              The transport mode deactivates the fol-
current consumption of the battery for transpor-           lowing systems:
tation to the dealers. This function is controlled by
the Gateway control unit.                                  • Radio.
                                                           • Interior lighting.
The transport mode is set in the self-diagnosis.           • Interior monitoring.
The switching on of the transport mode is the re-          • Inclination sensor.
sult of the number of kilometers driven. After the         • Save LED in the driver‘s door.
first 150 km, the transport mode can no longer be
switched on.


                                                        SP54_18


                                                                                              SP54_19


                             Display of the battery transport mode


18                                                                                                      GB
Onboard supply control unit

The onboard supply control unit is located on
the driver side under the dash panel. Relays are
mounted on its front side.


                                         SP54_20


                                                                                 SP54_21

The onboard supply control unit is obtainable in
two versions:
• For vehicles with fog lights and personalization.
• For all other vehicles.

The individual versions differ only in their index-
es.


Main functions of the control unit:
• Electrical load management.
• Interior and exterior light control.
• Reversing lights.
• Bulb monitoring.
• Fuel pump feed (pressure build-up).
                                                                                  SP54_22
• Windscreen wiper and washer system.
• Dual tone horn.
• Function enable for seat heating and sliding/
  tilting roof.                                       Note!
• Heated rear window.                                 In the lower part of the control unit
• Terminal control 15, 75X, 50.                       there is a mechanical fuse, which
                                                      should prevent disconnection of most
                                                      of the plugs.


 GB                                                                                         19
Dash panel insert


                                                                                          SP54_23


The following components are integrated in the          Self-diagnosis of the dash panel insert
dash panel insert:
                                                        The diagnosis of the control unit in the dash panel
• Control unit for display unit in the dash panel in-   insert is carried out via CAN databus diagnosis us-
  sert J285.                                            ing the diagnostic unit VAS 5051/5052.
• Immobilizer control unit J362.
• Speedometer.                                          In the self-diagnosis, the following components
• Rev counter.                                          can be checked with the function „actuator test“:
• Fuel gauge display.
• Coolant temperature gauge.                            • Rev counter.
• Warning lights.                                       • Coolant temperature gauge.
• Multifunction display.                                • Fuel gauge display.
                                                        • Speedometer.
All warning lights are in the LED version.              • Read out on the display.
                                                        • Warning light for immobiliser.
                                                        • Warning light for overheating.
                                                        • Warning light for brake pad wear.
                                                        • Warning light for fuel reserve.
                                                        • Warning light for oil pressure.
                                                        • Warning light for oil level.
                                                        • Warning light for driver seat belt.
          Note!
                                                        • Warning light for two-circuit brake system and
          After changing the dash panel insert,           handbrake.
          the coding and the adaptation have            • Gong.
          to be carried out on the other vehicle        • Warning buzzer.
          systems.                                      • Turn signal system, audible feedback.
In the control unit J285 all information is proc-
essed by the monitoring functions and passed
on to the warning lights as pulses for lighting up,
flashes or permanent lights.

The lighting up of certain warning lamps is per-
formed in combination with an acoustic signal.


20                                                                                                   GB
Warning light symbols                                   Versions
The readout on the display varies depending on          • Lowline - Basic version
the dash panel insert version.                          • Midline - with multifunction display
                                                        • Highline - with Maxi DOT display


Symbol       Warning light          Lowline   Midline   Highline   Meaning
             Right turn signal                                     flashes simultaneously with the right turn
             system                    4         4          4      signal

             Left turn signal                                      flashes simultaneously with the left turn sig-
             system                    4         4          4      nal

             Generator                                             fault in the vehicle recharging system
                                       4         4          4

             Engine hood                                           open engine hood *
                                       4         4         DOT

             Bulb failure                                          bulb filament for side, low beam or brake
                                       4         4          4      light destroyed

             Tyre pressure                                         tyre pressure too low *
             monitoring                4         4          4

             Main beam light                                       main beam light
                                       4         4          4

             Low beam light                                        low beam light
                                       4         4          4

             Rear fog light                                        rear fog light
                                       4         4          4

             Airbag                                                fault at airbag
                                       4         4          4

             Electronic Power                                      fault in EPC system
             Control (electronic       4         4          4
             throttle)
             TCS = Traction                                        lights up - TCS off, ESP off or fault in the sys-
             control system ESP                                    tem; flashes - system active
             = Electronic stabil-      4         4          4
             ity program

             Preglowing                                            flashes - fault in the motor electronics (die-
                                       4         4          4      sel engine)

             ABS                                                   fault in ABS system
                                       4         4          4


 GB                                                                                                              21
Dash panel insert

 Symbol         Warning light         Lowline      Midline      Highline    Meaning
                OBD - Onboard                                               lights up, fault in the exhaust gas relevant en-
                diagnosis (on-                                              gine electronics;
                                          4           4            4
                board diagnosis)                                            flashes, possible catalytic converter damage

                Steering aid                                                fault in the system of the electro/mechanical
                                                                            power steering
                                          4           4            4


                Immobiliser                                                 when lighting up, there is a start attempt with
                                          4           4            4        an unauthorised key

                Coolant level or                                            coolant shortage or overheating *
                overheating               4           4           DOT

                Brake monitoring                                            brake fluid shortage, handbrake applied *
                                          4           4            4

                Washing water                                               washing water shortage
                                          4           4           DOT

                Brake pad                                                   authorised brake pad minimum thickness
                                          4           4           DOT

                Fuel reserve                                                reserve in fuel reservoir *
                                          4           4           DOT

                Oil pressure                                                oil pressure in engine lubrication system too
                                          4           4           DOT       low

                Oil level                                                   lights up, engine oil level too low *; flashes,
                                          4           4           DOT       fault in the oil level/temperature sender


DOT - the symbol of the warning light is shown as pictograph in the DOT display
4 - the warning light is shown in the dash panel insert outside the DOT display
* The lighting up of the warning lamp is performed in combination with an acoustic signal - peep


           Note!
           The activation of the symbol on the
           display occurs in most cases when the
           engine is running or when driving.


22                                                                                                                    GB
4th generation of immobiliser

The 4th generation of immobiliser improves the       Adaptation
protection against unauthorized operation of the     The prerequisite for the correct function of the sys-
vehicle. The system ensures an electronic protec-    tem is the adaptation of the components to each
tion for the engine control unit.                    other. First the engine control unit has to be adapted,
                                                     which takes over the specific vehicle code and the
Design                                               password of the immobiliser control unit from the
                                                     immobiliser control unit and in return transmits the
The system consists of a transponder in the key,
                                                     password for the engine control unit and the block-
an engine control unit and an immobiliser control
                                                     ing code of the engine control unit to the immobiliser
unit.
                                                     control unit. After checking the correct code for cer-
                                                     tain vehicle makes, the keys are adapted (they take
The vehicle key contains:                            over the specific vehicle code from the immobiliser
- Electronic transponder with fixed code.            control unit and the immobiliser control unit takes
- Specific vehicle code of immobiliser.              over the fixed code of the key).
- Manufacturer code for certain vehicle makes
  (e.g. the VW keys cannot be used for Škoda).


The engine control unit contains:
- Password for the engine control unit.
- Blocking code for the engine control unit (pre-
  vents the adaptation of another control unit in-
  stead of the original engine control unit).
- Code for certain vehicle makes.
- Specific vehicle code for the communication
                                                                                                 SP54_24
  with the immobiliser.
                                                     Differences between the 3rd and 4th ge-
                                                     neration
The immobiliser control unit contains:
- Specific vehicle code.                             • The use of the code for certain group makes,
- Password of the immobiliser control unit.            which prevents the use of different components
- Blocking code for the engine control unit (pre-      amongst Škoda, VW, etc.
  vents the adaptation of another control unit in-   • All versions of the engine control unit have the
  stead of the original engine control unit).          so-called „Tuning protection“ (prevents the en-
- Code for certain vehicle makes.                      gine control unit being replaced with a control
                                                       unit with higher power output).
                                                     • Coded data transfer between the immobiliser
Explanations                                           control unit and the engine control unit.
• Specific vehicle code - defines the behaviour of   • Different cryptic algorithm for the key and the
  the immobiliser.                                     engine control unit.
• Password (random digit code) of the immobiliser
  control unit or the engine control unit.                     Note!
• Blocking code for the engine control unit - pre-
                                                               The waiting time for the adaptation of
  vents the adaptation of another control unit in-
                                                               the new components to the system is
  stead of the original engine control unit.
                                                               5 minutes for the keys and the immo-
• Code for certain vehicle makes - e.g. Škoda, VW,
                                                               biliser control unit and 10 minutes for
  etc.
                                                               the engine control unit.

 GB                                                                                                        23
Convenience electrics

The convenience electrics ressembles the one in      Amongst the important functions of the
the first generation of ŠkodaOctavia.                convenience system central control unit
                                                     are:
The self-diagnosis of the door control units, a
complete new type of coding for the convenience      • Control and inspection of the central locking.
system central control unit (the so-called „long     • Actuation of the rear doors.
coding“) and the introduction of the LIN databus     • Actuation of the tailgate release
are part of the essential changes.                   • Actuation of the tank release.
                                                     • Actuation of the anti-theft alarm system via LIN
                                                       databus.
The convenience system central control unit is lo-
cated under the dash panel above the glove com-
partment, next to the airbag holder.


                                                              Note!
                                                              Before pulling the plug out of the con-
                                                              venience system central control unit,
                                                              first of all the control unit must be
                                                              slightly pushed out of the holder.


                           SP54_25


                                                           SP54_26


24                                                                                               GB
The door control units
Just as for all the other control units at CAN data-     Emergency running function
bus these control units are also about the self-di-
agnosis. However the „long coding“ is not used for       The following emergency running functions are
coding the door control units.                           started, if a door control unit is disconnected from
                                                         the CAN databus cable.
The innovation represents the use of two control
motors in the locking unit. Thus a lower malfunc-        • If all the control units receive five times consecu-
tion susceptibility as well as a faster locking is          tively no message from the convenience system
achieved.                                                   central control unit, the driver side door control
                                                            unit ensures the control.

                                                         • If a door control unit is supplied with current and
                                                           cannot communicate via the CAN databus, then
                                                           the window can still be operated ten minutes af-
                                                           ter the last message from the CAN databus with
                                                           the switch for the electrical window actuation
                                                           which is connected to this control unit.

                                                         • In case of a failure of the CAN databus com-
                                                           munication between the convenience system
                                                           central control unit and the door control unit,
                                                           the vehicle can be locked by pressing down the
                                                           stopping lever up to the inner stop. The stop-
                                                           ping lever is located under a panel on the front
                                                           side of the door.

                                           SP54_27


                                       Stopping lever in basic
                                              position


The self-diagnosis of the door control units is per-
formed via the following address words:

• 42 - Driver door electronics.
• 52 - Front passenger door electronics.
• 62 - Rear left door electronics.
• 72 - Rear right door electronics.


                                                                                             SP54_28


  GB                                                                                                        25
Convenience electrics

The long coding
This new type of coding was installed up to now          After the diagnostic unit VAS 5051/5052 is con-
only at the convenience system central control           nected and the function „long coding“ was select-
unit, the onboard supply control unit and the            ed, the table with the current coding of the control
Gateway. The coding of the Gateway control unit          unit appears. If the convenience system central
is however different in comparison to the other          control unit is coded, 13 bytes are shown on the
two control units.                                       left of the screen, from which each consists of an
                                                         eight digit number block. Each position (byte) in
The coding of the convenience system central             this number block has its specific meaning.
control unit and the onboard supply control unit
is in principal identical. The difference exists only    E.g . the 0 in the 10th byte on the position 4 from
in the length of the hexadecimal code. The hexa-         the left means, that it concerns a vehicle with a
decimal code for the convenience system central          left-hand drive The meaning of the individual
control unit has only 26 digits, but the code for the    bytes is determined by the code table dependent
onboard supply control unit has 34 digits.               on the vehicle equipment.

                                                         The new control unit already has the group basic
                                                         coding. This coding must be adapted however in
                                                         accordance with the individual equipment and
                                                         specification from Škoda.

                                                         The mechanic can code with the help of either the
                                                         binary code or the hexadecimal code.


     Byte index   Hex    Byte pattern
     0            00     00000000
     1            F8     11111000
     2            00     00000000
     3            00     00000000
     4            7F     01111111
     5            2D     00101101
     6            85     10000101
     7            05     00000101
     8            48     01001000
     9            CF     11001111
     10           86     10000110
     11           10     00010000               Remove byte
                                                                 Hex         Bin                 SP54_17
     12           04     00000100

                                                                             SP54_29


26                                                                                                         GB
The vehicle inclination sender
With its function in active condition, it protects the       Operation:
vehicle against undesirable towing.                          The function of the sender consists of measur-
                                                             ing the vehicle inclination angle and analysing
It is located together with the interior monitoring          each random change of this angle. If an inclina-
sensor under a cover in the area of the front inte-          tion change is detected above the limit value, the
rior lighting.                                               sender control unit carries out a more detailed
                                                             analysis of the inclination angle. Then the send-
                                                             er control unit measures this angle with extreme
                                                             sensitivity and checks continuously, if the limit
                                                             value for the alarm activation was exceeded. If the
                                                             determined inclination angle is above the limit
                                                             value, the anti-theft warning system is activated.
    SP54_30


                                                             The convenience system central control unit mon-
The switch for deactivation of the vehicle inclina-          itors the complete course of communication.
tion sender is located on the driver side, in the bot-
tom „B-pillar“, together with the switch for deacti-         The communication between the convenience
vation of the interior monitoring sensor.                    system central control unit and the vehicle incli-
                                                             nation sender is performed via the LIN databus.
The function of the vehicle inclination sender can
only be deactivated with the switch when leaving
the vehicle. The vehicle inclination sender is deac-
tivated by pressing the switch when the ignition is          The inclination angle of the sender can be checked
switched off (terminal 15), the key is removed from          in the measured value block. For the correct dis-
the ignition lock (S-contact) and the driver door is         play of the current value, the sender must be in
opened. Then the vehicle must be locked within 30            the active condition.
seconds.


Switching off the vehicle inclination sender is only
carried out for one locking cycle.


                                     X-reference angle
                                     current X-delta angle
                                     Y-reference angle
                                     current Y-delta angle


                                                                                                      SP54_17
                        SP54_31                                                         SP54_32

  GB                                                                                                            27
Convenience electrics

The interior monitoring
The interior monitoring is performed by three ul-       If there is a possibility that an alarm could be trig-
trasound sensors. The sensors are located under a       gered through movement in the locked vehicle,
cover in the area of the front interior lighting.       the interior monitoring must be deactivated when
                                                        leaving the vehicle.
After the vehicle is locked, the anti-theft alarm
system and the interior monitoring are activated        The switch for deactivation of the interior moni-
automatically. If one of the doors is open when         toring sensor is located on the driver side, in the
activating the anti-theft alarm system, its moni-       bottom „B-pillar“. The interior monitoring can
toring is activated with a time delay of 5 seconds      only be deactivated by means of the switch when
after closing the door. The interior monitoring         leaving the vehicle. The vehicle inclination sender
is only activated after closing all the monitoring      is deactivated by pressing the switch when the ig-
points and after the activation time of 20 seconds      nition is switched off (terminal 15), the key is re-
has elapsed.                                            moved from the ignition lock (S-contact) and the
                                                        driver door is opened. Then the vehicle must be
Depending on the input signals (window open, in-        locked within 30 seconds.
stallation of auxiliary heater) the control unit sets
the sensitivity threshold for the alarm triggering.     Switching off the interior monitoring is only car-
                                                        ried out for one locking cycle.
If the vehicle is locked by radio control, this con-
dition of the convenience system central control
unit is also transmitted to the CAN databus. The
convenience system central control unit activates
the interior monitoring sensor via the LIN data-
bus.


                                                                          SP54_33


28                                                                                                      GB
The function of the ultrasound system
Phase „A“ deactivation status inactive                      the convenience system central control unit. The con-
The microprocessor of the ultrasound system is nor-         venience system control unit informs about the error
mally in idle state.                                        for 28 seconds by means of the light diode in the driver
It evaluates no ultrasound signals and blocks the emis-     door. The system moves into the deactivation state.
sion of the ultrasound.

The microprocessor is actuated regularly by a timer or      Phase „C“ analysis of an activation attempt
by the convenience system central control unit. The         The microprocessor of the ultrasound system is in
system communicates with the convenience system             operating condition.
central control unit via LIN databus and under its com-
                                                            It generates the frequency for the transmission of
mand it moves into the phase „Analysis of an activa-
                                                            an ultrasound signal, which is generated by one of
tion attempt“.
                                                            the sensors.

Phase „B“ connected in monitoring status                    It generates signals, which are indispensable for
The microprocessor of the ultrasound system is nor-         the incidental demodulation of the received ultra-
mally in idle state.                                        sound signals.
It is actuated every 200 milliseconds by the monitor-
ing timer. In active condition, the system transmits        It evaluates signals, which come from 4 analog
interrupted ultrasound signals and evaluates their re-      channels (2 per receiver). The alarm is activated,
sponse signals which are received by three sensors. If      if the signals have the same frequency and are out
the receiving signal matches the previously received        of phase by 90°.
signals, the microprocessor returns to idle state. If the
receiving signal is different in comparison to the previ-   In the case of an authorized alarm, the ultrasound
ous signal, the system moves into the phase „Analysis
                                                            system transmits a message via the LIN databus to
of an activation attempt“.
                                                            the convenience system central control unit.
This analysis can trigger the alarm. Otherwise the sys-
tem returns to the cyclic analysis of the response sig-     While deciding about the alarm triggering, the
nals.                                                       system remains in this phase or exits it. If these
                                                            signals do not lead to an alarm triggering, the
The sensitivity of this system is regulated automatically   system returns to the monitoring phase. The con-
when working with response signals. After the activa-       venience system central control unit can bring the
tion the maximum sensitivity is decreased in stages,        system into the phase „Deactivation „ or „Diagno-
until no further signal changes indicating a movement       sis“ via the LIN databus.
inside the vehicle are detected. This automatic control
is performed within two minutes after the activation.
                                                            Phase „D“ diagnosis
The microprocessor is actuated every second by the          The microprocessor of the ultrasound system is in
LIN databus, which transmits the messages regarding         operating condition. It is controlled by the convenien-
the current operating state. Under command of the           ce system central control unit.
convenience system central control unit, it can move
into the phase „Deactivation“ or „Diagnosis“.               The system is set to the phase „Deactivation“ or „Ana-
                                                            lysis of an activation attempt“.
The system evaluates the voltage and the operating
temperature in regular intervals of one minute.

If the measured values are within the tolerance, the
system moves into the phase „ Analysis of an activa-
tion attempt“. The system sends an error message to

  GB                                                                                                             29
Convenience electrics

The alarm horn


The alarm horn is located in the front right wheel-   After locking the vehicle, the LIN databus per-
house above the wheelhouse liner.                     forms an active communication between the
                                                      convenience system central control unit and the
                                                      alarm horn.

                                                      The convenience system central control unit
                                                      transmits a message every second to the alarm
                                                      horn regarding the current vehicle status. The
                                                      message is evaluated by the alarm horn and the
                                                      anti-theft alarm system is activated on command
                                                      for alarm triggering or when communication is in-
                                                      terrupted.

                                                      The alarm horn has its own Ni-MH-cells. These
                                                      are supplied directly with current from the fuse
                                                      box.


                                                                                         SP54_34


30                                                                                                 GB
The locking inspection
Outside locking                                        Inside locking
In the second generation of ŠkodaOctavia, the          The warning light for inside locking informs the cu-
safety knob is no longer a component of the door       stomer about the condition of the inside locking. The
lock.                                                  warning light serves as illumination of the central lok-
                                                       king switch, which is located in the centre console.
The message regarding the status of the safety
knob for central locking is partially ensured by the   The switch lights up orange:
locking warning light, which is connected direct-
ly to the driver side door control unit. In the ini-   • If the vehicle is locked automatically.
tial condition the warning light informs precisely     • If the vehicle is locked 2x consecutively within 2 se-
about the status of the central locking.                 conds using the key via the lock cylinder or with the
                                                         radio control.
The control signal of the warning light is activated   • If the vehicle with the central locking switch is lok-
by the convenience system central control unit.          ked centrally.

If the vehicle is locked and the anti-theft alarm
system is deactivated or there is a fault, the warn-
ing light shows various conditions.


          Vehicle without anti-theft alarm system.
          Locking with radio control or with a key
                   via the lock cylinder.


          Vehicle with anti-theft alarm system.
          Locking with radio control or with a key
                   via the lock cylinder..


          Vehicle without anti-theft alarm system.
          When locking the vehicle 2x consecutively
          within 2 seconds using a key via the lock
               cylinder or with radio control.

                          No signal

          Vehicle with anti-theft alarm system.
          When locking the vehicle 2x consecutively
           within 2 seconds using a key via the lock                                                SP54_36
                cylinder or with radio control.
                          No signal


           Vehicle with anti-theft alarm system.
            Central locking or interior monitoring
                          defective.
                      Permanent signal

       2s                           30 s     SP54_35

For reasons of secrecy, the locking warning light is
always actuated with a 0.5 Hz pulse after 30 sec-
onds.

  GB                                                                                                          31
Convenience electrics

The Memory seat
Three differently set seated positions can be stored    Setting
with the seat memory function The settings are
stored in the control unit, which is located in the
lower part of the seat.                                 Position the backrest up to the front stop when
                                                        the ignition is switched on. The Gong in the dash
In contrast to the first generation of ŠkodaOctavia,    panel insert confirms that the setting has been
the lumbar is also controlled additionally by the       carried out.
control unit.

The stored settings can be requested using the po-      Store seat position
sition buttons at the driver seat or after adaptation
of the radio control by pressing the button „Unlock“    Press the „SET“ button for one second when the
on the radio control or after opening the driver        ignition is switched on. Then press one of the
door.                                                   memory buttons within 10 seconds for 1 to 3 sec-
                                                        onds.
Each time the control unit for seat adjustment with
memory is changed, a setting must be carried out,       Adapt the radio control to the seat position:
which is absolutely necessary for the correct func-
tioning of the memory seat.                             Switch off the ignition (terminal 15), pull the ig-
                                                        nition key out of the ignition lock (S-contact) and
The limit values are stored in the „EEPROM memo-        press the button „Unlock“ on the radio control
ry“, so that no other setting is required. When con-    within 10 seconds after pressing one of the mem-
necting to the onboard supply for the first time, all   ory buttons 1 to 3.
senders and actuators are automatically read and
assigned by the control unit. The position of the
exterior mirrors is stored together with the current
seated position.


      Memory buttons 1-3


                                                                                     Lumbar setting
 „SET“ button for memo-
        ry function


                                                                                 Buttons for seat setting


                                                                   SP54_37


32                                                                                                          GB
Steering column switch

Characteristic
The steering column switch integrates the oper-
ating elements which are located at the steering
column in one unit. At the same time it commu-
nicates between the operating elements located
at the steering column and other vehicle systems.
This communication is ensured by the steering
column electronics control unit (J527), which is a
component of the steering column switch.                                                       SP54_39


                                                      1. Ignition lock - ignition starter switch
The steering column electronics control unit de-
                                                      - The ignition lock transmits the movement from
tects and processes all signals from the operating
                                                        the lock cylinder to the ignition starter switch
elements at the steering column and transmits
                                                        and closes the steering rod.
them to the individual vehicle systems.
                                                      - The ignition starter switch switches the signals
                                                        for the onboard supply of the vehicle.
In direction of the steering wheel the communi-
cation is performed via the LIN databus, in direc-
                                                      2. Connection line
tion of the vehicle it is performed via CAN databus
                                                      - It serves as a connection of the steering column
convenience and CAN databus drive.
                                                        electronics control unit with the ignition starter
                                                        switch and the electronic ignition key withdraw-
                                                        al lock on an automatic gearbox (not a compo-
                                                        nent of the ignition starter switch).

                                                      3. Carrier body

                                                      4. Turn signal lever
                                                      - It operates the turn signal lights, headlight
                                                        flasher, main beam, side light and cruise con-
                                                        trol system.

                                                      5. Windscreen wiper lever
                                                      - It operates the front and rear windscreen wiper
                                                        and washer system.

                                                      6. Steering angle sender
                                                      - It measures the steering angle values for the
                                                        steering aid and also for the ESP.

                                                      7. Restoring ring with slip ring
                                                      - They transfer signals between the steering
                                                        wheel, signal horn, multifunction steering
                                                        wheel and airbag.

                                          SP54_38     8. Steering column electronics control unit
                                                         (J527)
                                                      - It evaluates the signals from the individual com-
                                                        ponents and communicates with the other ve-
                                                        hicle systems.
 GB                                                                                                      33
Steering column switch

Operation:
• Switching of base signals for the onboard supply
  by the ignition starter switch.
• Transmitting signals between the vehicle and the
  steering wheel (signal horn, multifunction steer-
  ing wheel - communication via LIN databus, air-
  bag).                                                                                          Note!
• Operating turn signal lights, headlight flasher                                                The steering column electronics con-
  and main beam.                                                                                 trol unit is self-diagnostic under the
• Operating windscreen wiper and washer sys-                                                     address word 16 - steering wheel elec-
  tem.                                                                                           tronics.
• Operating onboard computer.
• Operating cruise control speed (at turn signal
  lever).
• Measuring steering angle and signal transmis-
  sion in the vehicle.
• Ignition key withdrawal lock (for automatic gear-
  box), if the selector lever is not in position „P“
  (lock function).

                                                                                                             * MFS - Multifunction steering
                                                                                                                        wheel
                                      Airbag                  Signal horn                 Button for MFS*


                                                                                                Steering
                                                                              Voltage supply


                                  Illumination for                                             wheel elec-
                                                       Signal horn


                                       MFS*                                                      tronics
                                                                              for MFS*
                                                                     Ground


                                                                                                                                                        Steering wheel
                                   Airbag
                                                                                               LIN


                                                     Restoring ring with slip ring

                                                       Steering angle sender
                                                                                                                                                        Steering rod
 Turn signal lever
                                                                                                                                  Windscreen wiper
 Headlight flasher
                                                                                                                                       lever
   main beam
                                  Steering column electronics control unit

     CCS switch                                                                                                                  Onboard computer


                                                       Ignition starter                                                        CSS Input/output
             CU for airbag
                                                            switch
                                                                                                                               Terminal 15 and terminal 50
 CAN databus convenience
                                                                                                                               Terminal 30 - Voltage
                                                         Ignition lock                                                         supply
                                                                                                                               Terminal 31
        CAN databus drive
                                                                                                                               Signal from selector lever

                                                                                                                                              SP54_40


34                                                                                                                                                  GB
Light

The onboard supply control unit J519 evaluates
the signals directly from the light switch or from
the light sensor. The information about switch-
ing on the turn signal light, the main beam and
the headlight flasher is transmitted via the steer-
ing column electronics control unit via the CAN
databus cable to the onboard supply control unit
J519.


                                                      SP54_41

D      Ignition lock
E19    Parking light switch
E4     Headlight dipper/flasher switch
F      Brake light switch
F4     Reversing light switch
G397   Rain and light detector sensor
J527   Steering column electronics control unit
J519   Onboard supply control unit
M25    Additional brake light
X      Number plate light


 GB                                                             35
Light

Headlight
The clear glass is made out of plastic.                    The parking and turn signal lights are covered with
                                                           a scattering filter.
The headlight forms a unit, which is divided in
three reflex surfaces:                                     The bulb for the turn signal is orange.
• Main beam light.
• Low beam light.
• Parking and turn signal light.

For the second generation of ŠkodaOctavia two
headlight versions are obtainable as an option.


Two chamber headlight


                       Main beam light


                            Low beam light                                                       SP54_42

                               Turn signal and parking light


Headlight with dioptric-eliptic element
Depending on equipment, either a halogen or a
xenon lamp can be inserted in the headlight with
dioptric-elipitic element.


                     Main beam light
                                                                                                     SP54_43

                                   Low beam light

                                                 Turn signal and parking light

36                                                                                                             GB
Reversing lights                                             Light sensor
The reversing lights are designed so that the tail           The light sensor is fitted in the foot of the interior
light at the entire outer circumference of the re-           mirror. It forms together with the rain sensor one
versing light lights up and creates the so-called            unit.
C-effect. 4 bulbs are used for the tail light - two
single-filament bulbs for the tail light, one two-           The vehicles equipped with the light sensor can
filament bulb for the tail light and brake light and         automatically detect the surrounding bright-
one two-filament bulb for the tail light and fog             ness and on the basis of this the driving light is
light.                                                       switched on or off .

The clear glass is inserted for the turn signal and          The light sensor measures the light values at three
reversing light. The component of the reversing              different levels in front of the vehicle. Because of
light lens forms a reflector.                                the difference between these light values, it can
                                                             detect the current surrounding brightness (dark-
                                                             ness, daylight, fog, driving into a tunnel, driving
                                                             out of tunnel, driving in an alley etc.)
                                                             Darkness     Light       Surrounding       Light
                                                              A   B   C   A   B   C   brightness

                                                              X   X   X               Darkness          on

                                                                                      Daylight          off
                                                                          X   X   X

                                                                                      Driving into a    on
                                                                                      tunnel, a fo-
                                                                  X   X   X
                                                                                      rest, a garage
                                         SP54_44                                      etc.
                                                                                      Bridge, Alley     on
                                                                  X       X       X

Direction indicators                                                                  Driving out of    on
                                                                                      a tunnel, a fo-
                                                              X               X   X
They are installed in the exterior mirrors. They                                      rest, a garage
                                                                                      etc.
consist of three LED diodes.
                                                             Function of the light sensor


                                      SP54_45


                                                   SP54_46

  GB                                                                                                            37
Windscreen wiper


                                                                                                 SP54_47
D      Ignition lock
E      Windscreen wiper lever
F266   Contact switch for engine hood               Positions of the windscreen wiper lever
G397   Rain and light detector sensor
J104   ABS control unit
J400   Wiper motor control unit
J519   Onboard supply control unit
J527   Steering column electronics control unit
J533   Gateway


The signal of the position of the windscreen le-
ver is passed on by the steering column electron-                                                 SP54_48
ics control unit via the CAN databus convenience
                                                    0 - Basic position
to the onboard supply control unit J519. The on-
                                                    1 - Interval wipe, controlled by the rain sensor
board supply control unit transmits the signal
                                                    2 - Slow wipe
about the current position of the windscreen wip-
                                                    3 - Fast wipe
er lever via the LIN databus to the wiper motor,
                                                    4 - Flick wipe, setting and service position
where this signal is processed.
                                                    5 - Automatic wipe/wash
                                                    6 - Rear window wipe
                                                    7 - Automatic wipe/wash for rear window
                                                    A - Switch for interval wipe and for sensitivity set-
                                                       ting of the rain sensor


38                                                                                                  GB
Wiper functions                                         Speed dependent wiping stage resetting
                                                        If the vehicle speed drops below 4 km/h (e.g
Speed dependent interval stages
                                                        when stopping at a traffic light post), the select-
The wiping can be set using the windscreen wiper
                                                        ed wiper speed is automatically decreased from
lever in four interval stages. The speed of the indi-
                                                        stage 3 to stage 2 or from stage 2 to interval wipe
vidual interval stages is dependent on the vehicle
                                                        (stage 1). When increasing the speed over 8 km/
speed. The rest periods between the individual
                                                        h the wiper speed returns to the selected stage.
wiping intervals vary between 1.28 seconds in
stage „I“ at approx. 150 km/h and 24 seconds in
stage „IV“ at approx. 4 km/h.
                                                        One time washing of the windscreen
                                                        If the button for the wash function is operated for
                                                        more than 0.8 seconds, the fast wipe is switched
                                                        on. If the operating time is low, the slow wipe is
                                                        switched on.


                                                        Antiblock function
                                                        If the wiper on the windscreen encounters an ob-
                                                        stacle, it can detect it. Then it attempts to push
                                                        away this obstacle. If it cannot remove the obsta-
                                                        cle, the wiping stops automatically after 5 wiping
                                                        intervals and the wiper remains in front of the ob-
                                             SP54_49    stacle. After removing the obstacle and switch-
         Stage I                     Stage III          ing on the wipe system again, the wiper begins to
         Stage II                    Stage IV           wipe again.


Wiping vehicles fitted with rain sensor
The wiper frequency is controlled by the rain sen-
sor. The windscreen wiper lever must be in the
position for interval wipes. The setting of the sen-
sor sensitivity can be performed with the wind-
screen wiper lever (position A).


                                                                                                 SP54_50


  GB                                                                                                       39
Windscreen wiper

Automatic wash/wipe for windscreen                          Service position for replacing the wiper blades
If the windscreen wiper lever at the steering wheel         This function cannot be activated if the engine
is pulled back into the position of the wash func-          hood is open.
tion, the wash system begins to operate immedi-             After activating this function, the wipers move into
ately, the wiper wipes with a time delay (800 mil-          the position where the wiper blades can be re-
liseconds). At a vehicle speed above 120 km/h the           placed without damage. The function is activated
wash and wipe system operates simultaneously.               by the windscreen wiper lever set in the position
After releasing the lever, the wash pump stops              for flick wiping within 20 seconds after switching
and another 3 to 4 wiping intervals are carried out         off the ignition. The wipers then move into service
(depending on the duration of washing)                      position.


Rewipe the windscreen
At a vehicle speed above 120 km/h and when ac-
tivating the wash system, another rewipe occurs
again 5 seconds after the last rewipe.


Alternative rest position
After each second time when the windscreen
wiper is switched off or after each fifth time when
the ignition is switched off, the rest position of the                                                SP54_52
windscreen wiper is newly defined, which should
prevent a deformation of the wiper blades. In or-           Switching off the wipers when the engine hood
der to facilitate the setting of the windscreen wip-        is open
ers at the works or for the pre-sale service, this          This function was introduced for the purpose of
function is switched off during the first 100 wiping        safety increase during service work .
intervals.
                                                            If the engine hood is opened when the vehicle is
                                                            in standstill or at a vehicle speed below 2 km/h,
                                                            the wipers do not operate. The wipers only start
                                                            wiping, after the engine hood is closed and the
                                                            windscreen wiper lever was set in the position for
                                                            wiping.

                                                            If the engine hood opens at a speed of 2 km/h up
                                                            to 16 km/h, the wipers stop. However, they can be
                                                            switched on again by setting the windscreen wip-
                                                            er lever once again in the position for wiping.

                                                            If the engine hood opens at a speed of more than
                                                            16 km/H, the signal from the hood contact is not
                                                  SP54_51
                                                            accepted by the wipers.
             Rest position after the second switching off
 Rest position after the first switching off


40                                                                                                          GB
Tyre inspection

The tyre inspection is a software module in the
ABS control unit. The ABS control unit compares
the circumferential speed on all 4 wheels and de-
termines on the basis of the determined values
and their possible deviations the pressure loss in
the tyres.


The roll-off circumference of a tyre depends on
its inflation pressure. When changing the tyre in-
flation pressure, the roll-off circumference of the
tyre changes as well.

If a pressure loss is detected, the driver is made
aware of this through the warning light lit up per-                                    Button for tyre in-
manently in the dash panel as well as a brief buzz-                                     spection display
ing tone.

The warning is only set back after a new calibra-
tion.                                                                                    SP54_53
                                                                 ABS wheel sensors


                                                      J104   ABS control unit
                                                      J285   Control unit in dash panel insert
                                                      J533   Onboard supply control unit

         Note!
         In case of extremely fast cornering,
         when braking or activating an ABS
         system, the tyre inspection display
         temporarily switches off automati-
         cally.


 GB                                                                                                     41
Tyre inspection

Basic setting (calibration)

For determining the reference data, a calibration
must be carried out after each change of the infla-
tion pressure or after a tyre change.


Calibration drive
The button for the tyre inspection display must be
pressed in order to start a calibration drive. The
warning lamp for the tyre inspection display lights
                                                                                                      SP54_54
up and the flashing of the warning lamp confirms
the start of the calibration.                                    Button for tyre inspection display


The system can only conduct a major monitoring
after several minutes in a specific speed category,
which is important in order to collect reference
data in different speed categories. The system is
fully operational only when sufficient data has       System fault
been collected. The driving distance for the cali-
bration drive should be performed on country          If a fault occurs in the ABS control unit, the tyre
roads or motorways.                                   inspection is rendered non-operational and the
                                                      warning lamp for the tyre inspection display
                                                      flashes.


Calibration status
The status of the calibration can be read out with
the diagnostic unit VAS 5051/5052 via the „target-
ed fault finding“.


42                                                                                                          GB
Trailer detector control unit

Operation

• It detects if a trailer is attached.                       The trailer detector control unit is self-diagnostic.
                                                             The diagnosis is carried out using the diagnostic
• It switches and monitors the lights of the trailer.        unit VAS 5051/5052.

• It indicates defective bulbs in the lights of the          The lighting up of the trailer lights can be set by
  trailer (tail light, brake light and turn signal light):   the coding.
  The reverse and rear fog light cannot be indicat-
  ed.                                                        The trailer lighting is activated by the onboard
                                                             supply control unit via the CAN databus.
• It ensures the automatic deactivation of the rear          The lighting is switched through semi-conduc-
  fog light on the vehicle, if a trailer is attached.        tors; no power load takes place for the control el-
                                                             ements of the vehicle illumination.


The trailer detector control unit is located in the
luggage compartment on the left wheelhouse be-
low the trim panel.


                                                                                  SP54_55


  GB                                                                                                           43
Personalization

With the help of the information display, the user        By means of adaptation, the user can set
has the possibilty to change certain settings. The        the following system profiles:
current setting is displayed in the information dis-
play on the respective point at the top below the
line.
                                                          • Display language.
The setting is conducted using the buttons on the         • Warning for winter tyres.
windscreen wiper lever. The menu selection is re-         • Setting of the control units.
quested, when the rocker switch is held pressed           • Light setting.
for more than 1 second. The personalized menu is          • Time.
shown via the display in the dash panel insert. The       • Setting of the functions for the convenience sys-
transmission of the selected settings to the con-           tem central control unit.
trol units is performed via CAN databus conven-
ience or CAN databus combi.


                                                                                    Rocker switch for menu request
                                                                                     and choice of the individual
                                                                                             menu fields


                                                       SP54_56


                                                                                           SP54_58


                                                                 Display of the selected data


                                        SP54_57


44                                                                                                          GB
Coming Home/Leaving Home

Coming Home                                              Leaving Home
In contrast to the first generation of ŠkodaOcta-        This function enables the light to be switched on
via, where this function was connected to several        by radio control for a brief period after unlocking
control elements, in the second generation of            the vehicle. This ensures an easy and safe getting
ŠkodaOctavia this function is controlled com-            in the vehicle.
pletely by the onboard supply control unit.
                                                         The light is controlled by the light sensor in the
This function enables the switching on of the low        foot of the interior mirror. If the intensity of the
beam light when the ignition is switched off.            light is higher than the value set at the light sensor,
                                                         the Leaving Home function is not activated after
Activation:                                              unlocking the vehicle..

- Switch off the ignition when the low beam light        The function is deactivated by switching on the ig-
  is switched on.                                        nition or locking the vehicle.
- Keep the light switch in the position of the low
  beam light.

The light goes off as soon as the set and active
time constant with the help of personalization has
expired.

If one of the doors or the tailgate remains open,        Depending on the equipment, the following com-
the light goes off 90 seconds after switching off        ponents of the Coming Home/Leaving Home
the ignition.                                            function are switched on:

For vehicles with automatic light, when the light        • Side light.
switch is in the position of the automatic light, the    • Low beam light.
light is controlled by the light sensor in the foot of   • Exterior mirror light.
the interior mirror.                                     • Number plate light.

If the intensity of the light is higher than the value
set at the light sensor, the light is not activated by
the onboard supply control unit after switching off
the ignition.


  GB                                                                                                         45
Mobile phone-Voice control system

A mobile phone-voice control system was devel-         A phone phonebook is a component of the voice
oped for the second generation of ŠkodaOctavia.        control system. In the phone phonebook there are
                                                       50 free memory locations available. This phone
The operating electronics control unit processes the   phonebook is independent of the appliance used
acoustic signals received by the microphone. Then      for the telephone. Separate phonebook entries,
it compares these signals with the databank of the     which are stored on the SIM card of the telephone,
other known commands (voice commands) and              can be called up additionally via the control buttons
decides which voice commands have to be carried        of the telephone. For vehicles fitted with multifunc-
out. If a voice command is not detected, the system    tion steering wheel, the operation is performed via
answers „Pardon?“ and a new entry can be per-          the function buttons on the steering wheel.
formed. After the 3rd attempt, the answer „Cancel“
is performed and the dialogue is ended.                With the GALA function of the radio, the volume of
                                                       the voice response/telephone calls is automatically
The voice control of the mobile phone is only possi-   controlled according to the vehicle speed. Further-
ble for vehicles, which are equipped with maxi DOT     more the volume can be changed individually at
Display and radio Audience, Stream, or with radio-     any time with the button for setting the radio or with
navigation system.                                     function buttons on the steering wheel.

The information about the telephone conversation
is shown on the display of the radio and on the in-
formation display in the dash panel insert.

With the help of the voice control, pre-defined com-
mands as well as commands defined by the user
(names) can be entered.

The voice control has a system for suppressing sur-
rounding noises. This enables also the voice control
at a relatively high surrounding sound level when
driving the vehicle.

Depending on the vehicle equipment, the voice
control is activated by pressing the push-button PTT
(push to talk) Ø on the telephone adapter or the
push-button on the multifunction steering wheel.

Incoming phone conversations are accepted with
the push-button Ø and are ended by pressing again
the push-button Ø.

The period of time, in which the telephone system
is ready to accept and carry out voice commands, is
called DIALOGUE.

By pressing the push-button Ø the dialogue is end-
ed.

In case of incoming conversation, the dialogue is
immediately interrupted, because the conversation
has a higher priority.


46                                                                                                     GB
System


                                                              SP54_59


R38    Telephone microphone
J412   Control unit for operating electronics, mobile phone


 GB                                                                     47
Ssp 054 en_octavia ii_электрика автомобиля

Weitere ähnliche Inhalte

Andere mochten auch

VW Passat B6 3C 2005-... Fuses Overview
VW Passat B6 3C 2005-... Fuses OverviewVW Passat B6 3C 2005-... Fuses Overview
VW Passat B6 3C 2005-... Fuses Overviewvwmaster
 
Iveco Jon Stokes
Iveco Jon StokesIveco Jon Stokes
Iveco Jon StokesEggfuel
 
40107338 vw-golf-ivl
40107338 vw-golf-ivl40107338 vw-golf-ivl
40107338 vw-golf-ivlLemkenToshiba
 
Electro mechanical steering system- most advance technology
Electro mechanical steering system- most advance technologyElectro mechanical steering system- most advance technology
Electro mechanical steering system- most advance technologyPept Yadav
 

Andere mochten auch (6)

VW Passat B6 3C 2005-... Fuses Overview
VW Passat B6 3C 2005-... Fuses OverviewVW Passat B6 3C 2005-... Fuses Overview
VW Passat B6 3C 2005-... Fuses Overview
 
Iveco workshop manual
Iveco workshop manualIveco workshop manual
Iveco workshop manual
 
Iveco Jon Stokes
Iveco Jon StokesIveco Jon Stokes
Iveco Jon Stokes
 
40107338 vw-golf-ivl
40107338 vw-golf-ivl40107338 vw-golf-ivl
40107338 vw-golf-ivl
 
MAN truck
MAN truckMAN truck
MAN truck
 
Electro mechanical steering system- most advance technology
Electro mechanical steering system- most advance technologyElectro mechanical steering system- most advance technology
Electro mechanical steering system- most advance technology
 

Ähnlich wie Ssp 054 en_octavia ii_электрика автомобиля

Automotive days 2014 ts-54 xx-v1.1 (Full Version)
Automotive days 2014 ts-54 xx-v1.1 (Full Version)Automotive days 2014 ts-54 xx-v1.1 (Full Version)
Automotive days 2014 ts-54 xx-v1.1 (Full Version)Interlatin
 
Ls catalog thiet bi tu dong gipam 2200-e
Ls catalog thiet bi tu dong gipam 2200-eLs catalog thiet bi tu dong gipam 2200-e
Ls catalog thiet bi tu dong gipam 2200-eDien Ha The
 
Ls catalog thiet bi tu dong gipam 2200-e
Ls catalog thiet bi tu dong gipam 2200-eLs catalog thiet bi tu dong gipam 2200-e
Ls catalog thiet bi tu dong gipam 2200-eDien Ha The
 
Optimization Project
Optimization ProjectOptimization Project
Optimization Projectjustsayani
 
Circontrol Circarlife Catalogue 2013 2014 - EV Charging Stations
Circontrol Circarlife Catalogue 2013 2014 - EV Charging StationsCircontrol Circarlife Catalogue 2013 2014 - EV Charging Stations
Circontrol Circarlife Catalogue 2013 2014 - EV Charging StationsMoises Barea
 
compliant charging controller for electric vehicle
compliant charging controller for electric vehiclecompliant charging controller for electric vehicle
compliant charging controller for electric vehiclecarloscostabr
 
Manual reparacion Jeep Compass - Patriot Limited 2007-2009_Lights interior
Manual reparacion Jeep Compass - Patriot Limited 2007-2009_Lights interiorManual reparacion Jeep Compass - Patriot Limited 2007-2009_Lights interior
Manual reparacion Jeep Compass - Patriot Limited 2007-2009_Lights interiorGustavo Castro
 
2010 Cadillac Escalade Service Repair Manual.pdf
2010 Cadillac Escalade Service Repair Manual.pdf2010 Cadillac Escalade Service Repair Manual.pdf
2010 Cadillac Escalade Service Repair Manual.pdffusjekmdjdud3e
 
2008 Cadillac Escalade Service Repair Manual.pdf
2008 Cadillac Escalade Service Repair Manual.pdf2008 Cadillac Escalade Service Repair Manual.pdf
2008 Cadillac Escalade Service Repair Manual.pdff8usjekdkdmmd
 
2008 Cadillac Escalade Service Repair Manual.pdf
2008 Cadillac Escalade Service Repair Manual.pdf2008 Cadillac Escalade Service Repair Manual.pdf
2008 Cadillac Escalade Service Repair Manual.pdffusjekmdjdud3e
 
2007 Cadillac Escalade Service Repair Manual.pdf
2007 Cadillac Escalade Service Repair Manual.pdf2007 Cadillac Escalade Service Repair Manual.pdf
2007 Cadillac Escalade Service Repair Manual.pdff8usjekdkdmmd
 
2010 Cadillac Escalade Service Repair Manual.pdf
2010 Cadillac Escalade Service Repair Manual.pdf2010 Cadillac Escalade Service Repair Manual.pdf
2010 Cadillac Escalade Service Repair Manual.pdff8usjekdkdmmd
 
2009 Cadillac Escalade Service Repair Manual.pdf
2009 Cadillac Escalade Service Repair Manual.pdf2009 Cadillac Escalade Service Repair Manual.pdf
2009 Cadillac Escalade Service Repair Manual.pdffusjekmdjdud3e
 
2009 Cadillac Escalade Service Repair Manual.pdf
2009 Cadillac Escalade Service Repair Manual.pdf2009 Cadillac Escalade Service Repair Manual.pdf
2009 Cadillac Escalade Service Repair Manual.pdff8usjekdkdmmd
 

Ähnlich wie Ssp 054 en_octavia ii_электрика автомобиля (20)

Automotive days 2014 ts-54 xx-v1.1 (Full Version)
Automotive days 2014 ts-54 xx-v1.1 (Full Version)Automotive days 2014 ts-54 xx-v1.1 (Full Version)
Automotive days 2014 ts-54 xx-v1.1 (Full Version)
 
Ls catalog thiet bi tu dong gipam 2200-e
Ls catalog thiet bi tu dong gipam 2200-eLs catalog thiet bi tu dong gipam 2200-e
Ls catalog thiet bi tu dong gipam 2200-e
 
Ls catalog thiet bi tu dong gipam 2200-e
Ls catalog thiet bi tu dong gipam 2200-eLs catalog thiet bi tu dong gipam 2200-e
Ls catalog thiet bi tu dong gipam 2200-e
 
Optimization Project
Optimization ProjectOptimization Project
Optimization Project
 
Circontrol Circarlife Catalogue 2013 2014 - EV Charging Stations
Circontrol Circarlife Catalogue 2013 2014 - EV Charging StationsCircontrol Circarlife Catalogue 2013 2014 - EV Charging Stations
Circontrol Circarlife Catalogue 2013 2014 - EV Charging Stations
 
compliant charging controller for electric vehicle
compliant charging controller for electric vehiclecompliant charging controller for electric vehicle
compliant charging controller for electric vehicle
 
plano schematic
plano schematicplano schematic
plano schematic
 
Exj 8 u
Exj 8 uExj 8 u
Exj 8 u
 
Unit 4 - PLC.pptx
Unit 4 - PLC.pptxUnit 4 - PLC.pptx
Unit 4 - PLC.pptx
 
UENR84970001.pdf
UENR84970001.pdfUENR84970001.pdf
UENR84970001.pdf
 
938 k eletrico w8k
938 k eletrico w8k938 k eletrico w8k
938 k eletrico w8k
 
Sistema electrico 950 h
Sistema electrico 950 hSistema electrico 950 h
Sistema electrico 950 h
 
Manual reparacion Jeep Compass - Patriot Limited 2007-2009_Lights interior
Manual reparacion Jeep Compass - Patriot Limited 2007-2009_Lights interiorManual reparacion Jeep Compass - Patriot Limited 2007-2009_Lights interior
Manual reparacion Jeep Compass - Patriot Limited 2007-2009_Lights interior
 
2010 Cadillac Escalade Service Repair Manual.pdf
2010 Cadillac Escalade Service Repair Manual.pdf2010 Cadillac Escalade Service Repair Manual.pdf
2010 Cadillac Escalade Service Repair Manual.pdf
 
2008 Cadillac Escalade Service Repair Manual.pdf
2008 Cadillac Escalade Service Repair Manual.pdf2008 Cadillac Escalade Service Repair Manual.pdf
2008 Cadillac Escalade Service Repair Manual.pdf
 
2008 Cadillac Escalade Service Repair Manual.pdf
2008 Cadillac Escalade Service Repair Manual.pdf2008 Cadillac Escalade Service Repair Manual.pdf
2008 Cadillac Escalade Service Repair Manual.pdf
 
2007 Cadillac Escalade Service Repair Manual.pdf
2007 Cadillac Escalade Service Repair Manual.pdf2007 Cadillac Escalade Service Repair Manual.pdf
2007 Cadillac Escalade Service Repair Manual.pdf
 
2010 Cadillac Escalade Service Repair Manual.pdf
2010 Cadillac Escalade Service Repair Manual.pdf2010 Cadillac Escalade Service Repair Manual.pdf
2010 Cadillac Escalade Service Repair Manual.pdf
 
2009 Cadillac Escalade Service Repair Manual.pdf
2009 Cadillac Escalade Service Repair Manual.pdf2009 Cadillac Escalade Service Repair Manual.pdf
2009 Cadillac Escalade Service Repair Manual.pdf
 
2009 Cadillac Escalade Service Repair Manual.pdf
2009 Cadillac Escalade Service Repair Manual.pdf2009 Cadillac Escalade Service Repair Manual.pdf
2009 Cadillac Escalade Service Repair Manual.pdf
 

Kürzlich hochgeladen

PSCC - Capability Statement Presentation
PSCC - Capability Statement PresentationPSCC - Capability Statement Presentation
PSCC - Capability Statement PresentationAnamaria Contreras
 
Global Scenario On Sustainable and Resilient Coconut Industry by Dr. Jelfina...
Global Scenario On Sustainable  and Resilient Coconut Industry by Dr. Jelfina...Global Scenario On Sustainable  and Resilient Coconut Industry by Dr. Jelfina...
Global Scenario On Sustainable and Resilient Coconut Industry by Dr. Jelfina...ictsugar
 
Financial-Statement-Analysis-of-Coca-cola-Company.pptx
Financial-Statement-Analysis-of-Coca-cola-Company.pptxFinancial-Statement-Analysis-of-Coca-cola-Company.pptx
Financial-Statement-Analysis-of-Coca-cola-Company.pptxsaniyaimamuddin
 
Digital Transformation in the PLM domain - distrib.pdf
Digital Transformation in the PLM domain - distrib.pdfDigital Transformation in the PLM domain - distrib.pdf
Digital Transformation in the PLM domain - distrib.pdfJos Voskuil
 
8447779800, Low rate Call girls in Uttam Nagar Delhi NCR
8447779800, Low rate Call girls in Uttam Nagar Delhi NCR8447779800, Low rate Call girls in Uttam Nagar Delhi NCR
8447779800, Low rate Call girls in Uttam Nagar Delhi NCRashishs7044
 
Flow Your Strategy at Flight Levels Day 2024
Flow Your Strategy at Flight Levels Day 2024Flow Your Strategy at Flight Levels Day 2024
Flow Your Strategy at Flight Levels Day 2024Kirill Klimov
 
(Best) ENJOY Call Girls in Faridabad Ex | 8377087607
(Best) ENJOY Call Girls in Faridabad Ex | 8377087607(Best) ENJOY Call Girls in Faridabad Ex | 8377087607
(Best) ENJOY Call Girls in Faridabad Ex | 8377087607dollysharma2066
 
Memorándum de Entendimiento (MoU) entre Codelco y SQM
Memorándum de Entendimiento (MoU) entre Codelco y SQMMemorándum de Entendimiento (MoU) entre Codelco y SQM
Memorándum de Entendimiento (MoU) entre Codelco y SQMVoces Mineras
 
8447779800, Low rate Call girls in Saket Delhi NCR
8447779800, Low rate Call girls in Saket Delhi NCR8447779800, Low rate Call girls in Saket Delhi NCR
8447779800, Low rate Call girls in Saket Delhi NCRashishs7044
 
8447779800, Low rate Call girls in Shivaji Enclave Delhi NCR
8447779800, Low rate Call girls in Shivaji Enclave Delhi NCR8447779800, Low rate Call girls in Shivaji Enclave Delhi NCR
8447779800, Low rate Call girls in Shivaji Enclave Delhi NCRashishs7044
 
Traction part 2 - EOS Model JAX Bridges.
Traction part 2 - EOS Model JAX Bridges.Traction part 2 - EOS Model JAX Bridges.
Traction part 2 - EOS Model JAX Bridges.Anamaria Contreras
 
Marketplace and Quality Assurance Presentation - Vincent Chirchir
Marketplace and Quality Assurance Presentation - Vincent ChirchirMarketplace and Quality Assurance Presentation - Vincent Chirchir
Marketplace and Quality Assurance Presentation - Vincent Chirchirictsugar
 
8447779800, Low rate Call girls in Kotla Mubarakpur Delhi NCR
8447779800, Low rate Call girls in Kotla Mubarakpur Delhi NCR8447779800, Low rate Call girls in Kotla Mubarakpur Delhi NCR
8447779800, Low rate Call girls in Kotla Mubarakpur Delhi NCRashishs7044
 
8447779800, Low rate Call girls in New Ashok Nagar Delhi NCR
8447779800, Low rate Call girls in New Ashok Nagar Delhi NCR8447779800, Low rate Call girls in New Ashok Nagar Delhi NCR
8447779800, Low rate Call girls in New Ashok Nagar Delhi NCRashishs7044
 
8447779800, Low rate Call girls in Rohini Delhi NCR
8447779800, Low rate Call girls in Rohini Delhi NCR8447779800, Low rate Call girls in Rohini Delhi NCR
8447779800, Low rate Call girls in Rohini Delhi NCRashishs7044
 
Buy gmail accounts.pdf Buy Old Gmail Accounts
Buy gmail accounts.pdf Buy Old Gmail AccountsBuy gmail accounts.pdf Buy Old Gmail Accounts
Buy gmail accounts.pdf Buy Old Gmail AccountsBuy Verified Accounts
 
Call US-88OO1O2216 Call Girls In Mahipalpur Female Escort Service
Call US-88OO1O2216 Call Girls In Mahipalpur Female Escort ServiceCall US-88OO1O2216 Call Girls In Mahipalpur Female Escort Service
Call US-88OO1O2216 Call Girls In Mahipalpur Female Escort Servicecallgirls2057
 
Ten Organizational Design Models to align structure and operations to busines...
Ten Organizational Design Models to align structure and operations to busines...Ten Organizational Design Models to align structure and operations to busines...
Ten Organizational Design Models to align structure and operations to busines...Seta Wicaksana
 

Kürzlich hochgeladen (20)

PSCC - Capability Statement Presentation
PSCC - Capability Statement PresentationPSCC - Capability Statement Presentation
PSCC - Capability Statement Presentation
 
Global Scenario On Sustainable and Resilient Coconut Industry by Dr. Jelfina...
Global Scenario On Sustainable  and Resilient Coconut Industry by Dr. Jelfina...Global Scenario On Sustainable  and Resilient Coconut Industry by Dr. Jelfina...
Global Scenario On Sustainable and Resilient Coconut Industry by Dr. Jelfina...
 
Financial-Statement-Analysis-of-Coca-cola-Company.pptx
Financial-Statement-Analysis-of-Coca-cola-Company.pptxFinancial-Statement-Analysis-of-Coca-cola-Company.pptx
Financial-Statement-Analysis-of-Coca-cola-Company.pptx
 
Digital Transformation in the PLM domain - distrib.pdf
Digital Transformation in the PLM domain - distrib.pdfDigital Transformation in the PLM domain - distrib.pdf
Digital Transformation in the PLM domain - distrib.pdf
 
8447779800, Low rate Call girls in Uttam Nagar Delhi NCR
8447779800, Low rate Call girls in Uttam Nagar Delhi NCR8447779800, Low rate Call girls in Uttam Nagar Delhi NCR
8447779800, Low rate Call girls in Uttam Nagar Delhi NCR
 
Enjoy ➥8448380779▻ Call Girls In Sector 18 Noida Escorts Delhi NCR
Enjoy ➥8448380779▻ Call Girls In Sector 18 Noida Escorts Delhi NCREnjoy ➥8448380779▻ Call Girls In Sector 18 Noida Escorts Delhi NCR
Enjoy ➥8448380779▻ Call Girls In Sector 18 Noida Escorts Delhi NCR
 
Flow Your Strategy at Flight Levels Day 2024
Flow Your Strategy at Flight Levels Day 2024Flow Your Strategy at Flight Levels Day 2024
Flow Your Strategy at Flight Levels Day 2024
 
(Best) ENJOY Call Girls in Faridabad Ex | 8377087607
(Best) ENJOY Call Girls in Faridabad Ex | 8377087607(Best) ENJOY Call Girls in Faridabad Ex | 8377087607
(Best) ENJOY Call Girls in Faridabad Ex | 8377087607
 
Memorándum de Entendimiento (MoU) entre Codelco y SQM
Memorándum de Entendimiento (MoU) entre Codelco y SQMMemorándum de Entendimiento (MoU) entre Codelco y SQM
Memorándum de Entendimiento (MoU) entre Codelco y SQM
 
No-1 Call Girls In Goa 93193 VIP 73153 Escort service In North Goa Panaji, Ca...
No-1 Call Girls In Goa 93193 VIP 73153 Escort service In North Goa Panaji, Ca...No-1 Call Girls In Goa 93193 VIP 73153 Escort service In North Goa Panaji, Ca...
No-1 Call Girls In Goa 93193 VIP 73153 Escort service In North Goa Panaji, Ca...
 
8447779800, Low rate Call girls in Saket Delhi NCR
8447779800, Low rate Call girls in Saket Delhi NCR8447779800, Low rate Call girls in Saket Delhi NCR
8447779800, Low rate Call girls in Saket Delhi NCR
 
8447779800, Low rate Call girls in Shivaji Enclave Delhi NCR
8447779800, Low rate Call girls in Shivaji Enclave Delhi NCR8447779800, Low rate Call girls in Shivaji Enclave Delhi NCR
8447779800, Low rate Call girls in Shivaji Enclave Delhi NCR
 
Traction part 2 - EOS Model JAX Bridges.
Traction part 2 - EOS Model JAX Bridges.Traction part 2 - EOS Model JAX Bridges.
Traction part 2 - EOS Model JAX Bridges.
 
Marketplace and Quality Assurance Presentation - Vincent Chirchir
Marketplace and Quality Assurance Presentation - Vincent ChirchirMarketplace and Quality Assurance Presentation - Vincent Chirchir
Marketplace and Quality Assurance Presentation - Vincent Chirchir
 
8447779800, Low rate Call girls in Kotla Mubarakpur Delhi NCR
8447779800, Low rate Call girls in Kotla Mubarakpur Delhi NCR8447779800, Low rate Call girls in Kotla Mubarakpur Delhi NCR
8447779800, Low rate Call girls in Kotla Mubarakpur Delhi NCR
 
8447779800, Low rate Call girls in New Ashok Nagar Delhi NCR
8447779800, Low rate Call girls in New Ashok Nagar Delhi NCR8447779800, Low rate Call girls in New Ashok Nagar Delhi NCR
8447779800, Low rate Call girls in New Ashok Nagar Delhi NCR
 
8447779800, Low rate Call girls in Rohini Delhi NCR
8447779800, Low rate Call girls in Rohini Delhi NCR8447779800, Low rate Call girls in Rohini Delhi NCR
8447779800, Low rate Call girls in Rohini Delhi NCR
 
Buy gmail accounts.pdf Buy Old Gmail Accounts
Buy gmail accounts.pdf Buy Old Gmail AccountsBuy gmail accounts.pdf Buy Old Gmail Accounts
Buy gmail accounts.pdf Buy Old Gmail Accounts
 
Call US-88OO1O2216 Call Girls In Mahipalpur Female Escort Service
Call US-88OO1O2216 Call Girls In Mahipalpur Female Escort ServiceCall US-88OO1O2216 Call Girls In Mahipalpur Female Escort Service
Call US-88OO1O2216 Call Girls In Mahipalpur Female Escort Service
 
Ten Organizational Design Models to align structure and operations to busines...
Ten Organizational Design Models to align structure and operations to busines...Ten Organizational Design Models to align structure and operations to busines...
Ten Organizational Design Models to align structure and operations to busines...
 

Ssp 054 en_octavia ii_электрика автомобиля

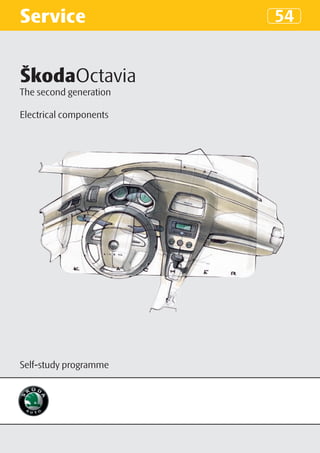
  • 1. Service 54 ŠkodaOctavia The second generation Electrical components Self-study programme
  • 2. This self-study programme informs you about the design and the function of certain components of the electrical compo- nents for the second generation of ŠkodaOctavia.
  • 3. Contents Onboard supply 4 CAN databus system 8 LIN databus 13 Gateway 15 Onboard supply control unit 19 Dash panel insert 20 4th generation of immobiliser 23 Convenience electrics 24 Steering column switch 33 Light 35 Windscreen wiper 38 Tyre inspection 41 Trailer detector control unit 43 Personalization 44 Coming Home/Leaving Home 45 Mobile phone-Voice control system 46 Self-diagnosis 50 You will find detailed inspection, setting and repair instructions in the provided repair manuals. The time of going to press was on the 22.3.2004. The contents are not updated. GB 3
  • 4. Onboard supply The fuse boxes and relay positions in the onboard supply The onboard supply in the second generation of ŠkodaOctavia is designed decentralized. Because of the diffferent installation conditions, the fuse boxes and the relay positions are located at different locations in the vehicle. These components are mounted decentralized. This means, they are located close to their rele- vant components and functional groups. The functioning of the entire system in the vehic- le is controlled by a series of specialised control units. The communication between the control units and other functional groups of the electrical sys- tem is performed via CAN databus line. Electric box in engine com- partment (E-box) 4 GB
  • 5. Fuse box Onboard supply control unit SP54_01 Additional relay carrier below the dash panel GB 5
  • 6. Onboard supply The fitting locations in the onboard supply - overview and characteristics The fuse box The fuse box is located in the left dash panel. SP54_02 The relay The additional relay carrier below the dash panel comprises the following components: • Thermal protection for the driver seat memory. • Headlight washer system relay. • Fuel pump relay. SP54_03 The following relays are located on the front side of the onboard supply control unit: • Terminal 30 voltage supply relay. • Heated rear window relay J9. • Dual tone horn relay J4. • Double washer pump relay -1- J729. • Double washer pump relay -2- J730. • Terminal 75X X-contact relay. SP54_04 6 GB
  • 7. The electric box (E-box) Because of a large number of electronic compo- nents, a number of fuses and relays had to be in- creased for better accessibility as well as the im- provement of the self-diagnosis. Certain fuses and relays are placed in the E-box located on the left in the engine compartment. The fuses and relays placed in the E-box assist the function in particular of the electrical compo- nents located in the engine compartment. On the front side of the E-box are the main fuses of the electrical system, which supply the current to the following electrical components: • Generator. SP54_05 • Electro/mechanical power steering. • Radiator fan. • Terminal X. • Electrical auxiliary air heater. • Terminal 30. Depending on the equipment, the fuses as well as the following relays are placed in the E-box: • Voltage supply relay terminal J329 (terminal 15). • Voltage supply relay terminal J682 (terminal 50). • Fuel pump relay J17. • Glow plug relay -J52. • Voltage supply relay terminal J317 (terminal 30). SP54_06 GB 7
  • 8. CAN databus networking The CAN databus networking concept K-wire J533 J285 CAN databus CAN data- diagnosis bus combi Control unit Gateway in dash panel insert CAN databus Diagnostic con- infotainment CAN databus drive nection T16 CAN databus convenience J503 J543 J386 J527 J743 CU for display CU for seat ad- CU for steering Direct shift Driver door column elec- unit for radio and justment with gearbox me- control unit tronics navigation memory chatronics* G85 J412 J345 J387 J217 Steering an- CU for operating CU for trailer Front passenger gle sender CU for automatic electronics, mo- detector door control unit gearbox bile phone LIN databus R12 J446 J388 E221 J587 CU for parking Rear left door Multi-function CU for selector Amplifier aid control unit steering wheel lever sensors* J255/J301 J389 G273 J... J583 CU for Climatronic, Rear right door Interior monitor- Engine control CU for NOx air conditioning control unit ing sensor unit sensor system J400 J604 J393 H12 J431 Convenience CU for head- Separate CAN CU for wiper CU for auxiliary system central Alarm horn light range databus motor air heater control unit control LIN databus LIN databus G397 J519 G384 J104 G419 Rain and light Onboard supply Vehicle inclinati- CU for ABS ESP sensor unit detector sensor control unit on sender J500 CU for steering aid J234 CU for airbag * only on gearbox 02E SP54_07 8 GB
  • 9. The networking of the CAN databus cables CAN databus combi CAN databus diagnosis Transmission speed 500 kbit/s Transmission speed 500 kbit/s Cable colour Cable colour CAN H - orange/purple CAN H - orange/black CAN L - orange/brown CAN L - orange/brown At the CAN databus combi, the communication The CAN databus diagnosis serves as a data trans- is only performed between the Gateway and the fer between the diagnostic unit VAS 5051/5052 dash panel insert. and the Gateway J285 CU for display unit in dash panel insert J533 Gateway Diagnostic con- nection T16 SP54_08 GB 9
  • 10. CAN databus networking CAN databus drive Transmission speed 500 kbit/s Cable colour CAN H - orange/black CAN L - orange/brown J500 CU for steering aid J... Engine control unit J743 Direct shift gearbox mechatronics* J104 CU for ABS J217 CU for auto- matic gearbox J431 CU for head- J527 CU for steer- light range control ing column elec- tronics J533 Gateway J234 CU for airbag SP54_09 J587 CU for selector lever sen- sors* * only on gearbox 02E 10 GB
  • 11. CAN databus convenience Transmission speed 100 kbit/s Cable colour CAN H - orange/green CAN L - orange/brown J604 CU for auxiliary air heater J519 CU for J533 Gateway onboard sup- ply J527 CU for steer- J393 Convenience ing column elec- system central con- tronics trol unit J386 - J389 Door J255 CU for Cli- control unit matronic or J301 CU for air condi- tioning system J345 CU for trailer detector J543 CU for seat adjustment with memory J446 CU for parking aid SP54_10 GB 11
  • 12. CAN databus networking CAN databus infotainment Transmission speed 100 kbit/s Cable colour CAN H - orange/purple CAN L - orange/brown J533 Gateway J503 CU for display unit for radio and navi- gation J412 CU for operating electron- R12 Amplifier ics, mobile phone SP54_11 12 GB
  • 13. LIN databus The modern vehicles of today are equipped with a lot of control units. In order to ensure their prop- er function, a mutual data transfer is absolutely necessary. The previous methods for transmitting information via individual line connections are already limited. The LIN databus (Local Intercon- nect Network) is therefore used more frequently together with the increasing number of control units connected directly via the CAN databus ca- ble. In the second generation of ŠkodaOctavia, the LIN databus is distributed in the following three subsystems: • Onboard supply control unit. • Convenience system central control unit. • Steering column electronics control unit. In contrast to the CAN databus cable, only one ca- ble is sufficient for the correct function. Another one-wire purple cable with a white marking is used. The cable has neither a screening nor an- SP54_12 other malfunction protection. E221 Operating unit in the steering wheel G273 Interior monitoring sensor G384 Vehicle inclination sender G397 Rain and light detector sensor H12 Alarm horn J393 Convenience system central control unit J400 Wiper motor control unit J519 Onboard supply control unit J527 Steering column electronics control unit GB 13
  • 14. LIN databus Its own communication is initiated exclusively by Tasks of the master control unit the master control unit, which is connected di- rectly to the CAN databus cable. This control unit • Ratio and data transmission between LIN and is also independently self-diagnostic and controls CAN databus. simultaneously the complete communication • Monitoring of the data ratio and the speed of process. The slave control unit cannot respond the data transmission. without request for data transfer. It is fully de- pendent on the master control unit. The master control unit can control up to 16 con- trol units. The transmission speed of the LIN data- bus in the second generation of ŠkodaOctavia is 19.2 kbit/s. Message header con- Message header trans- tent transmitter: LIN mitter: LIN master master or LIN slave U Battery voltage Recessive voltage level Dominant voltage level 0 SP54_13 t 14 GB
  • 15. Gateway The Gateway is an independent control unit, which is fitted under the dash panel above the ac- celerator pedal. The function of the Gateway control unit is in prin- cipal identical to the previous model. The control unit transmits information between the individual CAN databus cables. SP54_14 Combi wake-up CAN databus combi 15 CAN databus drive 30 30 CAN databus 31 convenience 31 CAN databus info- tainment CAN databus di- SP54_15 agnosis Diagnostic con- nection T16 GB 15
  • 16. Gateway The control units connected to the CAN databus are in home position when the ignition is switched off. Through this it is possible to achieve a low cur- rent consumption. The control of these conditions is carried out by the Gateway control unit. Sleep mode As soon as the last control unit of the CAN databus convenience and infotainment has transmitted its Master functions sleep mode readiness, the Gateway control unit The Gateway control unit controls at the CAN da- gives the sleep command. tabus cable the following functions: • Terminal 15 castor. If the CAN databus drive does not go into sleep • Sleep mode. mode, the CAN databus convenience and the • Wake-up mode. CAN databus infotainment also do not go into • Transport mode. sleep mode. If the CAN databus convenience does not go into sleep mode, the CAN databus in- fotainment also does not go into sleep mode. This is how a control unit can stop the vehicle from go- Terminal 15 castor ing into sleep mode. Certain control units also need the possibility to continue communicating after „ignition off“. This is why a message for controlling the castor is Wake-up mode transmitted to the CAN databus cable. The control If the control unit detects a pulse for activation, it units switch internally a connection from terminal sends a signal to the CAN databus cable. 30 to terminal 15 and continue to communicate. The Gateway control unit finally activates the oth- er control units at the CAN databus cable. Control units which participate in the The CAN databus drive is activated after the ig- castor: nition is switched on. The CAN databus conven- ience and CAN databus infortainment are activat- • Engine control unit. ed by opening the doors, switching on the hazard • ABS control unit. warning system, opening the tailgate, switching • Steering aid control unit. on the ignition etc. • Automatic gearbox control unit. • Steering column electronics control unit. • Control unit for selector lever sensors. Control units which do not participate in the castor: • Airbag. • Control unit for headlight range control. 16 GB
  • 17. The coding of the Gateway The coding of the Gateway control unit differs completely from the previous coding of the Gate- way or from the new long coding of the conven- ience system central control unit and the onboard supply control unit. When coding the Gateway control unit, the me- chanic must first of all have an overall view of the control units connected to the CAN databus ca- ble. Then he must inspect the control units or as- sign them to the Gateway listed in the list. This is required for the mutual communication of the control units. Afterwards the manufacturer, the body version, the steering type and the number of doors have to be selected. However the end code cannot be found. In case of an incorrect coding, only one message regarding an incorrectly per- formed coding is displayed in the fault memory. 01 - Motor electronics coded 02 - Gearbox electronics not coded 22 - Four-wheel drive electronics not coded 42 - Driver door electronics coded 52 - Front passenger door electronics coded 62 - Rear left door electronics coded 72 - Rear right door electronics coded 03 - Brake electronics coded 44 - Steering aid coded 15 - Airbag coded 25 - Immobiliser coded 55 - Headlight range control not coded 65 - Tyre pressure monitoring not coded 75 - Emergency call module not coded SP54_17 coded - the Gateway control unit is coded for the SP54_16 communication with the respective control unit GB 17
  • 18. Gateway The battery transport mode The transport mode enables a reduction of the The transport mode deactivates the fol- current consumption of the battery for transpor- lowing systems: tation to the dealers. This function is controlled by the Gateway control unit. • Radio. • Interior lighting. The transport mode is set in the self-diagnosis. • Interior monitoring. The switching on of the transport mode is the re- • Inclination sensor. sult of the number of kilometers driven. After the • Save LED in the driver‘s door. first 150 km, the transport mode can no longer be switched on. SP54_18 SP54_19 Display of the battery transport mode 18 GB
  • 19. Onboard supply control unit The onboard supply control unit is located on the driver side under the dash panel. Relays are mounted on its front side. SP54_20 SP54_21 The onboard supply control unit is obtainable in two versions: • For vehicles with fog lights and personalization. • For all other vehicles. The individual versions differ only in their index- es. Main functions of the control unit: • Electrical load management. • Interior and exterior light control. • Reversing lights. • Bulb monitoring. • Fuel pump feed (pressure build-up). SP54_22 • Windscreen wiper and washer system. • Dual tone horn. • Function enable for seat heating and sliding/ tilting roof. Note! • Heated rear window. In the lower part of the control unit • Terminal control 15, 75X, 50. there is a mechanical fuse, which should prevent disconnection of most of the plugs. GB 19
  • 20. Dash panel insert SP54_23 The following components are integrated in the Self-diagnosis of the dash panel insert dash panel insert: The diagnosis of the control unit in the dash panel • Control unit for display unit in the dash panel in- insert is carried out via CAN databus diagnosis us- sert J285. ing the diagnostic unit VAS 5051/5052. • Immobilizer control unit J362. • Speedometer. In the self-diagnosis, the following components • Rev counter. can be checked with the function „actuator test“: • Fuel gauge display. • Coolant temperature gauge. • Rev counter. • Warning lights. • Coolant temperature gauge. • Multifunction display. • Fuel gauge display. • Speedometer. All warning lights are in the LED version. • Read out on the display. • Warning light for immobiliser. • Warning light for overheating. • Warning light for brake pad wear. • Warning light for fuel reserve. • Warning light for oil pressure. • Warning light for oil level. • Warning light for driver seat belt. Note! • Warning light for two-circuit brake system and After changing the dash panel insert, handbrake. the coding and the adaptation have • Gong. to be carried out on the other vehicle • Warning buzzer. systems. • Turn signal system, audible feedback. In the control unit J285 all information is proc- essed by the monitoring functions and passed on to the warning lights as pulses for lighting up, flashes or permanent lights. The lighting up of certain warning lamps is per- formed in combination with an acoustic signal. 20 GB
  • 21. Warning light symbols Versions The readout on the display varies depending on • Lowline - Basic version the dash panel insert version. • Midline - with multifunction display • Highline - with Maxi DOT display Symbol Warning light Lowline Midline Highline Meaning Right turn signal flashes simultaneously with the right turn system 4 4 4 signal Left turn signal flashes simultaneously with the left turn sig- system 4 4 4 nal Generator fault in the vehicle recharging system 4 4 4 Engine hood open engine hood * 4 4 DOT Bulb failure bulb filament for side, low beam or brake 4 4 4 light destroyed Tyre pressure tyre pressure too low * monitoring 4 4 4 Main beam light main beam light 4 4 4 Low beam light low beam light 4 4 4 Rear fog light rear fog light 4 4 4 Airbag fault at airbag 4 4 4 Electronic Power fault in EPC system Control (electronic 4 4 4 throttle) TCS = Traction lights up - TCS off, ESP off or fault in the sys- control system ESP tem; flashes - system active = Electronic stabil- 4 4 4 ity program Preglowing flashes - fault in the motor electronics (die- 4 4 4 sel engine) ABS fault in ABS system 4 4 4 GB 21
  • 22. Dash panel insert Symbol Warning light Lowline Midline Highline Meaning OBD - Onboard lights up, fault in the exhaust gas relevant en- diagnosis (on- gine electronics; 4 4 4 board diagnosis) flashes, possible catalytic converter damage Steering aid fault in the system of the electro/mechanical power steering 4 4 4 Immobiliser when lighting up, there is a start attempt with 4 4 4 an unauthorised key Coolant level or coolant shortage or overheating * overheating 4 4 DOT Brake monitoring brake fluid shortage, handbrake applied * 4 4 4 Washing water washing water shortage 4 4 DOT Brake pad authorised brake pad minimum thickness 4 4 DOT Fuel reserve reserve in fuel reservoir * 4 4 DOT Oil pressure oil pressure in engine lubrication system too 4 4 DOT low Oil level lights up, engine oil level too low *; flashes, 4 4 DOT fault in the oil level/temperature sender DOT - the symbol of the warning light is shown as pictograph in the DOT display 4 - the warning light is shown in the dash panel insert outside the DOT display * The lighting up of the warning lamp is performed in combination with an acoustic signal - peep Note! The activation of the symbol on the display occurs in most cases when the engine is running or when driving. 22 GB
  • 23. 4th generation of immobiliser The 4th generation of immobiliser improves the Adaptation protection against unauthorized operation of the The prerequisite for the correct function of the sys- vehicle. The system ensures an electronic protec- tem is the adaptation of the components to each tion for the engine control unit. other. First the engine control unit has to be adapted, which takes over the specific vehicle code and the Design password of the immobiliser control unit from the immobiliser control unit and in return transmits the The system consists of a transponder in the key, password for the engine control unit and the block- an engine control unit and an immobiliser control ing code of the engine control unit to the immobiliser unit. control unit. After checking the correct code for cer- tain vehicle makes, the keys are adapted (they take The vehicle key contains: over the specific vehicle code from the immobiliser - Electronic transponder with fixed code. control unit and the immobiliser control unit takes - Specific vehicle code of immobiliser. over the fixed code of the key). - Manufacturer code for certain vehicle makes (e.g. the VW keys cannot be used for Škoda). The engine control unit contains: - Password for the engine control unit. - Blocking code for the engine control unit (pre- vents the adaptation of another control unit in- stead of the original engine control unit). - Code for certain vehicle makes. - Specific vehicle code for the communication SP54_24 with the immobiliser. Differences between the 3rd and 4th ge- neration The immobiliser control unit contains: - Specific vehicle code. • The use of the code for certain group makes, - Password of the immobiliser control unit. which prevents the use of different components - Blocking code for the engine control unit (pre- amongst Škoda, VW, etc. vents the adaptation of another control unit in- • All versions of the engine control unit have the stead of the original engine control unit). so-called „Tuning protection“ (prevents the en- - Code for certain vehicle makes. gine control unit being replaced with a control unit with higher power output). • Coded data transfer between the immobiliser Explanations control unit and the engine control unit. • Specific vehicle code - defines the behaviour of • Different cryptic algorithm for the key and the the immobiliser. engine control unit. • Password (random digit code) of the immobiliser control unit or the engine control unit. Note! • Blocking code for the engine control unit - pre- The waiting time for the adaptation of vents the adaptation of another control unit in- the new components to the system is stead of the original engine control unit. 5 minutes for the keys and the immo- • Code for certain vehicle makes - e.g. Škoda, VW, biliser control unit and 10 minutes for etc. the engine control unit. GB 23
  • 24. Convenience electrics The convenience electrics ressembles the one in Amongst the important functions of the the first generation of ŠkodaOctavia. convenience system central control unit are: The self-diagnosis of the door control units, a complete new type of coding for the convenience • Control and inspection of the central locking. system central control unit (the so-called „long • Actuation of the rear doors. coding“) and the introduction of the LIN databus • Actuation of the tailgate release are part of the essential changes. • Actuation of the tank release. • Actuation of the anti-theft alarm system via LIN databus. The convenience system central control unit is lo- cated under the dash panel above the glove com- partment, next to the airbag holder. Note! Before pulling the plug out of the con- venience system central control unit, first of all the control unit must be slightly pushed out of the holder. SP54_25 SP54_26 24 GB
  • 25. The door control units Just as for all the other control units at CAN data- Emergency running function bus these control units are also about the self-di- agnosis. However the „long coding“ is not used for The following emergency running functions are coding the door control units. started, if a door control unit is disconnected from the CAN databus cable. The innovation represents the use of two control motors in the locking unit. Thus a lower malfunc- • If all the control units receive five times consecu- tion susceptibility as well as a faster locking is tively no message from the convenience system achieved. central control unit, the driver side door control unit ensures the control. • If a door control unit is supplied with current and cannot communicate via the CAN databus, then the window can still be operated ten minutes af- ter the last message from the CAN databus with the switch for the electrical window actuation which is connected to this control unit. • In case of a failure of the CAN databus com- munication between the convenience system central control unit and the door control unit, the vehicle can be locked by pressing down the stopping lever up to the inner stop. The stop- ping lever is located under a panel on the front side of the door. SP54_27 Stopping lever in basic position The self-diagnosis of the door control units is per- formed via the following address words: • 42 - Driver door electronics. • 52 - Front passenger door electronics. • 62 - Rear left door electronics. • 72 - Rear right door electronics. SP54_28 GB 25
  • 26. Convenience electrics The long coding This new type of coding was installed up to now After the diagnostic unit VAS 5051/5052 is con- only at the convenience system central control nected and the function „long coding“ was select- unit, the onboard supply control unit and the ed, the table with the current coding of the control Gateway. The coding of the Gateway control unit unit appears. If the convenience system central is however different in comparison to the other control unit is coded, 13 bytes are shown on the two control units. left of the screen, from which each consists of an eight digit number block. Each position (byte) in The coding of the convenience system central this number block has its specific meaning. control unit and the onboard supply control unit is in principal identical. The difference exists only E.g . the 0 in the 10th byte on the position 4 from in the length of the hexadecimal code. The hexa- the left means, that it concerns a vehicle with a decimal code for the convenience system central left-hand drive The meaning of the individual control unit has only 26 digits, but the code for the bytes is determined by the code table dependent onboard supply control unit has 34 digits. on the vehicle equipment. The new control unit already has the group basic coding. This coding must be adapted however in accordance with the individual equipment and specification from Škoda. The mechanic can code with the help of either the binary code or the hexadecimal code. Byte index Hex Byte pattern 0 00 00000000 1 F8 11111000 2 00 00000000 3 00 00000000 4 7F 01111111 5 2D 00101101 6 85 10000101 7 05 00000101 8 48 01001000 9 CF 11001111 10 86 10000110 11 10 00010000 Remove byte Hex Bin SP54_17 12 04 00000100 SP54_29 26 GB
  • 27. The vehicle inclination sender With its function in active condition, it protects the Operation: vehicle against undesirable towing. The function of the sender consists of measur- ing the vehicle inclination angle and analysing It is located together with the interior monitoring each random change of this angle. If an inclina- sensor under a cover in the area of the front inte- tion change is detected above the limit value, the rior lighting. sender control unit carries out a more detailed analysis of the inclination angle. Then the send- er control unit measures this angle with extreme sensitivity and checks continuously, if the limit value for the alarm activation was exceeded. If the determined inclination angle is above the limit value, the anti-theft warning system is activated. SP54_30 The convenience system central control unit mon- The switch for deactivation of the vehicle inclina- itors the complete course of communication. tion sender is located on the driver side, in the bot- tom „B-pillar“, together with the switch for deacti- The communication between the convenience vation of the interior monitoring sensor. system central control unit and the vehicle incli- nation sender is performed via the LIN databus. The function of the vehicle inclination sender can only be deactivated with the switch when leaving the vehicle. The vehicle inclination sender is deac- tivated by pressing the switch when the ignition is The inclination angle of the sender can be checked switched off (terminal 15), the key is removed from in the measured value block. For the correct dis- the ignition lock (S-contact) and the driver door is play of the current value, the sender must be in opened. Then the vehicle must be locked within 30 the active condition. seconds. Switching off the vehicle inclination sender is only carried out for one locking cycle. X-reference angle current X-delta angle Y-reference angle current Y-delta angle SP54_17 SP54_31 SP54_32 GB 27
  • 28. Convenience electrics The interior monitoring The interior monitoring is performed by three ul- If there is a possibility that an alarm could be trig- trasound sensors. The sensors are located under a gered through movement in the locked vehicle, cover in the area of the front interior lighting. the interior monitoring must be deactivated when leaving the vehicle. After the vehicle is locked, the anti-theft alarm system and the interior monitoring are activated The switch for deactivation of the interior moni- automatically. If one of the doors is open when toring sensor is located on the driver side, in the activating the anti-theft alarm system, its moni- bottom „B-pillar“. The interior monitoring can toring is activated with a time delay of 5 seconds only be deactivated by means of the switch when after closing the door. The interior monitoring leaving the vehicle. The vehicle inclination sender is only activated after closing all the monitoring is deactivated by pressing the switch when the ig- points and after the activation time of 20 seconds nition is switched off (terminal 15), the key is re- has elapsed. moved from the ignition lock (S-contact) and the driver door is opened. Then the vehicle must be Depending on the input signals (window open, in- locked within 30 seconds. stallation of auxiliary heater) the control unit sets the sensitivity threshold for the alarm triggering. Switching off the interior monitoring is only car- ried out for one locking cycle. If the vehicle is locked by radio control, this con- dition of the convenience system central control unit is also transmitted to the CAN databus. The convenience system central control unit activates the interior monitoring sensor via the LIN data- bus. SP54_33 28 GB
  • 29. The function of the ultrasound system Phase „A“ deactivation status inactive the convenience system central control unit. The con- The microprocessor of the ultrasound system is nor- venience system control unit informs about the error mally in idle state. for 28 seconds by means of the light diode in the driver It evaluates no ultrasound signals and blocks the emis- door. The system moves into the deactivation state. sion of the ultrasound. The microprocessor is actuated regularly by a timer or Phase „C“ analysis of an activation attempt by the convenience system central control unit. The The microprocessor of the ultrasound system is in system communicates with the convenience system operating condition. central control unit via LIN databus and under its com- It generates the frequency for the transmission of mand it moves into the phase „Analysis of an activa- an ultrasound signal, which is generated by one of tion attempt“. the sensors. Phase „B“ connected in monitoring status It generates signals, which are indispensable for The microprocessor of the ultrasound system is nor- the incidental demodulation of the received ultra- mally in idle state. sound signals. It is actuated every 200 milliseconds by the monitor- ing timer. In active condition, the system transmits It evaluates signals, which come from 4 analog interrupted ultrasound signals and evaluates their re- channels (2 per receiver). The alarm is activated, sponse signals which are received by three sensors. If if the signals have the same frequency and are out the receiving signal matches the previously received of phase by 90°. signals, the microprocessor returns to idle state. If the receiving signal is different in comparison to the previ- In the case of an authorized alarm, the ultrasound ous signal, the system moves into the phase „Analysis system transmits a message via the LIN databus to of an activation attempt“. the convenience system central control unit. This analysis can trigger the alarm. Otherwise the sys- tem returns to the cyclic analysis of the response sig- While deciding about the alarm triggering, the nals. system remains in this phase or exits it. If these signals do not lead to an alarm triggering, the The sensitivity of this system is regulated automatically system returns to the monitoring phase. The con- when working with response signals. After the activa- venience system central control unit can bring the tion the maximum sensitivity is decreased in stages, system into the phase „Deactivation „ or „Diagno- until no further signal changes indicating a movement sis“ via the LIN databus. inside the vehicle are detected. This automatic control is performed within two minutes after the activation. Phase „D“ diagnosis The microprocessor is actuated every second by the The microprocessor of the ultrasound system is in LIN databus, which transmits the messages regarding operating condition. It is controlled by the convenien- the current operating state. Under command of the ce system central control unit. convenience system central control unit, it can move into the phase „Deactivation“ or „Diagnosis“. The system is set to the phase „Deactivation“ or „Ana- lysis of an activation attempt“. The system evaluates the voltage and the operating temperature in regular intervals of one minute. If the measured values are within the tolerance, the system moves into the phase „ Analysis of an activa- tion attempt“. The system sends an error message to GB 29
  • 30. Convenience electrics The alarm horn The alarm horn is located in the front right wheel- After locking the vehicle, the LIN databus per- house above the wheelhouse liner. forms an active communication between the convenience system central control unit and the alarm horn. The convenience system central control unit transmits a message every second to the alarm horn regarding the current vehicle status. The message is evaluated by the alarm horn and the anti-theft alarm system is activated on command for alarm triggering or when communication is in- terrupted. The alarm horn has its own Ni-MH-cells. These are supplied directly with current from the fuse box. SP54_34 30 GB
  • 31. The locking inspection Outside locking Inside locking In the second generation of ŠkodaOctavia, the The warning light for inside locking informs the cu- safety knob is no longer a component of the door stomer about the condition of the inside locking. The lock. warning light serves as illumination of the central lok- king switch, which is located in the centre console. The message regarding the status of the safety knob for central locking is partially ensured by the The switch lights up orange: locking warning light, which is connected direct- ly to the driver side door control unit. In the ini- • If the vehicle is locked automatically. tial condition the warning light informs precisely • If the vehicle is locked 2x consecutively within 2 se- about the status of the central locking. conds using the key via the lock cylinder or with the radio control. The control signal of the warning light is activated • If the vehicle with the central locking switch is lok- by the convenience system central control unit. ked centrally. If the vehicle is locked and the anti-theft alarm system is deactivated or there is a fault, the warn- ing light shows various conditions. Vehicle without anti-theft alarm system. Locking with radio control or with a key via the lock cylinder. Vehicle with anti-theft alarm system. Locking with radio control or with a key via the lock cylinder.. Vehicle without anti-theft alarm system. When locking the vehicle 2x consecutively within 2 seconds using a key via the lock cylinder or with radio control. No signal Vehicle with anti-theft alarm system. When locking the vehicle 2x consecutively within 2 seconds using a key via the lock SP54_36 cylinder or with radio control. No signal Vehicle with anti-theft alarm system. Central locking or interior monitoring defective. Permanent signal 2s 30 s SP54_35 For reasons of secrecy, the locking warning light is always actuated with a 0.5 Hz pulse after 30 sec- onds. GB 31
  • 32. Convenience electrics The Memory seat Three differently set seated positions can be stored Setting with the seat memory function The settings are stored in the control unit, which is located in the lower part of the seat. Position the backrest up to the front stop when the ignition is switched on. The Gong in the dash In contrast to the first generation of ŠkodaOctavia, panel insert confirms that the setting has been the lumbar is also controlled additionally by the carried out. control unit. The stored settings can be requested using the po- Store seat position sition buttons at the driver seat or after adaptation of the radio control by pressing the button „Unlock“ Press the „SET“ button for one second when the on the radio control or after opening the driver ignition is switched on. Then press one of the door. memory buttons within 10 seconds for 1 to 3 sec- onds. Each time the control unit for seat adjustment with memory is changed, a setting must be carried out, Adapt the radio control to the seat position: which is absolutely necessary for the correct func- tioning of the memory seat. Switch off the ignition (terminal 15), pull the ig- nition key out of the ignition lock (S-contact) and The limit values are stored in the „EEPROM memo- press the button „Unlock“ on the radio control ry“, so that no other setting is required. When con- within 10 seconds after pressing one of the mem- necting to the onboard supply for the first time, all ory buttons 1 to 3. senders and actuators are automatically read and assigned by the control unit. The position of the exterior mirrors is stored together with the current seated position. Memory buttons 1-3 Lumbar setting „SET“ button for memo- ry function Buttons for seat setting SP54_37 32 GB
  • 33. Steering column switch Characteristic The steering column switch integrates the oper- ating elements which are located at the steering column in one unit. At the same time it commu- nicates between the operating elements located at the steering column and other vehicle systems. This communication is ensured by the steering column electronics control unit (J527), which is a component of the steering column switch. SP54_39 1. Ignition lock - ignition starter switch The steering column electronics control unit de- - The ignition lock transmits the movement from tects and processes all signals from the operating the lock cylinder to the ignition starter switch elements at the steering column and transmits and closes the steering rod. them to the individual vehicle systems. - The ignition starter switch switches the signals for the onboard supply of the vehicle. In direction of the steering wheel the communi- cation is performed via the LIN databus, in direc- 2. Connection line tion of the vehicle it is performed via CAN databus - It serves as a connection of the steering column convenience and CAN databus drive. electronics control unit with the ignition starter switch and the electronic ignition key withdraw- al lock on an automatic gearbox (not a compo- nent of the ignition starter switch). 3. Carrier body 4. Turn signal lever - It operates the turn signal lights, headlight flasher, main beam, side light and cruise con- trol system. 5. Windscreen wiper lever - It operates the front and rear windscreen wiper and washer system. 6. Steering angle sender - It measures the steering angle values for the steering aid and also for the ESP. 7. Restoring ring with slip ring - They transfer signals between the steering wheel, signal horn, multifunction steering wheel and airbag. SP54_38 8. Steering column electronics control unit (J527) - It evaluates the signals from the individual com- ponents and communicates with the other ve- hicle systems. GB 33
  • 34. Steering column switch Operation: • Switching of base signals for the onboard supply by the ignition starter switch. • Transmitting signals between the vehicle and the steering wheel (signal horn, multifunction steer- ing wheel - communication via LIN databus, air- bag). Note! • Operating turn signal lights, headlight flasher The steering column electronics con- and main beam. trol unit is self-diagnostic under the • Operating windscreen wiper and washer sys- address word 16 - steering wheel elec- tem. tronics. • Operating onboard computer. • Operating cruise control speed (at turn signal lever). • Measuring steering angle and signal transmis- sion in the vehicle. • Ignition key withdrawal lock (for automatic gear- box), if the selector lever is not in position „P“ (lock function). * MFS - Multifunction steering wheel Airbag Signal horn Button for MFS* Steering Voltage supply Illumination for wheel elec- Signal horn MFS* tronics for MFS* Ground Steering wheel Airbag LIN Restoring ring with slip ring Steering angle sender Steering rod Turn signal lever Windscreen wiper Headlight flasher lever main beam Steering column electronics control unit CCS switch Onboard computer Ignition starter CSS Input/output CU for airbag switch Terminal 15 and terminal 50 CAN databus convenience Terminal 30 - Voltage Ignition lock supply Terminal 31 CAN databus drive Signal from selector lever SP54_40 34 GB
  • 35. Light The onboard supply control unit J519 evaluates the signals directly from the light switch or from the light sensor. The information about switch- ing on the turn signal light, the main beam and the headlight flasher is transmitted via the steer- ing column electronics control unit via the CAN databus cable to the onboard supply control unit J519. SP54_41 D Ignition lock E19 Parking light switch E4 Headlight dipper/flasher switch F Brake light switch F4 Reversing light switch G397 Rain and light detector sensor J527 Steering column electronics control unit J519 Onboard supply control unit M25 Additional brake light X Number plate light GB 35
  • 36. Light Headlight The clear glass is made out of plastic. The parking and turn signal lights are covered with a scattering filter. The headlight forms a unit, which is divided in three reflex surfaces: The bulb for the turn signal is orange. • Main beam light. • Low beam light. • Parking and turn signal light. For the second generation of ŠkodaOctavia two headlight versions are obtainable as an option. Two chamber headlight Main beam light Low beam light SP54_42 Turn signal and parking light Headlight with dioptric-eliptic element Depending on equipment, either a halogen or a xenon lamp can be inserted in the headlight with dioptric-elipitic element. Main beam light SP54_43 Low beam light Turn signal and parking light 36 GB
  • 37. Reversing lights Light sensor The reversing lights are designed so that the tail The light sensor is fitted in the foot of the interior light at the entire outer circumference of the re- mirror. It forms together with the rain sensor one versing light lights up and creates the so-called unit. C-effect. 4 bulbs are used for the tail light - two single-filament bulbs for the tail light, one two- The vehicles equipped with the light sensor can filament bulb for the tail light and brake light and automatically detect the surrounding bright- one two-filament bulb for the tail light and fog ness and on the basis of this the driving light is light. switched on or off . The clear glass is inserted for the turn signal and The light sensor measures the light values at three reversing light. The component of the reversing different levels in front of the vehicle. Because of light lens forms a reflector. the difference between these light values, it can detect the current surrounding brightness (dark- ness, daylight, fog, driving into a tunnel, driving out of tunnel, driving in an alley etc.) Darkness Light Surrounding Light A B C A B C brightness X X X Darkness on Daylight off X X X Driving into a on tunnel, a fo- X X X rest, a garage SP54_44 etc. Bridge, Alley on X X X Direction indicators Driving out of on a tunnel, a fo- X X X They are installed in the exterior mirrors. They rest, a garage etc. consist of three LED diodes. Function of the light sensor SP54_45 SP54_46 GB 37
  • 38. Windscreen wiper SP54_47 D Ignition lock E Windscreen wiper lever F266 Contact switch for engine hood Positions of the windscreen wiper lever G397 Rain and light detector sensor J104 ABS control unit J400 Wiper motor control unit J519 Onboard supply control unit J527 Steering column electronics control unit J533 Gateway The signal of the position of the windscreen le- ver is passed on by the steering column electron- SP54_48 ics control unit via the CAN databus convenience 0 - Basic position to the onboard supply control unit J519. The on- 1 - Interval wipe, controlled by the rain sensor board supply control unit transmits the signal 2 - Slow wipe about the current position of the windscreen wip- 3 - Fast wipe er lever via the LIN databus to the wiper motor, 4 - Flick wipe, setting and service position where this signal is processed. 5 - Automatic wipe/wash 6 - Rear window wipe 7 - Automatic wipe/wash for rear window A - Switch for interval wipe and for sensitivity set- ting of the rain sensor 38 GB
  • 39. Wiper functions Speed dependent wiping stage resetting If the vehicle speed drops below 4 km/h (e.g Speed dependent interval stages when stopping at a traffic light post), the select- The wiping can be set using the windscreen wiper ed wiper speed is automatically decreased from lever in four interval stages. The speed of the indi- stage 3 to stage 2 or from stage 2 to interval wipe vidual interval stages is dependent on the vehicle (stage 1). When increasing the speed over 8 km/ speed. The rest periods between the individual h the wiper speed returns to the selected stage. wiping intervals vary between 1.28 seconds in stage „I“ at approx. 150 km/h and 24 seconds in stage „IV“ at approx. 4 km/h. One time washing of the windscreen If the button for the wash function is operated for more than 0.8 seconds, the fast wipe is switched on. If the operating time is low, the slow wipe is switched on. Antiblock function If the wiper on the windscreen encounters an ob- stacle, it can detect it. Then it attempts to push away this obstacle. If it cannot remove the obsta- cle, the wiping stops automatically after 5 wiping intervals and the wiper remains in front of the ob- SP54_49 stacle. After removing the obstacle and switch- Stage I Stage III ing on the wipe system again, the wiper begins to Stage II Stage IV wipe again. Wiping vehicles fitted with rain sensor The wiper frequency is controlled by the rain sen- sor. The windscreen wiper lever must be in the position for interval wipes. The setting of the sen- sor sensitivity can be performed with the wind- screen wiper lever (position A). SP54_50 GB 39
  • 40. Windscreen wiper Automatic wash/wipe for windscreen Service position for replacing the wiper blades If the windscreen wiper lever at the steering wheel This function cannot be activated if the engine is pulled back into the position of the wash func- hood is open. tion, the wash system begins to operate immedi- After activating this function, the wipers move into ately, the wiper wipes with a time delay (800 mil- the position where the wiper blades can be re- liseconds). At a vehicle speed above 120 km/h the placed without damage. The function is activated wash and wipe system operates simultaneously. by the windscreen wiper lever set in the position After releasing the lever, the wash pump stops for flick wiping within 20 seconds after switching and another 3 to 4 wiping intervals are carried out off the ignition. The wipers then move into service (depending on the duration of washing) position. Rewipe the windscreen At a vehicle speed above 120 km/h and when ac- tivating the wash system, another rewipe occurs again 5 seconds after the last rewipe. Alternative rest position After each second time when the windscreen wiper is switched off or after each fifth time when the ignition is switched off, the rest position of the SP54_52 windscreen wiper is newly defined, which should prevent a deformation of the wiper blades. In or- Switching off the wipers when the engine hood der to facilitate the setting of the windscreen wip- is open ers at the works or for the pre-sale service, this This function was introduced for the purpose of function is switched off during the first 100 wiping safety increase during service work . intervals. If the engine hood is opened when the vehicle is in standstill or at a vehicle speed below 2 km/h, the wipers do not operate. The wipers only start wiping, after the engine hood is closed and the windscreen wiper lever was set in the position for wiping. If the engine hood opens at a speed of 2 km/h up to 16 km/h, the wipers stop. However, they can be switched on again by setting the windscreen wip- er lever once again in the position for wiping. If the engine hood opens at a speed of more than 16 km/H, the signal from the hood contact is not SP54_51 accepted by the wipers. Rest position after the second switching off Rest position after the first switching off 40 GB
  • 41. Tyre inspection The tyre inspection is a software module in the ABS control unit. The ABS control unit compares the circumferential speed on all 4 wheels and de- termines on the basis of the determined values and their possible deviations the pressure loss in the tyres. The roll-off circumference of a tyre depends on its inflation pressure. When changing the tyre in- flation pressure, the roll-off circumference of the tyre changes as well. If a pressure loss is detected, the driver is made aware of this through the warning light lit up per- Button for tyre in- manently in the dash panel as well as a brief buzz- spection display ing tone. The warning is only set back after a new calibra- tion. SP54_53 ABS wheel sensors J104 ABS control unit J285 Control unit in dash panel insert J533 Onboard supply control unit Note! In case of extremely fast cornering, when braking or activating an ABS system, the tyre inspection display temporarily switches off automati- cally. GB 41
  • 42. Tyre inspection Basic setting (calibration) For determining the reference data, a calibration must be carried out after each change of the infla- tion pressure or after a tyre change. Calibration drive The button for the tyre inspection display must be pressed in order to start a calibration drive. The warning lamp for the tyre inspection display lights SP54_54 up and the flashing of the warning lamp confirms the start of the calibration. Button for tyre inspection display The system can only conduct a major monitoring after several minutes in a specific speed category, which is important in order to collect reference data in different speed categories. The system is fully operational only when sufficient data has System fault been collected. The driving distance for the cali- bration drive should be performed on country If a fault occurs in the ABS control unit, the tyre roads or motorways. inspection is rendered non-operational and the warning lamp for the tyre inspection display flashes. Calibration status The status of the calibration can be read out with the diagnostic unit VAS 5051/5052 via the „target- ed fault finding“. 42 GB
  • 43. Trailer detector control unit Operation • It detects if a trailer is attached. The trailer detector control unit is self-diagnostic. The diagnosis is carried out using the diagnostic • It switches and monitors the lights of the trailer. unit VAS 5051/5052. • It indicates defective bulbs in the lights of the The lighting up of the trailer lights can be set by trailer (tail light, brake light and turn signal light): the coding. The reverse and rear fog light cannot be indicat- ed. The trailer lighting is activated by the onboard supply control unit via the CAN databus. • It ensures the automatic deactivation of the rear The lighting is switched through semi-conduc- fog light on the vehicle, if a trailer is attached. tors; no power load takes place for the control el- ements of the vehicle illumination. The trailer detector control unit is located in the luggage compartment on the left wheelhouse be- low the trim panel. SP54_55 GB 43
  • 44. Personalization With the help of the information display, the user By means of adaptation, the user can set has the possibilty to change certain settings. The the following system profiles: current setting is displayed in the information dis- play on the respective point at the top below the line. • Display language. The setting is conducted using the buttons on the • Warning for winter tyres. windscreen wiper lever. The menu selection is re- • Setting of the control units. quested, when the rocker switch is held pressed • Light setting. for more than 1 second. The personalized menu is • Time. shown via the display in the dash panel insert. The • Setting of the functions for the convenience sys- transmission of the selected settings to the con- tem central control unit. trol units is performed via CAN databus conven- ience or CAN databus combi. Rocker switch for menu request and choice of the individual menu fields SP54_56 SP54_58 Display of the selected data SP54_57 44 GB
  • 45. Coming Home/Leaving Home Coming Home Leaving Home In contrast to the first generation of ŠkodaOcta- This function enables the light to be switched on via, where this function was connected to several by radio control for a brief period after unlocking control elements, in the second generation of the vehicle. This ensures an easy and safe getting ŠkodaOctavia this function is controlled com- in the vehicle. pletely by the onboard supply control unit. The light is controlled by the light sensor in the This function enables the switching on of the low foot of the interior mirror. If the intensity of the beam light when the ignition is switched off. light is higher than the value set at the light sensor, the Leaving Home function is not activated after Activation: unlocking the vehicle.. - Switch off the ignition when the low beam light The function is deactivated by switching on the ig- is switched on. nition or locking the vehicle. - Keep the light switch in the position of the low beam light. The light goes off as soon as the set and active time constant with the help of personalization has expired. If one of the doors or the tailgate remains open, Depending on the equipment, the following com- the light goes off 90 seconds after switching off ponents of the Coming Home/Leaving Home the ignition. function are switched on: For vehicles with automatic light, when the light • Side light. switch is in the position of the automatic light, the • Low beam light. light is controlled by the light sensor in the foot of • Exterior mirror light. the interior mirror. • Number plate light. If the intensity of the light is higher than the value set at the light sensor, the light is not activated by the onboard supply control unit after switching off the ignition. GB 45
  • 46. Mobile phone-Voice control system A mobile phone-voice control system was devel- A phone phonebook is a component of the voice oped for the second generation of ŠkodaOctavia. control system. In the phone phonebook there are 50 free memory locations available. This phone The operating electronics control unit processes the phonebook is independent of the appliance used acoustic signals received by the microphone. Then for the telephone. Separate phonebook entries, it compares these signals with the databank of the which are stored on the SIM card of the telephone, other known commands (voice commands) and can be called up additionally via the control buttons decides which voice commands have to be carried of the telephone. For vehicles fitted with multifunc- out. If a voice command is not detected, the system tion steering wheel, the operation is performed via answers „Pardon?“ and a new entry can be per- the function buttons on the steering wheel. formed. After the 3rd attempt, the answer „Cancel“ is performed and the dialogue is ended. With the GALA function of the radio, the volume of the voice response/telephone calls is automatically The voice control of the mobile phone is only possi- controlled according to the vehicle speed. Further- ble for vehicles, which are equipped with maxi DOT more the volume can be changed individually at Display and radio Audience, Stream, or with radio- any time with the button for setting the radio or with navigation system. function buttons on the steering wheel. The information about the telephone conversation is shown on the display of the radio and on the in- formation display in the dash panel insert. With the help of the voice control, pre-defined com- mands as well as commands defined by the user (names) can be entered. The voice control has a system for suppressing sur- rounding noises. This enables also the voice control at a relatively high surrounding sound level when driving the vehicle. Depending on the vehicle equipment, the voice control is activated by pressing the push-button PTT (push to talk) Ø on the telephone adapter or the push-button on the multifunction steering wheel. Incoming phone conversations are accepted with the push-button Ø and are ended by pressing again the push-button Ø. The period of time, in which the telephone system is ready to accept and carry out voice commands, is called DIALOGUE. By pressing the push-button Ø the dialogue is end- ed. In case of incoming conversation, the dialogue is immediately interrupted, because the conversation has a higher priority. 46 GB
  • 47. System SP54_59 R38 Telephone microphone J412 Control unit for operating electronics, mobile phone GB 47