SlideShare ist ein Scribd-Unternehmen logo
1 von 122
Downloaden Sie, um offline zu lesen
DRAFT
April 22, 2014
1 | P a g e  
 
First Quarter : Drawing
Lesson No.1 : Kinds of Lines and their Characteristics
Code A3PR-If : Create a geometric design by contrasting two kinds
of lines in terms of type or size
Lesson Summary:
Art History Art Production Art Criticism
Art
Appreciation
The weave patterns and
the lines and colors,
used in the woven
textiles of the different
Ethnic Groups/
Indigenous People
(T’nalak of T’boli, of
Ifugao, etc.), which
correspond to certain
meanings or symbols,
emphasize their cultural
heritage.
Draw a design
for a gift wrap
using different
kinds of lines.
Compare one’s
output/design
with that of the
creative design
done by some
artists.
Appreciate
designs
created
which can
be used for
the crafts.
Elements and Principles of Art: Lines, Contrast
Value Focus: Creativity, Cooperation
Time Allotment: 1 session (40 minutes)
I- Art Activity: CREATING A GIFT WRAP
II- Objectives:
a. Name the different kinds of lines and their characteristics.
b. Create a geometric design with contrasting lines.
c. Show appreciation of own design and of others through an
art exhibit.
III- Materials:: Oslo paper, pencil, crayons or pastel colors,
pictures of beautiful sceneries, small flat stone
Reference : Active MAPE 3 p. 106-107
IV – Procedure:
A. Pre-Activity
Review:
Show pictures of beautiful scenery found in your locality.
Let the pupils talk about the pictures.
DRAFT
April 22, 2014
2 | P a g e  
 
B. Activity Proper :
1. Motivation :
Show an illustration of lines. Ask the pupils to describe the kinds
of lines and thier characteristics.
2.
Presentation and
Discussion:
Show picture or a drawing with geometric designs.
(You can also use the previous outputs of the pupils.)
2. Presentation
Say: Look and examine the drawing. Does the picture show
different kinds of lines?
Motivate the class to participate as they name and
describe the lines and their characteristics as seen in the
drawing.
In the drawing, you can see several linear designs. Linear designs
are designs out of different kinds of lines that form rectangles, triangles,
circles. The kinds of lines are straight and curve while the types of lines
are thin and thick.
DRAFT
April 22, 2014
3 | P a g e  
 
The weave patterns and the lines and colors, used in the woven
textiles of the different ethnic groups/ indigenous people (T’nalak of
T’boli, Ifugao, etc.) emphasize their cultural heritage.
3. Art Activity:
Activity I: Making a Design for a Gift Wrap
Instruct the pupils to do BE CREATIVE on LM page _______.
4. Processing/Critiquing of Art Works:
Encourage the pupils to post their artworks on the board. What
experiences inspire them to create the design for a gift wrap?
What makes your artwork special and different from others?
Aside from using it as a gift wrap, where can you use your
designs?
C. Post- Activity:
1. Generalization:
Ask:
What makes your design artistic and creative?
Different kinds of lines can create artistic and creative
designs.
2. Values Integration:
How can you make your art design different and unique?
How can you show appreciation of other’s artwork?
V- Assessment/Evaluation :
Refer to TAKE THE CHALLENGE on LM page ______.
Evaluate the artworks of the pupils using the rubric below.
Very
Evident
5
Evident
3
Not
Evident
1
The artwork is original and creative.
The kinds of lines and their
characteristics are shown in the artwork.
Geometric design is used in the artwork.
The artwork is finished on time.
DRAFT
April 22, 2014
4 | P a g e  
 
VI. Assignment:
Look for a picture of cloth with geometric designs from old
magazines or newspapers. Ask the assistance of your parents or
guardian in cutting the picture.
DRAFT
April 22, 2014


First Quarter : Drawing
Lesson No. 2 : People of Different Sizes
Code A3EL-Ia : Distinguishes the size of persons in the
drawing, by their distance from the
viewer
Lesson Summary:
Art History Art Production Art Criticism Art Appreciation
Drawing is one of the
major forms of
expression within the
visual arts. In a drawing
composition, the sizes
of shapes of objects
differ. This is to show the
distance of the objects
from one another and
from the viewer.
Fernando Amorsolo
(local artist) have good
works on Philippine
Landscape/ Seascape.
Edgar Degas (foreign
artist) emphasizes on
perspective.
Draw the image
of persons in a
composition
using the
knowledge on
sizes of shapes to
show distance
Distance is
shown with the
use of sizes and
shapes in a
drawing
composition
Show self
confidence in
creating an
artwork
Elements and Principles of Art: sizes of shapes
Value Focus: Self Confidence
Time Allotment: 1 session (40 minutes)
I. Art Activity I Drawing of Different Sizes of People
I. Objectives:
1. Tell the difference of the sizes of persons in a picture in order to show
awareness of distance.
DRAFT
April 22, 2014


2. Draw a picture of persons in different sizes in a composition to show
distance.
3. Give value on one’s ability and confidence in making an artwork showing
distance.
III. Materials and Reference;
Pencil, bond paper, crayon
IV. Procedure:
A Pre- Activity:
1. Review
What are the elements of art? (Line, shapes, form, color, texture, size)
Describe each element.
B. Activity Proper:
1. Motivation
Show a picture with people of different sizes.
Ask:
What have you observed in the picture?
Let the children notice the sizes of the persons in the drawing.
(The teacher may ask follow-up questions.)
DRAFT
April 22, 2014


2. Presentation and Discussion
Say:
In a drawing composition, the sizes of objects differ because of
their distance from the viewer. There is overlapping of objects and less
detail as the image seems farther away from the viewer. Objects look
smaller when they are far from the viewer, and larger when they are
near. This is how perspective is shown in a drawing.
Perspective is a way of portraying three-dimensions in a flat, two-
dimensional surface. This is to create the appearance and spatial
relationships of objects, buildings, etc. relative to each other as
determined by their distance from the viewer.
Show a picture of the community to the pupils and talk about it.
Show them also the works of Fernando Amorsolo (local artist) and
Edgar Degas (foreign artist) with works that emphasize perspective and
Philippine Landscape/Cityscape.
3. Art Activity
Activity 1
(Please refer to LM page ___.)
   
4. Processing and Critiquing
Ask:
What elements of art did you use? How did you show distance in
your drawing composition? Did you enjoy the activity? Why?
C. Post Activity:
1. Generalization
Ask:
How will you show distance in your drawing?
DRAFT
April 22, 2014


In a drawing, objects that are near to the viewer are bigger
while objects that are far from the viewer are smaller.
2. Values Integration
Ask:
 How did you show confidence in making an artwork?
V. Assessment/ Evaluation
Assess the output of the pupils based on the rubric below.
Questions
Very
Evident
3
Evident
2
Not
Evident
1
1.Was able to drew the different sizes of
people in the picture to show their distance
without the help of others?
2. Is creativity manifested in the drawing?
3. Is confidence manifested by drawing the
different sizes of people in the picture to show
distance.
4. Is the artwork finished on time?
V. Assignment/ Agreement:
Bring pictures of your community.
DRAFT
April 22, 2014
First Quarter : Drawing
Lesson No. 3 : Illusion of Space
Code: A3EL-Ib : Shows illusion of space in drawing objects and persons
of different sizes
Lesson Summary:
Art History Art Production Art Criticism Art Appreciation
In a drawing, it is
important for an artist
to be able to create
the illusion of space.
Manuel Baldemor
(local artist) and
Giovanni Antonio
Canal better known
as Canaletto(foreign
artist) have good
works that emphasize
cityscape and
Philippine
community/daily life
that shows treatment
of space.
Create a
picture that
shows the
illusion of
space.
Show the illusion
of space in
drawing objects
and persons of
different sizes.
Appreciate the
ability and skill of
the artists in
creating illusion
of space by
applying
learned
techniques in
one’s artwork.
Elements & Principles of Art: lines, shapes , and space
Value Focus: Appreciation of one’s artwork
Time Allotment: 1 Session (40 minutes)
I. Art Activity Drawing of Persons of Different Sizes
II. Objectives
1. Explain the concept of illusion of space.
2. Create an artwork that shows the illusion of space.
3. Appreciate the ability and skill of the artist in using lines to create the
illusion of space.
III. Materials and Reference
a. Materials: bond paper, pencil, crayon, picture of a community
DRAFT
April 22, 2014
b. Reference:
2002 BEC Sining 6- p122, Art in the Elementary School, PJV, Phil.
Normal College Manila September, 1959.pp.48,
Lesson Plans in Art 4, Division of Iloilo 2008-2011 ,Lesson 6 to 8, pp.11-16
http:// www.bing.com/images/search?q=optical+illusion+picture
IV. Procedure:
A. Pre- Activity
1. Review
Ask the children to look at the picture they drew in the previous
lesson. Let them examine the picture: the sizes of objects, the distance,
etc.
Then, ask:
How do we know that an object is near or far from the viewer’s
eye?
B. Activity Proper
1. Motivation
Show the following pictures.
Picture A Picture B
Let the pupils give their own opinion or idea on the sizes and
distance of objects in pictures A and B.
DRAFT
April 22, 2014
2. Presentation
Say:
The use of illusion of space is a technique or process used by an
artist to show distance and depth.
Show an example of a picture of objects and or people that shows
illusion of space.
Show them also the artwork of Manuel Baldemor (local artist) and
Giovanni Antonio Canal better known as Canaletto(foreign artist) who
have good works that emphasize cityscape and Philippine
community/daily life.
3. Art Activity
Activity 1
Let the pupils do the activity number 1 in LM p.______.
4. Processing/ Critiquing of Art Output
Ask the following questions to the pupils after they finished their
work:
1. What have you observed about the sizes of objects that are near
DRAFT
April 22, 2014
or far from the viewer?
2. Have you created the illusion of space? How?
C. Post Activity
1. Generalization
    How can you show the illusion of space in your artwork?
In a drawing, the smaller the object, the farther its distance from the
viewer. On the other hand, the bigger the object, the nearer its
distance from the viewer. This is called illusion of space.
2. Values Integration
How can you show appreciation for your own artwork and the
works of others?
3. Application
Refer to TAKE THE CHALLENGE on LM page ____________.
V. Assessment/ Evaluation
Assess the artwork of pupils using the rubric below:
Rubric
Very
Evident
3
Evident
2
Not
Evident
1
1. Illusion of space is shown in the artwork.
2. Persons and objects are included in the
drawing.
3. Creativity is shown in the
artwork by making it different from others.
4. The artwork is finished according to the time
allotted.
DRAFT
April 22, 2014
VI. Assignment/ Agreement
DRAFT
April 22, 2014
First Quarter : Drawing
Lesson 4 : Visual Texture
Code A3PL-Ic : Appreciates that artists create visual textures by
using lines, dots, and colors
Lesson Summary:
Art History Art Production Art Criticism Art Appreciation
Things around us
have different
textures. Texture
can be tactile or
visual. Visual
texture is the
perceived texture
of an object
without touching
it.
Create a still life
drawing with the
use of cross hatch
lines or dots to
show visual
texture.
Observe how lines
and colors are
used in a still life
drawing to create
a visual texture.
Give importance
to the artworks
that show visual
textures by using
lines, dots, and
colors.
Elements and Principles of Art: Texture, lines, and colors
Value Focus : Valuing an Artwork
Time Allotment : 1 Session (40 Minutes)
I Art Activity: Still Life Drawing Using Cross Hatch Lines or Dots
II Objectives
1. Discuss visual texture in a still life drawing with the use of cross
hatch lines or dots.
2. Draw a still life drawing that shows visual textures using lines, dots, and
colors.
3. Show appreciation of one’s skill in using variety of lines, dots, and colors
in artwork.
III Materials and References
Materials : pencil, colored pencils, bond paper,
DRAFT
April 22, 2014
IV Procedure
A. Pre Activity
1. Review
Ask:
How illusion of space is shown in a drawing?
B. Activity
1. Motivation
Distribute sets of jigsaw puzzles to groups of pupils. Let each
group assemble the puzzle.
Example:
Ask:
What picture was formed by the puzzle?
Does it show texture, lines and colors? Identify them.
2. Presentation and Discussion
Tell the pupils that visual texture is defined as the texture of an
object perceived without touching it. Every object has its own visual
texture and needs to be taken into consideration before creating a
composition.
DRAFT
April 22, 2014
 Look at the other picture. What have you observed in picture A?
in picture B?
Discuss further the use of cross hatch lines and dots
(pointillism) to create visual texture in a still life drawing.
Refer to THINK ABOUT THIS of the LM, p.____.
Here’s an illustration showing the
“crosshatching” of a pencil stroke. The
technique is very simple- you just do
the “ slinky’ pencil stroke in several
directions one over the other. Each
different direction adds more tone to
the shading, and progressively darker.
Pointillism is a method of using dots to
achieve various effects in a drawing or
painting. The dots can be placed singly,
in rows, or randomly. The dots can also
be placed by themselves, in groups,
and/or be overlapping.
The dots used can also vary in size.
Picture of still life showing 
the use of cross hatch lines.  
Picture of still life showing the use 
of dots.  
 
DRAFT
April 22, 2014
3. Art Activity: “Still Life Drawing with Cross Hatch Lines or Dots”
(Refer to BE CREATIVE of the LM, p. _____)
4. Processing/Critiquing
Let the pupils show their artworks to the class. Then, ask them
about their experiences and learning while doing the activity.
C. Post Activity
1. Generalization
Ask: What is Visual Texture?
(Visual texture is the texture of an object perceived without
touching it. It that can only be determined by looking at the object.)
2. Value Integration
How will you value your artwork and that others?
3. Application
(Refer to Take the Challenge of the LM, p.___)
IV Assessment/Evaluation:
(Refer to Be Proud of the LM p. ____)
V. Agreement/Assignment
Bring picture of a land formation.
DRAFT
April 22, 2014
First Quarter : Drawing
Lesson 5 : LANDSCAPE DRAWING
Code A3PL – ld : Tells that in a landscape, the nearest object drawn is
the foreground; the objects behind the foreground are
the middle ground, while the farthest objects are the
background.
Lesson Summary:
Art History Art Production Art Criticism Art Appreciation
There are many
famous
landscapes or
land formations in
the different
regions in the
country. Ex. Mt.
Mayon, Batangas
Plateau,
Chocolate Hills,
Mt. Apo, etc.
Make a
landscape
drawing.
Show balance in
the landscape
drawing by
indicating the
foreground,
middle ground
and background,
in the
composition.
Appreciate the
beauty of
landscape in the
province or region
through creative
drawing.
Elements & Principle of Art : Balance
Value Focus : Appreciating Beauty of Nature
Time Allotment : 1 Session (40 Minutes)
I Art Activity : Landscape Drawing
II Objectives
1. Identify and describe the foreground, middle ground, and
the background in a picture of a landscape.
2. Draw a landscape that shows balance.
3. Appreciate the beauty of landscapes in the province or region through
creative drawing.
III Materials and Reference
Materials : paper, pencil, crayon
Reference : Art Express, 1998 Harcourt Brace and Company,
Daniel V.E. et. Al.
DRAFT
April 22, 2014
IV Procedure
A. Preliminary Activity
1. Review
What is visual texture?
B. Developmental Activity
1. Motivation
Ask the pupils to show the pictures of land formation they
brought to class. Let them say something about it.
Introduce a guessing game of land formations and
landscapes by describing their characteristics.
(The teacher can use pictures of land formations and
landscapes found in their locality/province.)
2. Presentation and Discussion
Tell the pupils that there are famous landscape and land
formations in the Philippines. Introduce some of these with the aid of
pictures.
Ex. Cagayan Valley, Mayon Volcano in Bicol, Chocolate Hills
in Bohol, Mount Apo in Davao and Plateau in Baguio.
.
            Chocolate hills Mayon Volcano Mount Apo
Ask:
What objects in the picture appear nearest to the viewer?
What objects in the picture appear farthest to the viewer?
Compare their sizes.
In a landscape drawing, balance is shown through the presence of
foreground, middle ground, and background. Foreground is the part of
DRAFT
April 22, 2014
drawing that appears to be in the front, nearest to the viewer. While the
middle ground, is the part of the drawing that lies between the
foreground and the background. The background, is the part the
drawing that appears to be at the back, farthest away from the viewer.
(Refer to Think About This , LM p. ____)
3. Art Activity: “Landscape Drawing”
Refer to BE CREATIVE, LM p. _____
4. Processing and Critiquing
Say:
Show your artwork to your classmates and share your
experiences while doing the activity.
C. Post Activity
1. Generalization
Ask:
How is balance shown in the picture?
There is a feeling of balance when there is foreground, middle
ground, and background in the composition.
2. Value Integration
How can you preserve the beauty of nature in your place?
3. Application
Refer to TAKE THE CHALLENGE, LM P. ____
V Assessment/ Evaluation
Refer to BE PROUD, LM p. ____
DRAFT
April 22, 2014
First Quarter : Drawing
Lesson No. 6 : Textures and Shapes
Code A3PR-lg : Sketches on-the-spot outside or near the school to
draw a plant, flowers or a tree showing the different
textures and shape of each part, using only a pencil
or black crayon or ballpen.
Lesson Summary:
Art History/ Art Production Art Criticism Art Appreciation
Colors, textures and
shapes are
elements of art that
can be seen in
natural and man-
made objects.
These elements,
when used properly
in drawing,
contribute and add
beauty to the
artwork
On –the- spot
sketching of plants,
flowers or trees
with different
textures and
shapes using
pencil, black
crayon, or ballpen.
Identify the
textures and
shapes of things in
the drawing.
Share one’s feeling
about finding other
ways in using
textures and
shapes in the
artwork.
Elements and Principles of Art : Textures and Shapes
Value Focus : Awareness of the Things Around Us
Time Allotment : 1 session (40 minutes)
I – Art Activity : On –the-Spot Sketching
II- Objective:
1. Identify the textures and shapes of in natural and man-made objects.
2. Draw on-the-spot sketches of objects seen outside the school like plants,
flowers, or trees and objects found inside the room.
3. Develop awareness on texture of objects found in the natural environment
through drawing.
III – Materials : bond paper, black crayons, pencil, a
recycled hard board
Reference :
III – Procedure
A. Pre-Activity:
1. Review:
Ask: What kinds of lines can be used to create geometric
designs?
DRAFT
April 22, 2014
B. Activity Proper
1. Motivation
Show different kinds of real flowers. Let the pupils take turns to
examine and identify the texture and shape of the flowers.
2. Presentation and Discussion
Bring the children outside to observe the flowers, plants and trees in
the garden. Allow them to touch and discover the different textures
and shapes of the leaves, stems, and flowers of plants and trees.
Ask: What are the different textures and shapes you observed in the
plants?
Let the pupils give/share their experiences about the different
textures and shapes of the plants.
( The discussion can be done outside the classroom.)
Anita Magsaysay Ho (local artist) and Claude Monet (foreign
artist) are artists known to emphasize flowers or garden/nature as
theme in their works.
Refer to THINK ABOUT THIS on LM p_____.
3. Art Activity:
Drawing of a Plant, a Flower or a Tree
Let the children bring their drawing materials and recycled
hard board to be used during the drawing activity.
Refer to BE CREATIVE on LM p._______
4. Processing/ Critiquing of Arts Output:
Ask the pupils to show to the class their artworks and their
experiences in identifying the textures and shapes in their
drawing.
C. Post activity:
1. Generalization
Ask:
What elements are to be emphasized in sketching
natural objects like plants, flowers or trees?
2. Application
(Refer to TAKE THE CHALLENGE on LM p.___)
3. Value Integration:
How will you value the things around us?
DRAFT
April 22, 2014
IV – Assessment/Evaluation:
(Refer to BE PROUD on LM p.______)
V. Assignment/Agreement:
DRAFT
April 22, 2014
First Quarter : Drawing
Lesson No. 7 : Pencil/ Pen Drawing
Code A3PR‐lh  & Ie : 1. Creates a pencil or pen drawing of scene in daily
life, where people in the province/region show their
occupation by the action they are doing.
2. Describe the way of life of people in the cultural
community.
Lesson Summary:
Art History Art Production Art Criticism Art Appreciation
The works of the
people in the
locality depend
on the kind of
topography,
climate, and
culture of a
place.
Create a pencil
or pen drawing
of a scene in
daily life of
people in the
province/region
Evaluate own
artwork/drawing
on the use of lines
and shapes.
Give importance
to
one’s culture by
sharing the way of
life of people in
the community
through their
works.
Elements and Principles of Art:  Lines and Shapes
Value Focus: Pride in one’s culture and work
Time Allotment: 1 session (40 minutes)
I. Art Activity: Pencil or Pen Drawing of a Scene in Daily Life
II. Objectives:
1. Identify the different works of people in a province or region.
2. Create a pencil or pen drawing of a scene in daily life where
people in the province/region show their occupation by the action
they are doing.
3. Give importance to one’s culture by sharing the way of life of
people in the community through their works.
III. Materials: pencil or pen, bond paper, manila paper
References: a. en.wikipedia.org
b. stella-arnaldo.blogspot.com
c. rizalprovince.ph
IV. Procedure:
A. Pre Activity:
1. Review
Why is sketching important before you do the final drawing?
Let the pupils recall what they did during their previous art session.
DRAFT
April 22, 2014
 
Ask the pupils to make or draw designs using lines and shapes on
a paper, on air, on the blackboard, or anywhere they want.
Let the pupils look at the picture in the box.


Picture with a scene in a community using 
different lines and shapes. 


Tell the pupils to identify the lines and shapes in the picture.
B. Activity Proper:
1. Motivation
a. What do you mean by the word occupation?
b. What do you want to be when you grow up? Why?
Tell the children to act out or show a pantomime about what
they want to be when they grow up.
2. Presentation and Discussion
Say:
There are many kinds of works or occupations in different
places of our country. Each region or province has its major
source of income. It depends on the topographical situation,
climate, and culture of a place.
DRAFT
April 22, 2014
In some works of Ben Cabrera (local artist) and Ron C,
Guthrie (foreign artist), pointillism was used in creating daily life
scenes.
Show the painting of Fernando Amorsolo entitled, “Planting Rice”
Ask:
a. What kind of work or occupation is shown in the picture?
b. Are there also farmers in your place?
c. Aside from farming, what other works or occupations of
people are found in the province or region?
d. How important are their works to the community?
e. Describe the way of life of people living in your community.
Activity 1
Distribute the activity cards to the two groups. After a five-
minute group discussion and preparation, pupils should present
Picture Ben Cabrera’s
Artwork using pointillism.
DRAFT
April 22, 2014
their group output (group artwork-group song with action
presentation)
(Please refer to LM page ___.)
Activity 2 refer to LM page ___.)
  C. Processing and Critiquing
Ask:
 Did you enjoy the activity? Why? Why not?
 What kind of works or occupations do people in your
province or region have?
 In what ways can we be proud of the works or
occupations of the people in our place?
Let pupils take turns to explain their views.
D. Post Activity:
1. Generalization
Ask:
What are the works or occupations of the people in your
province or region?
2. Values Integration
Ask:
How can you give importance to people’s way of life or
culture in the community?
V. Assessment/Evaluation:
Use rubrics in assessing the pupils’ output.
Refer to BE PROUD on LM page___.
VI. Assignment/Agreement:
Ask the help of your family members to list down works or
occupations of people in your region or province.  
DRAFT
April 22, 2014
First Quarter : Drawing
Lesson No. 8 : Historical Houses and Buildings
Code A3PR-Ii : Sketches and colors the view of the province/region
with houses and buildings indicating the foreground
middle ground and background by the size of the
objects.
Lesson Summary:
Art History Art Production Art Criticism Art Appreciation
Houses and buildings
in the locality,
province or region
that played an
important role in the
history of the place
are considered as
historical houses and
buildings.
Draw historical
houses and
buildings
indicating the
foreground,
middle ground,
and
background in a
composition.
Observe shapes
and sizes of houses
in a composition
that indicates the
foreground,
middle ground,
and background.
State the
importance and
value of the
historical houses
and buildings in
one’s
province/region.
Elements and Principle of Art : Lines, shapes
Value Focus : Preservation of Houses and Buildings
Time Allotment : I session (40 minutes)
I. Art Activity : Drawing of Houses and Buildings
II. Objectives :
1. Describe the historical houses/buildings in one’s province/region.
2. Make sketches of historical houses/buildings that show unique
features such as windows made of capiz shell, decorative beams,
doors, etc.
3. Give importance to the historical houses and buildings in one’s
province/region.
III. Materials:
crayon, pencil, bond paper
IV. Procedure:
A. Preparatory Activity:
Review:
Ask: What art materials did you use in making a sketch of the
occupations of people in your community?
DRAFT
April 22, 2014
B. Activity Proper :
1. Motivation:
Show pictures of historical houses/buildings found in the
province/region.
Ask:
Where can these houses/buildings be found?
2. Presentation and Discussion
Present pictures of historical houses and buildings famous in
the country like the house of Rizal in Calamba, Laguna, Aguinaldo
Mansion, Cultural Center of the Philippines, Folk Arts Theater, etc.
Let the children say something about the picture.
Show pictures of historical houses and buildings in the region
and province and discuss with them the historical importance of the
structures.
3. Art Activity:
Let the pupils do BE CREATIVE on LM p.__
“Drawing of Houses or Buildings with Designs”
4. Processing/Critiquing of Art Outputs:
Let pupils describe the kinds of lines and shapes they used to
make their drawings of historical houses or buildings
unique and different.
C. Post Activity:
Pictures of Historical Houses
Or  
pictures historical houses and buildings from 
other regions 
DRAFT
April 22, 2014
1. Generalization;
Ask: What have you learned in our art activity?
2. Value Integration
Discuss the importance of preserving historical houses/buildings.
V. Assessment/Evaluation
Refer to TAKE THE CHALLENGE on LM page ___.
DRAFT
April 22, 2014
SUMMATIV TEST FOR QUARTER 1
Directions:  Encircle the letter of the correct answer.
1. What did you observe about the objects that appear nearer to the
viewer’s eyes?
A. It glows.
B. It becomes dark.
C. It appears bigger than the other objects.
D. It appears brighter than the other objects.
2. It tells the relationship of objects and people in terms of their distance.
A. shape B. distance C. harmony D. illusion of space
3. What did you observe about the objects that appear farther from the
viewer’s eye?
A. They appear glossy.
B. They are shinier than the other objects.
C. They are wider than the other objects.
D. They are smaller than the other objects.
4. What is the important use of the illusion of space in the artwork of an
artist?
A. To show creativity.
B. To give emphasis on the subject shown.
C. To make the artwork of the artist more colorful.
D. To show the distance, depth, and widen the space occupied by
the elements of art.
5. Which of the pictures below show illusion of space?
A. B. C. D.
DRAFT
April 22, 2014
6. How will you create a design?
A. By drawing shapes B. By drawing shapes and lines
C. By drawing lines D. By coloring
7. What do we mean by variation of lines?
A. different lines B. different shapes
C. the same lines D. the same shapes
8. Which of the following shows variation of lines?
A. / / / / /
B. / - X
C. = = = = =
D. ( ) ) )
9. What does pencil sketching mean?
A. Making a pencil.
B. Making pencil paintings.
C. Making a drawing of a pencil.
D. Making a sketch with the use of pencil.
10. Why is it important to make pencil sketches before painting?
A. To make an outline for the drawing or painting.
B. To assure the correct form of an object to be drawn
C. To determine the placement of the drawing or object.
D. To evaluate the drawing.
11. What is being formed if a set of points are connected together?
A. shape B. color C. lines D. proportion
12. What kind of line shows steadiness and balance?
A. straight line B. dotted line C. curved line D. zigzag line
13. If you connect four equal length of lines to form a figure, what shape is
formed?
A. triangle B. square C. rectangle D. circle
DRAFT
April 22, 2014
14. What figure is formed if two diagonal lines meet at a sharp angle?
A. curved lines B. zigzag lines C. angular lines D. vertical lines
15. What kind of line indicates action and energy?
A. straight line B. dotted line C. curved line D. horizontal line
16. What do you call the work of art that appears to be at the back part of a
picture and is the farthest object from the viewer?
A. foreground B. background C. middle Ground D. center of interest
17. Look at the picture in the box, which object/s is considered as the middle
ground?
A. B. C. D.
18. What principle of design is shown when we show foreground, middle ground,
and background in an artwork?
A. emphasis B. balance C. contrast D. variation
19. What famous land formation is found in Bohol region?
A. Mount Apo B. Mount Arayat
C. Mayon Volcano D. Chocolate Hills
       
DRAFT
April 22, 2014
20. Which picture shows formal balance?
A. B. C. D.
21. What are the elements and principles involved in visual texture?
A. Texture, lines, colors B. Lines, colors, contrast
C. Emphasis, lines, shape D. Colors, shapes, texture
22. It shows the surface of an object by illustrating it in a composition.
A. Hand puppet B. Visual Texture C. Pointillism D. Cross Hatch
23. This is a way of applying small strokes or dots of color to a surface.
A. Texture B. Contrast C. Pointillism D. Cross Hatch
24. This is defined as a mark or shade with two or more sets of intersecting
parallel lines.
A. Pointillism B. Texture C. Contrast D. Cross Hatch
25. How can you show appreciation for one’s artwork.
A. By giving negative comments.
B. By submitting his/her artwork on time.
C. By praising the artwork of your classmate/s.
D. By helping your classmates finish his/her artwork on time.
26. The elements of art that refers to the contour and profile of an object.
A. Form B. Line C. Color D. Value
27. This refers to the amount of light, shade or dark in an object.
A. Value B. Form C. Line D. Texture
28. Refers to the quality or kind of light that reflects from the surface of the
object.
A. Line B. Form C. Color D. Value
DRAFT
April 22, 2014
29. This is a line that suggests grace, femininity, variation, and movement.
A. light B. Heavy C. Straight D. Curve
30. Expresses calmness, quietness and peace or repose
A. horizontal B. Broken C. Heavy D. Curve
31. Element of arts showing the physical form of a thing.
A. Texture B. Shape C. Harmony D. Color
32. How would you identify textures?
A. By seeing and touching B. By clapping the hands
C. By walking and running D. By singing
33. This is an element of art that depicts the feelings of the viewer towards
certain object/artwork. It also refers to the smoothness or roughness of an
object.
A. Color B. Shape C. Texture D. Harmony
34. How would you appreciate your artwork?
A. Add different colors to your artwork.
B. Tell a short story about the artworks of others.
C. Show your artwork to your parents and friends.
D. Prepare the necessary materials, draw something and paint it.
35. How would you show creativity through drawing?
A. By doing other designs
B. By creating new designs
C. By using borrowed materials
D. By finishing your work on time
36. It is the part of a work of art that lies between the foreground and the
background.
A. Foreground B. Middle Ground C. Background D. Ground
37. It is the part of a work of art that appears to be in the front and nearest to
the viewer.
A. Foreground B. Middle Ground C. Background D. Ground
38. It is the part of a work of art that appears to be in the back and farthest
from the viewer.
A. Foreground B. Middle Ground C. Background D. Ground
DRAFT
April 22, 2014
39. Which of the following pictures shows a modern Filipino house?
A. B.
C. D.
40. How would you differentiate a traditional Filipino house from a modern
house?
A. Traditional Filipino houses were made of bamboo, wood, metal and
other concrete materials.
B. Modern houses are made of bamboo, wood, metal and other
concrete materials.
C. Traditional houses were made of stones, metal and galvanized iron
while houses modern houses are made of bamboo, wood and nipa or
anahaw leaves.
D. Traditional Filipino houses were made of bamboo, wood and nipa or
anahaw leaves while modern houses nowadays mostly are made of
stones, metal and galvanized iron.
 
DRAFT
April 22, 2014
Second Quarter : Painting
Lesson No. 1 : Harmony in Plants
Learning CodeA3PL-IIc : Perceives how harmony is created in an
artwork because of complementary colors
and shapes
LESSON SUMMARY :
Art History Art Production Art Criticism Art Appreciation
Harmony is an art
principle that can
be seen in things
all around.
It is the pleasing
selection and
arrangement of
colors, shapes,
and textures.
Paint a picture of
a plant or tree
using color,
harmony, shapes,
and textures.
Looking into the
styles of the artists
in painting,
harmony is
attained in
different ways by
combining the
selected colors,
shapes, and
textures.
Appreciate how
colors are
combined to
show harmony in
the artwork done
by pupils.
Elements and Principles of Art : Colors, Shapes, Textures
Value Focus : Environmental Awareness
Time Allotment : 1 Session (40 minutes)
I – Art Activity : Painting
II – Objectives:
1. Identify complementary colors in the color wheel.
2. Paint the things that can be seen in a natural environment in the
province or region.
3. Tell how painting is made more interesting by combining colors to
achieve harmony.
II- Materials : pencil, bond paper, brush, newspaper,
watercolor, oil pastel, water container, rags
Reference :
III – Procedure
A. Pre Activity
Review
Ask the pupils to name several complementary colors.
DRAFT
April 22, 2014
B. Activity Proper
1. Motivation:
Go on a nature walk. Let the pupils identify the different
complementary colors they see around the school premises.
(Discussions and activities can be done outside the
classroom.)
2. Presentation and Discussion
Harmony is an art principle that is present in things around
us. It is seen in the arrangement of colors, shapes, and textures.
Harmony in visual design means all parts of the visual image
relate to and complement each other.
Looking into the styles of the artists in painting, harmony is
attained by combining the selected colors, shapes and textures.
Some famous Filipino artists are appreciated because of
their style in combining colors and in producing harmony in their
artwork.
Discuss the things seen in the pictures. Ask about the different
colors, shapes, and textures seen in the pictures.
Let the pupils tell their observations about how complementary
colors were put together in the paintings.
2. Art activity: Painting
Let the children prepare the materials and remind them to
always to be careful in handling their art materials.
Refer to BE CREATIVE on LM p._____.
 
 
Painting showing complementary colors 
DRAFT
April 22, 2014
3. Processing/Critiquing of Art Output
a. What plant did your paint?
b. What colors did you use in your painting?
c. Is color harmony present in your artwork? Discuss briefly.
C. Post Activity
1. Generalization
Ask: How did you show color harmony in your painting/artwork?
Harmony in painting is a pleasing visual arrangement of
colors. It is created when secondary colors and their opposite
colors or complementary colors in the color wheel are used.
2. Application
Refer to TAKE THE CHALLENGE, LM p.____
3. Values Integration
Give a situation that shows environmental awareness.
IV – Assessment/Evaluation
Refer to BE PROUD, LM p.____
V – Assignment/Agreement:
Bring to class any kind of fruit.
DRAFT
April 22, 2014


Second Quarter : Painting
Lesson No.2 : Landscape Painting
Code A3EL-IIa : Sees that there is harmony in nature as seen in the color
of landscapes
Lesson Summary:
Art History Art Production Art Criticism Art Appreciation
The landscape painting
shows the visible features
of the land, such as
mountains and hills.
Known Filipino
landscape painters are
Felix Hidalgo, Fernando
Amorsolo, and
Jonahmar Salvosa.
Paint a
landscape at
different times
of the day
(morning, noon,
night time) to
show harmony
in nature.
Identify how
colors are
combined to
come up with
harmony in the
painting.
Show
appreciation
and
preservation of
nature through
painting a
landscape.
Elements and Principle of Art: Colors, Harmony
Value Focus: Environmental Awareness
Time Allotment: 1 session (40 minutes)
I. Art Activity: Landscape Painting
II. Objectives:
1. Identify the visible features of a landscape.
2. Tell how to paint a landscape that shows color harmony.
3. Identify bright and dull colors, light and dark colors.
3. Paint a landscape at different times of the day.
4. Express ideas, feelings, emotions, and imagination through painting a
landscape.
II. Materials
Pictures, pencil, bond paper, crayons, brush, water color
DRAFT
April 22, 2014


IV. Procedure:
A. Pre- Activity :
Review:
Share to the class your experiences of using colors in your
different artworks.
B. Activity Proper
1. Motivation
Show the sample pictures of the landscape paintings of Felix
Hidalgo,
Fernando Amorsolo, and Jonahmar Salvosa.
Ask:
What color combination have you seen in the painting?
Which are bright colors? dark colors? light colors?
What feelings/ emotions/ mood does the painter express in his
painting according to the color combination used?
2. Presentation and Discussion
Say:
The landscape painting shows the visible features of the land,
including the physical elements of landforms such as mountains and
hills. Known Filipino landscape painters are Felix Hidalgo, Fernando
Amorsolo, and Jonahmar Salvosa. They used different kinds of
colors to show emotions or moods in their painting.
3. Art Activity
Refer to BE CREATIVE on LM, page __________.
 
 
 landscape painting Ni 
Felix Hidalgo 
 
 
 landscape painting 
Ni Fernado Amorsolo 
 
 landscape painting 
Ni Jonahmar Salvosa 
DRAFT
April 22, 2014


4. Processing and Critiquing
Ask:
 Did you enjoy the activity? Why? Why not?
 How did you show the time of day in your composition?
 What elements of art did you use to show harmony?
 What colors did you use in your landscape painting?
 What did you feel while doing the landscape painting?
D. Post Activity:
1. Generalization
Ask:
How is harmony in nature depicted in landscape painting?
Harmony in nature is depicted through the different
combination of colors in the landscape painting. The painter
expresses his feelings/ mood or emotions based on the kinds
of colors he used in the painting.
2. Values Integration
Ask:
If you are a painter, how can you help develop
environmental awareness?
V. Assessment/ Evaluation
Rate the outputs of the pupils based on the given rubric below.
Criteria Points
3
Very
Evident
2
Evident
1
Not
Evident
1. Did he/ she use colors to express his / her
feelings/ moods or emotions?
2. Is the painting based on the theme?
3. Did he/she express himself/herself freely in
making the artworks using different colors
according to the time of the day?
4. Did he/she finish the artwork with
seriousness?
DRAFT
April 22, 2014


VI. Assignment/ Agreement
Bring pictures of animals found in province or region.
DRAFT
April 22, 2014
Second Quarter : Painting
LESSON 3 : LANDSCAPE PAINTING
Code A3PR– IIf : Paints a landscape at a particular time of
the day and selects colors that complement
each other to create a mood.
Lessons Summary:
Art History Art Production Art Criticism Art Appreciation
Many artists
create
paintings that
show different
moods and
feelings.
Paint a
landscape that
shows mood
and feelings
using warm and
cool colors.
Identify moods
and feelings in
the paintings.
Take pride and
inspiration in the
beauty of
landscapes
painted by
Filipino artists.
Elements & Principle of Art: Colors (warm and cool)
Value Focus : Take Pride of one’s work
Time Allotment : 1 Session (40 Minutes)
I. Art Activity : Landscape Painting Using Warm and
Cool Colors
II. Objectives
1. Identify warm and cool colors in the artwork that shows the
mood and feelings in the artwork.
2. Paint a landscape that creates mood and feelings using warm
and cool colors.
3. Take pride and inspiration in the beauty of landscapes painted
by Filipino artists.
III. Materials and Reference
Materials : pencil, watercolor, oslo paper
Reference : Art Express, 1998 Harcourt Brace and
Company,
Daniel V.E. et. Al.
IV. Procedure
A. Preliminary Activity
Review
How can you make light colors? How can you make dark
colors? What are the neutral colors?
DRAFT
April 22, 2014
B. Developmental Activity
1. Motivation
Have a guessing game on colors.
Group the pupils according to their favorite colors.
Tell the pupils that each color has meaning and
emotions to convey. Ex. red means bravery and
courage; green means calmness, etc..
2. Presentation and Discussion
Show a painting of a landscape.
Let the pupils identify the colors seen in the painting.
Ask the pupils what feeling or emotions each
painting wants to convey or tell.
Talk about the paintings.
Ask the pupils which objects in the paintings
communicate warm/cool feelings.
Let the pupils give their own thoughts and observations
about the feelings suggested by the picture.
Refer to THINK ABOUT THIS on LM page____.
3. Art Activity:
Landscape Painting Using Warm & Cool Colors
Refer to BE CREATIVE on LM page____.
Picture of a Landscape 
painting with bright 
colors by Filipino 
artists 
Picture of a Landscape 
painting with dark 
colors by Filipino 
artists 
 
DRAFT
April 22, 2014
4. Discussion of Artworks
Tell the pupils show their finished artworks to their
classmates. Let them discuss about their artwork and
share their experiences while painting landscapes.
C. Post Activity
1. Generalization
How can feelings or mood be shown in an artwork
or painting?
Refer to FRAME YOUR THOUGHTS on LM page____.
2. Value Integration
Should you be proud of your artwork and the works of
Filipino artists? Why?
3. Application
Refer to TAKE THE CHALLENGE on LM page ___.
V. Assessment/ Evaluation
Assess the pupils’ performance in painting landscape using
warm and cool colors.
Refer to BE PROUD on LM page ____
VI. Agreement/Assignment
List down at least five wild animals in your notebook.
DRAFT
April 22, 2014
Second Quarter : Painting
Lesson No. 4 : Landscape Painting
Code A3PR-IIh : Appreciates the Filipino artists painted
landscapes in their own particular style and
can identify what makes each artist unique in
his use of colors to create harmony.
Lesson Summary:
Art History Art Production Art Criticism Art Appreciation
There are
Filipino painters
like Fernando
Amorsolo, Jose
Blanco, and
others who are
famous
because of
their unique
style in painting.
Paint a
landscape with
the use of
bright and dark
colors.
Compare
unique styles of
Filipino artists in
their use of
bright and dark
colors.
Give importance
to one’s own
landscape
painting by
recognizing the
styles in paintings.
Elements/Principle of Art: Colors
Value Focus: Appreciate originality of one’s artwork
Time Allotment: 1 session (40 minutes)
I. Art Activity: Landscape Painting
II. Objectives
1. Identify the types of colors used in paintings by some Filipino artists.
2. Create a painting using bright and dark colors.
3. Show appreciation for the contribution of Filipino artists in
promoting Filipino culture pointing out to their unique styles in
painting.
III. Materials watercolor, brush, pencil, oslo paper, old
newspapers, apron
References: K12 Curriculum, URL, Work text in Music, Arts, and
Physical Education (Radiance) by: Imelda V.
Codog, et.al p.149-157
DRAFT
April 22, 2014
IV. Procedure
A. Preparatory Activity:
Review
Ask:
Let the pupils look around the room and out the
windows to look for things with warm and cool colors.
Draw art examples of warm and cool colors.
B. Activity Proper
1. Motivation
Say:
Let’s stand and sing the song “Magtanim ay Di Biro”
with actions of planting rice.
Show the paintings of Fernando Amorsolo’s “Planting
Rice” and Carlos Francisco’s “Bayanihan”.
Fernando Amorsolo’s “Planting Rice”
DRAFT
April 22, 2014
What can you say about Amorsolo’s painting?
Francisco’s painting?
Ask pupils to say something about the colors used by
the artists in their paintings.
1. Presentation and Discussion
Say:
The “Planting Rice” of Fernando Amorsolo has dark
and bright colors while Carlos Francisco’s painting
entitled “Bayanihan” uses bright colors. The two artists
have different styles in using colors for their paintings.
A color becomes darker when it is mixed with black.
A color is bright when it is not mixed with another color.
2. Art Activity
Refer to BE CREATIVE on LM page __.
3. Processing/Critiquing of Art Outputs
Let the pupils exhibit their artworks.
Call some pupils to say something about their painting.
Carlos Francisco’s ”Bayanihan”
DRAFT
April 22, 2014
C. Post Activity
Generalization
Ask:
What are the styles of Filipino artists in terms of their
choice of colors?
There are many Filipino artists in our country. Their
paintings became famous because of their unique styles
e.g. Fernando Amorsolo uses dark and bright colors while
Carlos Francisco uses bright colors in his paintings.
V. Assessment/Evaluation
Refer to TAKE THE CHALLENGE on Lm page ___.
VI. Agreement/Assignment
Look for an example of a painting by a Filipino artist. Determine
his/her unique style in the use of color. Follow the guide or format
below:
Title of the painting: ___________________
Name of artist: ____________________
Colors used: ____________________
DRAFT
April 22, 2014
Second Quarter : Painting
Lesson 5 : Still Life Painting of Fruits
Lesson Code A3PR-IId : Paints a still life by observing the different shapes,
color and texture of fruits, drawing them
overlapping, and choosing the right colors for
each fruit.
Lesson Summary:
Art History Art Production Art Criticism Art Appreciation
In still life painting,
the subjects in
painting are
assembled and
designed in a
pleasing art
composition.
Create a still life
painting of fruits
with different
shapes, colors,
and textures.
Point out how well
the fruits were
arranged and put
them together for
a still life painting.
Describe how
colors, shapes,
and textures were
used to make a
realistic still life
painting.
Elements & Principles of Art: Colors , shapes, and texture
Value Focus : Creativity
Time Allotment : 1 Session (40 minutes)
I Art Activity : Still Life Painting of Fruits
II Objectives:
1. Describe a still life painting and its use of the art elements and
principles.
2. Arrange objects showing overlapping.
3. Paint still life objects.
III Materials and References
Materials : pencil, bond paper, water color,
mixing pan, brush,
old newspaper or recycled materials,
different kinds of fruits
References :
DRAFT
April 22, 2014
IV Procedure
A. Pre Activity
Review
Are you familiar with fruits and trees that are common in your
place or in your region? Describe the colors, shapes, and
textures of the fruits.
B. Activity Proper
1. Motivation
Divide the class into two groups. Show samples of still life paintings.
Let each group identify and describe the art elements and principles used
in each painting.
2. Presentation and Discussion
Say:
Still life painting can show us a new way of looking at ordinary
objects around us. The objects like fruits, flowers, vases, bottles, and
many others are placed or assembled in a pleasing arrangement
overlapping each other.
Still Life Painting  of 
famous Filipino artist 
Still Life Painting  of 
famous Filipino artist 
 
DRAFT
April 22, 2014
3. Art Activity: Still Life Painting of Fruits
Refer to BE CREATIVE on LM p. _____
4. Processing/Critiquing
Let the children show their artwork to the class, then ask
them about their experiences while doing their artwork. Point out
how well the fruits were arranged and put together for a still life
painting.
C. Post Activity
1. Generalization:
What is a still life painting?
A still life painting is an arrangement of non-living or everyday
objects. These may be natural objects or man-made objects.
2. Value Integration
How did you show your creativity in painting a still life?
DRAFT
April 22, 2014
3. Application
Refer to TAKE THE CHALLENGE on LM page ____.
IV Evaluation:
Refer to BE PROUD on LM page _____.
V. Assignment/Agreement
DRAFT
April 22, 2014
Second Quarter : Painting
Lesson No. 6 : Tints and Shades of Colors
Code A3PR-IIe : Creates new tints and shades of colors
by mixing two or more colors.
Art History Art Production Art Criticism Art Appreciation
The artistic ability
of a painter
involves his
choice of colors
and use of
neutral colors to
show tints and
shades in his
artworks.
Create a
finger painting
showing tints
and shades of
colors.
Evaluate one’s
ability in
developing skills
of producing
tints and shades.
Show confidence
in making finger
painting through
the use of tints
and shades of
colors.
Elements and Principles of Art : Color, Balance, Contrast
Value Focus : Creativity, Confidence
Time Allotment: 1 session (40 minutes)
I. Art Activity : Finger Painting
II. Objectives :
1. Explain the process of producing tints and shades.
2. Create a finger painting showing the lightness and
darkness of colors.
3. Develop self-confidence in painting with tints and
shades through experimentation.
III. Materials and References
Materials: oslo paper, water color, brush, cornstarch, container,
rags, old newspapers, recycled plastic spoons, red
and blue colored dye
Reference : Active MAPE 3 pages 100-101
DRAFT
April 22, 2014
IV. Procedure:
A. Pre-Activity:
Review:
Ask:
What color will be produced if you mixed the following:
a. yellow and red
b. blue and red
c. yellow and blue
You learned before that you could show tints or shades or
light and dark of these colors by adding white or black.
 
B. Activity Proper:
1. Motivation
Ask:
When are the times that you are happy?
When are the times that you are sad?
Let the pupils share their happy and unforgettable
experiences with their friends on several occasions. Allow
them also to tell about some sad moments they had
experienced in the past.
2. Presentation and Discussion:
Tell the pupils that happy or sad feelings can also be felt
on paintings.
Show to pupils some pictures with colors that suggest
happiness or sadness. (Dull and dark colors on paintings
suggest sadness while bright and light colors suggests
happiness.
Show them also some samples of finger paintings then ask.
Have you done finger painting before?
Today, you will paint using your fingers.
DRAFT
April 22, 2014
Explain that finger paint is made of paste and dye.
3. Art Activity:
Let the pupils do BE CREATIVE on LM page _______
Activity I: Producing Tints and Shades
Activity 2: Finger Printing
C. Processing/Critiquing of Art Works:
Let the pupils display their artworks on the board.
Ask:
Why is it important to show value of colors used in
artworks?
D. Post – Activity :
1. Generalization:
How are tints and shades produced?
A tint is the mixture of a color with white and
a shade is the mixture of a color with black. Black and
white are neutral colors.
2. Values Integration:
Ask:
Are you willing to share and display your artwork or
painting? Why? Were you able to show confidence
when painting with your fingers to show happy and sad
feelings? Explain briefly.
DRAFT
April 22, 2014
V. Assessment/Evaluation :
Refer to BE PROUD on LM page ______.
VI. Agreement/Assignment:
Display your finger painting at home.
DRAFT
April 22, 2014
Second Quarter : Painting
Lesson No.7 : Painting of Animals
Code A3EL-IIb : Appreciates that nature is so rich for no two animals
have the same shape, skin covering, and color
Lesson Summary:
Art History Art Production Art Criticism Art Appreciation
Some regions in our country
are rich with animals that
are unique in color and skin
covering, just like the
Tamaraw in Mindoro,
Pilandok in Palawan, and
Philippine Eagle in Davao
and many more.
Painting of
animals known
in the province
or region with
unique colors
& skin
covering.
Notice that
animals in
different
regions have
uniqueness and
beauty of their
own.
Appreciate the
unique shape
and color of the
skin covering of
animals through
exhibits of
paintings of
animals found in
the province or
region.
Elements and Principle of Art : Colors, Shapes, and Texture
Value Focus : Kindness to Animals
Time Allotment : 1 session (40 minutes)
I. Art Activity : Painting of Animals
II. Objective
1. Describe the uniqueness of animals in terms of shape, skin covering,
and color.
2. Paint the picture of animals through crayon-resist painting technique.
3. Show kindness to animals through sharing of experiences in a group
discussion.
III. Materials
bond paper or oslo paper, watercolor, brush, crayon, pencil,
color wheel
References :
Sing and Sketch 5 pp.111
http:/www.hbschool.com
DRAFT
April 22, 2014
IV. Procedure
A. Pre Activity
Review
Say:
In an artwork, what colors are used that are opposites in the
color wheel?
Use the color wheel to identify complementary colors.
B. Activity Proper
1. Motivation
Ask:
What animals do you know in your locality, province, or
region? Tell us about your observations of their habits,
colors, textures, or skin covering.
2. Presentation
Show pictures of different animals that can be seen in the
different regions in our country like the following: Pilandok in
Palawan, Tamaraw in Mindoro, and Philippine Eagle in Davao.
Let the pupils identify the animals shown in the picture. Let
them notice the elements of art like lines, shapes, and texture
in their skin coverings.
Discuss their answers with the class.
DRAFT
April 22, 2014
3. Art Activity:
Refer to LM page____________.
Activity 1: Painting Using Crayon Resist
4. Processing / Critiquing of Output
What animal did you draw? Is it known in the province or region?
What makes it unique than other animals?
What shapes did you use in your artwork?
Describe its skin color and texture.
How did you show harmony in colors?
Why is crayon resist painting using complementary colors
Interesting?
C. Post Activity
1. Generalization:
How can skin coverings and colors of animals enrich or
contribute to the beauty of nature?
The physical characteristics of animals such as their size, color
texture, and body coverings add to the beauty of nature.
 
 
DRAFT
April 22, 2014
2. Value Integration
How can you show kindness to animals?
IV. Assessment/ Evaluation
Refer to BE PROUD on LM page _____.
V. Assignment/ Agreement
Bring pictures of trees or plants found in your place/ province, or
region.
DRAFT
April 22, 2014
Second Quarter : Painting
Lesson No. 8 : Painting Wild Animals
Code A3PR-IIg : Observes the characteristics of wild animals
by making several pencil sketches, and
painting it later, adding the texture of its skin
covering.
Lesson Summary:
Art History Art Production Art Criticism Art
Appreciation
Filipinos have always
been artistic. Many
Filipino painters are
known not only in the
country but also in
other countries like Dr.
Jose Rizal, Juan Luna,
Fernando Amorsolo
and many others.
Paint wild
animals showing
contrast of
colors.
Evaluate
own
painting in
terms of use
of the
elements
and
principles.
Show
appreciation
of wild
animals
through
painting.
Elements and Principles of Art: Texture, Color, Lines
Value Focus: Appreciation and care for animals
Time Allotment: 1 session (40 minutes)
I. Art Activity: Pencil Sketching and Painting Wild Animals
II. Objectives:
1. Observe the colors and textures of wild animals.
2. Create a painting using warm and cool colors.
3. Make painting realistic by using lines to show texture.
4. Show appreciation of wild animals through painting
emphasizing texture.
III. Materials: pencil , oslo paper, water color, and brush
References:
DRAFT
April 22, 2014
IV. Procedure:
A. Pre Activity:
Review
Distribute paper strips to the pupils. Let them write in the
strips examples of objects with warm and cool colors.
Ask them to paste the paper strips on the charts.
Example of the charts:
Check the responses of the pupils.
B. Activity Proper:
1. Motivation
Show pupils pictures of animals, then play a game.
Let the pupils identify wild animals and tamed or
domesticated animals. If the picture is an example of a
wild animal, pupils will give the sound of a tiger. If the
picture is an example of a tamed animal, pupils will give the
sound of a bird.
2. Presentation and Discussion
Ask:
What animals were shown in the pictures?
What kind of animals are they?
Things with warm colors. 


Things with cool colors . 


DRAFT
April 22, 2014
What do you observe about the skin of a crocodile? How
about the wild pig, the snake, the deer, or the shark?
3. Art Activity
(Please refer to BE CREATIVE on LM page ___.)
4. Processing/Critiquing
Tell the pupils to look at their painting.
Ask:
How did you show the skin texture of the animal you
chose to paint?
Let the pupils share their experiences when making their
art activity.
C. Post Activity:
1. Generalization
How would you enhance your painting?
To enhance a painting, add more lines, colors and textures.
2. Values Integration
Should wild animals be protected by people? Why?
3. Application
Refer to TAKE THE CHALLENGE on LM page ___.
V. Assessment/Evaluation:
Refer to BE PROUD on LM page ___. 
         
VI. Assignment/Agreement: 
Make a compilation of pictures of wild animals.
DRAFT
April 22, 2014


Third Quarter : Printmaking
Lesson I : Nature Prints
Code A3EL-IIIa : Tells that a print can be made from
objects in nature
Lesson Summary:
Art History Art Production Art Criticism Art Appreciation
Objects found
in nature can
be used to
make prints.
Prints can be
realistic or
abstract.
Make an
abstract print
using materials
found in nature. 
  
Identify shapes,
colors, and
emphasis in the
printed design.
Give importance
to the designs
made using
found objects in
nature through
print making.
Elements and Principles of Art: Shapes, color, and emphasis
Value Focus : Appreciation of each other’s work
Time Allotment: 1 session (40 minutes)
I. Art Activity: Printing Using Found Objects
II. Objectives:
A. Differentiate abstract prints from realistic prints.
B. Use natural materials to produce abstract prints.
C. Give importance to the designs made using found objects
through printmaking.
III. Materials and References
Found objects, water color or acrylic water-based paint, brush,
ink pad, or sponge
DRAFT
April 22, 2014


IV. Procedure:
A. Pre- Activity
Review
Have you done printing using natural objects? What are these
nature objects from nature that can be used in printing?
B. Activity Proper:
1. Motivation
Present to pupils examples of natural materials that can
be used to produce a design (e.g. stalks, leaves, twigs,
etc.).
2. Presentation/Discussion
Items found in nature like twigs, leaves, plants, rocks, and
other natural objects were used in the printing process to
produce an image.
3. Art Activity:
Bring the pupils outside the classroom and guide
them to collect objects that can be used for printmaking.
Refer to BE CREATIVE, LM, p._____.
4. Processing/Critiquing
Let the children show their artwork to the class, then
ask them to talk about their feelings and experiences while
doing their artwork. Motivate them to give their
observations about the elements and principles of art used
in the artwork.
DRAFT
April 22, 2014


II. Post Activity
1. Generalization :
What is printmaking?
Printmaking is a process of transferring or
reproducing text and images typically with ink
on paper or in other materials.
2. Value Integration :
How do we show appreciation the works of others?
V. Evaluation/ Assessment
Check or rate the output of the pupils based on the rubric
below.
Criteria
3
Very
Evident
2
Evident
1
Not
Evident
1. Found objects were used to make a
design.
2. The print shows realistic or abstract
design with emphasis on colors.
3. The artwork is unique and colorful.
4. Shows appreciation for the works of
others.
VI. Agreement:
Look for other found objects and discover their unique print
design. Make a creative artwork using the design.
DRAFT
April 22, 2014
Third Quarter : Printmaking
Lesson No. 2 : Marbling
Code A3PL-IIIb : Appreciates variety of
materials used for printing and its importance.
Lesson Summary:
Art History Art Production Art Criticism Art
Appreciation
Romblon is well-
known for marble
making. Marble
can be a good
material for
teaching an art
process like
printmaking.
Create prints of
varied textural
effects, lines,
and shapes
using paint.
Describe
varied textural
effects, lines,
and shapes in
an artwork.
Appreciate the
creative
outputs in doing
marbling.
Elements and Principles of Art: Shapes, colors, lines, and texture
Value Focus : Appreciating one’s work and others
Time Allotment : 1 session (40 minutes)
I. Art Activity: Marbling
II. Objectives:
1. Identify the steps in marbling.
2. Create textural effects, lines, and shapes using paint.
3. Appreciate the creative outputs in doing marbling.
III. Materials: Activity 1:
enamel paint (different primary colors, black and white),
oslo paper, basin of water, sticks, old newspaper, rags,
scissors, recycled plastic spoon
Activity 2:
Scissors, paste, empty cans
DRAFT
April 22, 2014
IV. Procedure
A. Pre Activity
Review
What found objects did you use in your printmaking?
B. Activity Proper
1. Motivation
The teacher will show pictures of different marbling. Let
the pupils observe the pictures then ask questions about them.
What are the pictures all about? Describe each picture.
Observe the shapes. Were the designs formed by swirling
of lines? and shapes?
2. Presentation and Discussion :
Say:
Romblon is known for marble works. Marble is
commonly used for sculpture and as a building material. It
has varied and colorful patterns that make it a favorite
decorative material. Marble can be a good material in
teaching the art process like printmaking.
Today, you will do paper marbling. It is a method of
making a design in the paper or fabric with swirling pattern
or combed patterns similar to stone.
Pictures of marble prints  Pictures of marble prints 
DRAFT
April 22, 2014
Show picture of marble design.
3. Art Activity:
Let the children prepare the materials and remind
them to always be careful in handling their art materials
especially the enamel paint since it is not water-based.
Refer to BE CREATIVE, LM, p._____.
Activity 1 : “Marbling”
Note :
The children can try using several colors, aside from
the primary colors in producing varied textural effects and
movements. They can do it by stirring the paint on the
water.
Activity 2 : “Making of a Pencil Holder Cover”


                  Picture of Marble design 
DRAFT
April 22, 2014
4. Processing/Critiquing :
Let the children show their artwork to the class, then
ask them to talk about their feelings and experiences while
doing their artwork. Motivate them to give their
observations about the elements and principles of art used
in the activity.
C. Post Activity
1. Generalization (Refer to FRAME YOUR THOUGHTS, LM p. ___)
What is Paper Marbling?
(Paper Marbling is a method of making a design in which
paper or fabric is decorated with swirling patterns similar
to stone.)
2. Value Integration:
How do we show appreciation for the works of others?
3. Application:
Refer to TAKE THE CHALLENGE, LM p. ___
V. Assessment/Evaluation:
Use Rubrics in assessing pupil’s performance in their artwork.
Refer to BE PROUD, LM p. ____
VI. Assignment:
Try marbling at home and create several designs.
DRAFT
April 22, 2014
Third Quarter : Printmaking
Lesson 3    :  Finger Printing 
Code A3PL-IIIc : Observes that a print design may use
repetition of shapes or lines and emphasis on
contrast of shapes and lines
Lesson Summary :
Art History Art Production Art Criticism
Art
Appreciation
Finger printing is a
simple artwork with
the use of fingers
to paint. It is
appreciated by
many people
because of the
simplicity of its
process and
designs are
formed. (Faulty
parallelism)
Make
different
designs
through finger
printing.
Notice how
repetition of
shapes or lines
and emphasis
on contrast is
used in
printmaking.
Appreciates
artworks done
by pupils in the
class and
those that are
seen in other
places through
exhibits.
Elements and Principles of Arts : Shapes, Color , Repetition,
Contrast
Value Focus : Perseverance
Time Allotment : 1 session (40 minutes)
I. Art Activity : Finger Painting
II. Objectives:
1. Identify the designs in finger printing.
2. Create good print designs using repetition of lines and
shapes with emphasis on their contrast.
3. Appreciate art works through different experiences of
making art.
III. Materials : pencil, bond paper, brush, acrylic paint, water
container, rags, sponge, recycled flat Styrofoam.
DRAFT
April 22, 2014
IV. Procedure
A. Pre-Activity:
1. Review
What materials were used in marbling?
What are the steps in marbling?
What designs were formed?
B. Activity Proper:
1. Motivation
Say:
Today you will explore another way of making print
designs.
Let the children sing and do the action of the
children’s song entitled, “I Have Two Hands”
Emphasize that aside from using the fingers to do an
action song, our fingers can also be used to make
artworks.
2. Presentation and Discussion:
Say:
Finger printing is an act of making designs with
the use of fingerprints. This artwork is simpler than
other art processes because artists can make
different designs with their fingers.
Show the different samples of Finger Printing
outputs and discuss the design, colors and the
process of finger printing.
3. Art Activity: “Finger Printing”
Let the children help the teacher prepare the
materials and remind them to always to be careful in
handling their art materials.
Refer to BE CREATIVE, LM, p._____.
DRAFT
April 22, 2014
4. Processing/ Critiquing of Arts Outputs
Ask the pupils to show to the class their finger
printings. Motivate them to share their experiences in
making print designs through finger printing. Talk about
their works to express appreciation of their own works and
the works of others.
C. Post Activity
1. Generalization
Ask:
What is finger painting? How will you create a good
print design?
Finger printing is a simpler artwork process. It is a
technique of making designs through printing with the use
of fingers. Good print designs are created by using
repeated shapes or lines and giving emphasis on contrast
of colors, shapes, and lines.
2. Integration of Value
How would you show perseverance in making an
artistic design?
V. Evaluation
Use rubric in the LM to measure self creativity in finger printing.
Refer to BE PROUD, LM p.____
VI. Assignment/Agreement:
DRAFT
April 22, 2014
Third Quarter : Printmaking
Lesson No. 4 : Stencil Making
Code A3PR-IIId&e : Realizes that a print design can be
duplicated many times by hand or by
machine and can be shared with others.
: Explain the meaning of the design created
Lesson Summary:
Art History Art Production Art Criticism Art Appreciation
Ethnic groups
or tribes in our
country have
their own art
designs that
identify their
culture.
Make a stencil
showing ethnic
designs.
Compare own
print designs
with designs
made by other
groups.
Appreciate the
ethnic designs of
the different
cultural groups
in the country by
making it as an
inspiration in
creating one’s
print designs.
Elements and Principles of Art: Repetition of shapes and colors
Value Focus: Sharing things with others
Time Allotment: 1 session (40 minutes)
I. Art Activity: Print Making
II. Objectives:
1. Realize that a print design can be duplicated many
times by hand or machine and can be shared with
others.
2. Make a stencil design for multiple printing.
3. Explain the meaning of the design created.
4. Share the produced design to others to show
appreciation of ethnic designs.
III. Materials: colored papers or used folder, newspaper,
water color/acrylic paint, water, small soft brush or
Chinese brush, scissors
References:
DRAFT
April 22, 2014
IV. Procedure:
A. Pre Activity:
Review
How did you create a repeated design in finger
printing?
Are you familiar with ethnic designs?
Describe the ethnic design you know.
B. Activity Proper:
1. Motivation
Look around you. Can you see objects or things with
printed designs?
Tell something about it.
2. Presentation and Discussion
Every ethnic group in the country is rich in artistry and
creative design that differentiates their ethnic group or tribe
from others. Ethnic designs are designs made by indigenous
people or ethnic tribes such as Maranao, Ifugao, Bagobo, and
others.
These kinds of designs can be used for printing shirts,
covers, cloths, garments, and many others. There are many
designs that can be used for printing such as flowers, trees,
animals, sceneries, and objects.
Look at the pictures on LM page________________.
DRAFT
April 22, 2014
3. Art Activities
Let the children do the Activity in the LM page ___.
4. Processing/Critiquing
Ask:
Did you share your design with other groups?
What can you say about your group works and of others?
How does it feel sharing your design to others?
C. Post Activity
1. Generalization
What is your realization after doing the activity?
Stencils or print designs can be multiplied many times by
hand or machine and can be shared with others.
2. Values Integration
How would you show generosity to others?
Give situations on how you can share things with others.
How do you show appreciation for ethnic designs of
different cultural groups?
V. Assessment/Evaluation:
(Please refer to LM page ____.)
VI. Assignment/Agreement:
Look for other examples of ethnic designs. Make a
scrapbook of ethnic designs.
 
DRAFT
April 22, 2014
Third Quarter : Print Making
Lesson No.5 : Logo Printing Using Discarded Materials
Code A3PR-IIIf : Designs an attractive logo with slogan
about the environment to be used for printing
Lesson Summary:
Art History Art Production Art Criticism Art
Appreciation
There are several
causes of pollution.
They can be natural
cause or man-made.
If help clean our
areas then our
country would be a
better and a cleaner
place to live in.
Design an
attractive logo
that conveys a
message about
the environment
to be used for
stamp printing.
Express
creativity in
making art
designs using
discarded
materials.
Demonstrate
appreciation for
print making by
inspiring others
to create logo
designs
promoting
environmental
awareness.
Elements and Principles of Art : Shapes, Rhythm, Contrast, Form
Value Focus : Environmental Awareness, Creativity
Time Allotment: 1 session (40 minutes)
I - Art Activity: Logo with Slogan for Environmental
Awareness
II-Objectives:
1. Promote environmental awareness through logo printing.
2. Realize that discarded materials can be made useful.
3. Create an attractive logo with a slogan about the environment with
the use of discarded materials.
4. Inspire others to create a print design from discarded
materials.
III- Materials: long bond paper, pictures of logo design, old plastic
spoon, brush, sponges (1 per group), discarded flat
plastic or styro plates, acrylic paints (red and black)
References:
IV- Procedure:
A. Pre-Activity :
1. Review:
Recall the lesson on marbling. Have a class discussion of
their new learning using the technique. Prepare them for
the new activity.
Encourage them to share their observations of the new
technique.
DRAFT
April 22, 2014
B. Activity Proper:
1. Motivation:
Show actual or different pictures of discarded and recyclable
materials.
Ask: What do you think are these materials?
Draw out the meaning of recyclable and
discarded materials.
Can you group these materials into recyclable and
non-recyclable materials ?
How can we make these materials useful in making
art works?
Connect their answers to the lesson for the day.
2. Presentation and Discussion:
We see trash everywhere since people produce a
lot of trash every day. This becomes the number one
concern of our government for it creates the big problem
on global warming. So, how to solve this problem is
everyone’s concern. Let’s recycle materials that can still
be used.
Present the activity of the day which is logo making
to promote environmental awareness.
Have an illustration on how to make a logo out of
recycled materials.
Ask: What are the recycled materials that can be used to
make art?
3. Art Activity :
Let the pupils do BE CREATIVE on LM page _______.
(Have a short demonstration on how to prepare colored
paste).
Motivate the children to show their cooperation and
creativity in this activity.
4. Processing/Critiquing of Art Works:
Encourage the pupils to post their stamp prints on the wall
for arts.
Call at least three pupils to tell something about their artwork.
Ask: Can you share what inspired you to have such a good
creative artwork?
What have you learned from the art activity?
Do you agree that discarded materials can
DRAFT
April 22, 2014
be used in making artworks?
C. Post- Activity:
1. Generalization:
What realization can be drawn from the activity?
Discarded materials can be made useful in any art activity.
An attractive design can be created by using repeated
patterns thru stamp printing.
  2. Values Integration:
How can we help our environment? How will you show
creativity in doing an artwork?
V- Assessment:
Refer to TAKE THE CHALLENGE on LM page ______.
VI-Agreement (optional)
Bring the materials for activity no. ____ on page ____ for our next
activity.


DRAFT
April 22, 2014
Third Quarter : Printmaking
LESSON 6 : STENCILING A NAME
Code A3PR – lIIg : Create and cut a stencil from paper
or plastic sheets to be used for multiple
prints on color or hard paper.
Lesson Summary:
Art History Art Production Art Criticism Art Appreciation
Stenciling is a
printmaking
method used to
produce multiple
images/designs
in t-shirts, bags,
handkerchiefs
and other things.
Create a stencil
from a
cardboard to
be used for
multiple prints.
Give emphasis
on printed
designs by
using different
colors in
multiple prints.
Awareness on
common
culture, heritage
or famous
places, icons,
animals in one’s
place.
Elements & Principle of Art: Colors
Value Focus: Awareness on culture and heritage of one’s
province or region.
Time Allotment: 1 session (40 minutes)
I. Art Activity : MAKING A STENCIL ART
II. Objectives
A. Use different colors in multiple print designs or stencil art.
B. Create a stencil from a cardboard and use it for multiple paper
prints.
C. Show appreciation for places, icons, animals, etc. in own
province/region through stencil art.
III. Materials and Reference
Materials: crayon, pair of scissors, cardboard, paper
References: Art Express, 1998 Harcourt Brace and Company, Daniel
V.E. et. Al.
Fragment
DRAFT
April 22, 2014
IV. Procedure
A. Preliminary Activities
1. Review
Ask the pupils to share their experiences about their
previous activity on printing using discarded things.
Let the pupils identify discarded things that can be used
for printing.
B. Developmental Activities
1. Motivation
Conduct a Photo quiz.
Present pictures of places, products, icons, animals,
and others found in your province or region.
Let the pupils write the name of the picture in the
boxes provided.
Example:
http://www.traveltourbohol.com/wp‐content/gallery/chocolate‐hills/chocolate‐hills‐3.jpg
Answer: BOHOL
DRAFT
April 22, 2014
2. Presentation and Discussion
Tell the pupils that they will print names of famous
places, products, icons, animals, or others which are
common in their places/province/region through stencil
art.
Examples:
BOHOL TARSIER MANILA MAYON
Stencil art or stenciling is printing of repeated
designs by making ink, paint or wax pass through holes or
cuts in a piece of cardboard or metal.
Refer to THINK ABOUT THIS, LM p. ___
3. Art Activity
Art Activity: Making a Stencil Art
Refer to BE CREATIVE on LM p. ___
4. Processing/Critiquing
Say:
Discuss your artwork with your classmates and give
emphasis on the letters and colors you used on the
stencil. Compare stenciling using crayons and stenciling
using paints.
C. Post Activity
1. Generalization
Refer to FRAME YOUR THOUGHTS, LM p. ___
DRAFT
April 22, 2014
2. Value Integration
What word did you use in your stencil?
Is the word related to something or a place which is familiar
to you?
Tell something about it.
V. Assessment/ Evaluation
Use the rubrics in assessing the pupil’s artwork.
Refer to BE PROUD, LM p. ____
VI. Assignment/Agreement
Cut pictures of ethic designs and paste them in your notebook.
DRAFT
April 22, 2014
Third Quarter : Printmaking
Lesson 7 : Printing Using Found Objects
Code A3PR-IIIh : Creates a print for a shirt, bag or a poster
using letter stencils or abstract designs that
conveys a message and can be replicated.
Lesson Summary:
Art History Art Production Art Criticism Art Appreciation
Filipinos are
naturally creative
and artistic. In
fact, there are
many print
makers in the
country who
create original
designs.
Create prints with
designs using
different found
objects for a shirt,
bag, or a poster.
Use of recycled
materials in an
interesting way.
Give importance
to the intricate
designs of found
objects or
recyclable
materials through
printing.
Elements and Principle of Art: Shapes, colors
Value Focus: Care for the Environment
Time Allotment: 1 session (40 minutes)
I. Art Activity: Making Prints Using Found Objects
II. Objectives
1. Define abstract designs.
2. Create an abstract design for a shirt, bag, or a poster
using found objects.
3. Inspire others to use found objects to create attractive
prints.
III. Materials/Reference
Materials: paint or watercolor, pencil, drafting paper or
bond paper, found objects like bottle caps,
paper clips, nails, nut shells, etc.
Reference:
III. Procedure
A. Preparatory Activity:
1. Review
Ask:
DRAFT
April 22, 2014
Define stencil making or stenciling.
Can you recall the steps in stencil making?
Let pupils enumerate/discuss the steps or processes in
stencil making.
What did you learn from the process of stencil making?
B. Activity Proper
1. Motivation
Present a word puzzle. Let them form a word out of the
scrambled letters and meanings.
Means: - it does not look like a particular
object;
- not real
Answer: (ABSTRACT)
Means: - A plan or drawing produced to
show the look and function of an
object or idea.
Answer: (DESIGN)
2. Presentation and Discussion
Say:
We can see different print designs on shirts,
bags, posters, tarpaulins, streamers, etc. The designs
can be realistic or abstract pictures, There are several
objects or materials which have the same designs.
This is because of using stencils of the same design.
Discuss THINK ABOUT THIS on LM page ____
3. Art Activity
Activity: “Making Prints Using Found Objects”
Refer to BE CREATIVE on LM page ____.
R A B T S C S A
N G I S E D
 
DRAFT
April 22, 2014
4. Processing/Critiquing of Art outputs
Let pupils show their artwork to the class and let them say
something about it. Allow their classmates to give their own
assessment.
C. Post Activity
1. Generalization
Ask:
What is an abstract design?
How will you create prints for your shirts, bags, etc.?
Found objects such as bottle caps, nut shells, paper clips, and
others can be used in creating print designs for shirts, bags, posters, etc.
Designs can be letters or abstract. Abstract design is not realistic in terms
of forms, shapes, and colors.
2. Values Integration
Ask:
How can you be friendly to your environment?
Cite some situations.
IV. Assessment/Evaluation:
Refer to BE PROUD on LM page ____.
V. Agreement/Assignment
Make a slogan for an environment friendly campaign.
DRAFT
April 22, 2014
Third Quarter : Printmaking
Lesson 8 : Slogan or Logo Making
Code A3PR IIIi : Writes a slogan about the environment that
correlates messages to be printed on t-shirts,
posters, banners, or bags.
Lesson Summary:
Art History Art Production Art Criticism
Art
Appreciation
Most of the
designs on
slogans and
logos printed on
T-shirts, posters,
banners and
bags nowadays
pertain to
environmental
awareness.
Make a slogan
or logo on
environmental
awareness.
Relate
messages
about
environmental
awareness to
the society
through slogans
and logos
printed on T-
shirts, posters,
and banners.
Show
appreciation
on the
importance of
slogan or logo
on T-shirts,
posters, and
banners
to advocate
love and care
for the
environment.
 
Elements & Principles of Art: Shapes and Colors 
Value Focus: Environmental Awareness
Time Allotment: 1 session (40 minutes)
 
I. Art Activity: Slogan or Logo Making
II. Objective:
1. Tell the importance of caring for the environment.
2. Write a slogan or create a logo related to environmental
awareness.
3. Appreciate the importance of slogan and logo to
advocate care of the environment .
III. Materials and Reference 
Materials: bond paper, crayons or pastels, water
Reference: Art in the Elementary School, PJV, Phil.
Normal College Manila September,
1959.pp.80, 163,
DRAFT
April 22, 2014
IV. Procedure:
A. Pre- Activity
1. Review
Recall the past lesson about print making. Let the pupils
explain briefly how found objects created beautiful prints and
artworks.
B. Activity Proper
1. Motivation
Present to the class a sample of a slogan and a logo
related to environmental awareness and let them say something
about it.
2. Presentation
Present the theme “Save Mother Earth” for slogan or logo
making.
Ask:
What particular word, icon, or symbol comes into your
mind which is related to the word environment?
Discuss and explain how to write a slogan or create a
logo.
Refer to THINK ABOUT THIS on LM page ___.
3. Art Activity
Let the pupils make a slogan or logo.
Refer to BE CREATIVE on LM page ___.
4. Processing/ Critiquing of Output
What particular symbol or words did you use in your slogan or
logo for t-shirts, bags and/or posters?
What shapes and colors did you use in your slogan or logo?
DRAFT
April 22, 2014
What message/s would you like to convey in your slogan or
logo?
C. Post Activity
1. Generalization
How will you make a slogan or logo attractive?
In making a slogan or logo, you should consider the
symbols or icons appropriate to the message you want to tell or
relay. Colors are also important to make your slogan or logo
attractive.
.
2. Value Integration:
Ask pupils to enumerate situation showing how to care for
the environment.
Ask:
Why should we care for our environment?
V. Assessment/Evaluation:
Evaluate the pupils artwork based on the rubric found
in the LM.
Refer to BE PROUD on LM page ____.
VI. Assignment/Agreement
Cut out a logo from a magazine or newspaper and paste
it in your notebook. Write a sentence about it.
DRAFT
April 22, 2014
Lesson Summary:
Art History
Art
Production
Art Criticism
Art
Appreciation
Puppetry is a form
of theatre or
performance that
involves the
manipulation
of puppets. It is
used in
entertainment and
in performance.
Create a
finger
puppet that
can be used
in a puppet
show.
Notice the
design of varied
shapes and
colors on
puppets that
suggest the
unique
character of
the puppet.
Show
appreciation of
the craft
through puppet
shows and
exhibits.
 
Elements and Principles of Art: line, shape, color
Value Focus: creativity, cooperation
Time Allotment: 1 session (40 minutes)
 
I. Art Activity: Finger Puppet Making
II. Objectives:
1. Identify the different styles of puppets made in the
Philippines.
2. Create a finger puppet for a puppet show.
3. Show appreciation of the artwork through puppet
shows or exhibits.
III. Materials and Reference
Materials: glue, marker, crayons, paper, cardboard, scissors,
color pencils
Reference:
Fourth Quarter  Sculpture/ 3D Works
Lesson No. I Finger Puppet
Code A3EL-IVa  Identifies different styles of puppets made in the
Philippines
DRAFT
April 22, 2014
IV. Procedure:
A. Pre- Activity
1.Review- Ask pupils what they have learned in the past lesson
and what skills have they developed in that activity.
B. Activity Proper:
1. Motivation
Ask:
Have you seen a puppet show? Did you enjoy the show?
Share your experiences with the class.
Look at the illustrations of puppets.
Do you know the different kinds of puppets?
2. Presentation/ Discussion
Say:
Puppets are effective means of educational
entertainment like the hand puppets, rod puppetry, stick
puppetry shadow puppetry, black theatre and string
puppets.
Discuss with the pupils the kinds of puppets:
a. Hand Puppets
These puppets are made of foam and cloth. The
puppeteer’s hand is inserted in the neck and holds
the flap to open the puppets mouth. Manipulations
are limited to the mouth, neck, arms, and hands.
Puppeteers perform by positioning themselves
below the improvised stage. And the common
position of a puppeteer is kneeling down or standing
up.
b. Rod Puppets
These Puppets are manipulated through a rod,
which controls movements in the head, arms, and
feet.
DRAFT
April 22, 2014
c. Giant Puppets
These are life size puppets made of foam.
Sometimes the head is made of fiber glass. The
puppeteer is inside the puppet. Giant puppets can
walk, dance, and jump.
d. Stick Puppets
Stick puppets made of cardboard and sticks.
Manipulation is through the movement of sticks.
e. Shadow Puppets
Shadow puppets are made of cardboard
and sticks. Puppeteer performs from the back of a
white cloth with light at the back of the puppets.
f. Black Theater Puppets
These puppets are made of foam, rope,
cloth, and stuffing. The whole body can be
manipulated. Puppeteers perform from behind,
using black light to illuminate the design and color
of puppets.
g. String Puppets
String puppets are made of wood or rubber,
cloth, string, small wires. The strings attached to the
puppets allow the puppeteer move the head, arms,
hand, and feet of the puppet. The reason why they
are called string puppets. Puppeteers perform from
above the improvised stage.
3. Art Activity:
Let the pupils do the activity.
Activity 1 : Finger Puppet
(Refer to BE CREATIVE, LM page. _____)
4. Processing/Critiquing
Let the pupils show their puppets to the class. Ask
them about their experiences in doing the activity and in
the presentation. Have a sharing time.
DRAFT
April 22, 2014
C. Post Activity
1. Generalization
What is a Finger Puppet?
It is a miniature puppet manipulated by one finger or all
fingers.
2. Values Integration
1. Were you able to show your creativity in making your
puppet?
2. Were you able to work well with your groupmates?
3. Were you resourceful in using recyclable materials?
Explain your answer.
V. Agreement/ Assessment
Evaluate the work of the pupils. Give corresponding points on
each output.
Questions 3 2 1
Does your output show creativity?
Were materials used properly?
Is the finger puppet made of different recycled
materials?
Did you participate willingly in the presentation?
Legend: 3 Very Evident, 2 Evident, 1 Not Evident
VI. Assignment:
Bring paper bag, recycled materials, 2 pcs. of black buttons,
water color, and paste or glue.
DRAFT
April 22, 2014
Fourth Quarter  Sculpture/ 3D Works 
Lesson No. 2 Hand Puppet
Code A3PL-IVc  Appreciates variations of puppets in terms of
material, structure, shapes, colors, and intricacy
of textural details
Lesson Summary:
Art History Art Production Art Criticism
Art
Appreciation
Puppets are made
out of different
materials.
Discarded and
recyclable
materials are still
useful in making
puppets.
Make a
puppet out of
a paper bag.
Know how
variation of
materials
used affects
the quality of
the puppets.
Show
appreciation for
the different
puppets made
out of
recyclable
materials
through puppet
shows or
exhibits.
Elements and Principles of Art: lines, shapes and texture
Value Focus: environmental awareness, creativity,
resourcefulness
Time Allotment: 1 session (40 minutes)
I. Art Activity: Hand Puppet (Paper Bag)
II. Objectives
1. Compare different puppets in the use of different
materials, structure, and shapes used.
2. Make a puppet using a paper bag and other
recyclable materials.
3. Show appreciation of the importance of use of
recyclable materials to promote environmental
awareness.
DRAFT
April 22, 2014
III. Materials and References
Materials: Used paper bag, other recyclable materials: e.g.
used colored paper, old magazines, paper, plastic
cups , paste or glue, pencil and marking pen.
Reference: K to12 Curriculum Guide Arts Grade 3 pp.13
Art in the Elementary School, PJV, Phil.
Normal College Manila September, 1959.pp.80-163, 
IV. Procedure
A. Pre- Activity
1. Review
Ask the pupils about what they learned about finger
puppets.
What skills were developed in the activity?
B. Activity Proper
1. Motivation
Prepare the pupils for another fun activity by making
another kind of puppet. Recall materials they used for their finger
puppet. Draw out from the pupils possible materials they can use
if they are to make hand puppets.
2. Presentation
Discarded and recyclable materials are found anywhere.
These materials are potential materials in puppet making.
Different colors, shapes, and textures of the recyclable and
discarded materials can create variation and can affect the
quality of the puppet.
Present real puppets or pictures of puppets to evoke the
interest and imagination of the pupils.
Say:
Today we will make another puppet made of a paper
bag and other recyclable materials. (Show undecorated paper
bag.)
DRAFT
April 22, 2014
3. Art Activity
Let the pupils do the Activity 1 BE CREATIVE (see LM p.___)
4. Processing/Critiquing of Art Works:
Guide the pupils in this activity.
Tell them to share their experiences in making a paper bag
puppet. Encourage them to discuss with their classmates the
materials, structure, shapes, colors, and texture they used in their
puppet.
C. Post Activity
1. Generalization
Why is using recyclable materials important in relation to
our environment?
(By reusing materials that can be recycled we help protect
our environment.)
How can variations of materials, colors , structure, texture,
and shapes affect the quality of your puppet?
(Variations of materials, colors, shapes, structure, texture,
and shape of the puppets makes the puppet attractive and
interesting.)
2. Value Integration
Ask:
How did you show creativity and resourcefulness in using
recyclable materials in making your puppet?
V. Assessment/ Evaluation
Check or rate the output of the pupil based on the given rubric.
Refer to BE PROUD on LM page ___________.
DRAFT
April 22, 2014
VI. Assignment / Agreement
List down recyclables materials found at home that can
still be used in making art projects.
DRAFT
April 22, 2014
Fourth Quarter  3D and Sculpture
Lesson No. 3 Sock Puppet
Code A3PR-IVc & d  Creates a puppet design that would give a
specific and unique character
Applies designs of varied shapes and colors
on puppets to show the unique character of
the puppet
Lesson Summary :
Art History
Art
Production
Art Criticism
Art
Appreciation
Puppetry in the
Philippines started
since the time of Dr.
Jose Rizal, our
national hero, when
he staged the play
entitled “Carillo,” a
form of shadow
puppetry. The
process of puppet
making is taught as a
creative activity in
schools.
Create a
unique sock
puppet.
Describe the
elements
used in
designing and
creating a
hand puppet.
Show
appreciation
for one’s
puppet through
puppet exhibit
and
presentation.
Elements and Principles of Art: Shape, Color , Contrast
Value Focus: Creativity, Teamwork and
Resourcefulness
Time Allotment: 1 session (40 minutes)
I. Objectives
1. Create a sock puppet design that shows a unique and
specific character
2. Apply varied decorations on puppets to make it
different and attractive
3. Appreciate the designs used in sock puppets through
puppet exhibits and presentations
DRAFT
April 22, 2014
II. Materials and Reference
Materials: glue, sock, felt paper, cardboard, pair of scissors, old
buttons, box of found objects
Reference:
III. Procedure
A. Pre Activity
1. Review
Share your experiences in puppet making from Lessons 1 -2.
What were the materials used in making those puppets?
B. Activity Proper
1. Motivation
Use a hand puppet made from a paper bag to get the
interest of the pupils. Let the pupils mention their
experiences in the past lessons.
Say:
Would you like to try another type of puppet?
Show illustrations of puppets
Can you describe what is in the picture?
How do the puppets differ from each other?
Can you name the materials used in making each puppet?
Picture of Finger 
Puppet 
Picture of Hand 
Puppet 
Picture of Stick 
Puppet 
DRAFT
April 22, 2014
2. Presentation and Discussion
Show a picture of a hand puppet made of socks.
Say:
The process of puppet making is taught as a creative
activity in schools. Puppets are used as main characters in
classroom presentations. During the time of Dr. Jose Rizal,
our national hero, he staged the play entitled “Carillo” a
shadow puppetry. He used a carton and a stick and he
place this at the back of a white cloth. Then he used the
candlelight at the back of the stage.
Aside from the traditional puppetry, there were groups of
puppeteers formed to entertain. These groups were
inspired by different puppetry art in other countries.
3. Art Activity:
Let the pupils do the activities below:
Activity 1 : “Hand Puppet Socks”
Activity 2 : “Mini Hand Puppet Show”
(Refer to BE CREATIVE, LM page. _____)
4. Processing/Critiquing
 
 
                  Picture of a hand puppet made of socks 
DRAFT
April 22, 2014
Let the pupil’s show their puppets to the class, then
ask them about their feelings and experiences in doing the
activity and the presentation.
C. Post Activity
1. Generalization
(Refer to FRAME YOUR THOUGHTS, LM p. ___)
What is a hand puppet?
(A hand puppet is a type of puppet that is controlled
by the hand. It is made of hallow head sewn or glued to
the material that fits over the hand of the puppeteer to
conceal the fingers and the thumb which manipulate it.)
2. Values Integration
1. Were you able to show your creativity in making your
puppet?
2. Were you able to work well with your groupmates?
3. Were you resourceful in using recyclable materials?
Explain your answer.
3. Application
(Refer to TAKE THE CHALLENGE, LM p. ___)
IV. Assessment/ Evaluation:
Use Rubrics in assessing the pupil’s output.
(Refer to BE PROUD, LM p. ____)
 
DRAFT
April 22, 2014
Fourth Quarter Sculpture/3d Works
Lesson No. 4 Stick Puppet
Code A3PR-IVe Constructs a simple puppet based on a
character in a legend, myth or story using
recyclable materials and bamboo sticks or
twigs.
 
Lesson Summary :
Art History Art Production Art Criticism
Art
Appreciation
Puppets today
are widely
considered to
be
entertainment
for all ages.
Construct a
simple puppet
based on a
character in a
legend, myth,
or story.
Identify the
variations of
stick puppets in
terms of
material,
structure,
shapes, colors,
and textural
designs.
Describe a stick
puppet as
another type of
puppetry using
art elements
and principles.
Elements and Principles of Art : Shapes, colors and texture, emphasis
Value Focus: Creativity, resourcefulness
Time Allotment: 1 session (40 minutes)
I. Art Activity : Stick Puppet Making
II. Objectives:
1. Identify the variety of puppets in terms of materials,
structure, shapes, colors, and texture
2. Construct a simple puppet based on a character in a
legend, myth, or story
3. Realize the value of puppet making as an enjoyable
experience
III. Materials and Reference : :
Materials: Recycled cardboards or folders, popsicle sticks,
glue, pair of scissors, box of found materials
Reference:
Creating illusion of space in drawings

Weitere ähnliche Inhalte

Was ist angesagt?

K TO 12 GRADE 3 LEARNING MATERIAL IN ARTS
K TO 12 GRADE 3 LEARNING MATERIAL IN ARTSK TO 12 GRADE 3 LEARNING MATERIAL IN ARTS
K TO 12 GRADE 3 LEARNING MATERIAL IN ARTSLiGhT ArOhL
 
MAPEH 3 Music Learner's Manual 1st Quarter
MAPEH 3 Music Learner's Manual 1st QuarterMAPEH 3 Music Learner's Manual 1st Quarter
MAPEH 3 Music Learner's Manual 1st QuarterEDITHA HONRADEZ
 
K to 12mapeh (pe) III complete objectives and subject matter
K to 12mapeh (pe) III complete objectives and subject matterK to 12mapeh (pe) III complete objectives and subject matter
K to 12mapeh (pe) III complete objectives and subject matterAlcaide Gombio
 
Art gr-1-teachers-guide-q12
Art gr-1-teachers-guide-q12Art gr-1-teachers-guide-q12
Art gr-1-teachers-guide-q12EDITHA HONRADEZ
 
Joan marimon semi detailed lesson plan
Joan marimon semi detailed lesson planJoan marimon semi detailed lesson plan
Joan marimon semi detailed lesson planJoan Marimon-Ramos
 
MAPEH 3 Music Learner's Manual 4th Quarter
MAPEH 3 Music Learner's Manual 4th QuarterMAPEH 3 Music Learner's Manual 4th Quarter
MAPEH 3 Music Learner's Manual 4th QuarterEDITHA HONRADEZ
 
MAPEH P.E. 3 Learner's Manual
MAPEH P.E. 3 Learner's ManualMAPEH P.E. 3 Learner's Manual
MAPEH P.E. 3 Learner's ManualEDITHA HONRADEZ
 
Music 3 tg draft 4.10.2014
Music 3 tg draft 4.10.2014Music 3 tg draft 4.10.2014
Music 3 tg draft 4.10.2014PRINTDESK by Dan
 
Mathematics Grade 2
Mathematics Grade 2Mathematics Grade 2
Mathematics Grade 2Ric Dagdagan
 
Detailed Lesson Plan in MAPEH V (Music)
Detailed Lesson Plan in MAPEH V (Music)Detailed Lesson Plan in MAPEH V (Music)
Detailed Lesson Plan in MAPEH V (Music)King Harold Serrado
 
Grade 3 Health Teachers Guide
Grade 3 Health Teachers GuideGrade 3 Health Teachers Guide
Grade 3 Health Teachers GuideLance Razon
 
Grade 3 Music Learners Module
Grade 3 Music Learners ModuleGrade 3 Music Learners Module
Grade 3 Music Learners ModuleLance Razon
 
MAPEH arts lesson plan for grade 1-2
MAPEH arts lesson plan for grade 1-2MAPEH arts lesson plan for grade 1-2
MAPEH arts lesson plan for grade 1-2Via Martinez Abayon
 

Was ist angesagt? (20)

K TO 12 GRADE 3 LEARNING MATERIAL IN ARTS
K TO 12 GRADE 3 LEARNING MATERIAL IN ARTSK TO 12 GRADE 3 LEARNING MATERIAL IN ARTS
K TO 12 GRADE 3 LEARNING MATERIAL IN ARTS
 
MAPEH 3 Music Learner's Manual 1st Quarter
MAPEH 3 Music Learner's Manual 1st QuarterMAPEH 3 Music Learner's Manual 1st Quarter
MAPEH 3 Music Learner's Manual 1st Quarter
 
3 arts lm q4
3 arts lm q43 arts lm q4
3 arts lm q4
 
Music 6 quarter 1
Music 6 quarter 1Music 6 quarter 1
Music 6 quarter 1
 
3 arts lm q3
3 arts lm q33 arts lm q3
3 arts lm q3
 
K to 12mapeh (pe) III complete objectives and subject matter
K to 12mapeh (pe) III complete objectives and subject matterK to 12mapeh (pe) III complete objectives and subject matter
K to 12mapeh (pe) III complete objectives and subject matter
 
Art gr-1-teachers-guide-q12
Art gr-1-teachers-guide-q12Art gr-1-teachers-guide-q12
Art gr-1-teachers-guide-q12
 
Joan marimon semi detailed lesson plan
Joan marimon semi detailed lesson planJoan marimon semi detailed lesson plan
Joan marimon semi detailed lesson plan
 
MAPEH 3 Music Learner's Manual 4th Quarter
MAPEH 3 Music Learner's Manual 4th QuarterMAPEH 3 Music Learner's Manual 4th Quarter
MAPEH 3 Music Learner's Manual 4th Quarter
 
MAPEH P.E. 3 Learner's Manual
MAPEH P.E. 3 Learner's ManualMAPEH P.E. 3 Learner's Manual
MAPEH P.E. 3 Learner's Manual
 
Music 3 tg draft 4.10.2014
Music 3 tg draft 4.10.2014Music 3 tg draft 4.10.2014
Music 3 tg draft 4.10.2014
 
3 p.e. lm q4
3 p.e. lm q43 p.e. lm q4
3 p.e. lm q4
 
Mathematics Grade 2
Mathematics Grade 2Mathematics Grade 2
Mathematics Grade 2
 
Detailed Lesson Plan in MAPEH V (Music)
Detailed Lesson Plan in MAPEH V (Music)Detailed Lesson Plan in MAPEH V (Music)
Detailed Lesson Plan in MAPEH V (Music)
 
3 p.e. lm q2
3 p.e. lm q23 p.e. lm q2
3 p.e. lm q2
 
Grade 3 Health Teachers Guide
Grade 3 Health Teachers GuideGrade 3 Health Teachers Guide
Grade 3 Health Teachers Guide
 
Music detailed lesson plan
Music detailed lesson plan Music detailed lesson plan
Music detailed lesson plan
 
Grade 3 Music Learners Module
Grade 3 Music Learners ModuleGrade 3 Music Learners Module
Grade 3 Music Learners Module
 
Lesson plan detailed
Lesson plan detailedLesson plan detailed
Lesson plan detailed
 
MAPEH arts lesson plan for grade 1-2
MAPEH arts lesson plan for grade 1-2MAPEH arts lesson plan for grade 1-2
MAPEH arts lesson plan for grade 1-2
 

Ähnlich wie Creating illusion of space in drawings

Ähnlich wie Creating illusion of space in drawings (20)

Art 3 tg full english
Art 3 tg full englishArt 3 tg full english
Art 3 tg full english
 
Art canvas
Art canvasArt canvas
Art canvas
 
Week 2 art and craft
Week 2 art and craftWeek 2 art and craft
Week 2 art and craft
 
Self Portraits
Self PortraitsSelf Portraits
Self Portraits
 
lesson-plan=Christy Becker
lesson-plan=Christy Beckerlesson-plan=Christy Becker
lesson-plan=Christy Becker
 
Module 1 activity clil unit plan template dafne fortea
Module 1 activity clil unit plan template dafne forteaModule 1 activity clil unit plan template dafne fortea
Module 1 activity clil unit plan template dafne fortea
 
Element of Arts Module
Element of Arts Module Element of Arts Module
Element of Arts Module
 
Project Planner: Who Am I?
Project Planner: Who Am I?Project Planner: Who Am I?
Project Planner: Who Am I?
 
Art gr-1-teachers-guide-q12
Art gr-1-teachers-guide-q12Art gr-1-teachers-guide-q12
Art gr-1-teachers-guide-q12
 
Art gr-1-teachers-guide-q12
Art gr-1-teachers-guide-q12Art gr-1-teachers-guide-q12
Art gr-1-teachers-guide-q12
 
Presentation1
Presentation1Presentation1
Presentation1
 
'Still life'
'Still life''Still life'
'Still life'
 
Y7 Ephemera Scheme Of Work
Y7 Ephemera Scheme Of WorkY7 Ephemera Scheme Of Work
Y7 Ephemera Scheme Of Work
 
Visualarts
VisualartsVisualarts
Visualarts
 
Visualarts
VisualartsVisualarts
Visualarts
 
Visual arts lesson 1
Visual arts lesson 1Visual arts lesson 1
Visual arts lesson 1
 
Q1-DLL-ARTS10-WEEK2.docx
Q1-DLL-ARTS10-WEEK2.docxQ1-DLL-ARTS10-WEEK2.docx
Q1-DLL-ARTS10-WEEK2.docx
 
Q2 MAPEH W2.docx
Q2 MAPEH W2.docxQ2 MAPEH W2.docx
Q2 MAPEH W2.docx
 
ugrmagbil
ugrmagbilugrmagbil
ugrmagbil
 
Art for Early Childhood
Art for Early ChildhoodArt for Early Childhood
Art for Early Childhood
 

Mehr von PRINTDESK by Dan

MGA GAWAING PANGKALUSUGAN TUNGO SA MABIKAS NA PAGGAYAK
MGA GAWAING PANGKALUSUGAN TUNGO SA MABIKAS NA PAGGAYAKMGA GAWAING PANGKALUSUGAN TUNGO SA MABIKAS NA PAGGAYAK
MGA GAWAING PANGKALUSUGAN TUNGO SA MABIKAS NA PAGGAYAKPRINTDESK by Dan
 
GENERAL BIOLOGY TEACHING GUIDE
GENERAL BIOLOGY TEACHING GUIDEGENERAL BIOLOGY TEACHING GUIDE
GENERAL BIOLOGY TEACHING GUIDEPRINTDESK by Dan
 
EARTH SCIENCE TEACHING GUIDE
EARTH SCIENCE TEACHING GUIDEEARTH SCIENCE TEACHING GUIDE
EARTH SCIENCE TEACHING GUIDEPRINTDESK by Dan
 
GENERAL PHYSICS 1 TEACHING GUIDE
GENERAL PHYSICS 1 TEACHING GUIDEGENERAL PHYSICS 1 TEACHING GUIDE
GENERAL PHYSICS 1 TEACHING GUIDEPRINTDESK by Dan
 
STATISTICS AND PROBABILITY (TEACHING GUIDE)
STATISTICS AND PROBABILITY (TEACHING GUIDE)STATISTICS AND PROBABILITY (TEACHING GUIDE)
STATISTICS AND PROBABILITY (TEACHING GUIDE)PRINTDESK by Dan
 
21st century literature from the philippines and the world
21st century literature from the philippines and the world21st century literature from the philippines and the world
21st century literature from the philippines and the worldPRINTDESK by Dan
 
The Rice Myth - Sappia The Goddess
The Rice Myth - Sappia The GoddessThe Rice Myth - Sappia The Goddess
The Rice Myth - Sappia The GoddessPRINTDESK by Dan
 
A control room of a local radio broadcast studio commonly known as the announcer
A control room of a local radio broadcast studio commonly known as the announcerA control room of a local radio broadcast studio commonly known as the announcer
A control room of a local radio broadcast studio commonly known as the announcerPRINTDESK by Dan
 
FILIPINO Grade 10 Learning Module Unit 3
FILIPINO Grade 10 Learning Module Unit 3FILIPINO Grade 10 Learning Module Unit 3
FILIPINO Grade 10 Learning Module Unit 3PRINTDESK by Dan
 
Mathematics 10 Learner’s Material Unit 4
Mathematics 10 Learner’s Material Unit 4Mathematics 10 Learner’s Material Unit 4
Mathematics 10 Learner’s Material Unit 4PRINTDESK by Dan
 
Mathematics 10 Learner’s Material Unit 3
Mathematics 10 Learner’s Material Unit 3Mathematics 10 Learner’s Material Unit 3
Mathematics 10 Learner’s Material Unit 3PRINTDESK by Dan
 
Unit 3 - Science 10 Learner’s Material
Unit 3 - Science 10 Learner’s MaterialUnit 3 - Science 10 Learner’s Material
Unit 3 - Science 10 Learner’s MaterialPRINTDESK by Dan
 
Science 10 Learner’s Material Unit 4
Science 10 Learner’s Material Unit 4 Science 10 Learner’s Material Unit 4
Science 10 Learner’s Material Unit 4 PRINTDESK by Dan
 

Mehr von PRINTDESK by Dan (20)

MGA GAWAING PANGKALUSUGAN TUNGO SA MABIKAS NA PAGGAYAK
MGA GAWAING PANGKALUSUGAN TUNGO SA MABIKAS NA PAGGAYAKMGA GAWAING PANGKALUSUGAN TUNGO SA MABIKAS NA PAGGAYAK
MGA GAWAING PANGKALUSUGAN TUNGO SA MABIKAS NA PAGGAYAK
 
GENERAL BIOLOGY TEACHING GUIDE
GENERAL BIOLOGY TEACHING GUIDEGENERAL BIOLOGY TEACHING GUIDE
GENERAL BIOLOGY TEACHING GUIDE
 
DepEd Mission and Vision
DepEd Mission and VisionDepEd Mission and Vision
DepEd Mission and Vision
 
EARTH SCIENCE TEACHING GUIDE
EARTH SCIENCE TEACHING GUIDEEARTH SCIENCE TEACHING GUIDE
EARTH SCIENCE TEACHING GUIDE
 
GENERAL PHYSICS 1 TEACHING GUIDE
GENERAL PHYSICS 1 TEACHING GUIDEGENERAL PHYSICS 1 TEACHING GUIDE
GENERAL PHYSICS 1 TEACHING GUIDE
 
STATISTICS AND PROBABILITY (TEACHING GUIDE)
STATISTICS AND PROBABILITY (TEACHING GUIDE)STATISTICS AND PROBABILITY (TEACHING GUIDE)
STATISTICS AND PROBABILITY (TEACHING GUIDE)
 
21st century literature from the philippines and the world
21st century literature from the philippines and the world21st century literature from the philippines and the world
21st century literature from the philippines and the world
 
The Rice Myth - Sappia The Goddess
The Rice Myth - Sappia The GoddessThe Rice Myth - Sappia The Goddess
The Rice Myth - Sappia The Goddess
 
Kultura ng taiwan
Kultura ng taiwanKultura ng taiwan
Kultura ng taiwan
 
MGA AWITING BAYAN
MGA AWITING BAYANMGA AWITING BAYAN
MGA AWITING BAYAN
 
A control room of a local radio broadcast studio commonly known as the announcer
A control room of a local radio broadcast studio commonly known as the announcerA control room of a local radio broadcast studio commonly known as the announcer
A control room of a local radio broadcast studio commonly known as the announcer
 
Gawains in Aral Pan 9
Gawains in Aral Pan 9Gawains in Aral Pan 9
Gawains in Aral Pan 9
 
FILIPINO Grade 10 Learning Module Unit 3
FILIPINO Grade 10 Learning Module Unit 3FILIPINO Grade 10 Learning Module Unit 3
FILIPINO Grade 10 Learning Module Unit 3
 
Mathematics 10 Learner’s Material Unit 4
Mathematics 10 Learner’s Material Unit 4Mathematics 10 Learner’s Material Unit 4
Mathematics 10 Learner’s Material Unit 4
 
Mathematics 10 Learner’s Material Unit 3
Mathematics 10 Learner’s Material Unit 3Mathematics 10 Learner’s Material Unit 3
Mathematics 10 Learner’s Material Unit 3
 
Unit 3 - Science 10 Learner’s Material
Unit 3 - Science 10 Learner’s MaterialUnit 3 - Science 10 Learner’s Material
Unit 3 - Science 10 Learner’s Material
 
Science 10 Learner’s Material Unit 4
Science 10 Learner’s Material Unit 4 Science 10 Learner’s Material Unit 4
Science 10 Learner’s Material Unit 4
 
Branches of biology
Branches of biologyBranches of biology
Branches of biology
 
Basketball
BasketballBasketball
Basketball
 
Babasit
BabasitBabasit
Babasit
 

Kürzlich hochgeladen

1029 - Danh muc Sach Giao Khoa 10 . pdf
1029 -  Danh muc Sach Giao Khoa 10 . pdf1029 -  Danh muc Sach Giao Khoa 10 . pdf
1029 - Danh muc Sach Giao Khoa 10 . pdfQucHHunhnh
 
Web & Social Media Analytics Previous Year Question Paper.pdf
Web & Social Media Analytics Previous Year Question Paper.pdfWeb & Social Media Analytics Previous Year Question Paper.pdf
Web & Social Media Analytics Previous Year Question Paper.pdfJayanti Pande
 
URLs and Routing in the Odoo 17 Website App
URLs and Routing in the Odoo 17 Website AppURLs and Routing in the Odoo 17 Website App
URLs and Routing in the Odoo 17 Website AppCeline George
 
Q4-W6-Restating Informational Text Grade 3
Q4-W6-Restating Informational Text Grade 3Q4-W6-Restating Informational Text Grade 3
Q4-W6-Restating Informational Text Grade 3JemimahLaneBuaron
 
mini mental status format.docx
mini    mental       status     format.docxmini    mental       status     format.docx
mini mental status format.docxPoojaSen20
 
Organic Name Reactions for the students and aspirants of Chemistry12th.pptx
Organic Name Reactions  for the students and aspirants of Chemistry12th.pptxOrganic Name Reactions  for the students and aspirants of Chemistry12th.pptx
Organic Name Reactions for the students and aspirants of Chemistry12th.pptxVS Mahajan Coaching Centre
 
Paris 2024 Olympic Geographies - an activity
Paris 2024 Olympic Geographies - an activityParis 2024 Olympic Geographies - an activity
Paris 2024 Olympic Geographies - an activityGeoBlogs
 
A Critique of the Proposed National Education Policy Reform
A Critique of the Proposed National Education Policy ReformA Critique of the Proposed National Education Policy Reform
A Critique of the Proposed National Education Policy ReformChameera Dedduwage
 
CARE OF CHILD IN INCUBATOR..........pptx
CARE OF CHILD IN INCUBATOR..........pptxCARE OF CHILD IN INCUBATOR..........pptx
CARE OF CHILD IN INCUBATOR..........pptxGaneshChakor2
 
Accessible design: Minimum effort, maximum impact
Accessible design: Minimum effort, maximum impactAccessible design: Minimum effort, maximum impact
Accessible design: Minimum effort, maximum impactdawncurless
 
Interactive Powerpoint_How to Master effective communication
Interactive Powerpoint_How to Master effective communicationInteractive Powerpoint_How to Master effective communication
Interactive Powerpoint_How to Master effective communicationnomboosow
 
Separation of Lanthanides/ Lanthanides and Actinides
Separation of Lanthanides/ Lanthanides and ActinidesSeparation of Lanthanides/ Lanthanides and Actinides
Separation of Lanthanides/ Lanthanides and ActinidesFatimaKhan178732
 
Advanced Views - Calendar View in Odoo 17
Advanced Views - Calendar View in Odoo 17Advanced Views - Calendar View in Odoo 17
Advanced Views - Calendar View in Odoo 17Celine George
 
Software Engineering Methodologies (overview)
Software Engineering Methodologies (overview)Software Engineering Methodologies (overview)
Software Engineering Methodologies (overview)eniolaolutunde
 
Call Girls in Dwarka Mor Delhi Contact Us 9654467111
Call Girls in Dwarka Mor Delhi Contact Us 9654467111Call Girls in Dwarka Mor Delhi Contact Us 9654467111
Call Girls in Dwarka Mor Delhi Contact Us 9654467111Sapana Sha
 
Presentation by Andreas Schleicher Tackling the School Absenteeism Crisis 30 ...
Presentation by Andreas Schleicher Tackling the School Absenteeism Crisis 30 ...Presentation by Andreas Schleicher Tackling the School Absenteeism Crisis 30 ...
Presentation by Andreas Schleicher Tackling the School Absenteeism Crisis 30 ...EduSkills OECD
 
SOCIAL AND HISTORICAL CONTEXT - LFTVD.pptx
SOCIAL AND HISTORICAL CONTEXT - LFTVD.pptxSOCIAL AND HISTORICAL CONTEXT - LFTVD.pptx
SOCIAL AND HISTORICAL CONTEXT - LFTVD.pptxiammrhaywood
 
Arihant handbook biology for class 11 .pdf
Arihant handbook biology for class 11 .pdfArihant handbook biology for class 11 .pdf
Arihant handbook biology for class 11 .pdfchloefrazer622
 
Nutritional Needs Presentation - HLTH 104
Nutritional Needs Presentation - HLTH 104Nutritional Needs Presentation - HLTH 104
Nutritional Needs Presentation - HLTH 104misteraugie
 

Kürzlich hochgeladen (20)

1029 - Danh muc Sach Giao Khoa 10 . pdf
1029 -  Danh muc Sach Giao Khoa 10 . pdf1029 -  Danh muc Sach Giao Khoa 10 . pdf
1029 - Danh muc Sach Giao Khoa 10 . pdf
 
Web & Social Media Analytics Previous Year Question Paper.pdf
Web & Social Media Analytics Previous Year Question Paper.pdfWeb & Social Media Analytics Previous Year Question Paper.pdf
Web & Social Media Analytics Previous Year Question Paper.pdf
 
URLs and Routing in the Odoo 17 Website App
URLs and Routing in the Odoo 17 Website AppURLs and Routing in the Odoo 17 Website App
URLs and Routing in the Odoo 17 Website App
 
Q4-W6-Restating Informational Text Grade 3
Q4-W6-Restating Informational Text Grade 3Q4-W6-Restating Informational Text Grade 3
Q4-W6-Restating Informational Text Grade 3
 
mini mental status format.docx
mini    mental       status     format.docxmini    mental       status     format.docx
mini mental status format.docx
 
Organic Name Reactions for the students and aspirants of Chemistry12th.pptx
Organic Name Reactions  for the students and aspirants of Chemistry12th.pptxOrganic Name Reactions  for the students and aspirants of Chemistry12th.pptx
Organic Name Reactions for the students and aspirants of Chemistry12th.pptx
 
Paris 2024 Olympic Geographies - an activity
Paris 2024 Olympic Geographies - an activityParis 2024 Olympic Geographies - an activity
Paris 2024 Olympic Geographies - an activity
 
A Critique of the Proposed National Education Policy Reform
A Critique of the Proposed National Education Policy ReformA Critique of the Proposed National Education Policy Reform
A Critique of the Proposed National Education Policy Reform
 
CARE OF CHILD IN INCUBATOR..........pptx
CARE OF CHILD IN INCUBATOR..........pptxCARE OF CHILD IN INCUBATOR..........pptx
CARE OF CHILD IN INCUBATOR..........pptx
 
Accessible design: Minimum effort, maximum impact
Accessible design: Minimum effort, maximum impactAccessible design: Minimum effort, maximum impact
Accessible design: Minimum effort, maximum impact
 
Interactive Powerpoint_How to Master effective communication
Interactive Powerpoint_How to Master effective communicationInteractive Powerpoint_How to Master effective communication
Interactive Powerpoint_How to Master effective communication
 
Separation of Lanthanides/ Lanthanides and Actinides
Separation of Lanthanides/ Lanthanides and ActinidesSeparation of Lanthanides/ Lanthanides and Actinides
Separation of Lanthanides/ Lanthanides and Actinides
 
Advanced Views - Calendar View in Odoo 17
Advanced Views - Calendar View in Odoo 17Advanced Views - Calendar View in Odoo 17
Advanced Views - Calendar View in Odoo 17
 
Software Engineering Methodologies (overview)
Software Engineering Methodologies (overview)Software Engineering Methodologies (overview)
Software Engineering Methodologies (overview)
 
Call Girls in Dwarka Mor Delhi Contact Us 9654467111
Call Girls in Dwarka Mor Delhi Contact Us 9654467111Call Girls in Dwarka Mor Delhi Contact Us 9654467111
Call Girls in Dwarka Mor Delhi Contact Us 9654467111
 
Presentation by Andreas Schleicher Tackling the School Absenteeism Crisis 30 ...
Presentation by Andreas Schleicher Tackling the School Absenteeism Crisis 30 ...Presentation by Andreas Schleicher Tackling the School Absenteeism Crisis 30 ...
Presentation by Andreas Schleicher Tackling the School Absenteeism Crisis 30 ...
 
SOCIAL AND HISTORICAL CONTEXT - LFTVD.pptx
SOCIAL AND HISTORICAL CONTEXT - LFTVD.pptxSOCIAL AND HISTORICAL CONTEXT - LFTVD.pptx
SOCIAL AND HISTORICAL CONTEXT - LFTVD.pptx
 
Código Creativo y Arte de Software | Unidad 1
Código Creativo y Arte de Software | Unidad 1Código Creativo y Arte de Software | Unidad 1
Código Creativo y Arte de Software | Unidad 1
 
Arihant handbook biology for class 11 .pdf
Arihant handbook biology for class 11 .pdfArihant handbook biology for class 11 .pdf
Arihant handbook biology for class 11 .pdf
 
Nutritional Needs Presentation - HLTH 104
Nutritional Needs Presentation - HLTH 104Nutritional Needs Presentation - HLTH 104
Nutritional Needs Presentation - HLTH 104
 

Creating illusion of space in drawings

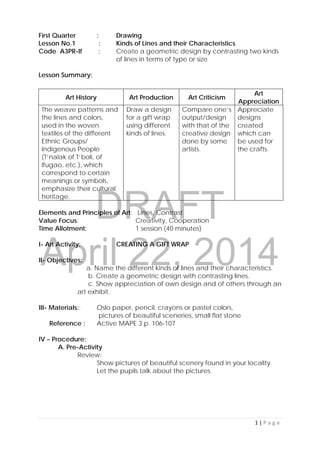
  • 1. DRAFT April 22, 2014 1 | P a g e     First Quarter : Drawing Lesson No.1 : Kinds of Lines and their Characteristics Code A3PR-If : Create a geometric design by contrasting two kinds of lines in terms of type or size Lesson Summary: Art History Art Production Art Criticism Art Appreciation The weave patterns and the lines and colors, used in the woven textiles of the different Ethnic Groups/ Indigenous People (T’nalak of T’boli, of Ifugao, etc.), which correspond to certain meanings or symbols, emphasize their cultural heritage. Draw a design for a gift wrap using different kinds of lines. Compare one’s output/design with that of the creative design done by some artists. Appreciate designs created which can be used for the crafts. Elements and Principles of Art: Lines, Contrast Value Focus: Creativity, Cooperation Time Allotment: 1 session (40 minutes) I- Art Activity: CREATING A GIFT WRAP II- Objectives: a. Name the different kinds of lines and their characteristics. b. Create a geometric design with contrasting lines. c. Show appreciation of own design and of others through an art exhibit. III- Materials:: Oslo paper, pencil, crayons or pastel colors, pictures of beautiful sceneries, small flat stone Reference : Active MAPE 3 p. 106-107 IV – Procedure: A. Pre-Activity Review: Show pictures of beautiful scenery found in your locality. Let the pupils talk about the pictures.
  • 2. DRAFT April 22, 2014 2 | P a g e     B. Activity Proper : 1. Motivation : Show an illustration of lines. Ask the pupils to describe the kinds of lines and thier characteristics. 2. Presentation and Discussion: Show picture or a drawing with geometric designs. (You can also use the previous outputs of the pupils.) 2. Presentation Say: Look and examine the drawing. Does the picture show different kinds of lines? Motivate the class to participate as they name and describe the lines and their characteristics as seen in the drawing. In the drawing, you can see several linear designs. Linear designs are designs out of different kinds of lines that form rectangles, triangles, circles. The kinds of lines are straight and curve while the types of lines are thin and thick.
  • 3. DRAFT April 22, 2014 3 | P a g e     The weave patterns and the lines and colors, used in the woven textiles of the different ethnic groups/ indigenous people (T’nalak of T’boli, Ifugao, etc.) emphasize their cultural heritage. 3. Art Activity: Activity I: Making a Design for a Gift Wrap Instruct the pupils to do BE CREATIVE on LM page _______. 4. Processing/Critiquing of Art Works: Encourage the pupils to post their artworks on the board. What experiences inspire them to create the design for a gift wrap? What makes your artwork special and different from others? Aside from using it as a gift wrap, where can you use your designs? C. Post- Activity: 1. Generalization: Ask: What makes your design artistic and creative? Different kinds of lines can create artistic and creative designs. 2. Values Integration: How can you make your art design different and unique? How can you show appreciation of other’s artwork? V- Assessment/Evaluation : Refer to TAKE THE CHALLENGE on LM page ______. Evaluate the artworks of the pupils using the rubric below. Very Evident 5 Evident 3 Not Evident 1 The artwork is original and creative. The kinds of lines and their characteristics are shown in the artwork. Geometric design is used in the artwork. The artwork is finished on time.
  • 4. DRAFT April 22, 2014 4 | P a g e     VI. Assignment: Look for a picture of cloth with geometric designs from old magazines or newspapers. Ask the assistance of your parents or guardian in cutting the picture.
  • 5. DRAFT April 22, 2014       First Quarter : Drawing Lesson No. 2 : People of Different Sizes Code A3EL-Ia : Distinguishes the size of persons in the drawing, by their distance from the viewer Lesson Summary: Art History Art Production Art Criticism Art Appreciation Drawing is one of the major forms of expression within the visual arts. In a drawing composition, the sizes of shapes of objects differ. This is to show the distance of the objects from one another and from the viewer. Fernando Amorsolo (local artist) have good works on Philippine Landscape/ Seascape. Edgar Degas (foreign artist) emphasizes on perspective. Draw the image of persons in a composition using the knowledge on sizes of shapes to show distance Distance is shown with the use of sizes and shapes in a drawing composition Show self confidence in creating an artwork Elements and Principles of Art: sizes of shapes Value Focus: Self Confidence Time Allotment: 1 session (40 minutes) I. Art Activity I Drawing of Different Sizes of People I. Objectives: 1. Tell the difference of the sizes of persons in a picture in order to show awareness of distance.
  • 6. DRAFT April 22, 2014       2. Draw a picture of persons in different sizes in a composition to show distance. 3. Give value on one’s ability and confidence in making an artwork showing distance. III. Materials and Reference; Pencil, bond paper, crayon IV. Procedure: A Pre- Activity: 1. Review What are the elements of art? (Line, shapes, form, color, texture, size) Describe each element. B. Activity Proper: 1. Motivation Show a picture with people of different sizes. Ask: What have you observed in the picture? Let the children notice the sizes of the persons in the drawing. (The teacher may ask follow-up questions.)
  • 7. DRAFT April 22, 2014       2. Presentation and Discussion Say: In a drawing composition, the sizes of objects differ because of their distance from the viewer. There is overlapping of objects and less detail as the image seems farther away from the viewer. Objects look smaller when they are far from the viewer, and larger when they are near. This is how perspective is shown in a drawing. Perspective is a way of portraying three-dimensions in a flat, two- dimensional surface. This is to create the appearance and spatial relationships of objects, buildings, etc. relative to each other as determined by their distance from the viewer. Show a picture of the community to the pupils and talk about it. Show them also the works of Fernando Amorsolo (local artist) and Edgar Degas (foreign artist) with works that emphasize perspective and Philippine Landscape/Cityscape. 3. Art Activity Activity 1 (Please refer to LM page ___.)     4. Processing and Critiquing Ask: What elements of art did you use? How did you show distance in your drawing composition? Did you enjoy the activity? Why? C. Post Activity: 1. Generalization Ask: How will you show distance in your drawing?
  • 8. DRAFT April 22, 2014       In a drawing, objects that are near to the viewer are bigger while objects that are far from the viewer are smaller. 2. Values Integration Ask:  How did you show confidence in making an artwork? V. Assessment/ Evaluation Assess the output of the pupils based on the rubric below. Questions Very Evident 3 Evident 2 Not Evident 1 1.Was able to drew the different sizes of people in the picture to show their distance without the help of others? 2. Is creativity manifested in the drawing? 3. Is confidence manifested by drawing the different sizes of people in the picture to show distance. 4. Is the artwork finished on time? V. Assignment/ Agreement: Bring pictures of your community.
  • 9. DRAFT April 22, 2014 First Quarter : Drawing Lesson No. 3 : Illusion of Space Code: A3EL-Ib : Shows illusion of space in drawing objects and persons of different sizes Lesson Summary: Art History Art Production Art Criticism Art Appreciation In a drawing, it is important for an artist to be able to create the illusion of space. Manuel Baldemor (local artist) and Giovanni Antonio Canal better known as Canaletto(foreign artist) have good works that emphasize cityscape and Philippine community/daily life that shows treatment of space. Create a picture that shows the illusion of space. Show the illusion of space in drawing objects and persons of different sizes. Appreciate the ability and skill of the artists in creating illusion of space by applying learned techniques in one’s artwork. Elements & Principles of Art: lines, shapes , and space Value Focus: Appreciation of one’s artwork Time Allotment: 1 Session (40 minutes) I. Art Activity Drawing of Persons of Different Sizes II. Objectives 1. Explain the concept of illusion of space. 2. Create an artwork that shows the illusion of space. 3. Appreciate the ability and skill of the artist in using lines to create the illusion of space. III. Materials and Reference a. Materials: bond paper, pencil, crayon, picture of a community
  • 10. DRAFT April 22, 2014 b. Reference: 2002 BEC Sining 6- p122, Art in the Elementary School, PJV, Phil. Normal College Manila September, 1959.pp.48, Lesson Plans in Art 4, Division of Iloilo 2008-2011 ,Lesson 6 to 8, pp.11-16 http:// www.bing.com/images/search?q=optical+illusion+picture IV. Procedure: A. Pre- Activity 1. Review Ask the children to look at the picture they drew in the previous lesson. Let them examine the picture: the sizes of objects, the distance, etc. Then, ask: How do we know that an object is near or far from the viewer’s eye? B. Activity Proper 1. Motivation Show the following pictures. Picture A Picture B Let the pupils give their own opinion or idea on the sizes and distance of objects in pictures A and B.
  • 11. DRAFT April 22, 2014 2. Presentation Say: The use of illusion of space is a technique or process used by an artist to show distance and depth. Show an example of a picture of objects and or people that shows illusion of space. Show them also the artwork of Manuel Baldemor (local artist) and Giovanni Antonio Canal better known as Canaletto(foreign artist) who have good works that emphasize cityscape and Philippine community/daily life. 3. Art Activity Activity 1 Let the pupils do the activity number 1 in LM p.______. 4. Processing/ Critiquing of Art Output Ask the following questions to the pupils after they finished their work: 1. What have you observed about the sizes of objects that are near
  • 12. DRAFT April 22, 2014 or far from the viewer? 2. Have you created the illusion of space? How? C. Post Activity 1. Generalization     How can you show the illusion of space in your artwork? In a drawing, the smaller the object, the farther its distance from the viewer. On the other hand, the bigger the object, the nearer its distance from the viewer. This is called illusion of space. 2. Values Integration How can you show appreciation for your own artwork and the works of others? 3. Application Refer to TAKE THE CHALLENGE on LM page ____________. V. Assessment/ Evaluation Assess the artwork of pupils using the rubric below: Rubric Very Evident 3 Evident 2 Not Evident 1 1. Illusion of space is shown in the artwork. 2. Persons and objects are included in the drawing. 3. Creativity is shown in the artwork by making it different from others. 4. The artwork is finished according to the time allotted.
  • 13. DRAFT April 22, 2014 VI. Assignment/ Agreement
  • 14. DRAFT April 22, 2014 First Quarter : Drawing Lesson 4 : Visual Texture Code A3PL-Ic : Appreciates that artists create visual textures by using lines, dots, and colors Lesson Summary: Art History Art Production Art Criticism Art Appreciation Things around us have different textures. Texture can be tactile or visual. Visual texture is the perceived texture of an object without touching it. Create a still life drawing with the use of cross hatch lines or dots to show visual texture. Observe how lines and colors are used in a still life drawing to create a visual texture. Give importance to the artworks that show visual textures by using lines, dots, and colors. Elements and Principles of Art: Texture, lines, and colors Value Focus : Valuing an Artwork Time Allotment : 1 Session (40 Minutes) I Art Activity: Still Life Drawing Using Cross Hatch Lines or Dots II Objectives 1. Discuss visual texture in a still life drawing with the use of cross hatch lines or dots. 2. Draw a still life drawing that shows visual textures using lines, dots, and colors. 3. Show appreciation of one’s skill in using variety of lines, dots, and colors in artwork. III Materials and References Materials : pencil, colored pencils, bond paper,
  • 15. DRAFT April 22, 2014 IV Procedure A. Pre Activity 1. Review Ask: How illusion of space is shown in a drawing? B. Activity 1. Motivation Distribute sets of jigsaw puzzles to groups of pupils. Let each group assemble the puzzle. Example: Ask: What picture was formed by the puzzle? Does it show texture, lines and colors? Identify them. 2. Presentation and Discussion Tell the pupils that visual texture is defined as the texture of an object perceived without touching it. Every object has its own visual texture and needs to be taken into consideration before creating a composition.
  • 16. DRAFT April 22, 2014  Look at the other picture. What have you observed in picture A? in picture B? Discuss further the use of cross hatch lines and dots (pointillism) to create visual texture in a still life drawing. Refer to THINK ABOUT THIS of the LM, p.____. Here’s an illustration showing the “crosshatching” of a pencil stroke. The technique is very simple- you just do the “ slinky’ pencil stroke in several directions one over the other. Each different direction adds more tone to the shading, and progressively darker. Pointillism is a method of using dots to achieve various effects in a drawing or painting. The dots can be placed singly, in rows, or randomly. The dots can also be placed by themselves, in groups, and/or be overlapping. The dots used can also vary in size. Picture of still life showing  the use of cross hatch lines.   Picture of still life showing the use  of dots.    
  • 17. DRAFT April 22, 2014 3. Art Activity: “Still Life Drawing with Cross Hatch Lines or Dots” (Refer to BE CREATIVE of the LM, p. _____) 4. Processing/Critiquing Let the pupils show their artworks to the class. Then, ask them about their experiences and learning while doing the activity. C. Post Activity 1. Generalization Ask: What is Visual Texture? (Visual texture is the texture of an object perceived without touching it. It that can only be determined by looking at the object.) 2. Value Integration How will you value your artwork and that others? 3. Application (Refer to Take the Challenge of the LM, p.___) IV Assessment/Evaluation: (Refer to Be Proud of the LM p. ____) V. Agreement/Assignment Bring picture of a land formation.
  • 18. DRAFT April 22, 2014 First Quarter : Drawing Lesson 5 : LANDSCAPE DRAWING Code A3PL – ld : Tells that in a landscape, the nearest object drawn is the foreground; the objects behind the foreground are the middle ground, while the farthest objects are the background. Lesson Summary: Art History Art Production Art Criticism Art Appreciation There are many famous landscapes or land formations in the different regions in the country. Ex. Mt. Mayon, Batangas Plateau, Chocolate Hills, Mt. Apo, etc. Make a landscape drawing. Show balance in the landscape drawing by indicating the foreground, middle ground and background, in the composition. Appreciate the beauty of landscape in the province or region through creative drawing. Elements & Principle of Art : Balance Value Focus : Appreciating Beauty of Nature Time Allotment : 1 Session (40 Minutes) I Art Activity : Landscape Drawing II Objectives 1. Identify and describe the foreground, middle ground, and the background in a picture of a landscape. 2. Draw a landscape that shows balance. 3. Appreciate the beauty of landscapes in the province or region through creative drawing. III Materials and Reference Materials : paper, pencil, crayon Reference : Art Express, 1998 Harcourt Brace and Company, Daniel V.E. et. Al.
  • 19. DRAFT April 22, 2014 IV Procedure A. Preliminary Activity 1. Review What is visual texture? B. Developmental Activity 1. Motivation Ask the pupils to show the pictures of land formation they brought to class. Let them say something about it. Introduce a guessing game of land formations and landscapes by describing their characteristics. (The teacher can use pictures of land formations and landscapes found in their locality/province.) 2. Presentation and Discussion Tell the pupils that there are famous landscape and land formations in the Philippines. Introduce some of these with the aid of pictures. Ex. Cagayan Valley, Mayon Volcano in Bicol, Chocolate Hills in Bohol, Mount Apo in Davao and Plateau in Baguio. .             Chocolate hills Mayon Volcano Mount Apo Ask: What objects in the picture appear nearest to the viewer? What objects in the picture appear farthest to the viewer? Compare their sizes. In a landscape drawing, balance is shown through the presence of foreground, middle ground, and background. Foreground is the part of
  • 20. DRAFT April 22, 2014 drawing that appears to be in the front, nearest to the viewer. While the middle ground, is the part of the drawing that lies between the foreground and the background. The background, is the part the drawing that appears to be at the back, farthest away from the viewer. (Refer to Think About This , LM p. ____) 3. Art Activity: “Landscape Drawing” Refer to BE CREATIVE, LM p. _____ 4. Processing and Critiquing Say: Show your artwork to your classmates and share your experiences while doing the activity. C. Post Activity 1. Generalization Ask: How is balance shown in the picture? There is a feeling of balance when there is foreground, middle ground, and background in the composition. 2. Value Integration How can you preserve the beauty of nature in your place? 3. Application Refer to TAKE THE CHALLENGE, LM P. ____ V Assessment/ Evaluation Refer to BE PROUD, LM p. ____
  • 21. DRAFT April 22, 2014 First Quarter : Drawing Lesson No. 6 : Textures and Shapes Code A3PR-lg : Sketches on-the-spot outside or near the school to draw a plant, flowers or a tree showing the different textures and shape of each part, using only a pencil or black crayon or ballpen. Lesson Summary: Art History/ Art Production Art Criticism Art Appreciation Colors, textures and shapes are elements of art that can be seen in natural and man- made objects. These elements, when used properly in drawing, contribute and add beauty to the artwork On –the- spot sketching of plants, flowers or trees with different textures and shapes using pencil, black crayon, or ballpen. Identify the textures and shapes of things in the drawing. Share one’s feeling about finding other ways in using textures and shapes in the artwork. Elements and Principles of Art : Textures and Shapes Value Focus : Awareness of the Things Around Us Time Allotment : 1 session (40 minutes) I – Art Activity : On –the-Spot Sketching II- Objective: 1. Identify the textures and shapes of in natural and man-made objects. 2. Draw on-the-spot sketches of objects seen outside the school like plants, flowers, or trees and objects found inside the room. 3. Develop awareness on texture of objects found in the natural environment through drawing. III – Materials : bond paper, black crayons, pencil, a recycled hard board Reference : III – Procedure A. Pre-Activity: 1. Review: Ask: What kinds of lines can be used to create geometric designs?
  • 22. DRAFT April 22, 2014 B. Activity Proper 1. Motivation Show different kinds of real flowers. Let the pupils take turns to examine and identify the texture and shape of the flowers. 2. Presentation and Discussion Bring the children outside to observe the flowers, plants and trees in the garden. Allow them to touch and discover the different textures and shapes of the leaves, stems, and flowers of plants and trees. Ask: What are the different textures and shapes you observed in the plants? Let the pupils give/share their experiences about the different textures and shapes of the plants. ( The discussion can be done outside the classroom.) Anita Magsaysay Ho (local artist) and Claude Monet (foreign artist) are artists known to emphasize flowers or garden/nature as theme in their works. Refer to THINK ABOUT THIS on LM p_____. 3. Art Activity: Drawing of a Plant, a Flower or a Tree Let the children bring their drawing materials and recycled hard board to be used during the drawing activity. Refer to BE CREATIVE on LM p._______ 4. Processing/ Critiquing of Arts Output: Ask the pupils to show to the class their artworks and their experiences in identifying the textures and shapes in their drawing. C. Post activity: 1. Generalization Ask: What elements are to be emphasized in sketching natural objects like plants, flowers or trees? 2. Application (Refer to TAKE THE CHALLENGE on LM p.___) 3. Value Integration: How will you value the things around us?
  • 23. DRAFT April 22, 2014 IV – Assessment/Evaluation: (Refer to BE PROUD on LM p.______) V. Assignment/Agreement:
  • 24. DRAFT April 22, 2014 First Quarter : Drawing Lesson No. 7 : Pencil/ Pen Drawing Code A3PR‐lh  & Ie : 1. Creates a pencil or pen drawing of scene in daily life, where people in the province/region show their occupation by the action they are doing. 2. Describe the way of life of people in the cultural community. Lesson Summary: Art History Art Production Art Criticism Art Appreciation The works of the people in the locality depend on the kind of topography, climate, and culture of a place. Create a pencil or pen drawing of a scene in daily life of people in the province/region Evaluate own artwork/drawing on the use of lines and shapes. Give importance to one’s culture by sharing the way of life of people in the community through their works. Elements and Principles of Art:  Lines and Shapes Value Focus: Pride in one’s culture and work Time Allotment: 1 session (40 minutes) I. Art Activity: Pencil or Pen Drawing of a Scene in Daily Life II. Objectives: 1. Identify the different works of people in a province or region. 2. Create a pencil or pen drawing of a scene in daily life where people in the province/region show their occupation by the action they are doing. 3. Give importance to one’s culture by sharing the way of life of people in the community through their works. III. Materials: pencil or pen, bond paper, manila paper References: a. en.wikipedia.org b. stella-arnaldo.blogspot.com c. rizalprovince.ph IV. Procedure: A. Pre Activity: 1. Review Why is sketching important before you do the final drawing? Let the pupils recall what they did during their previous art session.
  • 25. DRAFT April 22, 2014   Ask the pupils to make or draw designs using lines and shapes on a paper, on air, on the blackboard, or anywhere they want. Let the pupils look at the picture in the box.       Picture with a scene in a community using  different lines and shapes.                                    Tell the pupils to identify the lines and shapes in the picture. B. Activity Proper: 1. Motivation a. What do you mean by the word occupation? b. What do you want to be when you grow up? Why? Tell the children to act out or show a pantomime about what they want to be when they grow up. 2. Presentation and Discussion Say: There are many kinds of works or occupations in different places of our country. Each region or province has its major source of income. It depends on the topographical situation, climate, and culture of a place.
  • 26. DRAFT April 22, 2014 In some works of Ben Cabrera (local artist) and Ron C, Guthrie (foreign artist), pointillism was used in creating daily life scenes. Show the painting of Fernando Amorsolo entitled, “Planting Rice” Ask: a. What kind of work or occupation is shown in the picture? b. Are there also farmers in your place? c. Aside from farming, what other works or occupations of people are found in the province or region? d. How important are their works to the community? e. Describe the way of life of people living in your community. Activity 1 Distribute the activity cards to the two groups. After a five- minute group discussion and preparation, pupils should present Picture Ben Cabrera’s Artwork using pointillism.
  • 27. DRAFT April 22, 2014 their group output (group artwork-group song with action presentation) (Please refer to LM page ___.) Activity 2 refer to LM page ___.)   C. Processing and Critiquing Ask:  Did you enjoy the activity? Why? Why not?  What kind of works or occupations do people in your province or region have?  In what ways can we be proud of the works or occupations of the people in our place? Let pupils take turns to explain their views. D. Post Activity: 1. Generalization Ask: What are the works or occupations of the people in your province or region? 2. Values Integration Ask: How can you give importance to people’s way of life or culture in the community? V. Assessment/Evaluation: Use rubrics in assessing the pupils’ output. Refer to BE PROUD on LM page___. VI. Assignment/Agreement: Ask the help of your family members to list down works or occupations of people in your region or province.  
  • 28. DRAFT April 22, 2014 First Quarter : Drawing Lesson No. 8 : Historical Houses and Buildings Code A3PR-Ii : Sketches and colors the view of the province/region with houses and buildings indicating the foreground middle ground and background by the size of the objects. Lesson Summary: Art History Art Production Art Criticism Art Appreciation Houses and buildings in the locality, province or region that played an important role in the history of the place are considered as historical houses and buildings. Draw historical houses and buildings indicating the foreground, middle ground, and background in a composition. Observe shapes and sizes of houses in a composition that indicates the foreground, middle ground, and background. State the importance and value of the historical houses and buildings in one’s province/region. Elements and Principle of Art : Lines, shapes Value Focus : Preservation of Houses and Buildings Time Allotment : I session (40 minutes) I. Art Activity : Drawing of Houses and Buildings II. Objectives : 1. Describe the historical houses/buildings in one’s province/region. 2. Make sketches of historical houses/buildings that show unique features such as windows made of capiz shell, decorative beams, doors, etc. 3. Give importance to the historical houses and buildings in one’s province/region. III. Materials: crayon, pencil, bond paper IV. Procedure: A. Preparatory Activity: Review: Ask: What art materials did you use in making a sketch of the occupations of people in your community?
  • 29. DRAFT April 22, 2014 B. Activity Proper : 1. Motivation: Show pictures of historical houses/buildings found in the province/region. Ask: Where can these houses/buildings be found? 2. Presentation and Discussion Present pictures of historical houses and buildings famous in the country like the house of Rizal in Calamba, Laguna, Aguinaldo Mansion, Cultural Center of the Philippines, Folk Arts Theater, etc. Let the children say something about the picture. Show pictures of historical houses and buildings in the region and province and discuss with them the historical importance of the structures. 3. Art Activity: Let the pupils do BE CREATIVE on LM p.__ “Drawing of Houses or Buildings with Designs” 4. Processing/Critiquing of Art Outputs: Let pupils describe the kinds of lines and shapes they used to make their drawings of historical houses or buildings unique and different. C. Post Activity: Pictures of Historical Houses Or   pictures historical houses and buildings from  other regions 
  • 30. DRAFT April 22, 2014 1. Generalization; Ask: What have you learned in our art activity? 2. Value Integration Discuss the importance of preserving historical houses/buildings. V. Assessment/Evaluation Refer to TAKE THE CHALLENGE on LM page ___.
  • 31. DRAFT April 22, 2014 SUMMATIV TEST FOR QUARTER 1 Directions:  Encircle the letter of the correct answer. 1. What did you observe about the objects that appear nearer to the viewer’s eyes? A. It glows. B. It becomes dark. C. It appears bigger than the other objects. D. It appears brighter than the other objects. 2. It tells the relationship of objects and people in terms of their distance. A. shape B. distance C. harmony D. illusion of space 3. What did you observe about the objects that appear farther from the viewer’s eye? A. They appear glossy. B. They are shinier than the other objects. C. They are wider than the other objects. D. They are smaller than the other objects. 4. What is the important use of the illusion of space in the artwork of an artist? A. To show creativity. B. To give emphasis on the subject shown. C. To make the artwork of the artist more colorful. D. To show the distance, depth, and widen the space occupied by the elements of art. 5. Which of the pictures below show illusion of space? A. B. C. D.
  • 32. DRAFT April 22, 2014 6. How will you create a design? A. By drawing shapes B. By drawing shapes and lines C. By drawing lines D. By coloring 7. What do we mean by variation of lines? A. different lines B. different shapes C. the same lines D. the same shapes 8. Which of the following shows variation of lines? A. / / / / / B. / - X C. = = = = = D. ( ) ) ) 9. What does pencil sketching mean? A. Making a pencil. B. Making pencil paintings. C. Making a drawing of a pencil. D. Making a sketch with the use of pencil. 10. Why is it important to make pencil sketches before painting? A. To make an outline for the drawing or painting. B. To assure the correct form of an object to be drawn C. To determine the placement of the drawing or object. D. To evaluate the drawing. 11. What is being formed if a set of points are connected together? A. shape B. color C. lines D. proportion 12. What kind of line shows steadiness and balance? A. straight line B. dotted line C. curved line D. zigzag line 13. If you connect four equal length of lines to form a figure, what shape is formed? A. triangle B. square C. rectangle D. circle
  • 33. DRAFT April 22, 2014 14. What figure is formed if two diagonal lines meet at a sharp angle? A. curved lines B. zigzag lines C. angular lines D. vertical lines 15. What kind of line indicates action and energy? A. straight line B. dotted line C. curved line D. horizontal line 16. What do you call the work of art that appears to be at the back part of a picture and is the farthest object from the viewer? A. foreground B. background C. middle Ground D. center of interest 17. Look at the picture in the box, which object/s is considered as the middle ground? A. B. C. D. 18. What principle of design is shown when we show foreground, middle ground, and background in an artwork? A. emphasis B. balance C. contrast D. variation 19. What famous land formation is found in Bohol region? A. Mount Apo B. Mount Arayat C. Mayon Volcano D. Chocolate Hills        
  • 34. DRAFT April 22, 2014 20. Which picture shows formal balance? A. B. C. D. 21. What are the elements and principles involved in visual texture? A. Texture, lines, colors B. Lines, colors, contrast C. Emphasis, lines, shape D. Colors, shapes, texture 22. It shows the surface of an object by illustrating it in a composition. A. Hand puppet B. Visual Texture C. Pointillism D. Cross Hatch 23. This is a way of applying small strokes or dots of color to a surface. A. Texture B. Contrast C. Pointillism D. Cross Hatch 24. This is defined as a mark or shade with two or more sets of intersecting parallel lines. A. Pointillism B. Texture C. Contrast D. Cross Hatch 25. How can you show appreciation for one’s artwork. A. By giving negative comments. B. By submitting his/her artwork on time. C. By praising the artwork of your classmate/s. D. By helping your classmates finish his/her artwork on time. 26. The elements of art that refers to the contour and profile of an object. A. Form B. Line C. Color D. Value 27. This refers to the amount of light, shade or dark in an object. A. Value B. Form C. Line D. Texture 28. Refers to the quality or kind of light that reflects from the surface of the object. A. Line B. Form C. Color D. Value
  • 35. DRAFT April 22, 2014 29. This is a line that suggests grace, femininity, variation, and movement. A. light B. Heavy C. Straight D. Curve 30. Expresses calmness, quietness and peace or repose A. horizontal B. Broken C. Heavy D. Curve 31. Element of arts showing the physical form of a thing. A. Texture B. Shape C. Harmony D. Color 32. How would you identify textures? A. By seeing and touching B. By clapping the hands C. By walking and running D. By singing 33. This is an element of art that depicts the feelings of the viewer towards certain object/artwork. It also refers to the smoothness or roughness of an object. A. Color B. Shape C. Texture D. Harmony 34. How would you appreciate your artwork? A. Add different colors to your artwork. B. Tell a short story about the artworks of others. C. Show your artwork to your parents and friends. D. Prepare the necessary materials, draw something and paint it. 35. How would you show creativity through drawing? A. By doing other designs B. By creating new designs C. By using borrowed materials D. By finishing your work on time 36. It is the part of a work of art that lies between the foreground and the background. A. Foreground B. Middle Ground C. Background D. Ground 37. It is the part of a work of art that appears to be in the front and nearest to the viewer. A. Foreground B. Middle Ground C. Background D. Ground 38. It is the part of a work of art that appears to be in the back and farthest from the viewer. A. Foreground B. Middle Ground C. Background D. Ground
  • 36. DRAFT April 22, 2014 39. Which of the following pictures shows a modern Filipino house? A. B. C. D. 40. How would you differentiate a traditional Filipino house from a modern house? A. Traditional Filipino houses were made of bamboo, wood, metal and other concrete materials. B. Modern houses are made of bamboo, wood, metal and other concrete materials. C. Traditional houses were made of stones, metal and galvanized iron while houses modern houses are made of bamboo, wood and nipa or anahaw leaves. D. Traditional Filipino houses were made of bamboo, wood and nipa or anahaw leaves while modern houses nowadays mostly are made of stones, metal and galvanized iron.  
  • 37. DRAFT April 22, 2014 Second Quarter : Painting Lesson No. 1 : Harmony in Plants Learning CodeA3PL-IIc : Perceives how harmony is created in an artwork because of complementary colors and shapes LESSON SUMMARY : Art History Art Production Art Criticism Art Appreciation Harmony is an art principle that can be seen in things all around. It is the pleasing selection and arrangement of colors, shapes, and textures. Paint a picture of a plant or tree using color, harmony, shapes, and textures. Looking into the styles of the artists in painting, harmony is attained in different ways by combining the selected colors, shapes, and textures. Appreciate how colors are combined to show harmony in the artwork done by pupils. Elements and Principles of Art : Colors, Shapes, Textures Value Focus : Environmental Awareness Time Allotment : 1 Session (40 minutes) I – Art Activity : Painting II – Objectives: 1. Identify complementary colors in the color wheel. 2. Paint the things that can be seen in a natural environment in the province or region. 3. Tell how painting is made more interesting by combining colors to achieve harmony. II- Materials : pencil, bond paper, brush, newspaper, watercolor, oil pastel, water container, rags Reference : III – Procedure A. Pre Activity Review Ask the pupils to name several complementary colors.
  • 38. DRAFT April 22, 2014 B. Activity Proper 1. Motivation: Go on a nature walk. Let the pupils identify the different complementary colors they see around the school premises. (Discussions and activities can be done outside the classroom.) 2. Presentation and Discussion Harmony is an art principle that is present in things around us. It is seen in the arrangement of colors, shapes, and textures. Harmony in visual design means all parts of the visual image relate to and complement each other. Looking into the styles of the artists in painting, harmony is attained by combining the selected colors, shapes and textures. Some famous Filipino artists are appreciated because of their style in combining colors and in producing harmony in their artwork. Discuss the things seen in the pictures. Ask about the different colors, shapes, and textures seen in the pictures. Let the pupils tell their observations about how complementary colors were put together in the paintings. 2. Art activity: Painting Let the children prepare the materials and remind them to always to be careful in handling their art materials. Refer to BE CREATIVE on LM p._____.     Painting showing complementary colors 
  • 39. DRAFT April 22, 2014 3. Processing/Critiquing of Art Output a. What plant did your paint? b. What colors did you use in your painting? c. Is color harmony present in your artwork? Discuss briefly. C. Post Activity 1. Generalization Ask: How did you show color harmony in your painting/artwork? Harmony in painting is a pleasing visual arrangement of colors. It is created when secondary colors and their opposite colors or complementary colors in the color wheel are used. 2. Application Refer to TAKE THE CHALLENGE, LM p.____ 3. Values Integration Give a situation that shows environmental awareness. IV – Assessment/Evaluation Refer to BE PROUD, LM p.____ V – Assignment/Agreement: Bring to class any kind of fruit.
  • 40. DRAFT April 22, 2014       Second Quarter : Painting Lesson No.2 : Landscape Painting Code A3EL-IIa : Sees that there is harmony in nature as seen in the color of landscapes Lesson Summary: Art History Art Production Art Criticism Art Appreciation The landscape painting shows the visible features of the land, such as mountains and hills. Known Filipino landscape painters are Felix Hidalgo, Fernando Amorsolo, and Jonahmar Salvosa. Paint a landscape at different times of the day (morning, noon, night time) to show harmony in nature. Identify how colors are combined to come up with harmony in the painting. Show appreciation and preservation of nature through painting a landscape. Elements and Principle of Art: Colors, Harmony Value Focus: Environmental Awareness Time Allotment: 1 session (40 minutes) I. Art Activity: Landscape Painting II. Objectives: 1. Identify the visible features of a landscape. 2. Tell how to paint a landscape that shows color harmony. 3. Identify bright and dull colors, light and dark colors. 3. Paint a landscape at different times of the day. 4. Express ideas, feelings, emotions, and imagination through painting a landscape. II. Materials Pictures, pencil, bond paper, crayons, brush, water color
  • 41. DRAFT April 22, 2014       IV. Procedure: A. Pre- Activity : Review: Share to the class your experiences of using colors in your different artworks. B. Activity Proper 1. Motivation Show the sample pictures of the landscape paintings of Felix Hidalgo, Fernando Amorsolo, and Jonahmar Salvosa. Ask: What color combination have you seen in the painting? Which are bright colors? dark colors? light colors? What feelings/ emotions/ mood does the painter express in his painting according to the color combination used? 2. Presentation and Discussion Say: The landscape painting shows the visible features of the land, including the physical elements of landforms such as mountains and hills. Known Filipino landscape painters are Felix Hidalgo, Fernando Amorsolo, and Jonahmar Salvosa. They used different kinds of colors to show emotions or moods in their painting. 3. Art Activity Refer to BE CREATIVE on LM, page __________.      landscape painting Ni  Felix Hidalgo       landscape painting  Ni Fernado Amorsolo     landscape painting  Ni Jonahmar Salvosa 
  • 42. DRAFT April 22, 2014         4. Processing and Critiquing Ask:  Did you enjoy the activity? Why? Why not?  How did you show the time of day in your composition?  What elements of art did you use to show harmony?  What colors did you use in your landscape painting?  What did you feel while doing the landscape painting? D. Post Activity: 1. Generalization Ask: How is harmony in nature depicted in landscape painting? Harmony in nature is depicted through the different combination of colors in the landscape painting. The painter expresses his feelings/ mood or emotions based on the kinds of colors he used in the painting. 2. Values Integration Ask: If you are a painter, how can you help develop environmental awareness? V. Assessment/ Evaluation Rate the outputs of the pupils based on the given rubric below. Criteria Points 3 Very Evident 2 Evident 1 Not Evident 1. Did he/ she use colors to express his / her feelings/ moods or emotions? 2. Is the painting based on the theme? 3. Did he/she express himself/herself freely in making the artworks using different colors according to the time of the day? 4. Did he/she finish the artwork with seriousness?
  • 43. DRAFT April 22, 2014       VI. Assignment/ Agreement Bring pictures of animals found in province or region.
  • 44. DRAFT April 22, 2014 Second Quarter : Painting LESSON 3 : LANDSCAPE PAINTING Code A3PR– IIf : Paints a landscape at a particular time of the day and selects colors that complement each other to create a mood. Lessons Summary: Art History Art Production Art Criticism Art Appreciation Many artists create paintings that show different moods and feelings. Paint a landscape that shows mood and feelings using warm and cool colors. Identify moods and feelings in the paintings. Take pride and inspiration in the beauty of landscapes painted by Filipino artists. Elements & Principle of Art: Colors (warm and cool) Value Focus : Take Pride of one’s work Time Allotment : 1 Session (40 Minutes) I. Art Activity : Landscape Painting Using Warm and Cool Colors II. Objectives 1. Identify warm and cool colors in the artwork that shows the mood and feelings in the artwork. 2. Paint a landscape that creates mood and feelings using warm and cool colors. 3. Take pride and inspiration in the beauty of landscapes painted by Filipino artists. III. Materials and Reference Materials : pencil, watercolor, oslo paper Reference : Art Express, 1998 Harcourt Brace and Company, Daniel V.E. et. Al. IV. Procedure A. Preliminary Activity Review How can you make light colors? How can you make dark colors? What are the neutral colors?
  • 45. DRAFT April 22, 2014 B. Developmental Activity 1. Motivation Have a guessing game on colors. Group the pupils according to their favorite colors. Tell the pupils that each color has meaning and emotions to convey. Ex. red means bravery and courage; green means calmness, etc.. 2. Presentation and Discussion Show a painting of a landscape. Let the pupils identify the colors seen in the painting. Ask the pupils what feeling or emotions each painting wants to convey or tell. Talk about the paintings. Ask the pupils which objects in the paintings communicate warm/cool feelings. Let the pupils give their own thoughts and observations about the feelings suggested by the picture. Refer to THINK ABOUT THIS on LM page____. 3. Art Activity: Landscape Painting Using Warm & Cool Colors Refer to BE CREATIVE on LM page____. Picture of a Landscape  painting with bright  colors by Filipino  artists  Picture of a Landscape  painting with dark  colors by Filipino  artists   
  • 46. DRAFT April 22, 2014 4. Discussion of Artworks Tell the pupils show their finished artworks to their classmates. Let them discuss about their artwork and share their experiences while painting landscapes. C. Post Activity 1. Generalization How can feelings or mood be shown in an artwork or painting? Refer to FRAME YOUR THOUGHTS on LM page____. 2. Value Integration Should you be proud of your artwork and the works of Filipino artists? Why? 3. Application Refer to TAKE THE CHALLENGE on LM page ___. V. Assessment/ Evaluation Assess the pupils’ performance in painting landscape using warm and cool colors. Refer to BE PROUD on LM page ____ VI. Agreement/Assignment List down at least five wild animals in your notebook.
  • 47. DRAFT April 22, 2014 Second Quarter : Painting Lesson No. 4 : Landscape Painting Code A3PR-IIh : Appreciates the Filipino artists painted landscapes in their own particular style and can identify what makes each artist unique in his use of colors to create harmony. Lesson Summary: Art History Art Production Art Criticism Art Appreciation There are Filipino painters like Fernando Amorsolo, Jose Blanco, and others who are famous because of their unique style in painting. Paint a landscape with the use of bright and dark colors. Compare unique styles of Filipino artists in their use of bright and dark colors. Give importance to one’s own landscape painting by recognizing the styles in paintings. Elements/Principle of Art: Colors Value Focus: Appreciate originality of one’s artwork Time Allotment: 1 session (40 minutes) I. Art Activity: Landscape Painting II. Objectives 1. Identify the types of colors used in paintings by some Filipino artists. 2. Create a painting using bright and dark colors. 3. Show appreciation for the contribution of Filipino artists in promoting Filipino culture pointing out to their unique styles in painting. III. Materials watercolor, brush, pencil, oslo paper, old newspapers, apron References: K12 Curriculum, URL, Work text in Music, Arts, and Physical Education (Radiance) by: Imelda V. Codog, et.al p.149-157
  • 48. DRAFT April 22, 2014 IV. Procedure A. Preparatory Activity: Review Ask: Let the pupils look around the room and out the windows to look for things with warm and cool colors. Draw art examples of warm and cool colors. B. Activity Proper 1. Motivation Say: Let’s stand and sing the song “Magtanim ay Di Biro” with actions of planting rice. Show the paintings of Fernando Amorsolo’s “Planting Rice” and Carlos Francisco’s “Bayanihan”. Fernando Amorsolo’s “Planting Rice”
  • 49. DRAFT April 22, 2014 What can you say about Amorsolo’s painting? Francisco’s painting? Ask pupils to say something about the colors used by the artists in their paintings. 1. Presentation and Discussion Say: The “Planting Rice” of Fernando Amorsolo has dark and bright colors while Carlos Francisco’s painting entitled “Bayanihan” uses bright colors. The two artists have different styles in using colors for their paintings. A color becomes darker when it is mixed with black. A color is bright when it is not mixed with another color. 2. Art Activity Refer to BE CREATIVE on LM page __. 3. Processing/Critiquing of Art Outputs Let the pupils exhibit their artworks. Call some pupils to say something about their painting. Carlos Francisco’s ”Bayanihan”
  • 50. DRAFT April 22, 2014 C. Post Activity Generalization Ask: What are the styles of Filipino artists in terms of their choice of colors? There are many Filipino artists in our country. Their paintings became famous because of their unique styles e.g. Fernando Amorsolo uses dark and bright colors while Carlos Francisco uses bright colors in his paintings. V. Assessment/Evaluation Refer to TAKE THE CHALLENGE on Lm page ___. VI. Agreement/Assignment Look for an example of a painting by a Filipino artist. Determine his/her unique style in the use of color. Follow the guide or format below: Title of the painting: ___________________ Name of artist: ____________________ Colors used: ____________________
  • 51. DRAFT April 22, 2014 Second Quarter : Painting Lesson 5 : Still Life Painting of Fruits Lesson Code A3PR-IId : Paints a still life by observing the different shapes, color and texture of fruits, drawing them overlapping, and choosing the right colors for each fruit. Lesson Summary: Art History Art Production Art Criticism Art Appreciation In still life painting, the subjects in painting are assembled and designed in a pleasing art composition. Create a still life painting of fruits with different shapes, colors, and textures. Point out how well the fruits were arranged and put them together for a still life painting. Describe how colors, shapes, and textures were used to make a realistic still life painting. Elements & Principles of Art: Colors , shapes, and texture Value Focus : Creativity Time Allotment : 1 Session (40 minutes) I Art Activity : Still Life Painting of Fruits II Objectives: 1. Describe a still life painting and its use of the art elements and principles. 2. Arrange objects showing overlapping. 3. Paint still life objects. III Materials and References Materials : pencil, bond paper, water color, mixing pan, brush, old newspaper or recycled materials, different kinds of fruits References :
  • 52. DRAFT April 22, 2014 IV Procedure A. Pre Activity Review Are you familiar with fruits and trees that are common in your place or in your region? Describe the colors, shapes, and textures of the fruits. B. Activity Proper 1. Motivation Divide the class into two groups. Show samples of still life paintings. Let each group identify and describe the art elements and principles used in each painting. 2. Presentation and Discussion Say: Still life painting can show us a new way of looking at ordinary objects around us. The objects like fruits, flowers, vases, bottles, and many others are placed or assembled in a pleasing arrangement overlapping each other. Still Life Painting  of  famous Filipino artist  Still Life Painting  of  famous Filipino artist   
  • 53. DRAFT April 22, 2014 3. Art Activity: Still Life Painting of Fruits Refer to BE CREATIVE on LM p. _____ 4. Processing/Critiquing Let the children show their artwork to the class, then ask them about their experiences while doing their artwork. Point out how well the fruits were arranged and put together for a still life painting. C. Post Activity 1. Generalization: What is a still life painting? A still life painting is an arrangement of non-living or everyday objects. These may be natural objects or man-made objects. 2. Value Integration How did you show your creativity in painting a still life?
  • 54. DRAFT April 22, 2014 3. Application Refer to TAKE THE CHALLENGE on LM page ____. IV Evaluation: Refer to BE PROUD on LM page _____. V. Assignment/Agreement
  • 55. DRAFT April 22, 2014 Second Quarter : Painting Lesson No. 6 : Tints and Shades of Colors Code A3PR-IIe : Creates new tints and shades of colors by mixing two or more colors. Art History Art Production Art Criticism Art Appreciation The artistic ability of a painter involves his choice of colors and use of neutral colors to show tints and shades in his artworks. Create a finger painting showing tints and shades of colors. Evaluate one’s ability in developing skills of producing tints and shades. Show confidence in making finger painting through the use of tints and shades of colors. Elements and Principles of Art : Color, Balance, Contrast Value Focus : Creativity, Confidence Time Allotment: 1 session (40 minutes) I. Art Activity : Finger Painting II. Objectives : 1. Explain the process of producing tints and shades. 2. Create a finger painting showing the lightness and darkness of colors. 3. Develop self-confidence in painting with tints and shades through experimentation. III. Materials and References Materials: oslo paper, water color, brush, cornstarch, container, rags, old newspapers, recycled plastic spoons, red and blue colored dye Reference : Active MAPE 3 pages 100-101
  • 56. DRAFT April 22, 2014 IV. Procedure: A. Pre-Activity: Review: Ask: What color will be produced if you mixed the following: a. yellow and red b. blue and red c. yellow and blue You learned before that you could show tints or shades or light and dark of these colors by adding white or black.   B. Activity Proper: 1. Motivation Ask: When are the times that you are happy? When are the times that you are sad? Let the pupils share their happy and unforgettable experiences with their friends on several occasions. Allow them also to tell about some sad moments they had experienced in the past. 2. Presentation and Discussion: Tell the pupils that happy or sad feelings can also be felt on paintings. Show to pupils some pictures with colors that suggest happiness or sadness. (Dull and dark colors on paintings suggest sadness while bright and light colors suggests happiness. Show them also some samples of finger paintings then ask. Have you done finger painting before? Today, you will paint using your fingers.
  • 57. DRAFT April 22, 2014 Explain that finger paint is made of paste and dye. 3. Art Activity: Let the pupils do BE CREATIVE on LM page _______ Activity I: Producing Tints and Shades Activity 2: Finger Printing C. Processing/Critiquing of Art Works: Let the pupils display their artworks on the board. Ask: Why is it important to show value of colors used in artworks? D. Post – Activity : 1. Generalization: How are tints and shades produced? A tint is the mixture of a color with white and a shade is the mixture of a color with black. Black and white are neutral colors. 2. Values Integration: Ask: Are you willing to share and display your artwork or painting? Why? Were you able to show confidence when painting with your fingers to show happy and sad feelings? Explain briefly.
  • 58. DRAFT April 22, 2014 V. Assessment/Evaluation : Refer to BE PROUD on LM page ______. VI. Agreement/Assignment: Display your finger painting at home.
  • 59. DRAFT April 22, 2014 Second Quarter : Painting Lesson No.7 : Painting of Animals Code A3EL-IIb : Appreciates that nature is so rich for no two animals have the same shape, skin covering, and color Lesson Summary: Art History Art Production Art Criticism Art Appreciation Some regions in our country are rich with animals that are unique in color and skin covering, just like the Tamaraw in Mindoro, Pilandok in Palawan, and Philippine Eagle in Davao and many more. Painting of animals known in the province or region with unique colors & skin covering. Notice that animals in different regions have uniqueness and beauty of their own. Appreciate the unique shape and color of the skin covering of animals through exhibits of paintings of animals found in the province or region. Elements and Principle of Art : Colors, Shapes, and Texture Value Focus : Kindness to Animals Time Allotment : 1 session (40 minutes) I. Art Activity : Painting of Animals II. Objective 1. Describe the uniqueness of animals in terms of shape, skin covering, and color. 2. Paint the picture of animals through crayon-resist painting technique. 3. Show kindness to animals through sharing of experiences in a group discussion. III. Materials bond paper or oslo paper, watercolor, brush, crayon, pencil, color wheel References : Sing and Sketch 5 pp.111 http:/www.hbschool.com
  • 60. DRAFT April 22, 2014 IV. Procedure A. Pre Activity Review Say: In an artwork, what colors are used that are opposites in the color wheel? Use the color wheel to identify complementary colors. B. Activity Proper 1. Motivation Ask: What animals do you know in your locality, province, or region? Tell us about your observations of their habits, colors, textures, or skin covering. 2. Presentation Show pictures of different animals that can be seen in the different regions in our country like the following: Pilandok in Palawan, Tamaraw in Mindoro, and Philippine Eagle in Davao. Let the pupils identify the animals shown in the picture. Let them notice the elements of art like lines, shapes, and texture in their skin coverings. Discuss their answers with the class.
  • 61. DRAFT April 22, 2014 3. Art Activity: Refer to LM page____________. Activity 1: Painting Using Crayon Resist 4. Processing / Critiquing of Output What animal did you draw? Is it known in the province or region? What makes it unique than other animals? What shapes did you use in your artwork? Describe its skin color and texture. How did you show harmony in colors? Why is crayon resist painting using complementary colors Interesting? C. Post Activity 1. Generalization: How can skin coverings and colors of animals enrich or contribute to the beauty of nature? The physical characteristics of animals such as their size, color texture, and body coverings add to the beauty of nature.    
  • 62. DRAFT April 22, 2014 2. Value Integration How can you show kindness to animals? IV. Assessment/ Evaluation Refer to BE PROUD on LM page _____. V. Assignment/ Agreement Bring pictures of trees or plants found in your place/ province, or region.
  • 63. DRAFT April 22, 2014 Second Quarter : Painting Lesson No. 8 : Painting Wild Animals Code A3PR-IIg : Observes the characteristics of wild animals by making several pencil sketches, and painting it later, adding the texture of its skin covering. Lesson Summary: Art History Art Production Art Criticism Art Appreciation Filipinos have always been artistic. Many Filipino painters are known not only in the country but also in other countries like Dr. Jose Rizal, Juan Luna, Fernando Amorsolo and many others. Paint wild animals showing contrast of colors. Evaluate own painting in terms of use of the elements and principles. Show appreciation of wild animals through painting. Elements and Principles of Art: Texture, Color, Lines Value Focus: Appreciation and care for animals Time Allotment: 1 session (40 minutes) I. Art Activity: Pencil Sketching and Painting Wild Animals II. Objectives: 1. Observe the colors and textures of wild animals. 2. Create a painting using warm and cool colors. 3. Make painting realistic by using lines to show texture. 4. Show appreciation of wild animals through painting emphasizing texture. III. Materials: pencil , oslo paper, water color, and brush References:
  • 64. DRAFT April 22, 2014 IV. Procedure: A. Pre Activity: Review Distribute paper strips to the pupils. Let them write in the strips examples of objects with warm and cool colors. Ask them to paste the paper strips on the charts. Example of the charts: Check the responses of the pupils. B. Activity Proper: 1. Motivation Show pupils pictures of animals, then play a game. Let the pupils identify wild animals and tamed or domesticated animals. If the picture is an example of a wild animal, pupils will give the sound of a tiger. If the picture is an example of a tamed animal, pupils will give the sound of a bird. 2. Presentation and Discussion Ask: What animals were shown in the pictures? What kind of animals are they? Things with warm colors.            Things with cool colors .           
  • 65. DRAFT April 22, 2014 What do you observe about the skin of a crocodile? How about the wild pig, the snake, the deer, or the shark? 3. Art Activity (Please refer to BE CREATIVE on LM page ___.) 4. Processing/Critiquing Tell the pupils to look at their painting. Ask: How did you show the skin texture of the animal you chose to paint? Let the pupils share their experiences when making their art activity. C. Post Activity: 1. Generalization How would you enhance your painting? To enhance a painting, add more lines, colors and textures. 2. Values Integration Should wild animals be protected by people? Why? 3. Application Refer to TAKE THE CHALLENGE on LM page ___. V. Assessment/Evaluation: Refer to BE PROUD on LM page ___.            VI. Assignment/Agreement:  Make a compilation of pictures of wild animals.
  • 66. DRAFT April 22, 2014         Third Quarter : Printmaking Lesson I : Nature Prints Code A3EL-IIIa : Tells that a print can be made from objects in nature Lesson Summary: Art History Art Production Art Criticism Art Appreciation Objects found in nature can be used to make prints. Prints can be realistic or abstract. Make an abstract print using materials found in nature.     Identify shapes, colors, and emphasis in the printed design. Give importance to the designs made using found objects in nature through print making. Elements and Principles of Art: Shapes, color, and emphasis Value Focus : Appreciation of each other’s work Time Allotment: 1 session (40 minutes) I. Art Activity: Printing Using Found Objects II. Objectives: A. Differentiate abstract prints from realistic prints. B. Use natural materials to produce abstract prints. C. Give importance to the designs made using found objects through printmaking. III. Materials and References Found objects, water color or acrylic water-based paint, brush, ink pad, or sponge
  • 67. DRAFT April 22, 2014       IV. Procedure: A. Pre- Activity Review Have you done printing using natural objects? What are these nature objects from nature that can be used in printing? B. Activity Proper: 1. Motivation Present to pupils examples of natural materials that can be used to produce a design (e.g. stalks, leaves, twigs, etc.). 2. Presentation/Discussion Items found in nature like twigs, leaves, plants, rocks, and other natural objects were used in the printing process to produce an image. 3. Art Activity: Bring the pupils outside the classroom and guide them to collect objects that can be used for printmaking. Refer to BE CREATIVE, LM, p._____. 4. Processing/Critiquing Let the children show their artwork to the class, then ask them to talk about their feelings and experiences while doing their artwork. Motivate them to give their observations about the elements and principles of art used in the artwork.
  • 68. DRAFT April 22, 2014       II. Post Activity 1. Generalization : What is printmaking? Printmaking is a process of transferring or reproducing text and images typically with ink on paper or in other materials. 2. Value Integration : How do we show appreciation the works of others? V. Evaluation/ Assessment Check or rate the output of the pupils based on the rubric below. Criteria 3 Very Evident 2 Evident 1 Not Evident 1. Found objects were used to make a design. 2. The print shows realistic or abstract design with emphasis on colors. 3. The artwork is unique and colorful. 4. Shows appreciation for the works of others. VI. Agreement: Look for other found objects and discover their unique print design. Make a creative artwork using the design.
  • 69. DRAFT April 22, 2014 Third Quarter : Printmaking Lesson No. 2 : Marbling Code A3PL-IIIb : Appreciates variety of materials used for printing and its importance. Lesson Summary: Art History Art Production Art Criticism Art Appreciation Romblon is well- known for marble making. Marble can be a good material for teaching an art process like printmaking. Create prints of varied textural effects, lines, and shapes using paint. Describe varied textural effects, lines, and shapes in an artwork. Appreciate the creative outputs in doing marbling. Elements and Principles of Art: Shapes, colors, lines, and texture Value Focus : Appreciating one’s work and others Time Allotment : 1 session (40 minutes) I. Art Activity: Marbling II. Objectives: 1. Identify the steps in marbling. 2. Create textural effects, lines, and shapes using paint. 3. Appreciate the creative outputs in doing marbling. III. Materials: Activity 1: enamel paint (different primary colors, black and white), oslo paper, basin of water, sticks, old newspaper, rags, scissors, recycled plastic spoon Activity 2: Scissors, paste, empty cans
  • 70. DRAFT April 22, 2014 IV. Procedure A. Pre Activity Review What found objects did you use in your printmaking? B. Activity Proper 1. Motivation The teacher will show pictures of different marbling. Let the pupils observe the pictures then ask questions about them. What are the pictures all about? Describe each picture. Observe the shapes. Were the designs formed by swirling of lines? and shapes? 2. Presentation and Discussion : Say: Romblon is known for marble works. Marble is commonly used for sculpture and as a building material. It has varied and colorful patterns that make it a favorite decorative material. Marble can be a good material in teaching the art process like printmaking. Today, you will do paper marbling. It is a method of making a design in the paper or fabric with swirling pattern or combed patterns similar to stone. Pictures of marble prints  Pictures of marble prints 
  • 71. DRAFT April 22, 2014 Show picture of marble design. 3. Art Activity: Let the children prepare the materials and remind them to always be careful in handling their art materials especially the enamel paint since it is not water-based. Refer to BE CREATIVE, LM, p._____. Activity 1 : “Marbling” Note : The children can try using several colors, aside from the primary colors in producing varied textural effects and movements. They can do it by stirring the paint on the water. Activity 2 : “Making of a Pencil Holder Cover”                                                                                                          Picture of Marble design 
  • 72. DRAFT April 22, 2014 4. Processing/Critiquing : Let the children show their artwork to the class, then ask them to talk about their feelings and experiences while doing their artwork. Motivate them to give their observations about the elements and principles of art used in the activity. C. Post Activity 1. Generalization (Refer to FRAME YOUR THOUGHTS, LM p. ___) What is Paper Marbling? (Paper Marbling is a method of making a design in which paper or fabric is decorated with swirling patterns similar to stone.) 2. Value Integration: How do we show appreciation for the works of others? 3. Application: Refer to TAKE THE CHALLENGE, LM p. ___ V. Assessment/Evaluation: Use Rubrics in assessing pupil’s performance in their artwork. Refer to BE PROUD, LM p. ____ VI. Assignment: Try marbling at home and create several designs.
  • 73. DRAFT April 22, 2014 Third Quarter : Printmaking Lesson 3    :  Finger Printing  Code A3PL-IIIc : Observes that a print design may use repetition of shapes or lines and emphasis on contrast of shapes and lines Lesson Summary : Art History Art Production Art Criticism Art Appreciation Finger printing is a simple artwork with the use of fingers to paint. It is appreciated by many people because of the simplicity of its process and designs are formed. (Faulty parallelism) Make different designs through finger printing. Notice how repetition of shapes or lines and emphasis on contrast is used in printmaking. Appreciates artworks done by pupils in the class and those that are seen in other places through exhibits. Elements and Principles of Arts : Shapes, Color , Repetition, Contrast Value Focus : Perseverance Time Allotment : 1 session (40 minutes) I. Art Activity : Finger Painting II. Objectives: 1. Identify the designs in finger printing. 2. Create good print designs using repetition of lines and shapes with emphasis on their contrast. 3. Appreciate art works through different experiences of making art. III. Materials : pencil, bond paper, brush, acrylic paint, water container, rags, sponge, recycled flat Styrofoam.
  • 74. DRAFT April 22, 2014 IV. Procedure A. Pre-Activity: 1. Review What materials were used in marbling? What are the steps in marbling? What designs were formed? B. Activity Proper: 1. Motivation Say: Today you will explore another way of making print designs. Let the children sing and do the action of the children’s song entitled, “I Have Two Hands” Emphasize that aside from using the fingers to do an action song, our fingers can also be used to make artworks. 2. Presentation and Discussion: Say: Finger printing is an act of making designs with the use of fingerprints. This artwork is simpler than other art processes because artists can make different designs with their fingers. Show the different samples of Finger Printing outputs and discuss the design, colors and the process of finger printing. 3. Art Activity: “Finger Printing” Let the children help the teacher prepare the materials and remind them to always to be careful in handling their art materials. Refer to BE CREATIVE, LM, p._____.
  • 75. DRAFT April 22, 2014 4. Processing/ Critiquing of Arts Outputs Ask the pupils to show to the class their finger printings. Motivate them to share their experiences in making print designs through finger printing. Talk about their works to express appreciation of their own works and the works of others. C. Post Activity 1. Generalization Ask: What is finger painting? How will you create a good print design? Finger printing is a simpler artwork process. It is a technique of making designs through printing with the use of fingers. Good print designs are created by using repeated shapes or lines and giving emphasis on contrast of colors, shapes, and lines. 2. Integration of Value How would you show perseverance in making an artistic design? V. Evaluation Use rubric in the LM to measure self creativity in finger printing. Refer to BE PROUD, LM p.____ VI. Assignment/Agreement:
  • 76. DRAFT April 22, 2014 Third Quarter : Printmaking Lesson No. 4 : Stencil Making Code A3PR-IIId&e : Realizes that a print design can be duplicated many times by hand or by machine and can be shared with others. : Explain the meaning of the design created Lesson Summary: Art History Art Production Art Criticism Art Appreciation Ethnic groups or tribes in our country have their own art designs that identify their culture. Make a stencil showing ethnic designs. Compare own print designs with designs made by other groups. Appreciate the ethnic designs of the different cultural groups in the country by making it as an inspiration in creating one’s print designs. Elements and Principles of Art: Repetition of shapes and colors Value Focus: Sharing things with others Time Allotment: 1 session (40 minutes) I. Art Activity: Print Making II. Objectives: 1. Realize that a print design can be duplicated many times by hand or machine and can be shared with others. 2. Make a stencil design for multiple printing. 3. Explain the meaning of the design created. 4. Share the produced design to others to show appreciation of ethnic designs. III. Materials: colored papers or used folder, newspaper, water color/acrylic paint, water, small soft brush or Chinese brush, scissors References:
  • 77. DRAFT April 22, 2014 IV. Procedure: A. Pre Activity: Review How did you create a repeated design in finger printing? Are you familiar with ethnic designs? Describe the ethnic design you know. B. Activity Proper: 1. Motivation Look around you. Can you see objects or things with printed designs? Tell something about it. 2. Presentation and Discussion Every ethnic group in the country is rich in artistry and creative design that differentiates their ethnic group or tribe from others. Ethnic designs are designs made by indigenous people or ethnic tribes such as Maranao, Ifugao, Bagobo, and others. These kinds of designs can be used for printing shirts, covers, cloths, garments, and many others. There are many designs that can be used for printing such as flowers, trees, animals, sceneries, and objects. Look at the pictures on LM page________________.
  • 78. DRAFT April 22, 2014 3. Art Activities Let the children do the Activity in the LM page ___. 4. Processing/Critiquing Ask: Did you share your design with other groups? What can you say about your group works and of others? How does it feel sharing your design to others? C. Post Activity 1. Generalization What is your realization after doing the activity? Stencils or print designs can be multiplied many times by hand or machine and can be shared with others. 2. Values Integration How would you show generosity to others? Give situations on how you can share things with others. How do you show appreciation for ethnic designs of different cultural groups? V. Assessment/Evaluation: (Please refer to LM page ____.) VI. Assignment/Agreement: Look for other examples of ethnic designs. Make a scrapbook of ethnic designs.  
  • 79. DRAFT April 22, 2014 Third Quarter : Print Making Lesson No.5 : Logo Printing Using Discarded Materials Code A3PR-IIIf : Designs an attractive logo with slogan about the environment to be used for printing Lesson Summary: Art History Art Production Art Criticism Art Appreciation There are several causes of pollution. They can be natural cause or man-made. If help clean our areas then our country would be a better and a cleaner place to live in. Design an attractive logo that conveys a message about the environment to be used for stamp printing. Express creativity in making art designs using discarded materials. Demonstrate appreciation for print making by inspiring others to create logo designs promoting environmental awareness. Elements and Principles of Art : Shapes, Rhythm, Contrast, Form Value Focus : Environmental Awareness, Creativity Time Allotment: 1 session (40 minutes) I - Art Activity: Logo with Slogan for Environmental Awareness II-Objectives: 1. Promote environmental awareness through logo printing. 2. Realize that discarded materials can be made useful. 3. Create an attractive logo with a slogan about the environment with the use of discarded materials. 4. Inspire others to create a print design from discarded materials. III- Materials: long bond paper, pictures of logo design, old plastic spoon, brush, sponges (1 per group), discarded flat plastic or styro plates, acrylic paints (red and black) References: IV- Procedure: A. Pre-Activity : 1. Review: Recall the lesson on marbling. Have a class discussion of their new learning using the technique. Prepare them for the new activity. Encourage them to share their observations of the new technique.
  • 80. DRAFT April 22, 2014 B. Activity Proper: 1. Motivation: Show actual or different pictures of discarded and recyclable materials. Ask: What do you think are these materials? Draw out the meaning of recyclable and discarded materials. Can you group these materials into recyclable and non-recyclable materials ? How can we make these materials useful in making art works? Connect their answers to the lesson for the day. 2. Presentation and Discussion: We see trash everywhere since people produce a lot of trash every day. This becomes the number one concern of our government for it creates the big problem on global warming. So, how to solve this problem is everyone’s concern. Let’s recycle materials that can still be used. Present the activity of the day which is logo making to promote environmental awareness. Have an illustration on how to make a logo out of recycled materials. Ask: What are the recycled materials that can be used to make art? 3. Art Activity : Let the pupils do BE CREATIVE on LM page _______. (Have a short demonstration on how to prepare colored paste). Motivate the children to show their cooperation and creativity in this activity. 4. Processing/Critiquing of Art Works: Encourage the pupils to post their stamp prints on the wall for arts. Call at least three pupils to tell something about their artwork. Ask: Can you share what inspired you to have such a good creative artwork? What have you learned from the art activity? Do you agree that discarded materials can
  • 81. DRAFT April 22, 2014 be used in making artworks? C. Post- Activity: 1. Generalization: What realization can be drawn from the activity? Discarded materials can be made useful in any art activity. An attractive design can be created by using repeated patterns thru stamp printing.   2. Values Integration: How can we help our environment? How will you show creativity in doing an artwork? V- Assessment: Refer to TAKE THE CHALLENGE on LM page ______. VI-Agreement (optional) Bring the materials for activity no. ____ on page ____ for our next activity.          
  • 82. DRAFT April 22, 2014 Third Quarter : Printmaking LESSON 6 : STENCILING A NAME Code A3PR – lIIg : Create and cut a stencil from paper or plastic sheets to be used for multiple prints on color or hard paper. Lesson Summary: Art History Art Production Art Criticism Art Appreciation Stenciling is a printmaking method used to produce multiple images/designs in t-shirts, bags, handkerchiefs and other things. Create a stencil from a cardboard to be used for multiple prints. Give emphasis on printed designs by using different colors in multiple prints. Awareness on common culture, heritage or famous places, icons, animals in one’s place. Elements & Principle of Art: Colors Value Focus: Awareness on culture and heritage of one’s province or region. Time Allotment: 1 session (40 minutes) I. Art Activity : MAKING A STENCIL ART II. Objectives A. Use different colors in multiple print designs or stencil art. B. Create a stencil from a cardboard and use it for multiple paper prints. C. Show appreciation for places, icons, animals, etc. in own province/region through stencil art. III. Materials and Reference Materials: crayon, pair of scissors, cardboard, paper References: Art Express, 1998 Harcourt Brace and Company, Daniel V.E. et. Al. Fragment
  • 83. DRAFT April 22, 2014 IV. Procedure A. Preliminary Activities 1. Review Ask the pupils to share their experiences about their previous activity on printing using discarded things. Let the pupils identify discarded things that can be used for printing. B. Developmental Activities 1. Motivation Conduct a Photo quiz. Present pictures of places, products, icons, animals, and others found in your province or region. Let the pupils write the name of the picture in the boxes provided. Example: http://www.traveltourbohol.com/wp‐content/gallery/chocolate‐hills/chocolate‐hills‐3.jpg Answer: BOHOL
  • 84. DRAFT April 22, 2014 2. Presentation and Discussion Tell the pupils that they will print names of famous places, products, icons, animals, or others which are common in their places/province/region through stencil art. Examples: BOHOL TARSIER MANILA MAYON Stencil art or stenciling is printing of repeated designs by making ink, paint or wax pass through holes or cuts in a piece of cardboard or metal. Refer to THINK ABOUT THIS, LM p. ___ 3. Art Activity Art Activity: Making a Stencil Art Refer to BE CREATIVE on LM p. ___ 4. Processing/Critiquing Say: Discuss your artwork with your classmates and give emphasis on the letters and colors you used on the stencil. Compare stenciling using crayons and stenciling using paints. C. Post Activity 1. Generalization Refer to FRAME YOUR THOUGHTS, LM p. ___
  • 85. DRAFT April 22, 2014 2. Value Integration What word did you use in your stencil? Is the word related to something or a place which is familiar to you? Tell something about it. V. Assessment/ Evaluation Use the rubrics in assessing the pupil’s artwork. Refer to BE PROUD, LM p. ____ VI. Assignment/Agreement Cut pictures of ethic designs and paste them in your notebook.
  • 86. DRAFT April 22, 2014 Third Quarter : Printmaking Lesson 7 : Printing Using Found Objects Code A3PR-IIIh : Creates a print for a shirt, bag or a poster using letter stencils or abstract designs that conveys a message and can be replicated. Lesson Summary: Art History Art Production Art Criticism Art Appreciation Filipinos are naturally creative and artistic. In fact, there are many print makers in the country who create original designs. Create prints with designs using different found objects for a shirt, bag, or a poster. Use of recycled materials in an interesting way. Give importance to the intricate designs of found objects or recyclable materials through printing. Elements and Principle of Art: Shapes, colors Value Focus: Care for the Environment Time Allotment: 1 session (40 minutes) I. Art Activity: Making Prints Using Found Objects II. Objectives 1. Define abstract designs. 2. Create an abstract design for a shirt, bag, or a poster using found objects. 3. Inspire others to use found objects to create attractive prints. III. Materials/Reference Materials: paint or watercolor, pencil, drafting paper or bond paper, found objects like bottle caps, paper clips, nails, nut shells, etc. Reference: III. Procedure A. Preparatory Activity: 1. Review Ask:
  • 87. DRAFT April 22, 2014 Define stencil making or stenciling. Can you recall the steps in stencil making? Let pupils enumerate/discuss the steps or processes in stencil making. What did you learn from the process of stencil making? B. Activity Proper 1. Motivation Present a word puzzle. Let them form a word out of the scrambled letters and meanings. Means: - it does not look like a particular object; - not real Answer: (ABSTRACT) Means: - A plan or drawing produced to show the look and function of an object or idea. Answer: (DESIGN) 2. Presentation and Discussion Say: We can see different print designs on shirts, bags, posters, tarpaulins, streamers, etc. The designs can be realistic or abstract pictures, There are several objects or materials which have the same designs. This is because of using stencils of the same design. Discuss THINK ABOUT THIS on LM page ____ 3. Art Activity Activity: “Making Prints Using Found Objects” Refer to BE CREATIVE on LM page ____. R A B T S C S A N G I S E D  
  • 88. DRAFT April 22, 2014 4. Processing/Critiquing of Art outputs Let pupils show their artwork to the class and let them say something about it. Allow their classmates to give their own assessment. C. Post Activity 1. Generalization Ask: What is an abstract design? How will you create prints for your shirts, bags, etc.? Found objects such as bottle caps, nut shells, paper clips, and others can be used in creating print designs for shirts, bags, posters, etc. Designs can be letters or abstract. Abstract design is not realistic in terms of forms, shapes, and colors. 2. Values Integration Ask: How can you be friendly to your environment? Cite some situations. IV. Assessment/Evaluation: Refer to BE PROUD on LM page ____. V. Agreement/Assignment Make a slogan for an environment friendly campaign.
  • 89. DRAFT April 22, 2014 Third Quarter : Printmaking Lesson 8 : Slogan or Logo Making Code A3PR IIIi : Writes a slogan about the environment that correlates messages to be printed on t-shirts, posters, banners, or bags. Lesson Summary: Art History Art Production Art Criticism Art Appreciation Most of the designs on slogans and logos printed on T-shirts, posters, banners and bags nowadays pertain to environmental awareness. Make a slogan or logo on environmental awareness. Relate messages about environmental awareness to the society through slogans and logos printed on T- shirts, posters, and banners. Show appreciation on the importance of slogan or logo on T-shirts, posters, and banners to advocate love and care for the environment.   Elements & Principles of Art: Shapes and Colors  Value Focus: Environmental Awareness Time Allotment: 1 session (40 minutes)   I. Art Activity: Slogan or Logo Making II. Objective: 1. Tell the importance of caring for the environment. 2. Write a slogan or create a logo related to environmental awareness. 3. Appreciate the importance of slogan and logo to advocate care of the environment . III. Materials and Reference  Materials: bond paper, crayons or pastels, water Reference: Art in the Elementary School, PJV, Phil. Normal College Manila September, 1959.pp.80, 163,
  • 90. DRAFT April 22, 2014 IV. Procedure: A. Pre- Activity 1. Review Recall the past lesson about print making. Let the pupils explain briefly how found objects created beautiful prints and artworks. B. Activity Proper 1. Motivation Present to the class a sample of a slogan and a logo related to environmental awareness and let them say something about it. 2. Presentation Present the theme “Save Mother Earth” for slogan or logo making. Ask: What particular word, icon, or symbol comes into your mind which is related to the word environment? Discuss and explain how to write a slogan or create a logo. Refer to THINK ABOUT THIS on LM page ___. 3. Art Activity Let the pupils make a slogan or logo. Refer to BE CREATIVE on LM page ___. 4. Processing/ Critiquing of Output What particular symbol or words did you use in your slogan or logo for t-shirts, bags and/or posters? What shapes and colors did you use in your slogan or logo?
  • 91. DRAFT April 22, 2014 What message/s would you like to convey in your slogan or logo? C. Post Activity 1. Generalization How will you make a slogan or logo attractive? In making a slogan or logo, you should consider the symbols or icons appropriate to the message you want to tell or relay. Colors are also important to make your slogan or logo attractive. . 2. Value Integration: Ask pupils to enumerate situation showing how to care for the environment. Ask: Why should we care for our environment? V. Assessment/Evaluation: Evaluate the pupils artwork based on the rubric found in the LM. Refer to BE PROUD on LM page ____. VI. Assignment/Agreement Cut out a logo from a magazine or newspaper and paste it in your notebook. Write a sentence about it.
  • 92. DRAFT April 22, 2014 Lesson Summary: Art History Art Production Art Criticism Art Appreciation Puppetry is a form of theatre or performance that involves the manipulation of puppets. It is used in entertainment and in performance. Create a finger puppet that can be used in a puppet show. Notice the design of varied shapes and colors on puppets that suggest the unique character of the puppet. Show appreciation of the craft through puppet shows and exhibits.   Elements and Principles of Art: line, shape, color Value Focus: creativity, cooperation Time Allotment: 1 session (40 minutes)   I. Art Activity: Finger Puppet Making II. Objectives: 1. Identify the different styles of puppets made in the Philippines. 2. Create a finger puppet for a puppet show. 3. Show appreciation of the artwork through puppet shows or exhibits. III. Materials and Reference Materials: glue, marker, crayons, paper, cardboard, scissors, color pencils Reference: Fourth Quarter  Sculpture/ 3D Works Lesson No. I Finger Puppet Code A3EL-IVa  Identifies different styles of puppets made in the Philippines
  • 93. DRAFT April 22, 2014 IV. Procedure: A. Pre- Activity 1.Review- Ask pupils what they have learned in the past lesson and what skills have they developed in that activity. B. Activity Proper: 1. Motivation Ask: Have you seen a puppet show? Did you enjoy the show? Share your experiences with the class. Look at the illustrations of puppets. Do you know the different kinds of puppets? 2. Presentation/ Discussion Say: Puppets are effective means of educational entertainment like the hand puppets, rod puppetry, stick puppetry shadow puppetry, black theatre and string puppets. Discuss with the pupils the kinds of puppets: a. Hand Puppets These puppets are made of foam and cloth. The puppeteer’s hand is inserted in the neck and holds the flap to open the puppets mouth. Manipulations are limited to the mouth, neck, arms, and hands. Puppeteers perform by positioning themselves below the improvised stage. And the common position of a puppeteer is kneeling down or standing up. b. Rod Puppets These Puppets are manipulated through a rod, which controls movements in the head, arms, and feet.
  • 94. DRAFT April 22, 2014 c. Giant Puppets These are life size puppets made of foam. Sometimes the head is made of fiber glass. The puppeteer is inside the puppet. Giant puppets can walk, dance, and jump. d. Stick Puppets Stick puppets made of cardboard and sticks. Manipulation is through the movement of sticks. e. Shadow Puppets Shadow puppets are made of cardboard and sticks. Puppeteer performs from the back of a white cloth with light at the back of the puppets. f. Black Theater Puppets These puppets are made of foam, rope, cloth, and stuffing. The whole body can be manipulated. Puppeteers perform from behind, using black light to illuminate the design and color of puppets. g. String Puppets String puppets are made of wood or rubber, cloth, string, small wires. The strings attached to the puppets allow the puppeteer move the head, arms, hand, and feet of the puppet. The reason why they are called string puppets. Puppeteers perform from above the improvised stage. 3. Art Activity: Let the pupils do the activity. Activity 1 : Finger Puppet (Refer to BE CREATIVE, LM page. _____) 4. Processing/Critiquing Let the pupils show their puppets to the class. Ask them about their experiences in doing the activity and in the presentation. Have a sharing time.
  • 95. DRAFT April 22, 2014 C. Post Activity 1. Generalization What is a Finger Puppet? It is a miniature puppet manipulated by one finger or all fingers. 2. Values Integration 1. Were you able to show your creativity in making your puppet? 2. Were you able to work well with your groupmates? 3. Were you resourceful in using recyclable materials? Explain your answer. V. Agreement/ Assessment Evaluate the work of the pupils. Give corresponding points on each output. Questions 3 2 1 Does your output show creativity? Were materials used properly? Is the finger puppet made of different recycled materials? Did you participate willingly in the presentation? Legend: 3 Very Evident, 2 Evident, 1 Not Evident VI. Assignment: Bring paper bag, recycled materials, 2 pcs. of black buttons, water color, and paste or glue.
  • 96. DRAFT April 22, 2014 Fourth Quarter  Sculpture/ 3D Works  Lesson No. 2 Hand Puppet Code A3PL-IVc  Appreciates variations of puppets in terms of material, structure, shapes, colors, and intricacy of textural details Lesson Summary: Art History Art Production Art Criticism Art Appreciation Puppets are made out of different materials. Discarded and recyclable materials are still useful in making puppets. Make a puppet out of a paper bag. Know how variation of materials used affects the quality of the puppets. Show appreciation for the different puppets made out of recyclable materials through puppet shows or exhibits. Elements and Principles of Art: lines, shapes and texture Value Focus: environmental awareness, creativity, resourcefulness Time Allotment: 1 session (40 minutes) I. Art Activity: Hand Puppet (Paper Bag) II. Objectives 1. Compare different puppets in the use of different materials, structure, and shapes used. 2. Make a puppet using a paper bag and other recyclable materials. 3. Show appreciation of the importance of use of recyclable materials to promote environmental awareness.
  • 97. DRAFT April 22, 2014 III. Materials and References Materials: Used paper bag, other recyclable materials: e.g. used colored paper, old magazines, paper, plastic cups , paste or glue, pencil and marking pen. Reference: K to12 Curriculum Guide Arts Grade 3 pp.13 Art in the Elementary School, PJV, Phil. Normal College Manila September, 1959.pp.80-163,  IV. Procedure A. Pre- Activity 1. Review Ask the pupils about what they learned about finger puppets. What skills were developed in the activity? B. Activity Proper 1. Motivation Prepare the pupils for another fun activity by making another kind of puppet. Recall materials they used for their finger puppet. Draw out from the pupils possible materials they can use if they are to make hand puppets. 2. Presentation Discarded and recyclable materials are found anywhere. These materials are potential materials in puppet making. Different colors, shapes, and textures of the recyclable and discarded materials can create variation and can affect the quality of the puppet. Present real puppets or pictures of puppets to evoke the interest and imagination of the pupils. Say: Today we will make another puppet made of a paper bag and other recyclable materials. (Show undecorated paper bag.)
  • 98. DRAFT April 22, 2014 3. Art Activity Let the pupils do the Activity 1 BE CREATIVE (see LM p.___) 4. Processing/Critiquing of Art Works: Guide the pupils in this activity. Tell them to share their experiences in making a paper bag puppet. Encourage them to discuss with their classmates the materials, structure, shapes, colors, and texture they used in their puppet. C. Post Activity 1. Generalization Why is using recyclable materials important in relation to our environment? (By reusing materials that can be recycled we help protect our environment.) How can variations of materials, colors , structure, texture, and shapes affect the quality of your puppet? (Variations of materials, colors, shapes, structure, texture, and shape of the puppets makes the puppet attractive and interesting.) 2. Value Integration Ask: How did you show creativity and resourcefulness in using recyclable materials in making your puppet? V. Assessment/ Evaluation Check or rate the output of the pupil based on the given rubric. Refer to BE PROUD on LM page ___________.
  • 99. DRAFT April 22, 2014 VI. Assignment / Agreement List down recyclables materials found at home that can still be used in making art projects.
  • 100. DRAFT April 22, 2014 Fourth Quarter  3D and Sculpture Lesson No. 3 Sock Puppet Code A3PR-IVc & d  Creates a puppet design that would give a specific and unique character Applies designs of varied shapes and colors on puppets to show the unique character of the puppet Lesson Summary : Art History Art Production Art Criticism Art Appreciation Puppetry in the Philippines started since the time of Dr. Jose Rizal, our national hero, when he staged the play entitled “Carillo,” a form of shadow puppetry. The process of puppet making is taught as a creative activity in schools. Create a unique sock puppet. Describe the elements used in designing and creating a hand puppet. Show appreciation for one’s puppet through puppet exhibit and presentation. Elements and Principles of Art: Shape, Color , Contrast Value Focus: Creativity, Teamwork and Resourcefulness Time Allotment: 1 session (40 minutes) I. Objectives 1. Create a sock puppet design that shows a unique and specific character 2. Apply varied decorations on puppets to make it different and attractive 3. Appreciate the designs used in sock puppets through puppet exhibits and presentations
  • 101. DRAFT April 22, 2014 II. Materials and Reference Materials: glue, sock, felt paper, cardboard, pair of scissors, old buttons, box of found objects Reference: III. Procedure A. Pre Activity 1. Review Share your experiences in puppet making from Lessons 1 -2. What were the materials used in making those puppets? B. Activity Proper 1. Motivation Use a hand puppet made from a paper bag to get the interest of the pupils. Let the pupils mention their experiences in the past lessons. Say: Would you like to try another type of puppet? Show illustrations of puppets Can you describe what is in the picture? How do the puppets differ from each other? Can you name the materials used in making each puppet? Picture of Finger  Puppet  Picture of Hand  Puppet  Picture of Stick  Puppet 
  • 102. DRAFT April 22, 2014 2. Presentation and Discussion Show a picture of a hand puppet made of socks. Say: The process of puppet making is taught as a creative activity in schools. Puppets are used as main characters in classroom presentations. During the time of Dr. Jose Rizal, our national hero, he staged the play entitled “Carillo” a shadow puppetry. He used a carton and a stick and he place this at the back of a white cloth. Then he used the candlelight at the back of the stage. Aside from the traditional puppetry, there were groups of puppeteers formed to entertain. These groups were inspired by different puppetry art in other countries. 3. Art Activity: Let the pupils do the activities below: Activity 1 : “Hand Puppet Socks” Activity 2 : “Mini Hand Puppet Show” (Refer to BE CREATIVE, LM page. _____) 4. Processing/Critiquing                       Picture of a hand puppet made of socks 
  • 103. DRAFT April 22, 2014 Let the pupil’s show their puppets to the class, then ask them about their feelings and experiences in doing the activity and the presentation. C. Post Activity 1. Generalization (Refer to FRAME YOUR THOUGHTS, LM p. ___) What is a hand puppet? (A hand puppet is a type of puppet that is controlled by the hand. It is made of hallow head sewn or glued to the material that fits over the hand of the puppeteer to conceal the fingers and the thumb which manipulate it.) 2. Values Integration 1. Were you able to show your creativity in making your puppet? 2. Were you able to work well with your groupmates? 3. Were you resourceful in using recyclable materials? Explain your answer. 3. Application (Refer to TAKE THE CHALLENGE, LM p. ___) IV. Assessment/ Evaluation: Use Rubrics in assessing the pupil’s output. (Refer to BE PROUD, LM p. ____)  
  • 104. DRAFT April 22, 2014 Fourth Quarter Sculpture/3d Works Lesson No. 4 Stick Puppet Code A3PR-IVe Constructs a simple puppet based on a character in a legend, myth or story using recyclable materials and bamboo sticks or twigs.   Lesson Summary : Art History Art Production Art Criticism Art Appreciation Puppets today are widely considered to be entertainment for all ages. Construct a simple puppet based on a character in a legend, myth, or story. Identify the variations of stick puppets in terms of material, structure, shapes, colors, and textural designs. Describe a stick puppet as another type of puppetry using art elements and principles. Elements and Principles of Art : Shapes, colors and texture, emphasis Value Focus: Creativity, resourcefulness Time Allotment: 1 session (40 minutes) I. Art Activity : Stick Puppet Making II. Objectives: 1. Identify the variety of puppets in terms of materials, structure, shapes, colors, and texture 2. Construct a simple puppet based on a character in a legend, myth, or story 3. Realize the value of puppet making as an enjoyable experience III. Materials and Reference : : Materials: Recycled cardboards or folders, popsicle sticks, glue, pair of scissors, box of found materials Reference: